Tag: Organization

DIY Organizing Ideas

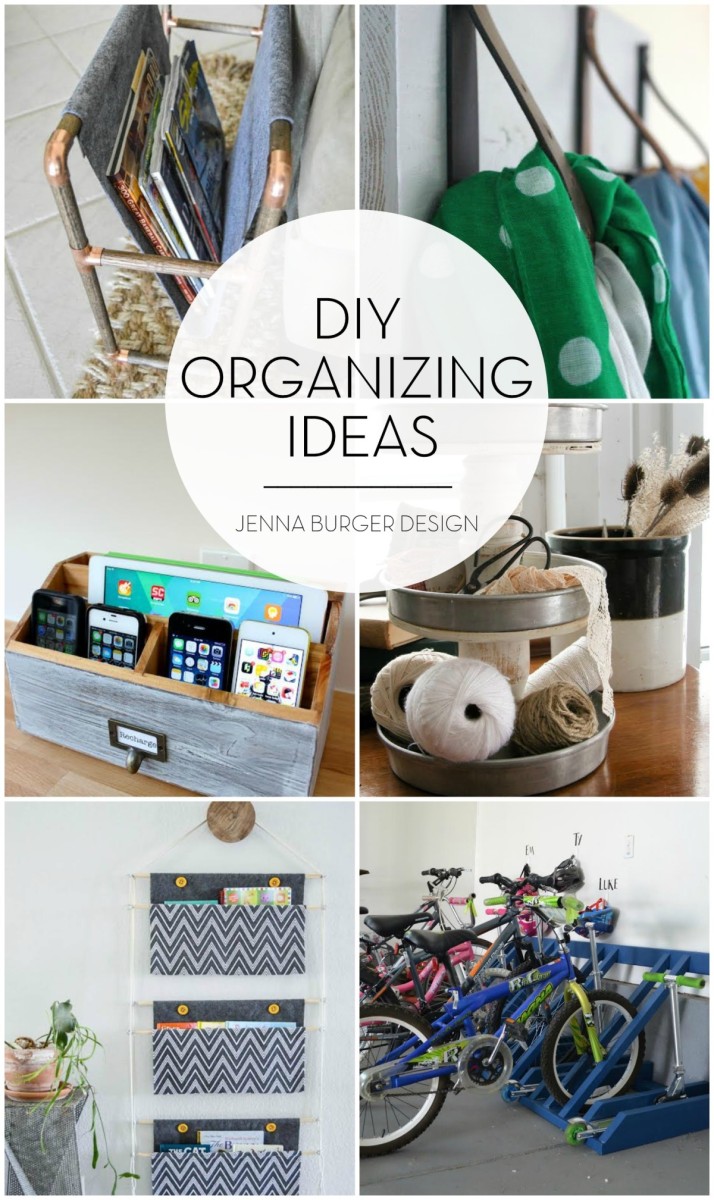
I adore DIYing not only to save money, but to create something unique that fits the exact need + style + look I am trying to achieve. For every nook & cranny of the house, do-it-yourself creations can be just the answer to the missing part.

When it comes to organizing, more often than not, what I’m in need of just can’t be found in a store – or I don’t want to spend the $$$. So then the next best thing is to DIY it, of course!

You’re in luck because I have a new article up on BHG.com on DIY Organization Ideas for every room of the home.  From the kitchen to the living room to the garage, creating EXACTLY WHAT YOU NEED can be the perfect solution to keep things organized.

Click to read the full article on >>>DIY Organization for Every Room of the Home

DIY ORGANIZING IDEAS for every room of the house. Awesome do-it-yourself ideas + solutions that fit YOUR style + needs!

Check out my bio page + all my articles on Better Homes and Gardens

More content coming soon to be featured on BHG.com!

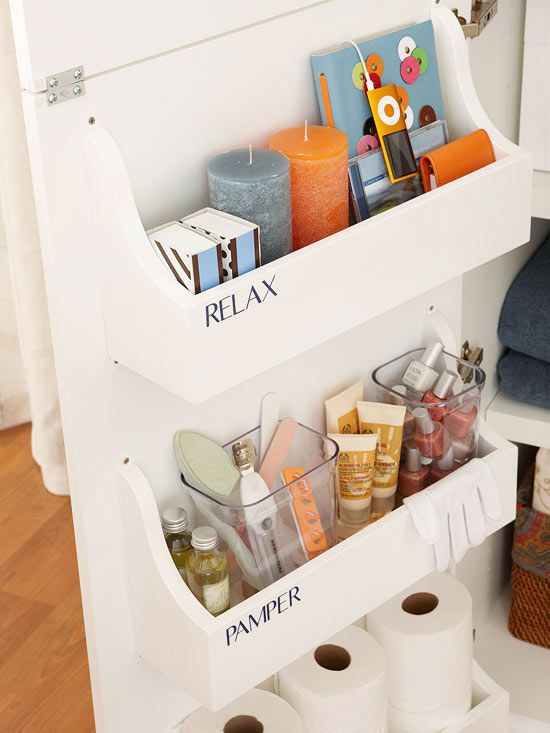
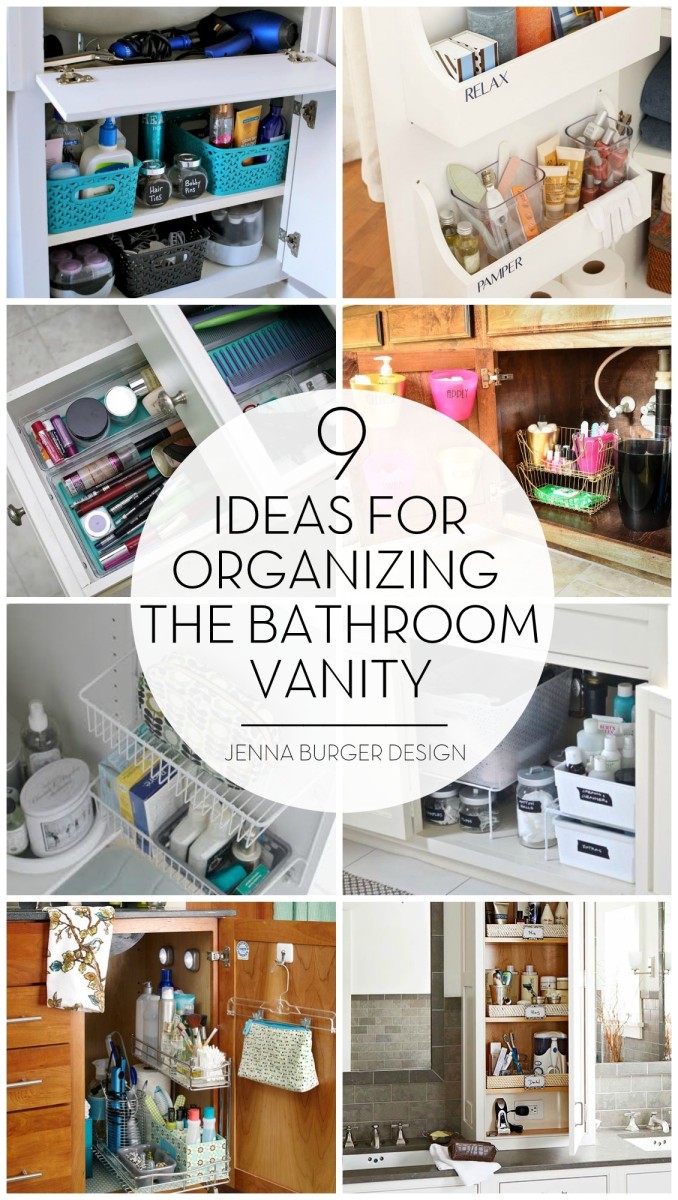
9 Ideas for Organizing the Bathroom Vanity

Well we totally missed last weeks snowstorm that I know a lot of you were affected by and are still digging out from.  Kinda crazy that upstate New York has less snow that DC…

What haven’t missed – or rather, avoided – is the nasty sick bug going around. Once again, another January has hit us hard with sickness and it’s the kind that lingers and seems to never leave. Unfortunately it’s got us all down.  The last few weeks have been rocky, but I’m trying to keeping chugging forward with thoughts of warmer weather + sunnier days ahead.  It’s the only think you can do, right?!

Anyway, I am happy to share that I have a new post up at Better Homes and Gardens.

If you’ve been busy decluttering and organizing since the new year hit, then I have a post for you…
Getting a hold on THE MESSY VANITY.  I’ve got one, do you?  Then here are 9 Easy Ways to Make Over a Messy Vanity.

I took away so much while putting this post together and I hope you will too.

Click to read the full article on >>> 9 Easy Ways to Make Over a Messy Vanity

BATHROOM ORGANIZATION: Organizational ideas + tips for the bathroom vanity

Check out my bio page + all my articles on Better Homes and Gardens

More content coming soon to be featured on BHG.com!

Getting Organized in the Garage: Ideas for Organization & Storage

As the days are getting warmer, time spent outdoors is about to increase – finally, right?! It’s been a loooong winter.  And lots of fun in the sun, comes months ahead with the garage door open and hours a day playing various sports activities + time spent on the lawn & garden.

While cooped up all Winter, we barely stepped foot in the garage other than to throw out the garbage + recycling.  From remodeling the bathroom to receiving many large packages for the living room makeover (which is almost complete), the garage was totally neglected and got piled high with a lot of stuff.  It was in desperate need of an overhaul + organization!

A few weekends ago we got our hands on the mess and started the process of whipping it into shape…

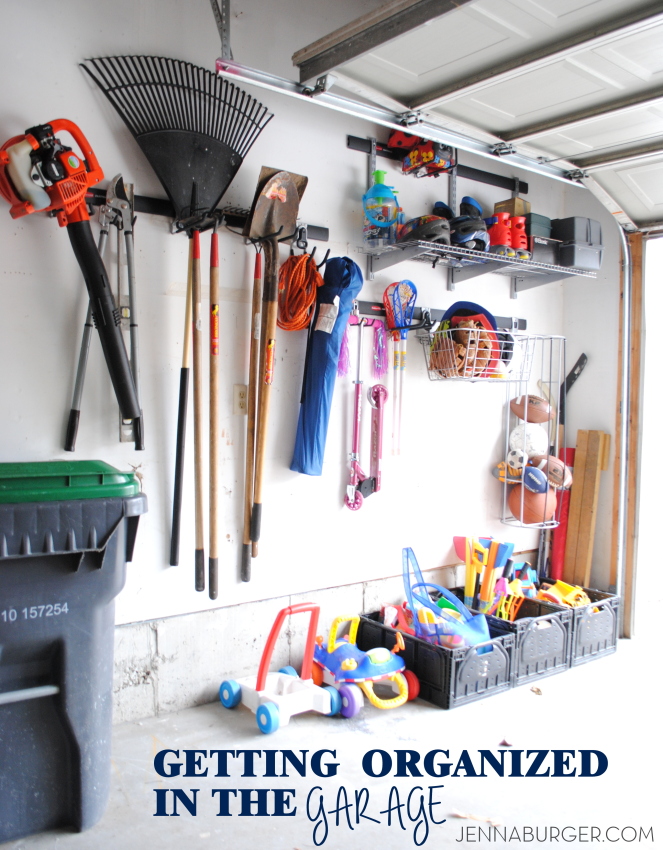
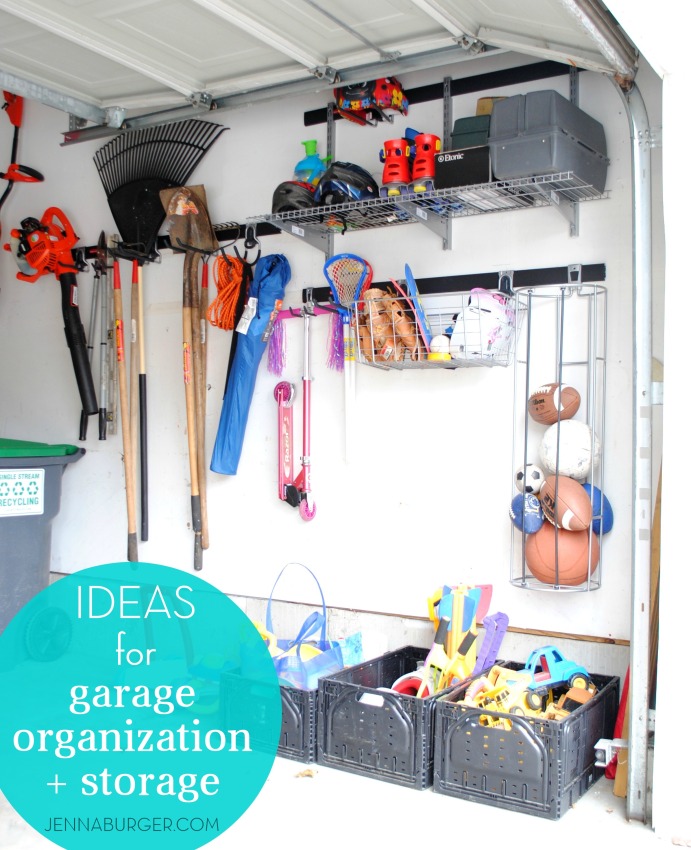
Getting organized in the GARAGE: tips + ideas for garage organization & storage by Jenna Burger Design, www.jennaburger.com

The temps were still a wee bit chilly, but the Mister and I set forth to start taking back our garage space.  It’s definitely going to take time (we are not at all finished – yet), but we had to start someplace and that someplace was the kids stuff + lawn & gardening supplies.

Garage Takeover Step 1, in action…

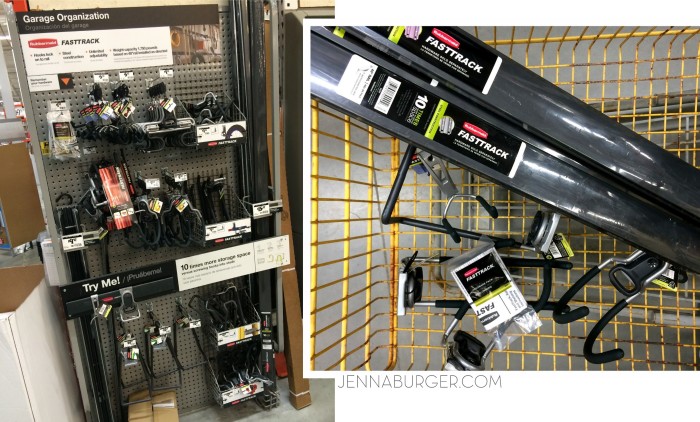
We chose to use a product by Rubbermaid called FastTrack Garage Organization System.  This system is similar to the closet organizational products that Rubbermaid also offers (we have similar systems in the coat closet/pantry + the kids bedroom closets) where there is one track at the top and brackets mount to it to easily add/adjust shelving for storage.  It’s ideal because you only need to screw in the one rail and everything hangs off of it making the install time much quicker + easier.

The FastTrack System has a huge range of products that gets the most out of your vertical wall space to achieve an organized garage.  I shopped at Home Depot for the items and they have a wide selection + a nice display set up.  If there is something you are looking for specifically that they don’t have in the store, I discovered there are even more accessory options for purchase on the website.

Getting organized in the GARAGE: tips + ideas for garage organization & storage by Jnna Burger Design, www.jennaburger.comHere are the accessories that I chose for our garage space…

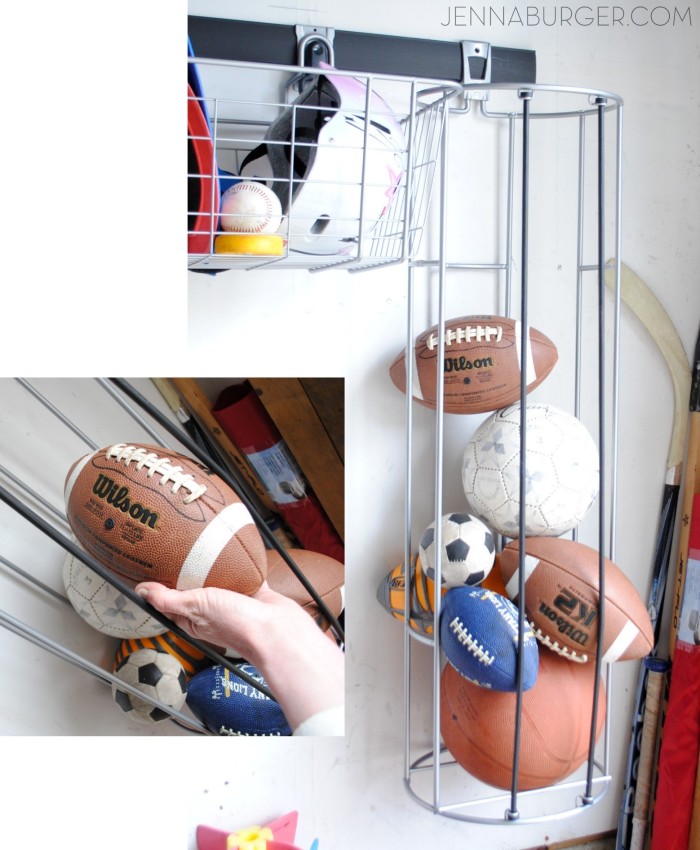
the vertical ball rack

Getting organized in the GARAGE using Rubbermaid Fast Track Garage Organizational system - vertical ball rack

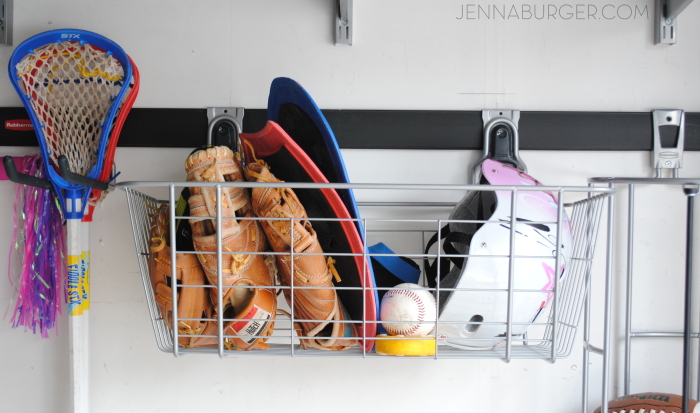
the wire basket which holds up to 50lbs.

Getting organized in the GARAGE using Rubbermaid Fast Track Garage Organizational system - wire basket

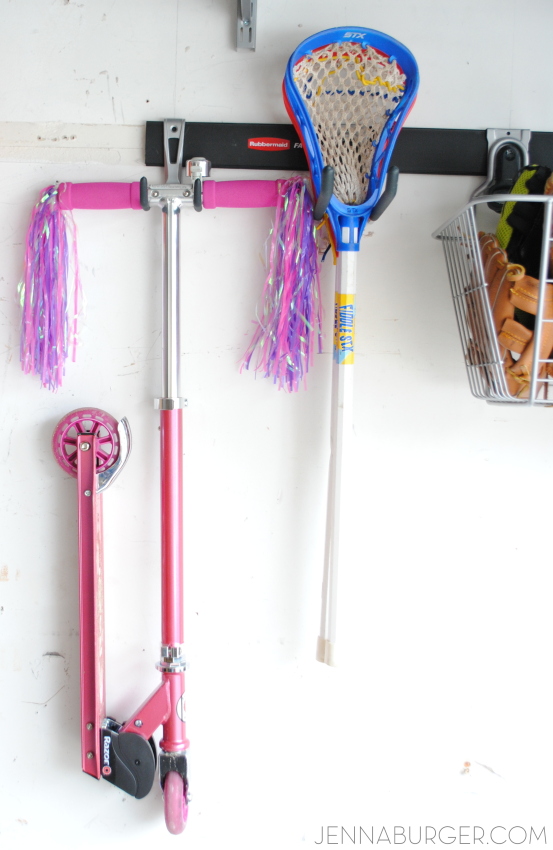
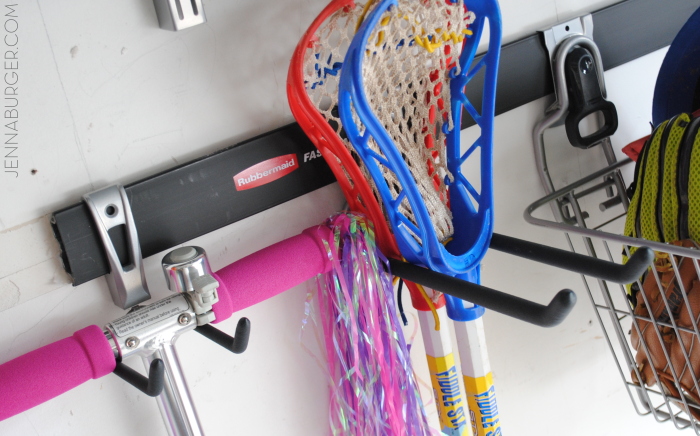
the cooler hook (which is holding the scooter) and the multi-purpose hook (holding the lacrosse sticks)

Getting organized in the GARAGE using Rubbermaid Fast Track Garage Organizational system

Getting organized in the GARAGE using Rubbermaid Fast Track Garage Organizational system

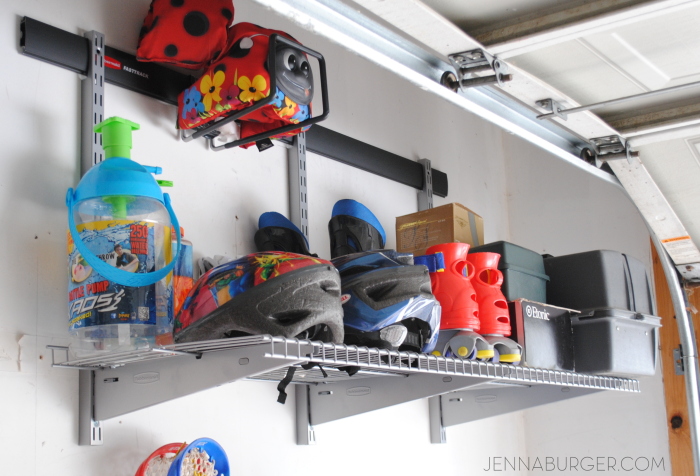
Similar to a closet system, the Fast Track offers uprights + brackets + shelving options to get the most out of a vertical surface.  Being able to have a shelf for storage is a must in the garage.  I’ve loaded this shelf with our fishing tackle boxes, skates, bike helmets, etc.

Getting organized in the GARAGE using Rubbermaid Fast Track Garage Organizational system

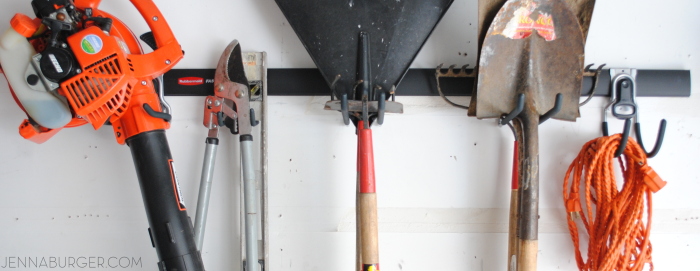
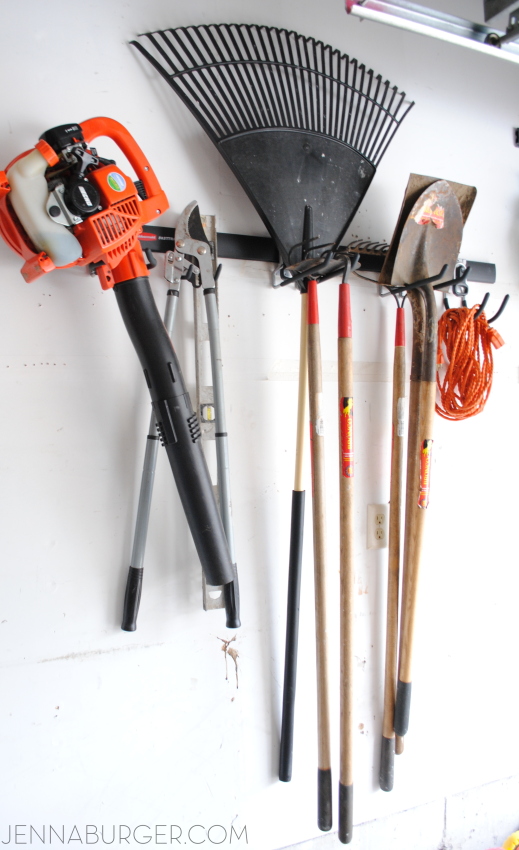
Last, but not least we used the track system to hold all of the lawn + gardening supplies…

(left to right) the power tool holder, the cooler hook, the multi-purpose hook, the utility hook

Getting organized in the GARAGE using Rubbermaid Fast Track Garage Organizational system

Getting organized in the GARAGE using Rubbermaid Fast Track Garage Organizational system

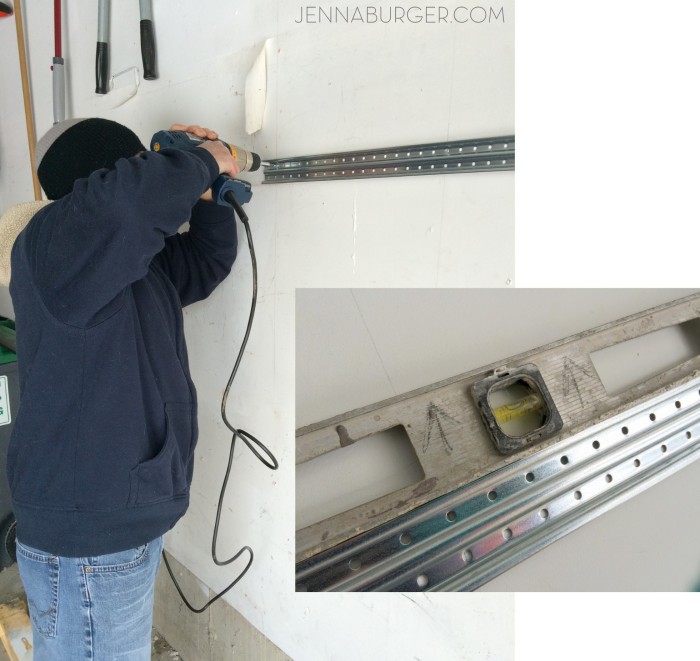
Once I came up with my plan of action for how the organizational components would work best on the wall, the install was very easy & took about 20 minutes – I swear.  It doesn’t take long because all that needs to be installed are the rails.  Once those were up, I was able to hang everything off of them + make adjustments as needed.

We chose (3) 4′ long rails (they also come in an 8′ length), determined where the studs were located, then installed the rails using the FastTrack hardware.  For one rail, we couldn’t locate the stud, so we used the anchors that came with the hardware package. After the rail was in place & level, we slid on the black cover.  Per the FastTrack website, each rail holds 1750 lbs – wow!

Getting organized in the GARAGE: tips + ideas for garage organization & storage by Jnna Burger Design, www.jennaburger.com

After that, the accessories easily attached to create a truly customized garage storage system.

You simply attach, snap, and hang!

Getting organized in the GARAGE: tips + ideas for garage organization & storage by Jnna Burger Design, www.jennaburger.com

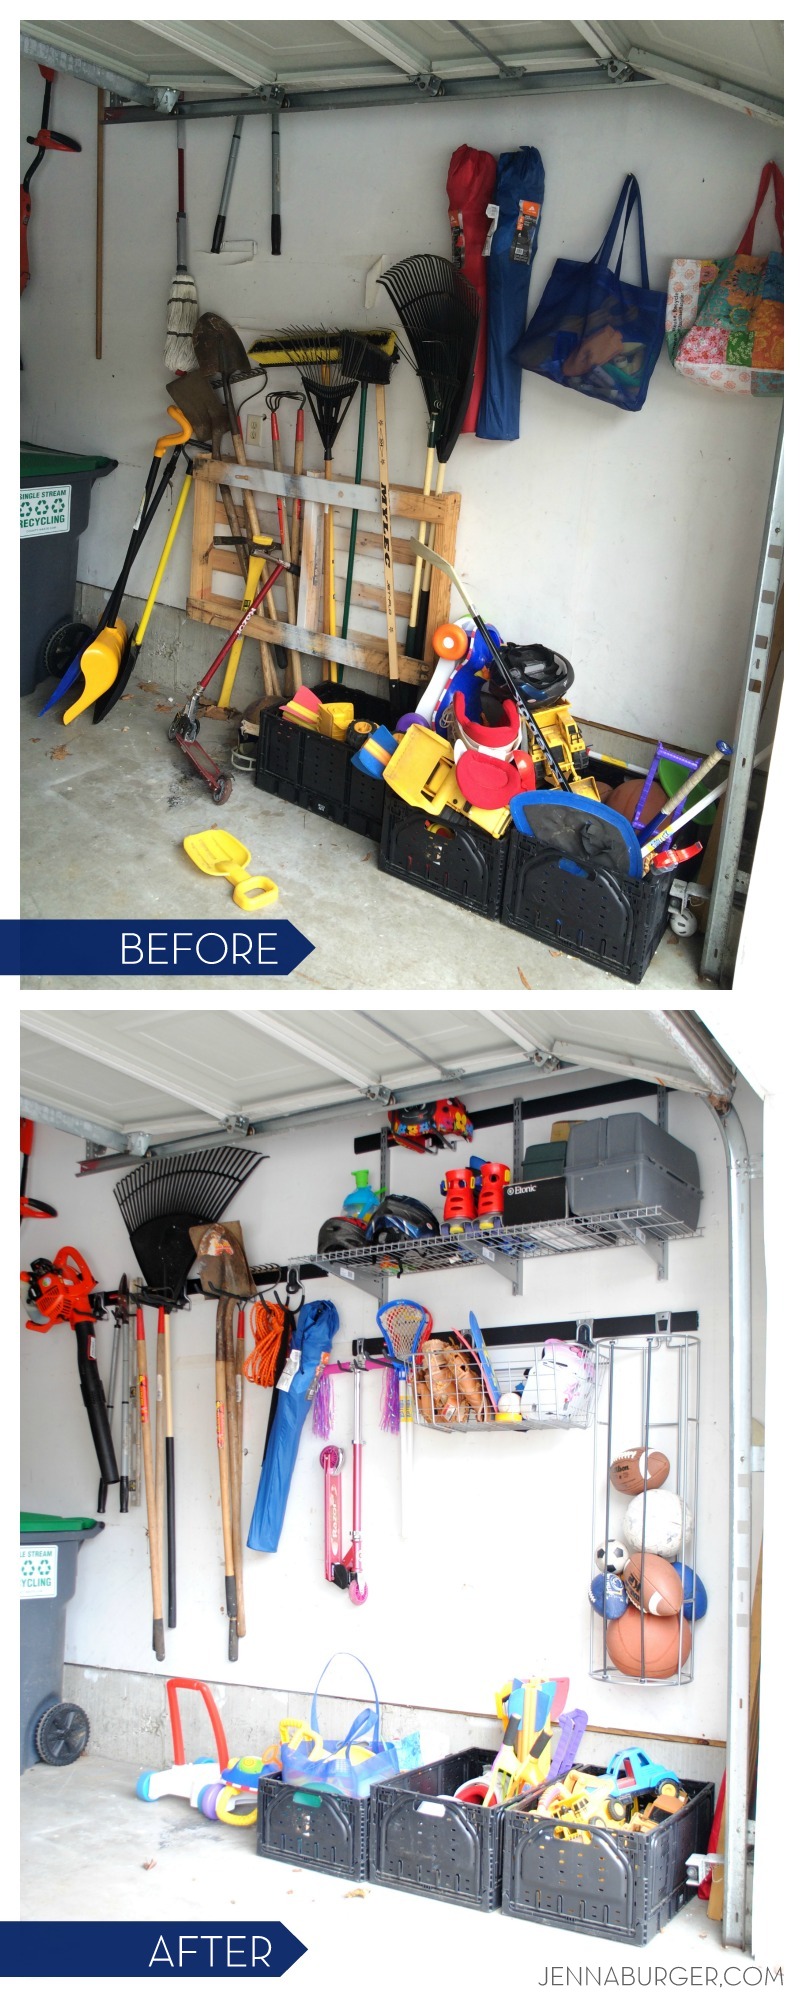
Oh and I never showed you the ‘before’ of the garage – yikes, it looked horrible and SO UNORGANIZED.  Now it’s a completely organized + tidy spot…

Getting organized in the GARAGE: tips + ideas for garage organization & storage by Jenna Burger Design, www.jennaburger.com

Staying Organized

Organizing takes a bit of time + energy, but really isn’t difficult.  What is DIFFICULT though is staying organized… that is always the challenge.  Since this section of the garage is a lot about the kids, I really need them to stay on top of keeping it organized.  I don’t have the time to clean up after them each day AND I want them too take responsibility for putting back what they take out.

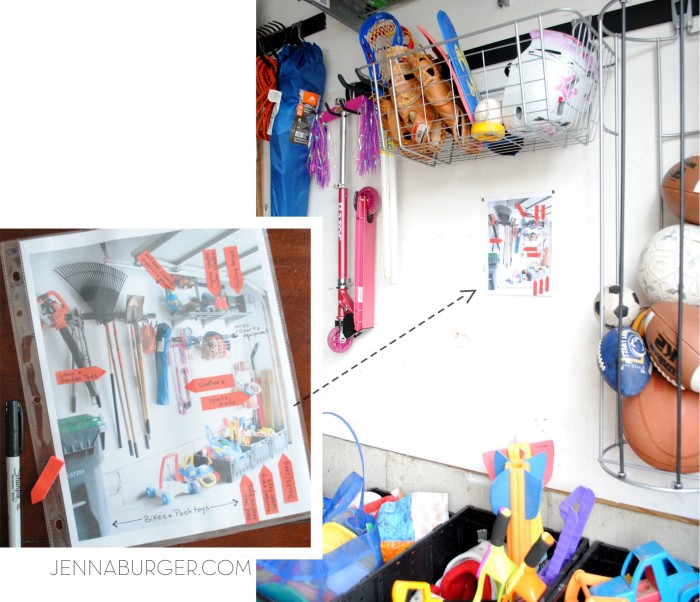
Call me crazy, but I snapped a picture, printed it, and put it in a clear sheet protector.  I added a few hand-written labels – nothing fancy – and pinned it to the wall. Now there is no excuse or wonder as to where things are supposed to go.

Getting organized in the GARAGE: tips + ideas for garage organization & storage by Jenna Burger Design, www.jennaburger.com

We shall see if it works…

I’m still making my way around the house, room by room, to get organized using my foolproof steps to home organization!  I realized those same steps can pertain to the garage space too…

> make a list write down a plan of action for what you want to organize and what you need to lose

> get moving now once your plan of action is in place, it’s time to get moving. Don’t analyze (which I’m known to do) Just start.

> purge. toss. donate. start by sorting through the items you no longer need, use, and/or want. Set up 3 boxes or bags (I typically use large heavy-duty garbage bags) to purge, toss, and/or donate.

> organize using shelving with baskets, bins, and other storage caddies are a great way to organize items you want to keep.

> go vertical maximize your storage capabilities by using more wall space – just like I did with the FastTrack system

> commit getting organized is one thing, but staying organized is truly a commitment. Once you’re organized, take the extra few minutes to maintain it.


Getting organized in the GARAGE: tips + ideas for garage organization & storage by Jenna Burger Design, www.jennaburger.com

I am so happy with how this section of the garage turned out.  We have lots more cleanup to do in this neglected space + a whole lotta work outdoors once the snow completely melts, but with warmer days on the horizon, we’ll make our way one day at a time.

Disclosure: This is a sponsored post by Rubbermaid FastTrack.  I chose to work with them because I knew it would help organize my dreaded garage space.  I have been provided with product, but as always I was not told what to write and I only feature companies on my blog that I truly love and believe in 100%.

This is a sponsored conversation written by me on behalf of Newell Rubbermaid. The opinions and text are all mine.

How-To Make a GIANT Inspiration Board

Pinterest is a favorite for many (including me) who want to organize and keep their online inspiration in one place.

As a visual person though, I feel there is nothing like seeing and holding a picture in hand.  I still buy and subscribe to magazines.  I still tear out pictures and reference them when looking for inspiration.

Until recently, I didn’t have a “place”, a specific go-to spot, for all my collected loves.

I needed something! Thus the creation of my mega, giant, humongous, and amazing inspiration board…
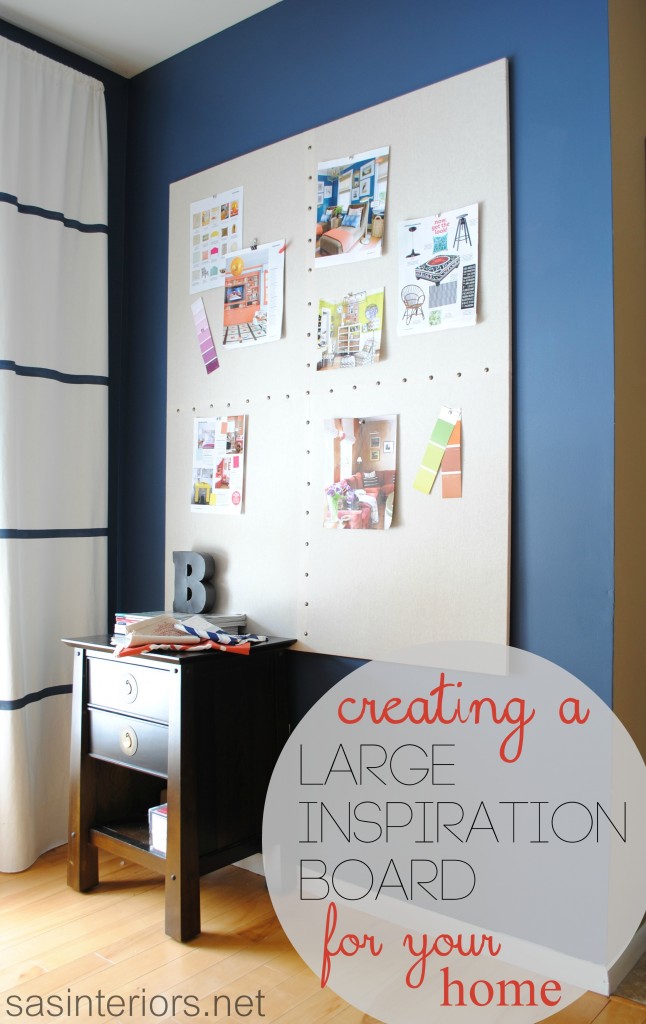
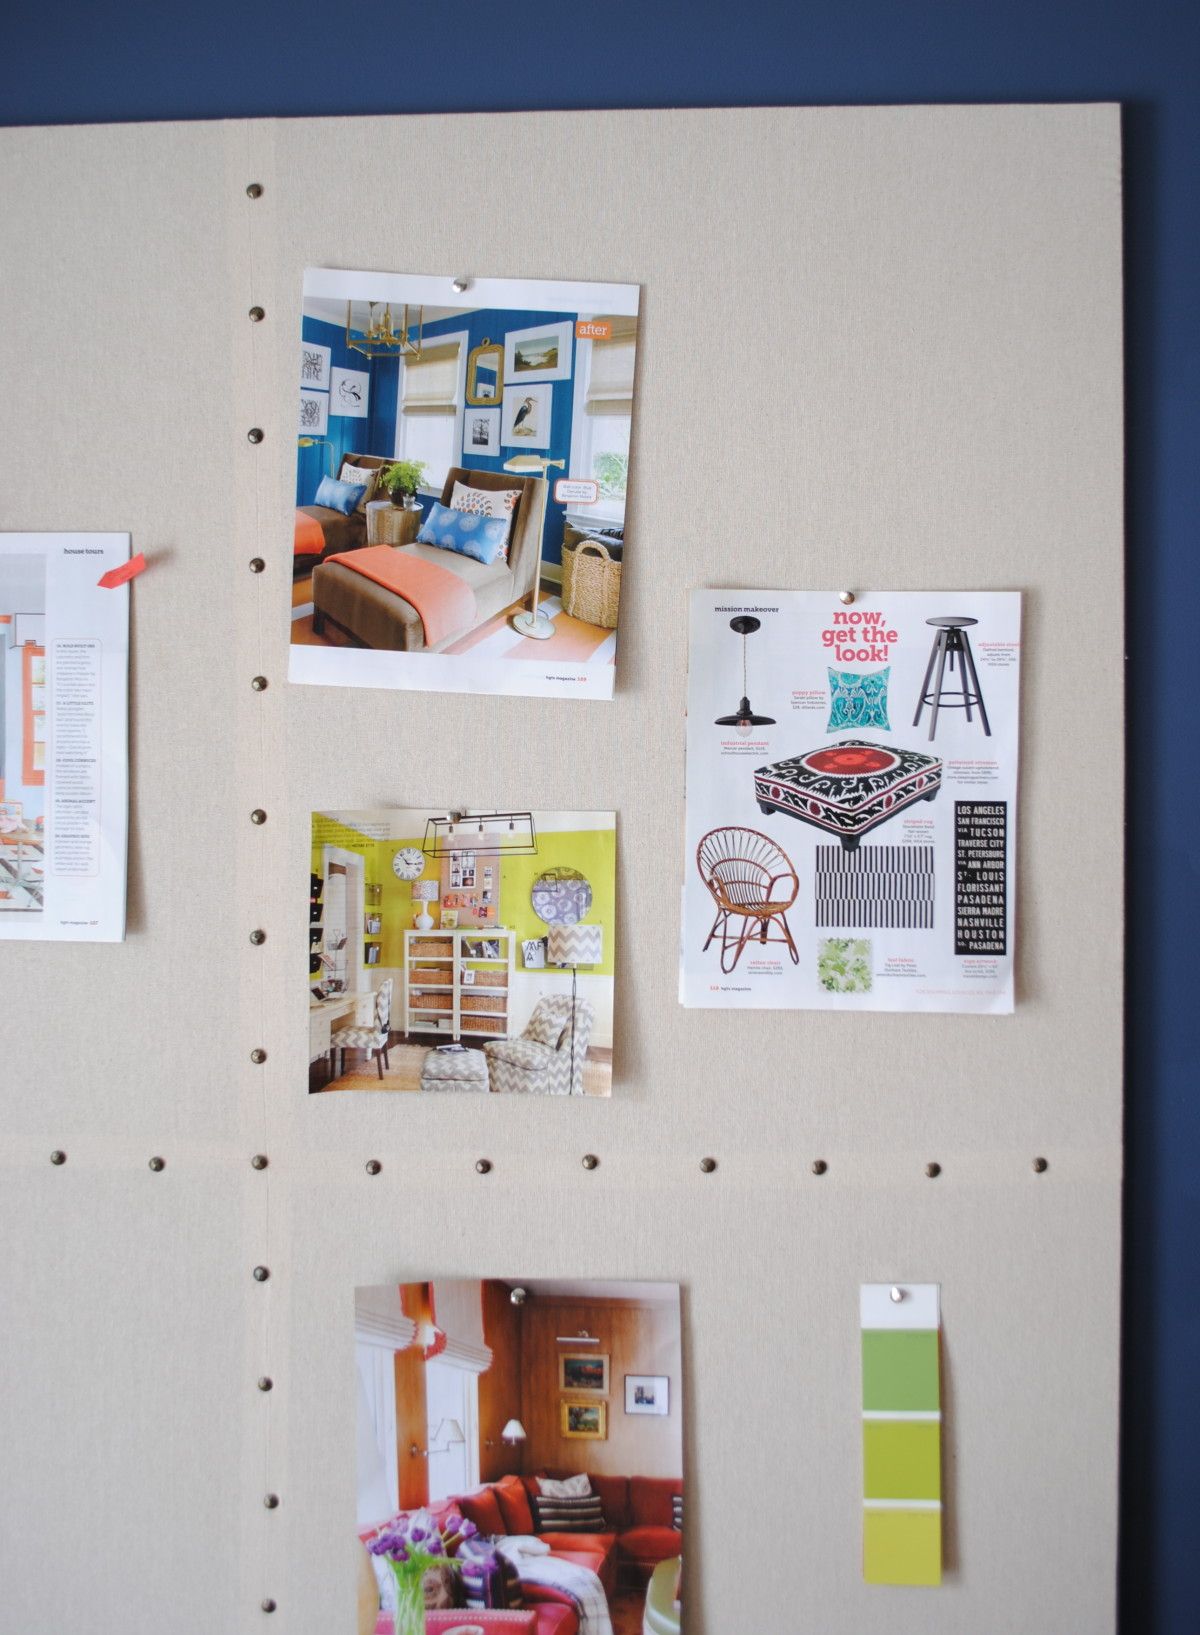
HUGE, Giant Inspiration Board created by @Jenna_Burger, sasinteriors.net

I am in heaven.  This newly created inspiration board is not only functional, but the pictures that are displayed are gorgeous and make the space colorful and fun.

Here’s how I made it.

I started with these supplies:

  • MDF board (I used MDF because I had a large leftover piece from an old upholstered headboard.  A large thick piece of unwarped plywood could also be good for this project)
  • Fabric (I chose a neutral linen-like fabric which was $4/yd – I bought 3 yards)
  • Decorative Nailheads (I purchased them at Hobby Lobby for $2 for 50)
  • Sewing Machine
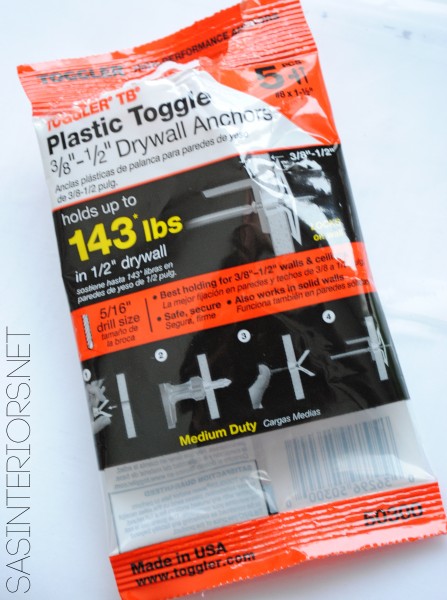
  • Screws and Anchors (I prefer plastic toggle drywall anchors – see below for a picture)
  • Painters Tape
  • Measuring Tape
  • Drill
  • Screwdriver
  • Level (optional, but very helpful)

1. I started off making sure the MDF board was the right size for the wall. The size was perfect, 3′-9″ X 4′-6″, and didn’t need to be cut.  If you’re using this tutorial as inspiration, you can create any size inspiration board that fits your space.
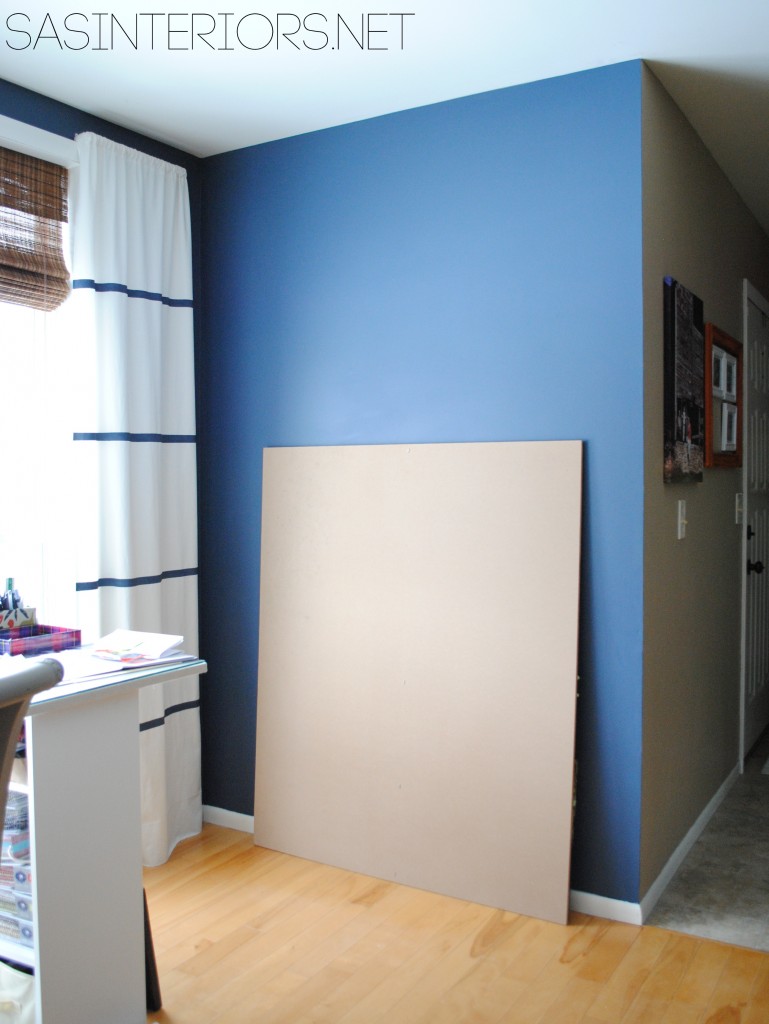
HUGE, Giant Inspiration Board created by @Jenna_Burger, sasinteriors.net

One of the biggest obstacles with making this GIANT Inspiration Board was the difficulty of hanging it.

No doubt, this size board is HEAVY!   Drilling through the board was out of the question because it is covered in fabric and hanging it from wire wouldn’t make the back flush with the wall, which is the look that I desired.

SOoooo…  Onto a different solution.  The basic idea that I came up with was to drill 3 holes into the back of the board that would hang on to 3 screws in the wall.

Let’s take a look at the step by step…

2. After determining and marking the height at which I wanted the board to hang, I layed the board face down so the back was exposed.  I took a piece of painters tape and added it to the back of the board making sure it was completely level with the top of the board.  The tape does not have to go from edge-to-edge, but I made sure each end was within 12″ of the side.

With a permanent marker, I marked three places on the tape – they do not have to be evenly spaced.
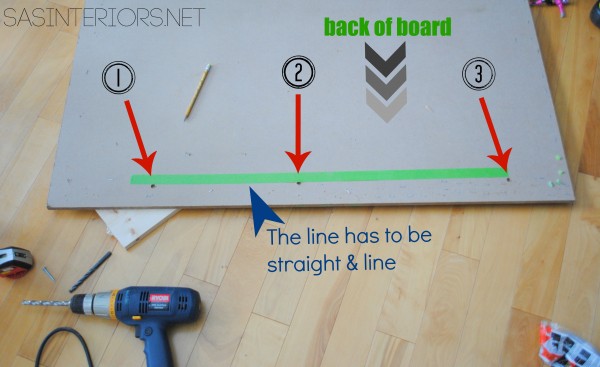
HUGE, Giant Inspiration Board created by @Jenna_Burger, sasinteriors.net

3. Using a drill, I carefully drilled about 3/4 of the way through the MDF back (I DID NOT go through to the front).
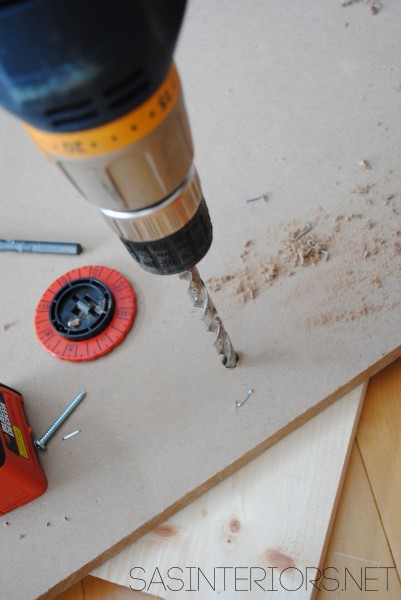
HUGE, Giant Inspiration Board created by @Jenna_Burger, sasinteriors.net

4. Once the 3 holes were drilled, I removed the piece of tape and put it on the wall at the height I had determined before.  Also I made sure to hang the tape so it was placed horizontally correct – my board is centered on the wall, but that might not be the case for your creation.  Be sure to hang it vertically (up and down) and horizontally (left and right) correct.

Something to watch out for…

A laser helps with this part, but if you don’t have one, measure down from the ceiling so that all 3 marks are at the same height.

Also, when the board was laying down, the marks went 1,2,3.  Now the marks will be 3,2,1 because of how the board will fit onto the wall.  It will make more sense once you’re in the midst of it.
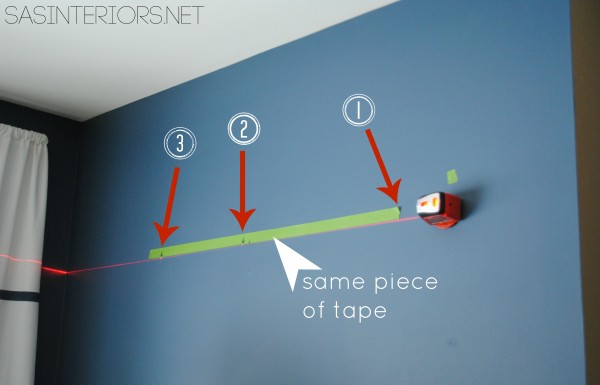
HUGE, Giant Inspiration Board created by @Jenna_Burger, sasinteriors.net

5. Once the wall was marked with the three locations, I drilled the holes.  Then added plastic toggle drywall anchors (which hold mega weight) and then the screws.  These are like my all-time favorite anchors and screws!!
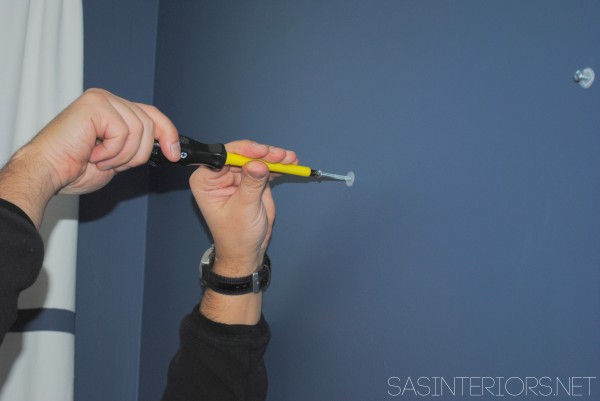
HUGE, Giant Inspiration Board created by @Jenna_Burger, sasinteriors.net

HUGE, Giant Inspiration Board created by @Jenna_Burger, sasinteriors.net

6. Once the screws were secure, it was time to put on the board.  It takes alittle time figuring where the holes meet the screws, but if you measure right and take your time (which thankfully we did), it should work perfectly and be level!

Unfortunately I don’t have a picture of us hanging the board since it was a 2-man job and the kiddos were already asleep (they are my backup photographers), but here’s the result (and part of the next step)…

It’s hanging + straight – YES!
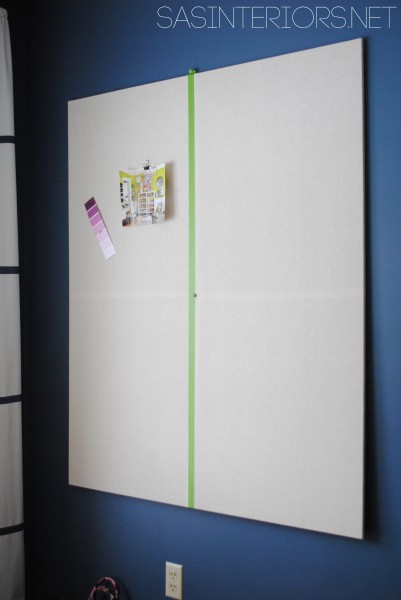
HUGE, Giant Inspiration Board created by @Jenna_Burger, sasinteriors.net

Before hanging this bad-boy on the wall, I covered it in fabric.  I chose a loose natural linen-like cotton.  Because of the width of the board, I needed to piece the fabric together to make one large piece.  I ended up cutting and sewing 4 pieces of equal sized fabric.  The result was fairly good, but my lines were slightly wavey.  Toss it up to DIY, right?!

Anyway, to jazz up the board (and distract the eye from my wavy lines), I decided to use decorative nail head trim and follow the lines of the seams horizontally and vertically.

7. To start off, I used painters tape and made a level line from top to bottom and then from left to right following the seam.
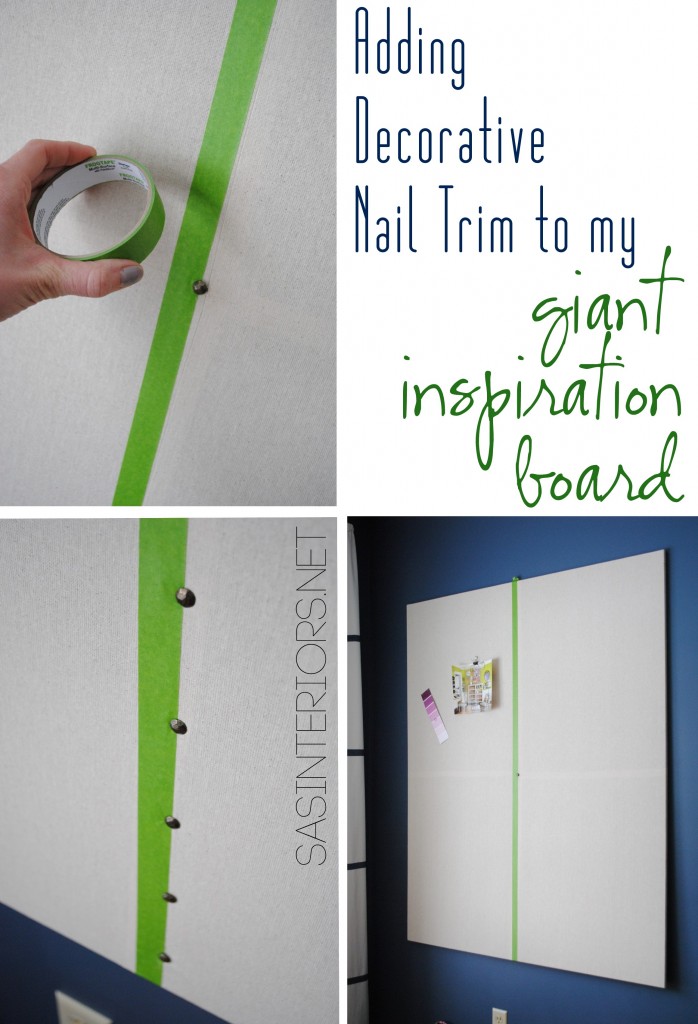
HUGE, Giant Inspiration Board created by @Jenna_Burger, sasinteriors.net

8. On that edge of the tape, I hammered in the nails with a mallet (a hammer will do but sometimes the metal on metal ruins the nailheads), then removed the tape.
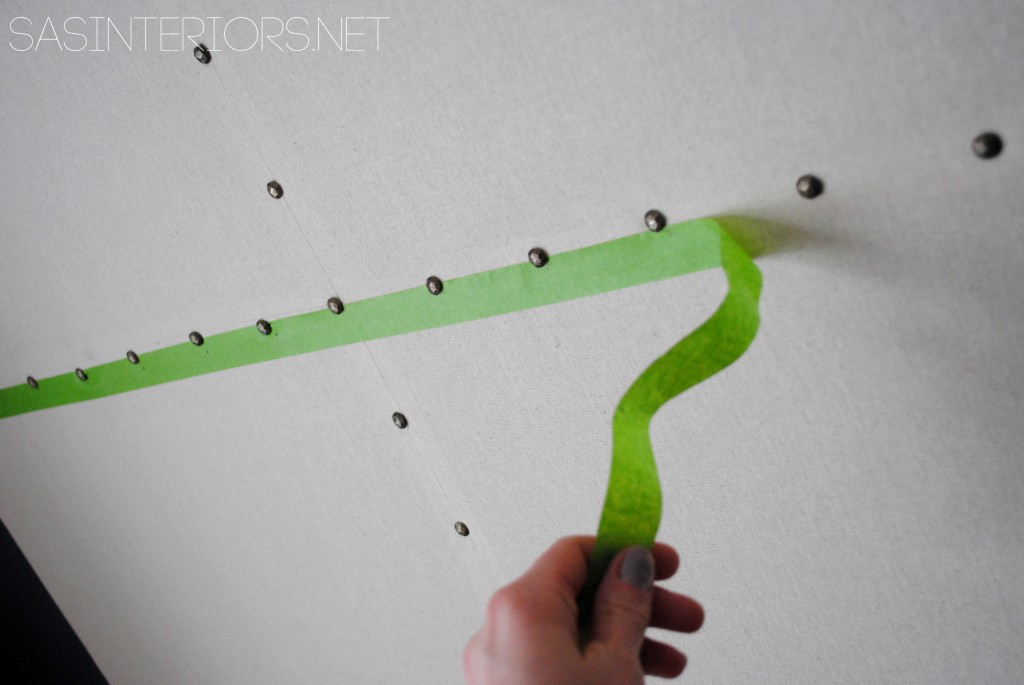
HUGE, Giant Inspiration Board created by @Jenna_Burger, sasinteriors.net

And now was the point of happiness!

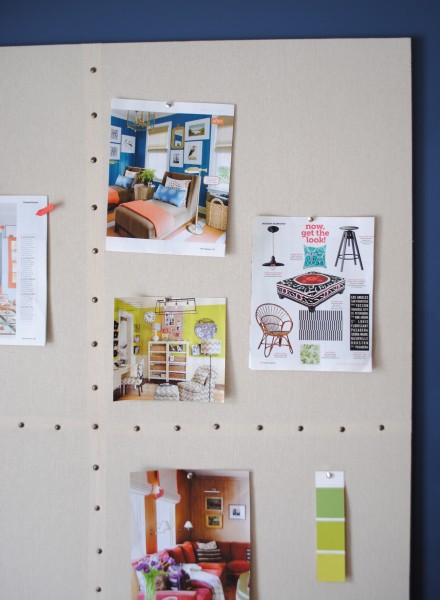
I could finally fill up my inspiration board with all the things I love…
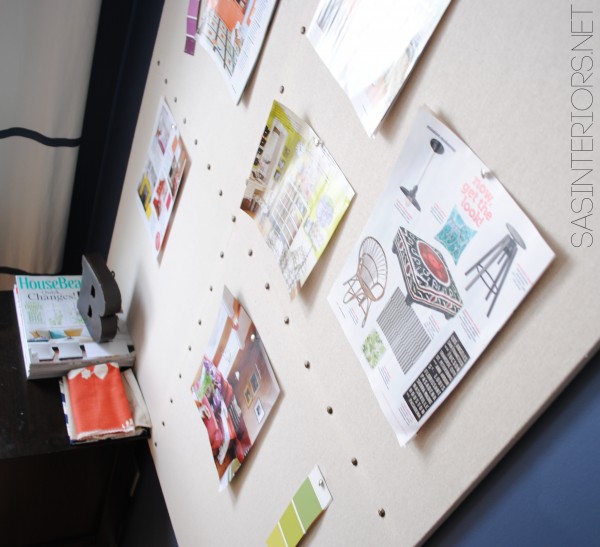
HUGE, Giant Inspiration Board created by @Jenna_Burger, sasinteriors.net

HUGE, Giant Inspiration Board created by @Jenna_Burger, sasinteriors.net

MDF board is not exactly like cork (obviously).  Pushpins aren’t as easy to push in, but with a bit of muscle and oomph, it works fine.  As an idea, a layer of cork could have been added to the front surface of the MDF before the fabric was wrapped around, to make it more “cushiony” and pinnable.  For me though, it works fine.
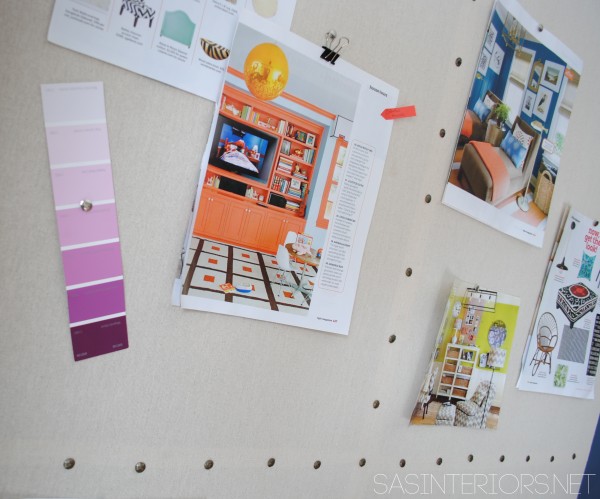
HUGE, Giant Inspiration Board created by @Jenna_Burger, sasinteriors.net

If you know me, I LOVE COLOR, and I have a favorite article pinned on my handmade GIANT inspiration board that I ripped out a recent issue of HGTV Magazine…

I adore the glittery gold disco ball.
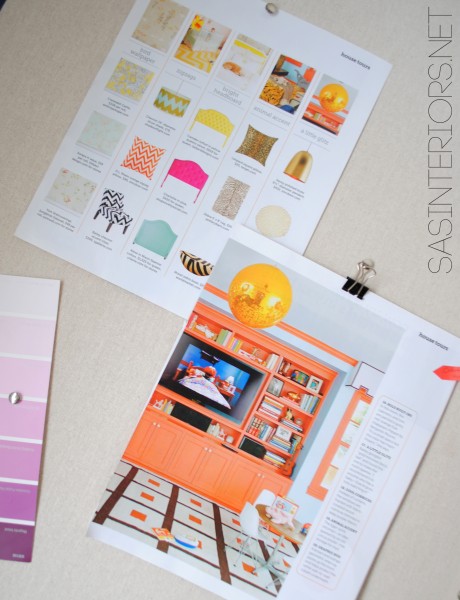
HUGE, Giant Inspiration Board created by @Jenna_Burger, sasinteriors.net

Now I have lots and lots and lots of room to fill up.  I’m sure it won’t always look this clean.  I actually am in love with some of these other GIANT Inspiration Boards!

HUGE, Giant Inspiration Board created by @Jenna_Burger, sasinteriors.net

I hope you’re inspired by my new HUMONGOUS Inspiration Board!  I’m loving my new home office / family room.  Not only is it inspiring to work in this new space, but I really enjoy flipping through my favorite magazines and actually pinning them I.R.L.

Aside from Pinterest, how do you collect and organize inspirational things?

I link my projects to some of these parties: Skip to My Lou, Dittle Dattle, Between Naps on the Porch, Today’s Creative Blog, Stories of A to Z, All Things Heart & Home, House of Hepworths, Finding Fabulous, The Shabby Nest, Serenity Now, Tatertots and Jello, Thrifty Decor Chick, Tip Junkie
DIY: Glass Jar Pen Holder using a Pipe Clamp
Are you ready for a super easy project (from start to finish it took 5 minutes) that can be used all throughout the house and cost pennies to create?

I knew you would be!

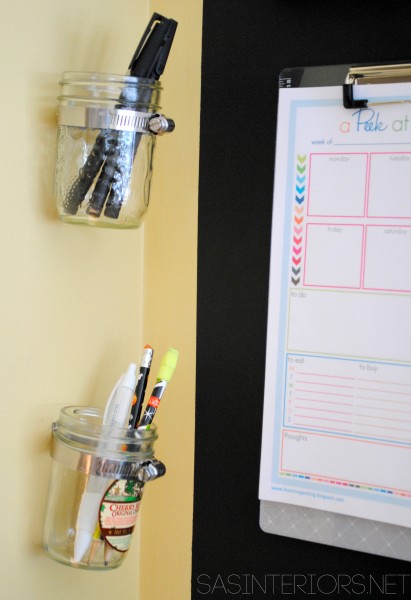
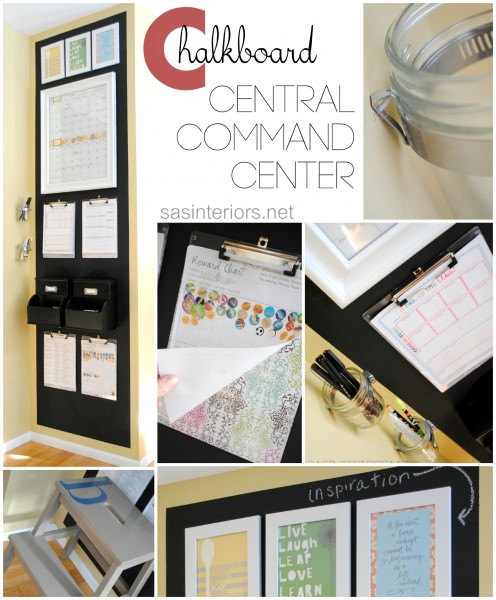
My revamped central command center has put our family on the right path to an organized year (I’m crossing my fingers it’ll stay that way).  You’ve all loved it which I’m completely psyched about and today I’m back sharing the easy step-by-steo on how I created the new glass jar holders hanging on the wall.  It’s super simple, so let’s get started!

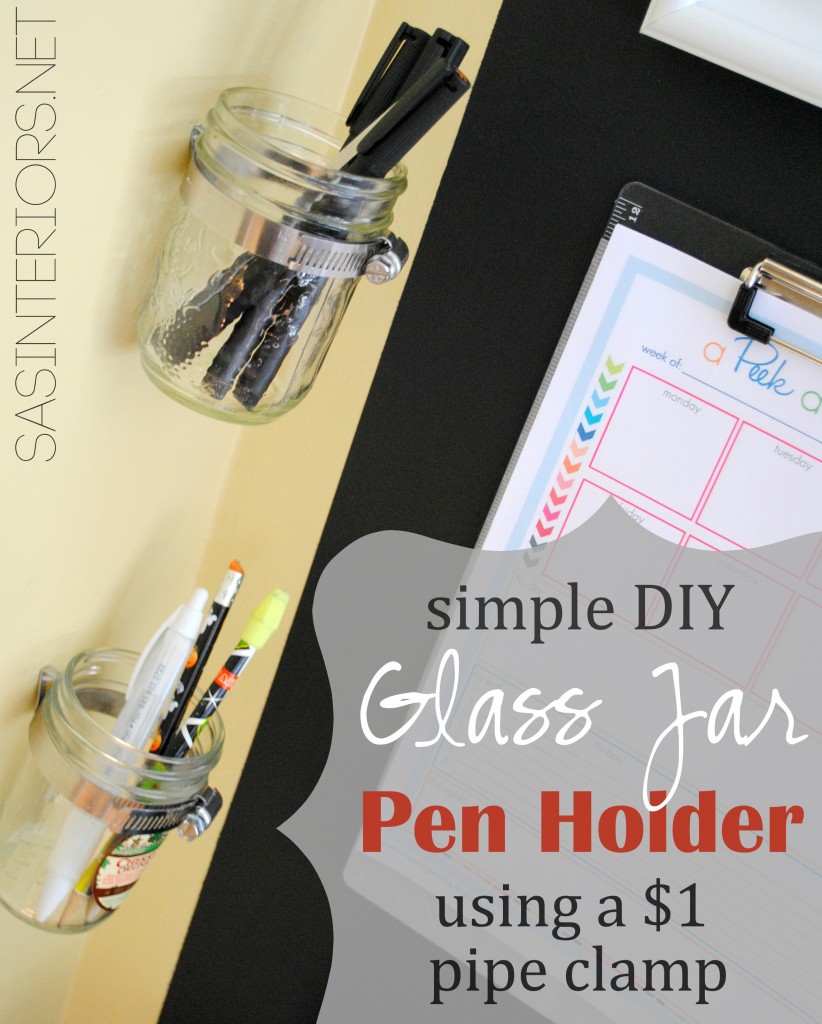
Simple DIY Glass Jar Pen Holder using a one dollar pipe clamp! Super easy to create & can be used anywhere around the house!

The one big annoyance with the old CCC was the lack of pen and pencil storage.  When in need of something to write with, we would always be hunting around the house and then the task or thought that needed to be remembered and written down was totally forgotten.

NOT ANYMORE!

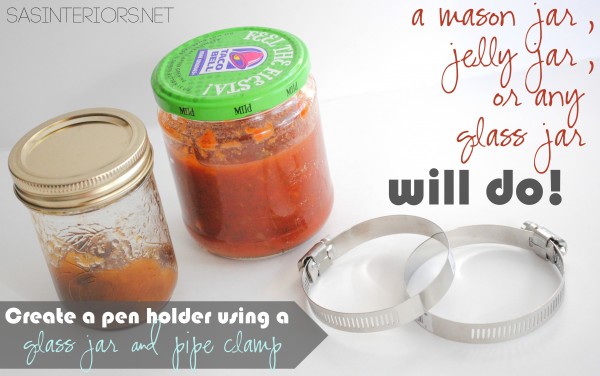
To start out, I grabbed a few glass jars from the refrig that were either empty or almost near empty.  I chose a jelly jar and a salsa jar, but really any glass jar will do!  (Unfortunately the diameter of the salsa jar was too big, so I substituted it with another glass jar).

Simple DIY Glass Jar Pen Holder using a one dollar pipe clamp! Super easy to create & can be used anywhere around the house!

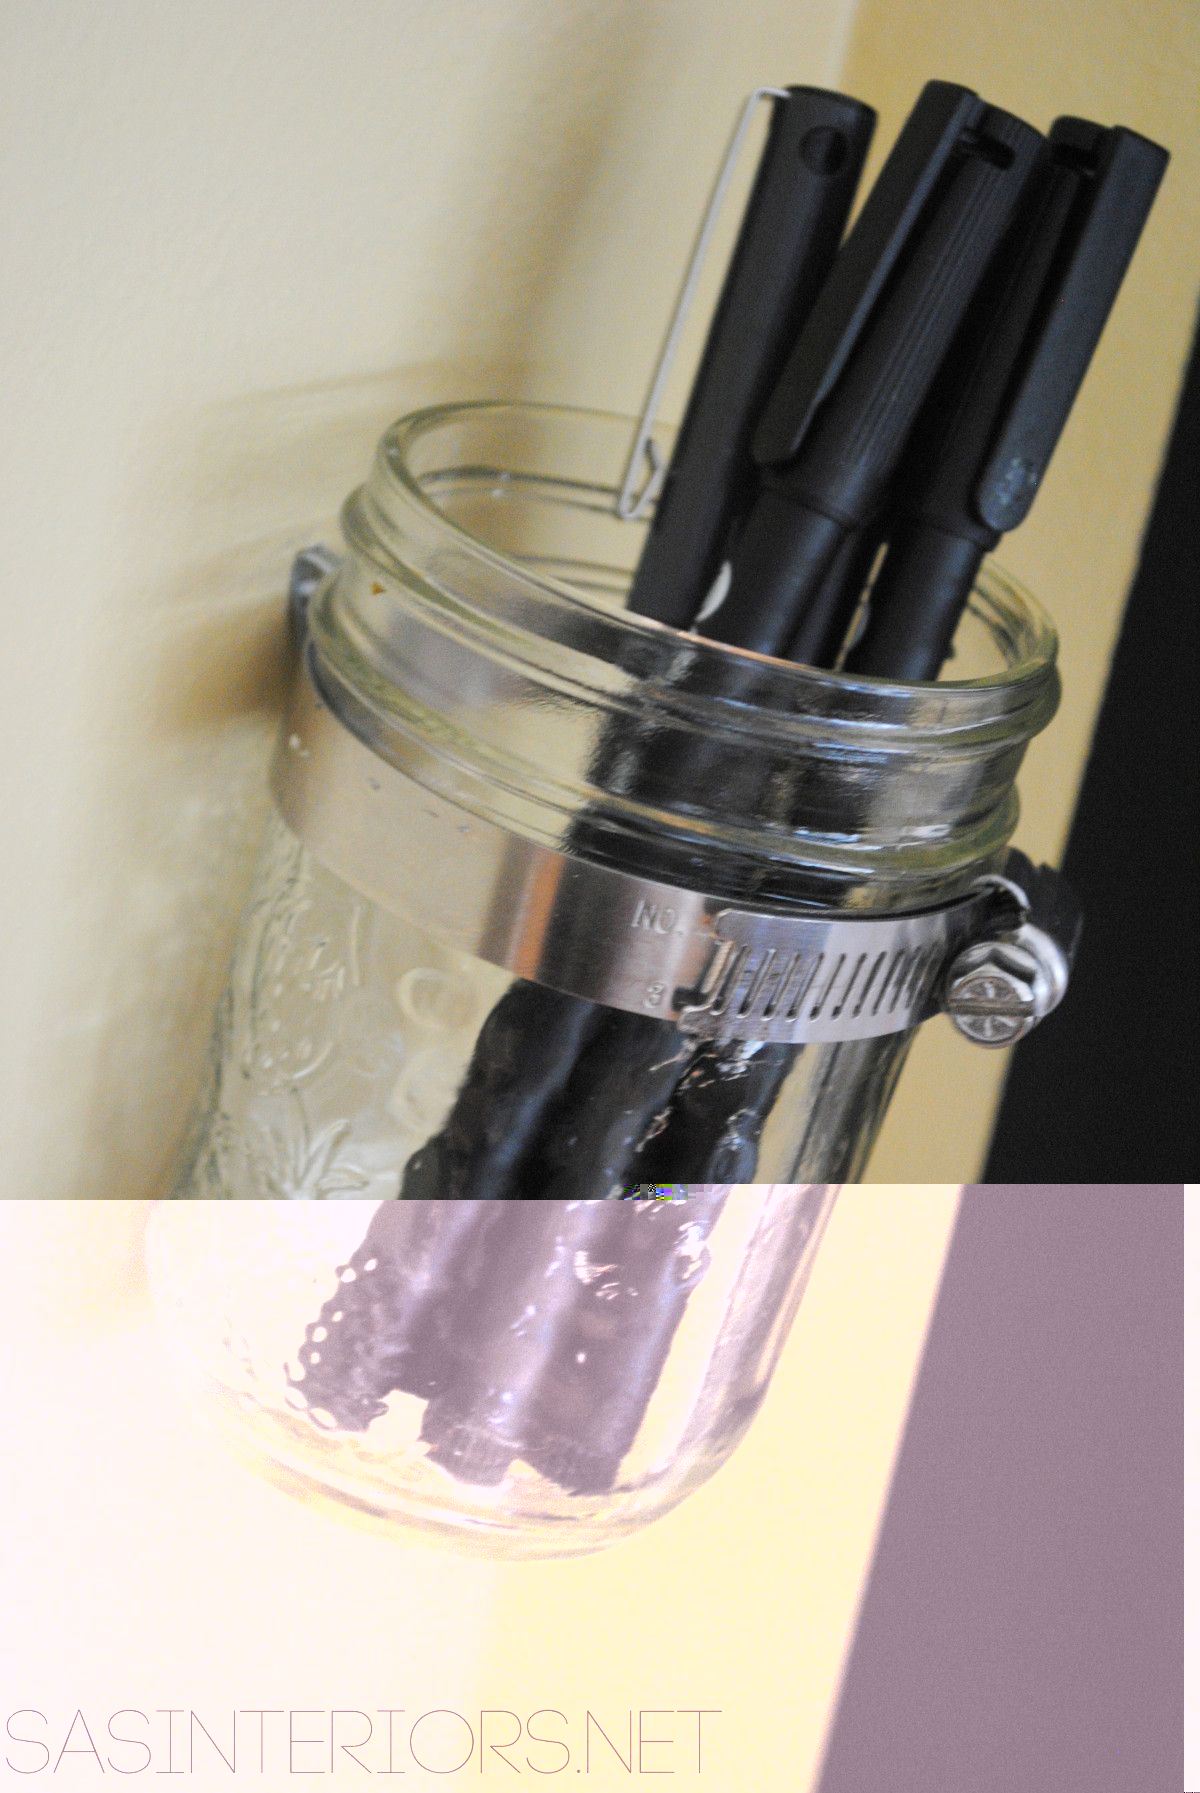
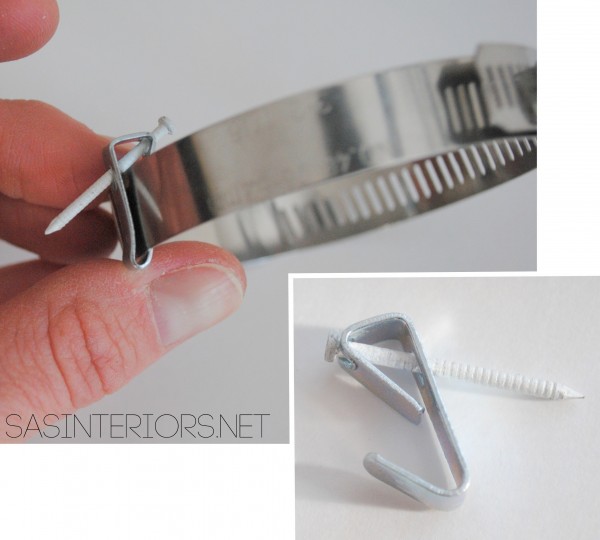
The trick to these babies hanging from the wall is a $1 (I actually think it cost even less $$$) hose pipe clamp (usually found in the plumbing section). I chose a 3″ diameter, but there are larger and smaller styles.  The salsa jar could have worked if I chose a 4″+ size.

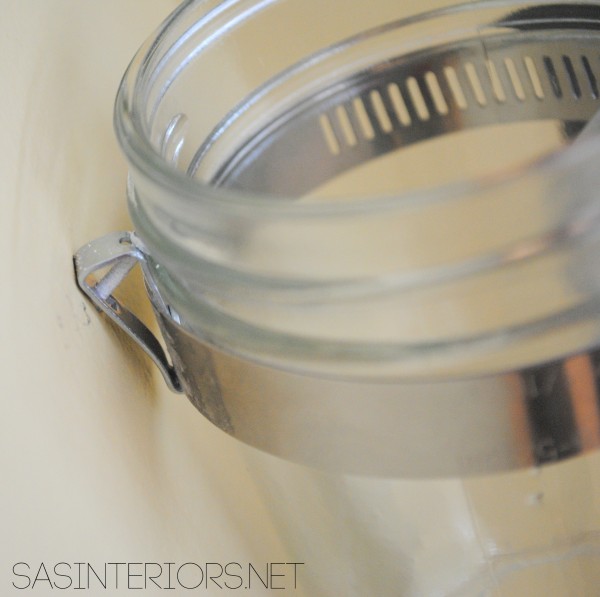
Once I had the jars cleaned out, they were ready to hang.  After some thought (and a few fails), I thought the easiest way to hang the hose pipe clamps from the wall was with a picture hanger.  This would allow for there to be only one hole in the wall (easy patch up job at a later date) and I could easily choose the right spot for install.

I wrapped the picture hook around the hose clamp and tightened it a bit so it was secure – super easy.  No tools needed other than a hammer.

Simple DIY Glass Jar Pen Holder using a one dollar pipe clamp! Super easy to create & can be used anywhere around the house!

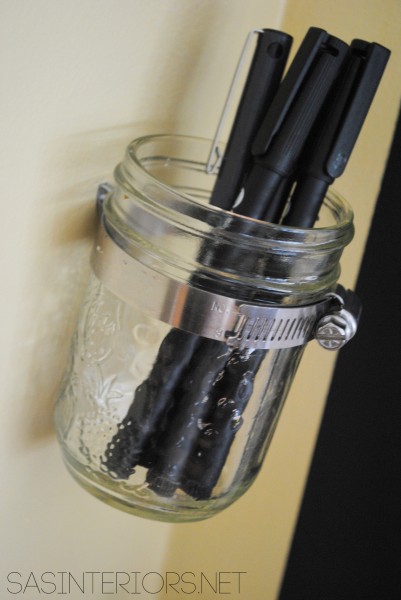
The result once hung…

Simple DIY Glass Jar Pen Holder using a one dollar pipe clamp! Super easy to create & can be used anywhere around the house!

And the result with actual pens…

Simple DIY Glass Jar Pen Holder using a one dollar pipe clamp! Super easy to create & can be used anywhere around the house!

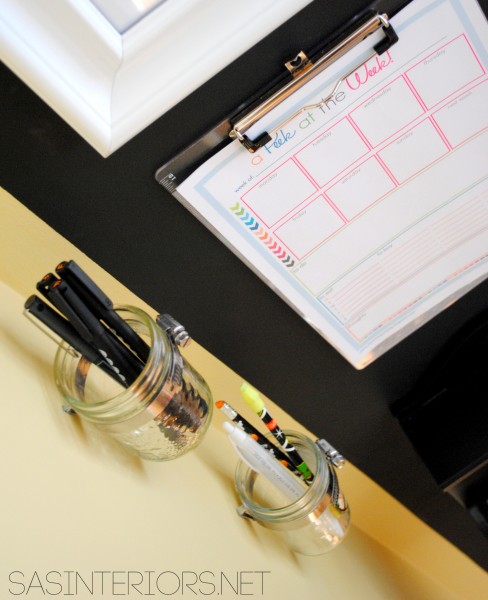
Super easy and unbelievably functional!  YES – huge score.

Simple DIY Glass Jar Pen Holder using a one dollar pipe clamp! Super easy to create & can be used anywhere around the house!

To keep the glass jars even more secure, I added a tacky dot at the spot where the jar meets the wall.  Now it stays perfectly in place.


Simple DIY Glass Jar Pen Holder using a one dollar pipe clamp! Super easy to create & can be used anywhere around the house!

If you want to see more of my Family Central Command Center, click {here}

Chalkboard Family Central Command Center for the heart of the home including a monthly calendar, kids charts, inspirational quotes, and more.  Created by @Jenna_Burger via sasinteriors.net

It’s amazing what can be created with very little money and at the same time be super useful!  Now I’m on the hunt for other places around the house where I can stick a glass jar (or two) on the wall.

Do you collect or display mason jars?  Ever use this technique of using a hose pipe clamp?

DIY: Personalized Dry Erase Calendar

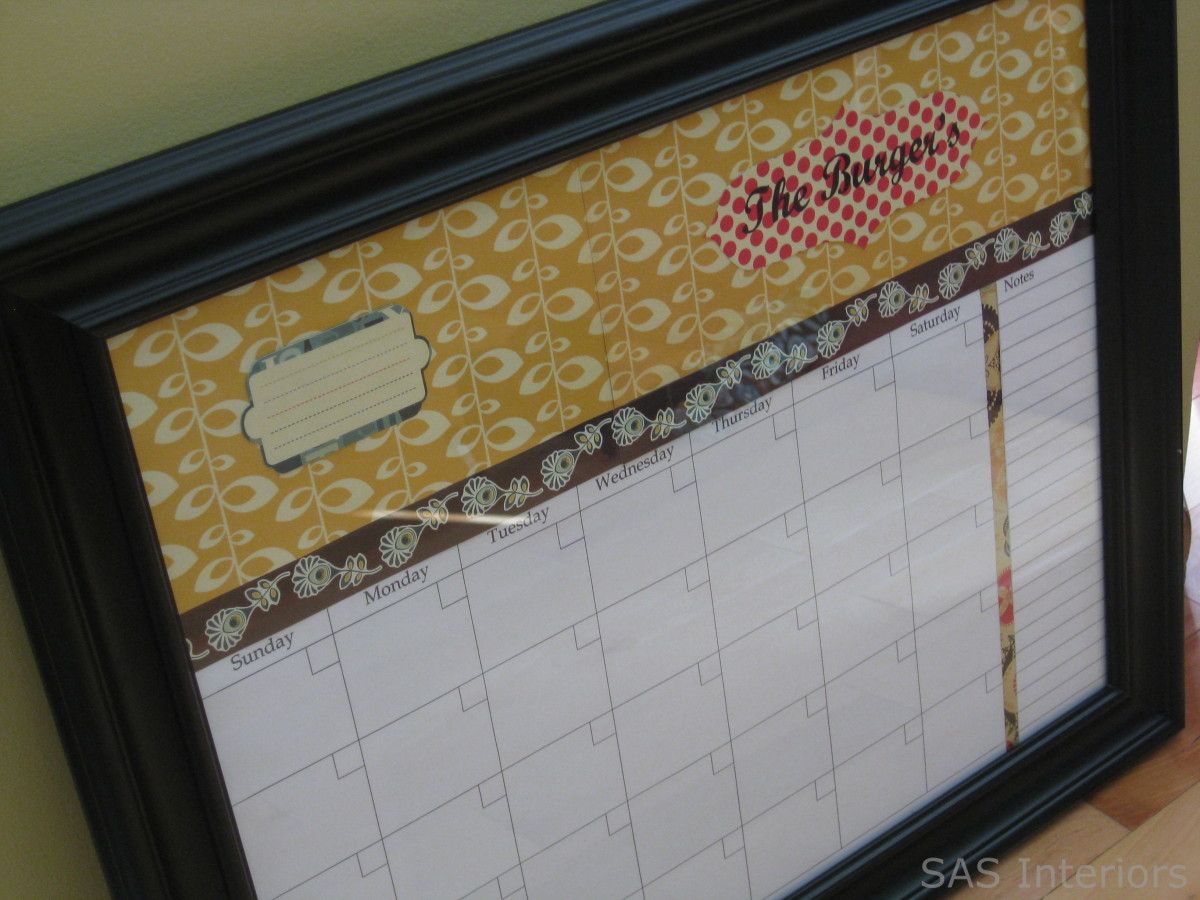
Last week I shared some inspirational ideas on creating a Central Command Center, as well as my new CCC spot.  One of the features in my newly organized space is the personalized dry-erase calendar that I made.  I had previously purchased a dry-erase board from Tar-Jay, but it was just too small to write all the activities and notes to keep my family on track for the month ahead.

We needed something that had space for our daily schedule, as well as a place for notes, like:
bring books to the library by Tuesday or
pick up the dry cleaning after 6 on Friday or
don’t forget to buy MILK!

Hopefully with this new and much larger calendar, tasks and plans won’t fall through the cracks…


Last week right after finishing this CCC wall, we had some friends over for a bbq.  While enjoying our cocktails, the husband shouts out while pointing to the calendar, “That’s exactly what we need, where did you buy that?”

My response, “I didn’t buy it, I made it”

His response, “really?” … (he totally wasn’t believing it!)

But I really did make it myself and so can you… for less $15! I started off with a 16″ x 20″” frame from AC Moore.  The Portrait frames are always on sale for 40 or 50%, so I scored this for about $13.

At the time of purchase, I wasn’t sure how I was going to pull this calendar together, but I knew I wanted to add some color and pizazz.  I found some pretty scrapbook paper (which was also on sale) for $0.40 a sheet. I loved their modern designs and vibrant hues… a perfect compliment to the kitchen and dining space. (I have a lot of paper leftover, which I will definitely be using for another project!)

Then using the Excel program, I was able to make a calendar and print it on 11 x 17 paper.  I also made a separate sheet for notes.  Using the cells in Excel, it’s really easy to create.  Are you an excel user?  It’s one of my favorite programs to use ~ weird, I know.

Using my good ole’ imagination, along with my pretty paper and magic scissors, I created my personalized dry erase calendar.

To add a bit of personalization, I included our family name – Burger – to the top, using one of the stylish papers and my printer.  No silhouette machine here… ( I would love one though!)

I have to admit, this vibrant red polka-dot paper wasn’t the best choice for writing our name on, but O well, it works.  A quieter background would have been better – you learn from your mistakes, right?  That’s what is great about this personalized calendar… I can continually change the background and it’ll only cost pennies!

Here it is, complete and ready to be used!

After Post Note: I’ve received ALOT of questions about writing directly on the glass.  Just like a dry erase board, a dry erase marker can be used to write on the glass and it’s easy to clean with the felt end tip, a paper towel, or even your finger. DO NOT USE A SHARPIE – that will not erase!

It wasn’t up on the wall for five minutes and was already filled out…

And if you missed my new Central Command Center, here’s a peak and you can read this {post}.

In making this calendar, I was inspired by the personalized calendar that Beth created using one of her favorite go-to resources.  Check out her post {here}. Thanks Beth!

How do you stay organized?  Do you have a ‘go-to’ spot in your home where everything is layed out for the whole family? Do you have a family calendar? or a Central Command Center?  I have to admit, it sure is nice to be organized (at least in one area of my house, ha)!

Skateboard Shelves

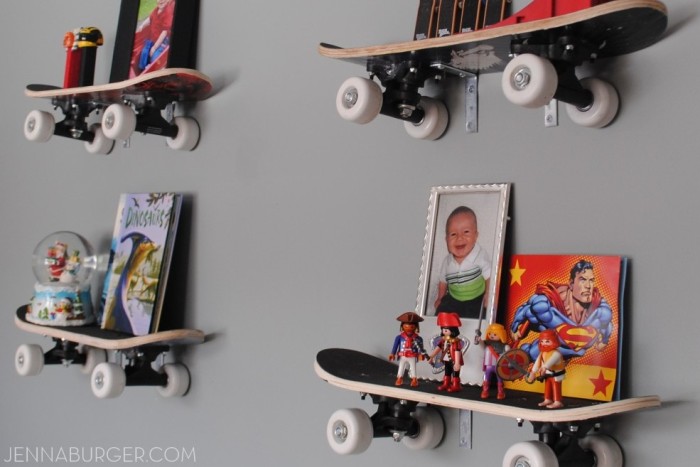
I’ve been meaning to install shelves in my son’s room for awhile, but wanted to do something unique and different.  At four years old, he has SO many interests, but one of his favorites is skateboarding.  So when recently putting the finishing touches on his “space”, I thought making shelves out of skateboards would be the perfect addition!

DIY: Skateboard Shelves - perfect for a boys room, young or old! Super easy to hang & totally rad

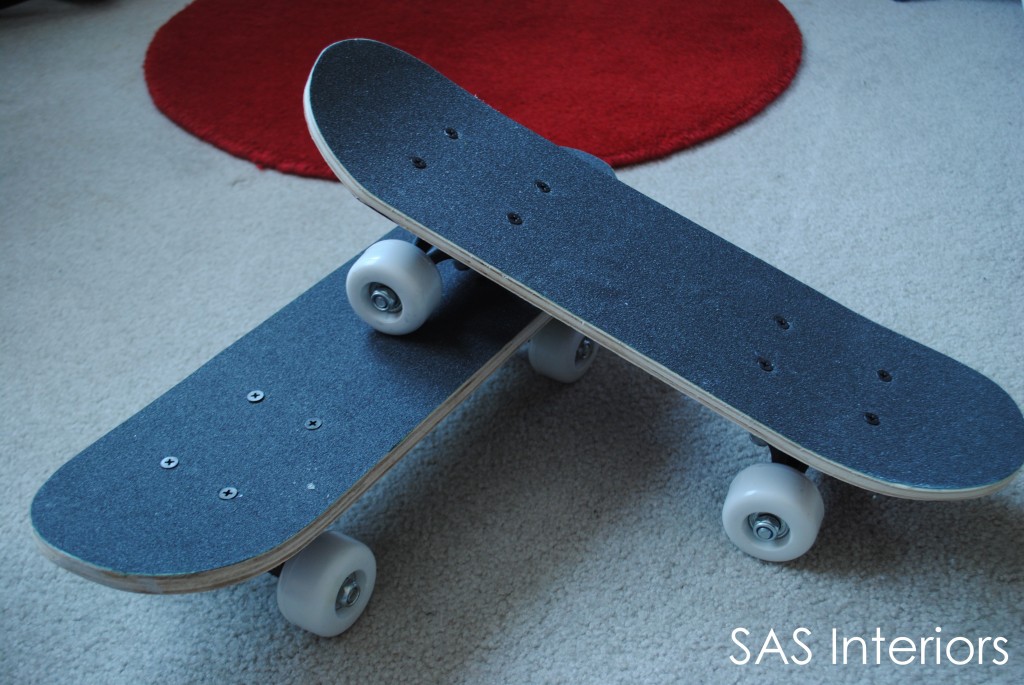
Real skateboard decks can start out around $40+ and there was no way I was purchasing shelves for that amount (I admit, I am frugal)! THANKFULLY, I stumbled upon these mini skateboards at Five Below and just like the name of the store, they were $5.  SCORE!

To start out, I bought 4 mini skateboards that are 17″ long (they are shorter than a typical skateboard deck, but they function just the same).  They were perfect for the size wall that I wanted to put them on.

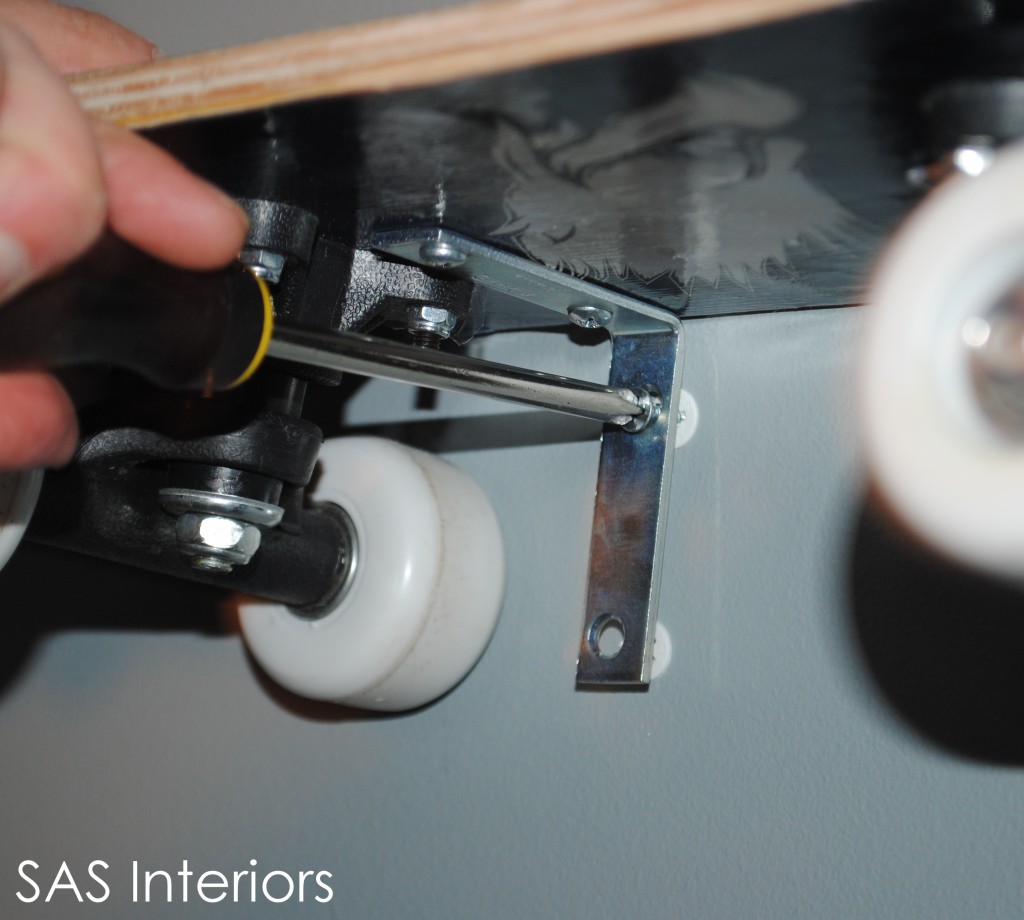
To make sure the skateboards were properly hung, I (along with my husband) used “L” brackets to install the skateboards to the wall. We used brackets that can hold up to 65 lbs….though, I really don’t think something that anything weighing 65 lbs will be sitting on these shelves ~ It’s better to be safe than sorry.

Now, the shelves are ready to be hung…
Once the “L” brackets are in place on the skateboard, they are ready to be hung on the wall. We positioned the skateboard on the wall (making sure it was level) and made a pencil mark of the holes on the “L” bracket.  Then, we put in the anchor ~ If there isn’t a stud (I don’t mean your guy…haha, bad joke, I know) behind the wall, your screw will not hold and your shelf will most likely fall out.  MY ADVICE: USE ANCHORS!

Then hang the shelf…

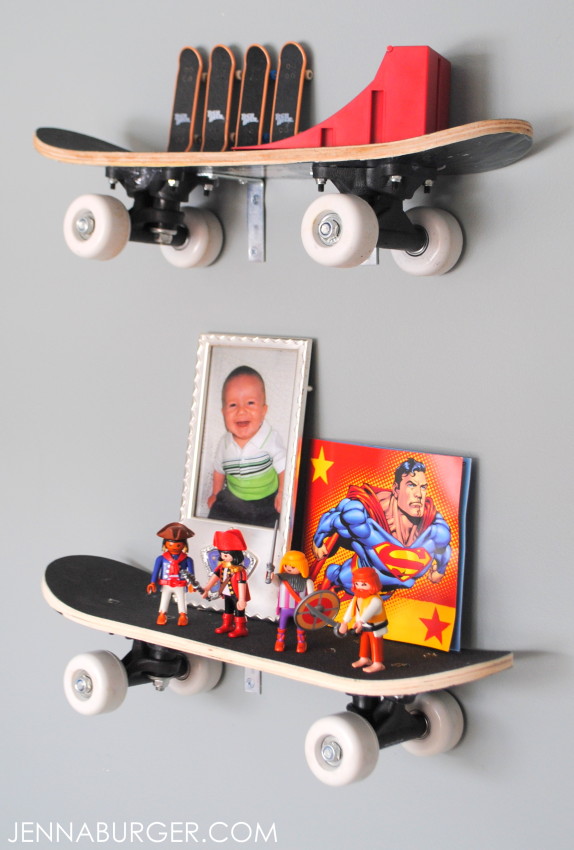
And the shelves are complete…

DIY: Skateboard Shelves - perfect for a boys room, young or old! Super easy to hang & totally rad

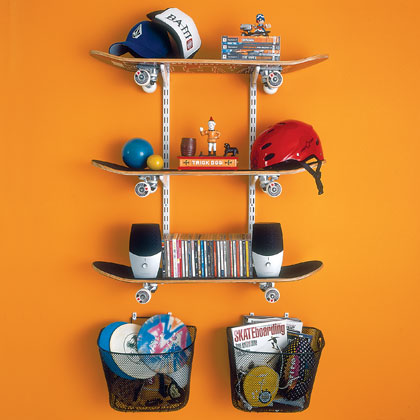
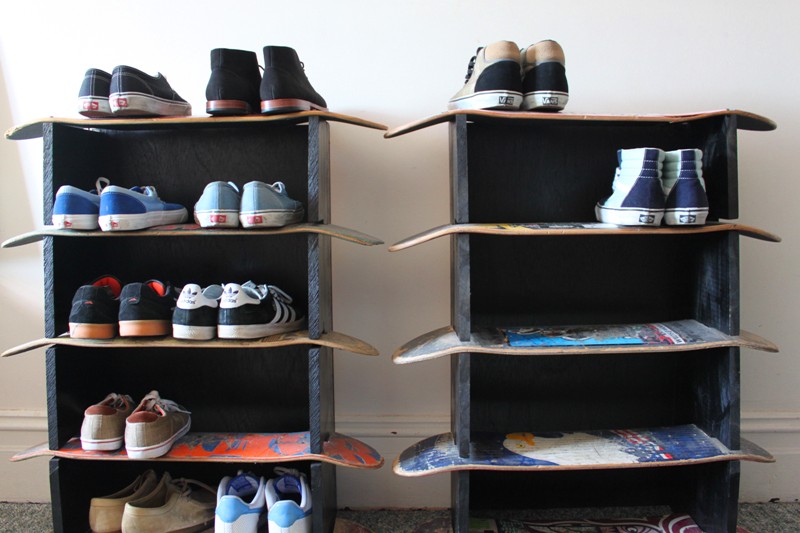
SKATEBOARD SHELF INSPIRATION.

How neat!  Great idea to take off the trucks and wheels, and then hang the board on it’s flat on the wall.  Then add the simple shelving.

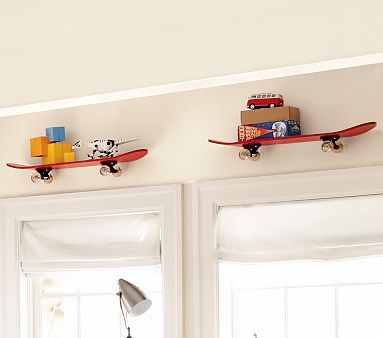
Great idea to add some style above the windows.  It gives the white, neutral room a POP of color!

Try regular wiring shelving as I used in my mom cave, and then put the decks on top…totally RAD!  (I had to add some skateboard lingo)

Look at this creative idea…use the skateboard decks as a show rack.

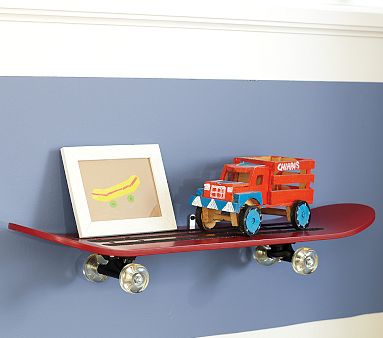
This is the skateboard shelf that is available at Pottery Barn for $70….  I’ll stick with my skateboard shelf for $5!

Do you have shelves in your child’s room?  Did you do anything creative

IMAGES COURTESY OF Home Improve Ideas, Family Fun, Jodeska

Having fun ORGANIZING!

This is going to sound SO unromantic, but for my wedding anniversary that is coming up soon, I asked for my present to be shelving…(YES, I said shelving), meaning organization for my closets.  How horrible, right?!? We moved into our home less than a year ago, and the shelving in most of the closets of our builder-style home, is just one wire shelf set about 5′ above the floor.  That certainly doesn’t provide much shelving to store or hang anything!!  So away we went to Home Depot to buy shelving.  Of course, I would have LOVED to have had a closet company come install beautiful wood shelves, but we’re on a budget and I’m fine with basic!  Here are some pictures of our closet transformation:

Organization Tips

Martha Stewart for Home Depot

Purge

Take everything out of your closet/space; figure out what you don’t use and throw it away.  If you haven’t touched it in 6 months+, you probably don’t need it!

Go as high as you can go!

There is no reason to stop your shelving at 5′ or 6′ to where you can reach while standing on the floor.  Install a shelf even higher. Just get a step stool and put items on the top most shelf that you don’t need to access on a regular basis, like large platters, holiday dishes, linens, etc.  This will give you so much more room to store!

Baskets or Bins

While at Home Depot in the shelving section, I saw this great display of colorful bins by Martha Stewart.  The bins also come in colors that coordinate with the Martha Stewart Paint Colors (how cool!).  I got 4 bins (one for each of us) in a different color/pattern.  This is a fun way to incorporate color and your unique flair!

Install the shelving how YOU are going to use it

Before installing the shelving, have a general layout and think about how YOU and your family will use it.  If you use a ‘typical’ configuration, it might not fit what YOU need, resulting in waste of space!

Have fun with it

Before installing the shelving, paint or wallpaper the back wall of the closet.  Even though, it’s not something you will see all the time, it’s a fun way to do something funky and fun.  Choose a color that you maybe wouldn’t do throughout the rest of your house since it’s too bright or bold.  Another idea, is to wallpaper the back wall to add some interest every time you open the door.  One more suggestion, add a picture or painting on the back wall…another surprise every time you look inside.

Along with Home Depot, The Container Store has some great organizational solutions and closet systems.  If you have an opportunity to visit one of their stores, you’ll be amazed how many shelves, bins, baskets, organizers that they have to offer…..it’s incredible and a little overwhelming too.  BUT, take it one step at a time and the job will get done! (I used to live down the street from one when living in an apartment, so I was always looking for more storage solutions)

If you’ve got money to spend, definitely invest in having a closet company assist you with designing your space.  California Closets has experienced Closet Consultants that will help you put everything in it’s place! They obviously specialize in closets, but they can also help with storage for your office, garage, pantry, etc.

Images courtesy of Martha Stewart for Home Depot, The Container Store, California Closets