From Wood to White: How-To Paint Mouldings
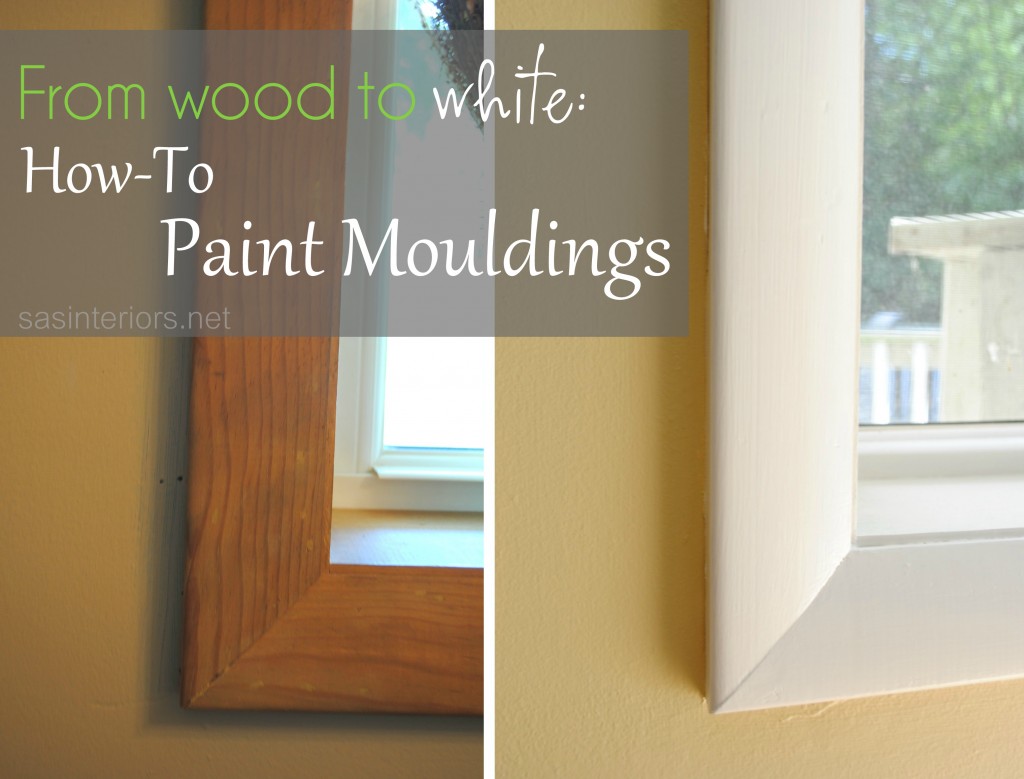
If I could sum up my Summer in DIY terms, it was all about painting. From the staircase to my office chair, from the white shelves to the new blue room, I think there was 2 (or maybe even 3) weeks straight that I had a paintbrush in-hand everyday! Honestly, I’m kind of sick done with painting for awhile. Anyway, alot of projects got accomplished and one in particular were the oak stained wood mouldings that I painted white. All I can say is… WHAT A DIFFERENCE!
The staircase project was what did it and started the process of updating the mouldings. It’s something that I wanted to undertake for a long time, but just didn’t know where to begin. Once I started painting the stair risers and balusters, I realized that painting the trimwork wasn’t too difficult, so I just continued around the room. Even though the staircase was time consuming, the result was completely worth the effort and I knew I would feel the same way once the mouldings were finished.
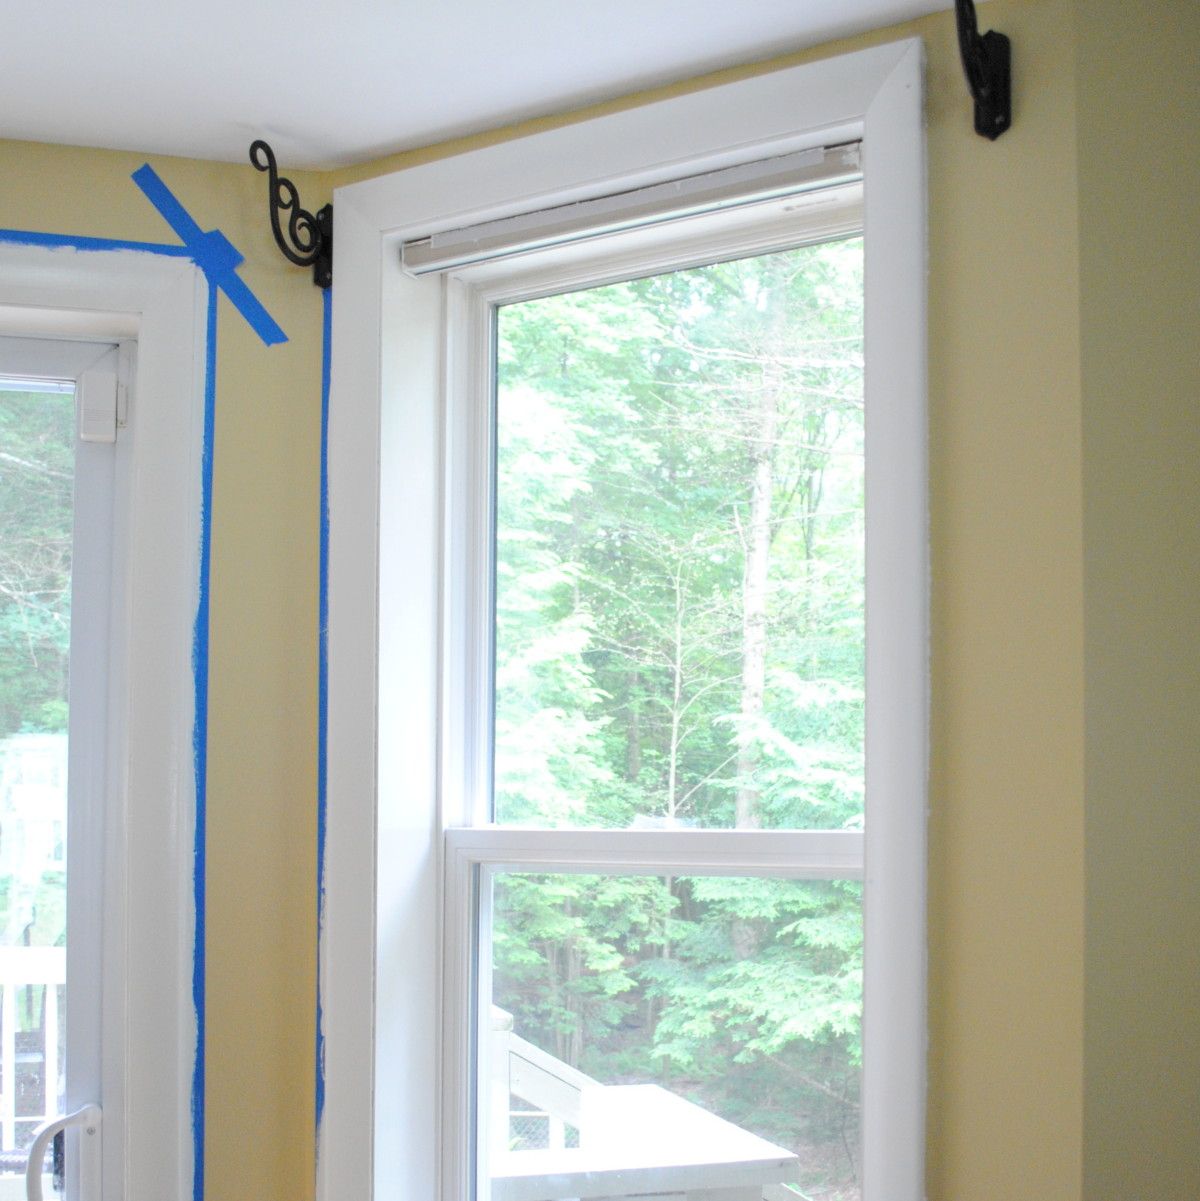
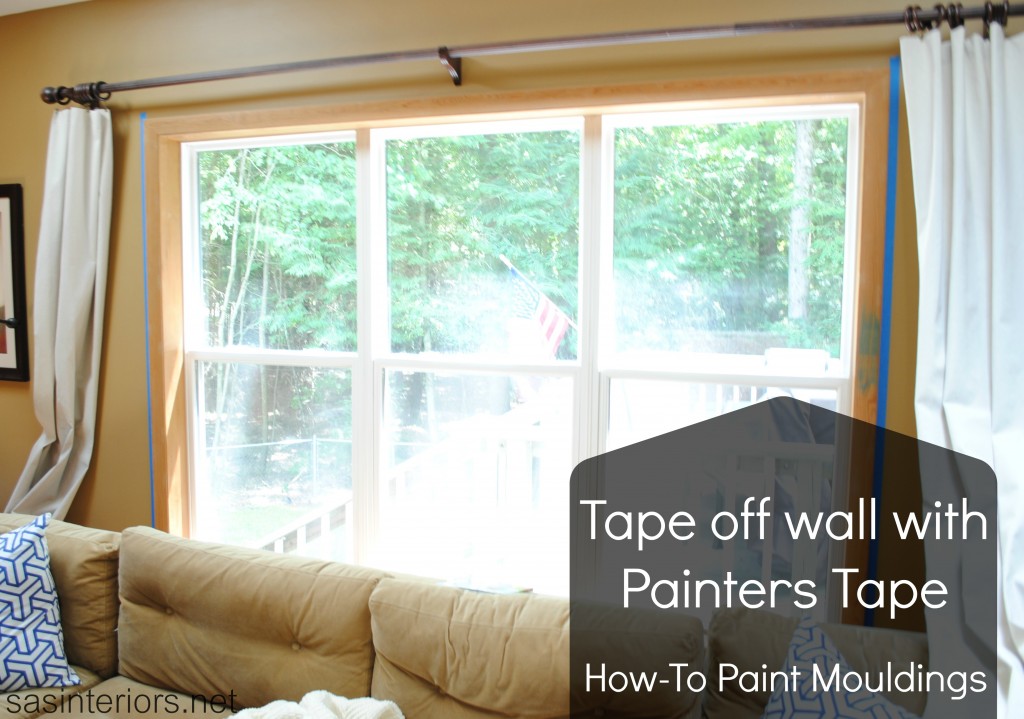
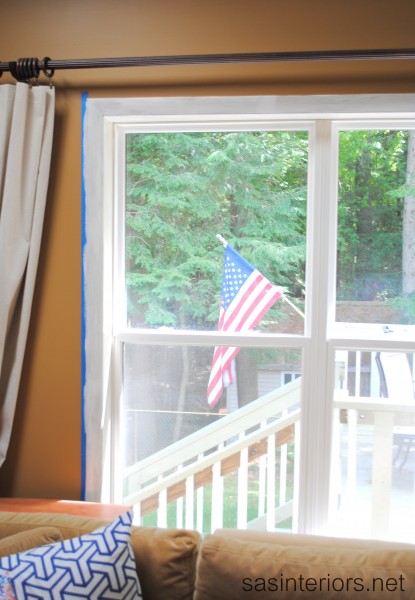
To start off, I applied painters tape to the wall so only the mouldings (the areas that I wanted to paint) were exposed.
Here’s a snapshot when I painted the area around the window in the living room.
* Sidenote: My walls were already painted, but if you’re undertaking this project and your walls are NOT painted or you plan on changing the wall color, then paint the mouldings first. Believe Me, It’s much easier! So you would reverse the step I just mentioned. Paint your mouldings first and once they are dry, tape the moulding edge (or buy a moulding paint gadget), THEN paint the wall color.
okay, moving on…
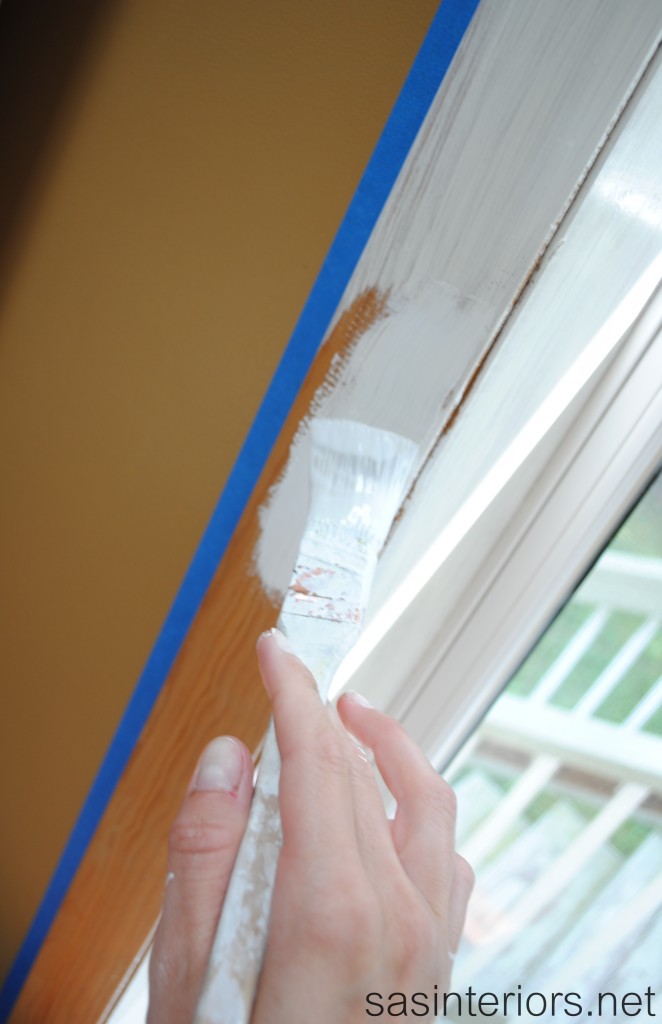
Once the tape was up, I was ready to paint. Using my favorite Purdy brush, I applied one coat of Kilz Primer (I’ve heard good things about gripper primer too, but haven’t tried it yet). I didn’t bother with sanding because even though the mouldings were stained, there was no gloss or sheen to them. They were at the point of needing to be restained (to protect them) or painted (as I did). IF you’re undertaking this project and your mouldings have a gloss finish, giving them a light sand is probably a good idea.
Primer for the mouldings is really important. At one window I didn’t use it (by accident – it was late at night – you know the rest…) and you could see the orange color of the stain coming through the paint. No matter how many coats of paint I applied, the orange tint always showed. Now with primer, you may still get the orangey color, BUT when you go to apply the paint color, the orange color won’t come through because the primer will block it. Primer truly is amazing stuff!
After the one coat of primer, then it was time to paint. I continued with the paint I used for the staircase which was, Snowfall White by Benjamin Moore (thanks BM for providing the paint!).
Here’s a snapshot of the first coat of paint.
In most areas, I applied 1 coat of primer + 2 coats of paint, but in some areas I did use 3 coats. It really depended on the finish look after 2 coats.
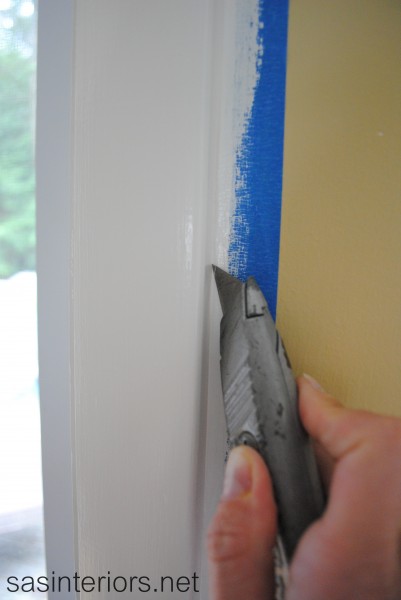
Once the painting was complete, it was time to remove the tape. I’ll forewarn you – Don’t quickly pull off the tape because you’re freshly painted mouldings might get ruined. When the paint was dry (to the touch – it takes about 20-30 days to fully cure), I pulled off the tape and some of the paint came to. To avoid that from happening, I used an X-acto blade to score the corner of where the moulding and wall meet…
…then removed the tape.
At this point, I noticed that some of the paint bled under the painters tape – so annoying, right? I’ll tell ya, I tried lots of different ways to avoid this, but nothing worked. I even googled it, and I found nada. If you know a secret way, will you share? Until then, this is what I did that worked best.
After removing the tape, I took the wall paint color and my Purdy angled brush, and slowly dragged it down the wall where the wall and moulding meet. It worked perfectly!
And that’s about it… Not too difficult, just alittle time consuming. But believe me, the result is SO worth it. Take it room by room – that’s what I’ve done. Honestly, not all my rooms are completely finished, but most are and the result is so satisfying!
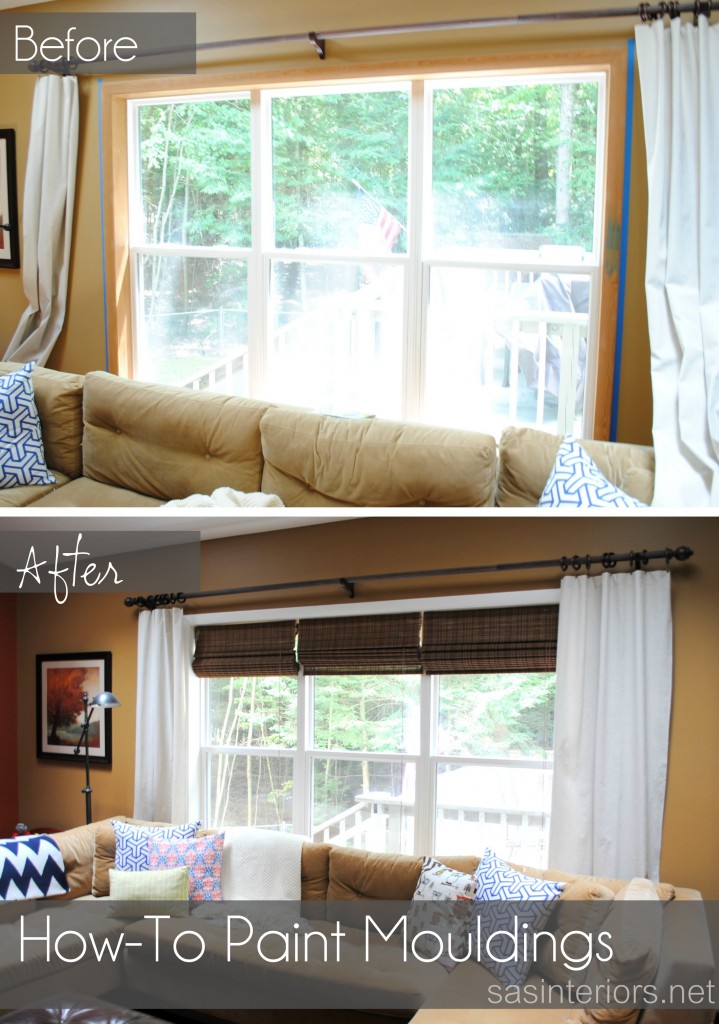
Here is the before and after of the living room…
Want to see some more?
Do you remember when I updated the door hardware? Check out how fresh it looks with the newly painted white mouldings…
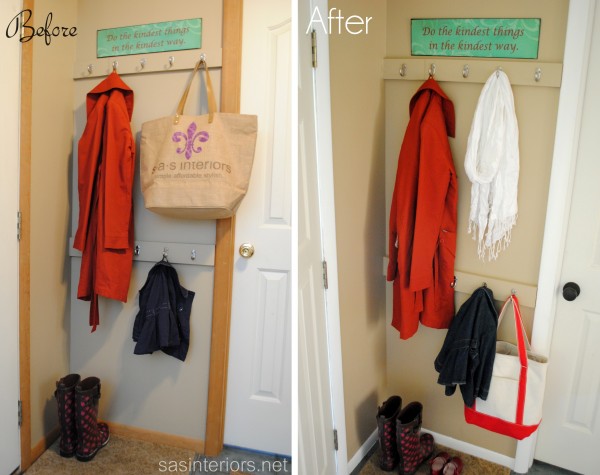
And here’s one more. Do you remember the DIY built-in coat rack behind my front door? Well here it is now surrounded by freshly painted mouldings…
What a refreshing update! Well I have a few more painting projects that I worked on over the Summer that still need to be shared, so check back soon!
What painting projects did you work on this past Summer?
I link my projects to some of these parties: Skip to My Lou, Dittle Dattle, Between Naps on the Porch, Today’s Creative Blog, Stories of A to Z, All Things Heart & Home, Savvy Southern Style, House of Hepworths, Finding Fabulous, Creation Corner, The Shabby Nest, Serenity Now, Tatertots and Jello, Thrifty Decor Chick, Tip Junkie
