
Tag: play tent

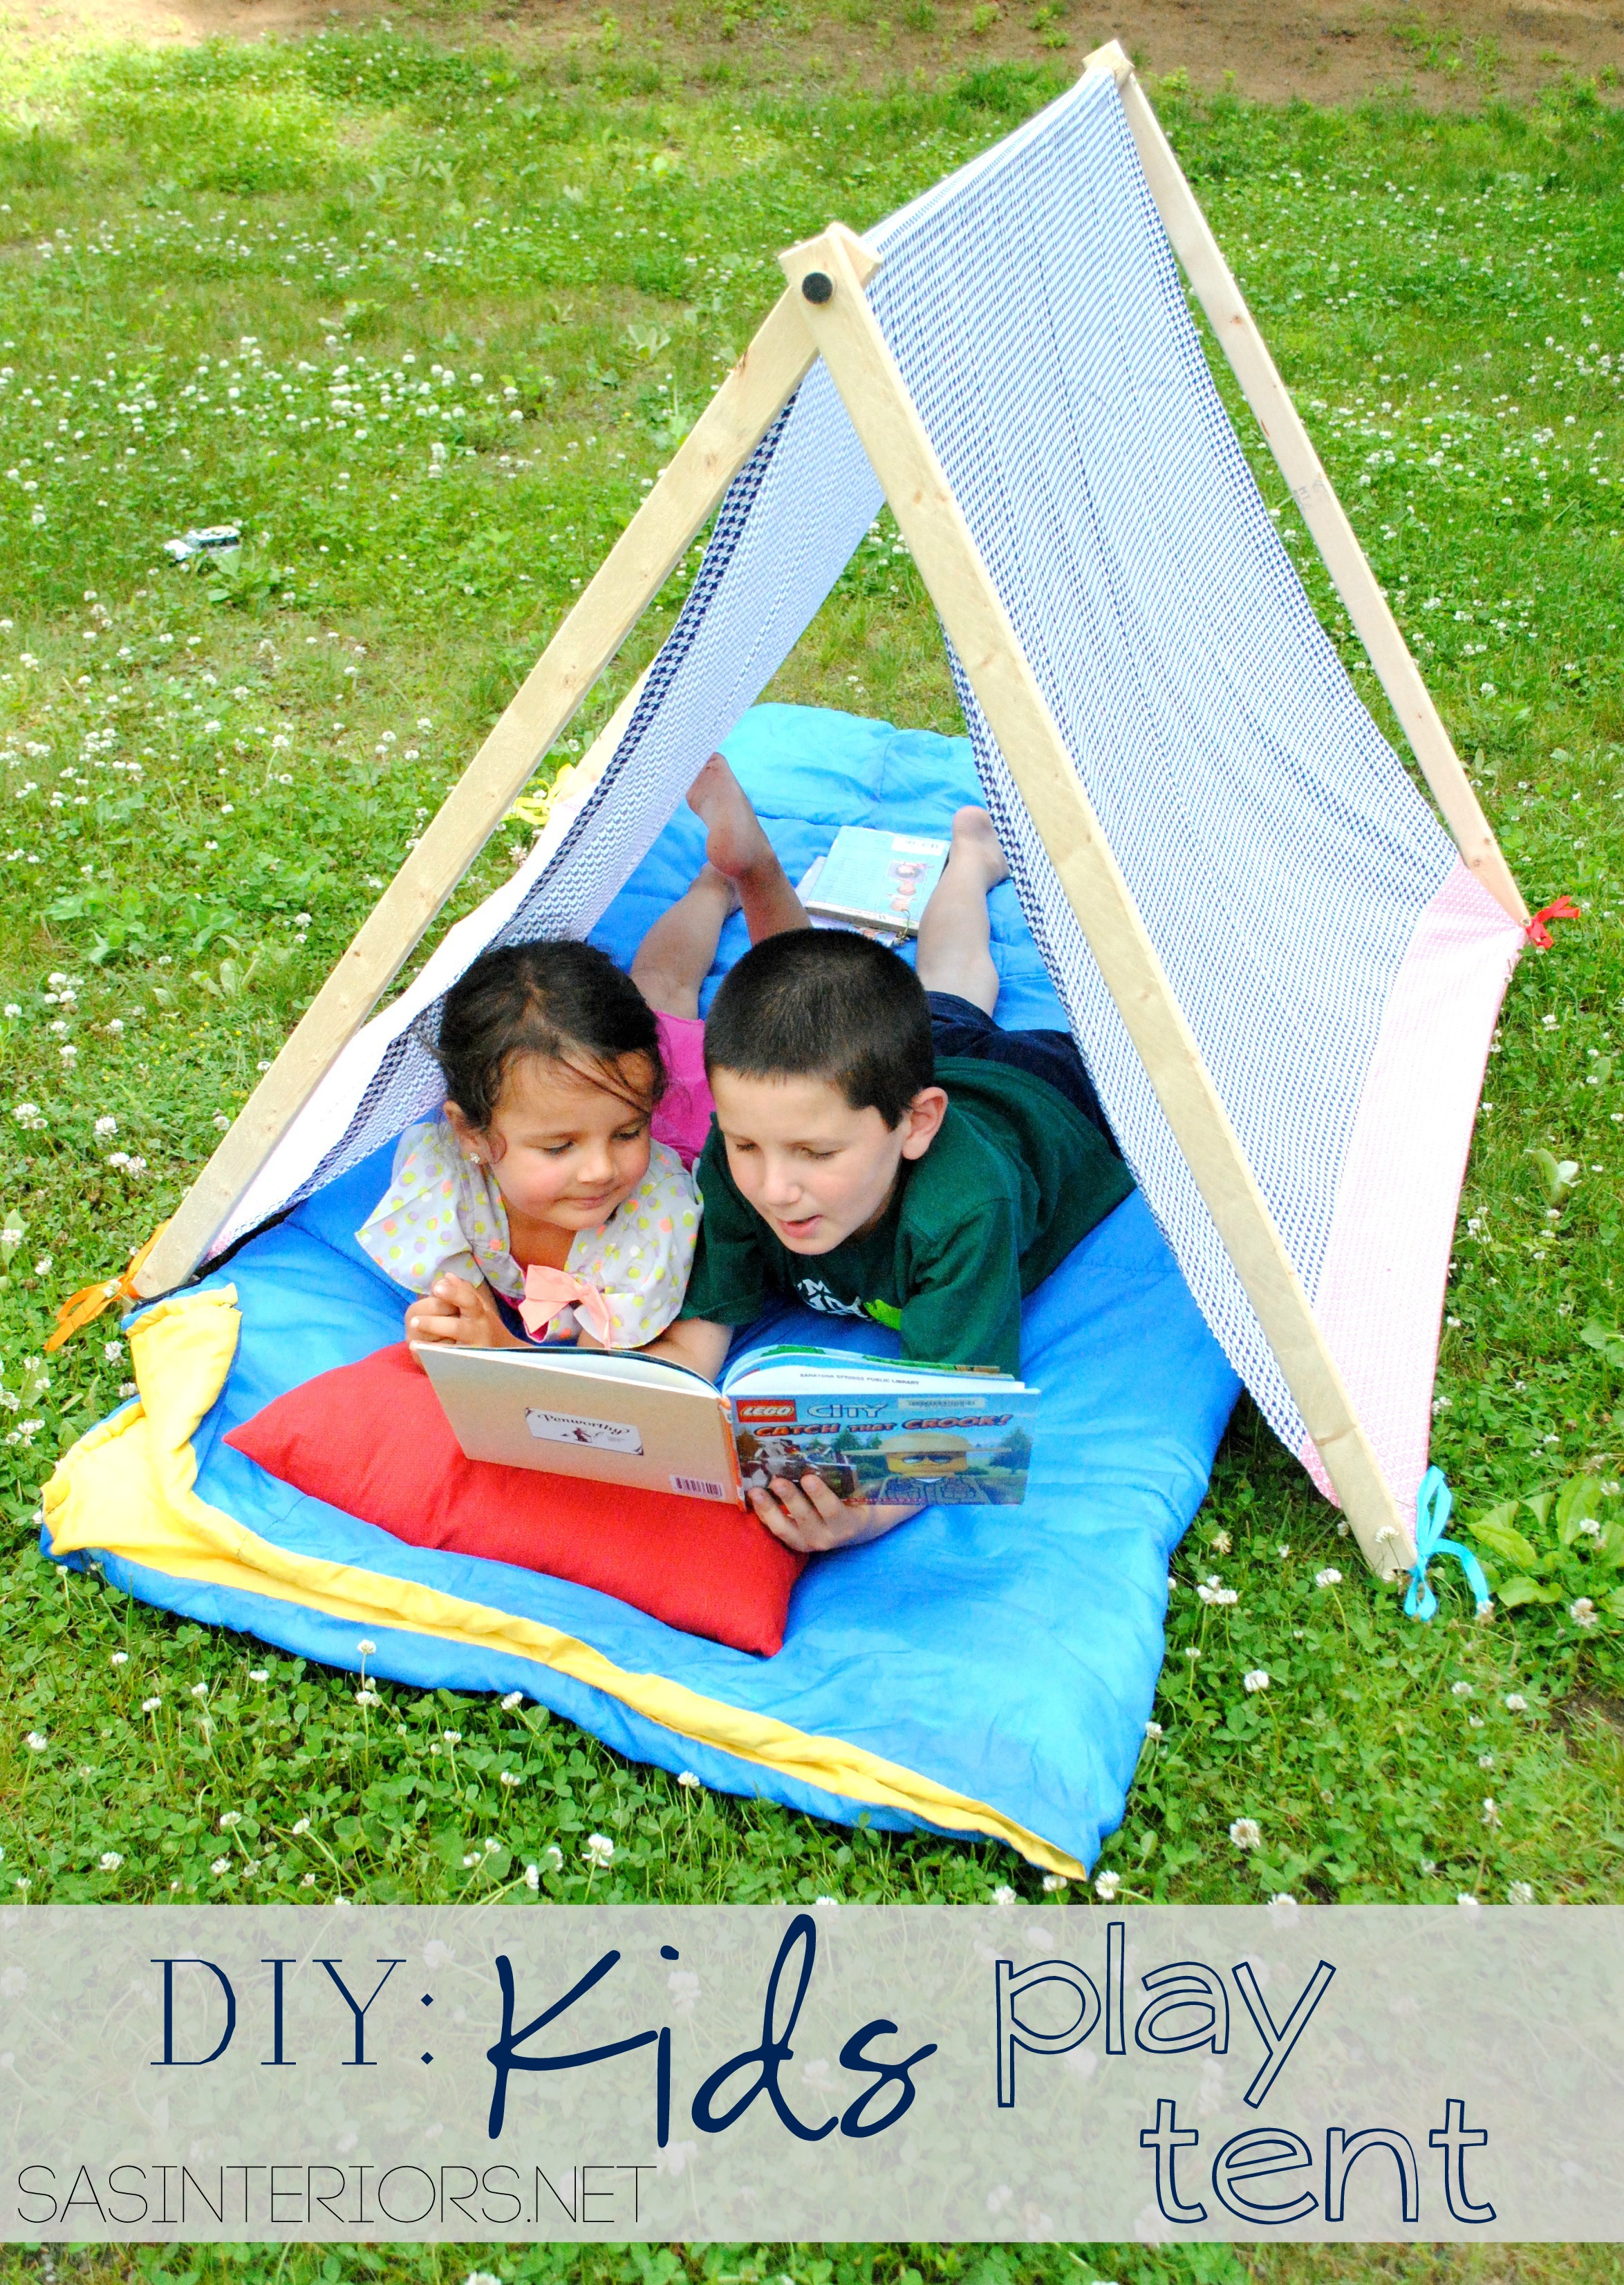
DIY: Kids Play + Camping Tent

Happy July!

For me, it officially feels like Summer has begun.  The kids are out of school now for just about a week, and the Summer sun is setting in (despite all the rain we’ve been having).  The kids and I have been enjoying fun outings each day, while also spending some down-time at home just relaxing.  Often on those home-bound days, the hours creep by with boredom, so when Lowe’s put me up to the challenge this month to create something related to DIY camping, I thought of the perfect solution…
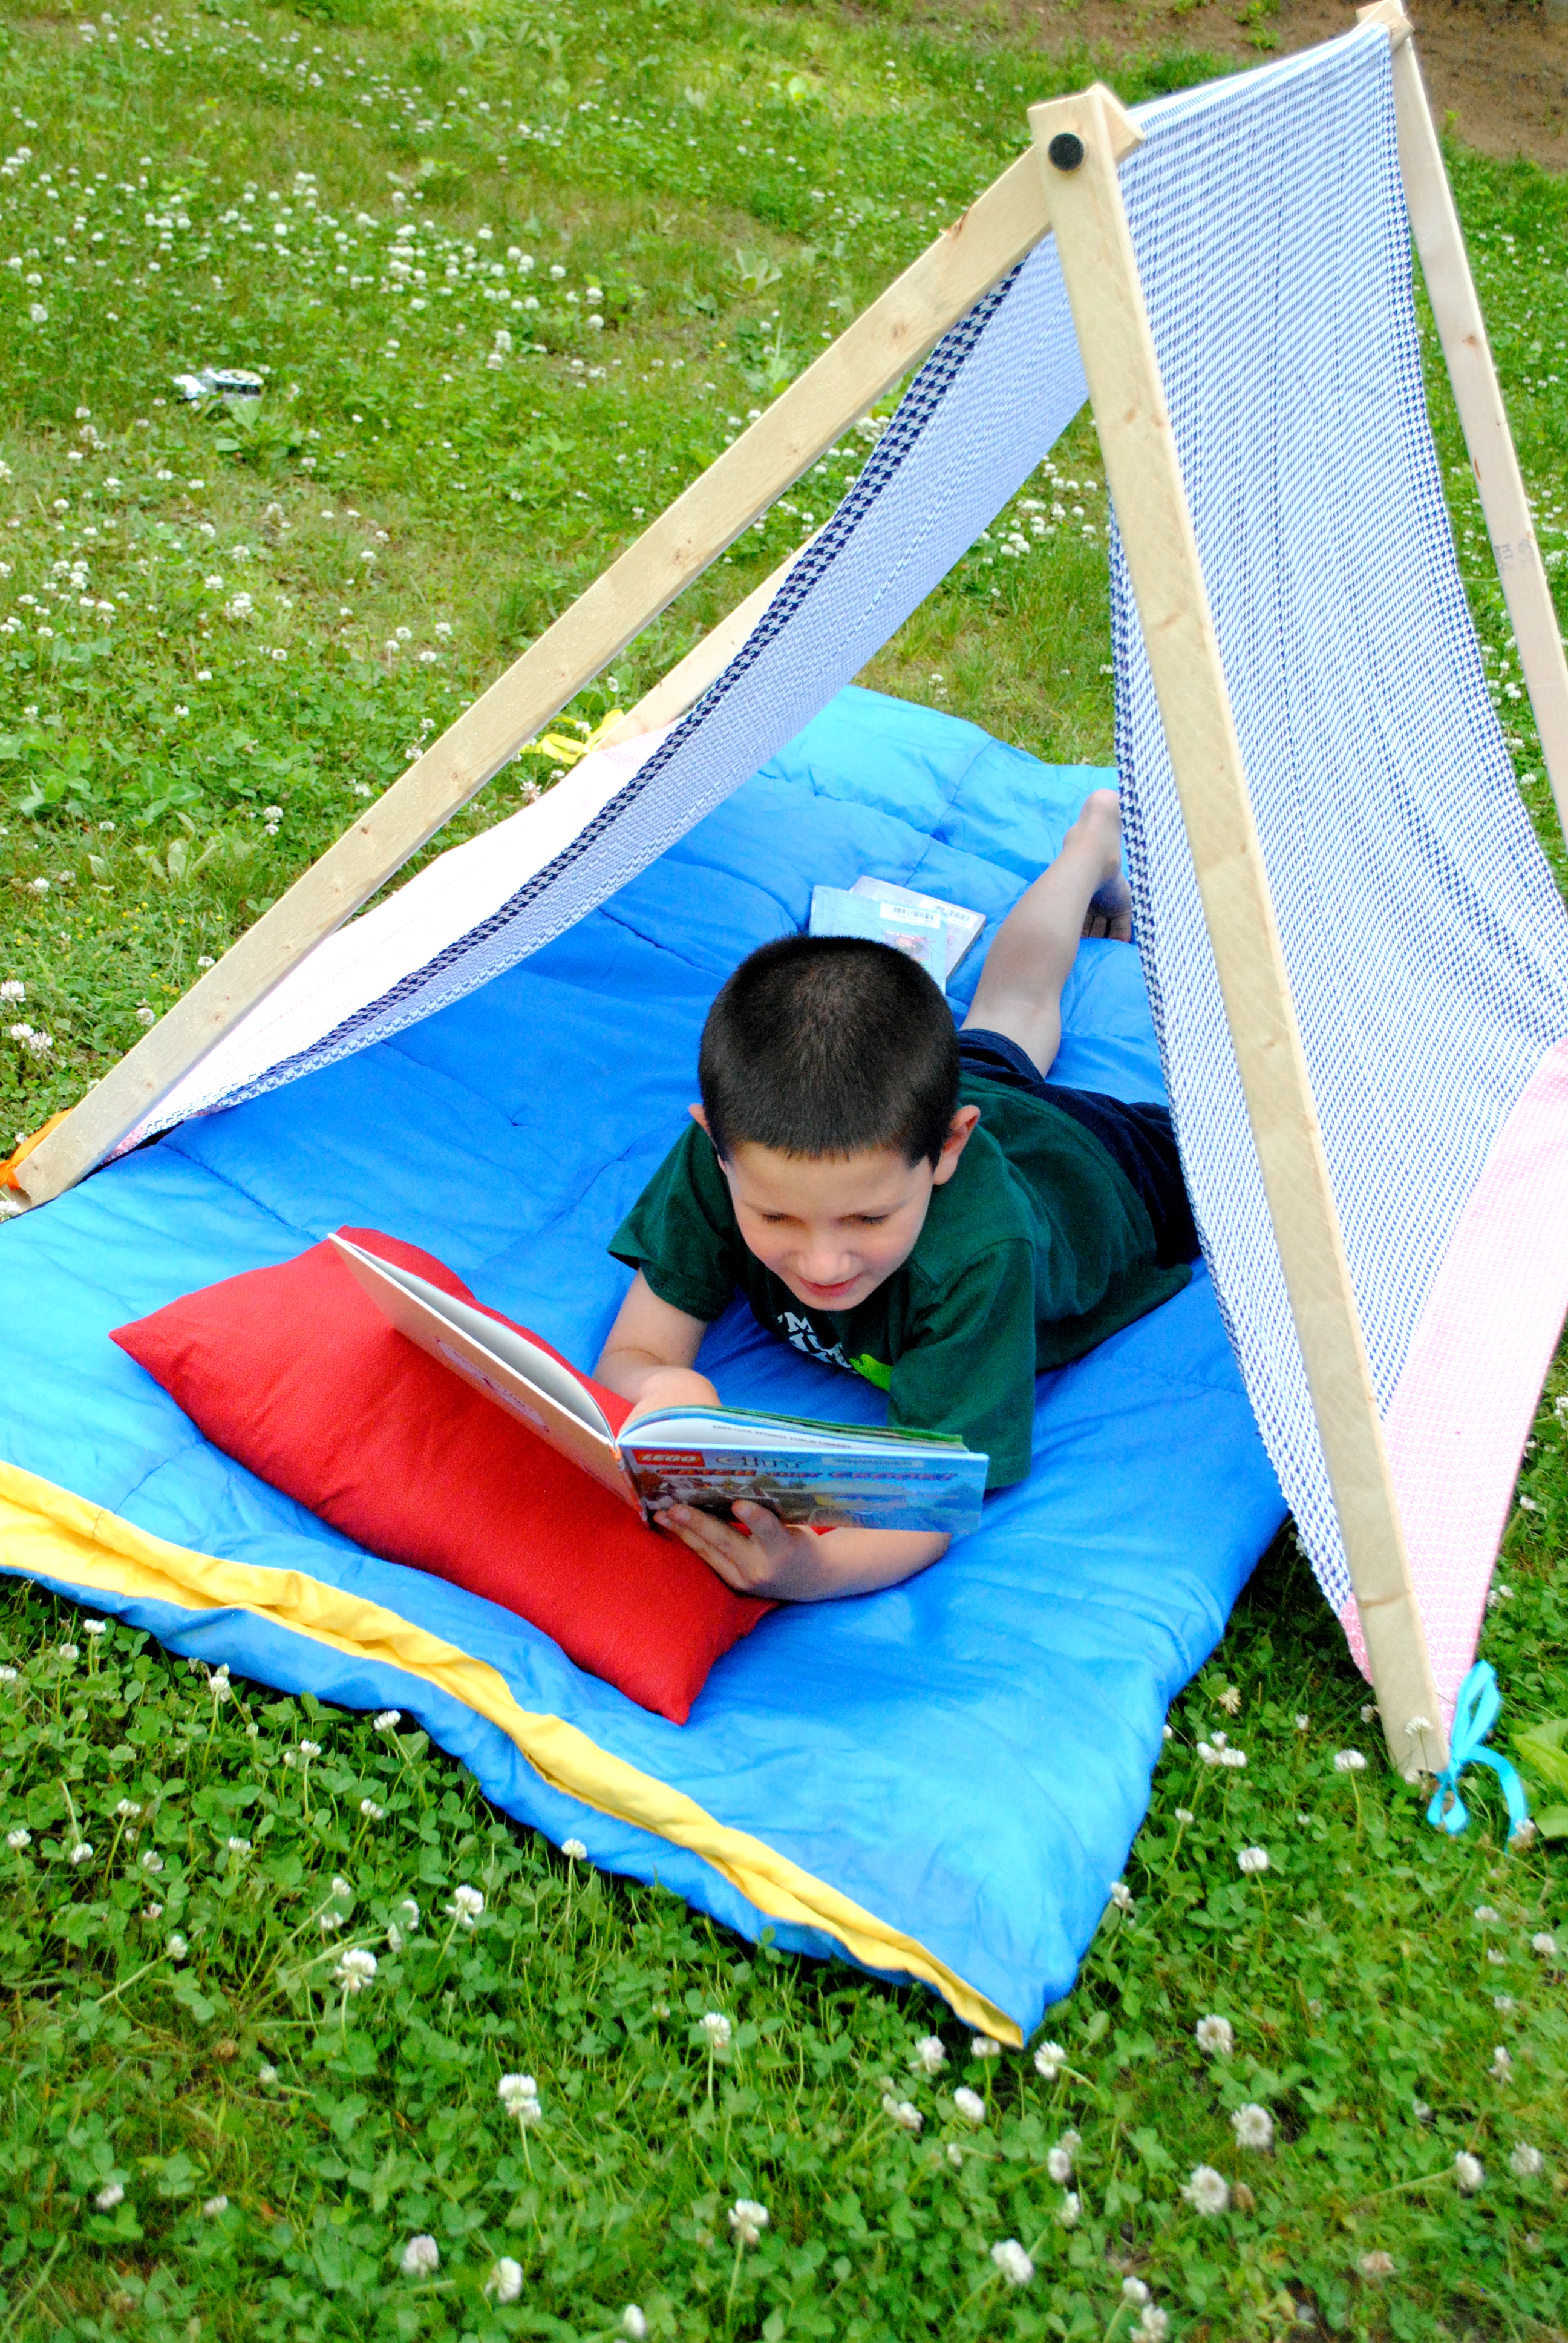
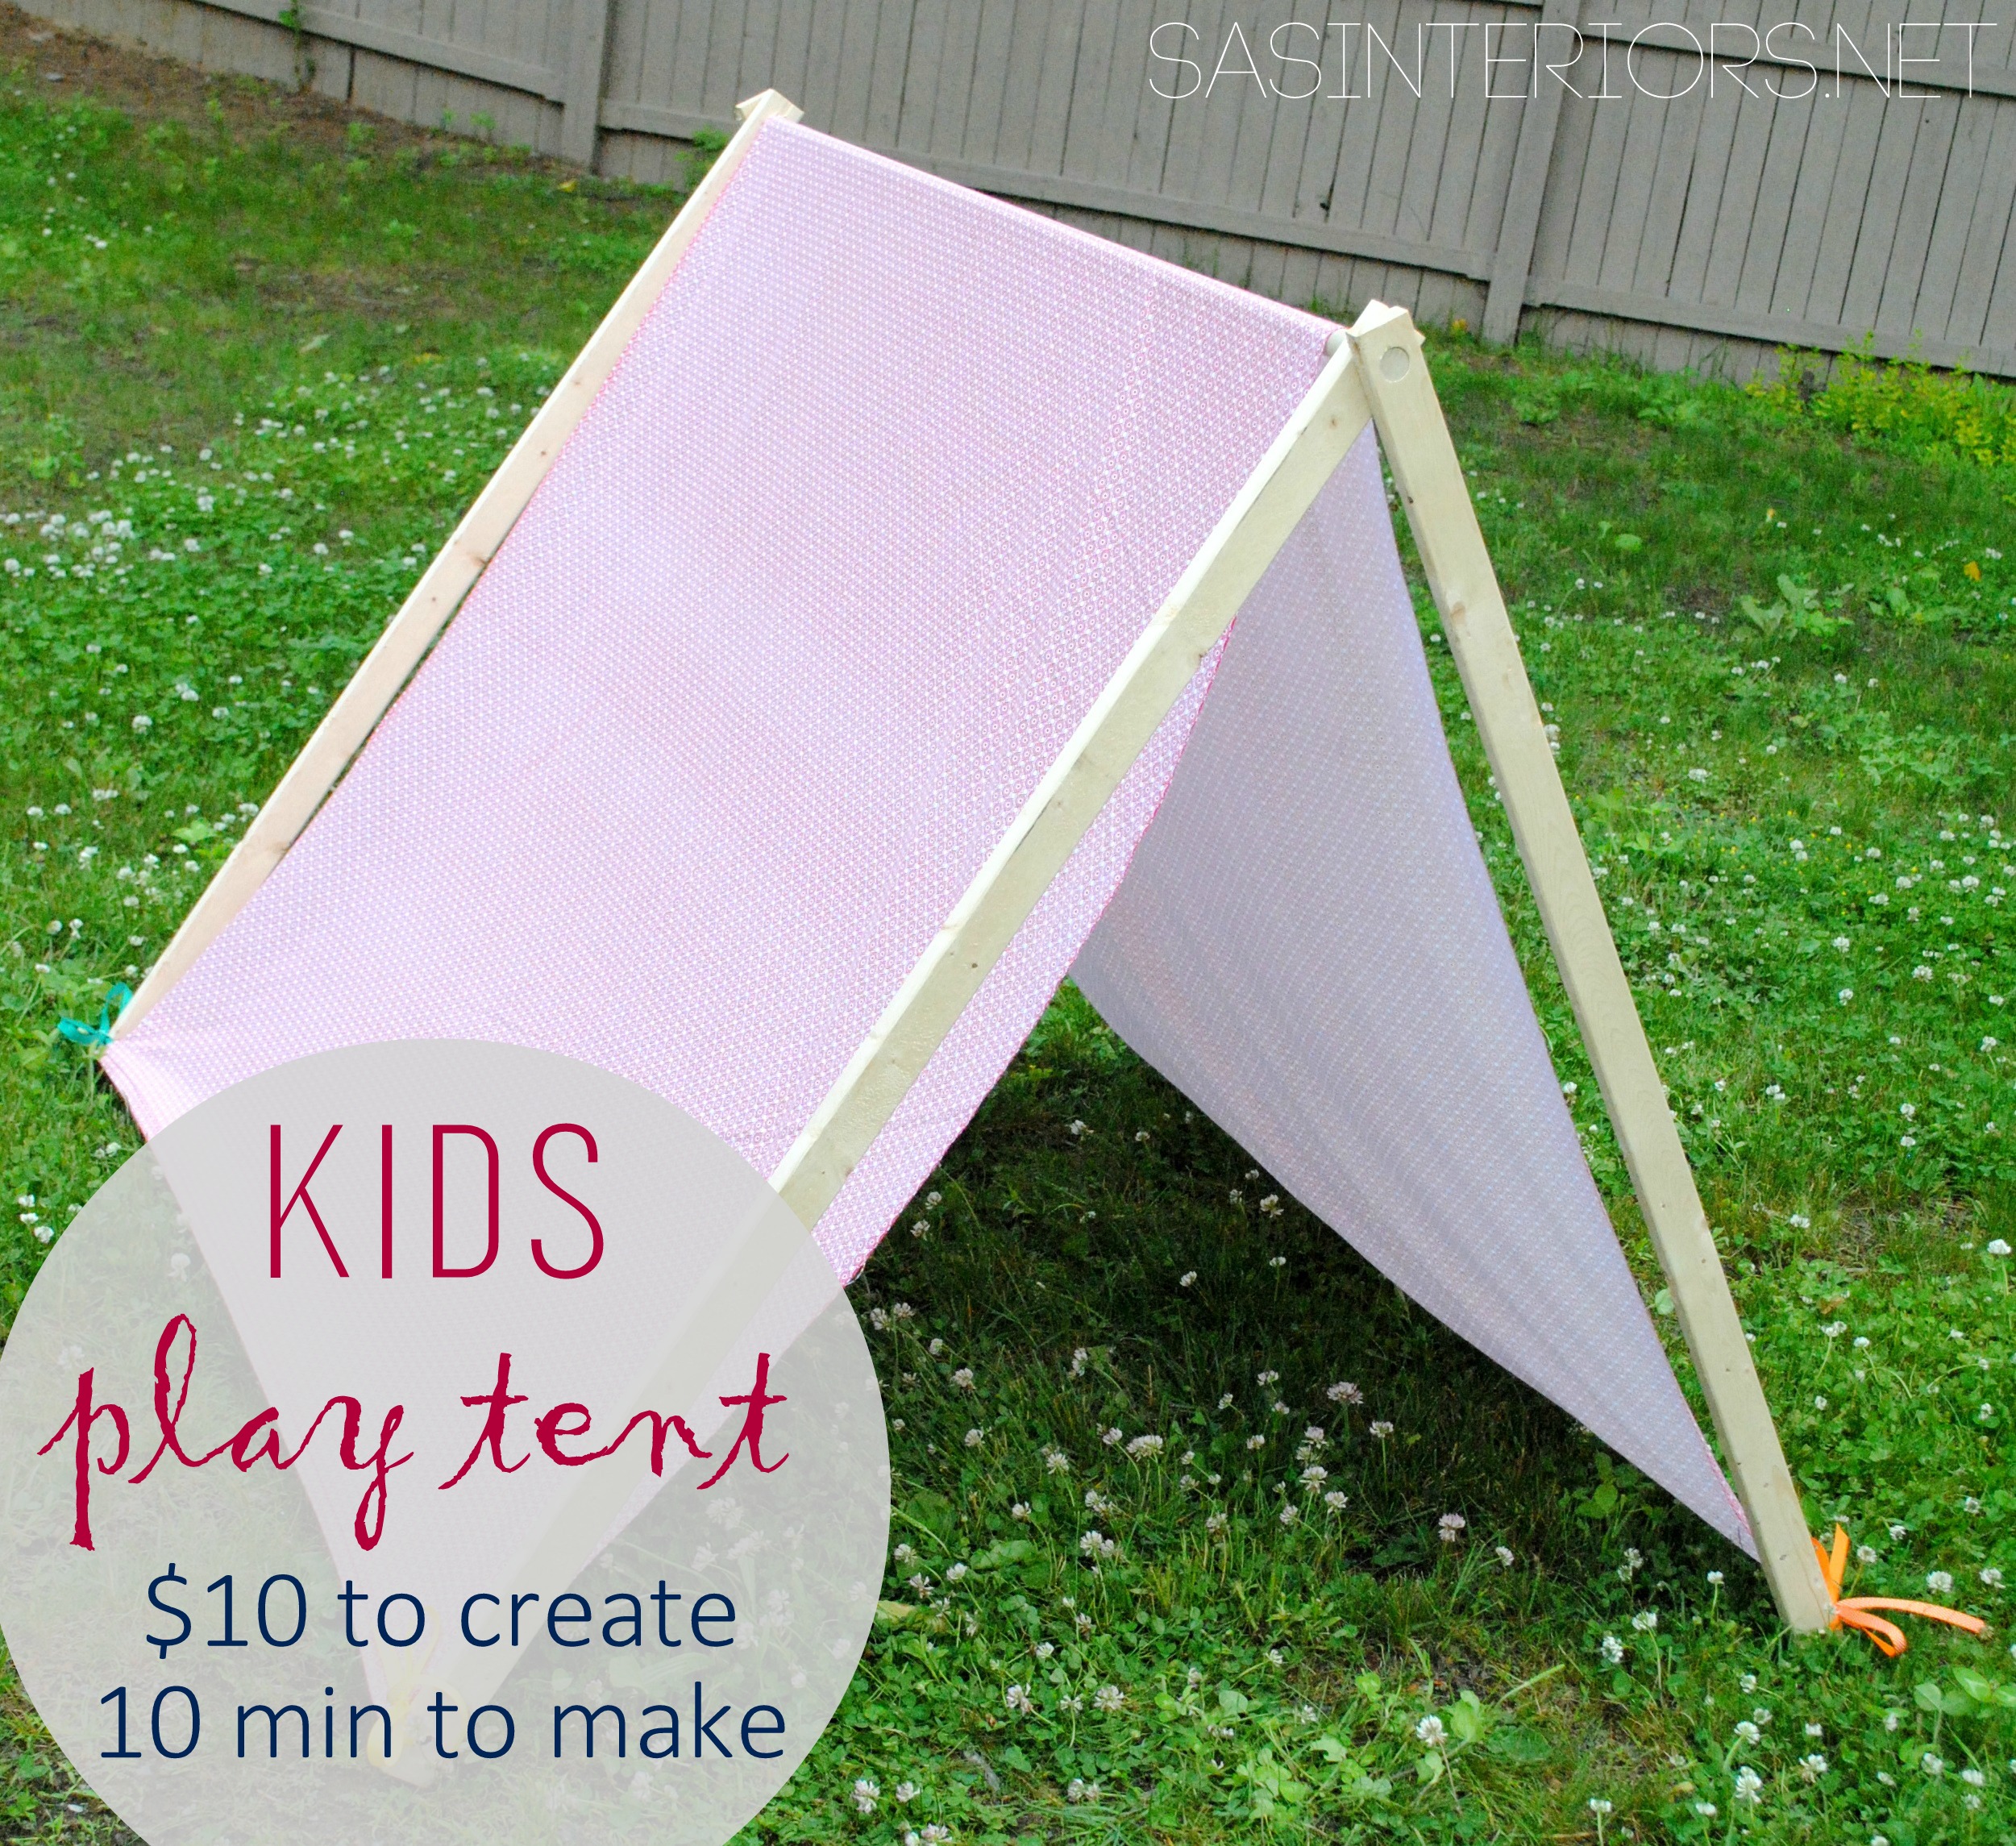
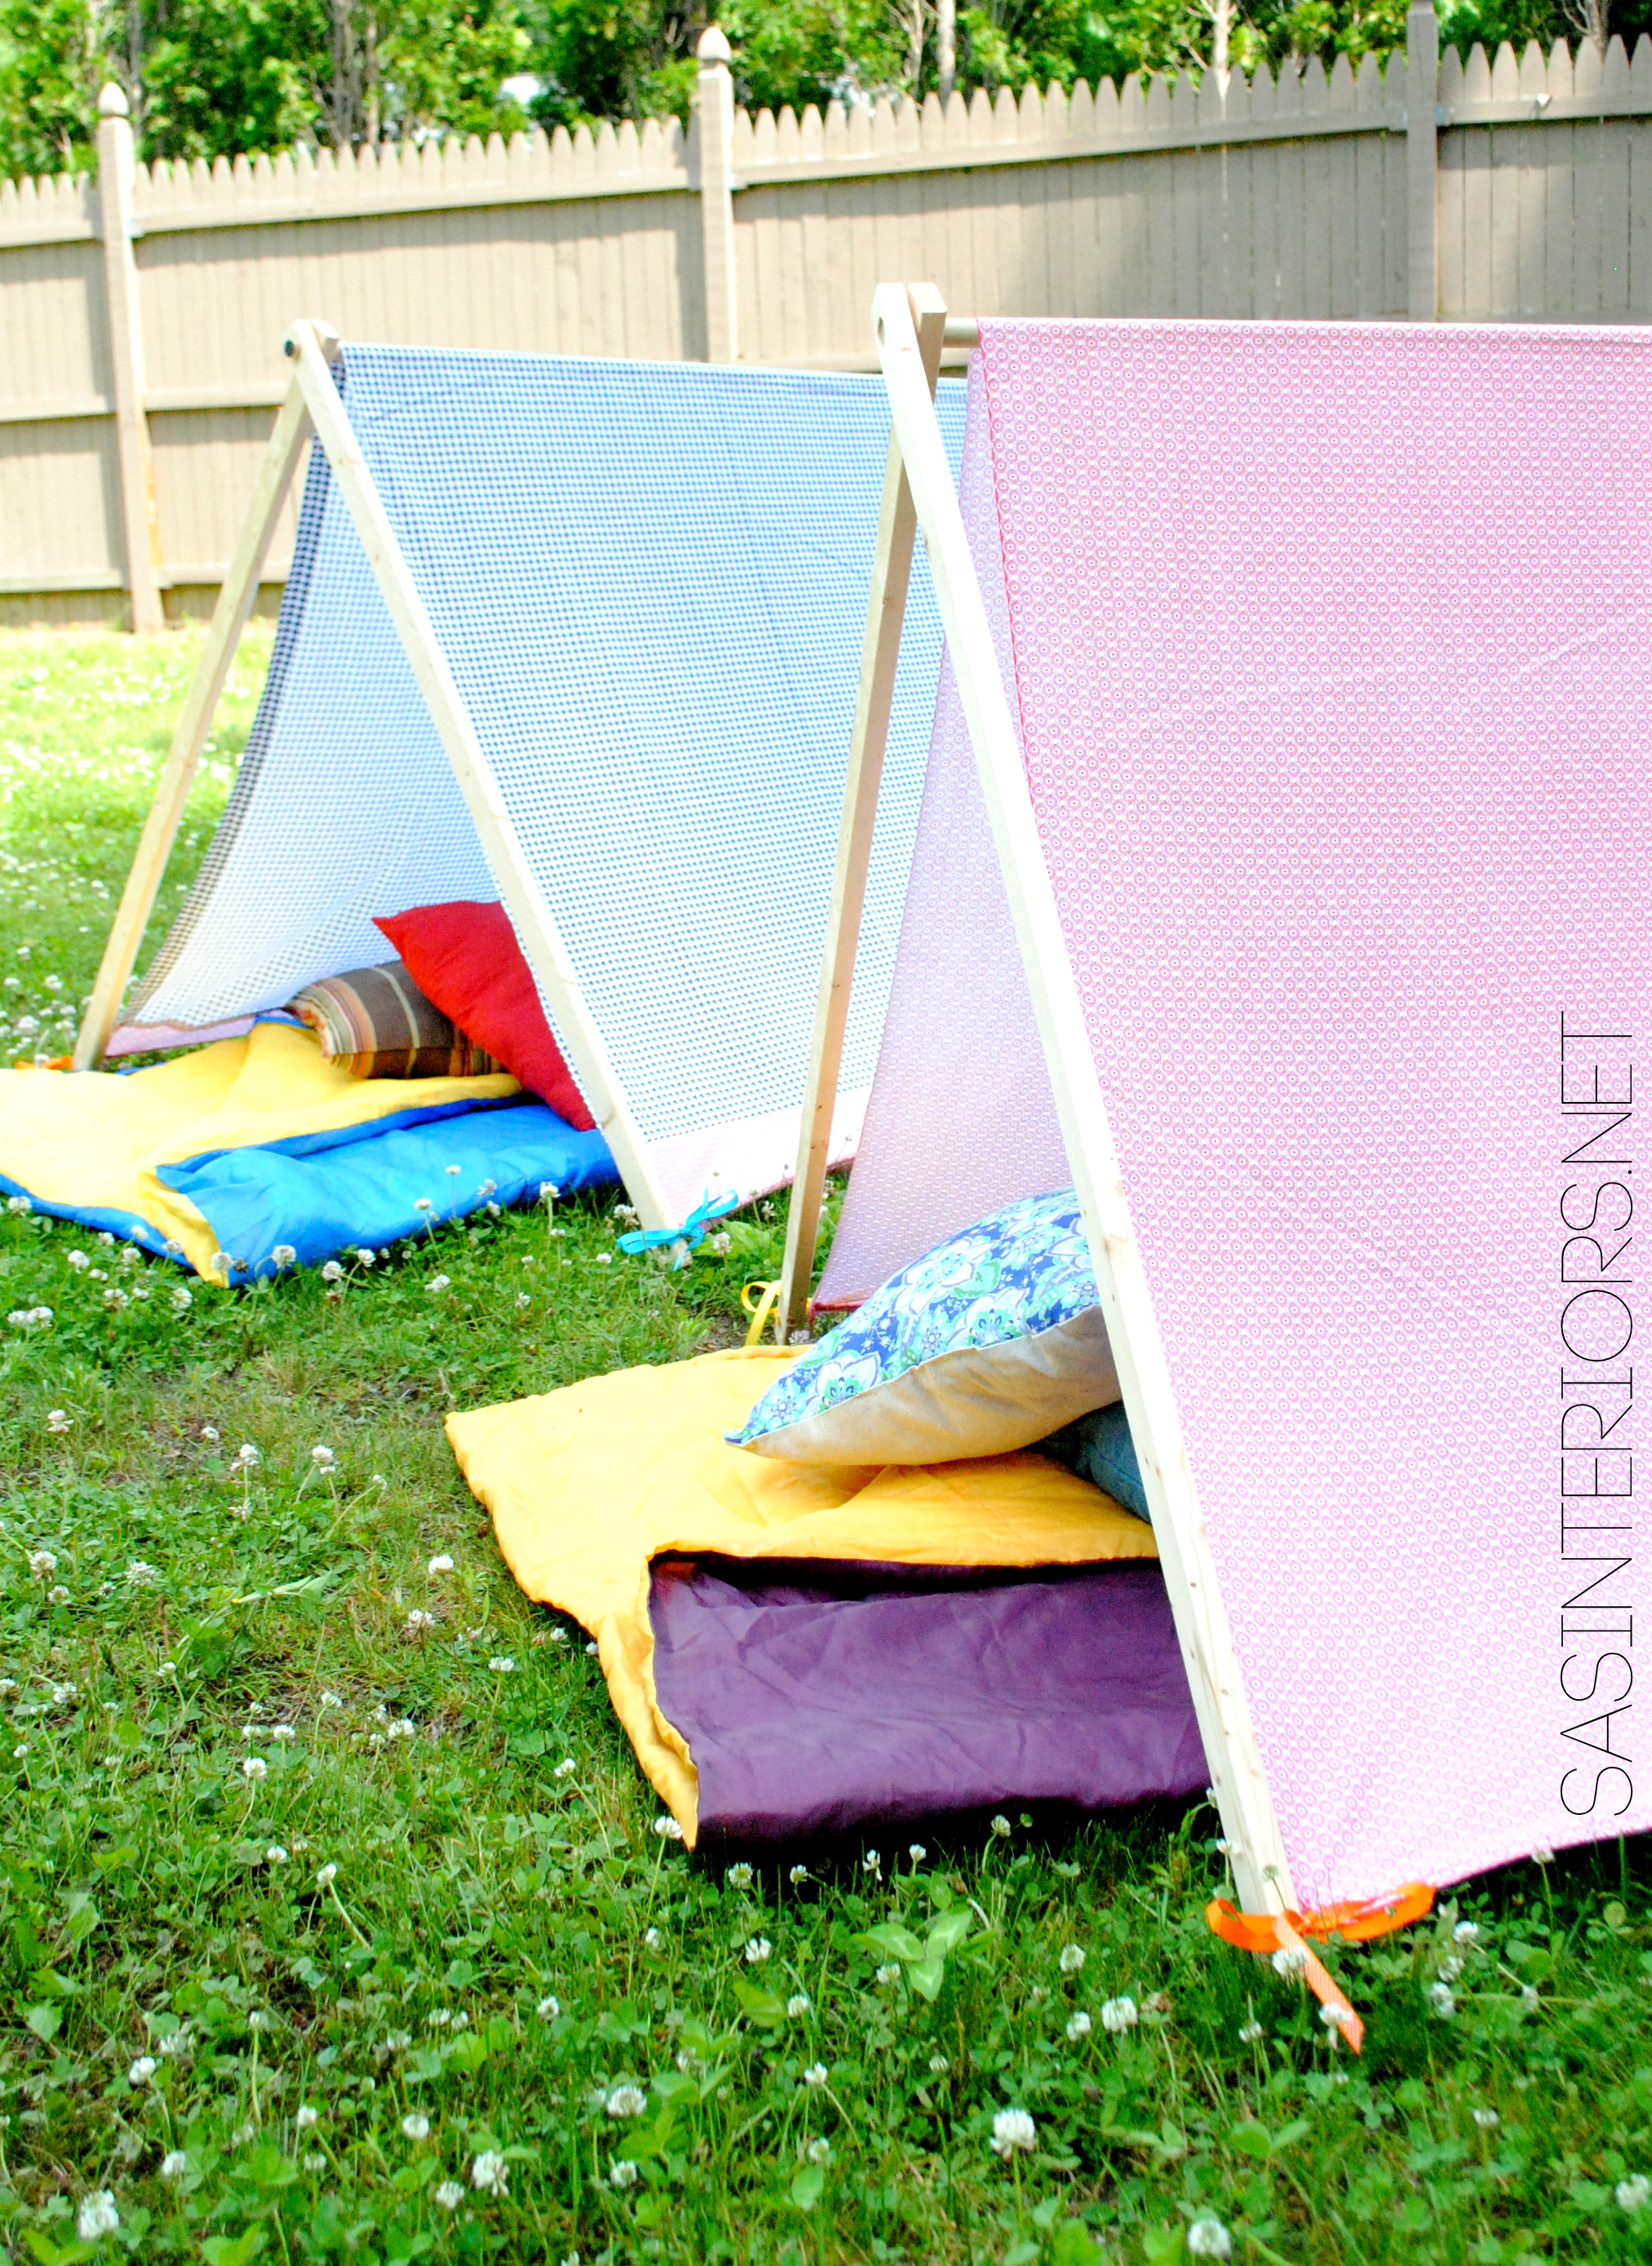
a kids play + camping tent.  They can use it as a tent to play in during the day, as well as a spot to sleep in once the sun sets and the stars peak.

Kids Play + Camping Tent - 10 dollars to make +10 minutes to create! Super simple creation that your kids will love!

The the best part about this tent is that it only took about $10 to make + 10 minutes to create!  I made two, so the cost and time were double.

Supplies for (1) Tent:

  • (4) 1 x 2 piece of wood at 42″ long ($2.16)
    • At Lowe’s I had them cut down (1) 1 x 2 x 8 which cost $1.08 into my (2) 42″ long pieces
  • (1) 3/4″ diameter dowel at 48″ long ($2.85)
  • 2.5 total yards of fabric ($2.25/yard x 2.5 = $5.63)
  • 1.5 total yards of ribbon (leftovers)
  • Drill with a 3/4″ drill bit

This tent is really easy to create, and what’s even better is that you can put it up and take it down very easily with each use.   I made it so it can be easily assembled and just as easy to disassemble for storage.  More on that later…

1. (2 minutes)

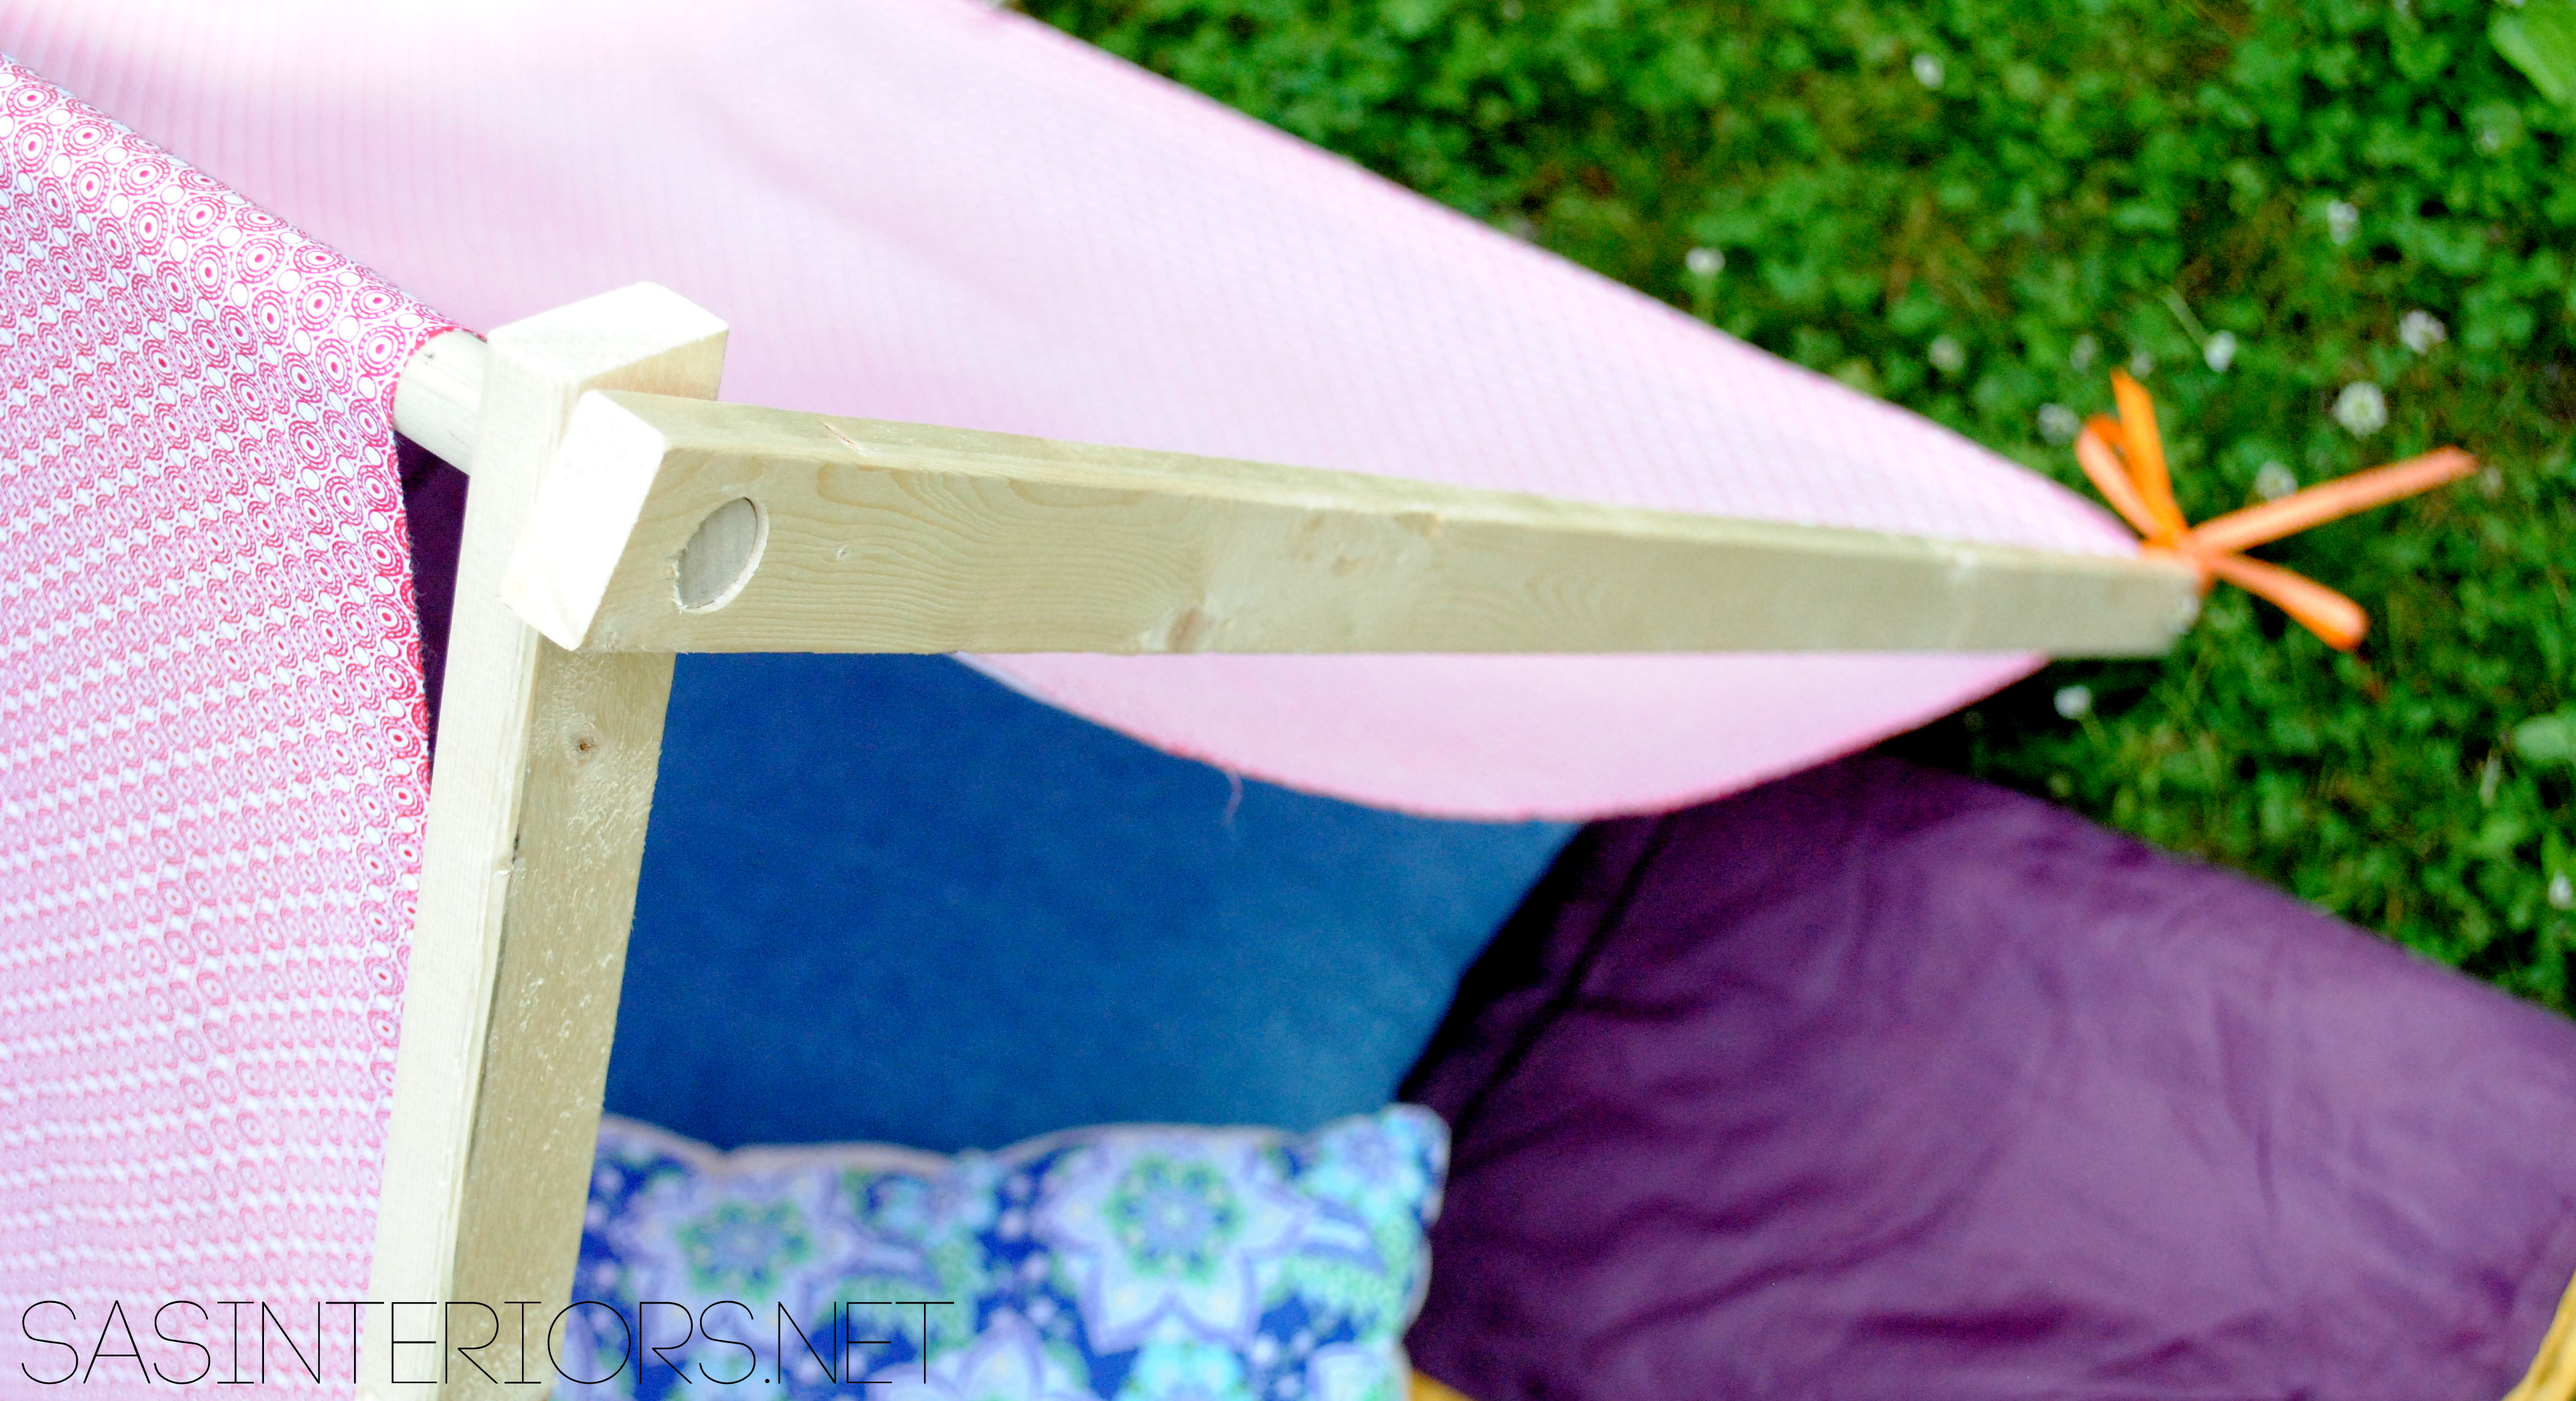
To start off, I drilled a 3/4″ hole at each end of the 1 x 2 piece of wood.  The Mister and I set up a “drilling station” by creating two piles of stacked wood so the 1 x 2 could bridge across the top.  As an alternative, you can drill through your piece of lumber with a scrap piece underneath.  Either method will work.

One hole of each piece will be for the peak of the tent, while the other hole will be for the ribbon to tie through.  Keep reading and it’ll all come together…
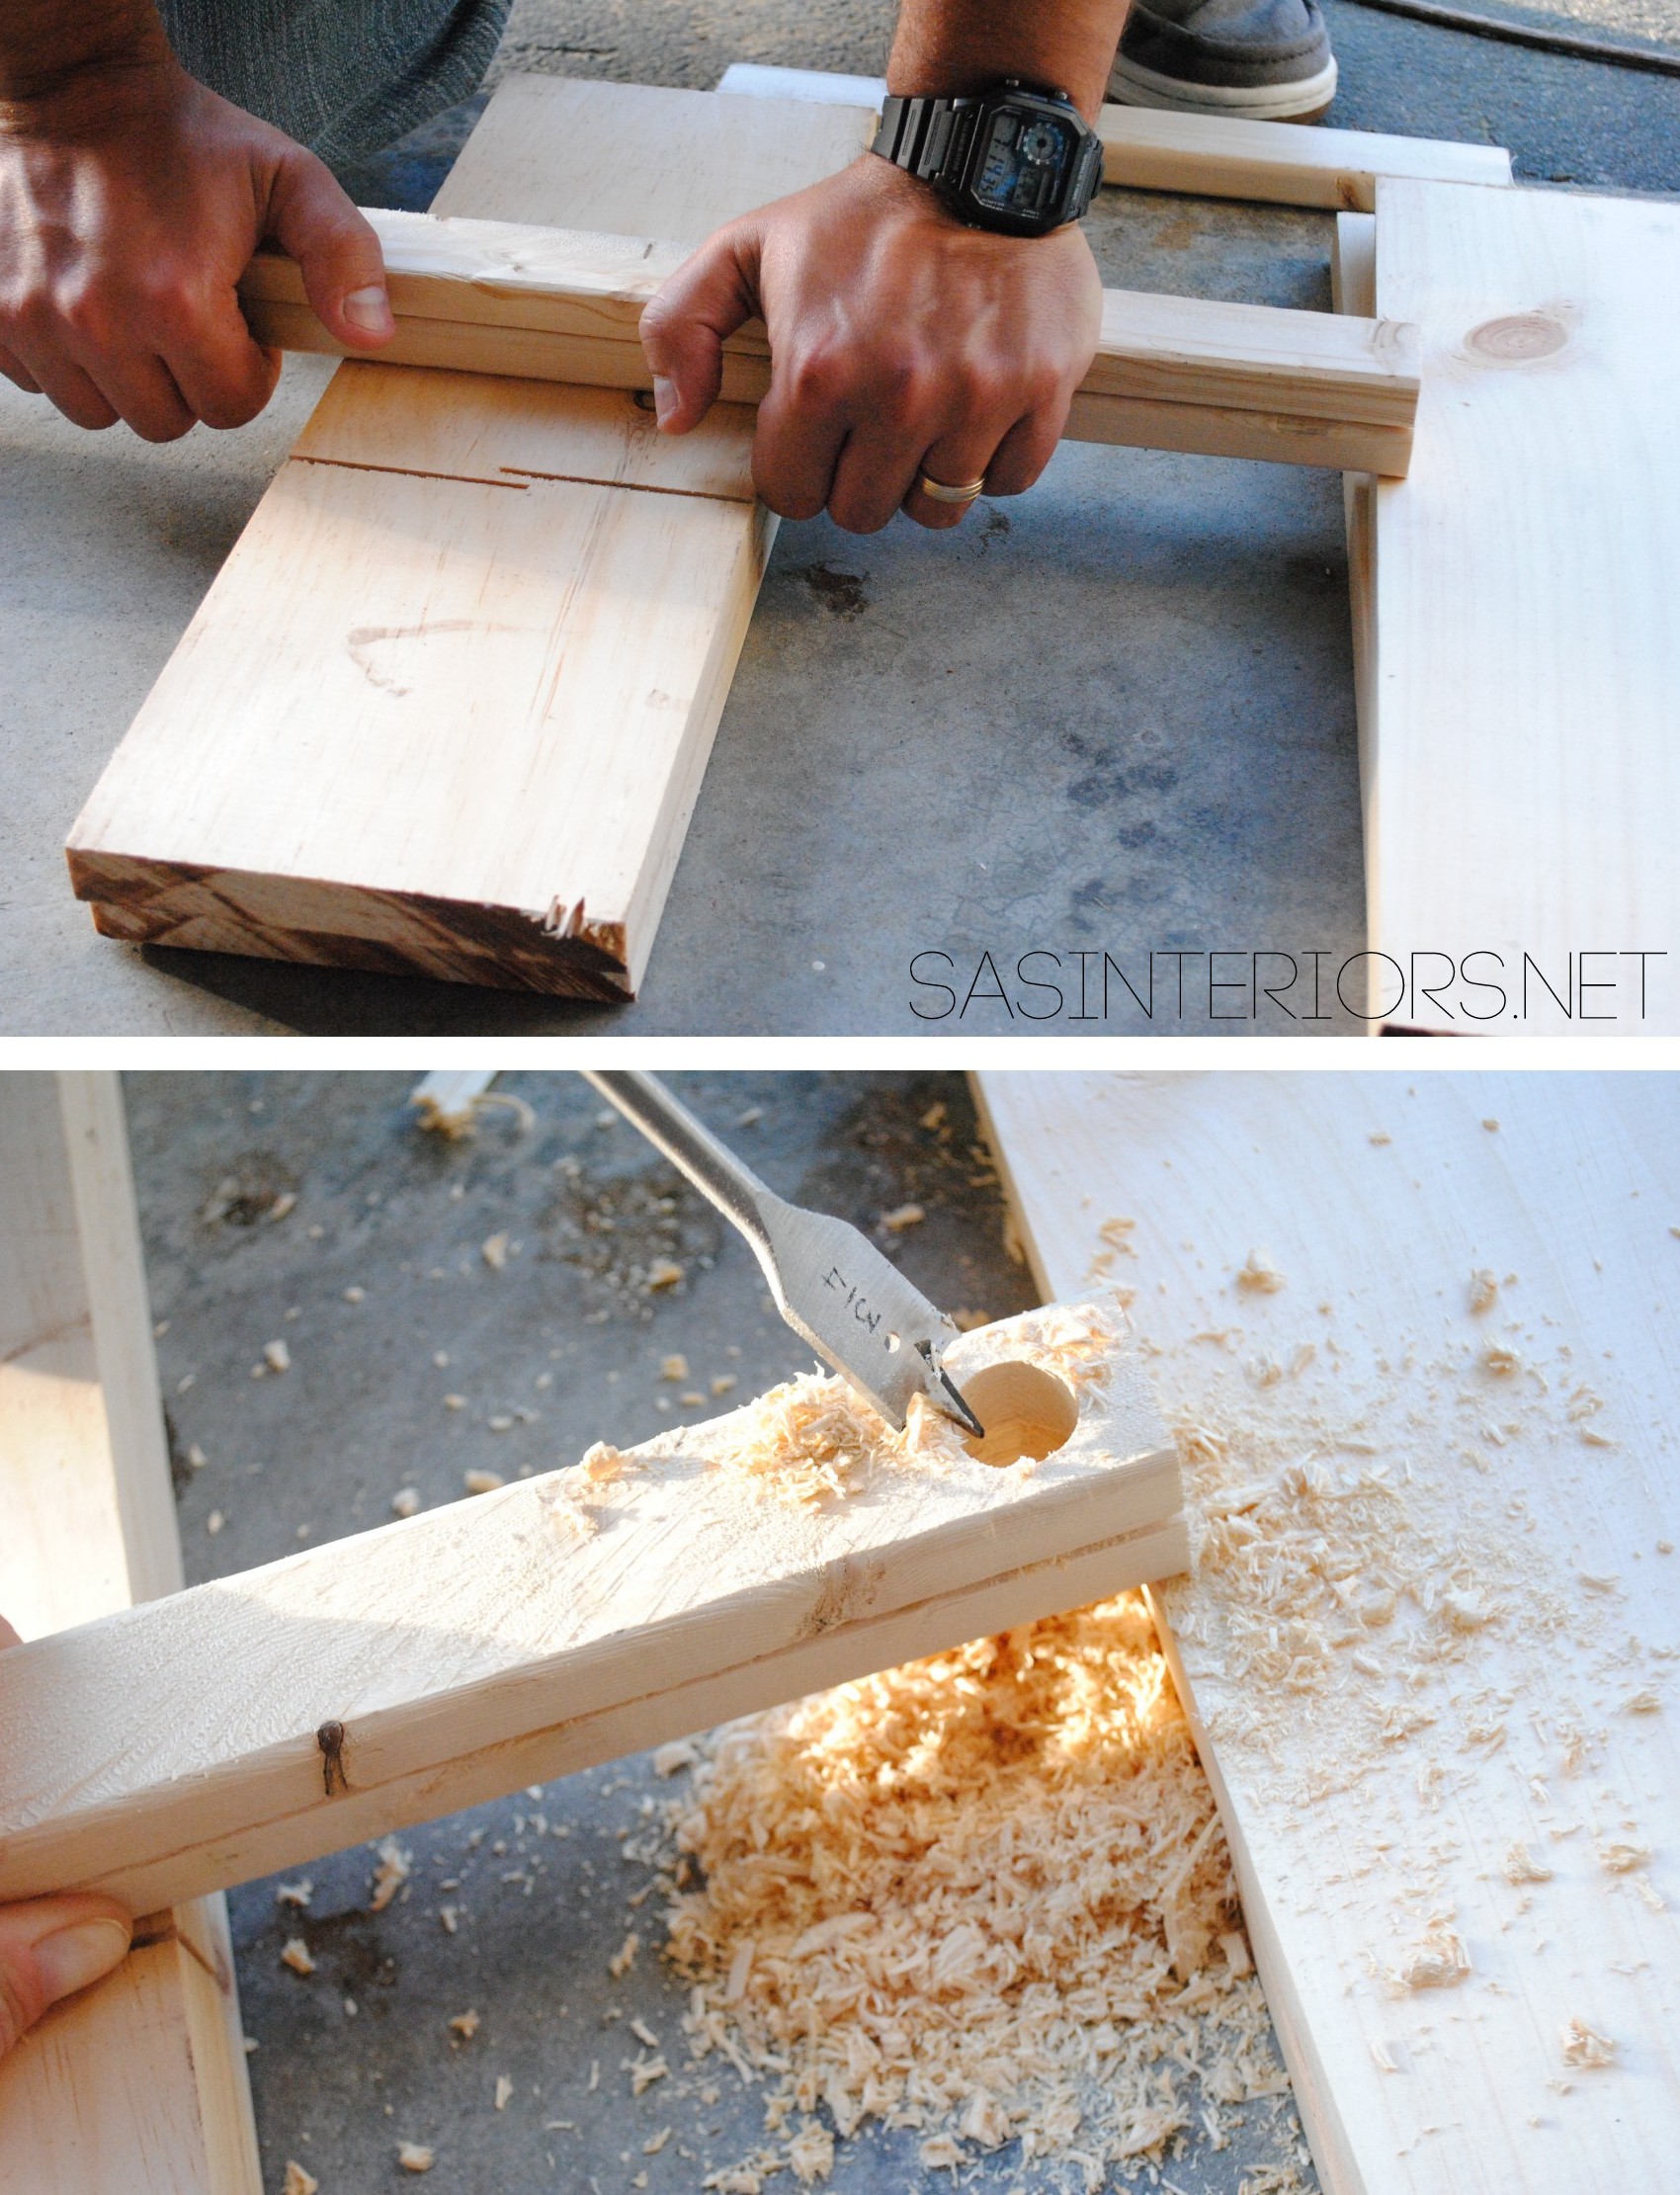
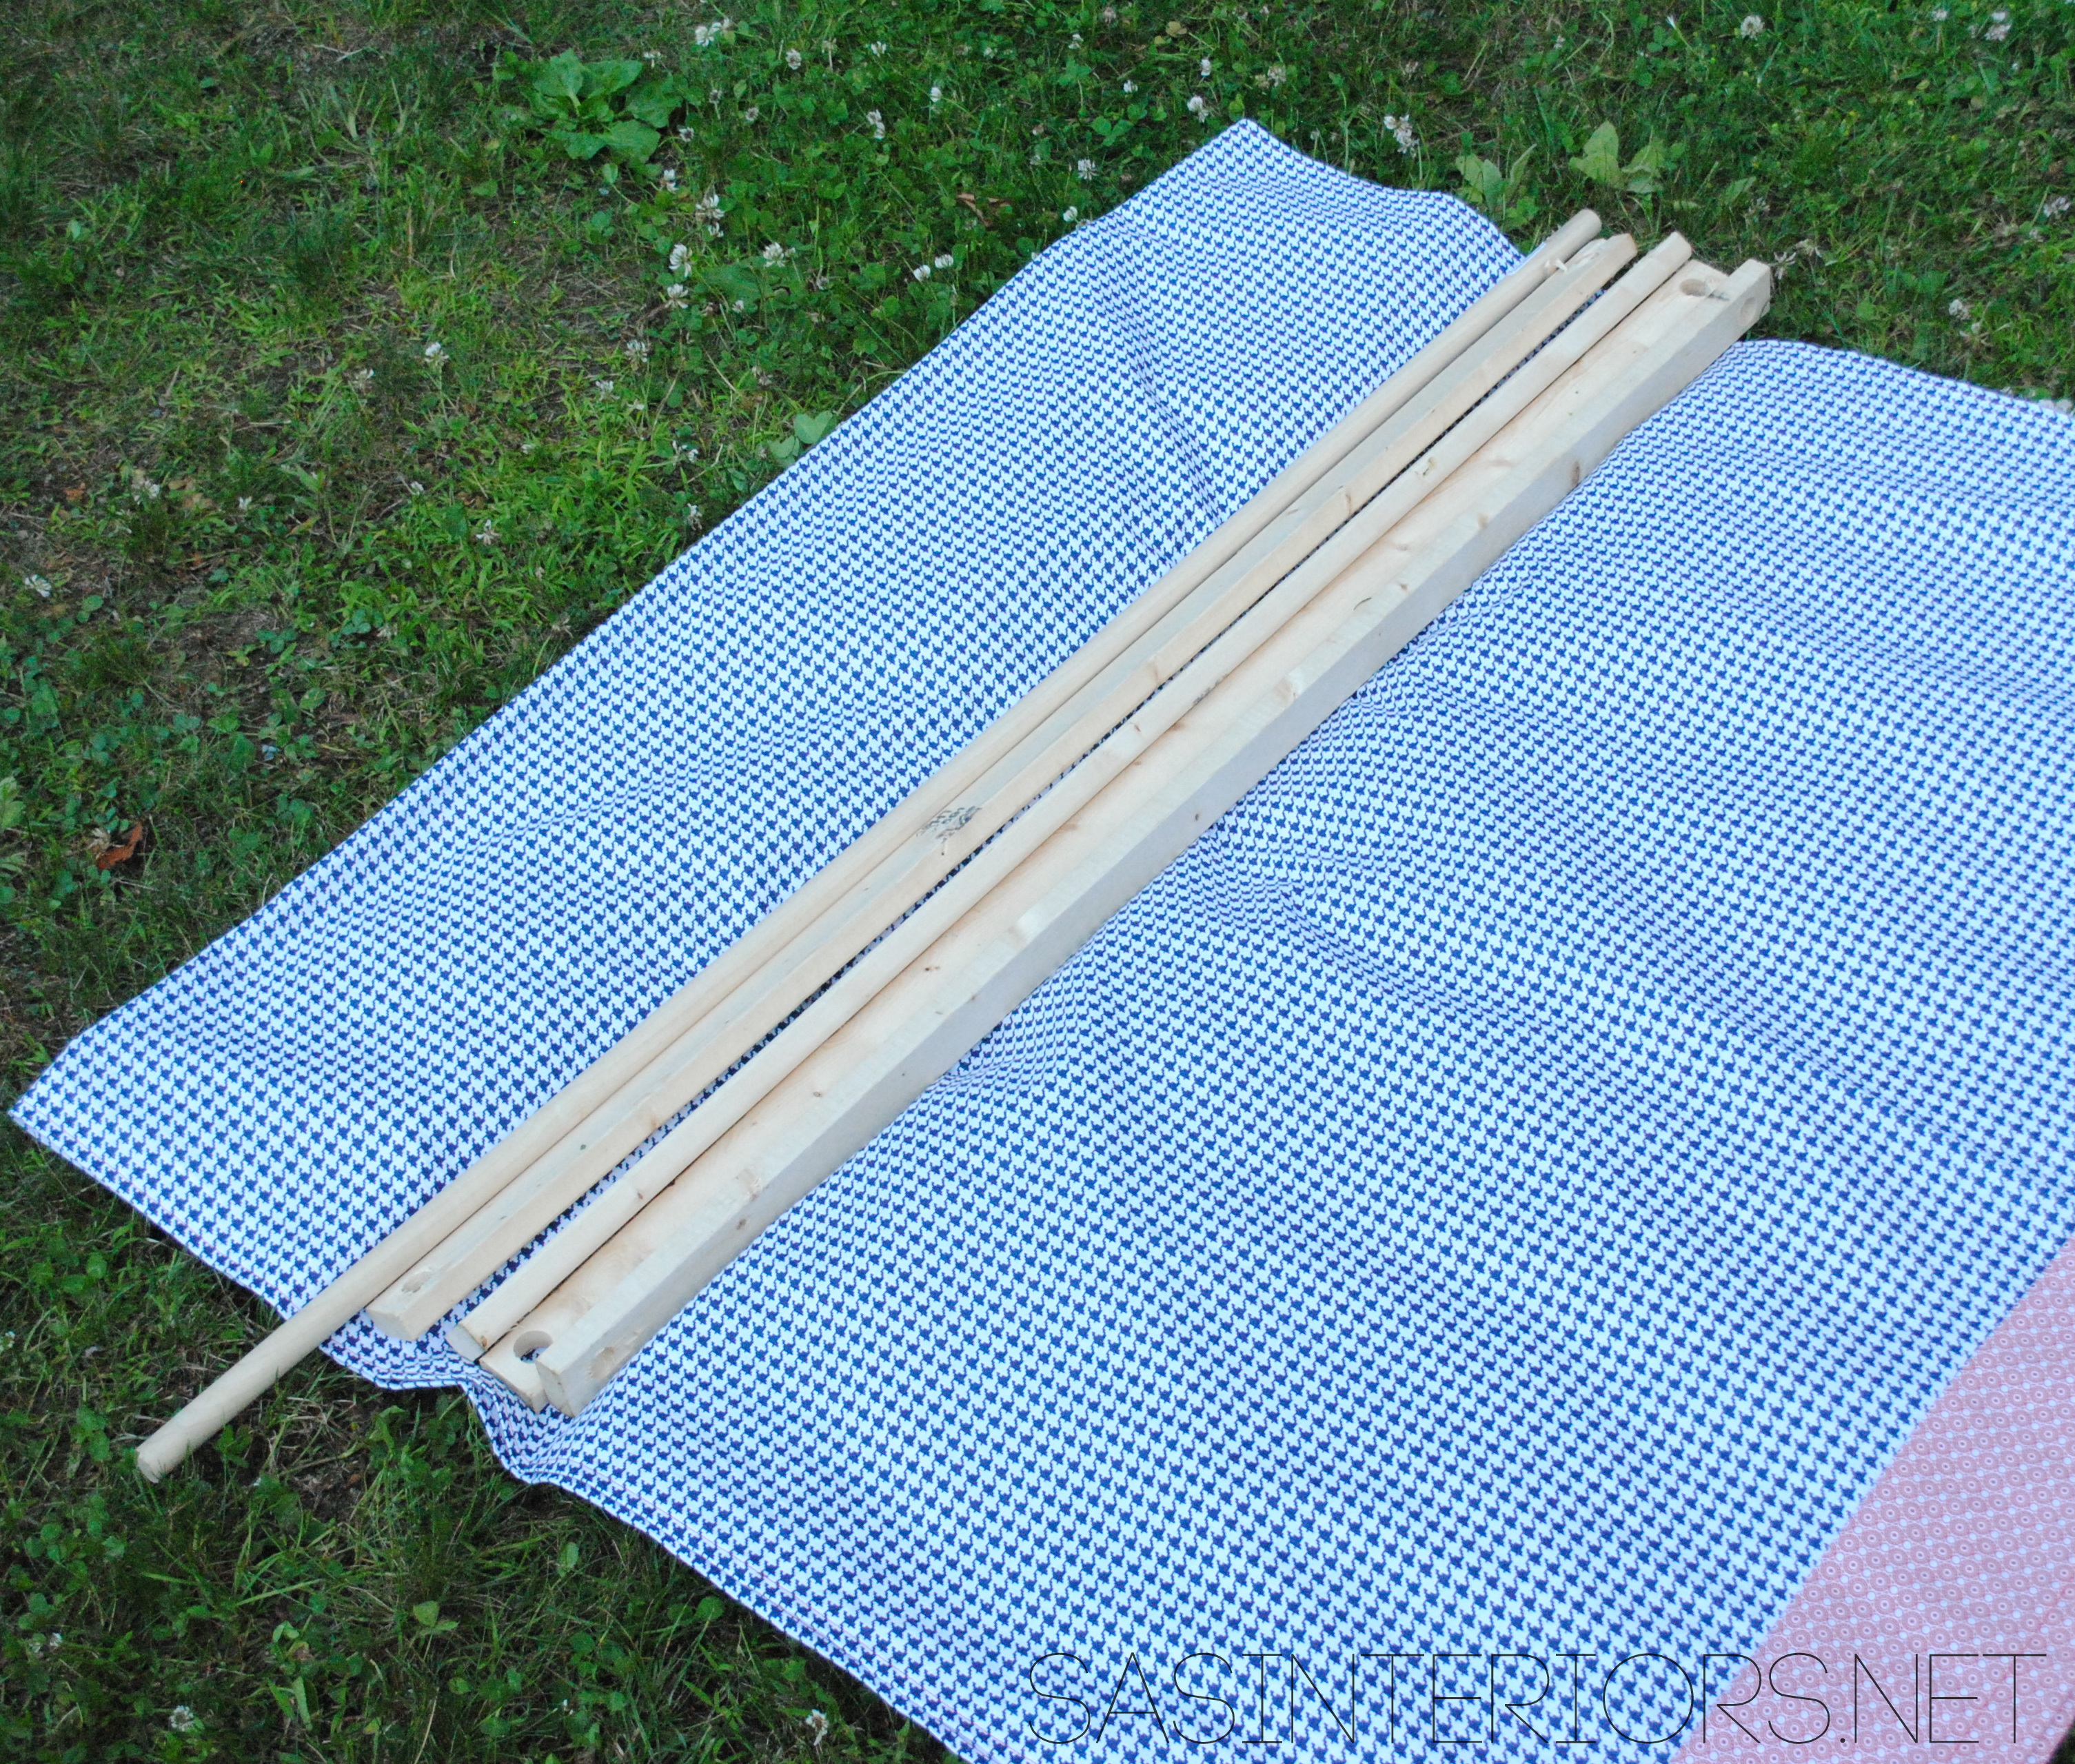
Kids Play + Camping Tent - 10 dollars to make +10 minutes to create! Super simple creation that your kids will love!

2. (1 minute)

Once the holes were drilled, I fed one end of the dowel through two of the 1 x 2’s, then fed the other end of the dowel through the other two 1 x 2’s.

Kids Play + Camping Tent - 10 dollars to make +10 minutes to create! Super simple creation that your kids will love!

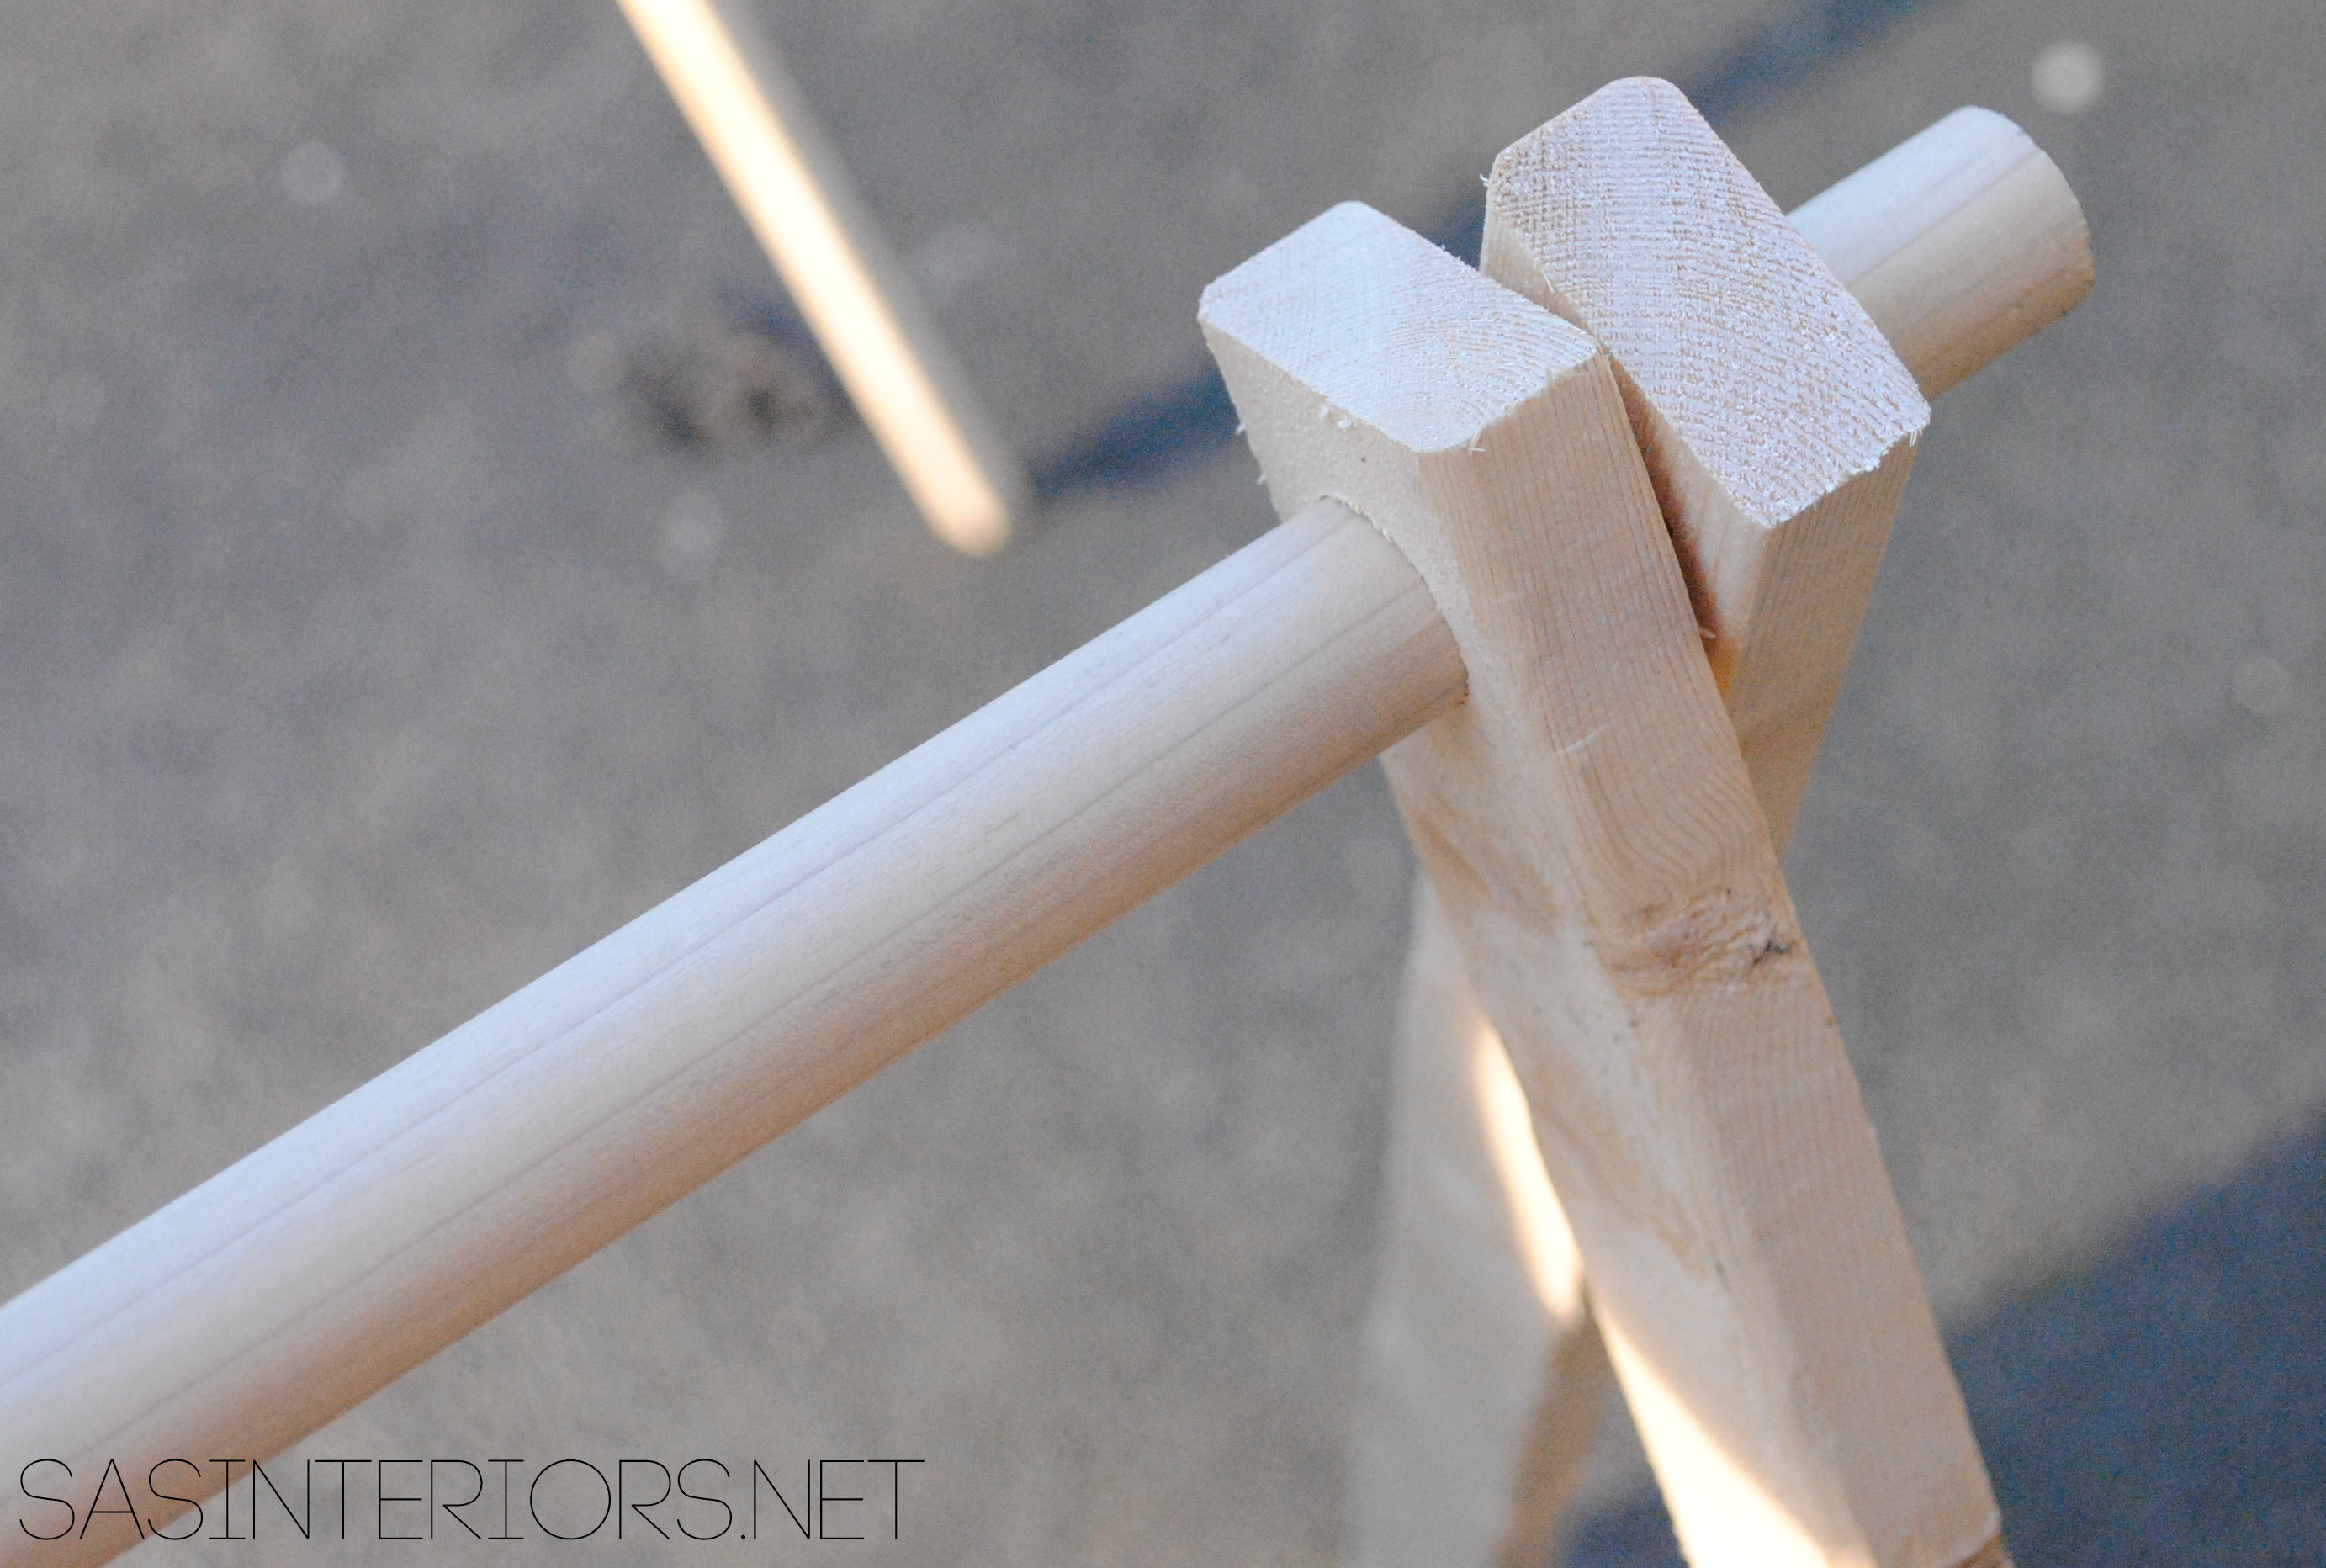
Note: The drill bit size needs to match the dowel size, so it fits snug.  I used a 3/4″ dowel and a 3/4″ drill bit.  The dowel needs to be snug in the 1 x 2’s so it stays in place, yet is still easily adjustable.

And the frame was done!

Onto the fabric.

3. (2 minutes)

Many fabric comes in a 44/45″ width, so the sides don’t need to be hemmed (if you want to hem them you can, but I didn’t).  To start off, I folded over one end of the fabric and sewed.
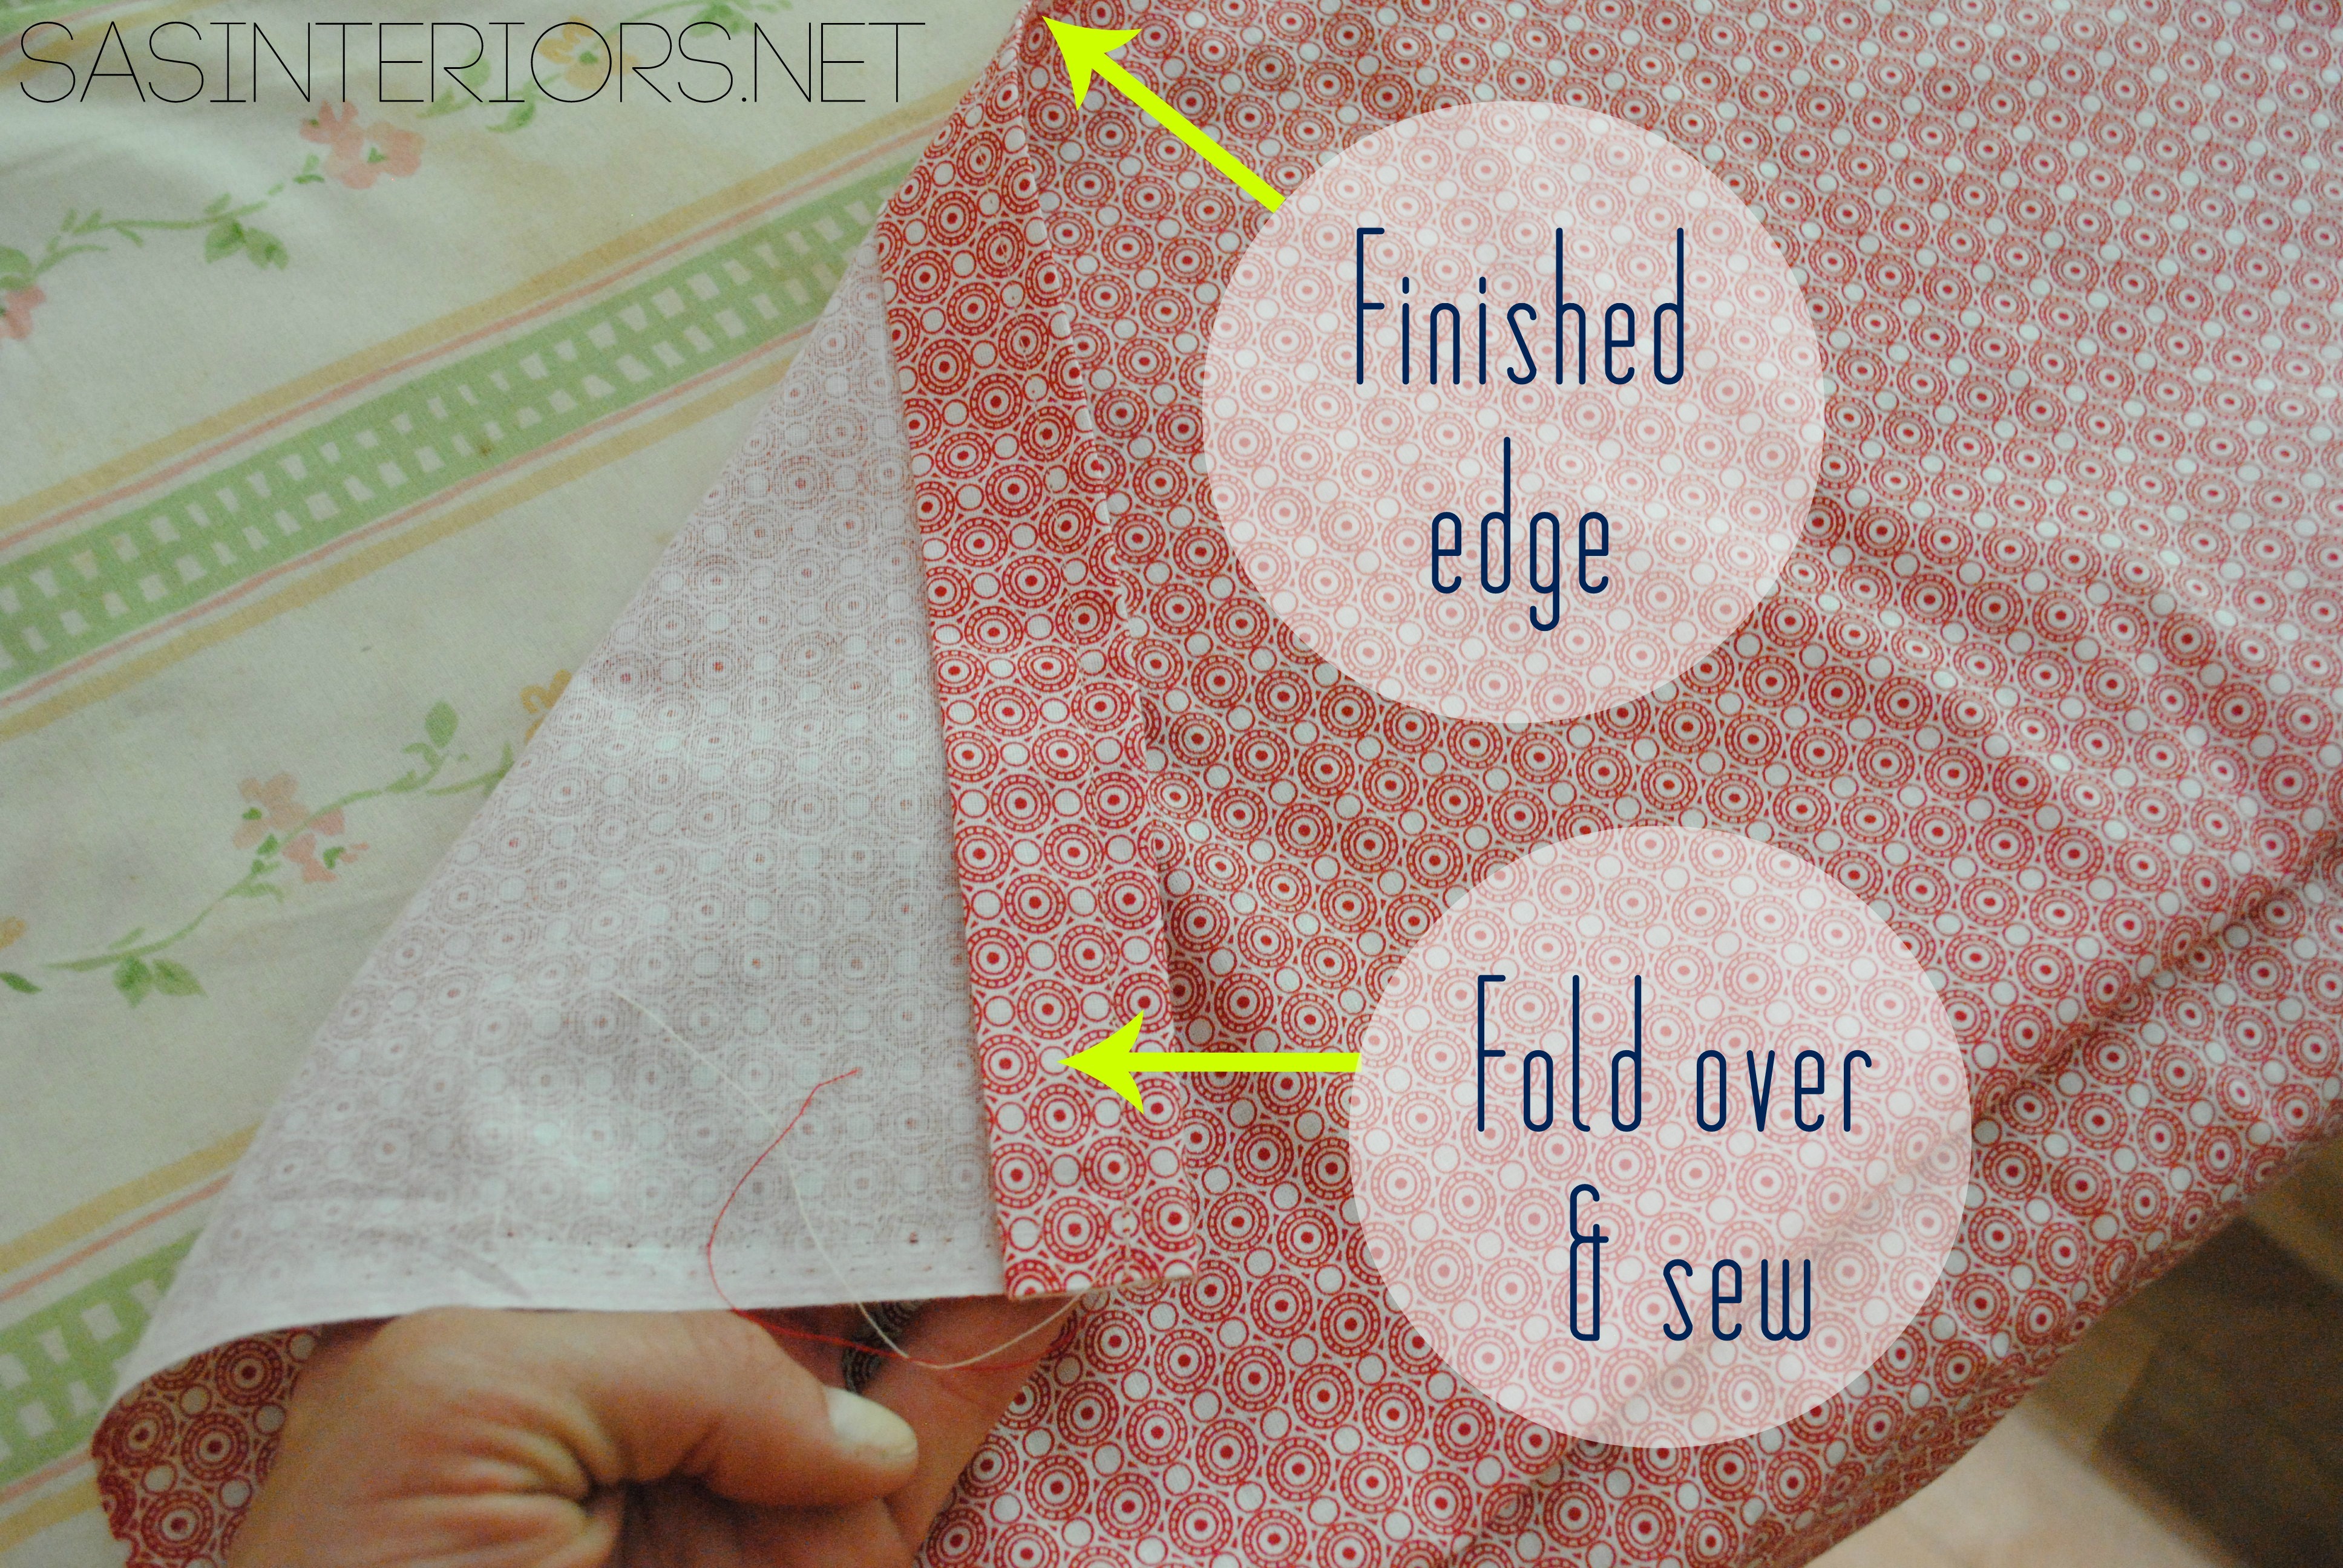
Kids Play + Camping Tent - 10 dollars to make +10 minutes to create! Super simple creation that your kids will love!

4. (2 minutes)

I draped the fabric (with one finished edge) over the tent frame.  I lined up the finished edge side with the bottom of the legs, so I could determine how much needed to be trimmed off the other side – be sure to leave enough fabric to fold over and sew (about  1″ extra inch).

Using my Jar O’ Ribbons, I picked out 4 fun colors.

Kids Play + Camping Tent - 10 dollars to make +10 minutes to create! Super simple creation that your kids will love!

5. (2 minutes)

To secure the fabric to the frame,  I added ribbon.  I cut (4) 12-15″ long pieces of ribbon, and sewed the center of it to the right side of each corner using a fun stitch.

Kids Play + Camping Tent - 10 dollars to make +10 minutes to create! Super simple creation that your kids will love!

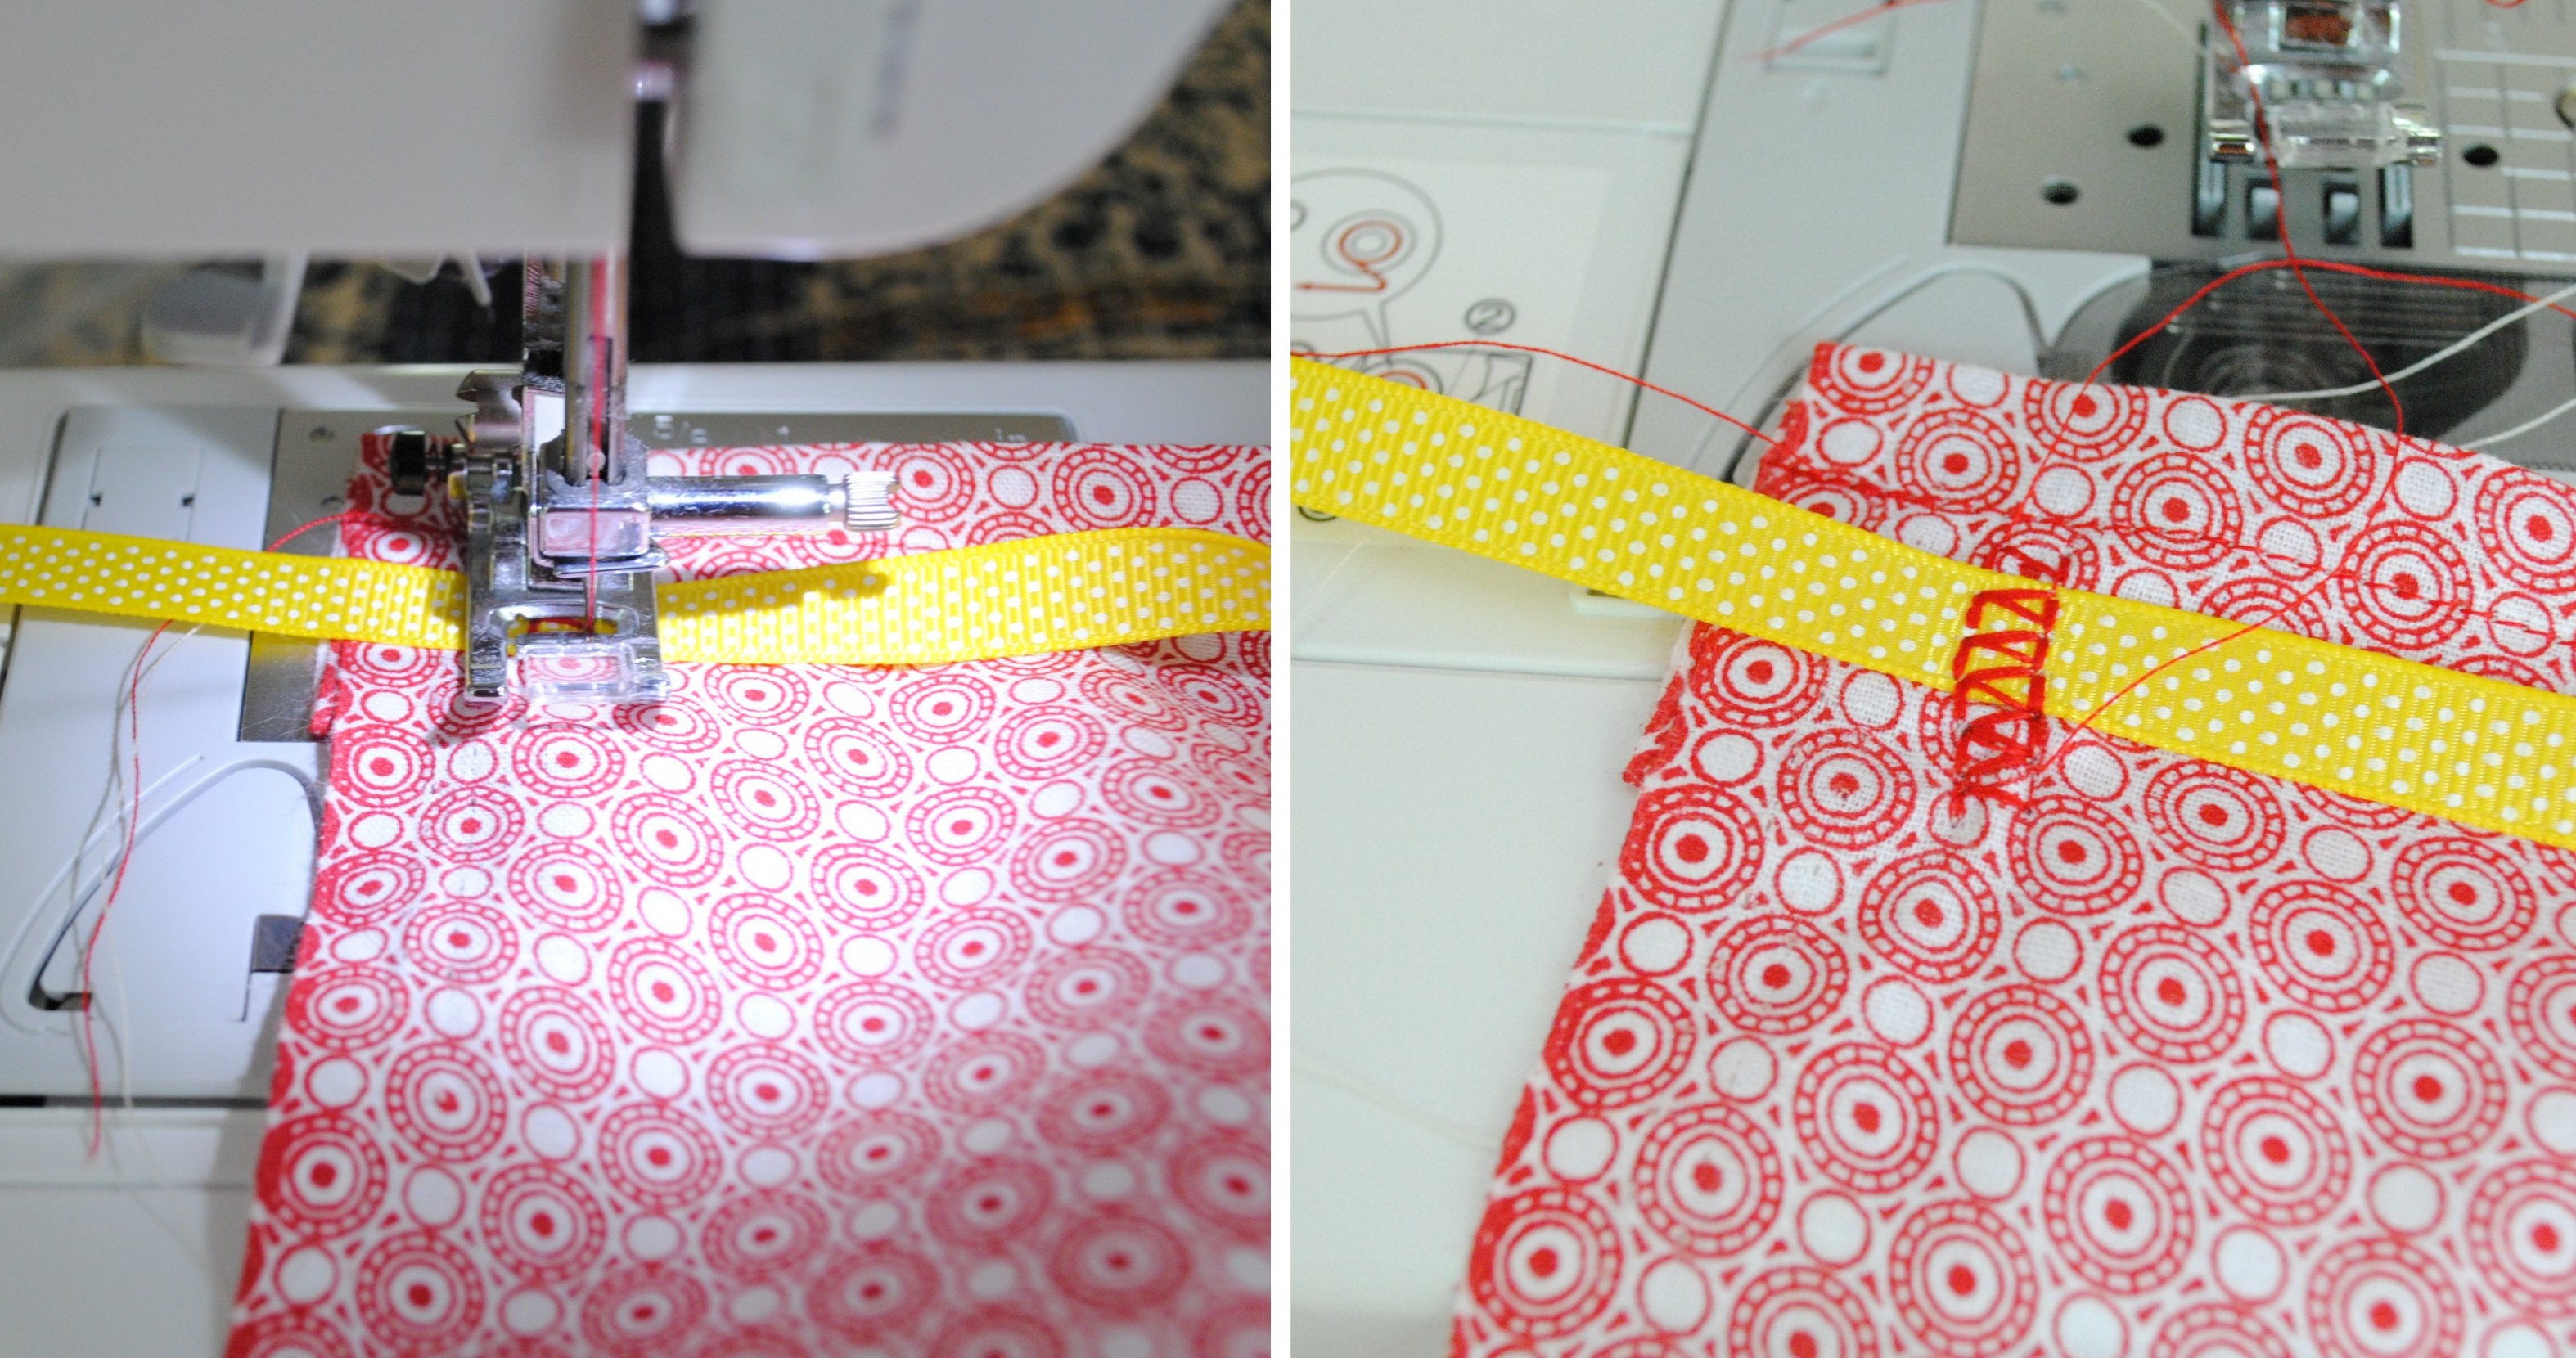
After cutting the loose threads, it was complete!

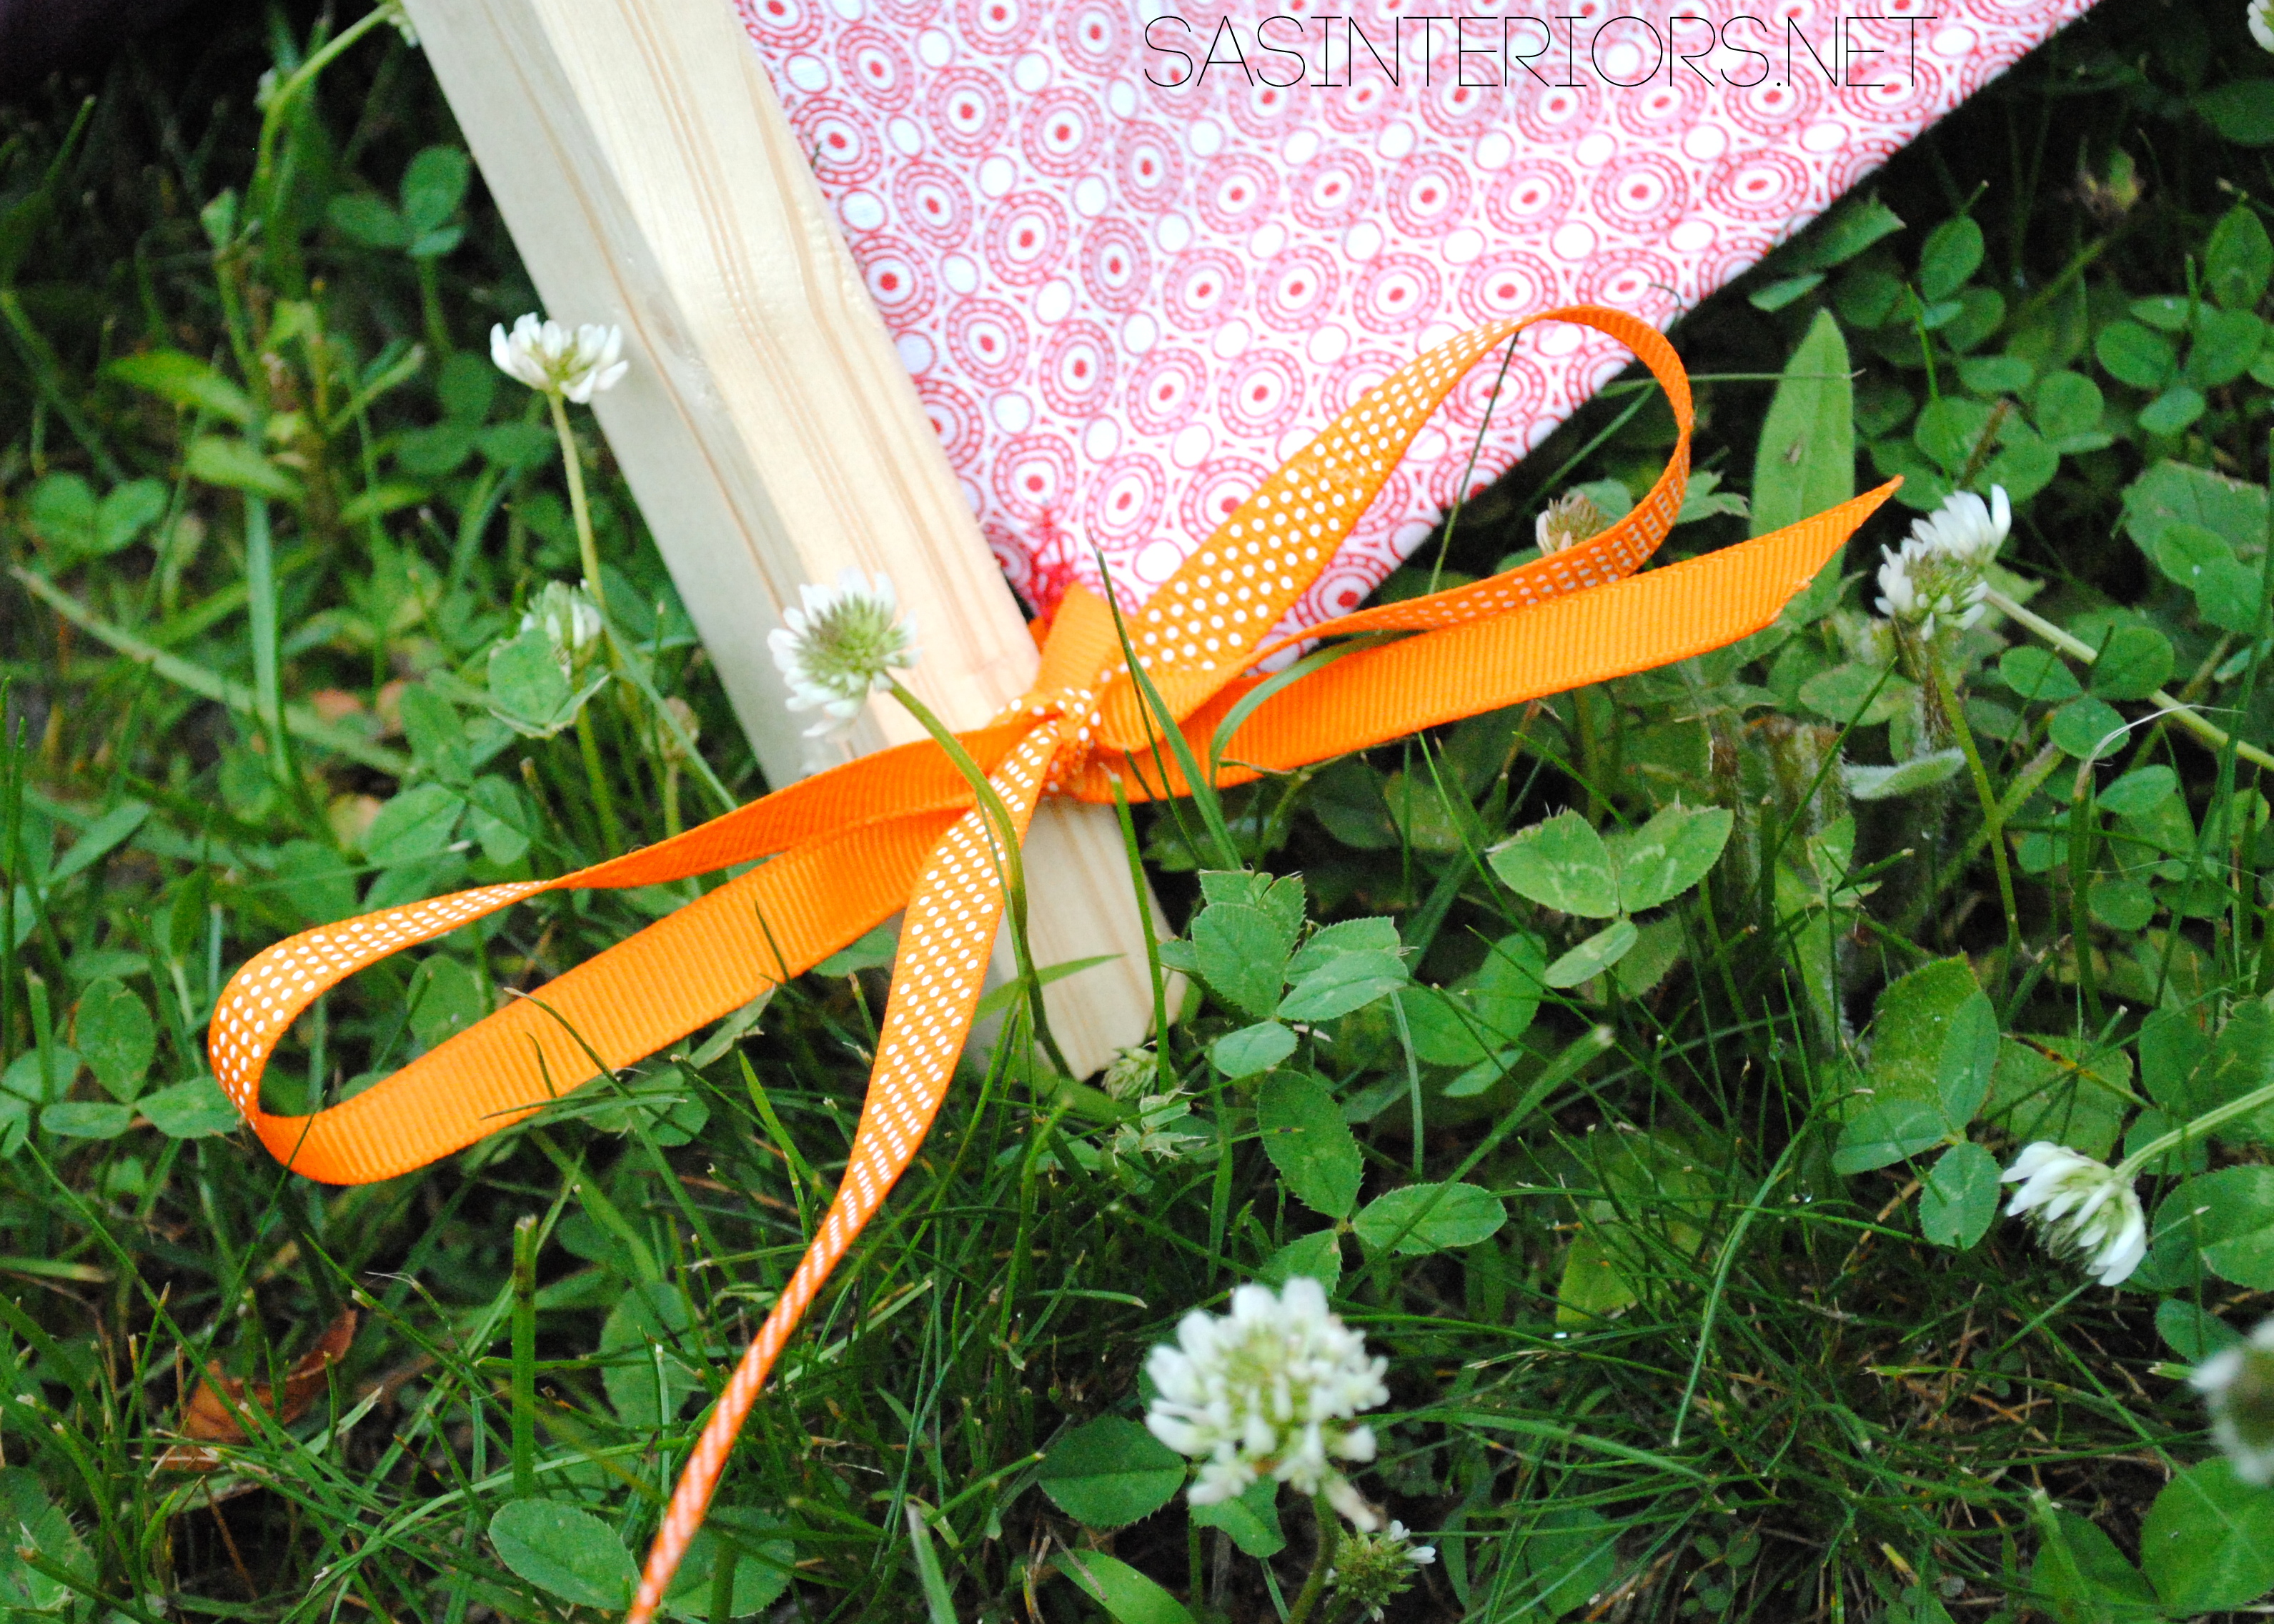
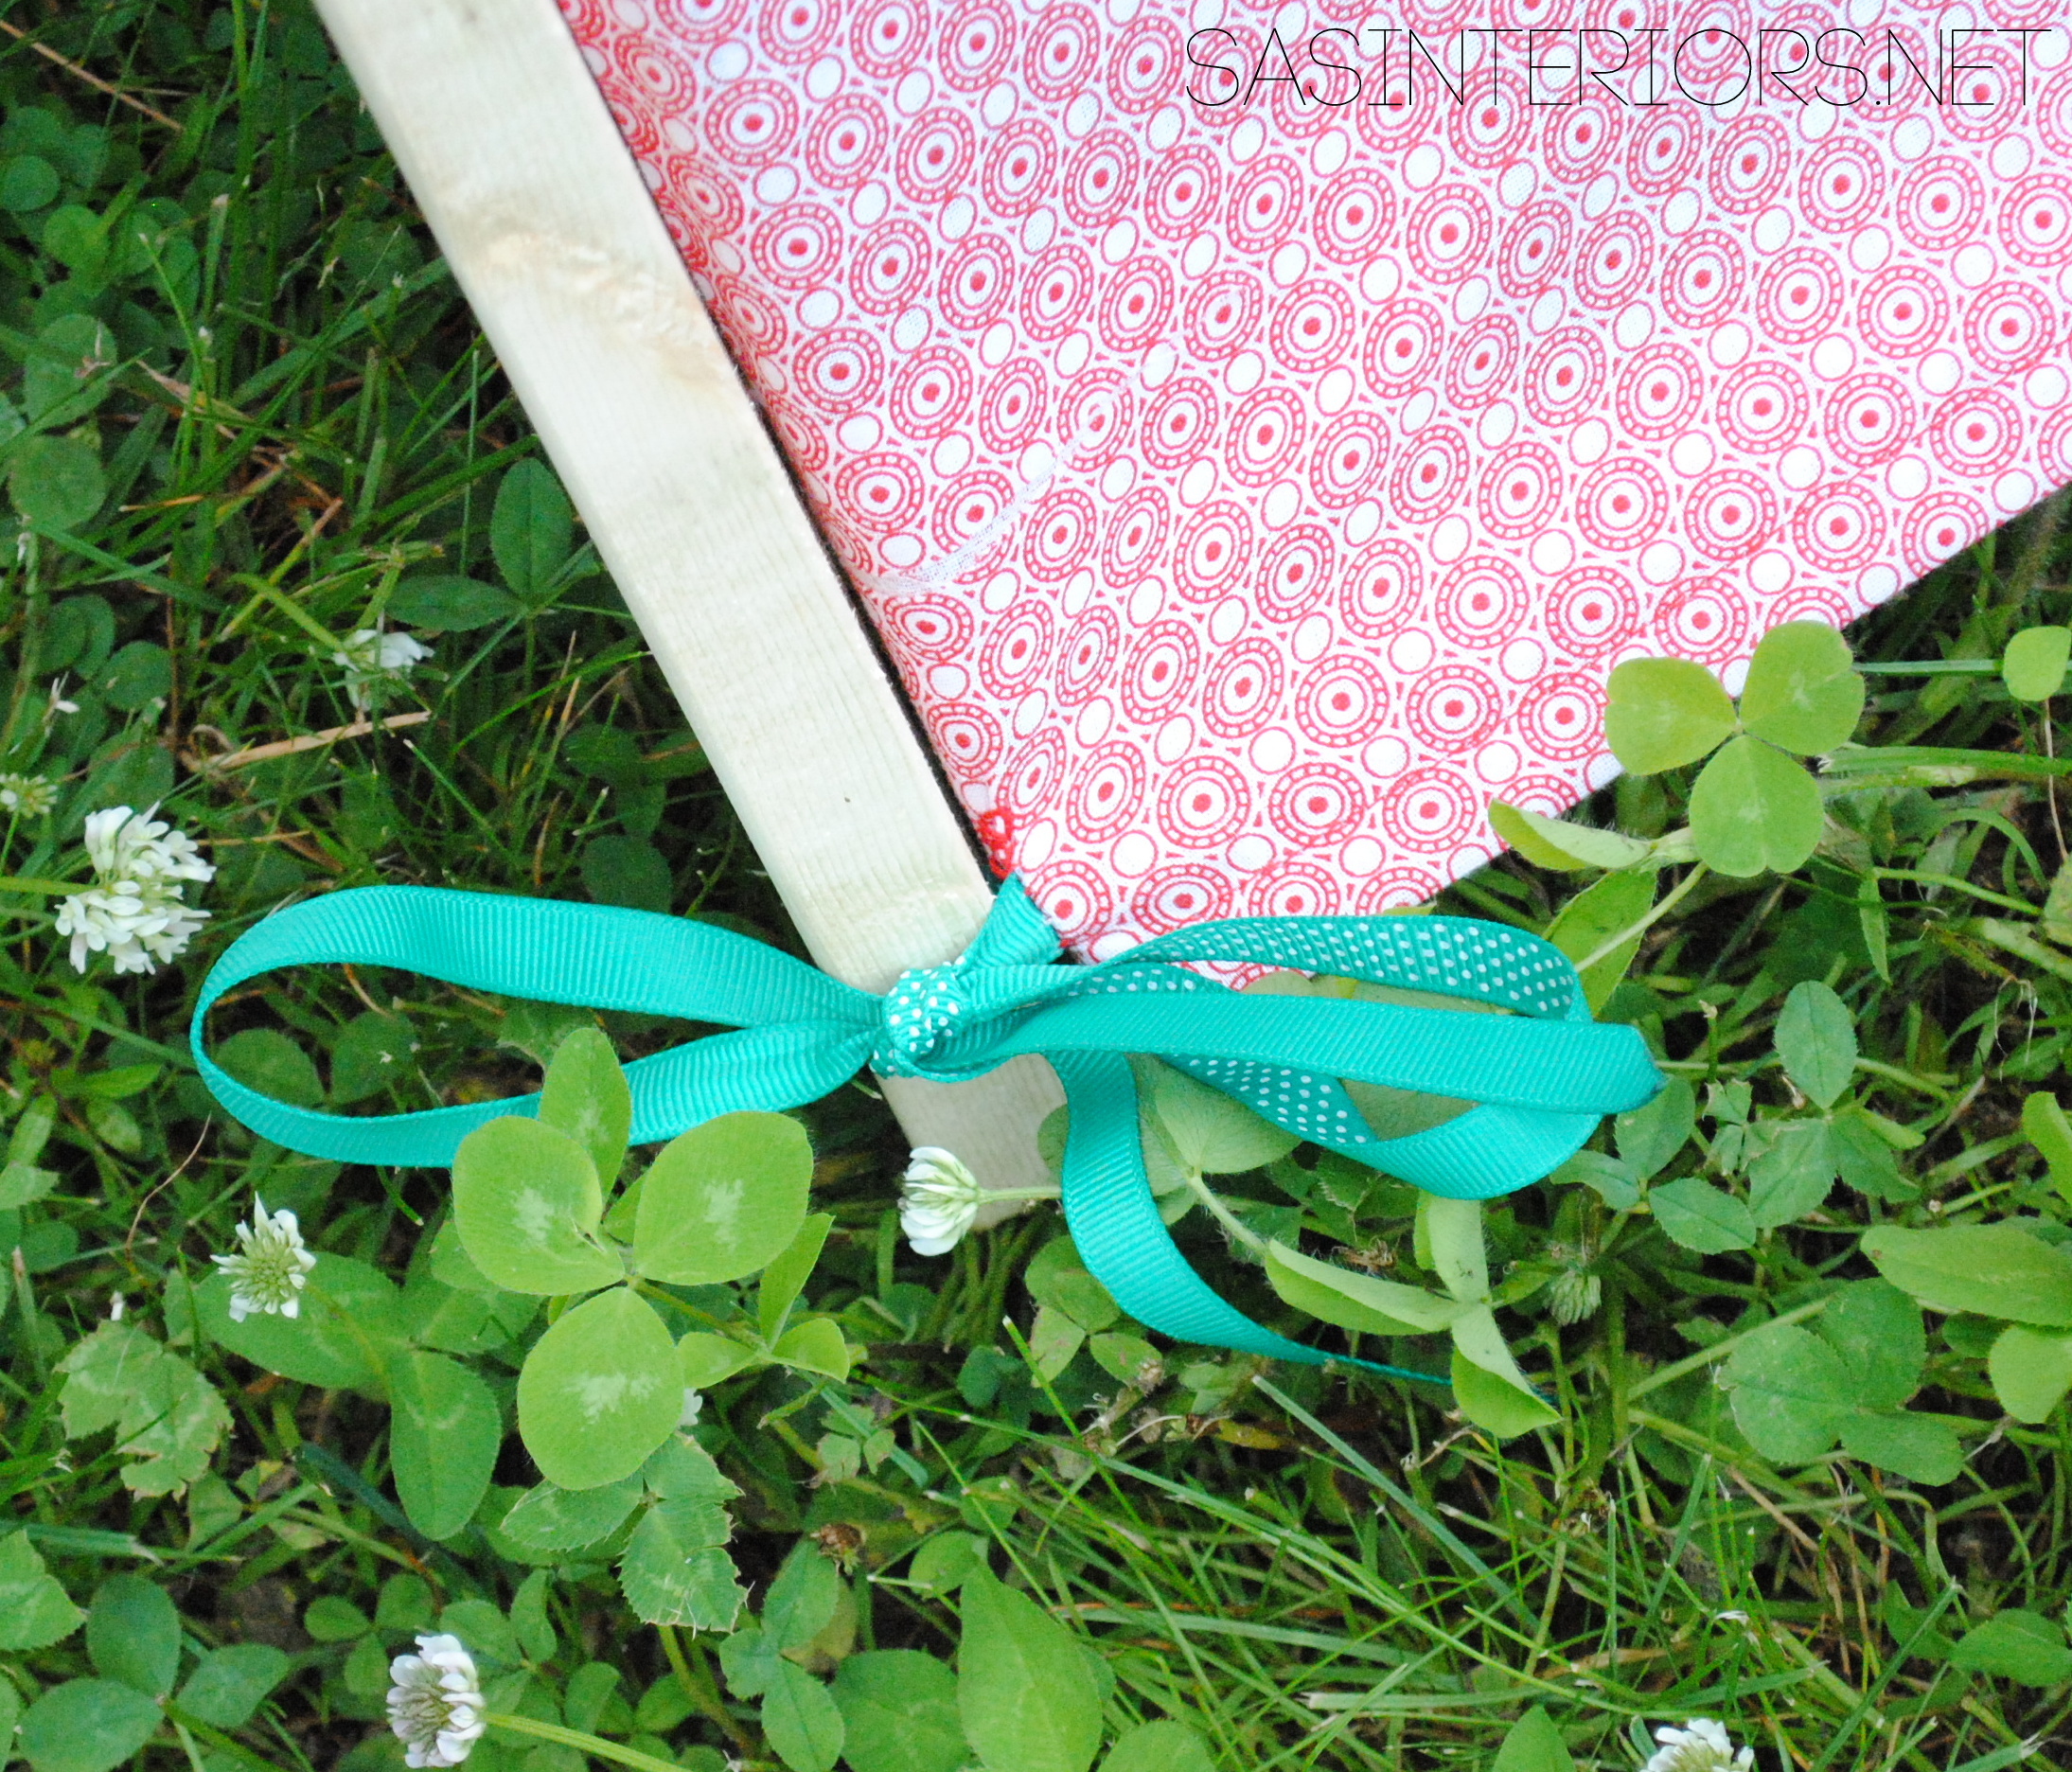
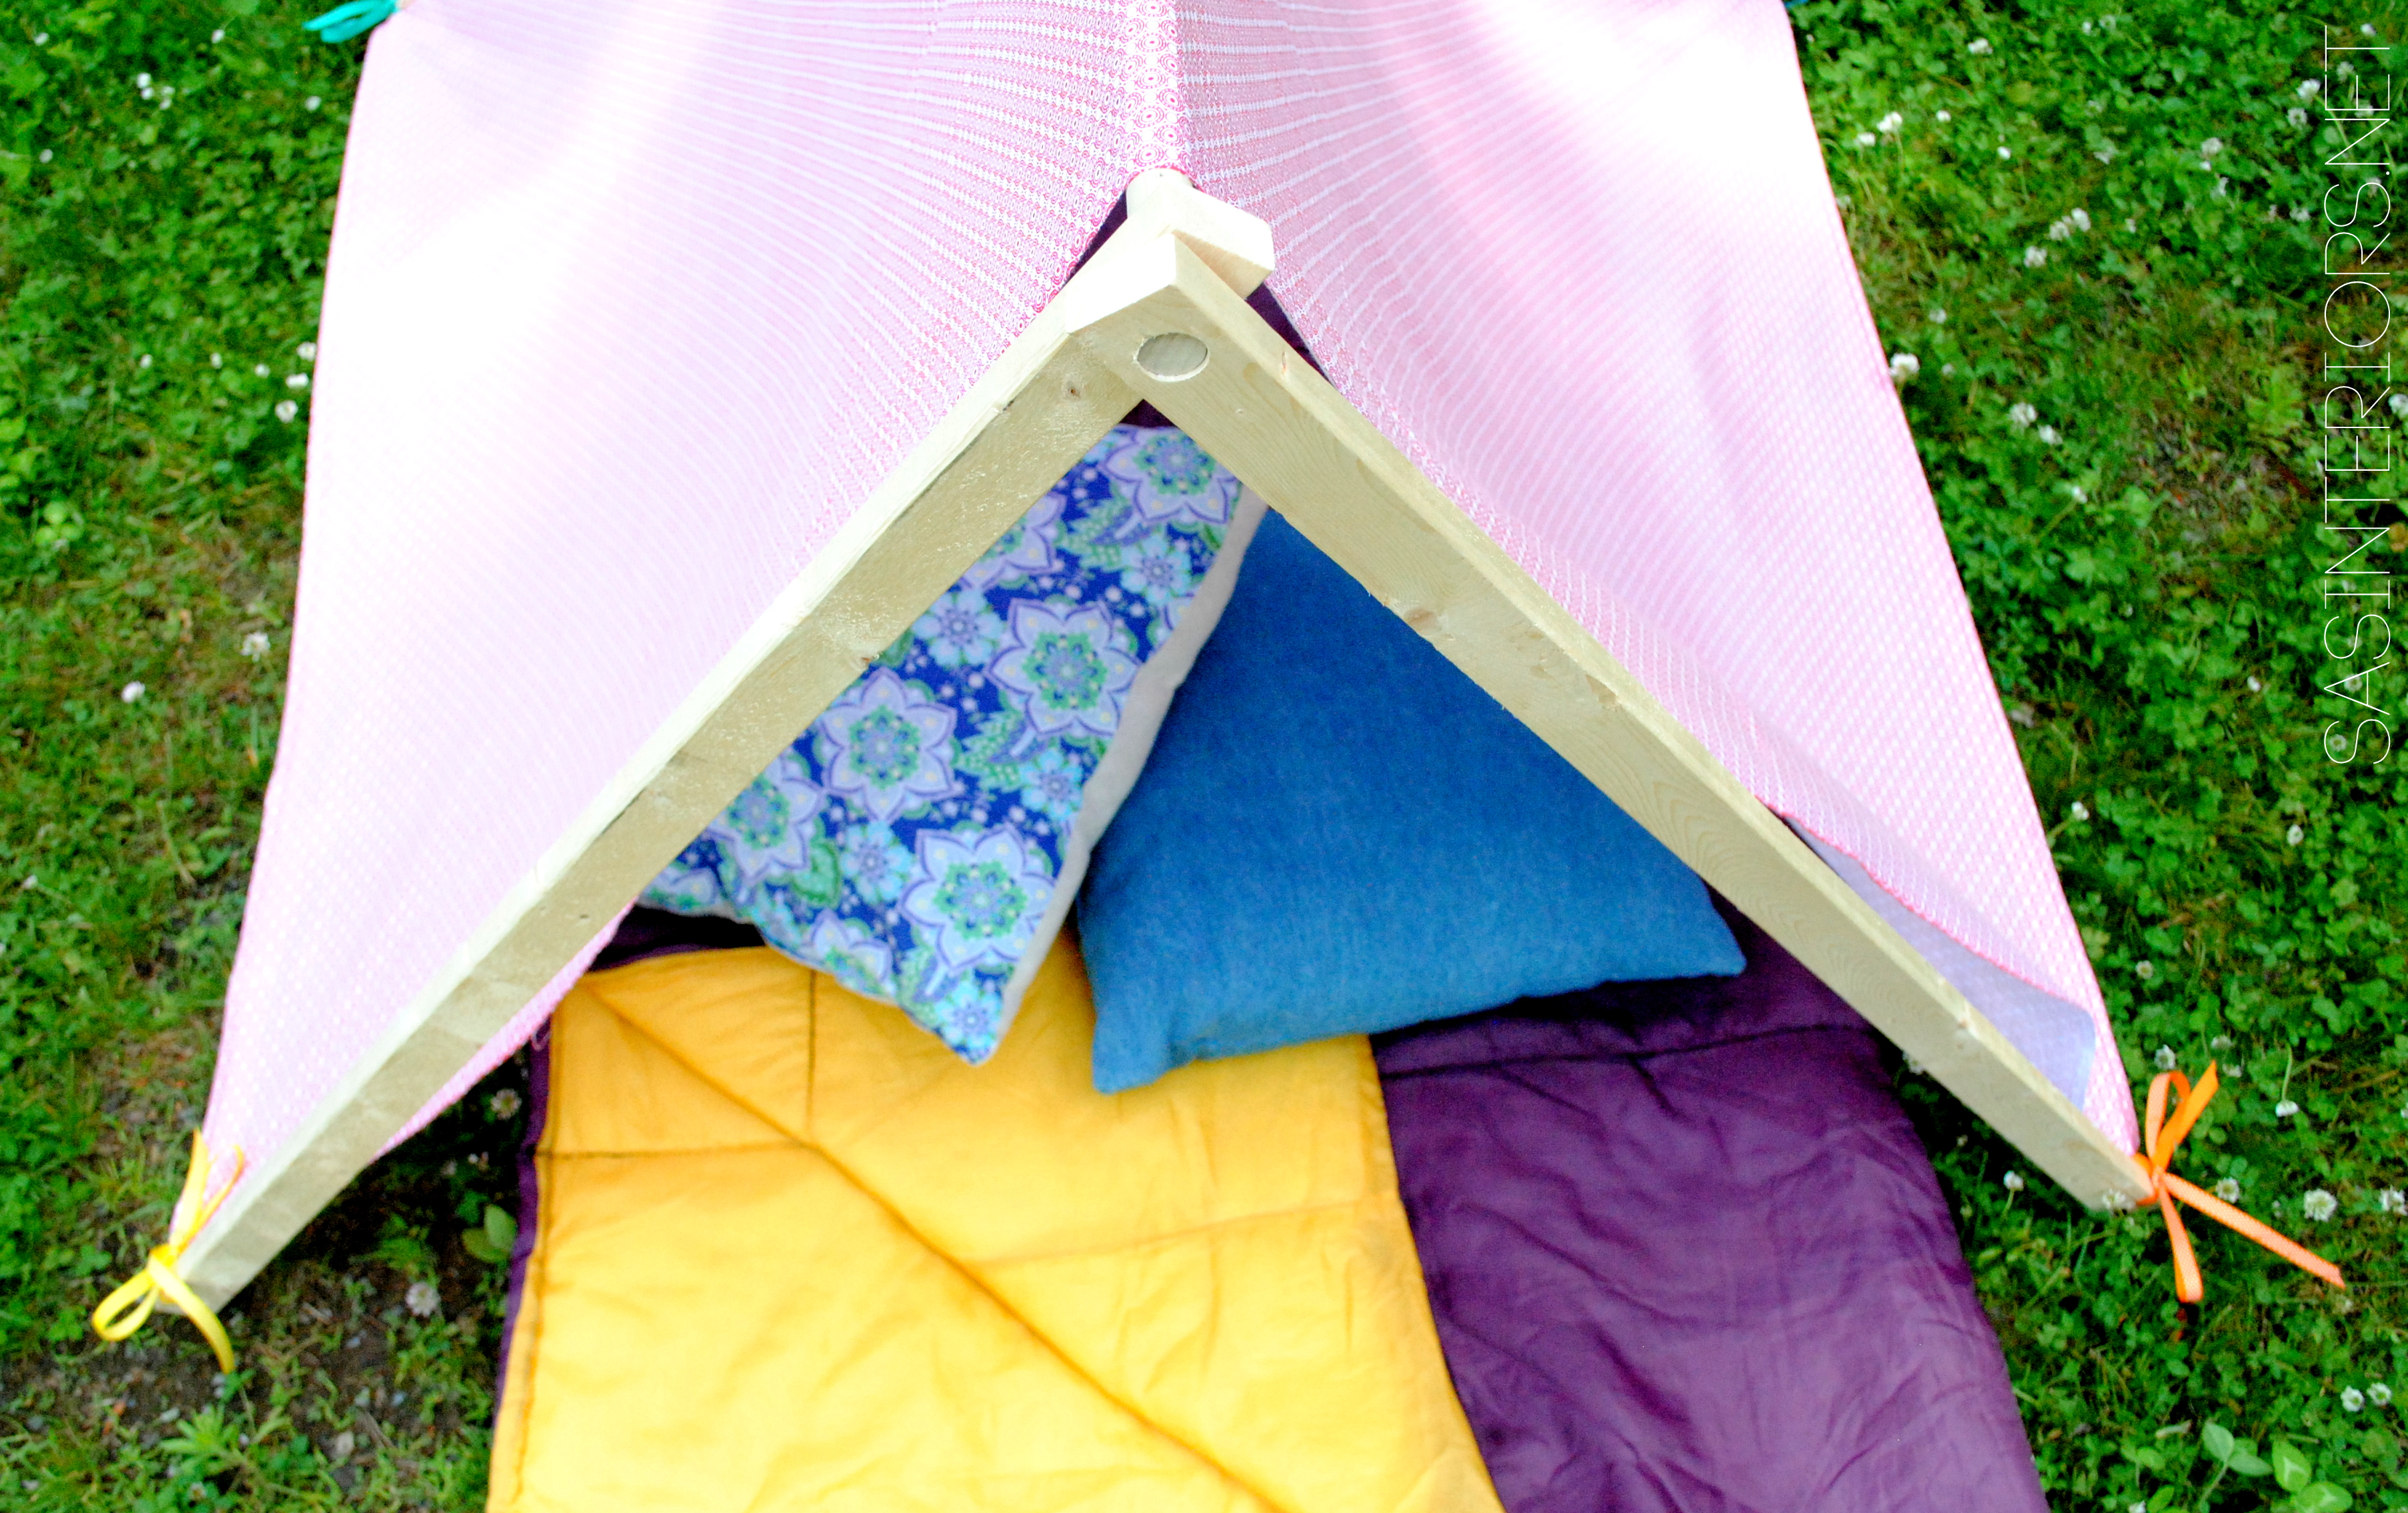
I draped the fabric over the dowel, attached the 4 ribbons through the 4 bottom holes, and secured. (1 minute)

Kids Play + Camping Tent - 10 dollars to make +10 minutes to create! Super simple creation that your kids will love!

Kids Play + Camping Tent - 10 dollars to make +10 minutes to create! Super simple creation that your kids will love!

And the dual play + camping tent was complete.

Kids Play + Camping Tent - 10 dollars to make +10 minutes to create! Super simple creation that your kids will love!

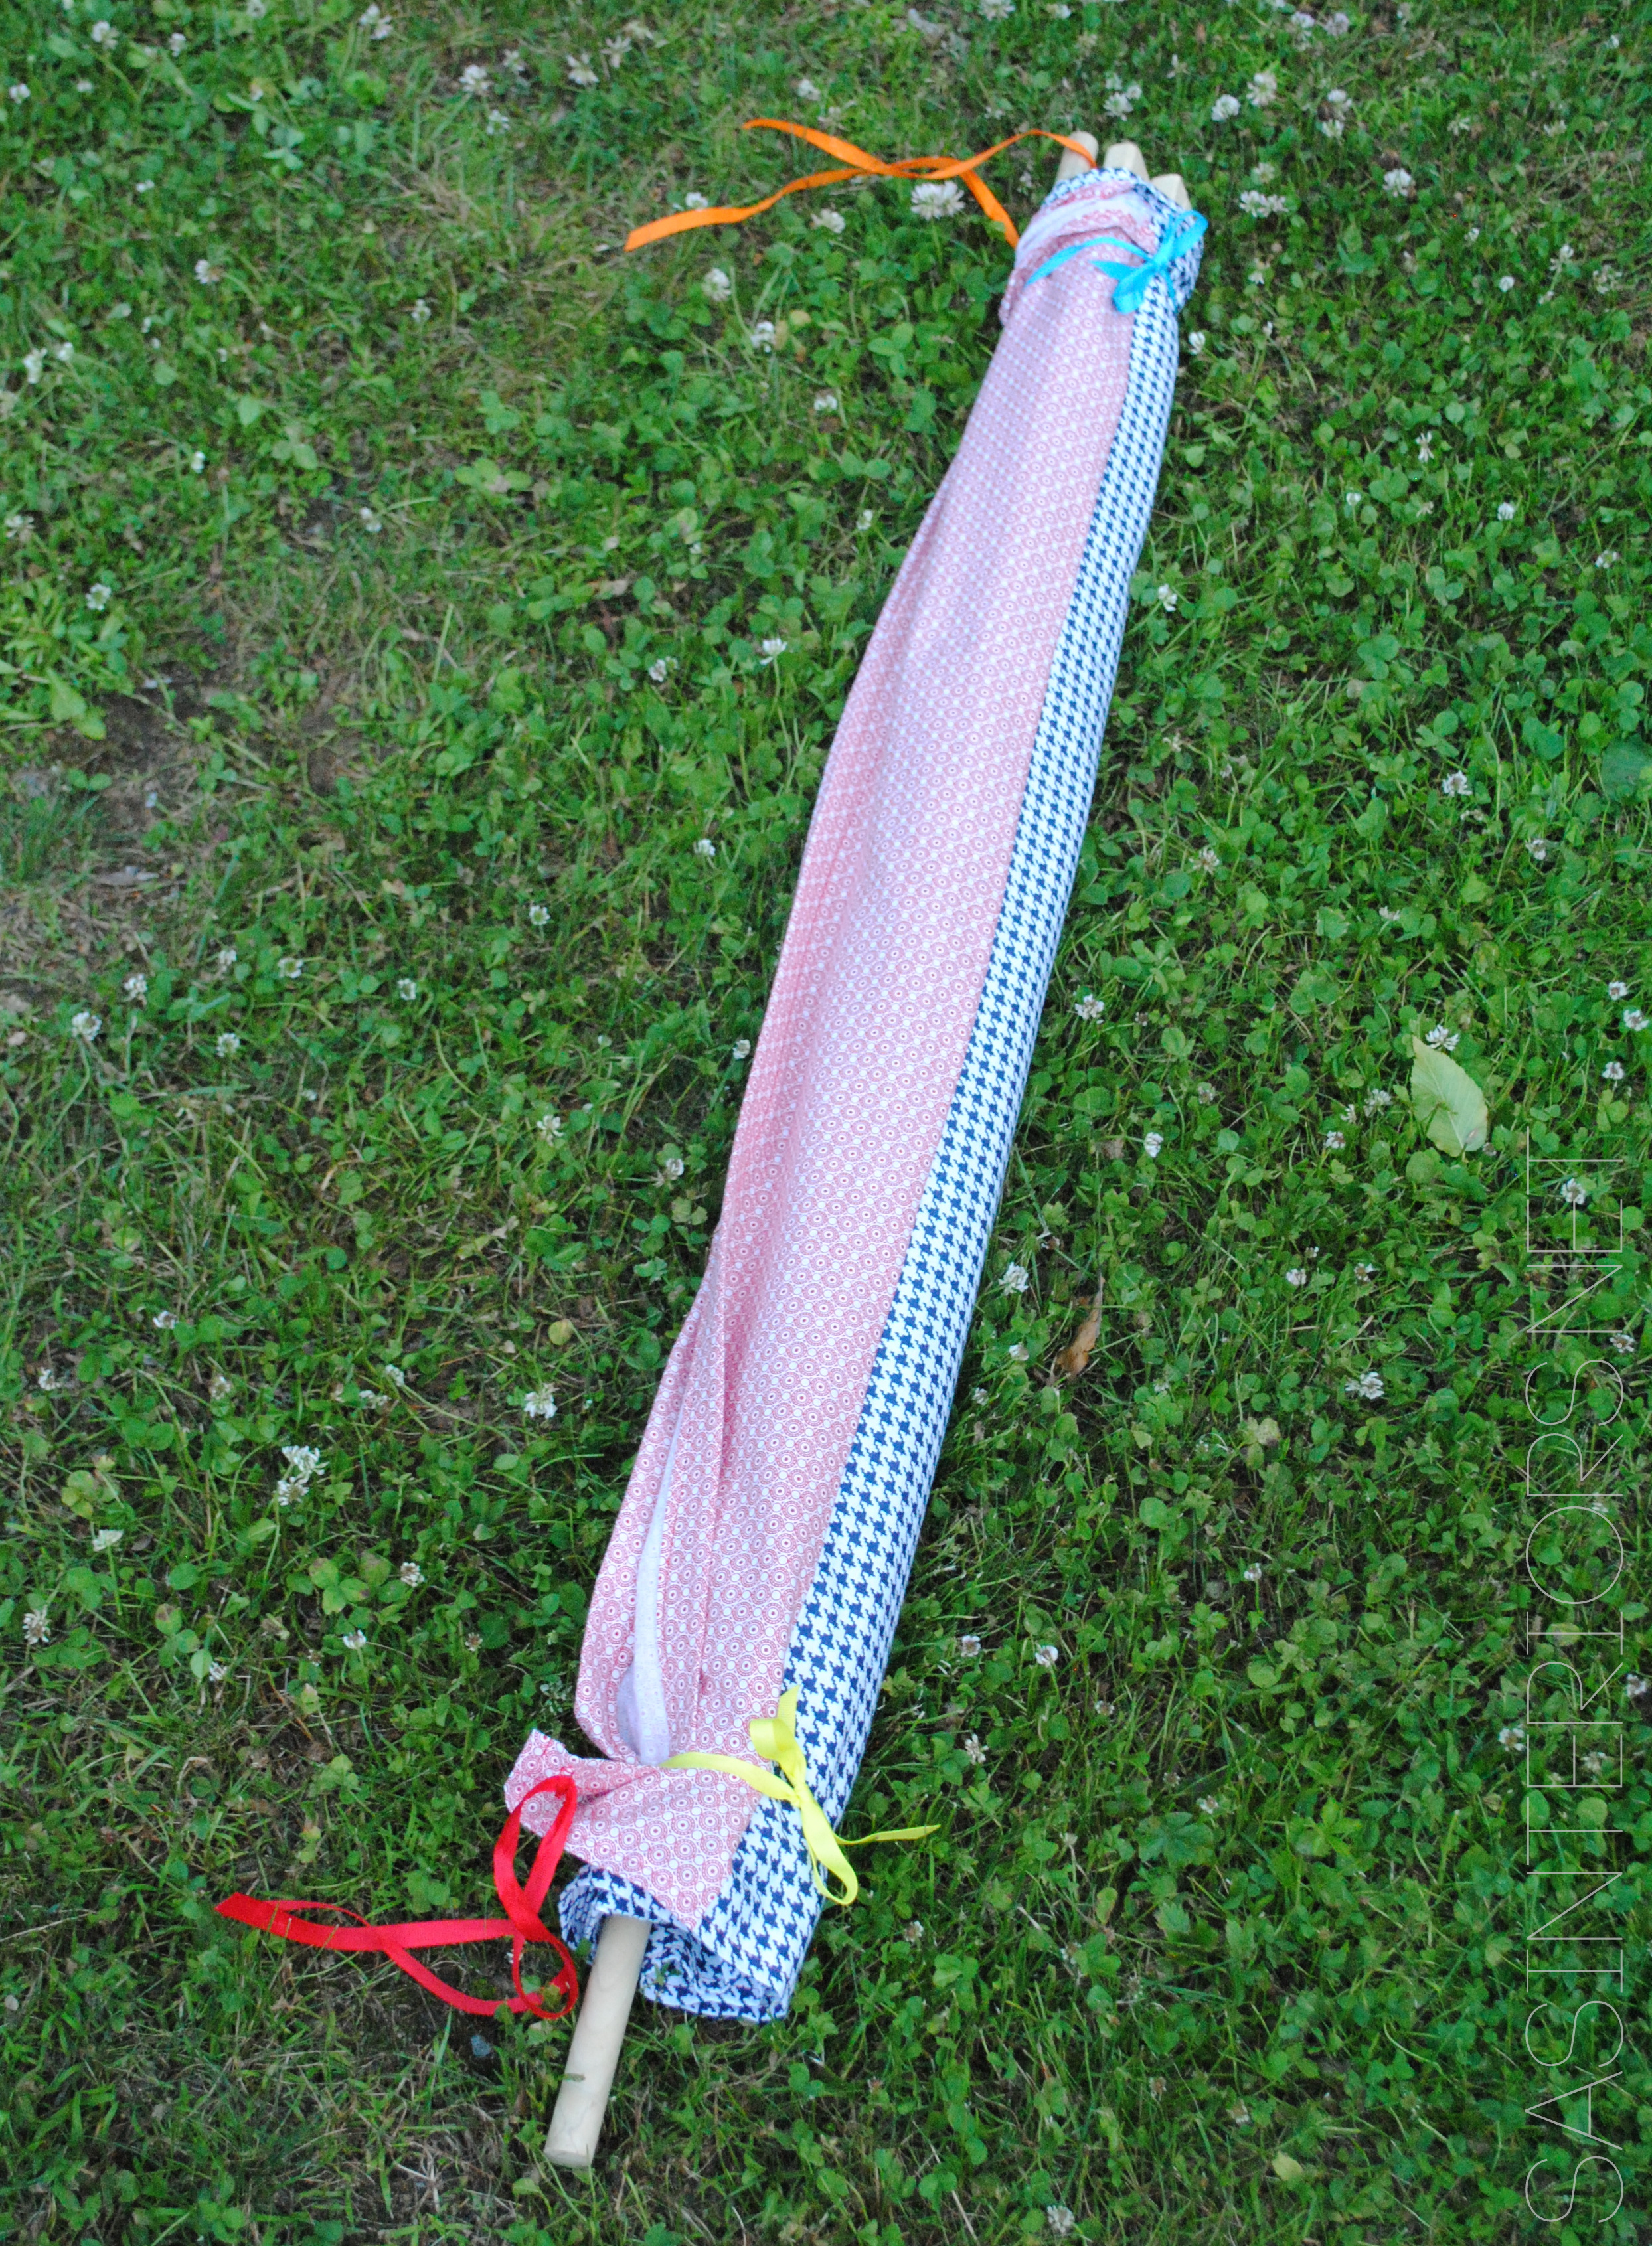
It’s just as easy to disassemble as it is to assemble!  Plus it folds right up to store away.  I put all the legs together, wrapped the fabric around them, and secured it at both ends with the attached ribbon.

Kids Play + Camping Tent - 10 dollars to make +10 minutes to create! Super simple creation that your kids will love!

Kids Play + Camping Tent - 10 dollars to make +10 minutes to create! Super simple creation that your kids will love!

The details.

Kids Play + Camping Tent - 10 dollars to make +10 minutes to create! Super simple creation that your kids will love!

Kids Play + Camping Tent - 10 dollars to make +10 minutes to create! Super simple creation that your kids will love!

Kids Play + Camping Tent - 10 dollars to make +10 minutes to create! Super simple creation that your kids will love!

Kids Play + Camping Tent - 10 dollars to make +10 minutes to create! Super simple creation that your kids will love!

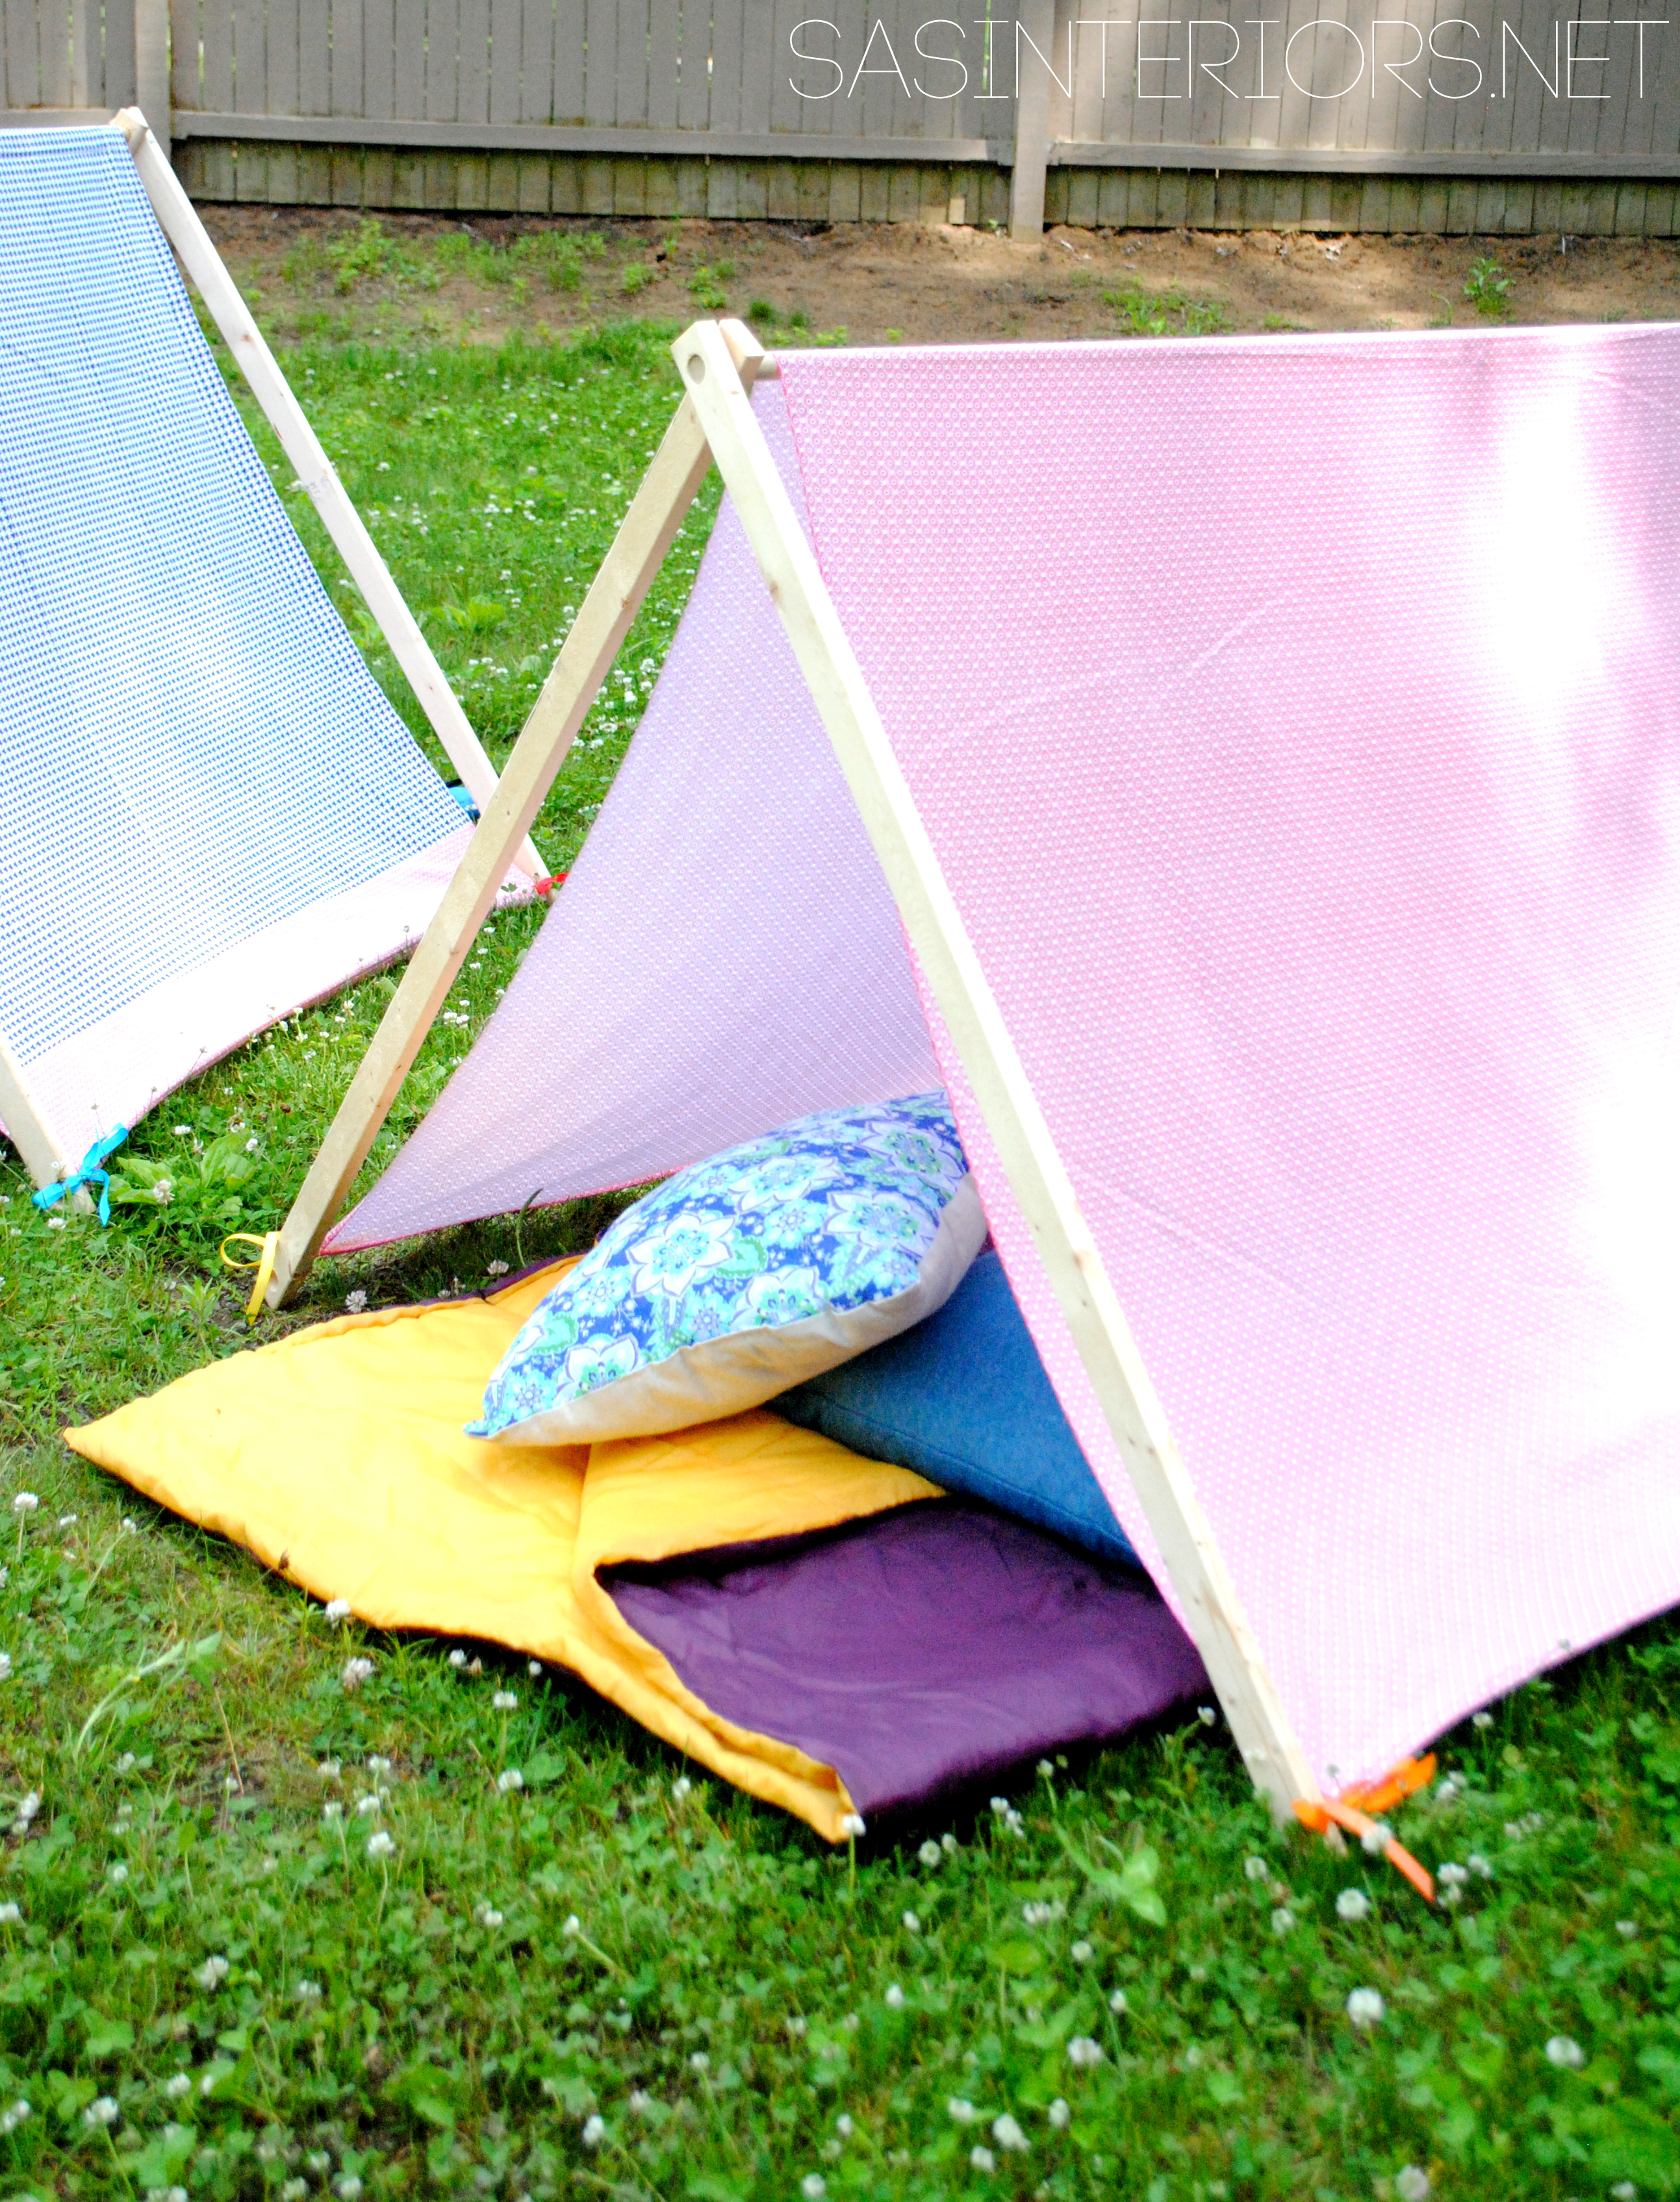
My kids are having such a fun time with their new creations.

Day for Play…

Kids Play + Camping Tent - 10 dollars to make +10 minutes to create! Super simple creation that your kids will love!

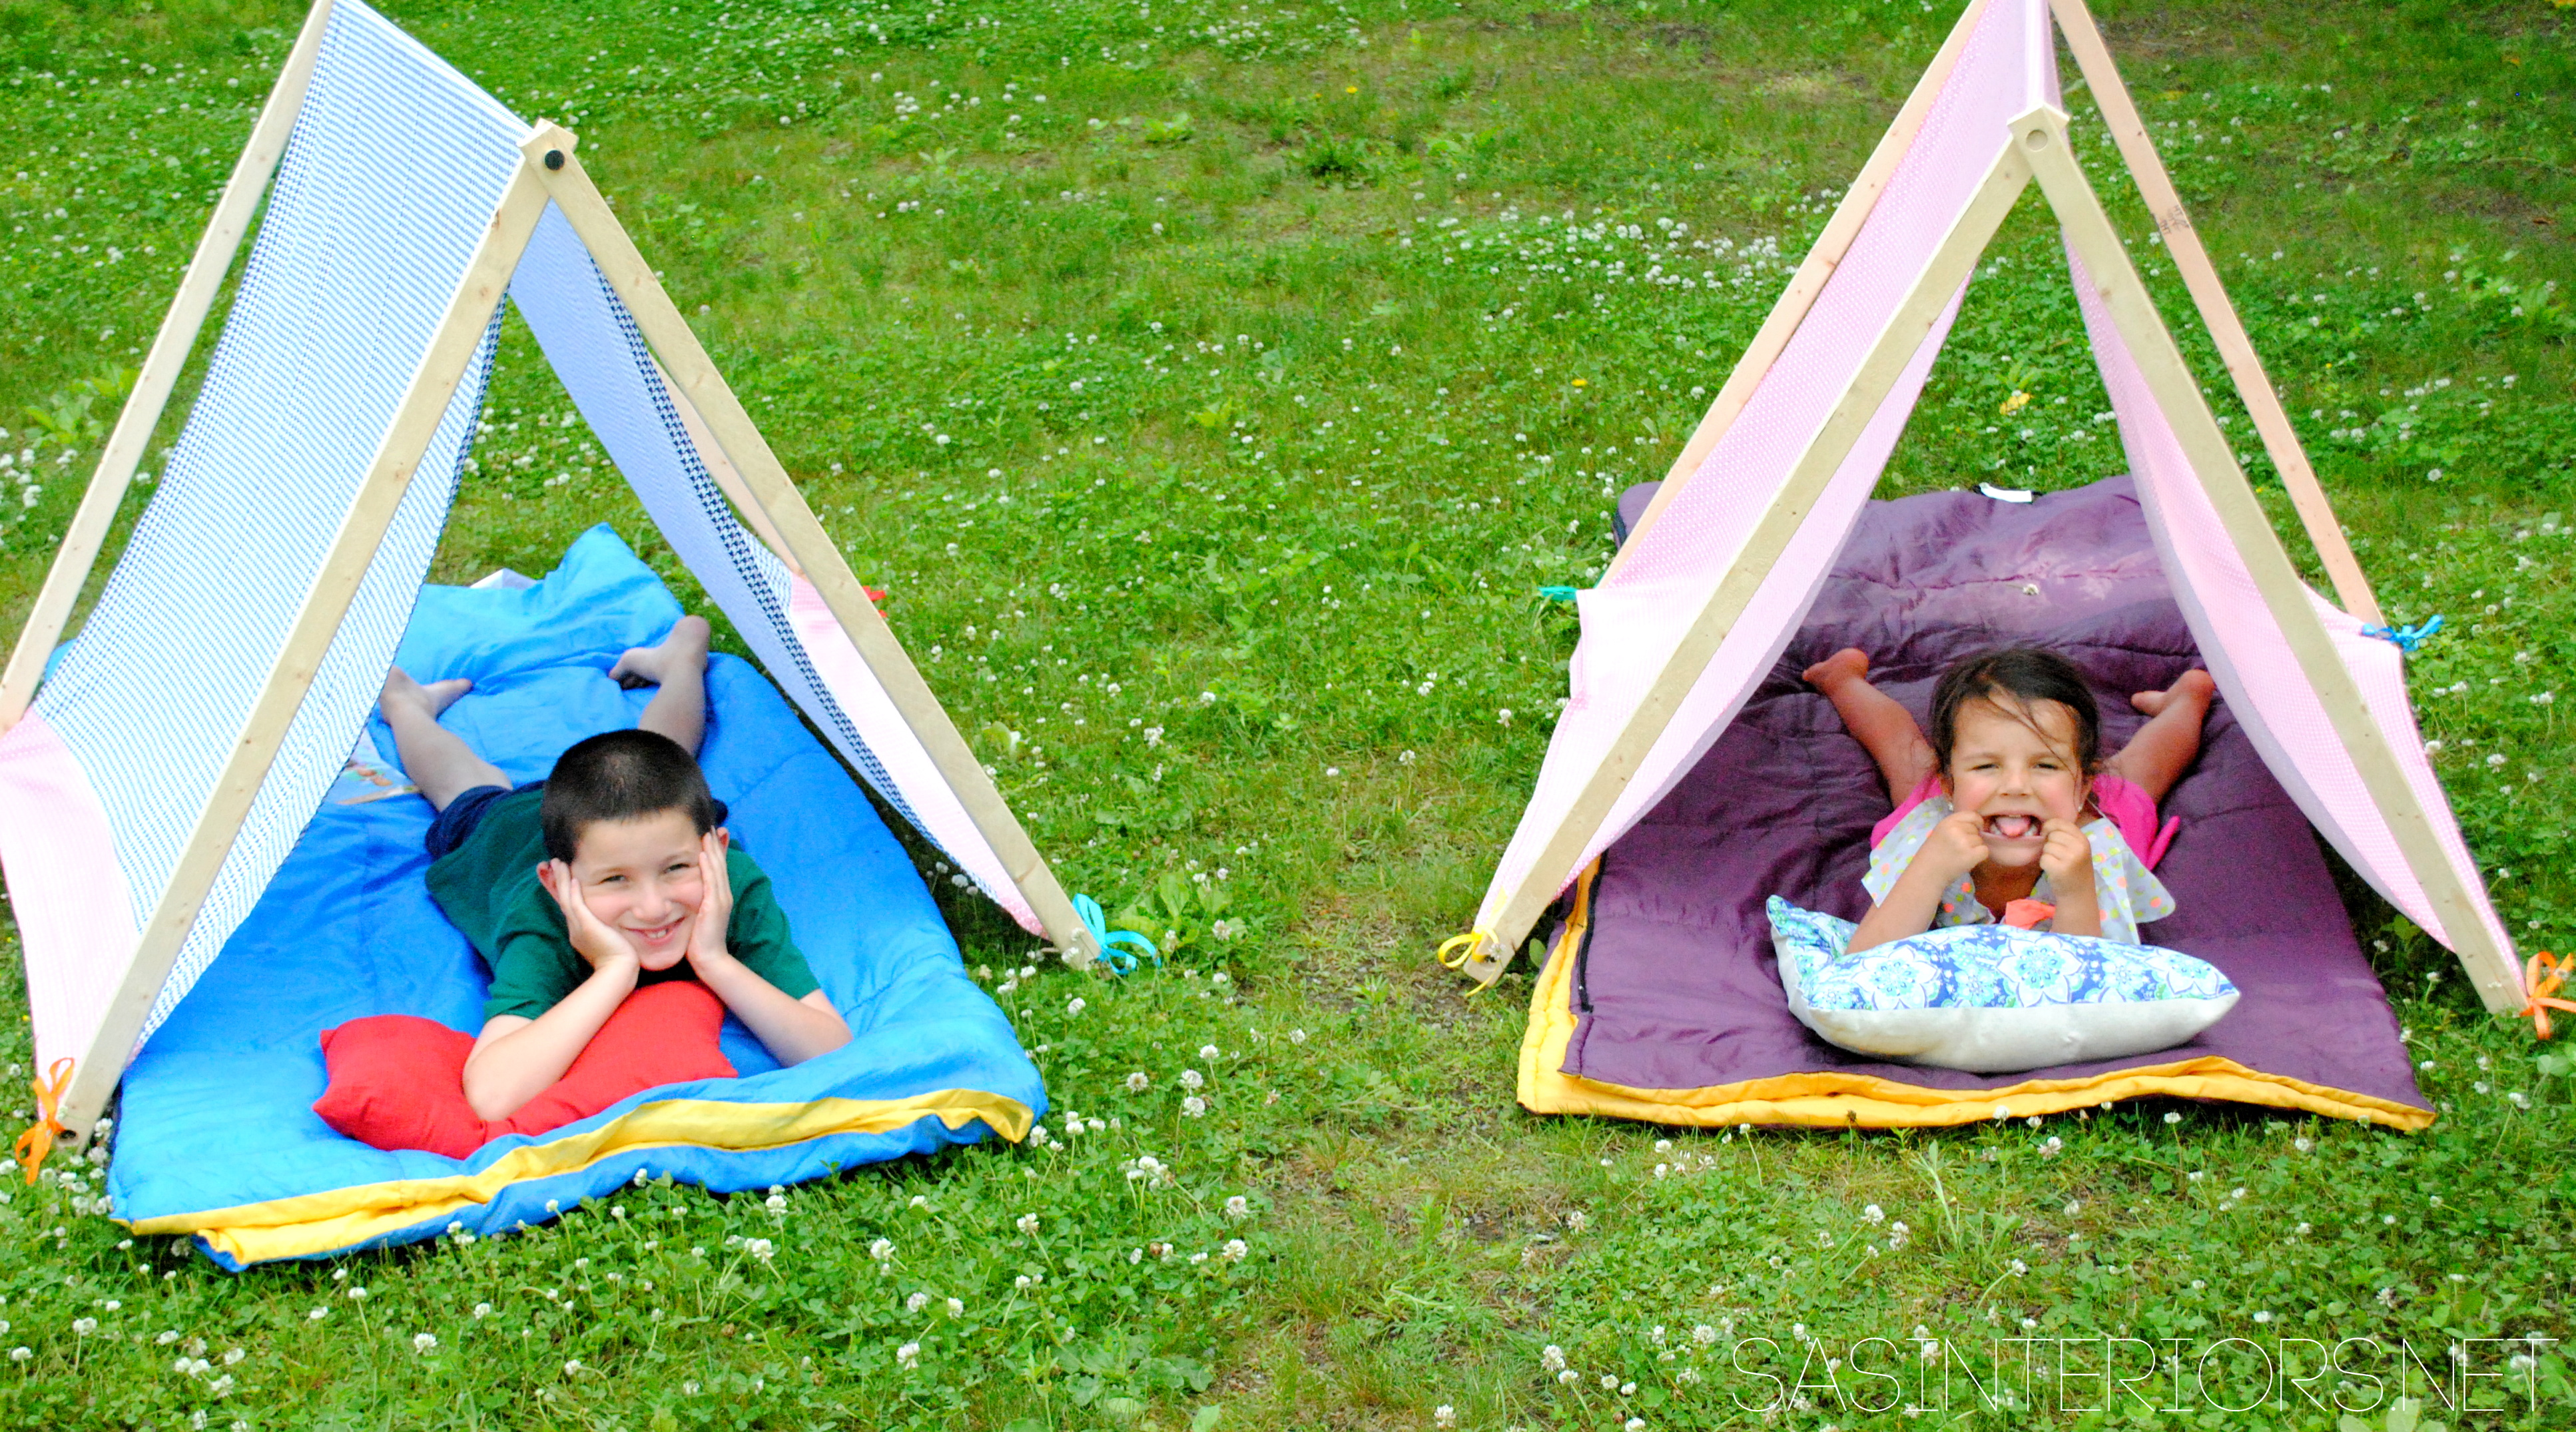
And night for camping… (well kinda.  it didn’t last the whole night).

Kids Play + Camping Tent - 10 dollars to make +10 minutes to create! Super simple creation that your kids will love!

Either way, they are fun, easy to make, and are perfect for some Summer Fun!

Kids Play + Camping Tent - 10 dollars to make +10 minutes to create! Super simple creation that your kids will love!

DIY: 3 in 1 Kids Play Tent – A Lowe’s Creative Idea

I hope you’re having a great week and I want to thank all of you who left such kind comments about my daughter’s room makeover. I already shared one DIY creation in the room (the washi tape initial) and I’m back today to share another part of the space for my first challenge as a Lowe’s Creative Team Member (learn more about that here).

One of my favorite parts of the room was creating a play tent. My kids, as most kids do, love creating forts and tents with blankets and pillows. They love the idea of a hidden place to play, read books, and tell stories. When embarking on this makeover, I thought a play tent would be the perfect addition for a small space in the corner of her room.  I didn’t want to make the tent dominate the space, but I also didn’t want it to be too small because what fun is that?!

My solution for the dilemma… A 3-in-1 tent with long panels to allow room for 1 child or 5.

Kids love options – am I right?!  You never know if they want to play by themselves in a little cocoon or if they want all their friends around to have a tea party, play barbies, or battle like droids (parents of Star War fans know what I’m talking about).

When starting this project, I of course, headed to Lowe’s to gather my supplies.

  • 1 x 6 board
  • flexible wood board (I ended up using a 4″ wide x 8′ long) wood toe kick thanks to the suggestion by a Lowe’s sales person)
  • nails, screws, and anchors
  • fabric of your choice
  • ribbon of your choice
  • drapery panels

To start off, I headed to my favorite home improvement store, Lowe’s, to gather my supplies.

1. Once home, I cut the 1″ x 6″ board into a 38″ piece and a 26″ piece (Lowe’s will also cut your wood pieces to size).  The nailed the two ends together.

2. Using anchors and screws ( I always use the self-screwing kind), I attached to the two pieces of wood to the corner space.  Then for the curve, I cut the 4″ wide x 8′ long toe kick in half.  Using finishing nails, I attached the flexible curved wood to the end of each 1″ x 6″ to finish the canopy base.

The curved wood was a little flimsy (obviously so it can bend), so I secured it in the back by hot gluing on paint sticks.

Once the base was done, the fun part started… adding the fabric.

In knowing that I was going to use white long panels, I wanted to add a bit of whimsy and fun to the valance, so I used a fun Duralee Ikea fabric along with drop cloth and a white pom-pom trim.

3. I cut a piece of drop cloth that was slightly larger that the valance, then wrapped it around the front of the valance and secured it in the back with hot glue.  The curved front sits about 1/2″ from the ceiling so I was able to wrap the fabric at the top as well.

Time to jazz it up!

4. After the drop cloth was in place, I added the colorful Ikat fabric.  I determined that I wanted to have a 3″ band of the fabric and marked it along the valance.  Then once again, I hot glued on the fabric.  Easy-Peasy!

secured the fabric in the front…

secured the fabric on the back…

5. Then I added the cute white pom-pom trim. Of course with hot glue… again.

For the last part of this 3-in-1 Kids Play Tent, are the panels.

Ok, so let’s take a step back and let me explain how and why I created these panels. Because of the dynamic fuschia in the room, I thought white panels would be a quieter, fresh contrast.  I also wanted them to feel light and airy, so decided on a sheer panel with a small pattern (sheers from Target).  The overall length was only 84″ and needed to be much longer, so I added a solid white cotton fabric (used from Ikea window panels) to the bottom.  They look pretty for the tent, but could also be used as drapery panels at a later date – I love creating things that can be used now AND later.

6. With right sides together, I sewed the two short ends of the panels.  I wasn’t worried about the length because the longer the better – this is how the large canopy is created.

7. Once the two panels were created, I attached them with staples to the ceiling on the inside of the valance.  I also overlapped the two panels creating a natural opening / closure.

8. Lastly, I added metal tie backs that I purchased at Lowe’s.  These tiebacks are perfect to pull back the panels and have the space wide open – like a stage for the kids to put on a play.


And it’s done. An exciting 3-in-1 Kids Play Tent.

1 – Panels completely pulled back

2 – A cozy hidden nook with panels drawn

3 – Panels pulled out creating a larger “tent”

What a fun spot! Within minutes of having this space done, my kids had all their stuffed animals, blankets, and pillows tucked away inside.

Well my little girl is calling me to go back into her tent – I gotta go!

To see more on this space, click over to see the Big Girl Bedroom {Reveal}

You can find more DIY creations in the Lowe’s Creative Magazine or the Lowe’s Ipad App for FREE!

Disclosure: I am part of the Lowe’s Creative Team and was provided with a Lowe’s gift card to purchase items for my project.  I was also compensated for my time to use the products.  No one told me what to create, what to buy, how to use the product, or what to write.  All opinions are 100% mine!

I link my projects to some of these parties: Skip to My Lou, Dittle Dattle, Between Naps on the Porch, Today’s Creative Blog, Stories of A to Z, All Things Heart & Home, House of Hepworths, Finding Fabulous, The Shabby Nest, Serenity Now, Tatertots and Jello, Thrifty Decor Chick, Tip Junkie