Bathroom Makeover: Installing Wallpaper {Day 17}

If you follow along with me on Instagram, then you may have seen a few sneak peeks of the next phase of the Bathroom Remodel… the WALLPAPER! Tile is done (well mostly) and after 17 days of cutting, grouting, tiling, I never want to touch another tile again in my life. Now we know that’s not true. But in all honesty, it was a big job. Totally doable for any skill level, but just time consuming!
As I move forward with this Bathroom Makeover in 30 Days Challenge, the walls are now adorned with pure beautiful.
Take a look…

Can we say dynamic?! What do you think??
The evolution of this bathroom has been quite interesting. Every moment I think I am leaning one direction, I end up going the opposite way. Such as life, I guess. Originally my plan was to go basic and neutral for the base elements, and then add pops of color and interest with layers. Before tiling, I painted over the previous yellow paint color with a neutral greige. Once the white tile went up, it felt boring. It wasn’t a reflection of my design style or the home we’ve created. It needed something… Then I found the wallpaper.
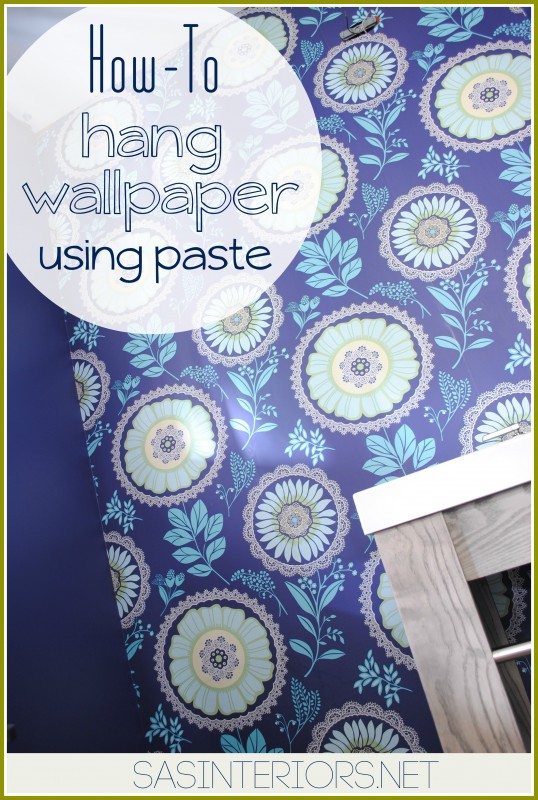
This wallpaper by Serena and Lily gave the perfect amount of eye-catching intrigue without overwhelming the space. There is still a lot of whites + neutrals, and with the other elements I have planned, it’s going to be my next favorite space.
So on to the install…
I’ve wallpapered areas in my home before including the powder room and my son’s bedroom. Both were one wall projects and didn’t involve a lot of cutting. When working with a tight space that has lots of nooks, crannies, and crevices, it can get a bit tricky.
Differently from the other walls I’ve used wallpaper on, I never before used a wallpaper paste. A discussion started a few weeks back on a picture I shared on Instagram about using wallpaper primer. An expert chimed in strongly suggesting using wallpaper primer before wallpapering, ” You can install wallpaper without primer if you have smooth walls, however, it’s going to be a pain later when when you want to remove it. If you prime your walls, the wallpaper will roll down in long flowing strips. If you don’t prime, the drywall comes off with the wallpaper in 6+ years.” My thought upon this input… USE WALLPAPER PRIMER.

I chose this clear wallpaper primer at Lowe’s and the gallon was about $16. I used the smallest amount so a little goes a long way. I wish they sold it in smaller amounts, but o well.
I poured the primer into a paint tray and using a roller, I applied it to the walls. You really only need a thin coat because it is watery. I found after a few minutes some of the primer dripping down the wall, so I took a cloth and dabbed it so it wouldn’t harden.

In about 3 hours, it was dry and ready to wallpaper. I waited till the next morning to start though…
Supplies for Wallpapering
- Wallpaper
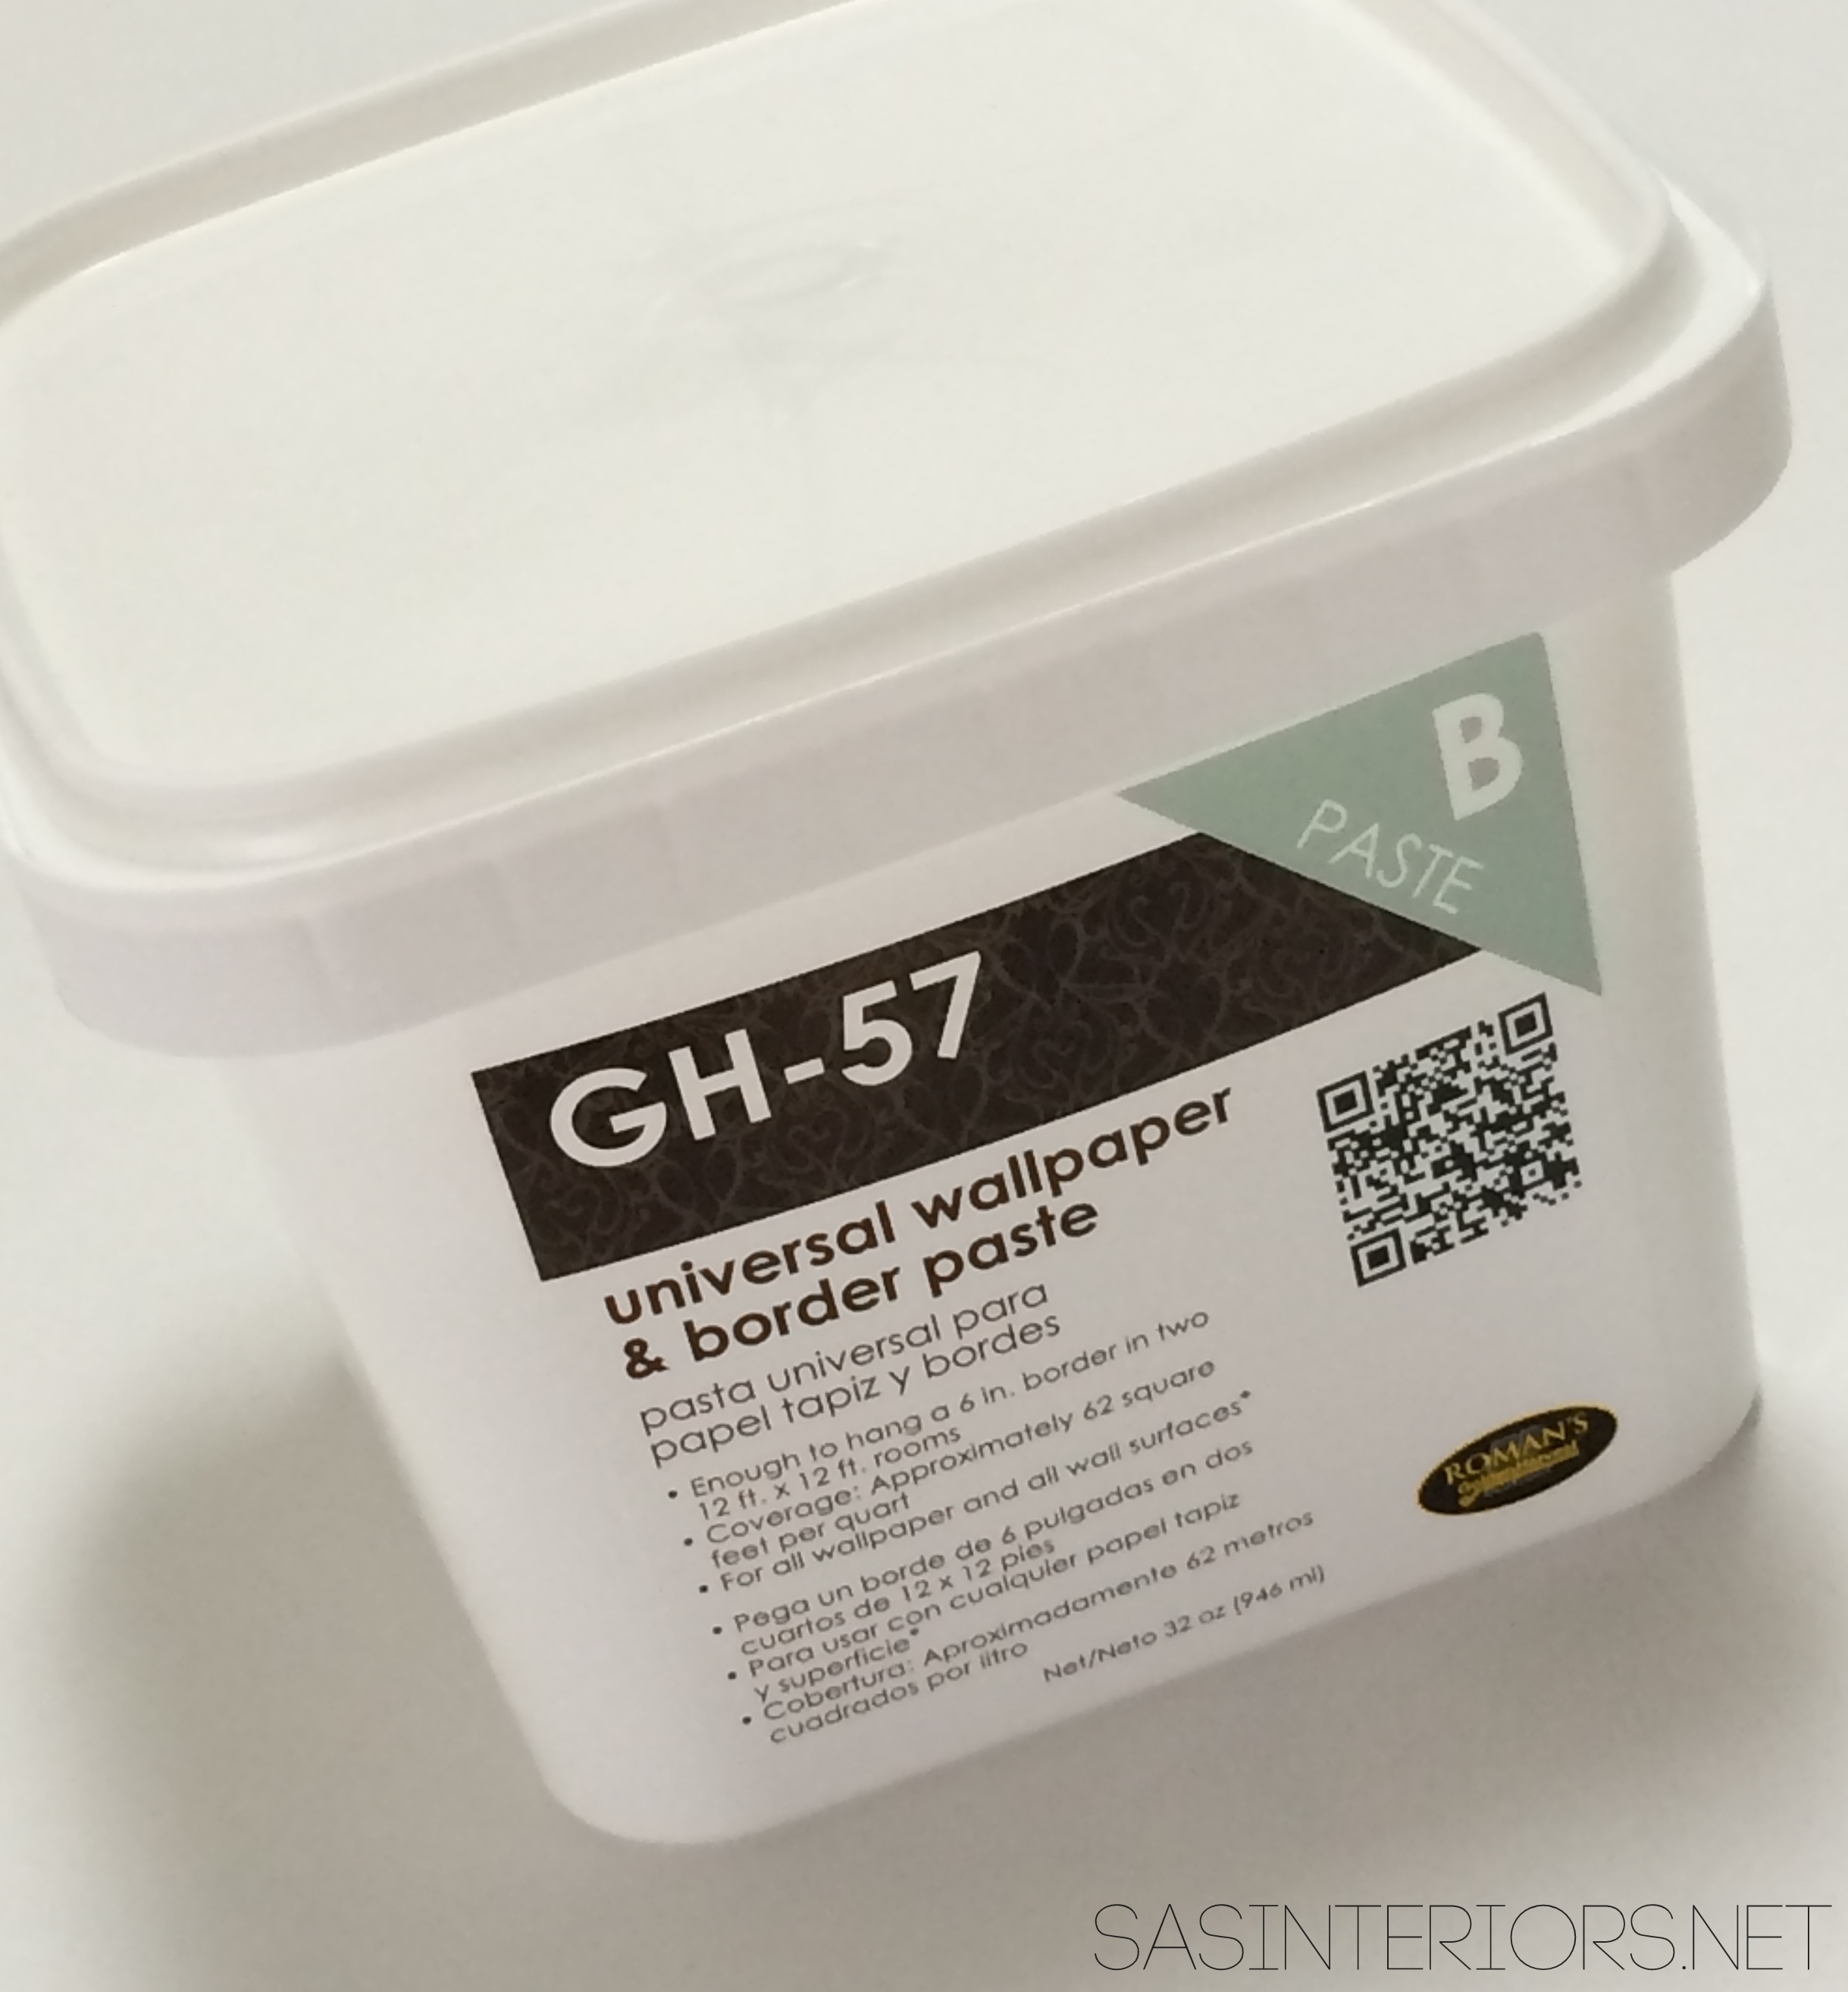
- Wallpaper Paste
- Smoothing Tool
- Sharp Razor or blade
- Other handy tools for wallpapering are: a tape measure, a laser level, a pencil
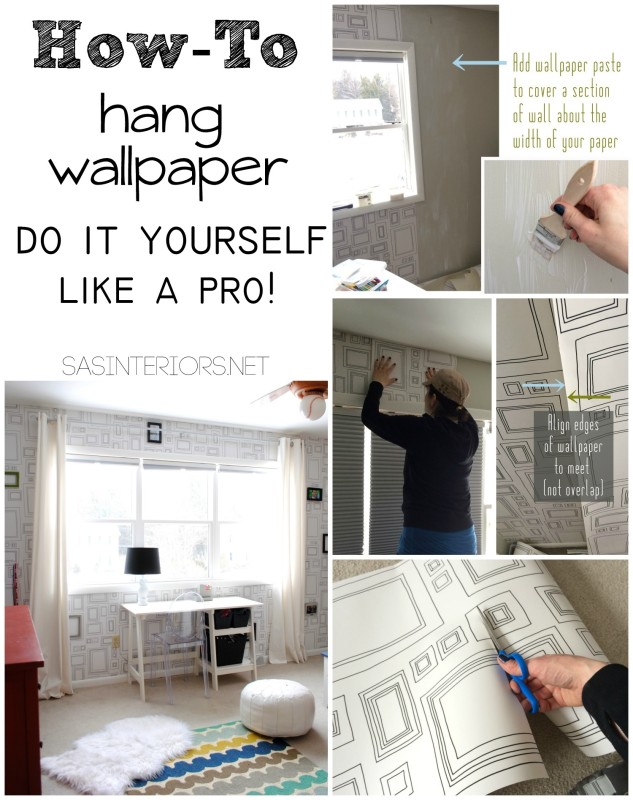
How-To Wallpaper
I started off at one edge of the wall and worked my way around the room from that point. Because I am planning on adding moulding at the top of the wall, and a tile trim piece at the bottom, measuring exactly wasn’t needed – phew! I measured about the length of the wall and cut my wallpaper with a scissor. Then I layed it on the floor so I could apply the paste.

Unlike with my previous wallpaper experiences, this time I applied the wallpaper paste to the back of the wallpaper as indicated on the instructions that came with the wallpaper. In the past, I put the paste directly on the wall, then adhered the paper. I wanted to see if this other method worked better (and in the end, it did!). Why? I felt that by adding the paste to the back of the wallpaper instead of applying the paste to the wall there resulted in less air bubbles and air pockets. The paper was easier to smooth out which avoided the paper from getting creased or damaged.
I applied a nice coating of wallpaper paste using an inexpensive paint brush.

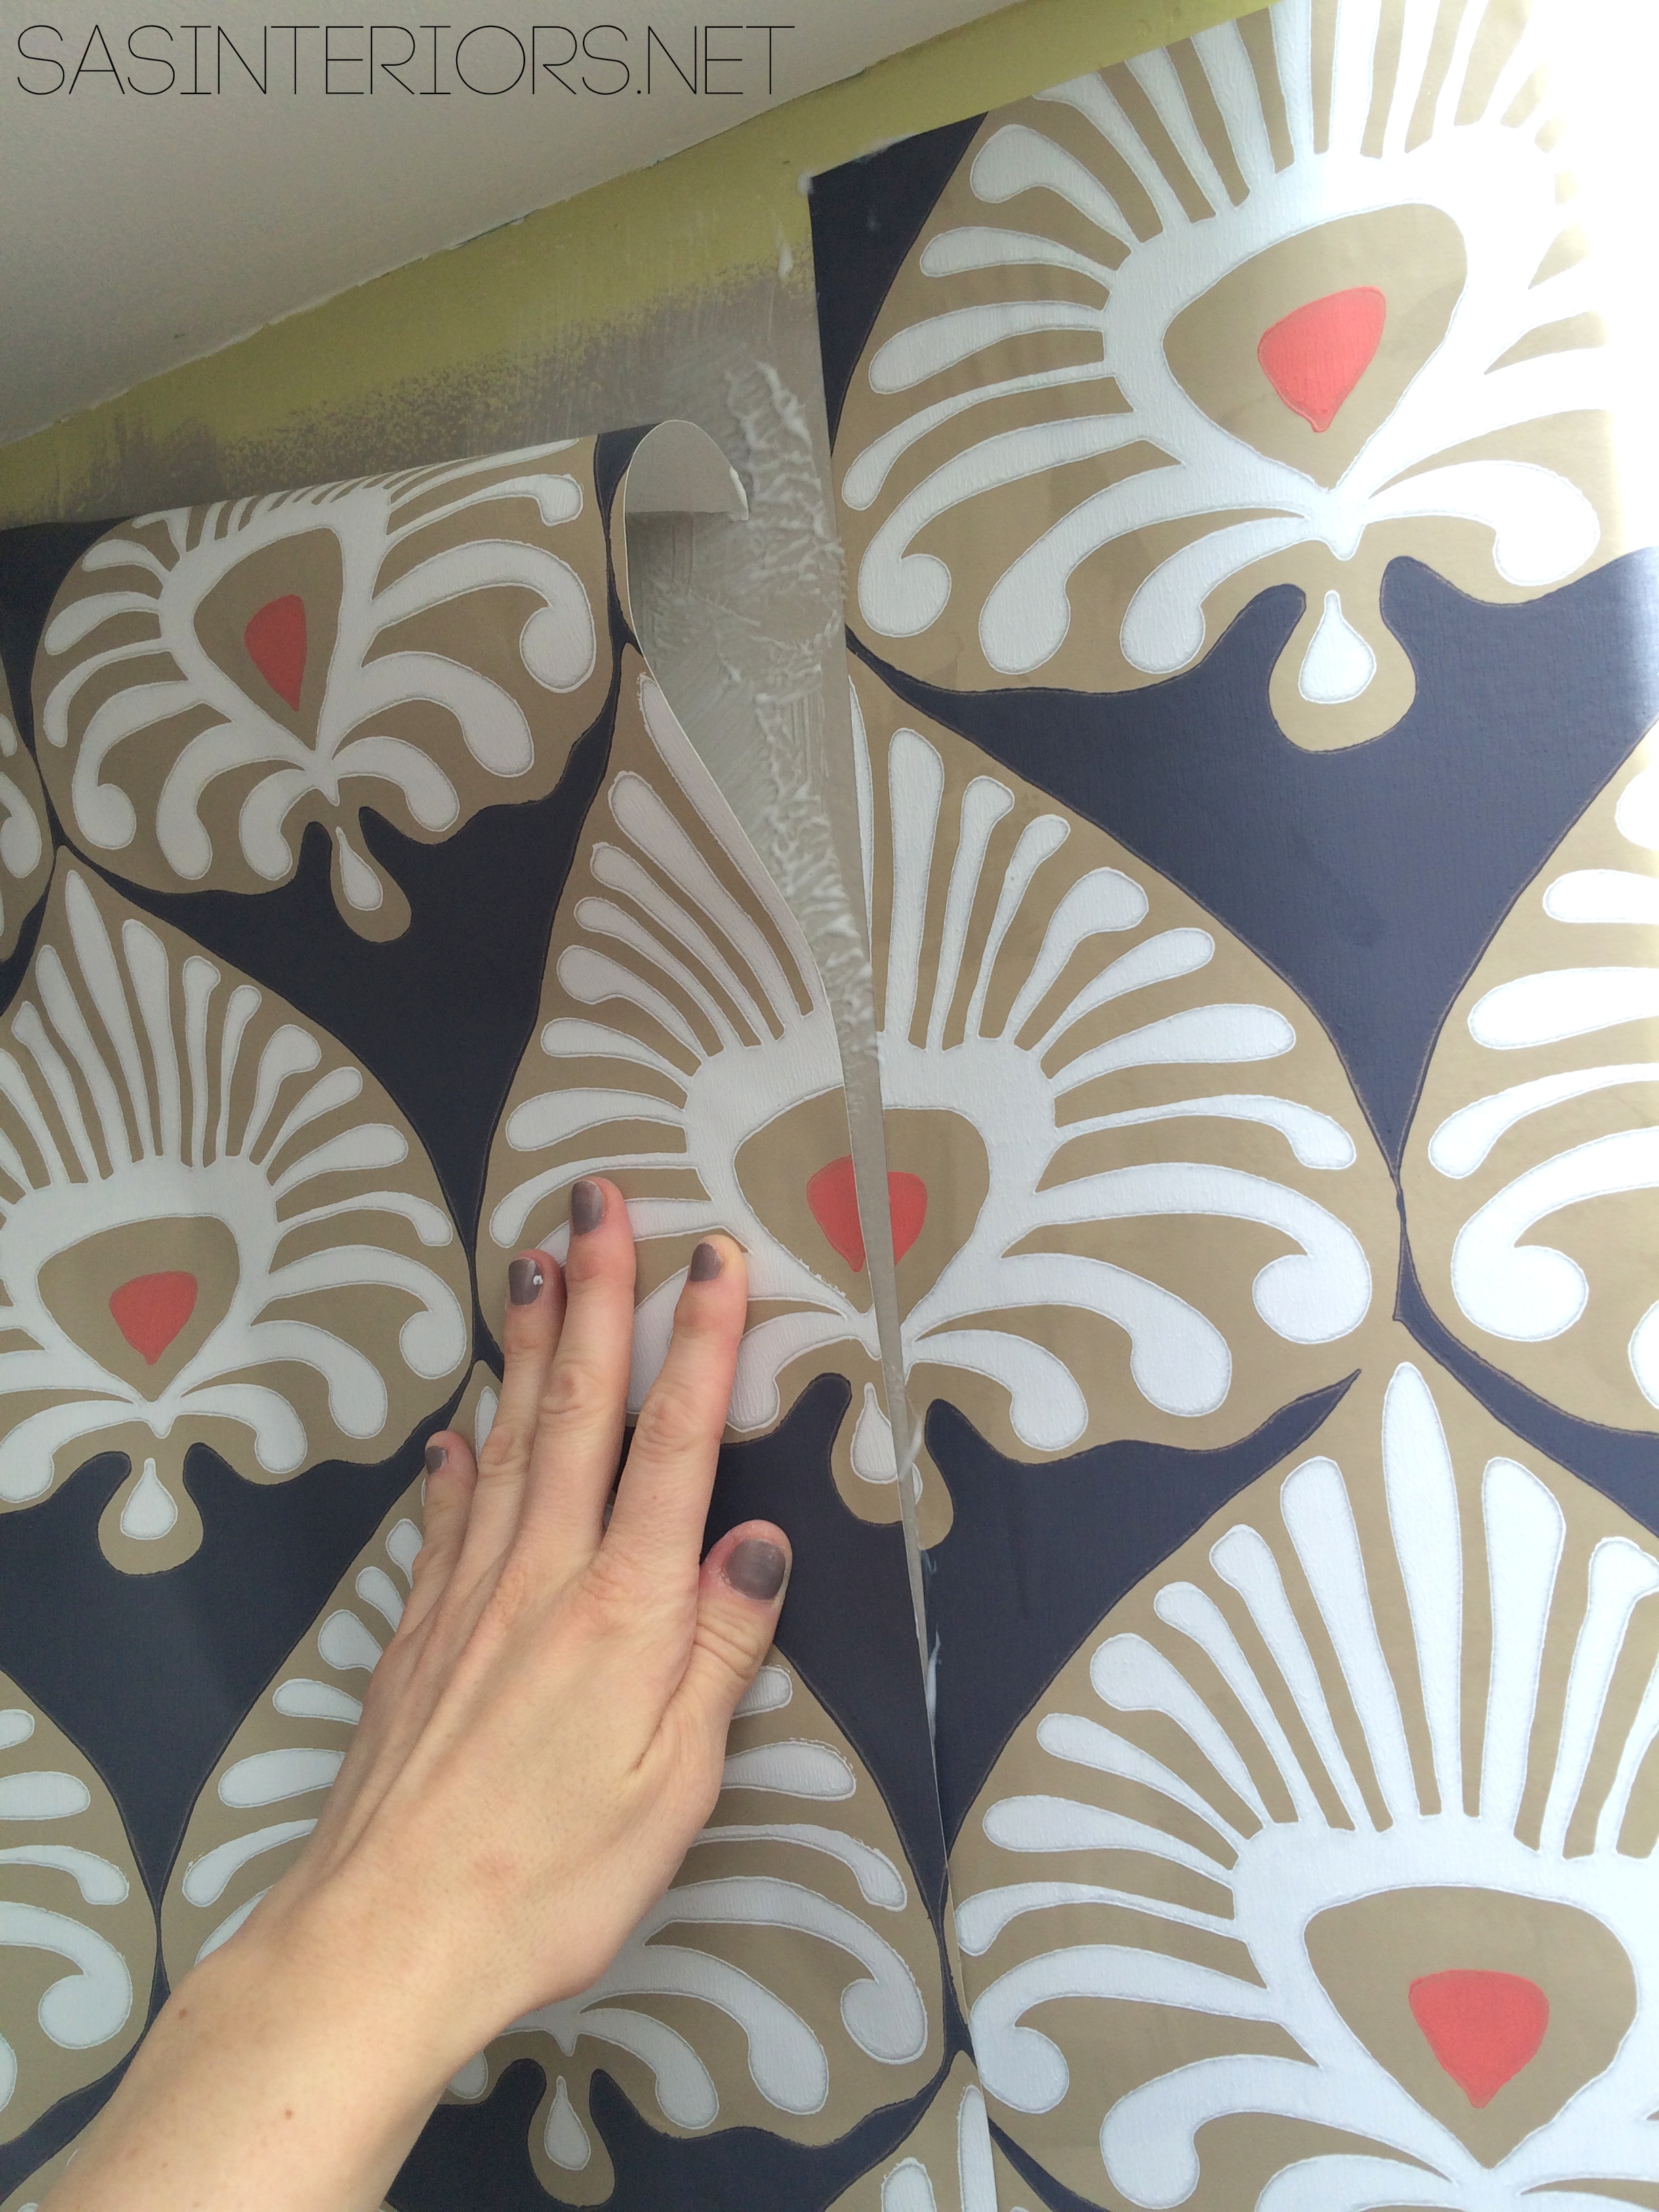
Then I let the paper sit about 3 minutes (as the instructions stated) and aligned it on the wall.

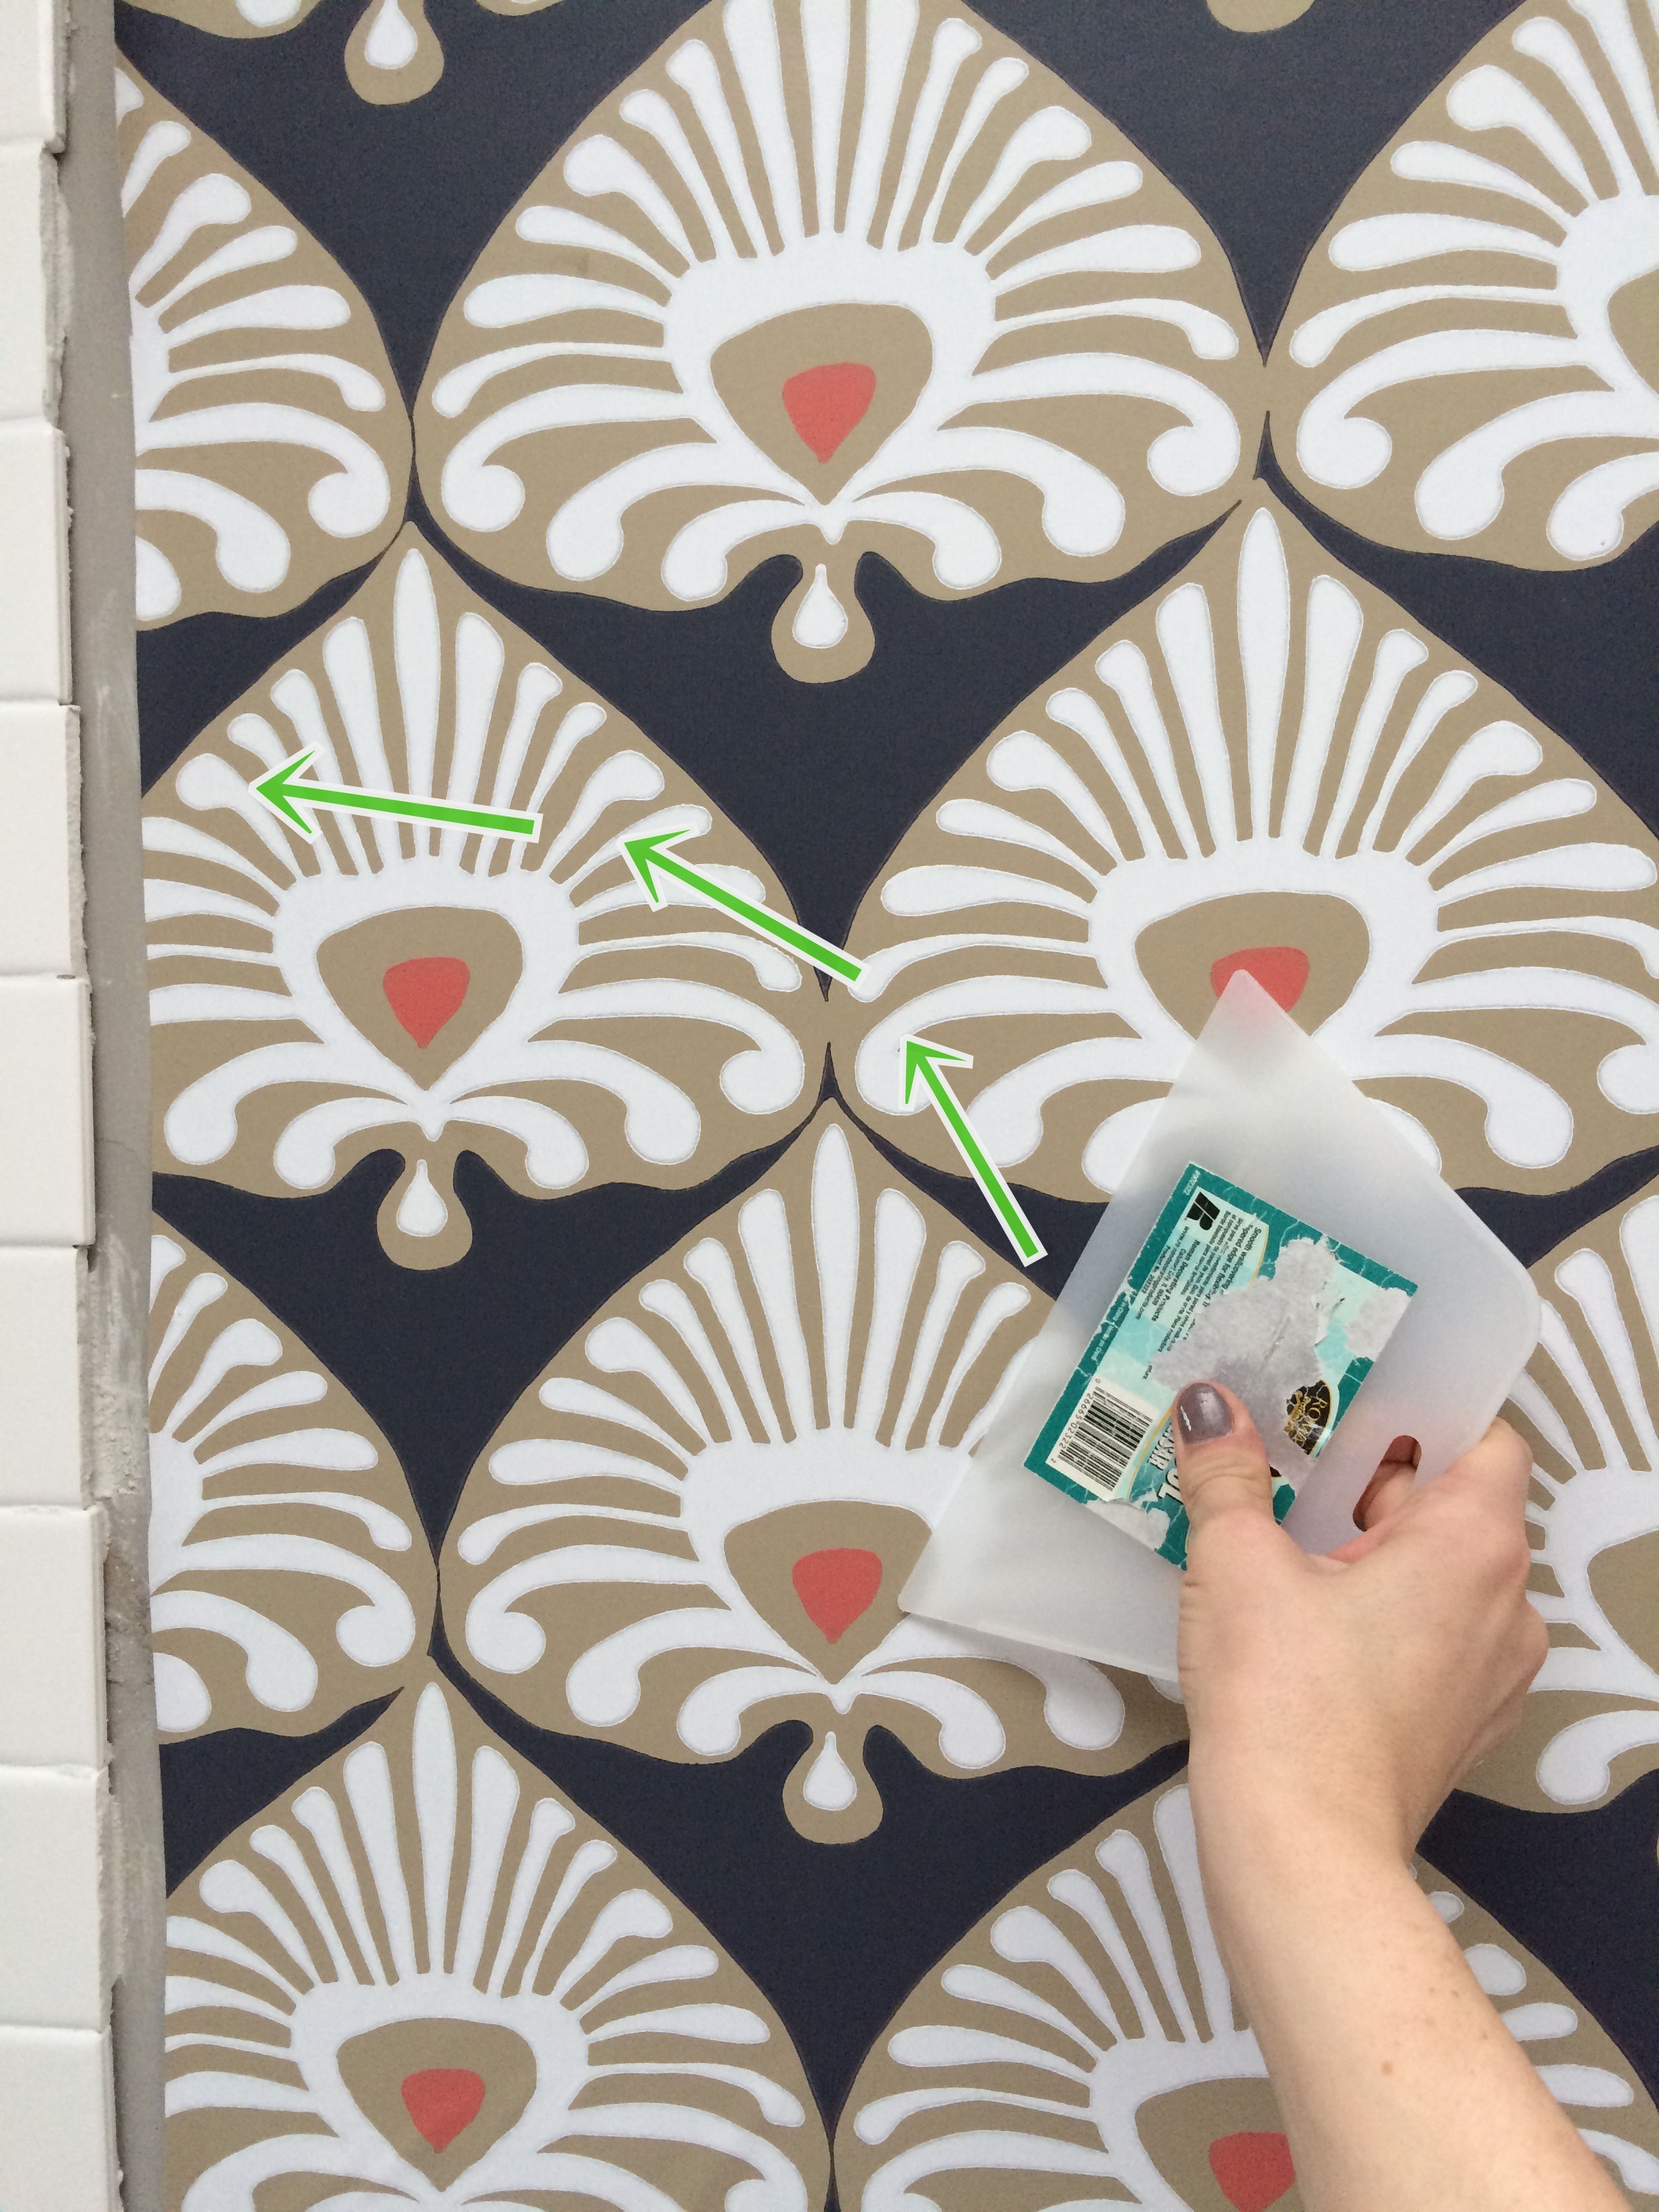
Once I positioned it where I thought it look best, I used a long level (sorry no picture) and made sure it was vertically plumb. Once I had the paper in the right place, I used the smoothing tool to smooth out the paper from air bubbles and air pockets. It’s best to start in the center of the paper and work your way out to the edges.
Once the paper was smooth, it was time to move on to the next piece. I cut another piece of wallpaper length and then aligned it edge to edge with the previous piece. Never overlap the wallpaper.

Once it was smoothed out, I took a lint-free rag and cleaned off the paste from the seams. One reason that I love this paper is that is easily cleanable.

This damask looking wallpaper was really nice to work with and the quality was very good, but I was slightly unhappy with the design repeat when I went to align the edges. The design didn’t match exactly like it should and I was bummed about it. I tried my best to line up the design to make it look right. Thankfully the pattern is so busy that you don’t really notice.

Once I had the 2 sheets up, I was feeling really confident in my work. I continued around the room and then I came to my first obstacle… the corner and the door.
For this area, I used the old method of applying the paste to the wall because I was afraid if I didn’t, the paste would get on everything – door, tile, etc. To start, I measured and trimmed the paper leaving lots of extra on the edges. Then I put it in place and trimmed again until the size of the paper fit the exact space.

I had a few other obstacles to overcome like the outlets, the switches, and the light. I typically use a scissor or a sharp blade to cut the paper.

Before I knew it, a few hours later, all the walls were covered and the wallpapering process was complete.

A recap of the before & in-progress now.

Whats up next?
The moulding at the top + the tile trim around the shower & walls…

As you can see, this new bathroom space is surely NOT going to be boring. I can’t wait to finish it up and finally use it. Even though there are lots of little things still to do, I am thrilled with the direction that it is taking.
The installation of this dynamic wallpaper took about 5 hours on one day
Follow along on this bathroom remodel with these other posts
Plan of Action {Day 1}
Demo: Removal + Installation of the Tub & Walls {Day 2-4}
How-To Tile + Grout the Bathroom Walls {Day 5-16}
Installing Wallpaper {Day 17}
Adding a Tile Accent Border {Day 18}
Creating a Tiled Niche {Day 19 + 20}
Coming up (still to do)
Details: Moulding, Lighting, Accessories
Finishing Touches
Bathroom Remodel Reveal
{Day 17} Wallpaper – Complete! 13 more days to go…
This post is sponsored by Lowe’s, but all thoughts and opinions are 100% my own. I am thrilled (and a bit nervous) about tackling this project, but very excited to be partnering with Lowe’s on creating an entirely new bathroom space. I’d love for you to follow along on this new project!
Check out more of my posts on wallpapering