In less than a month, we’ll be living in our home 6 years. 6 years. The fastest 6 of my life. More than double the time of any place we’ve lived before.
We moved here as a family of 3 and now we’re a family of 5 + a cute white little kitty. Life has changed so much and as much as our family + lives have evolved, so has the house we stepped in to – and almost walked away from – 6 years ago.
The shell that was a vacant house, has been transformed into a home. A chaotic, crazy, bustling HOME. Every surface has been touched. Walls has been repainted + wallpapered (some a few times over). Floors have been recarpeted + retiled. And most importantly our home is now adorned with key elements that show who we are, what we love, and where we’ve been. Our mark has been made.

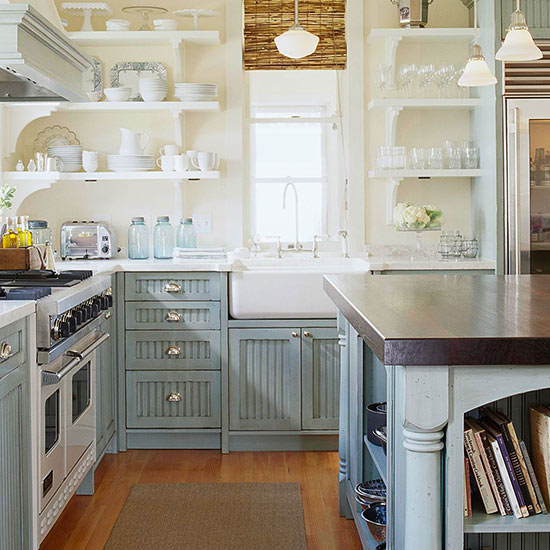
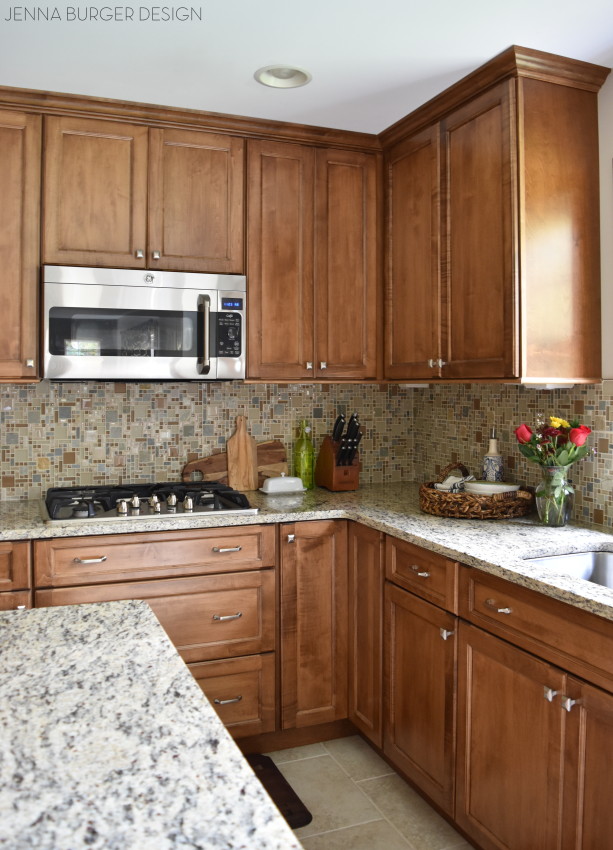
The kitchen, the hub of our new house in 2010 seemed fine. The cabinets were in fine shape, the counters weren’t pretty but functional. A few months in, we changed the hardware + the sink, and called it done.
Until… 2 years later and I was itching to freshen it up. A $300 kitchen revamp + new appliances left us happy campers. We were in love. The do-it-yourself upgrade on a budget was perfect. At that moment it reflected us.
>>> TO SEE THE DIY KITCHEN MAKEOVER CLICK HERE
In the 3 year time gap from then to now, our lives have turned upside down – all for the good! When we bought our home, we had just came off a really rough patch with the economy affecting our jobs.
Thankfully things have changed a lot…
Fast forward… the Misters job has been stable & growing + I’ve been able to continue expanding my blog + business – designing LOTS of other peoples homes. Life has been good. Real good. And truly grateful. And the time had come for US to get the kitchen of our dreams. It was finally our turn. Surreal, but true. I wanted – and needed – a gourmet kitchen of my own. And here it is. Finally complete and still pinching myself with excitement.
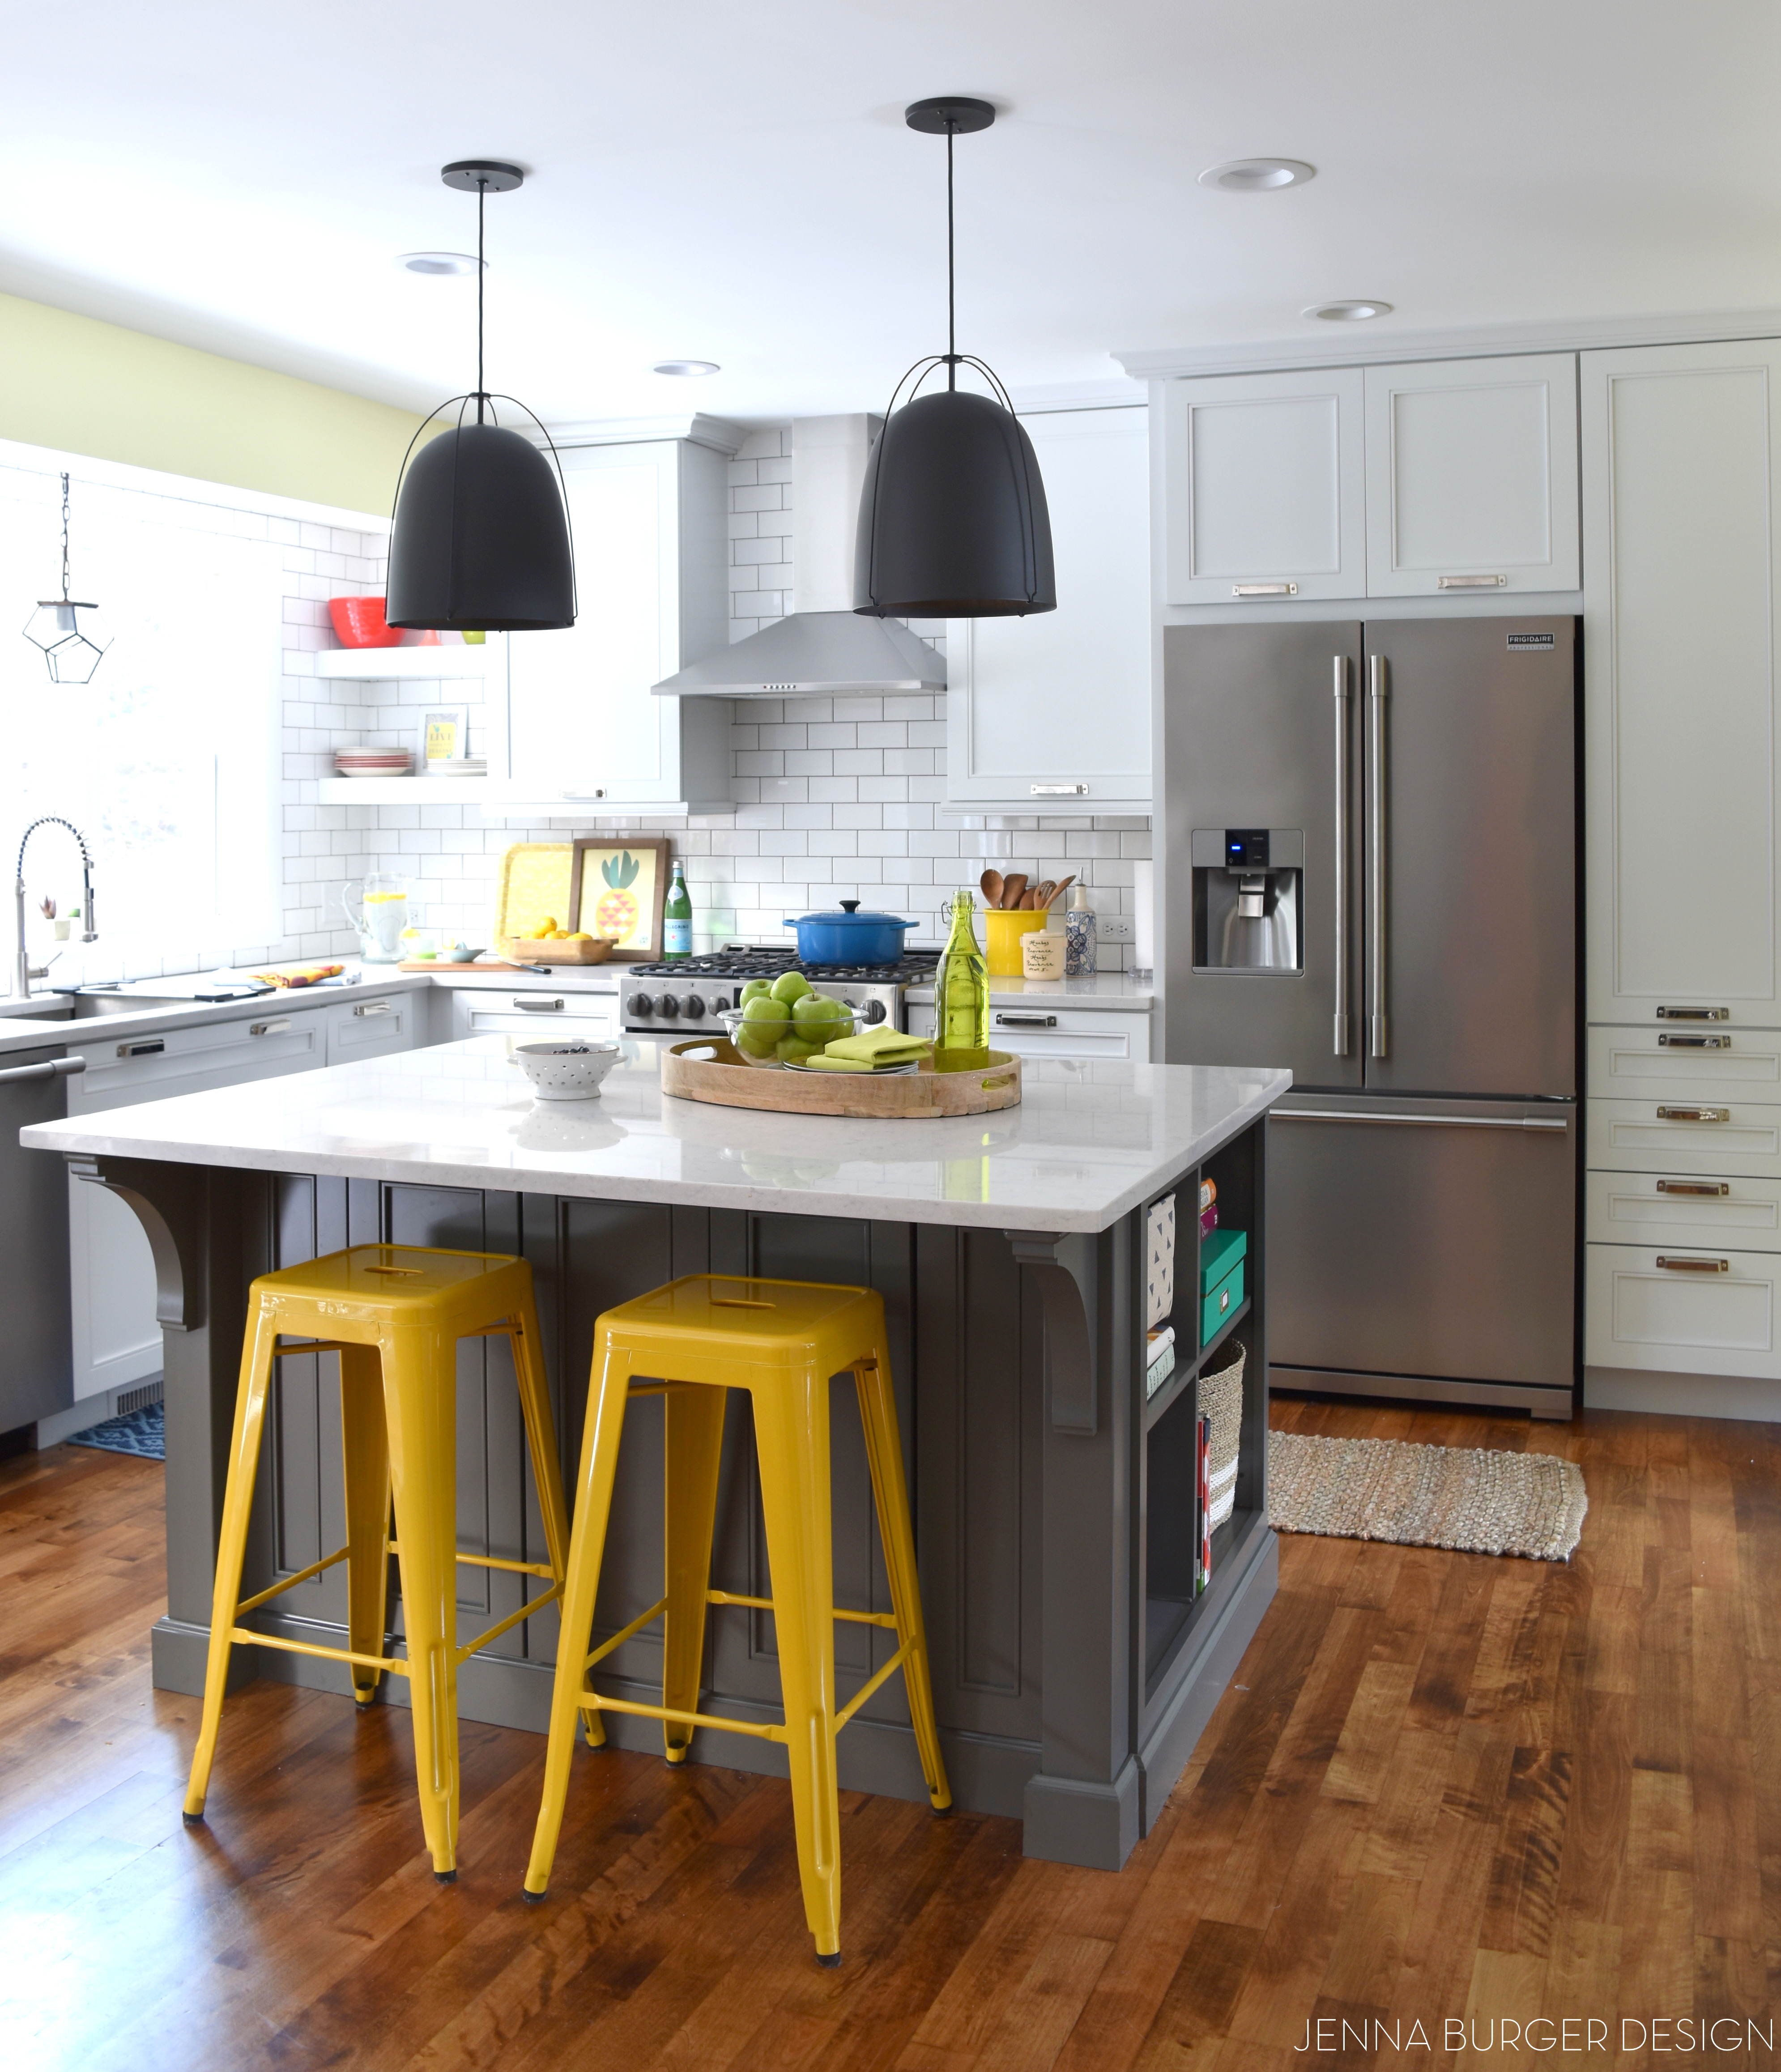
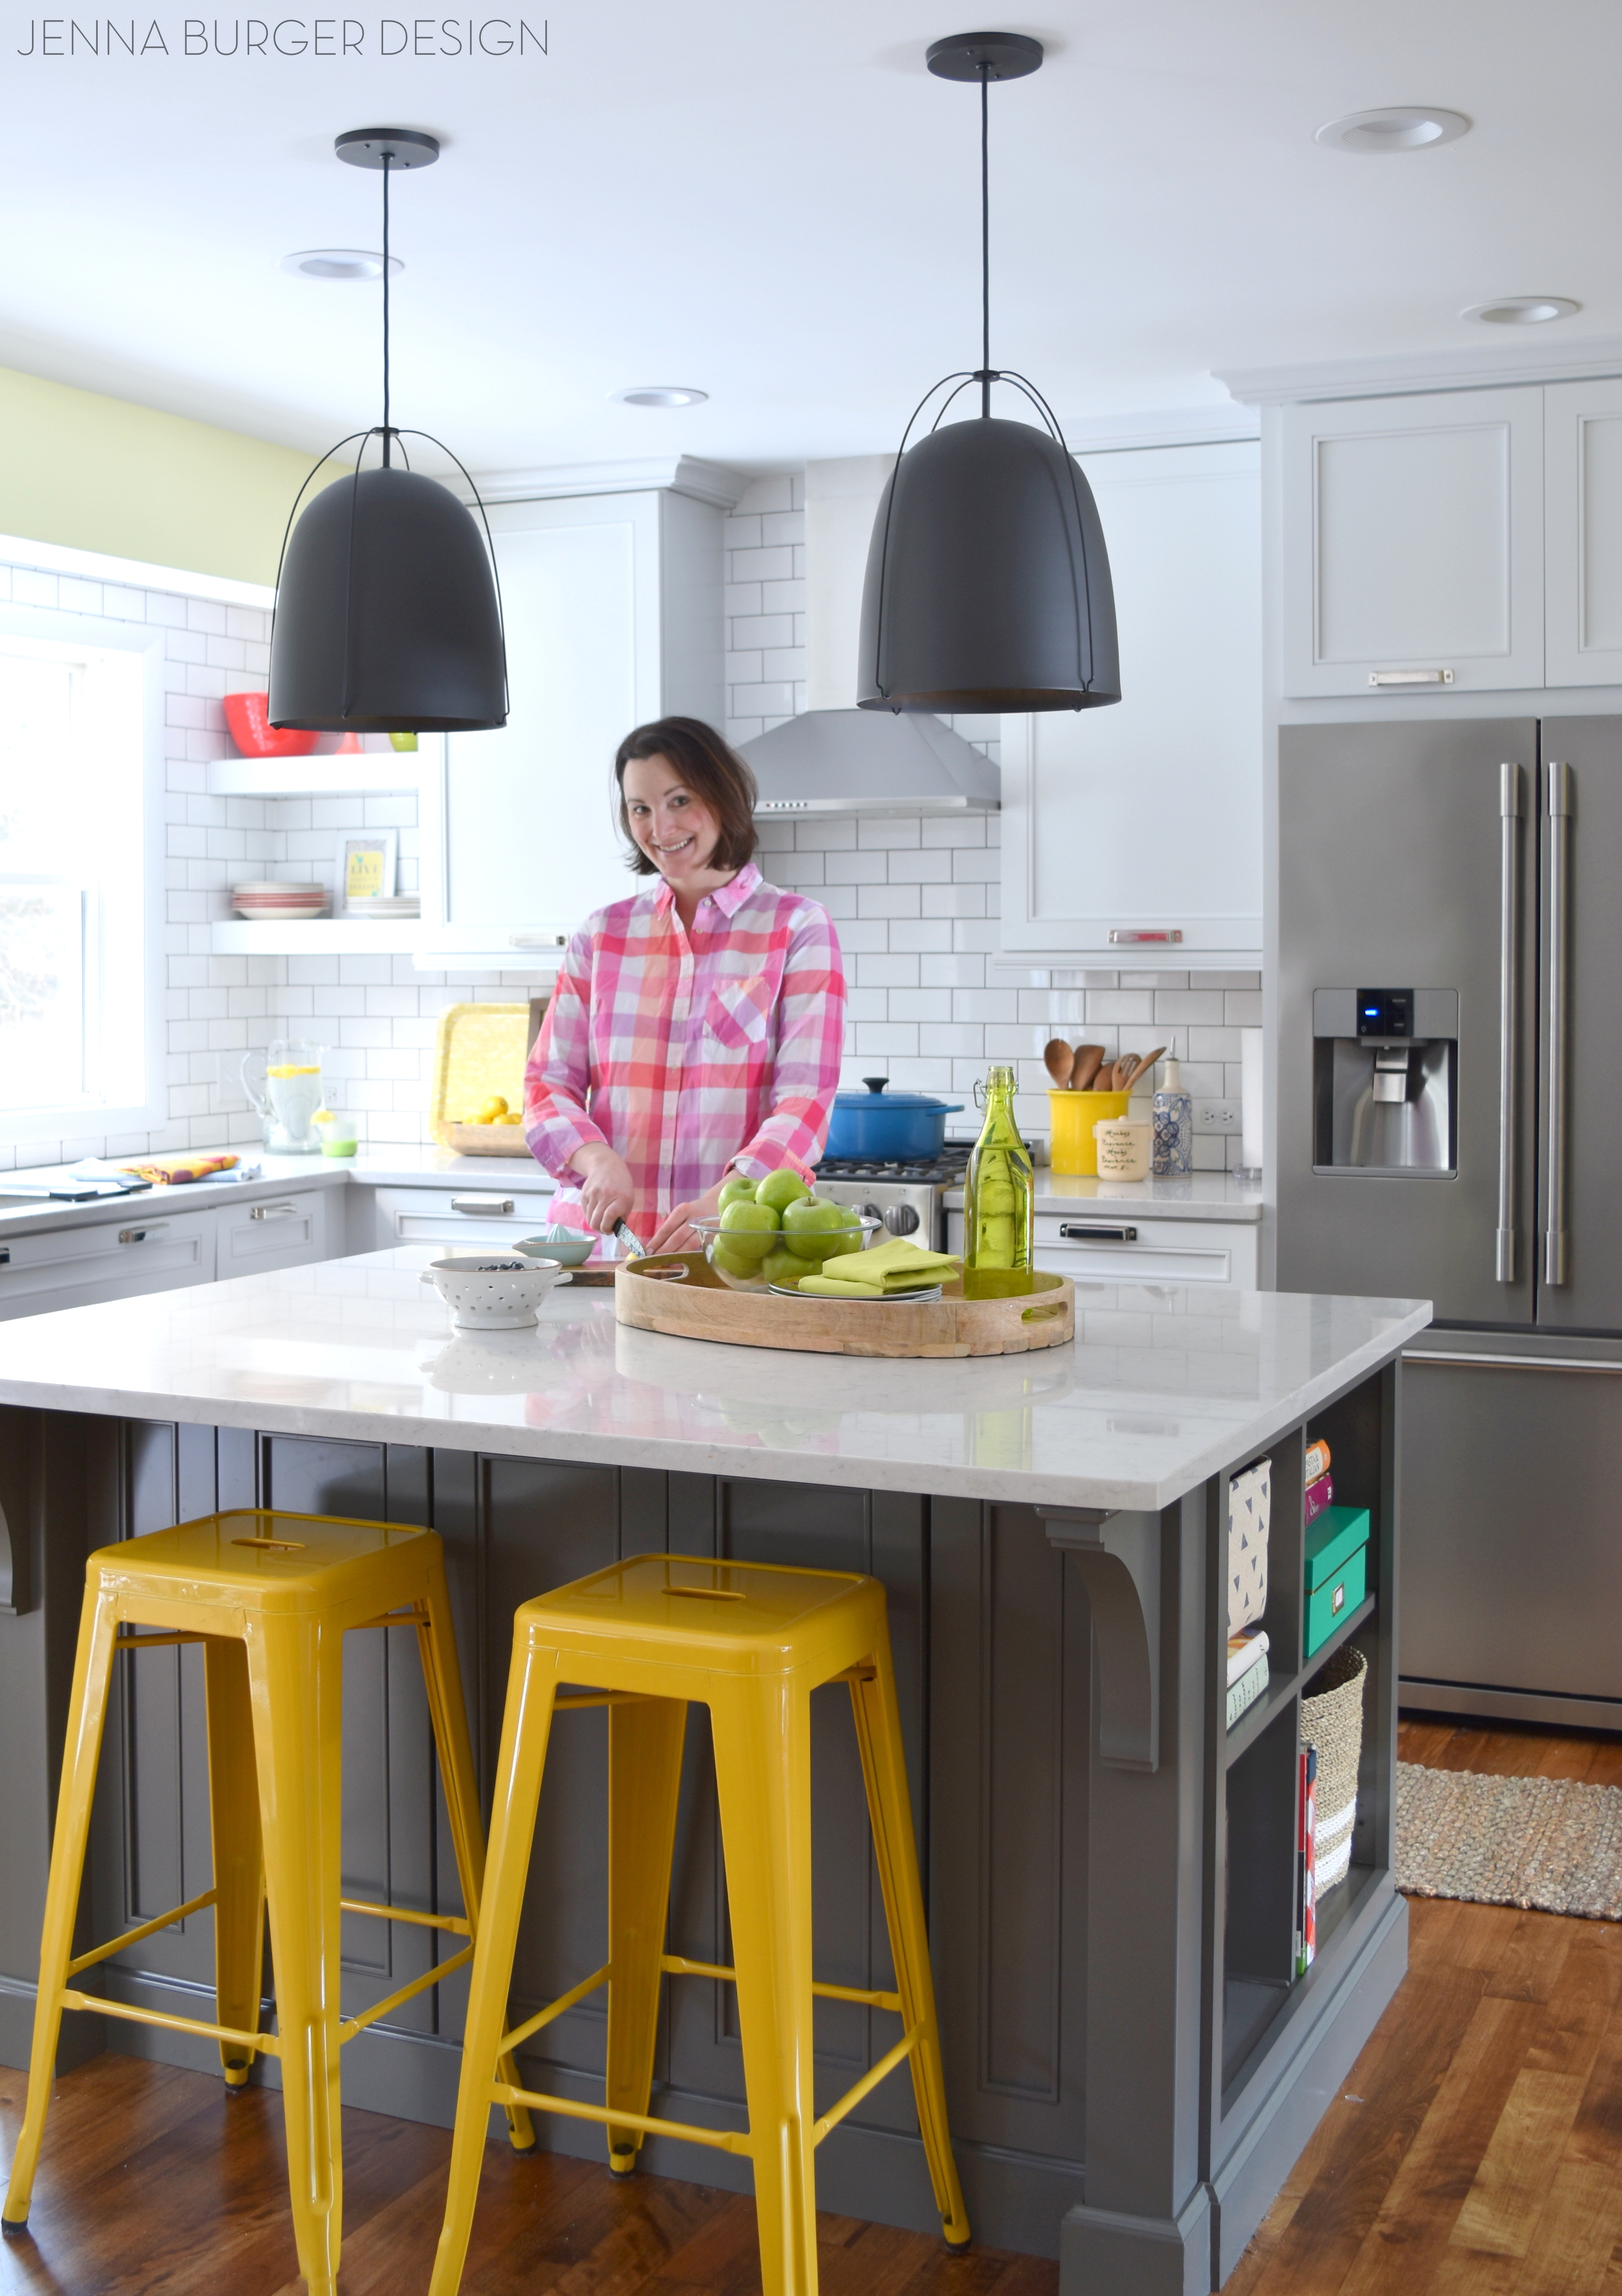
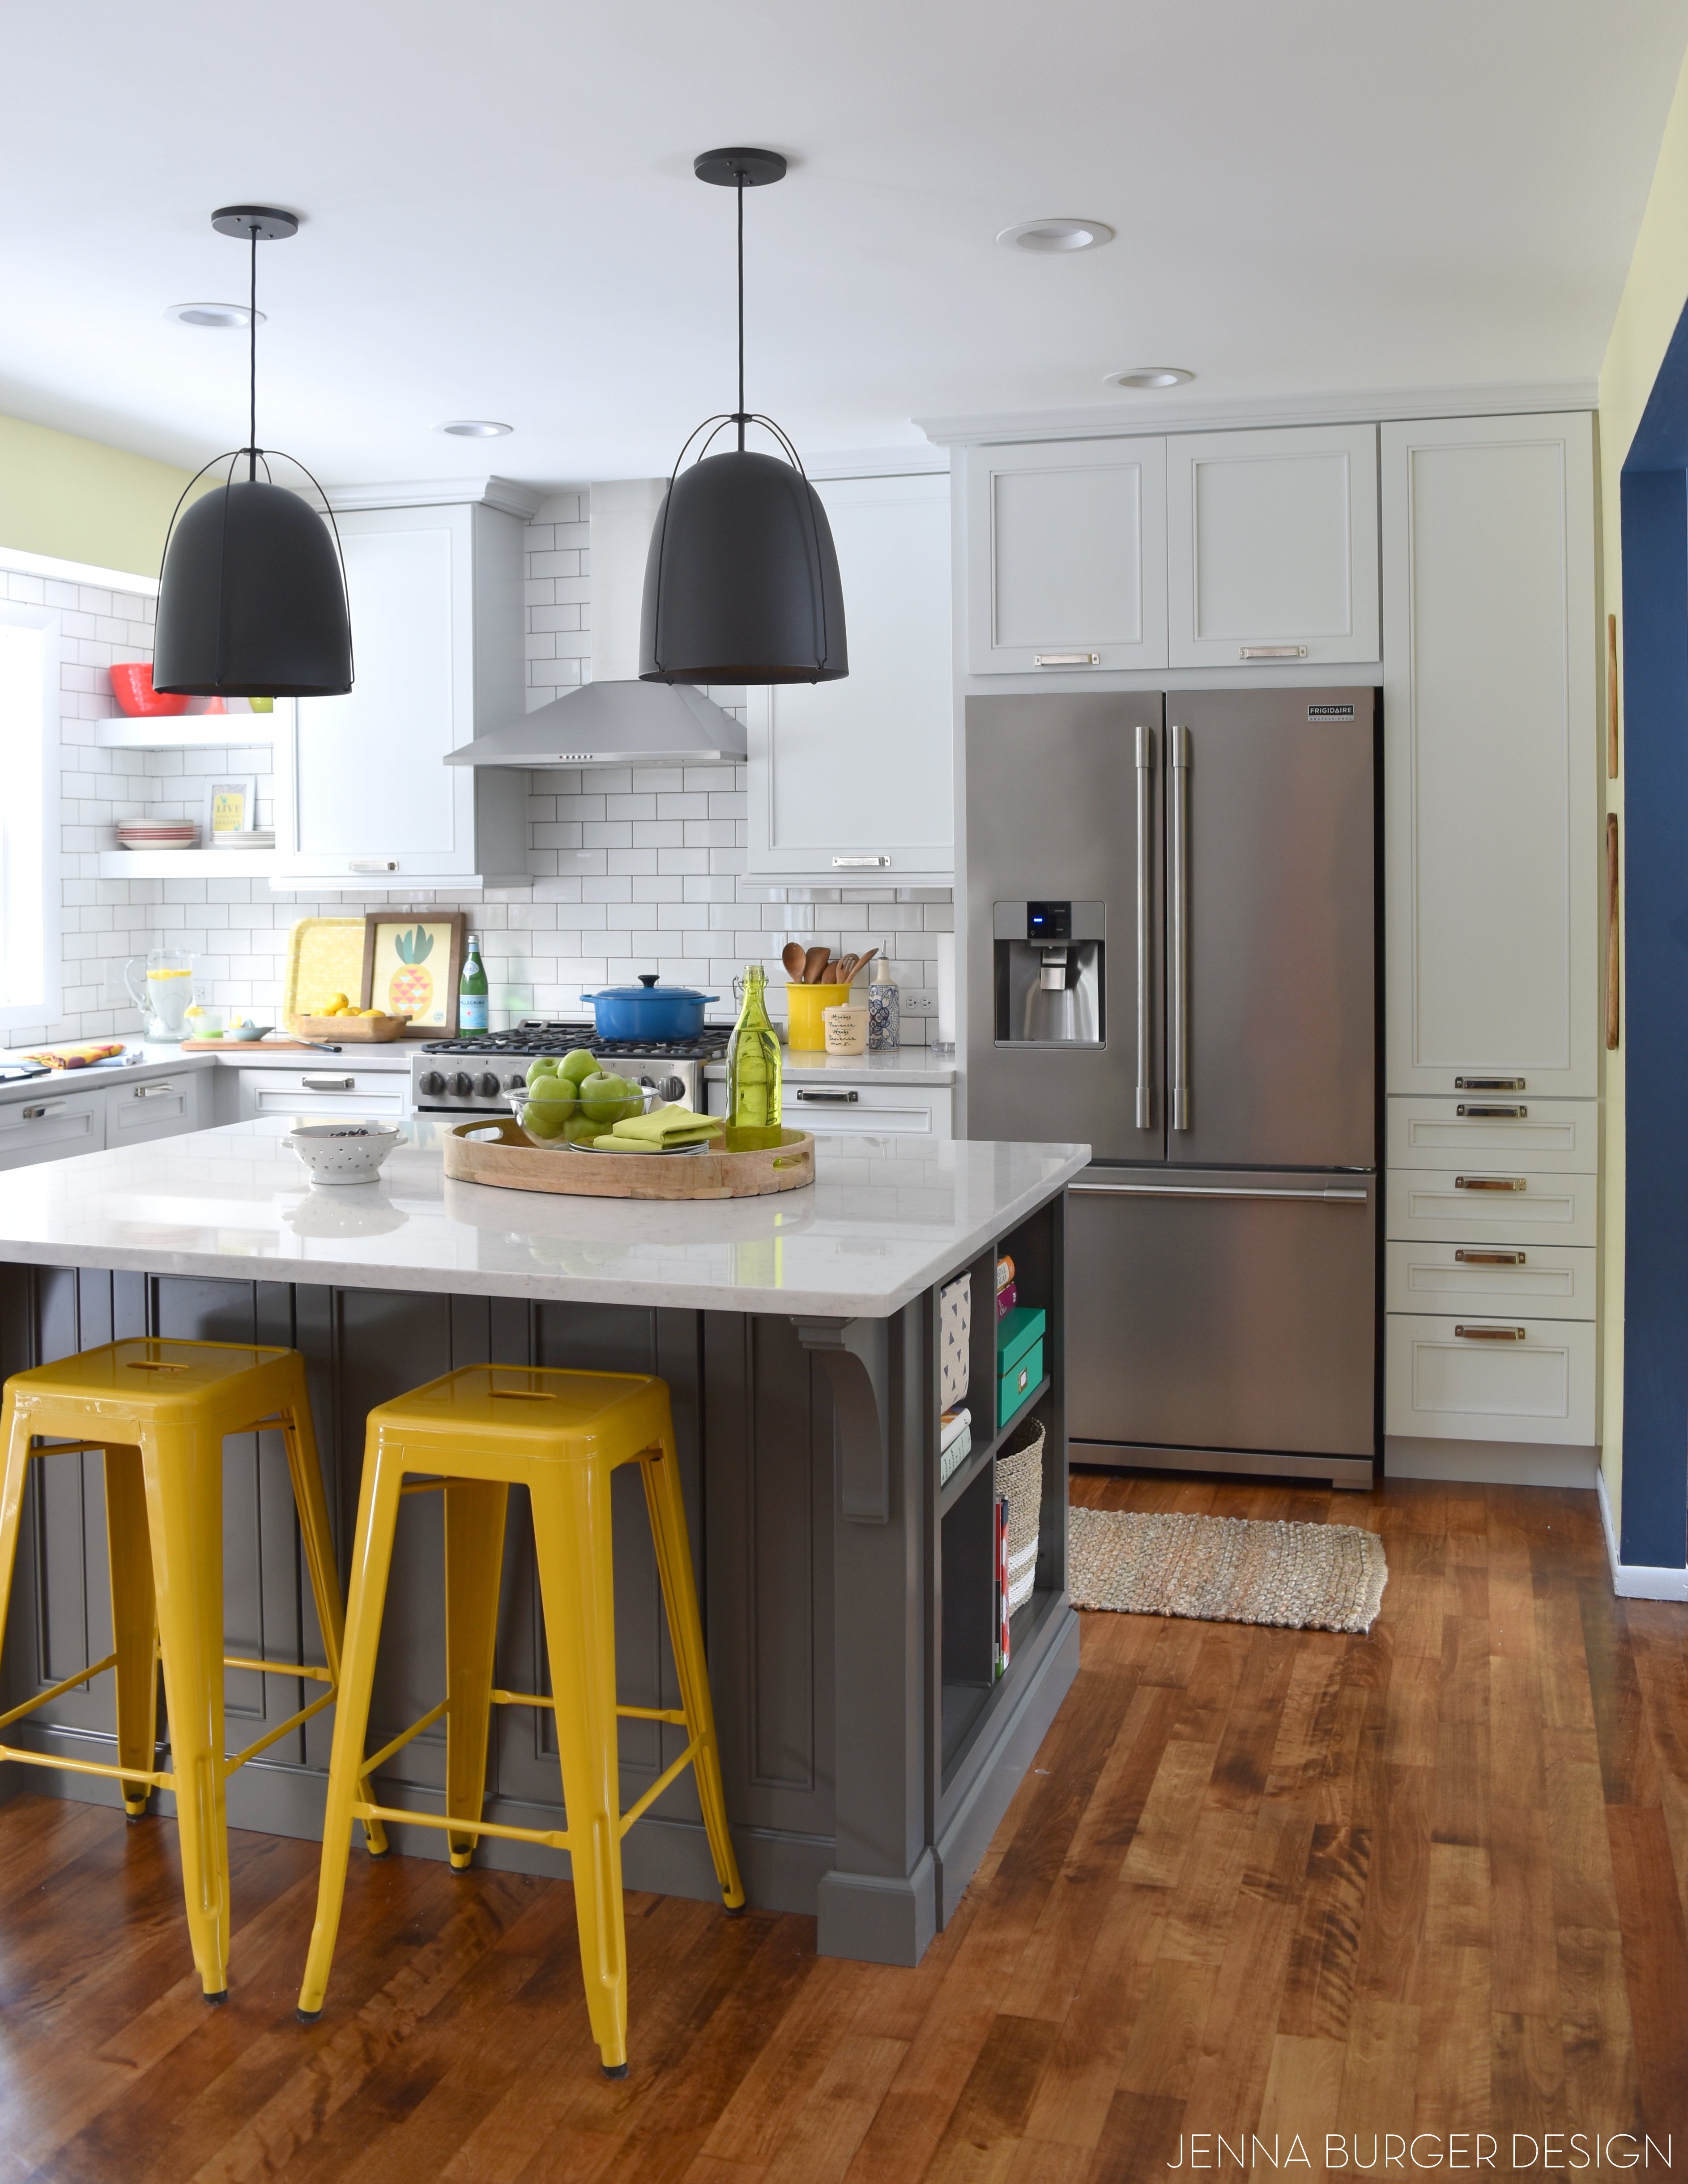
WELCOME to our kitchen
This kitchen could not have been possible without the assistance + backing from my friends at Lowe’s, Kraftmaid, and Frigidaire. I’ve collaborated with Lowe’s countless times over the years and I am blessed that they never ask questions and always believe. I strive to execute outside-of-the-box creations which in turn inspires you, my amazing & dedicated readers. That’s what I’m here for. That’s what I do… Inspire. And that’s what I hope the take away is with the new kitchen space I designed.
Enough chit-chat, come on in…

Where to begin, is the question…
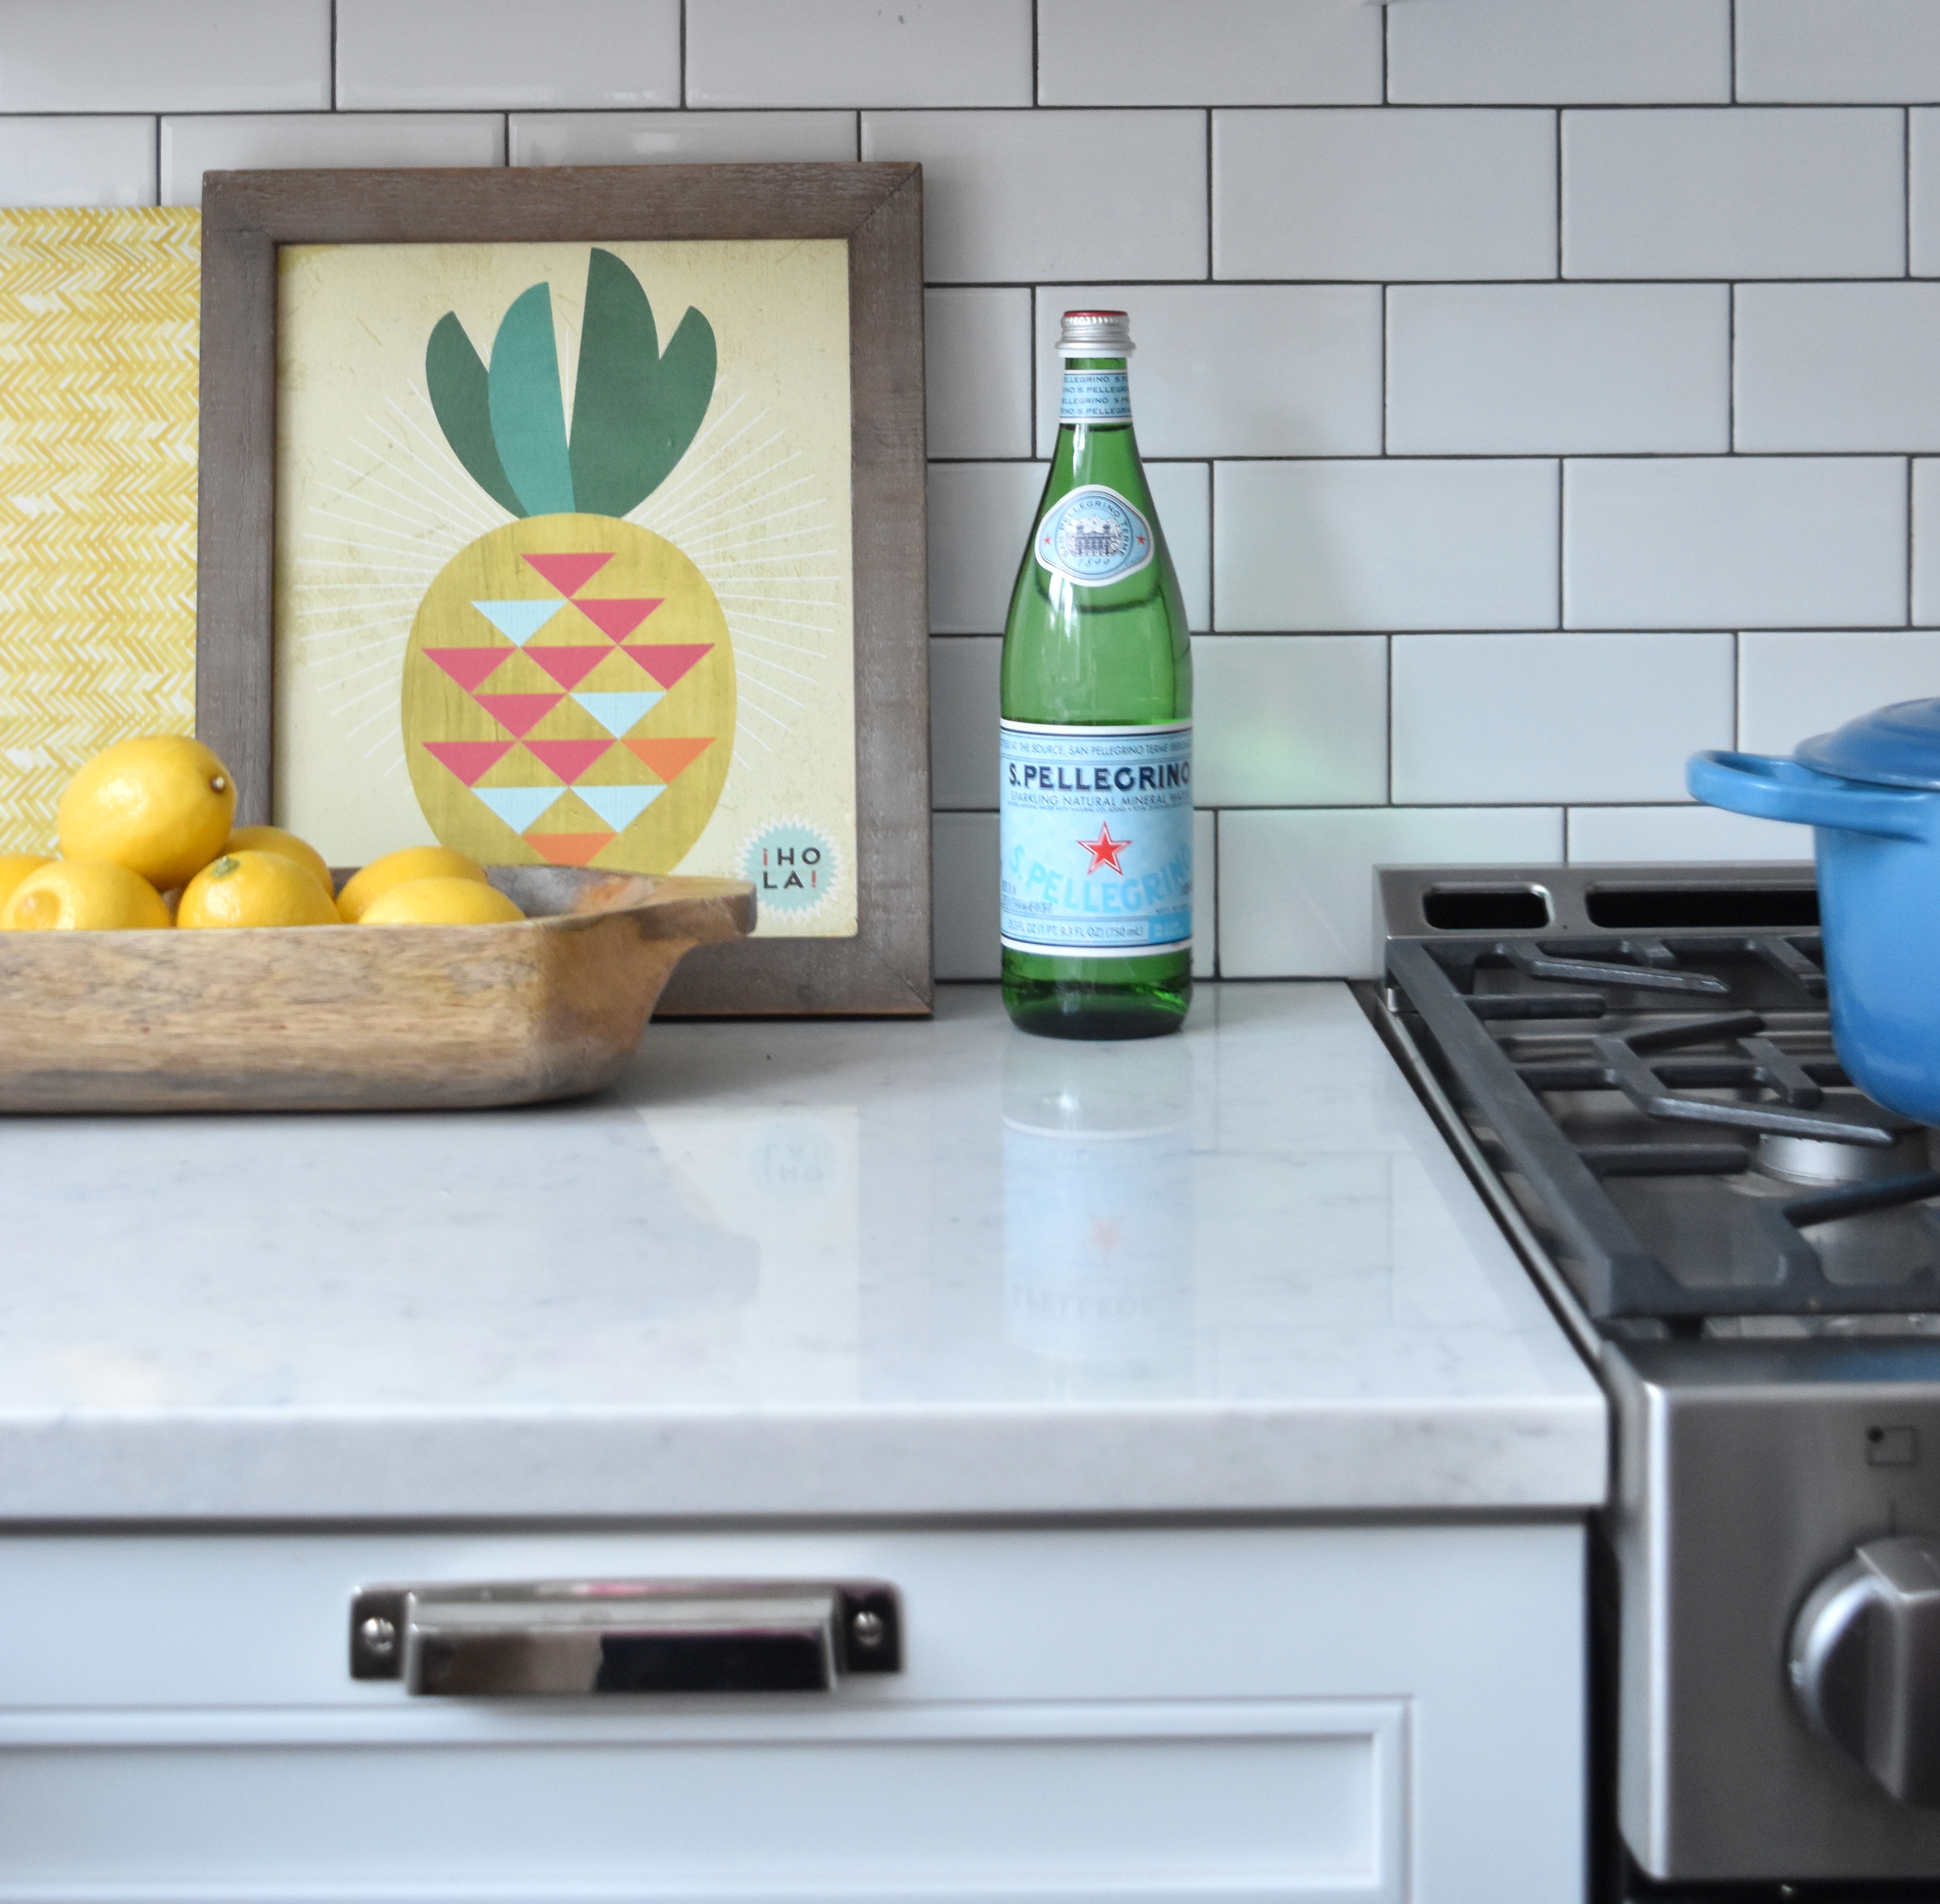
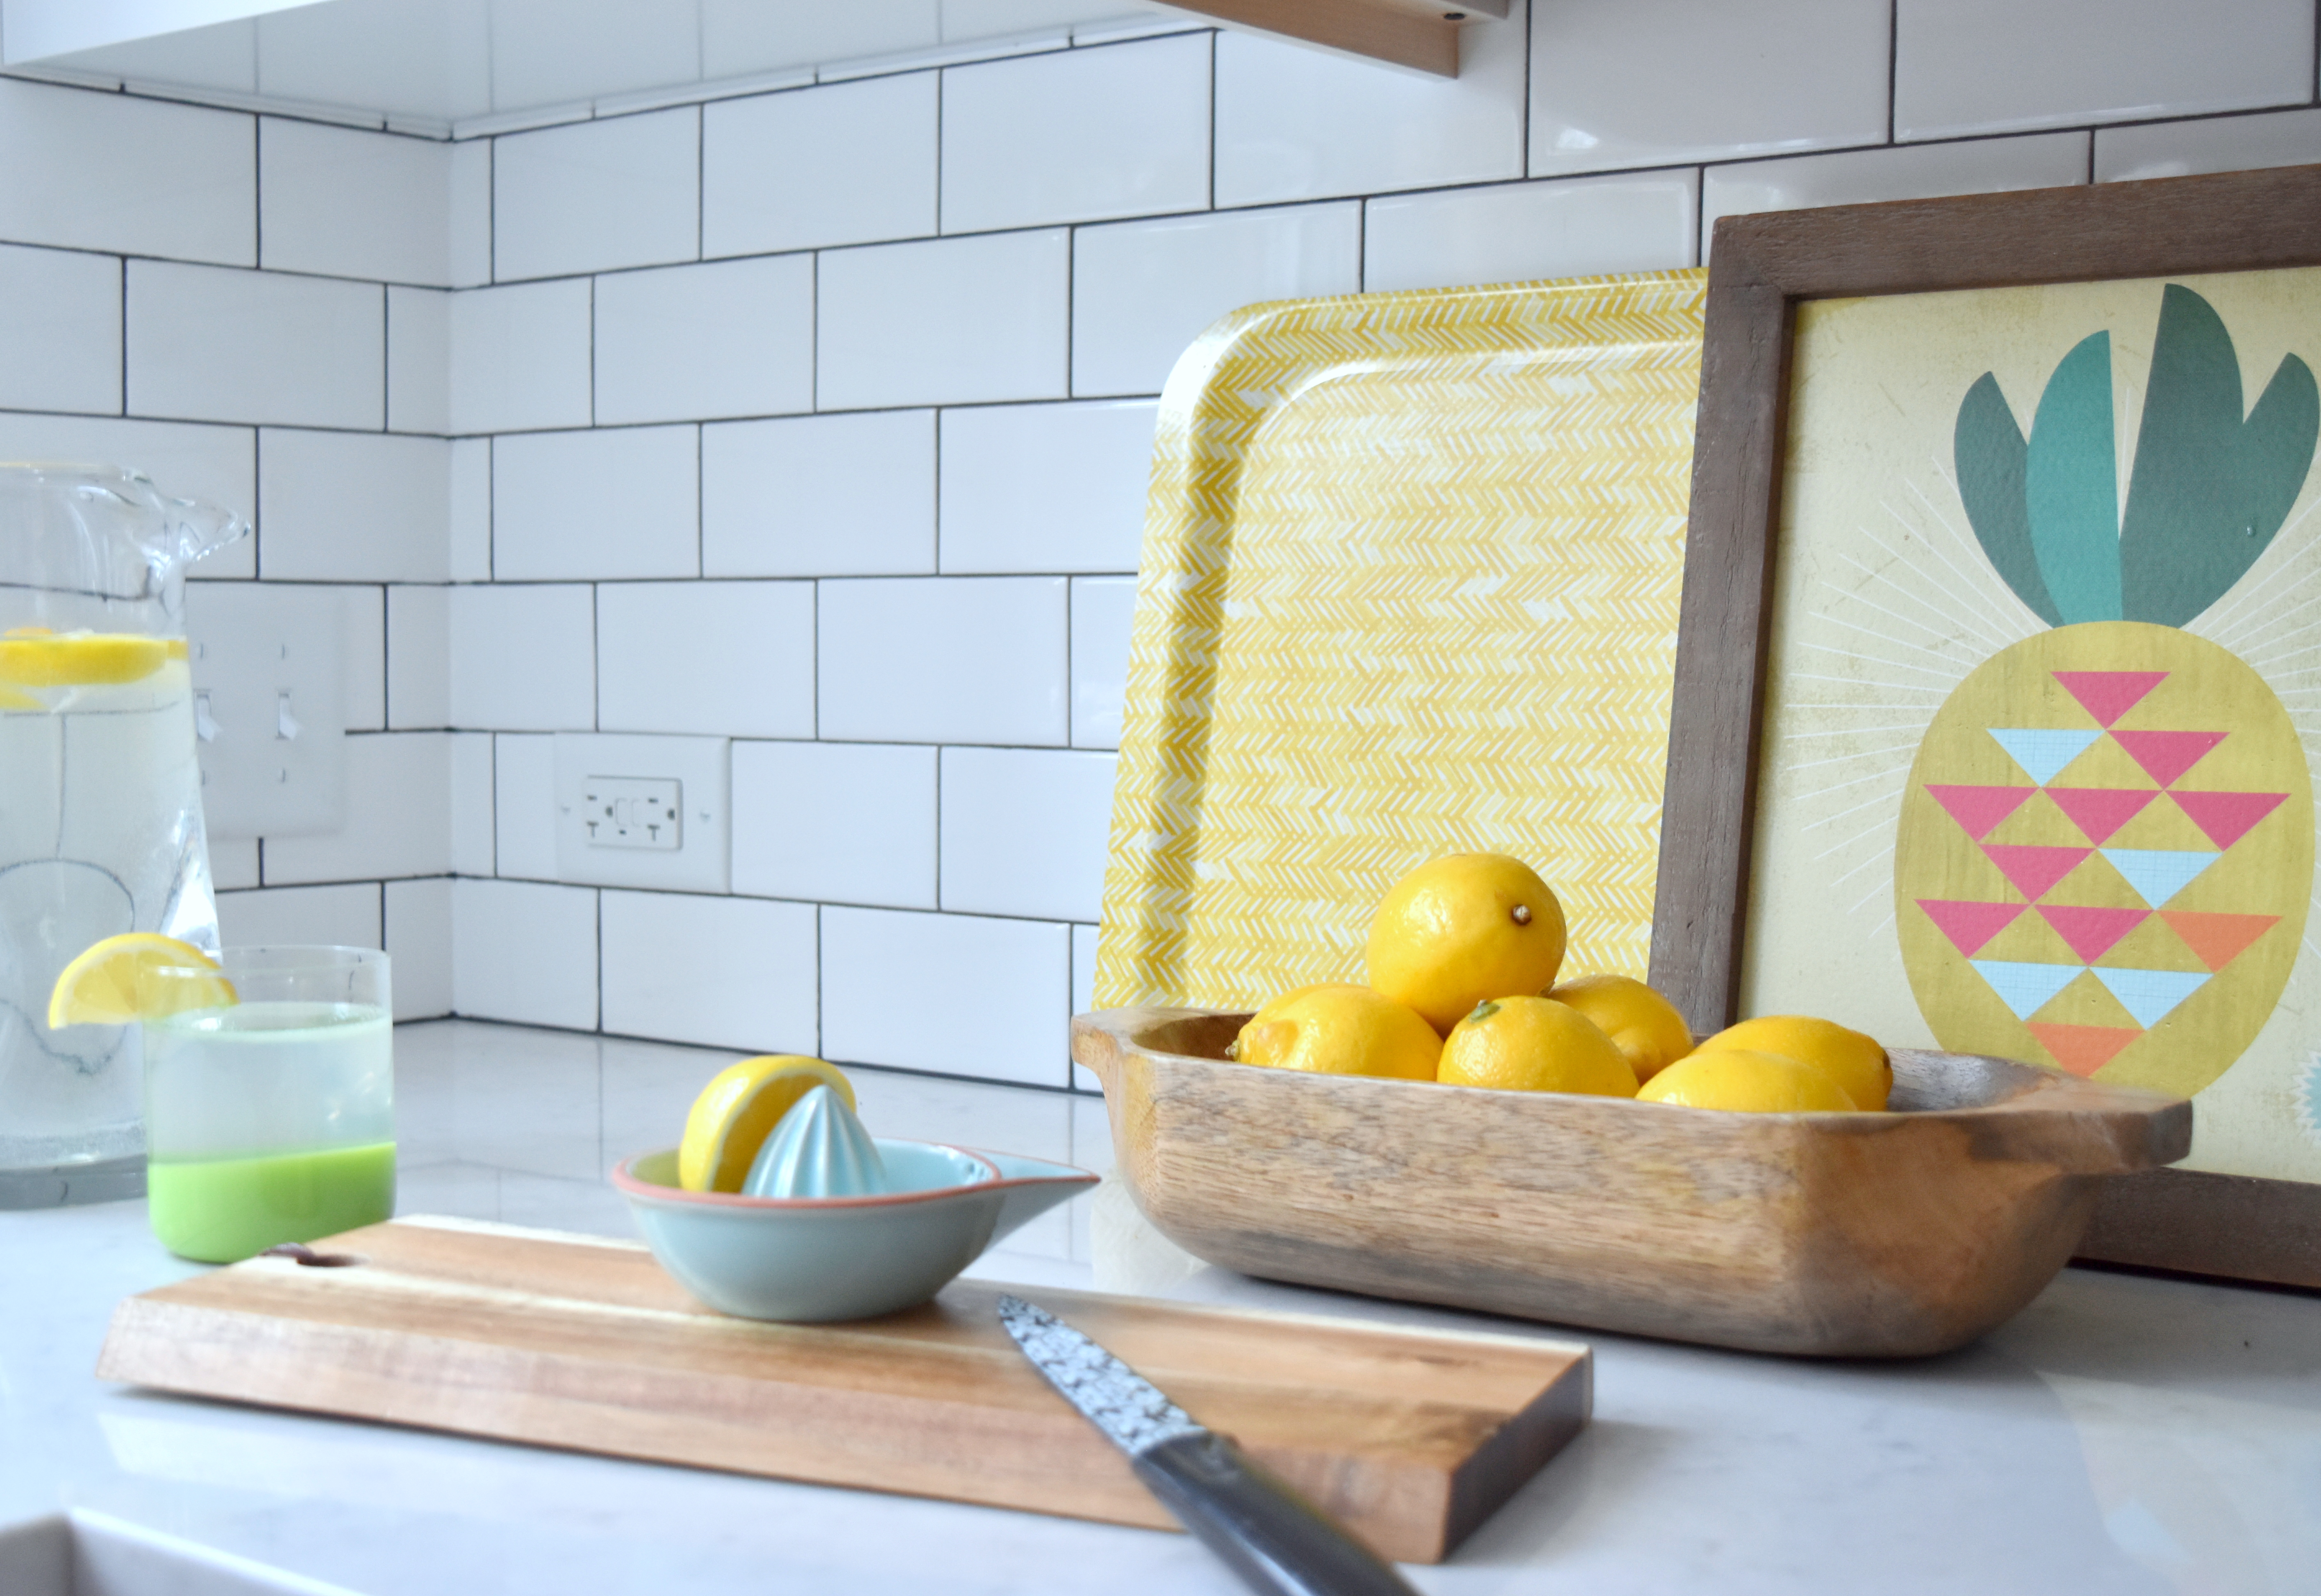
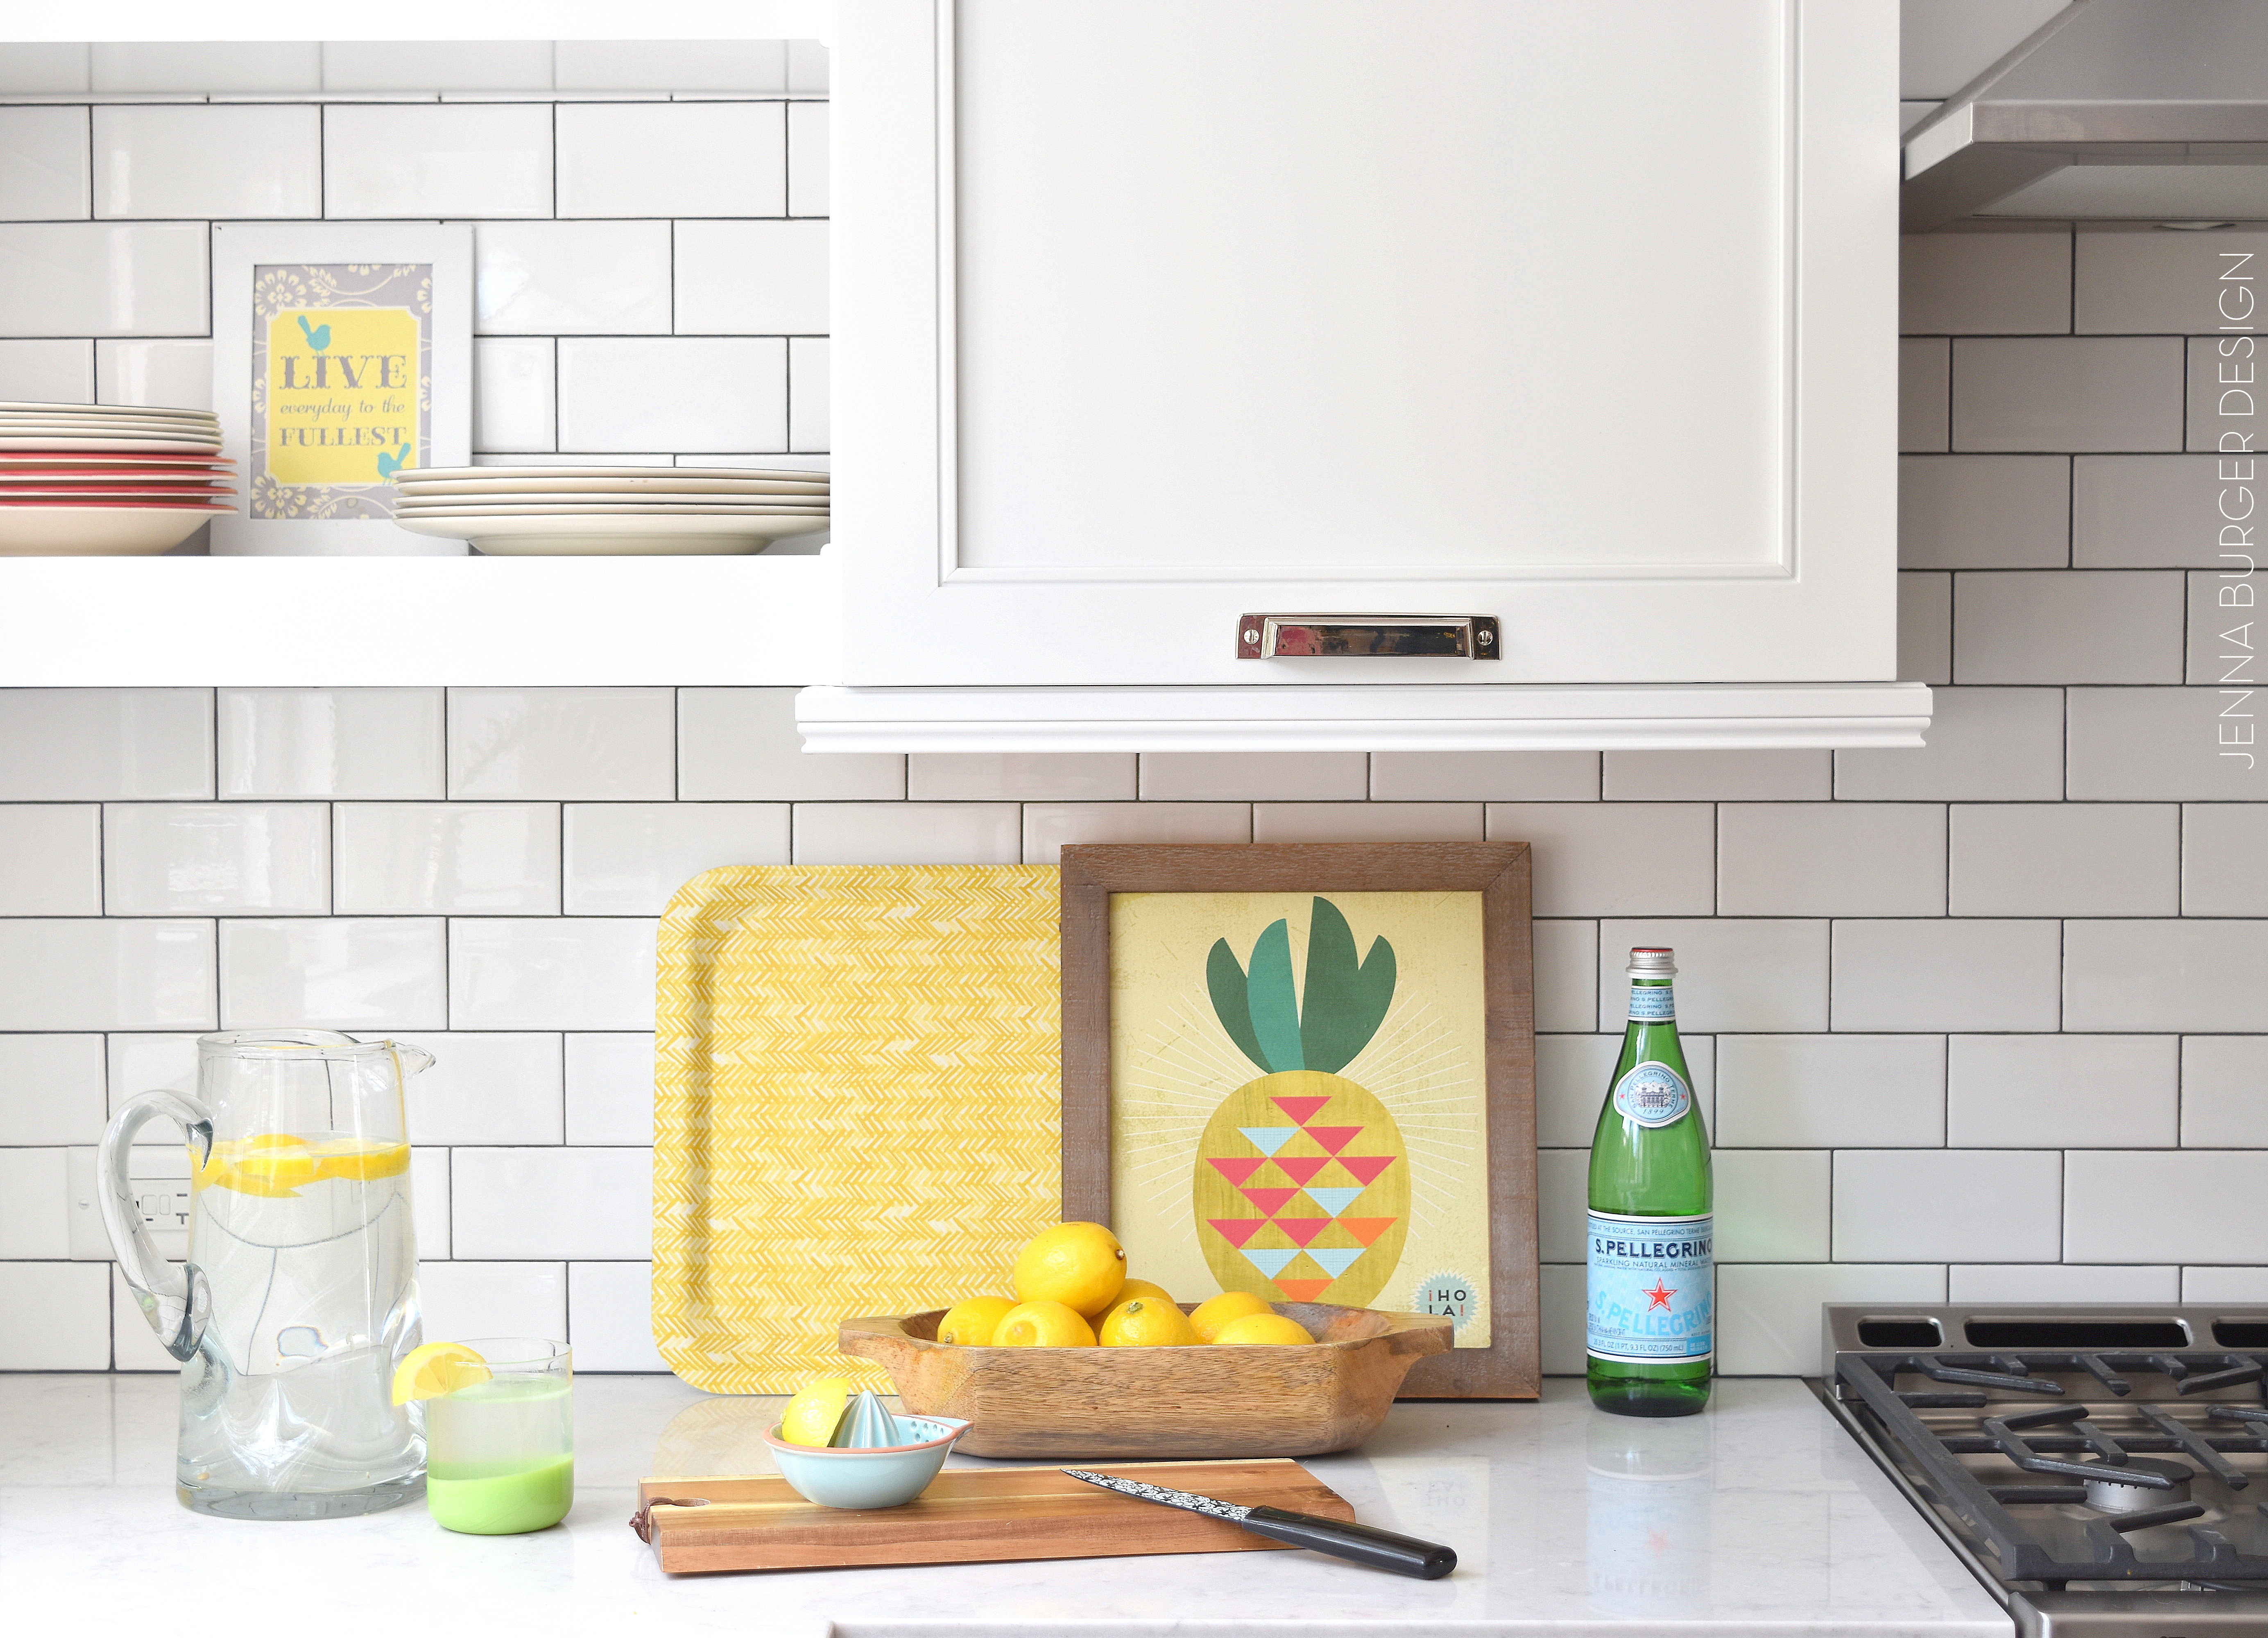
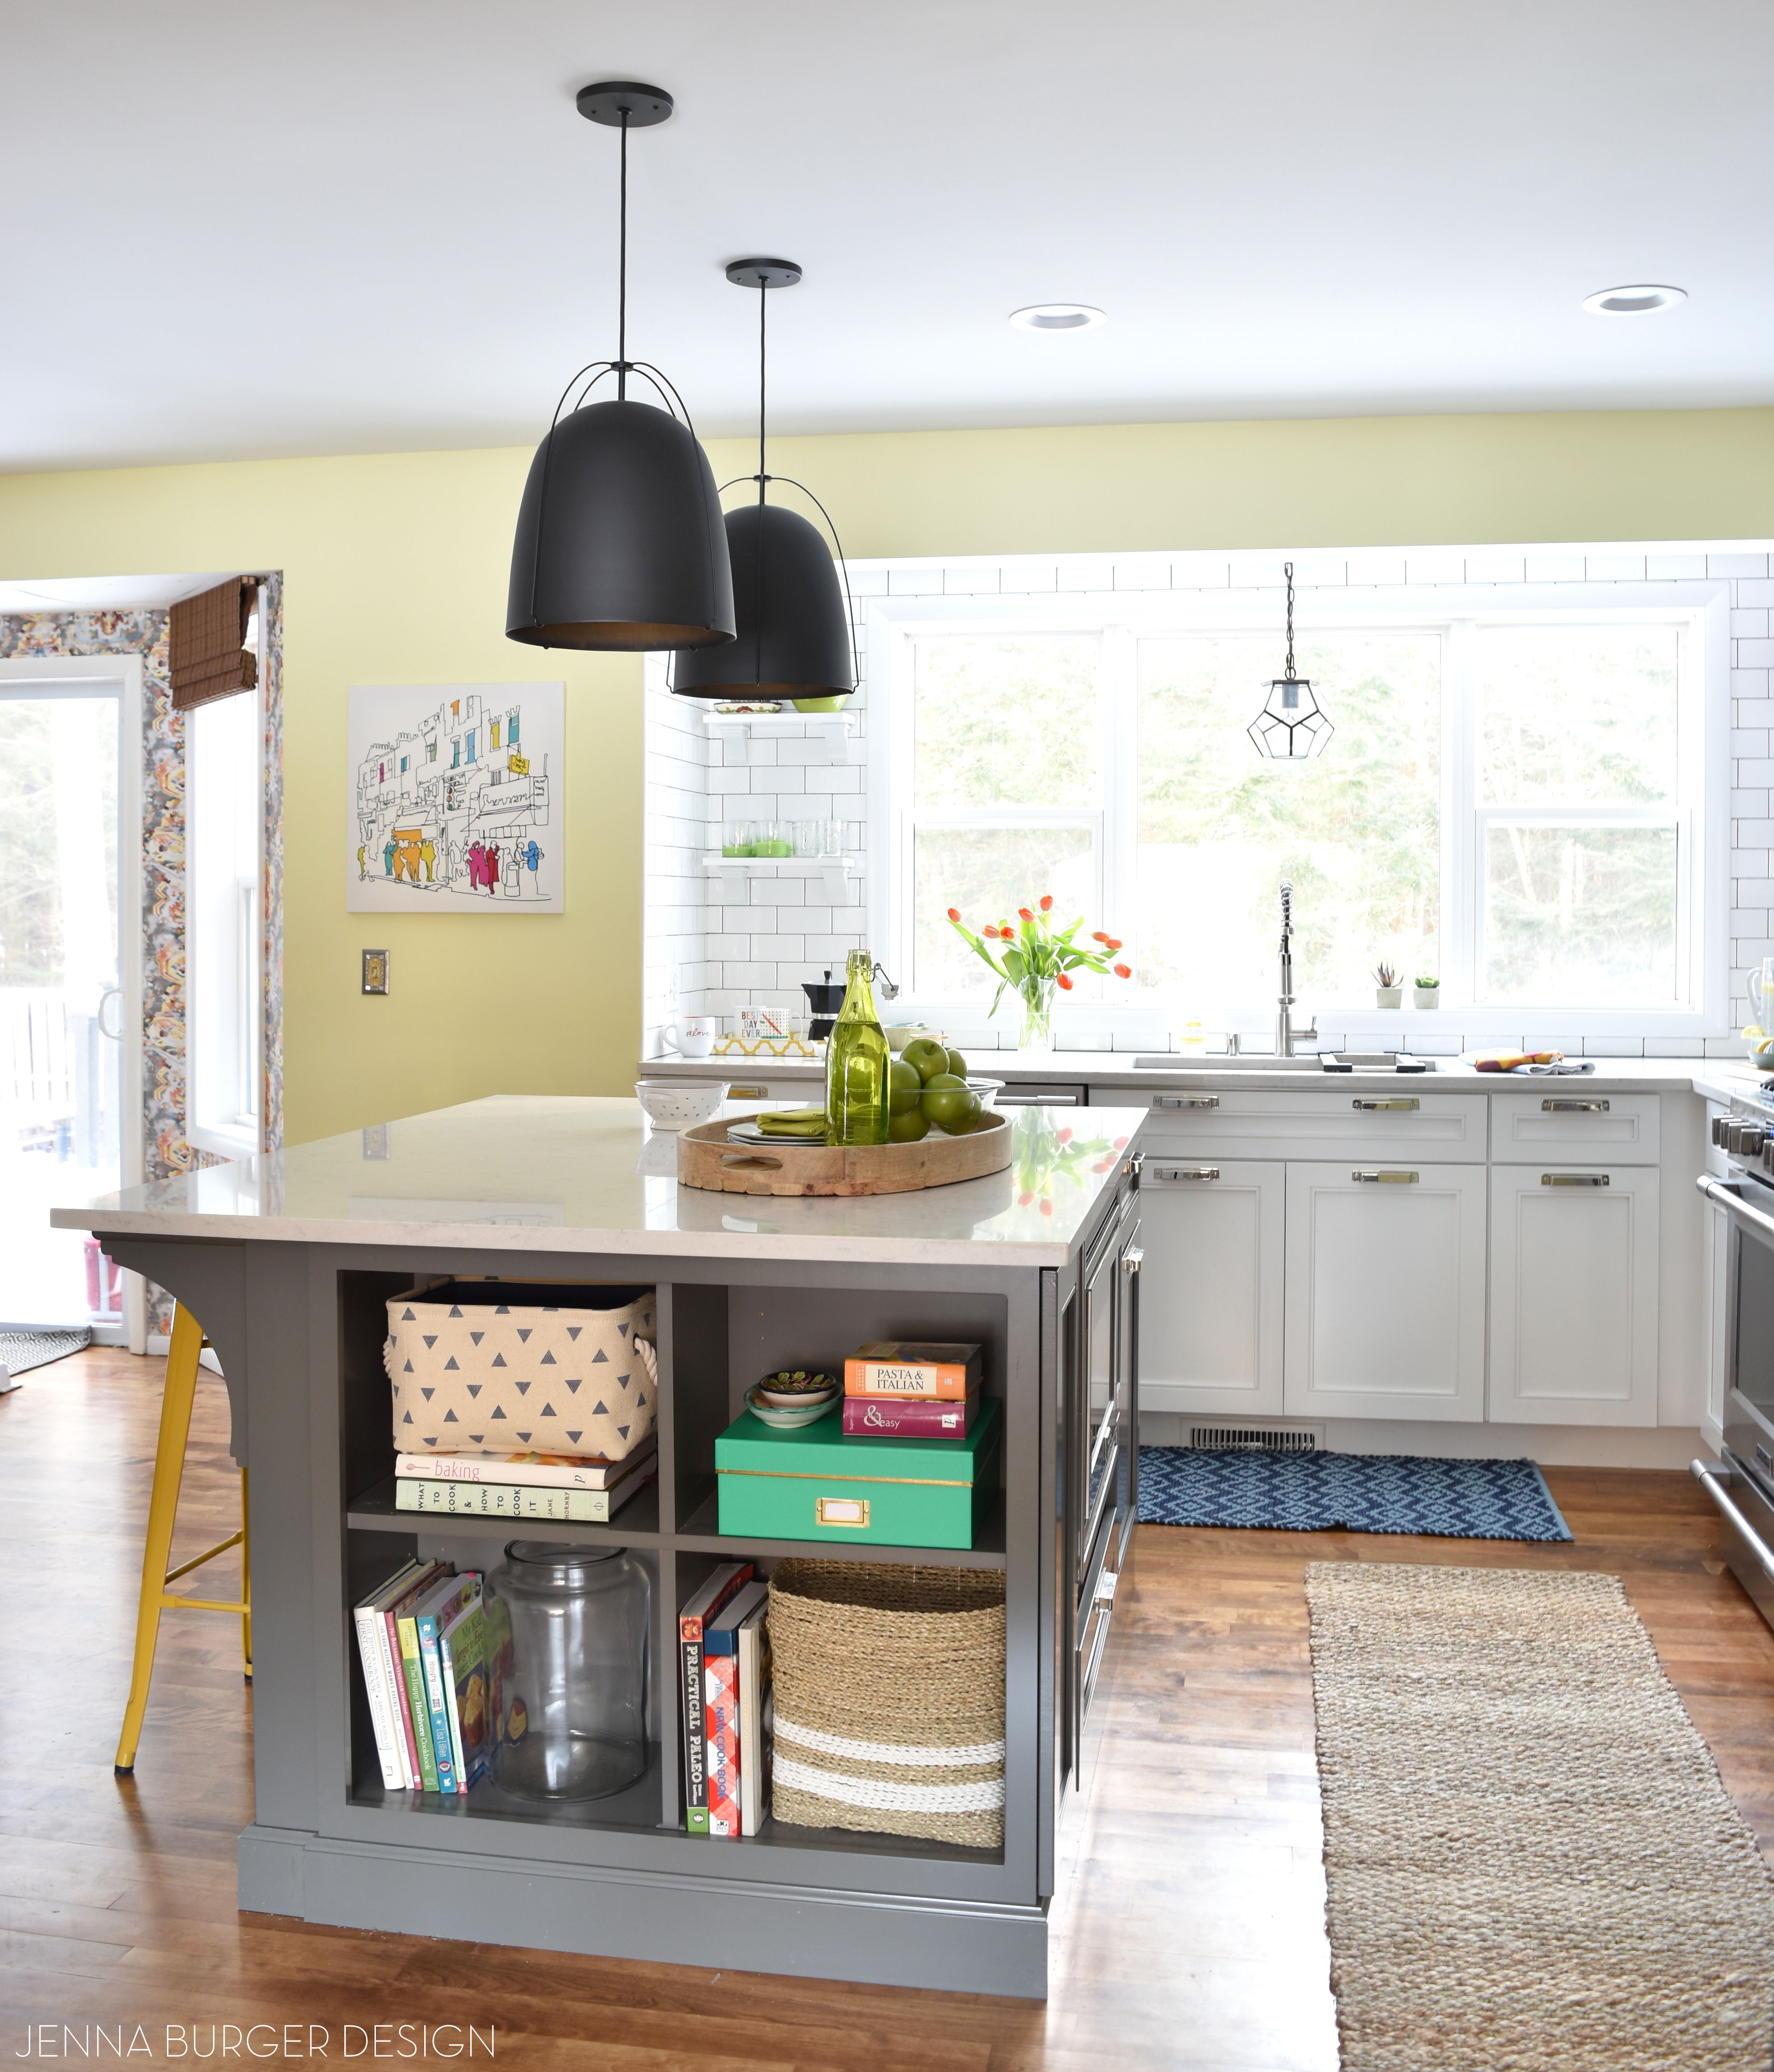
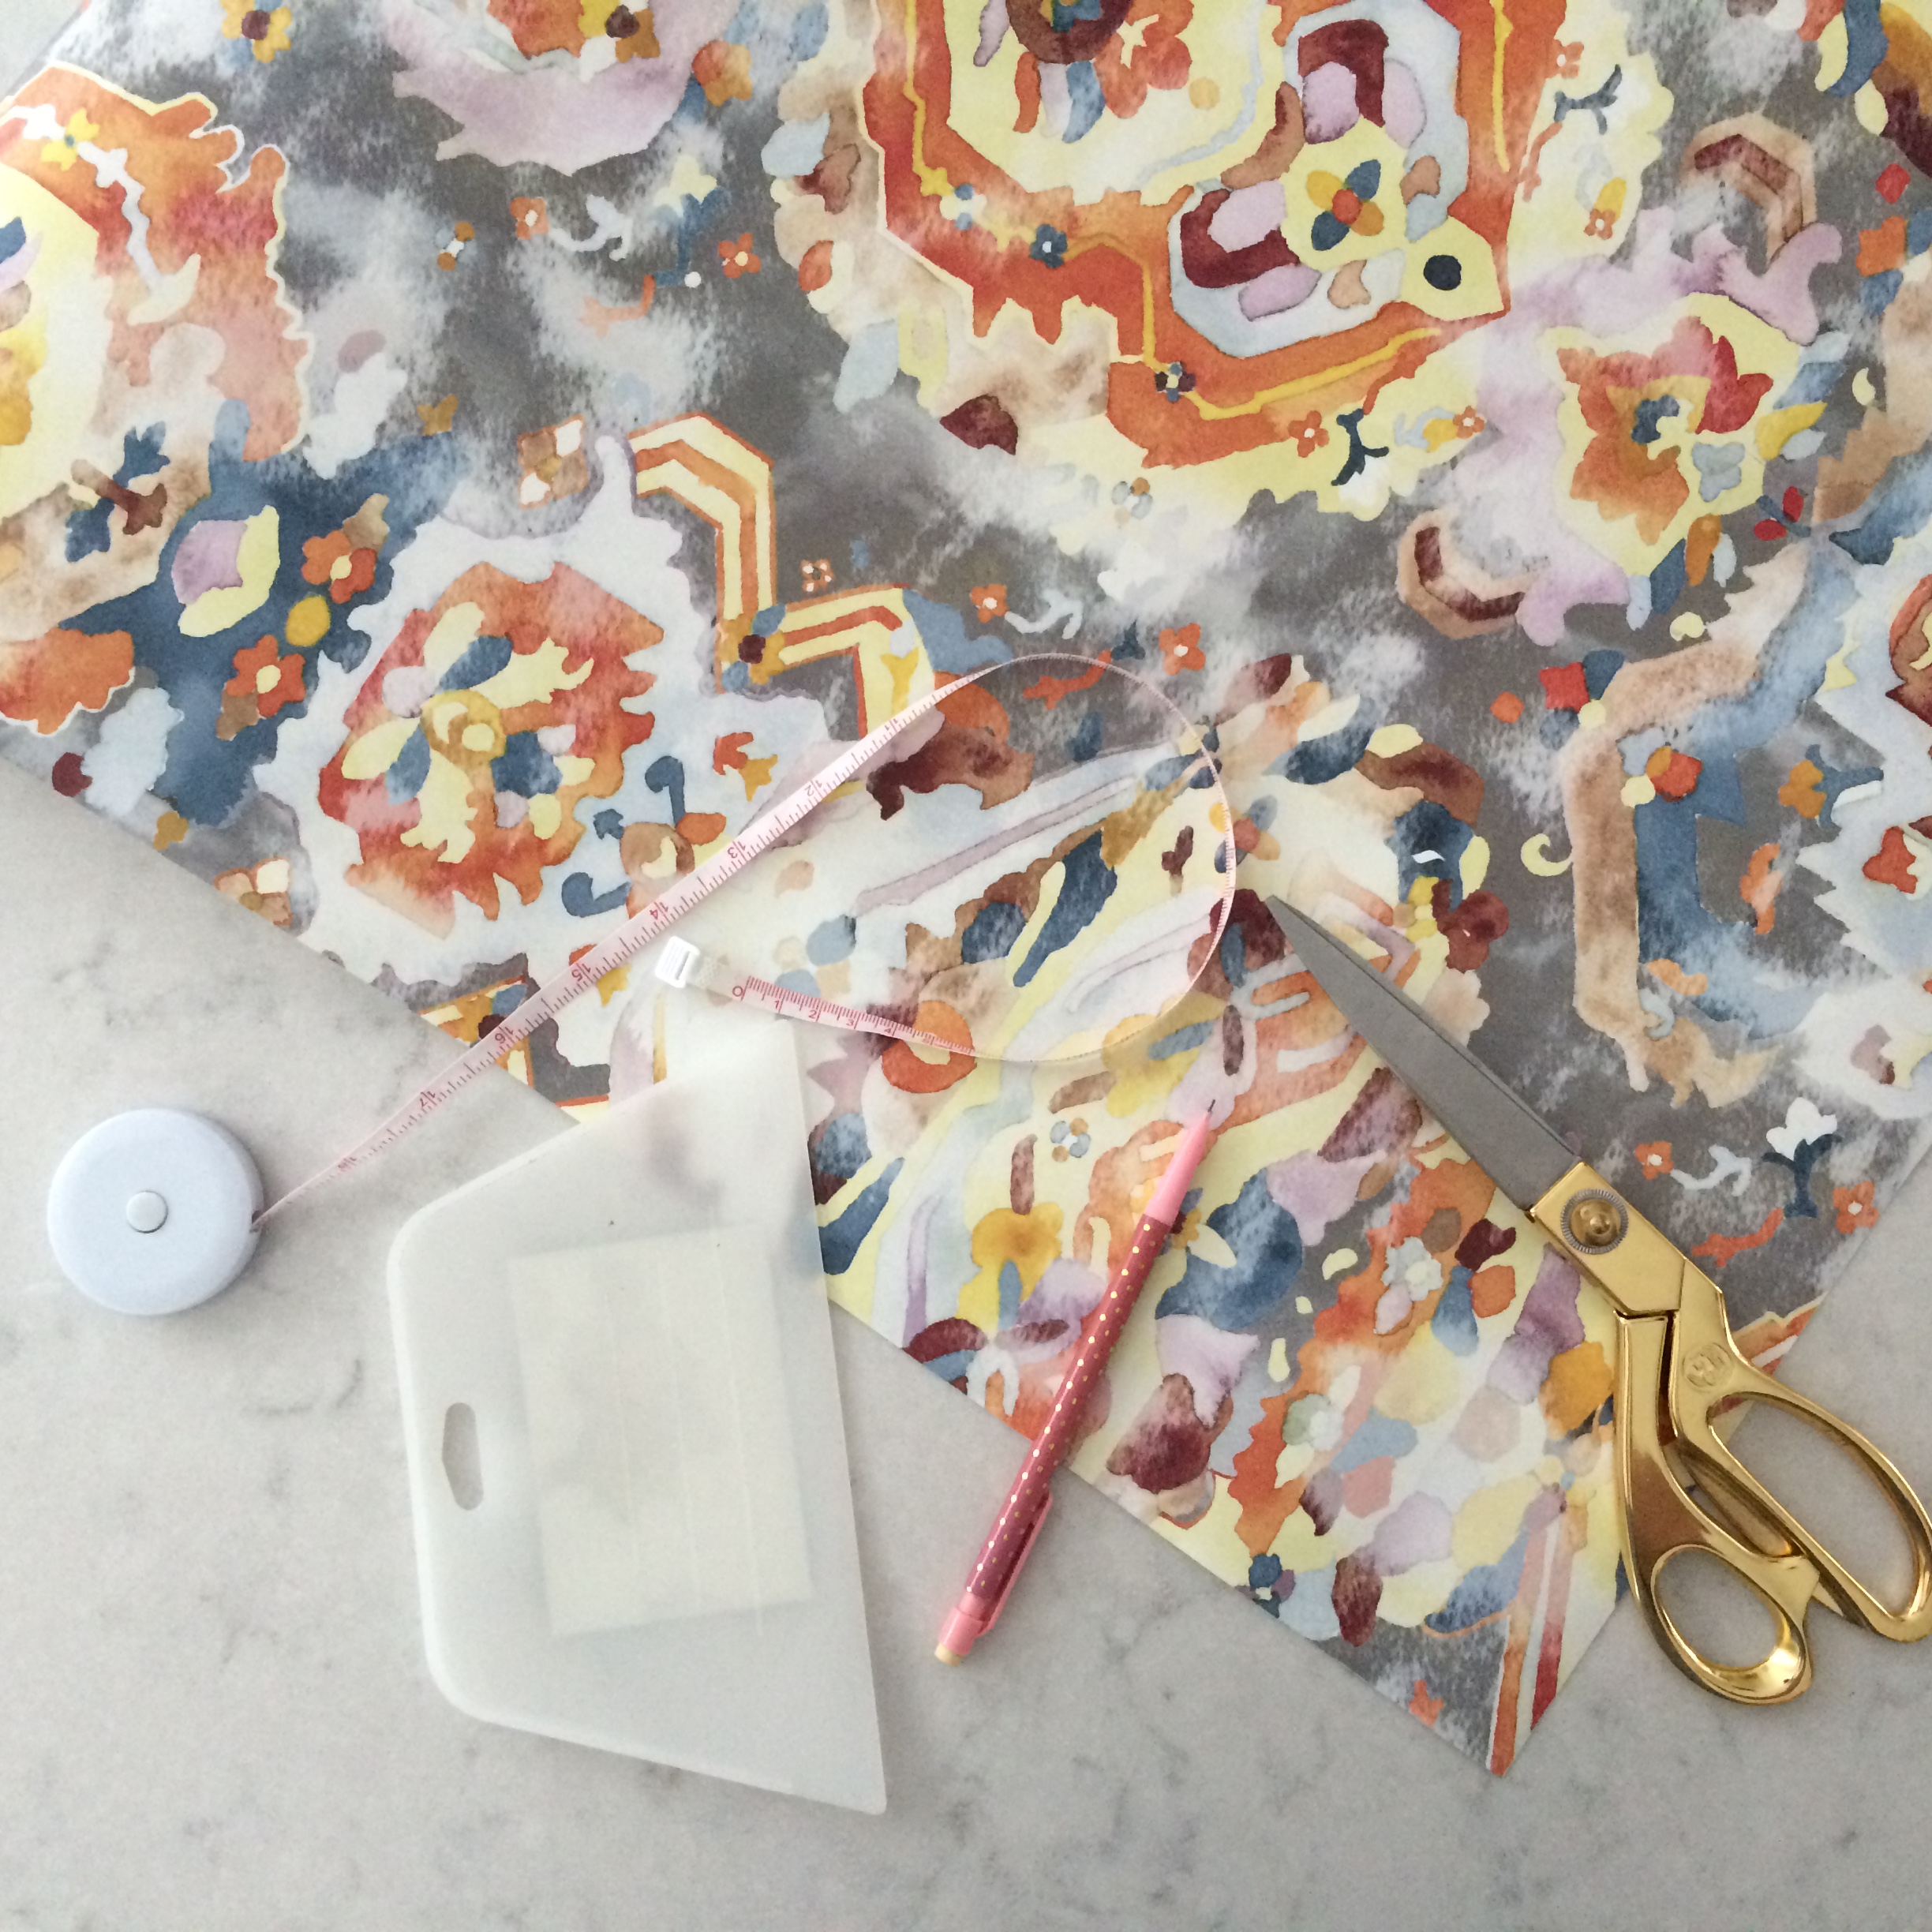
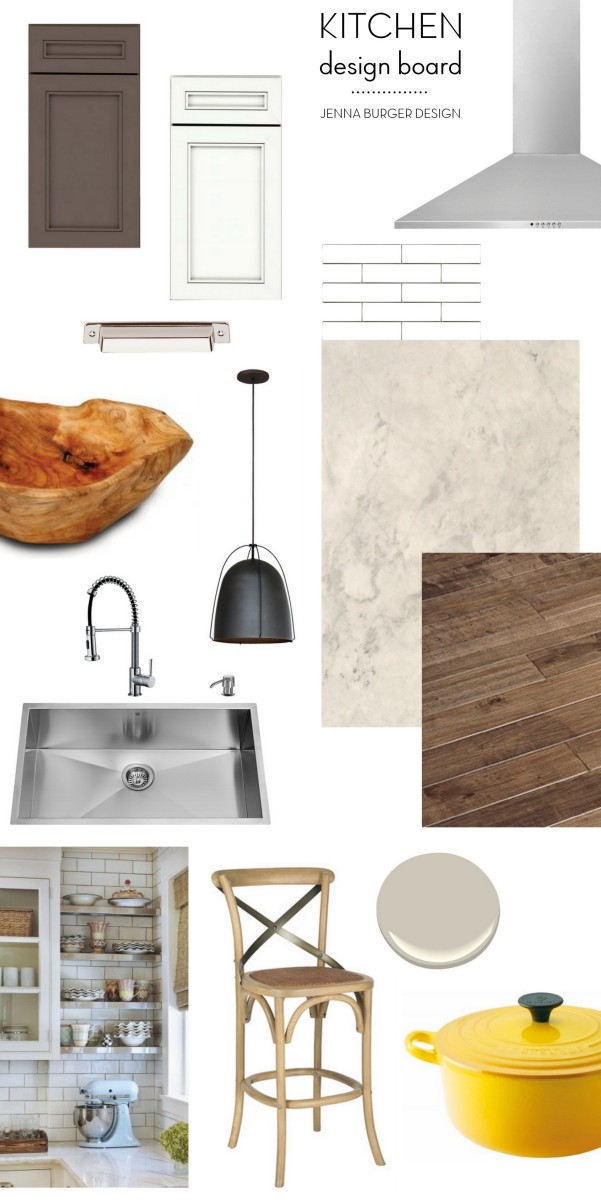
The inspiration for the color palette came from a piece of art. I snagged this canvas from Ikea last year and at the time it was meant for the living room, which I had been in the process of remodeling. I loved the white background layered with bold pops of color – yellow, blue, raspberry, green, turquoise.
I was drawn to it’s simplicity, yet intricate focus on detail. And that’s exactly the vision I wanted the kitchen to evoke – clean, simple, and BOLD.

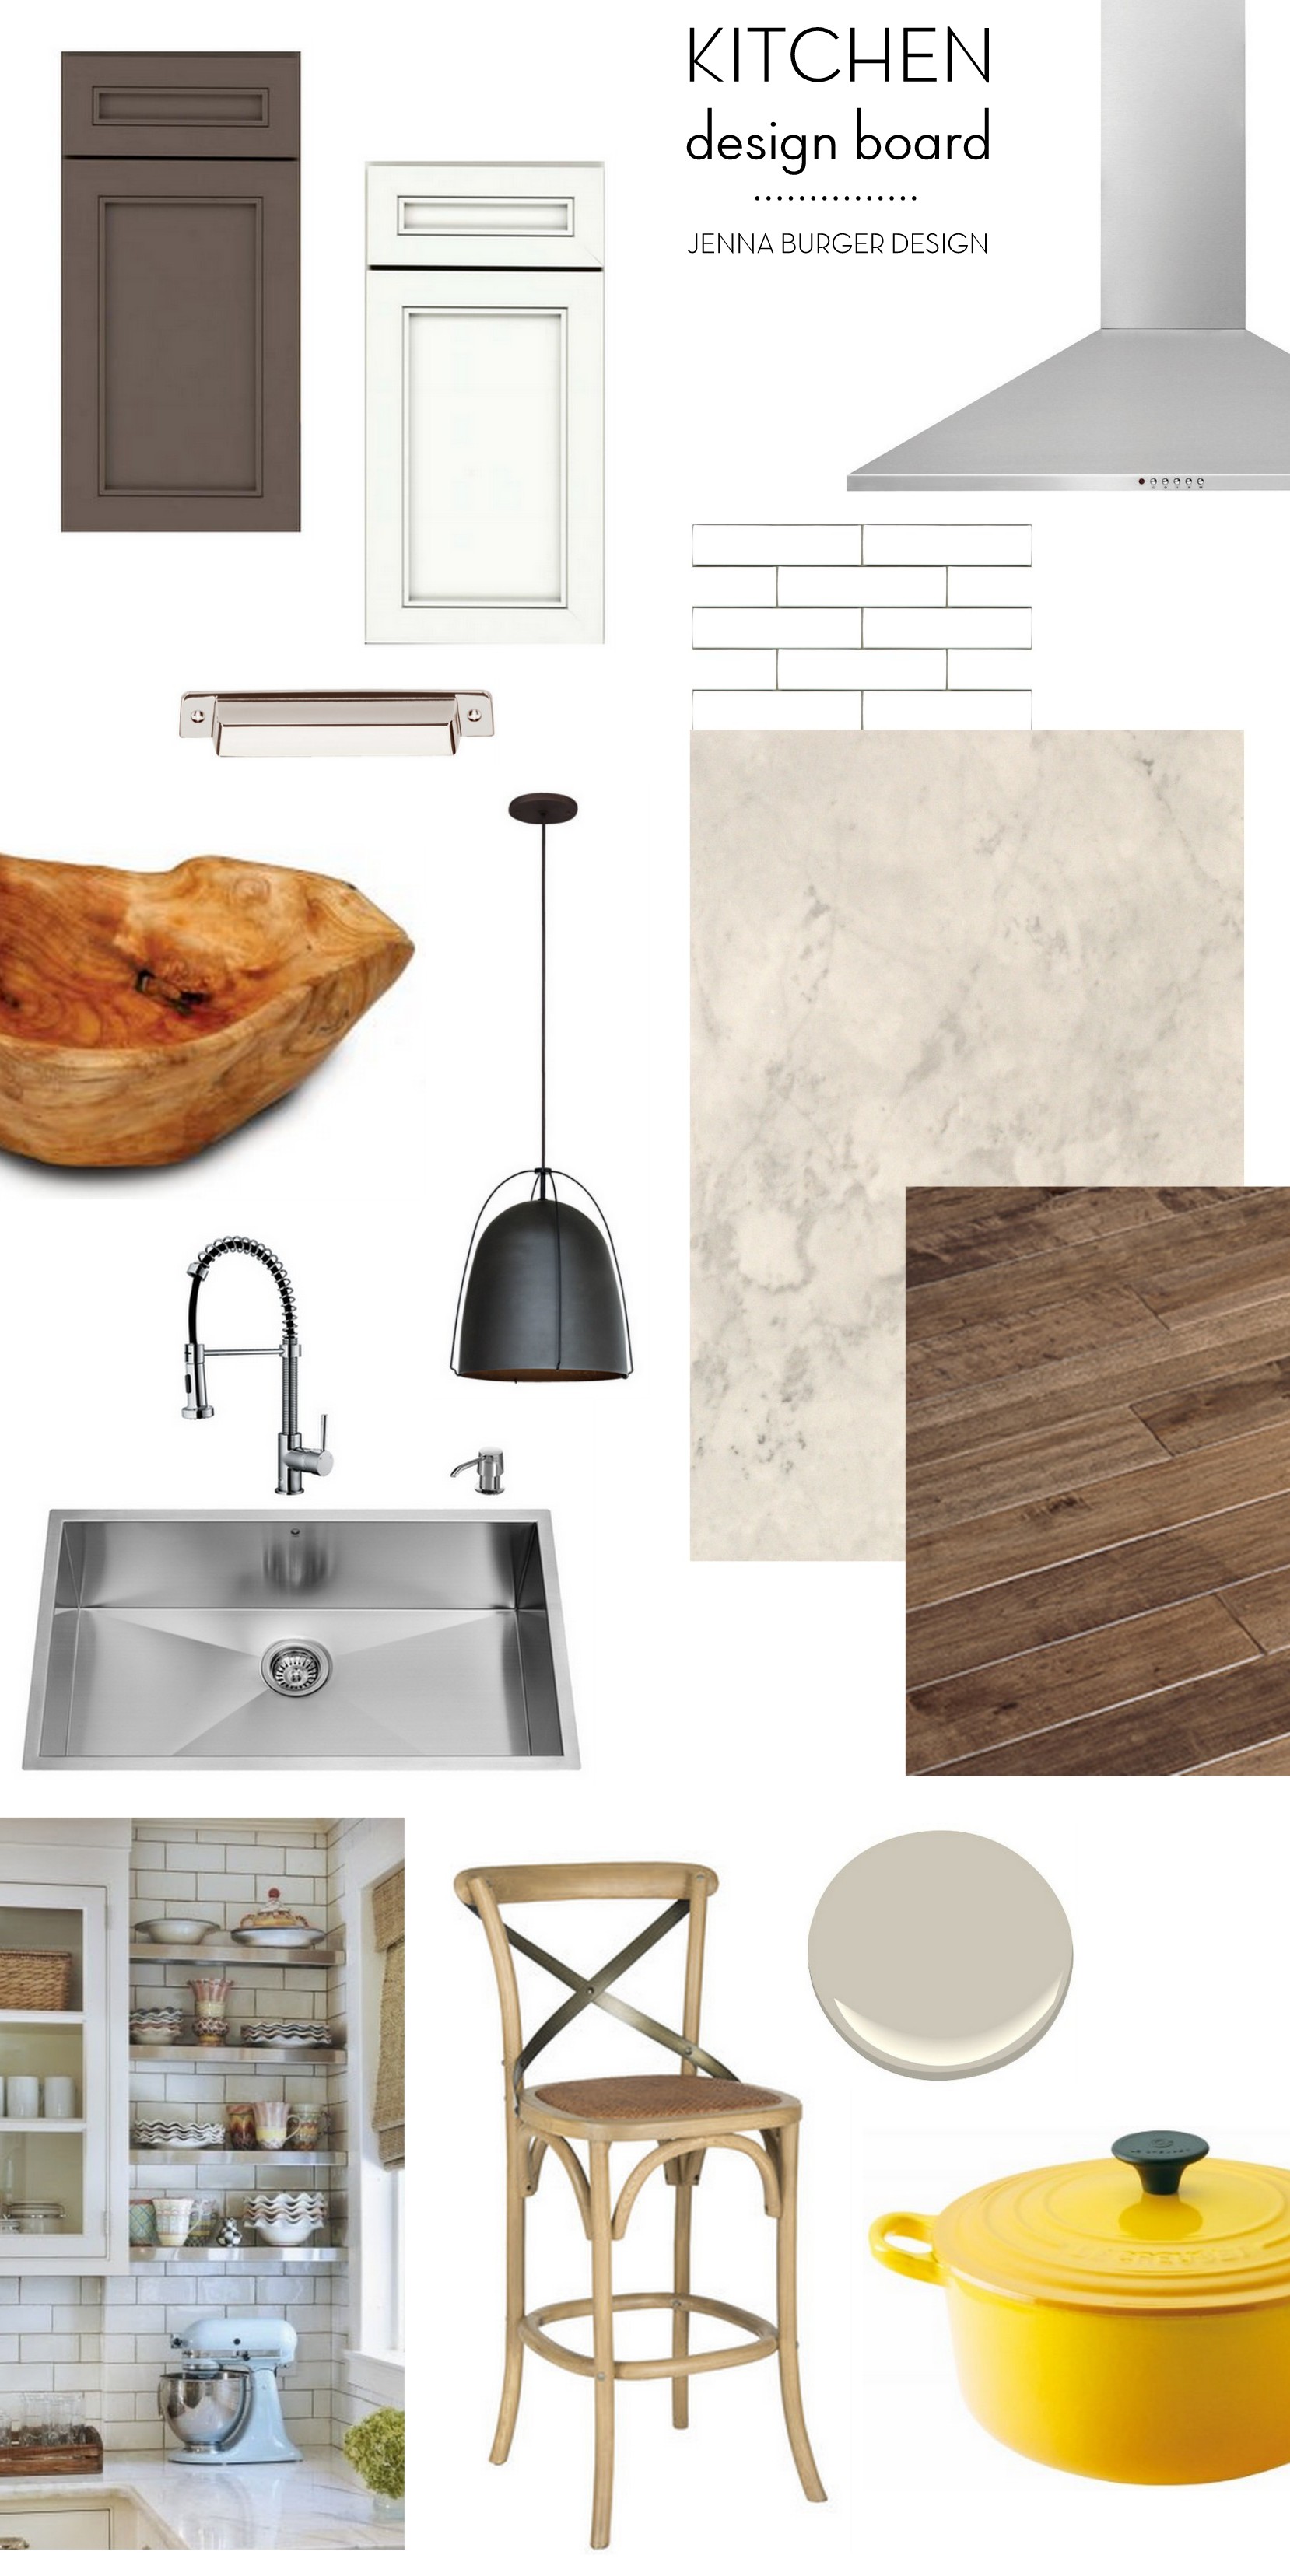
This was the mood board I created…
… And months later, I feel I’ve achieved just that. I’m content. This new kitchen truly evokes everything I am and everything my style is.

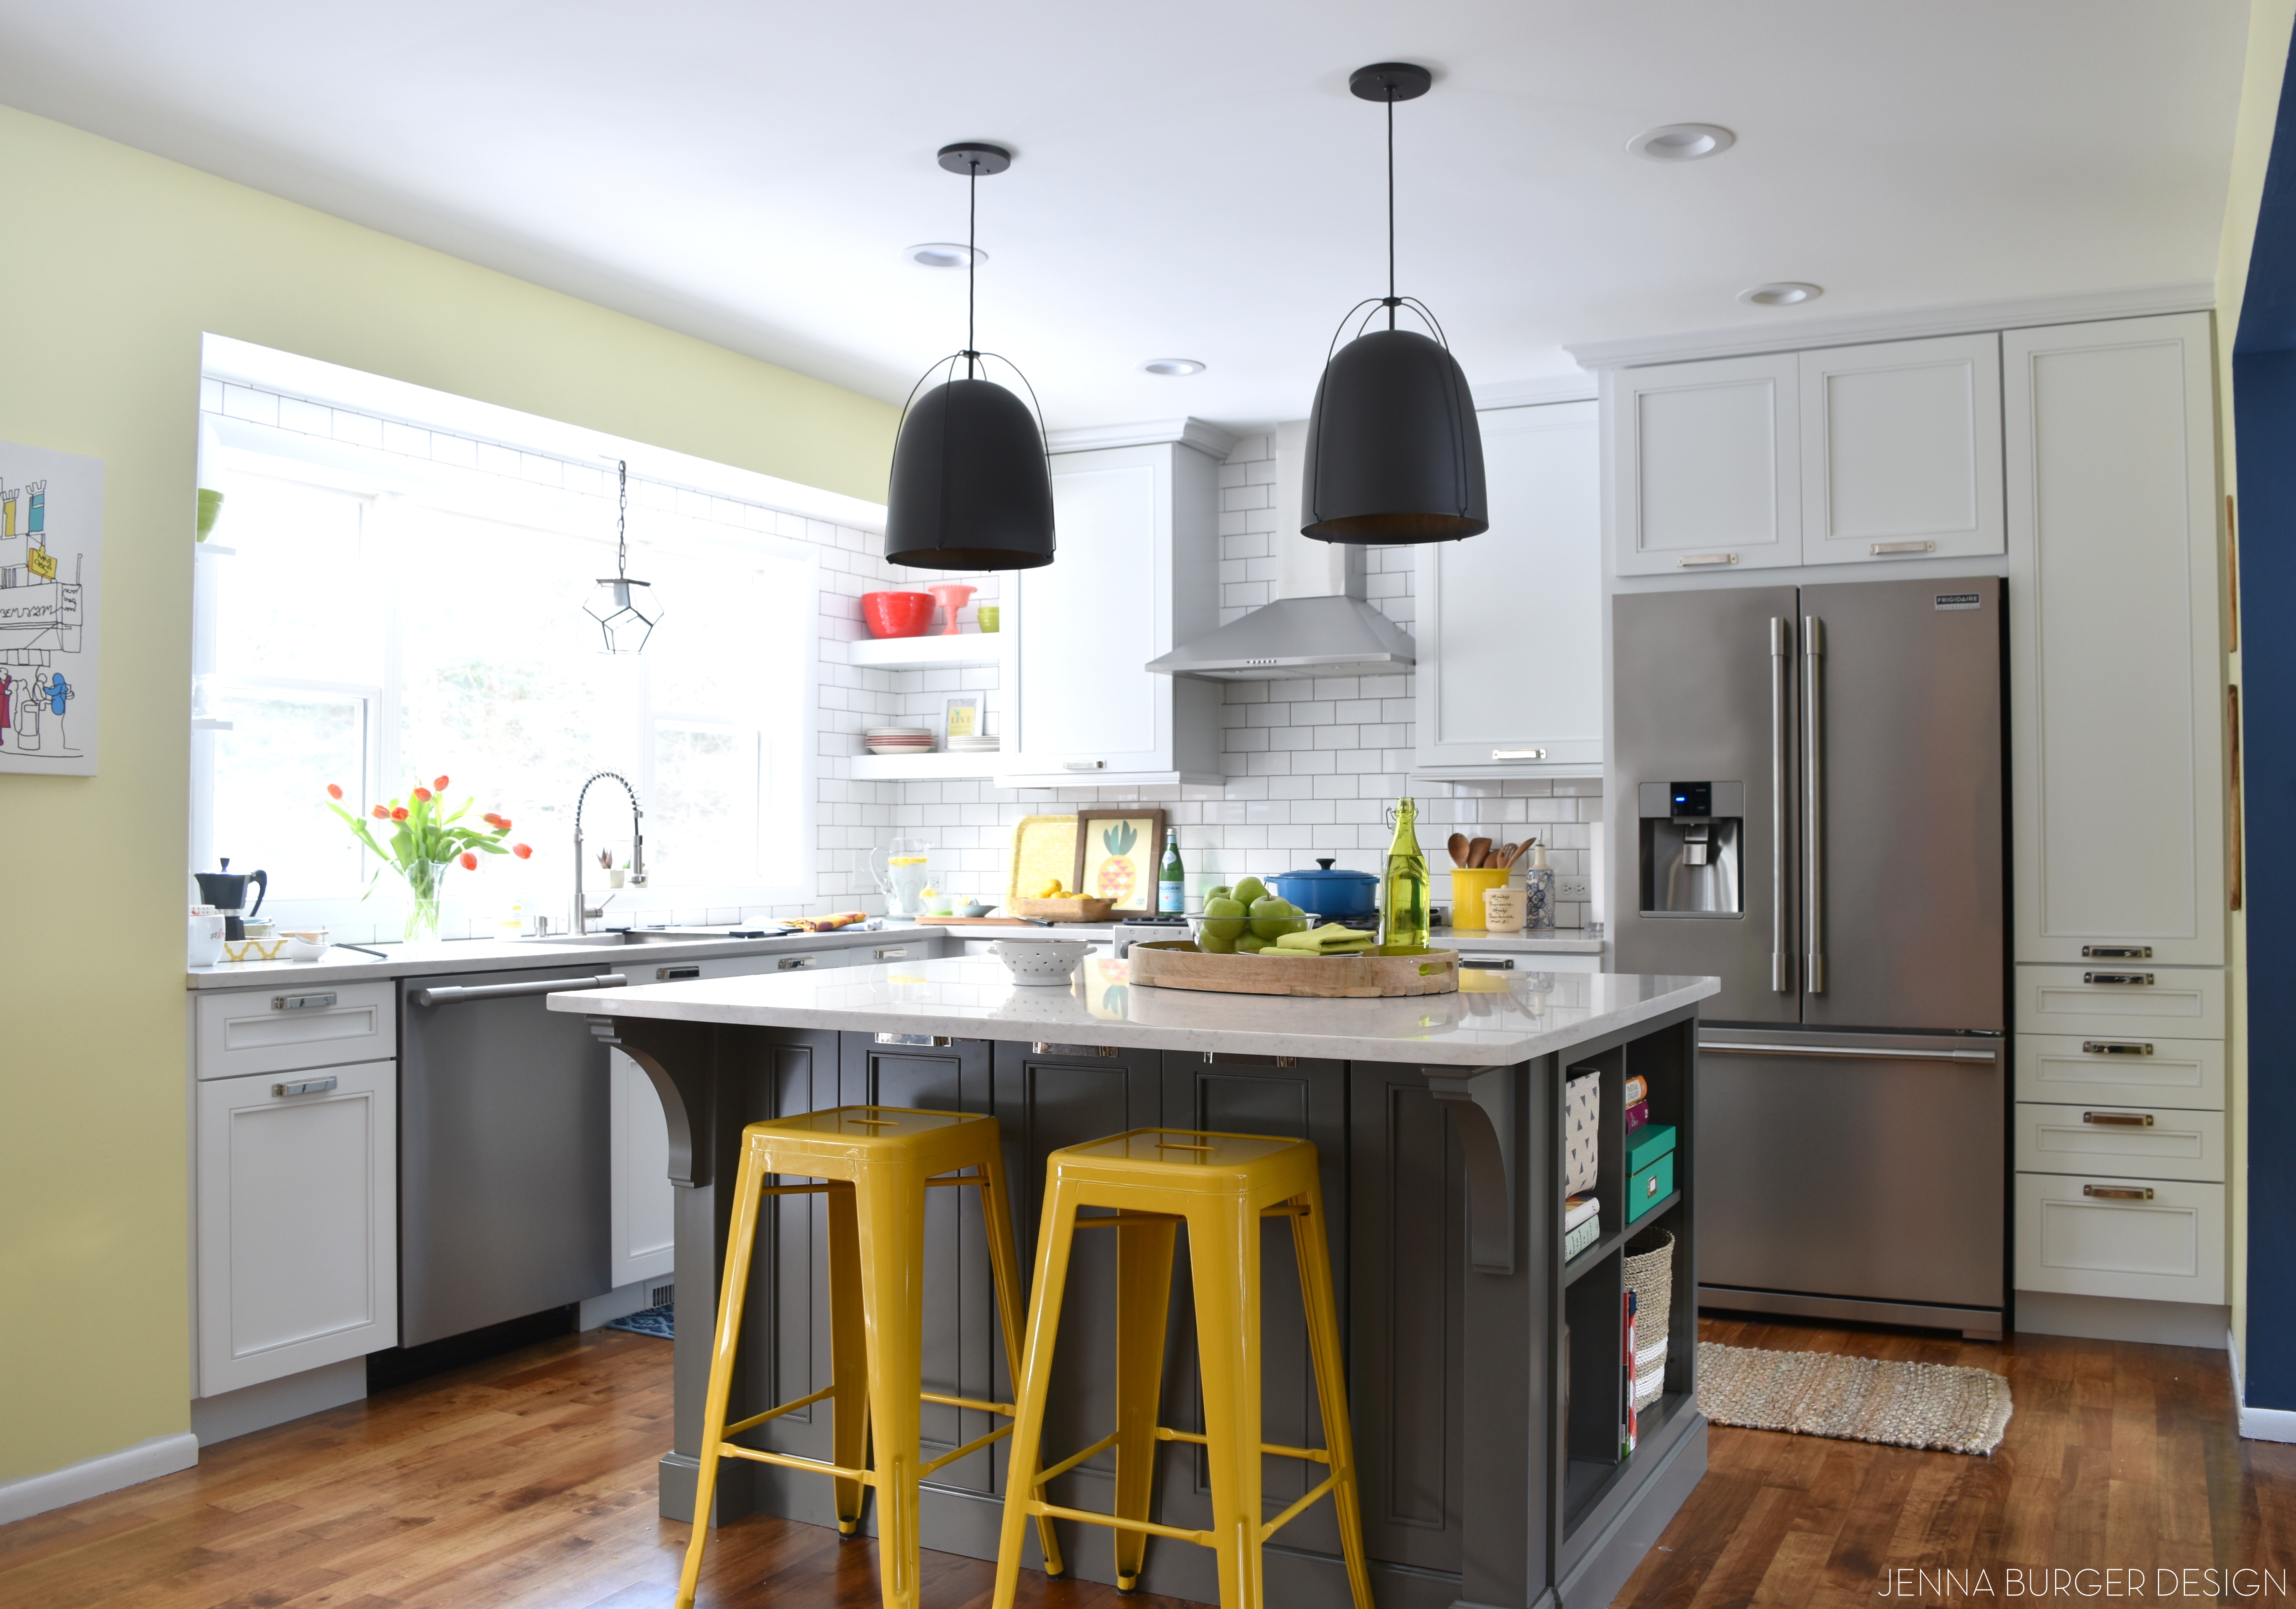
From edge to edge, here it is…

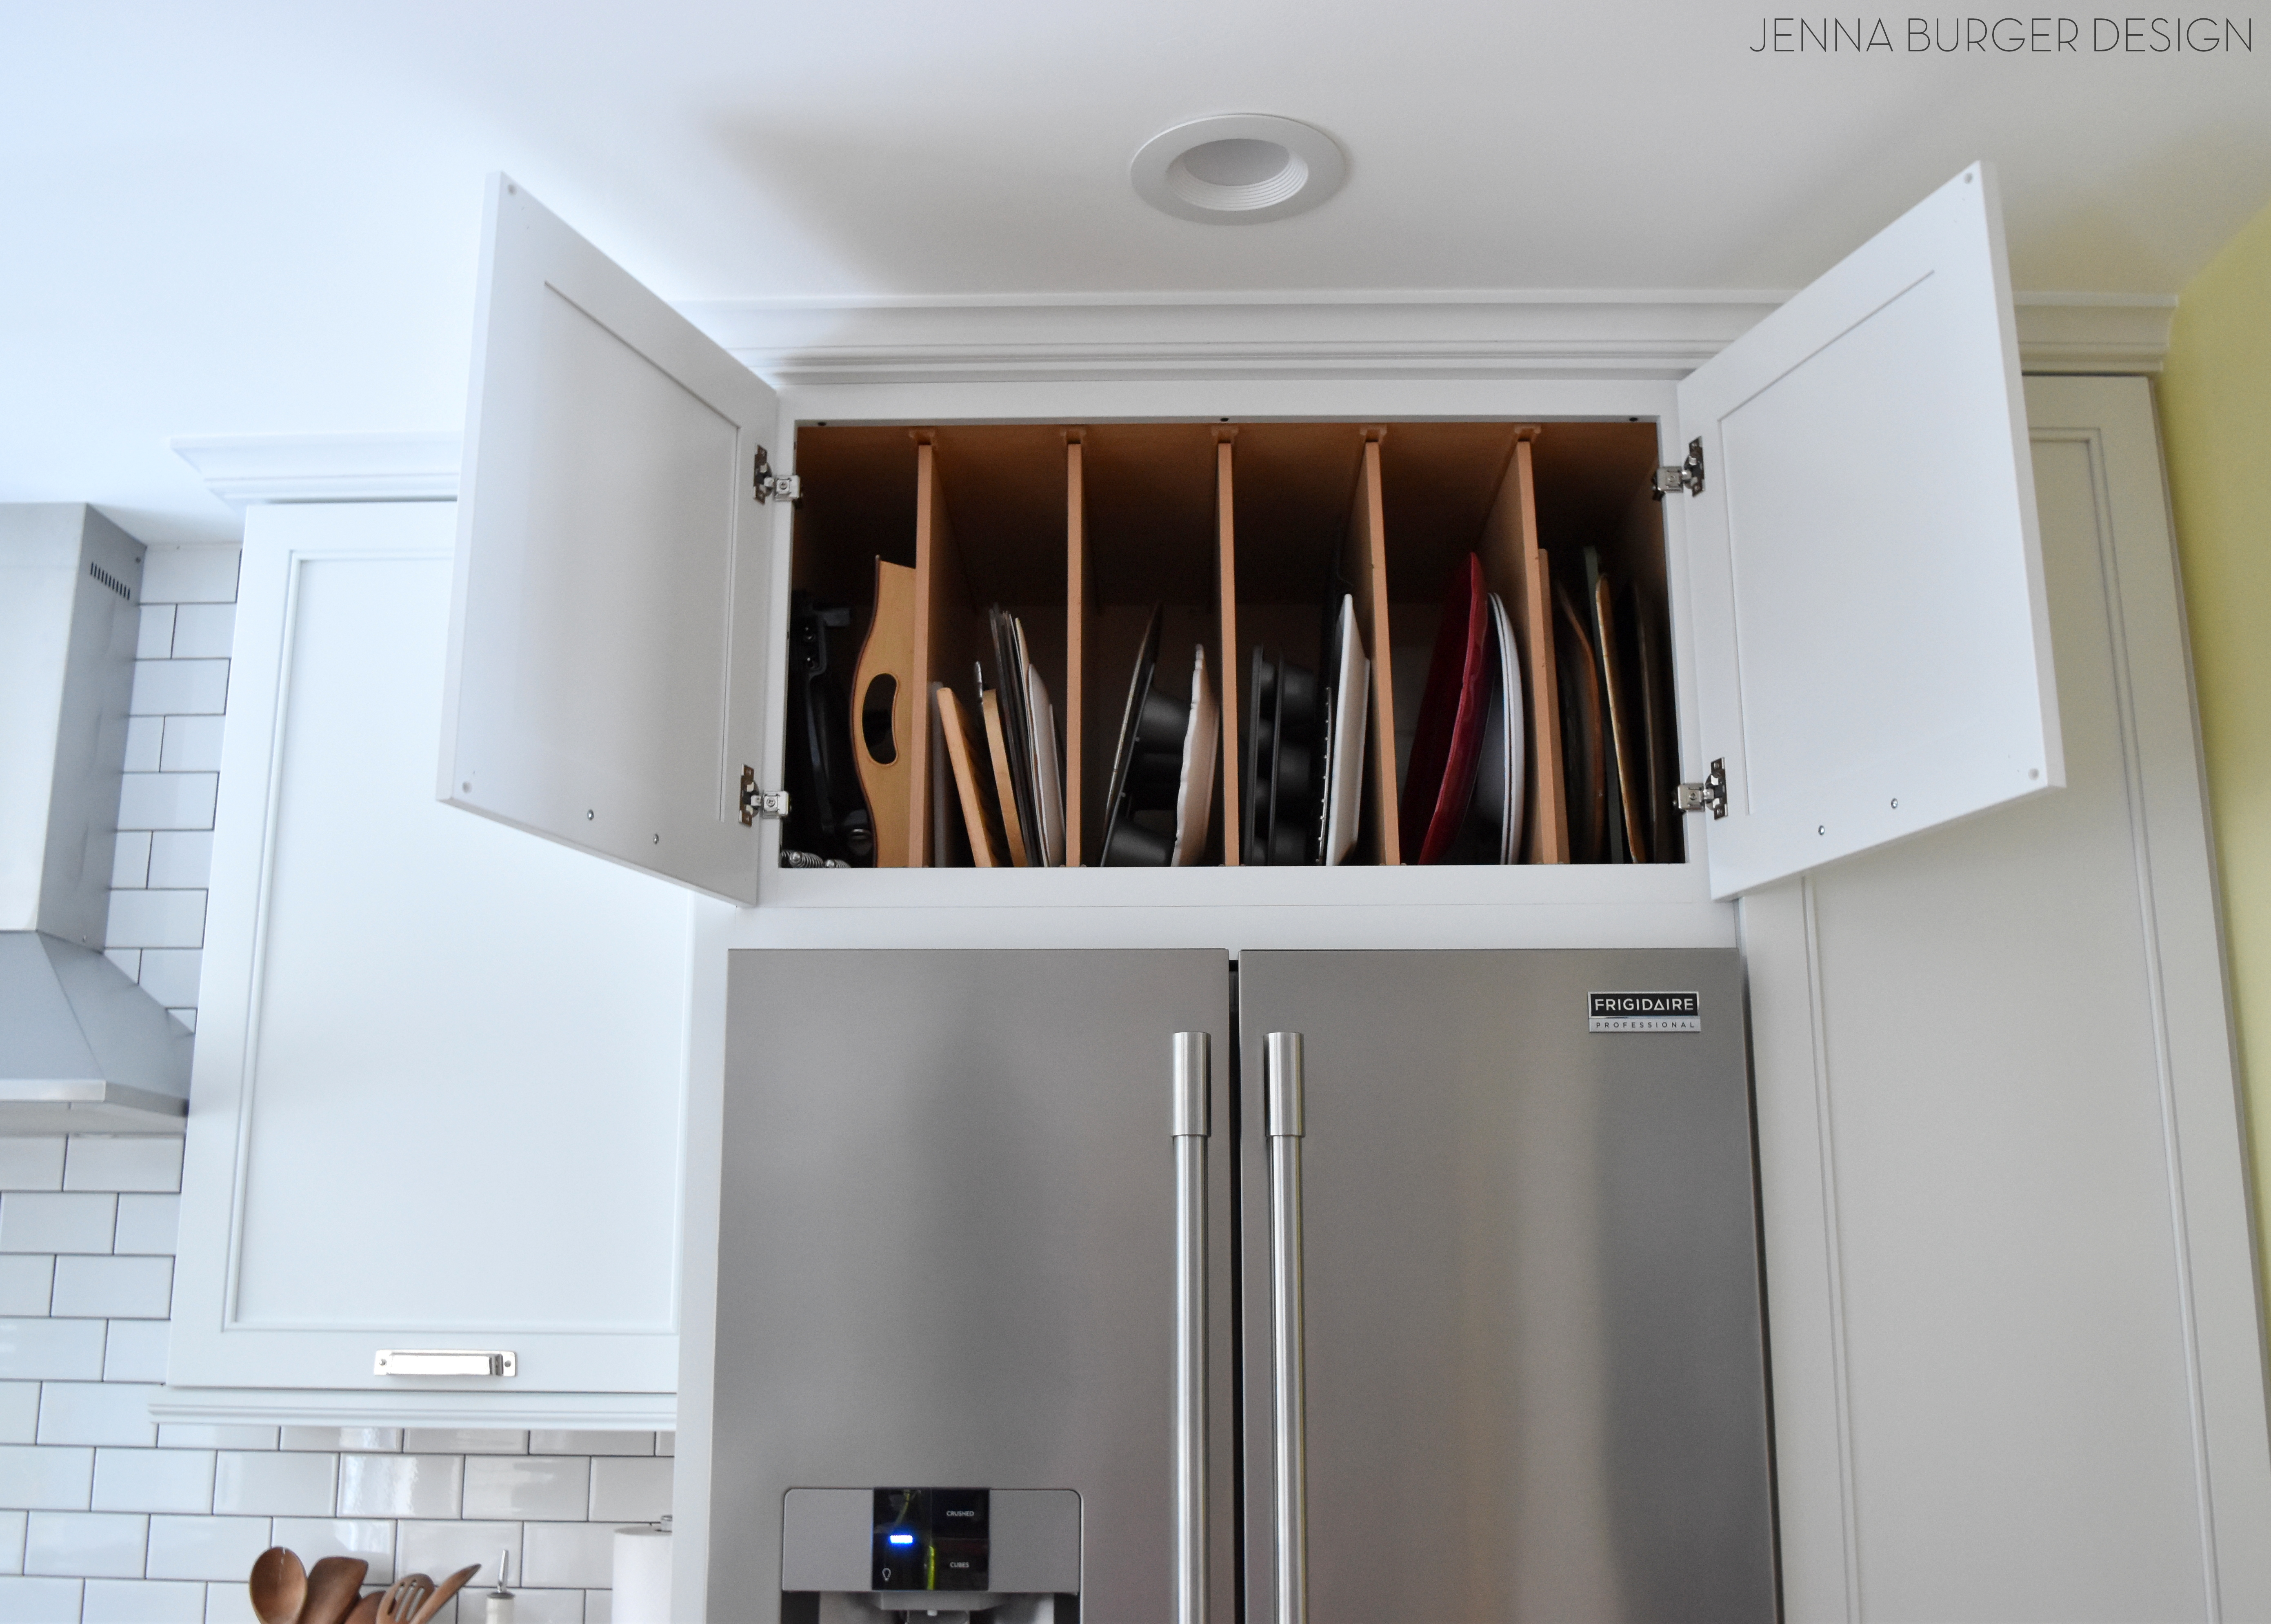
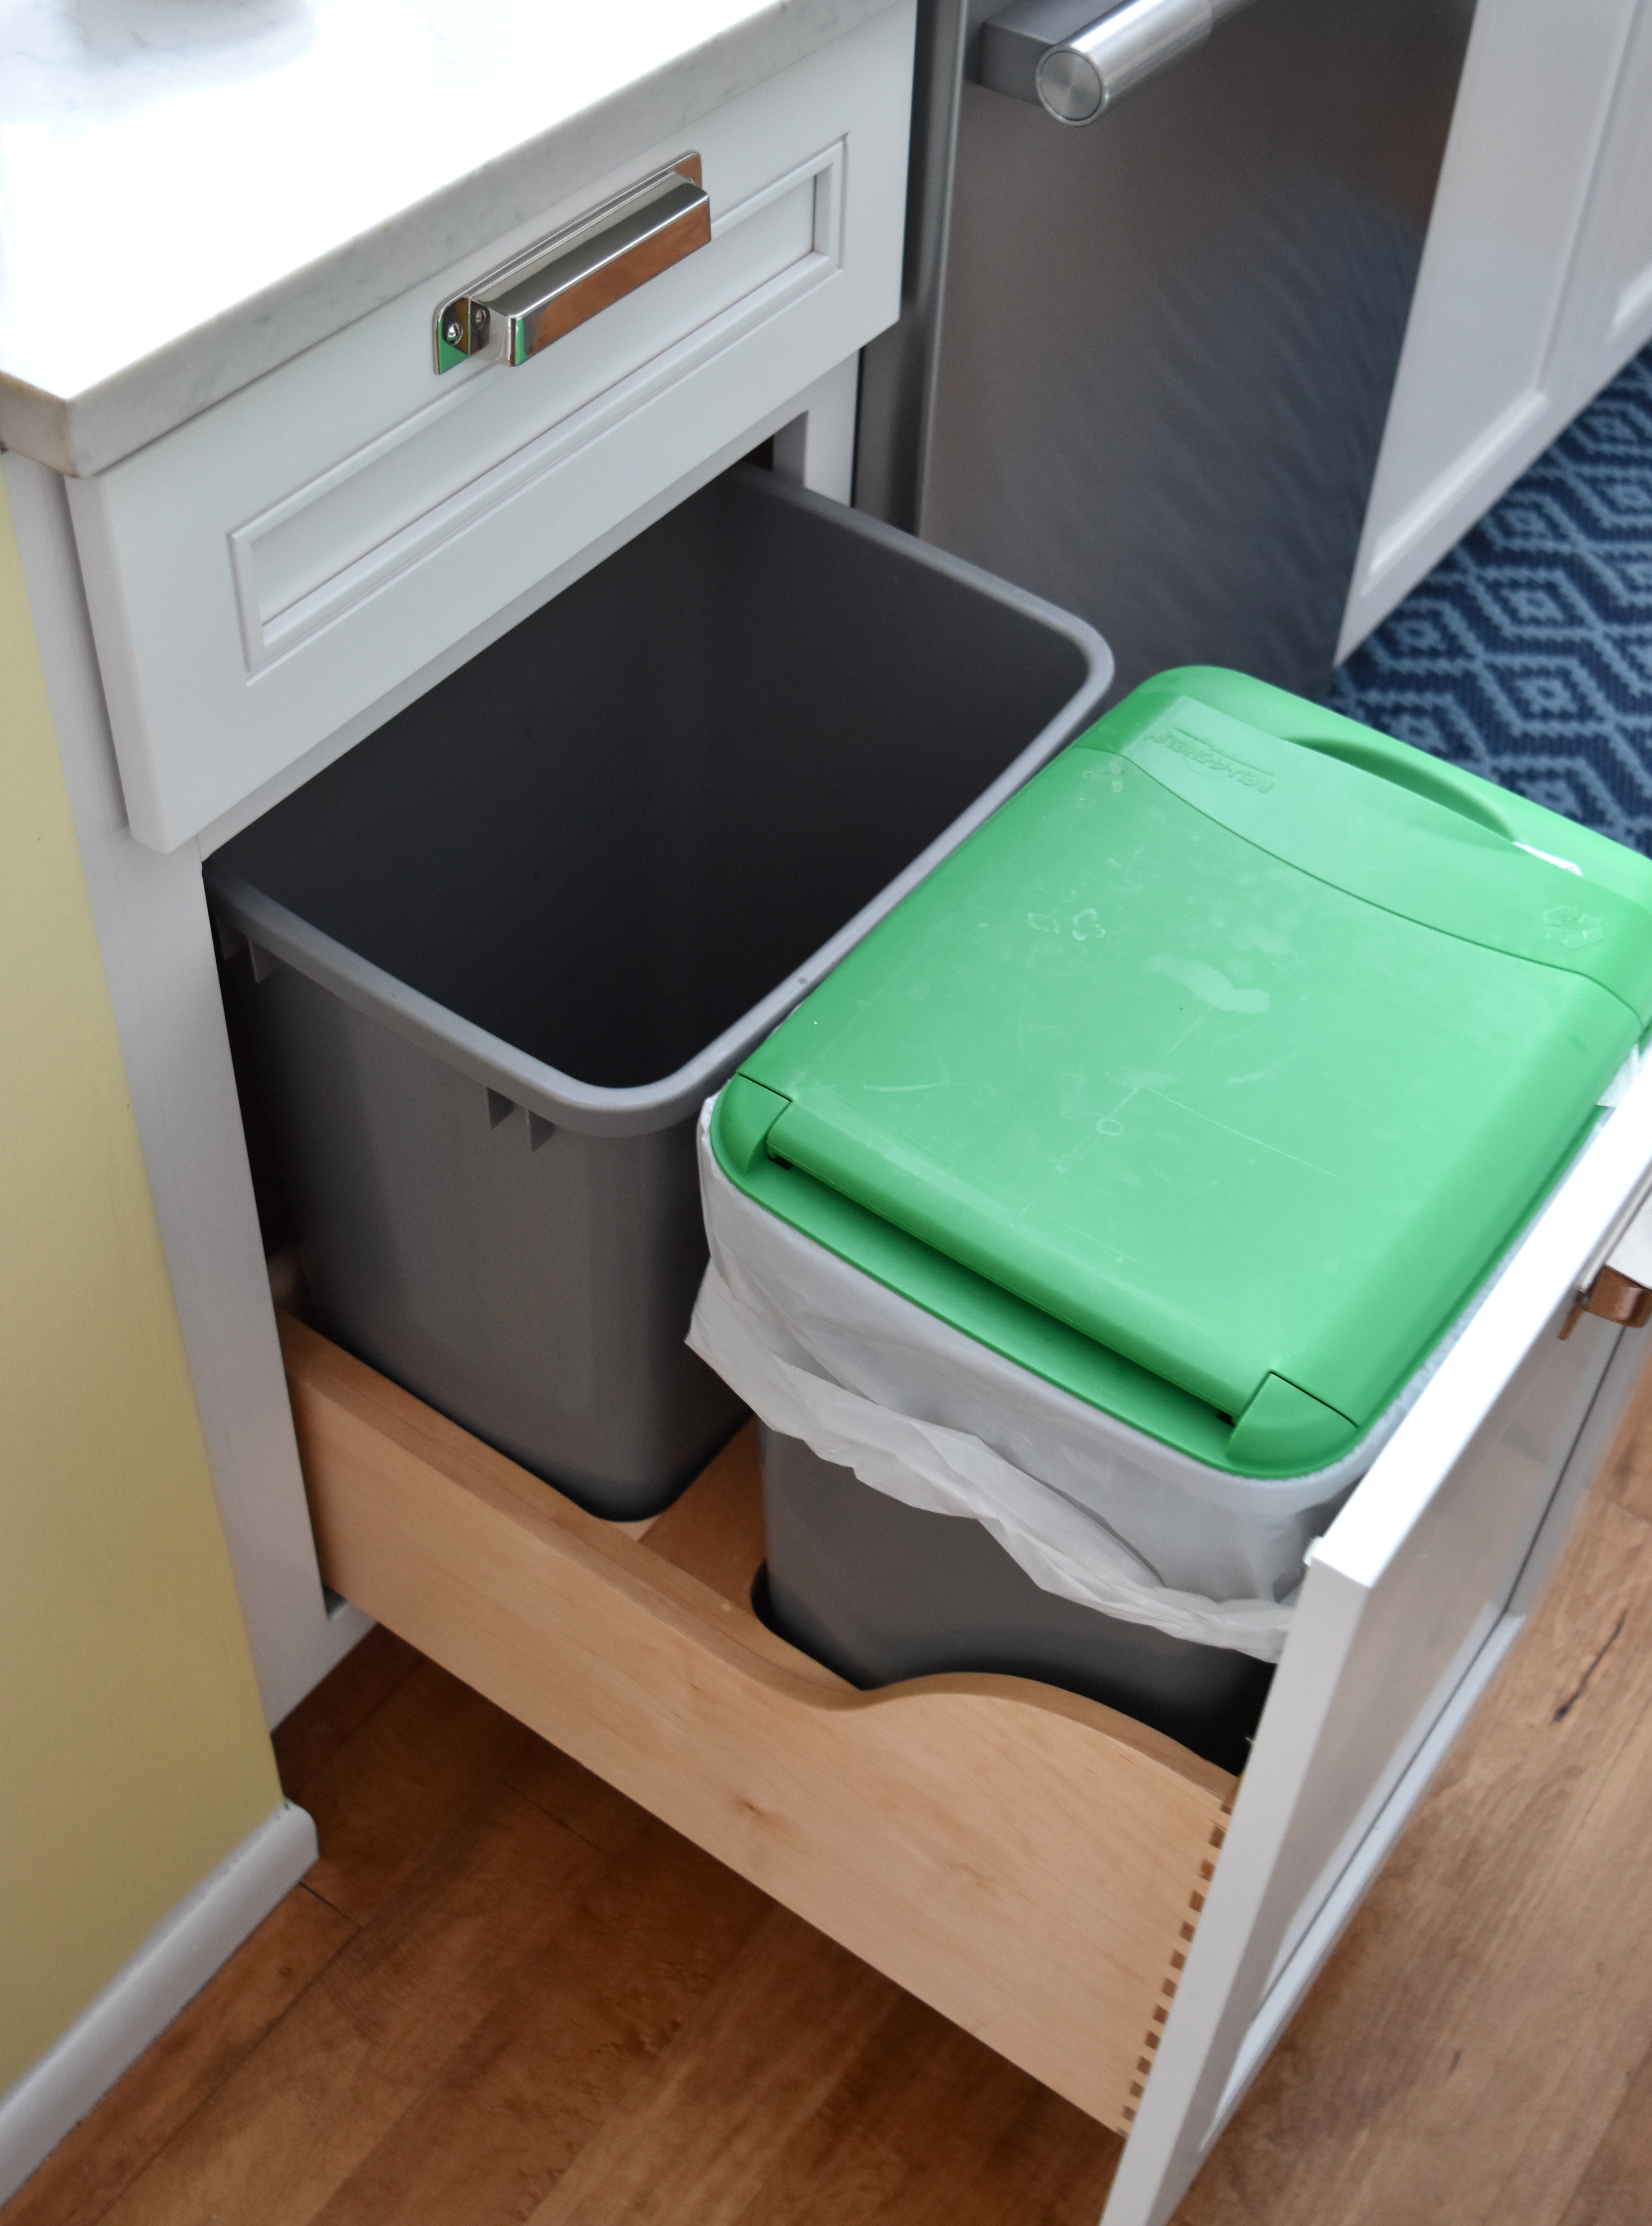
The cabinetry in the new kitchen is by Kraftmaid, one of several cabinet companies displayed at Lowe’s. I chose the Kraftmaid line of cabinets for a range of reasons. Not only does Kraftmaid have an extensive selection of cabinet styles + colors, their attention to detail is exquisite, as well as the craftmanship of their product. When I started the design process for this renovation, I was quite impressed with all the ‘bells & whistles’ that they offer (many of which come standard with their cabinetry) + the variety of storage solutions they offer.
More on the details of the kitchen + cabinetry in a post coming soon.
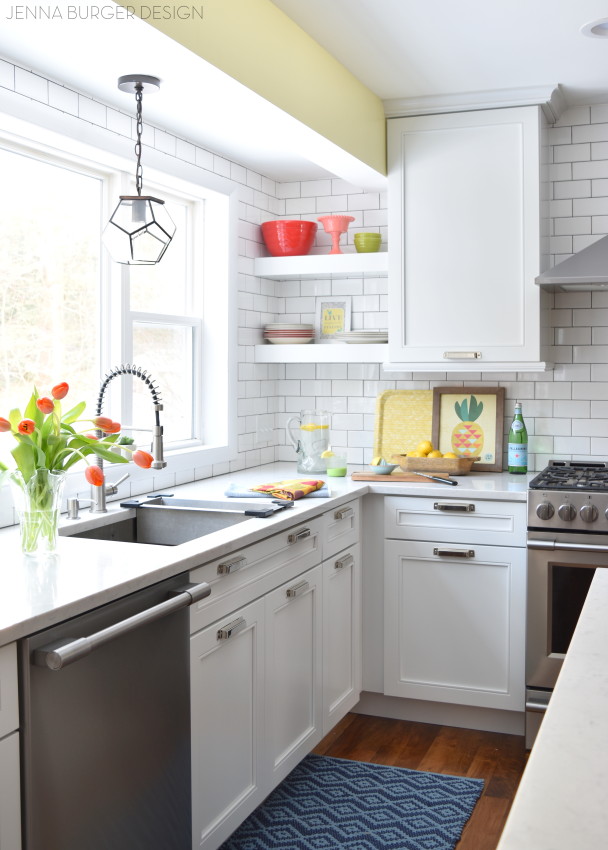
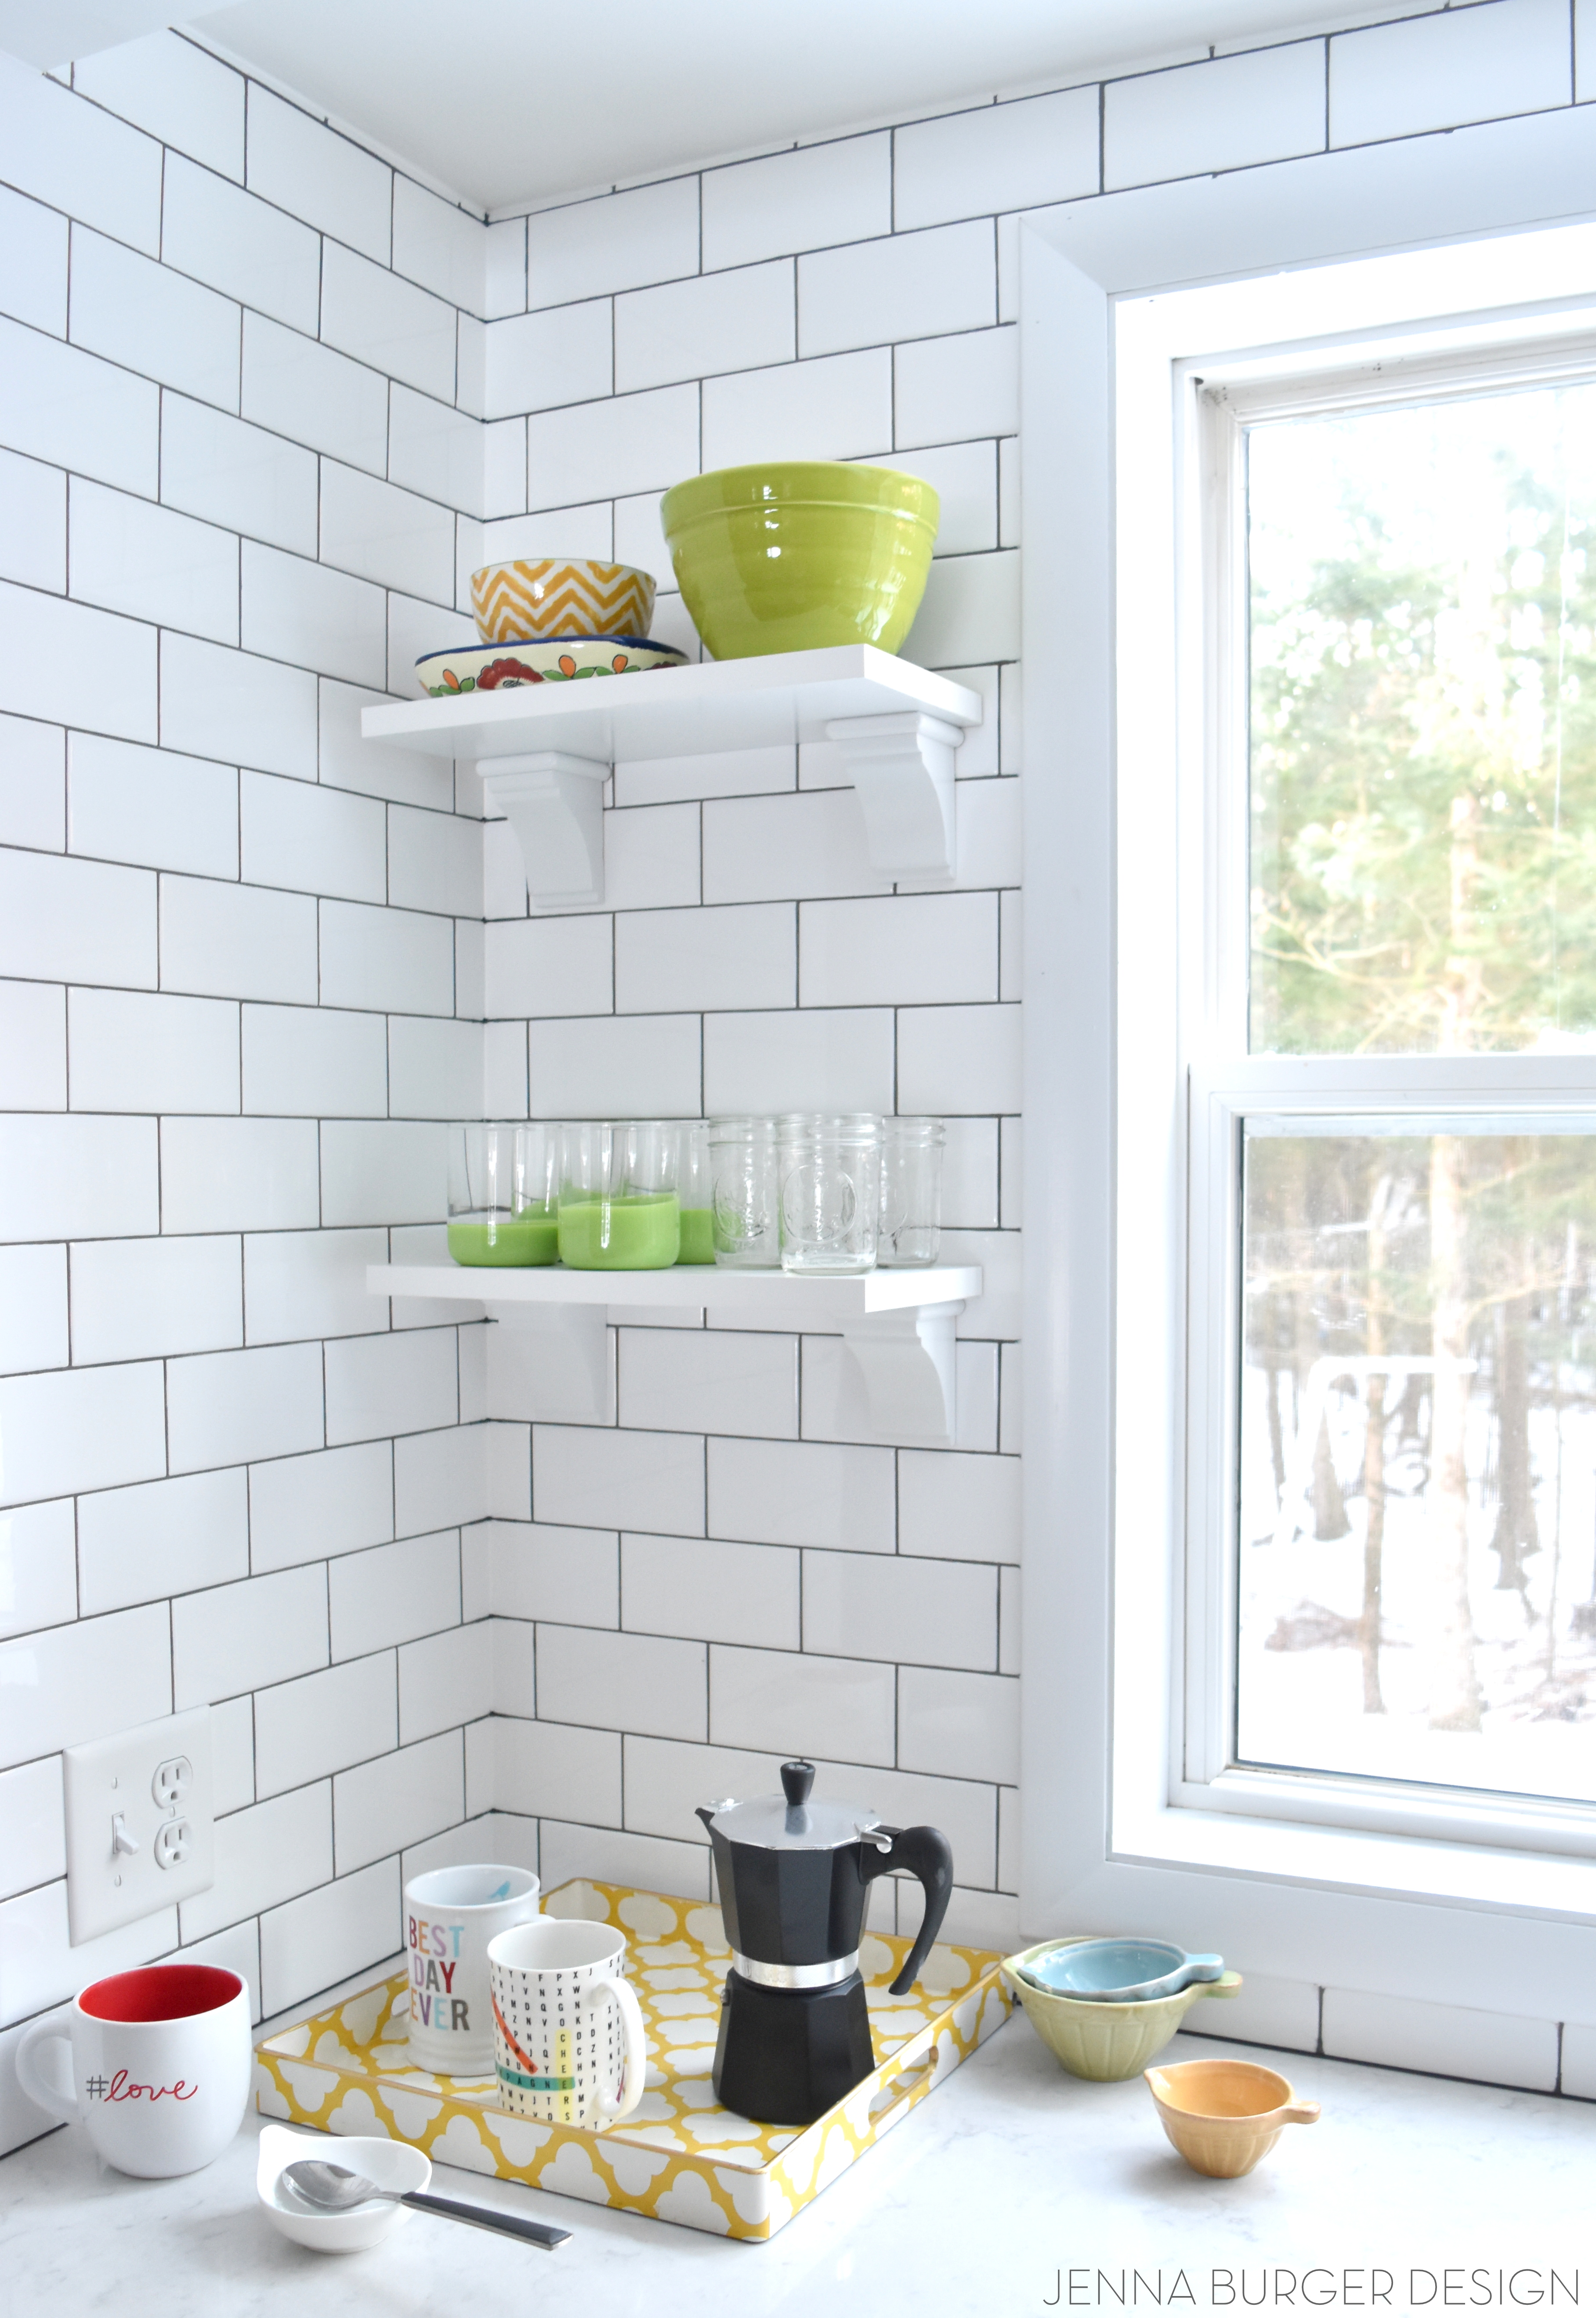
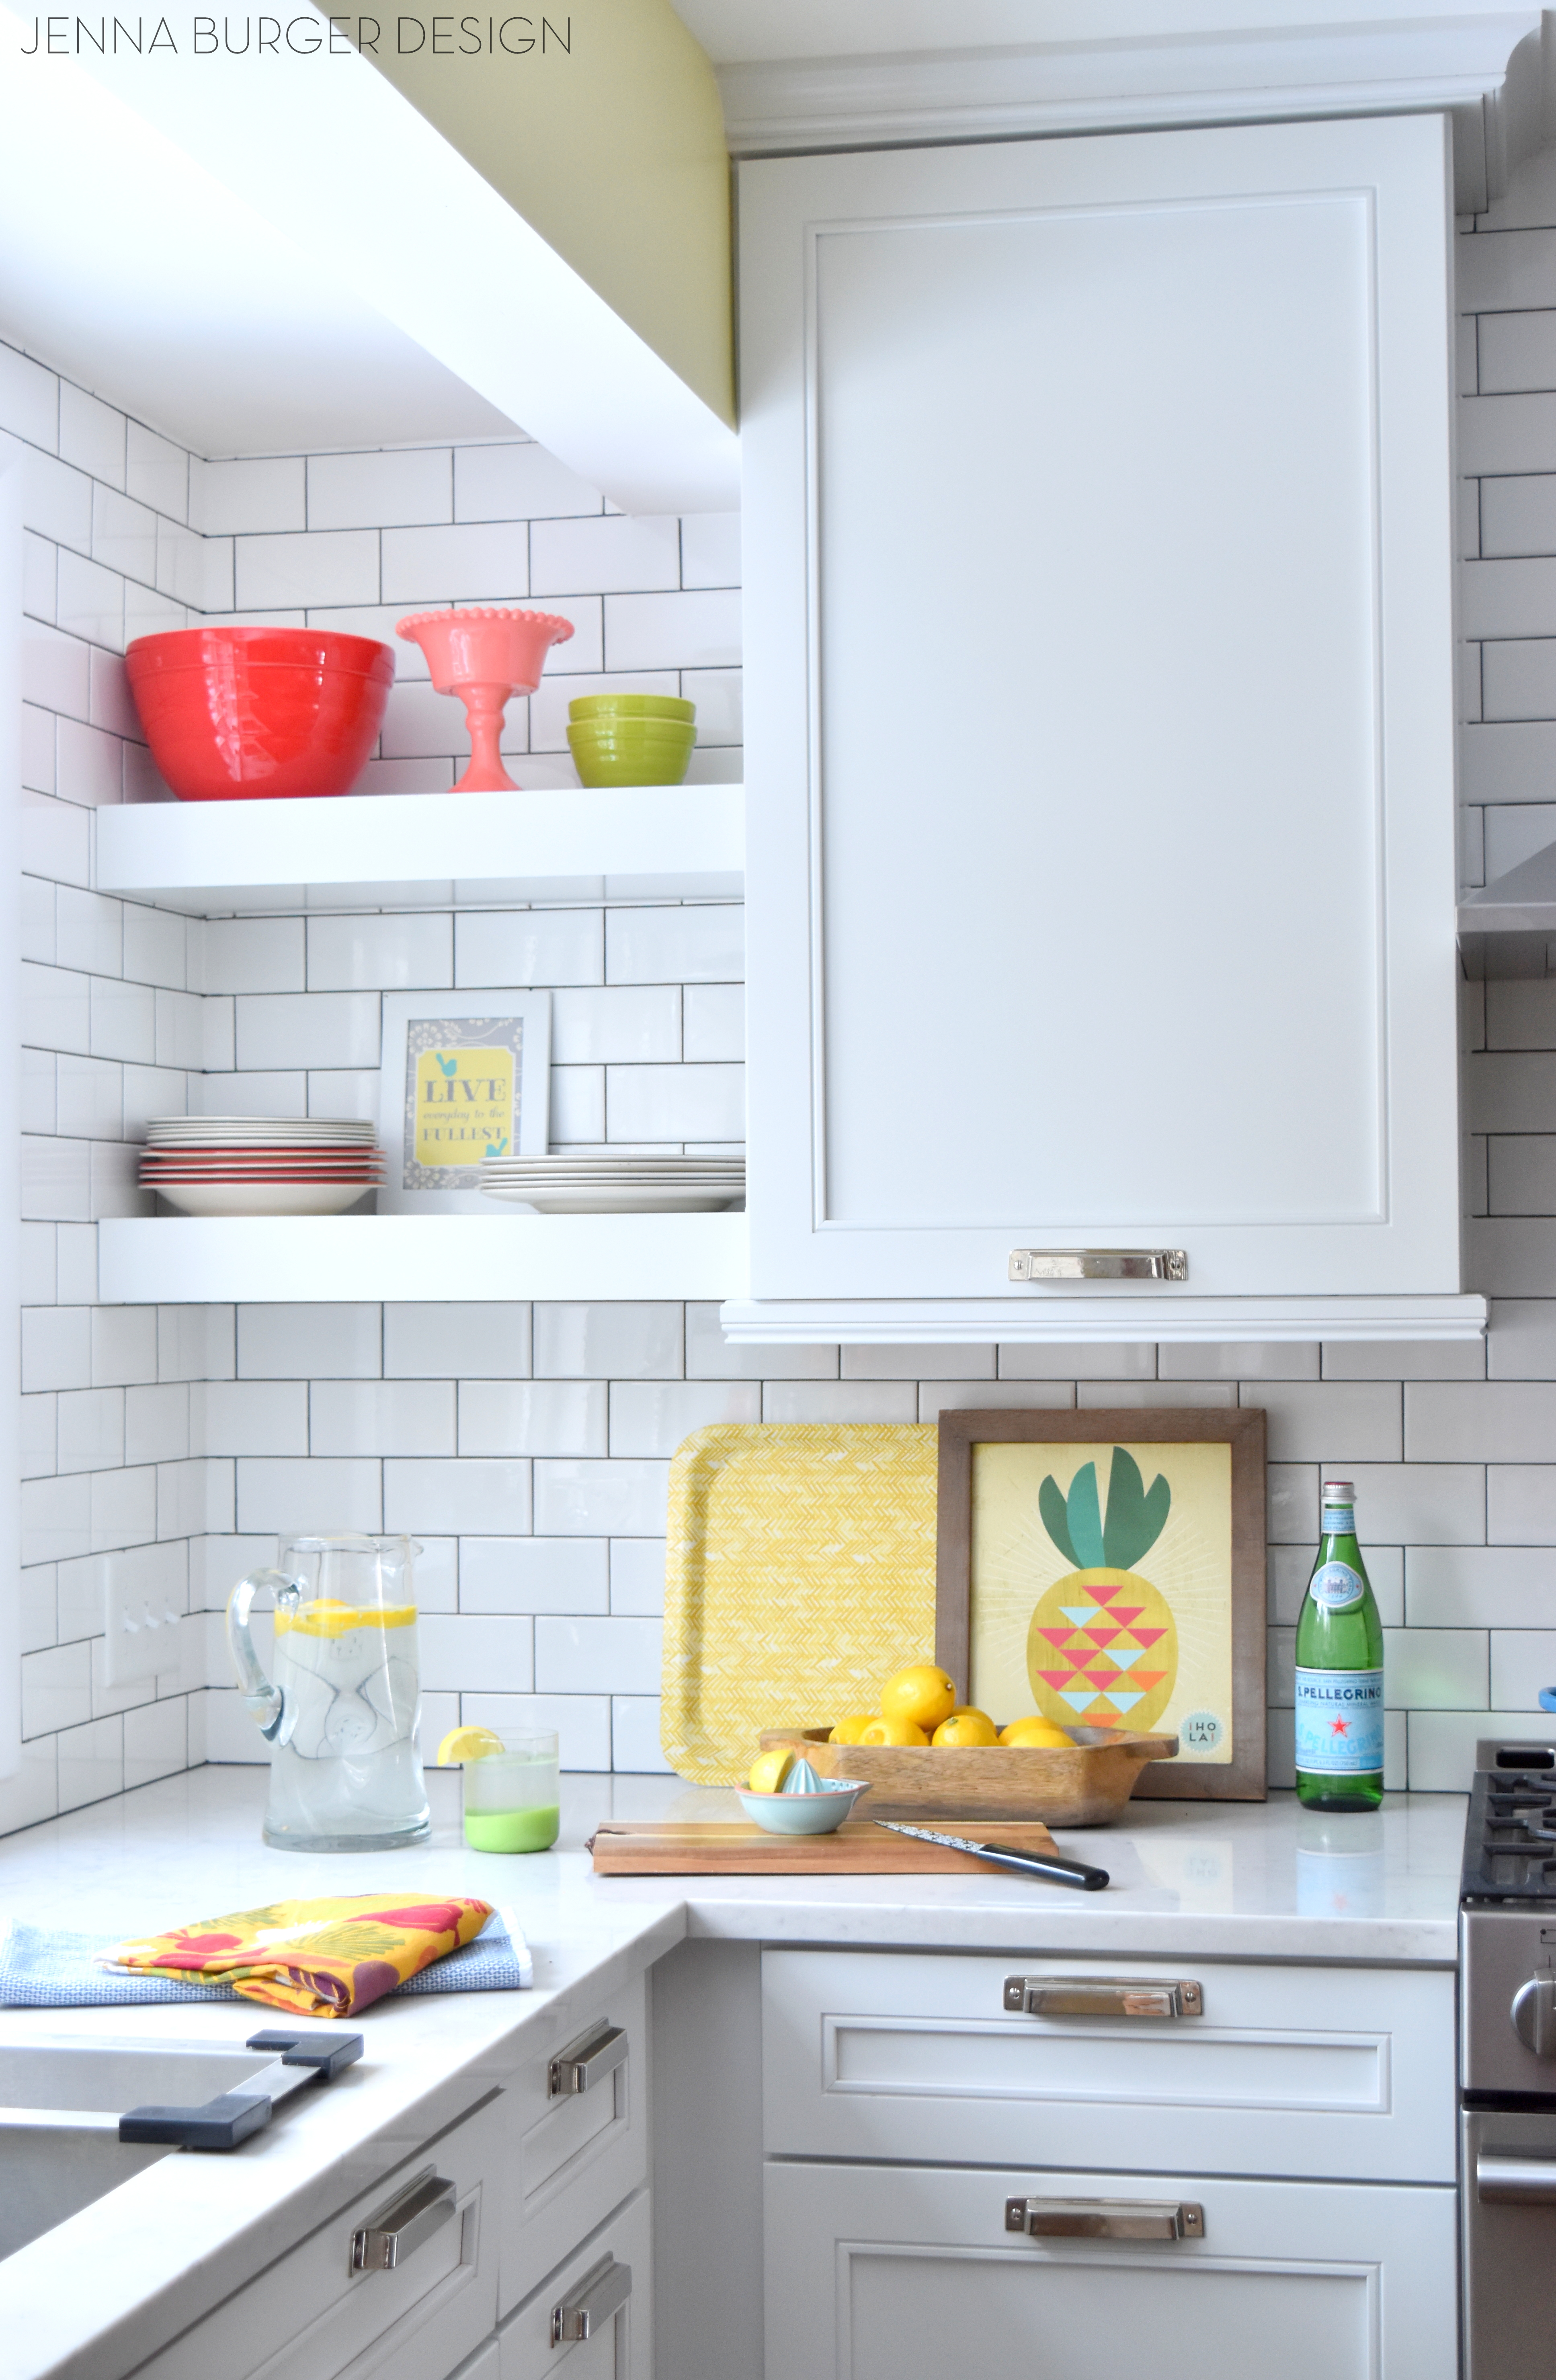
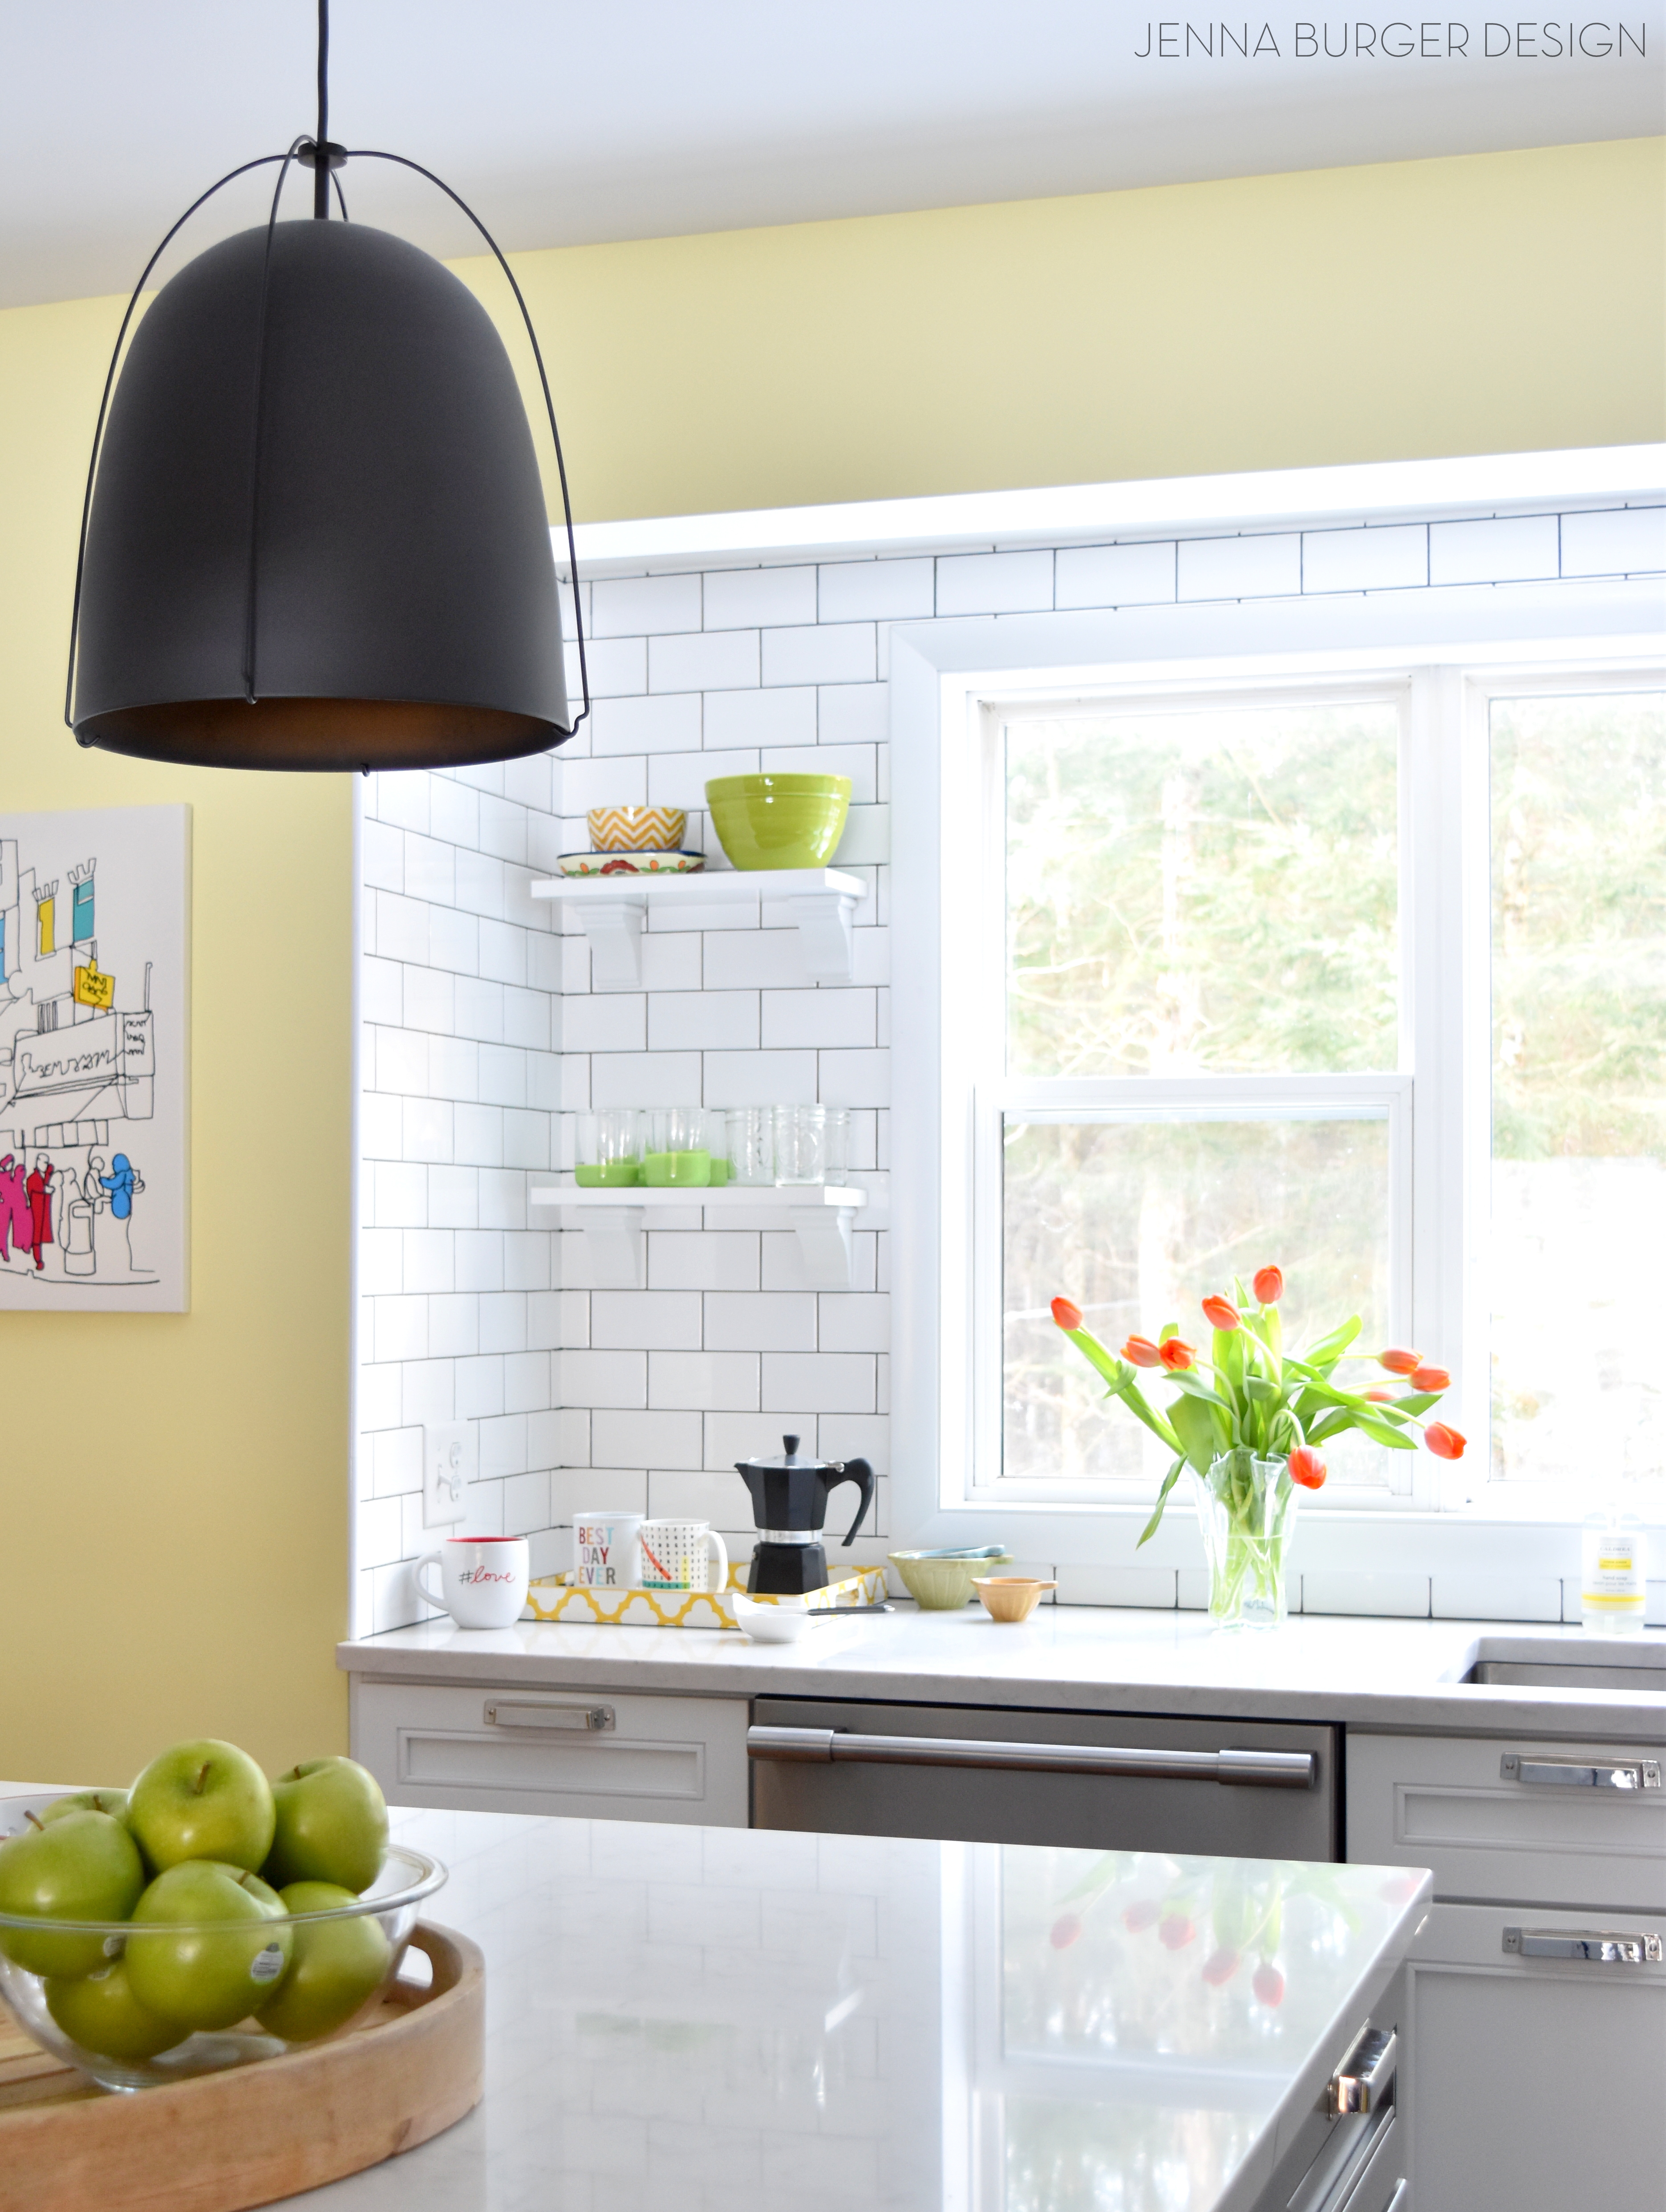
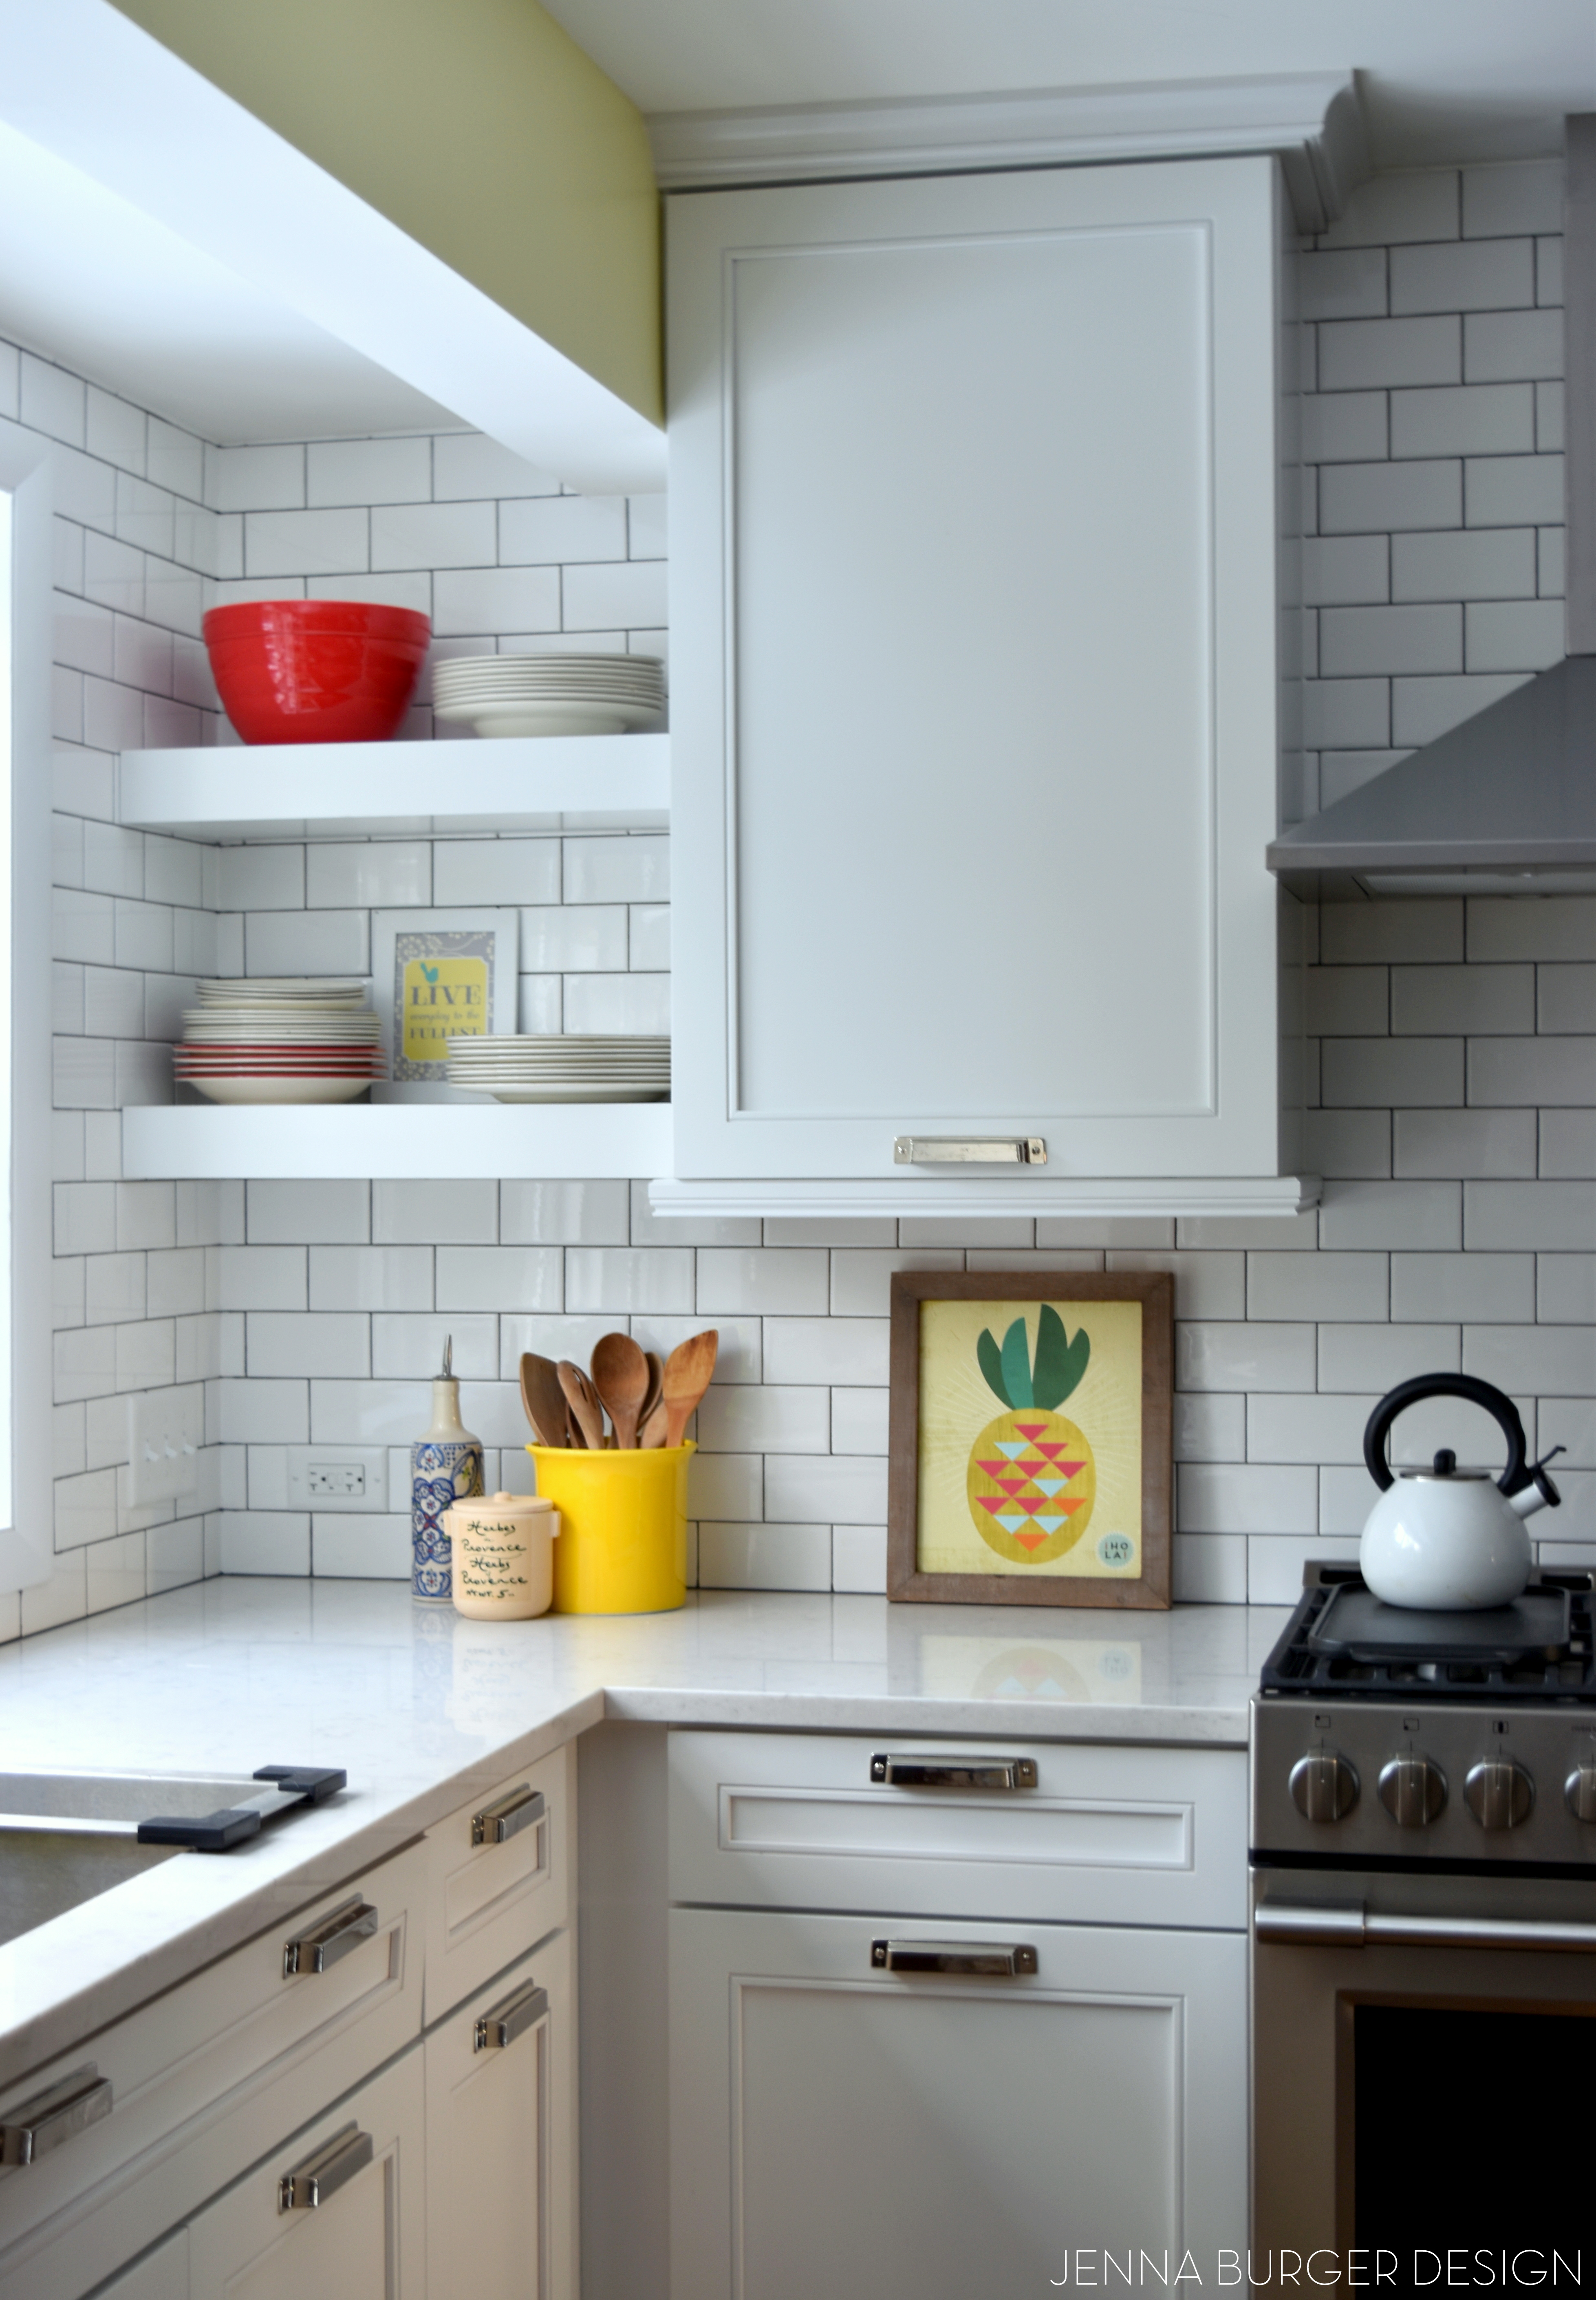
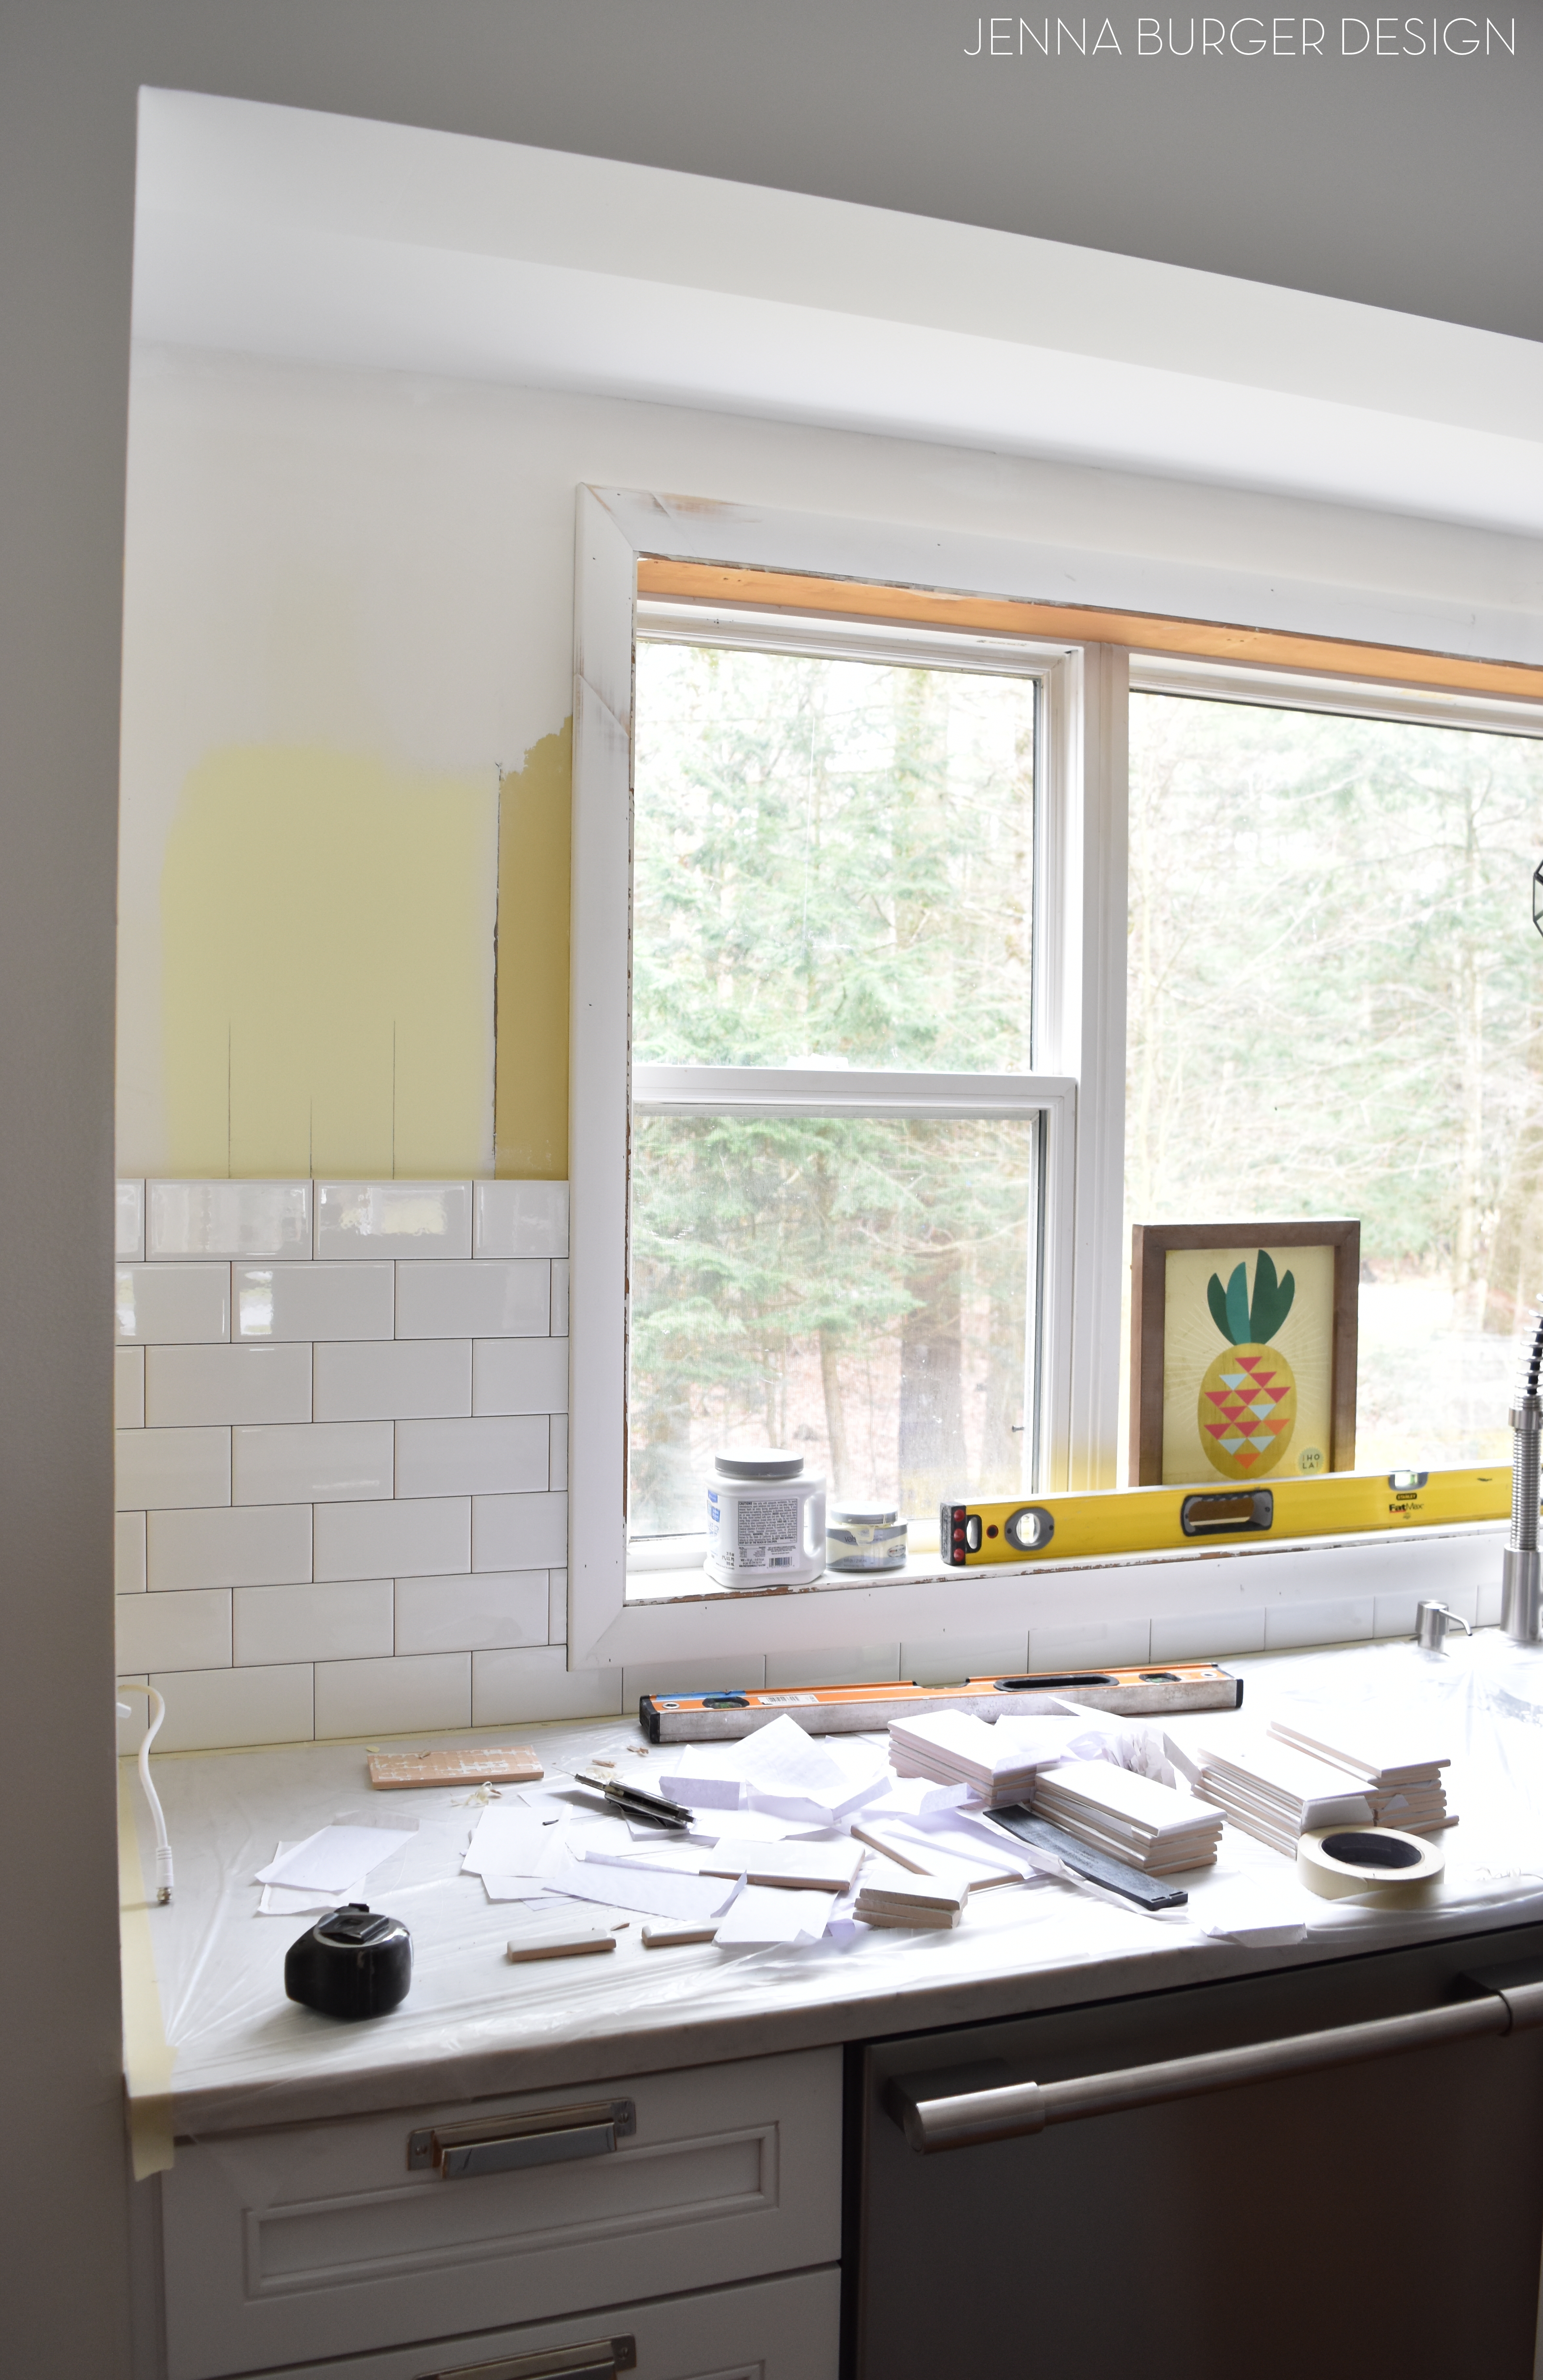
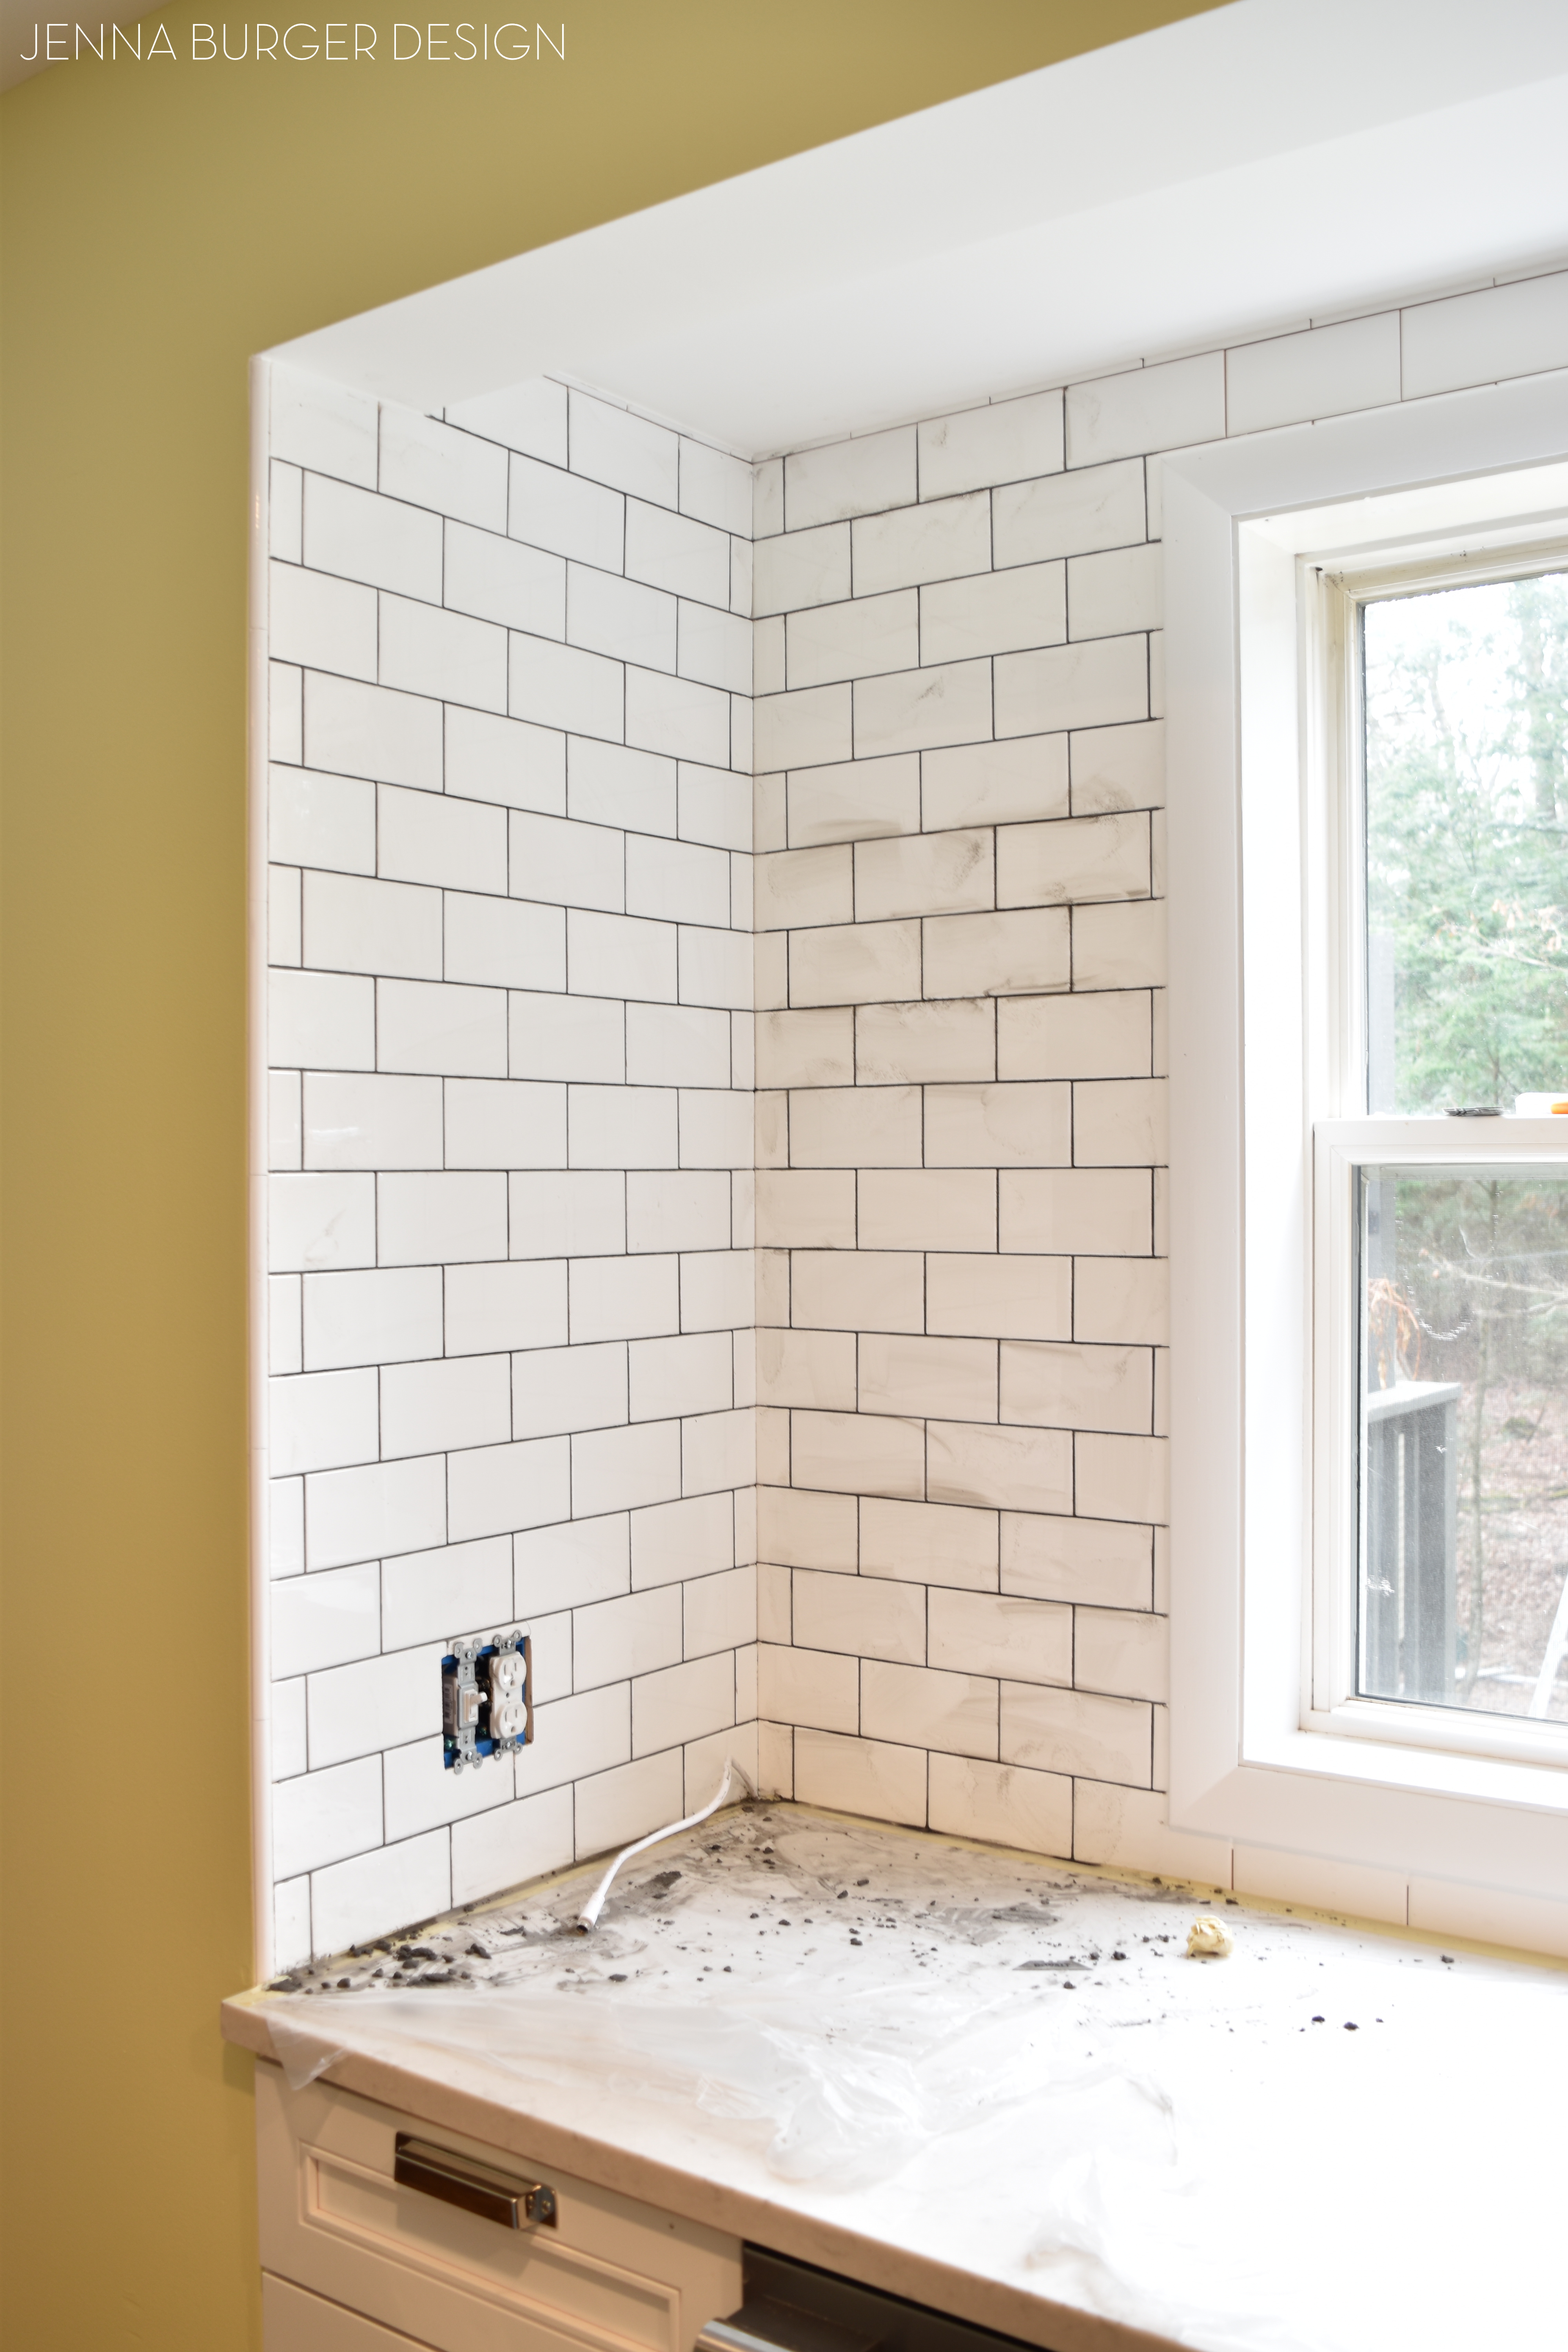
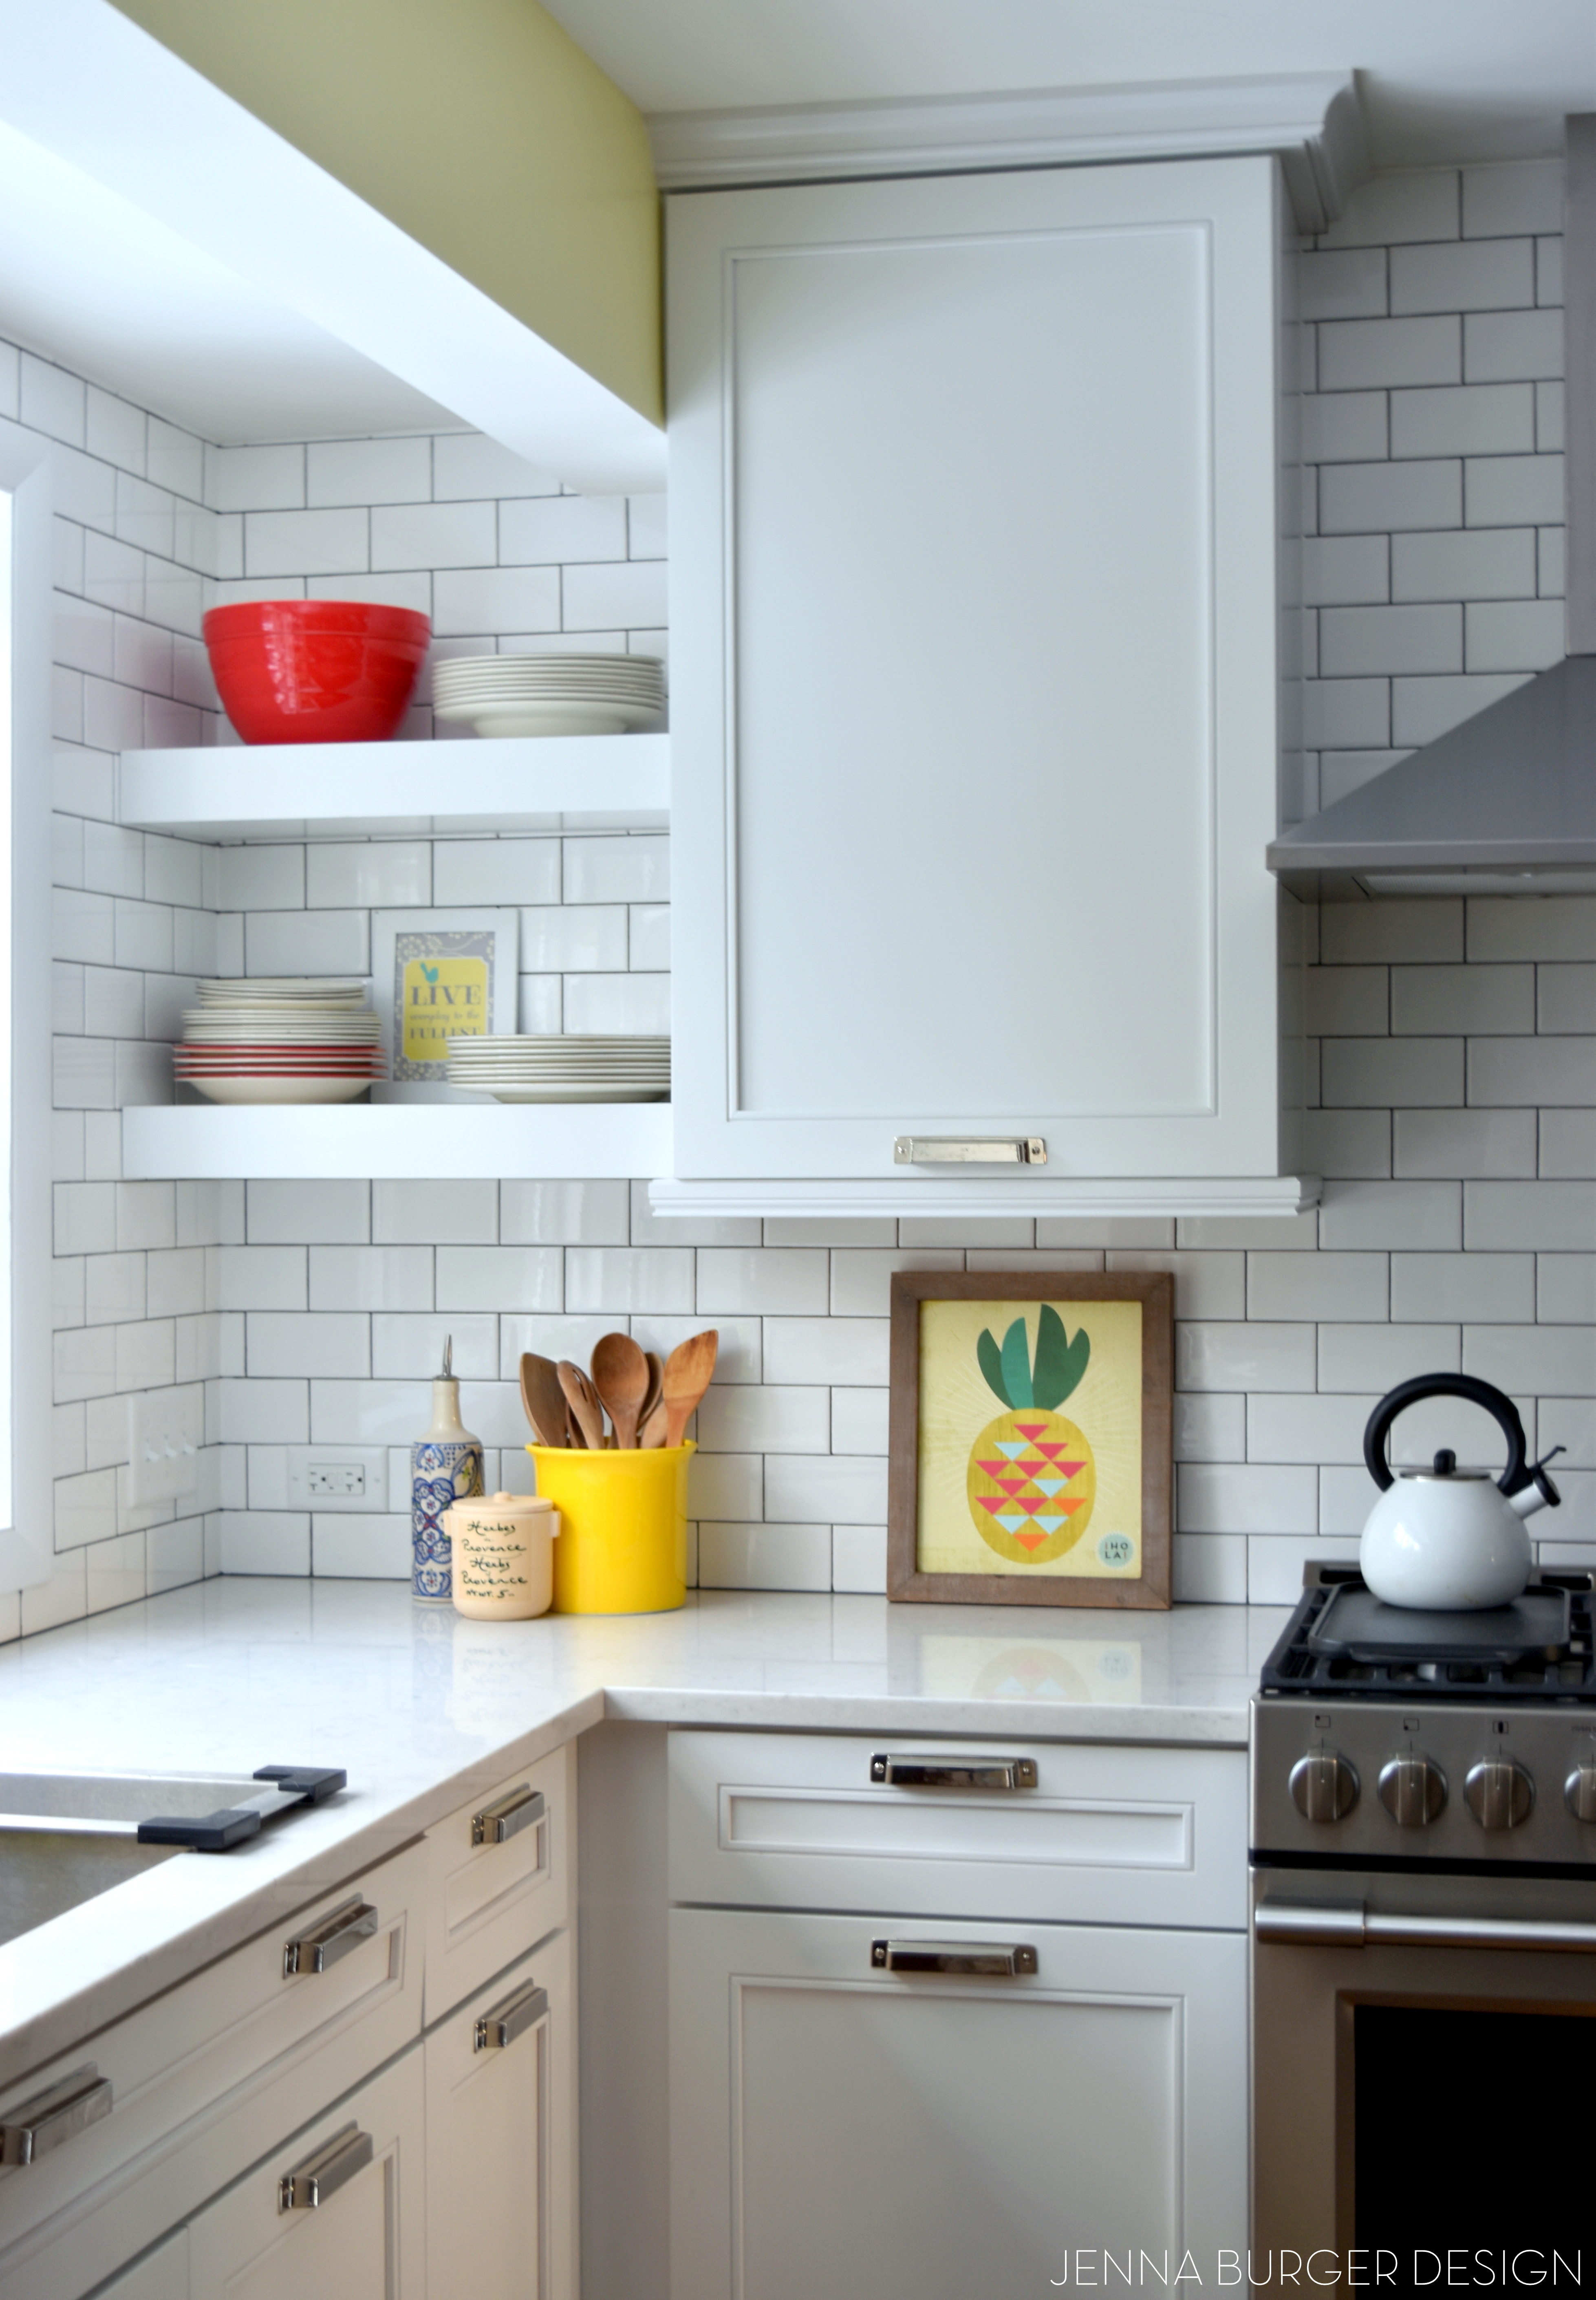
When the process of the remodel began, the intention was to remove the soffit above the upper cabinet and the soffit above the window. Unbeknownst to us in the beginning stages, the soffit above the window is a beam that is holding up the back of the house and couldn’t be removed – obviously. What we WERE able to do was have a higher ceiling in the window section, which allowed the new subway tile to continue up and around the entire window, which really heightens the space.
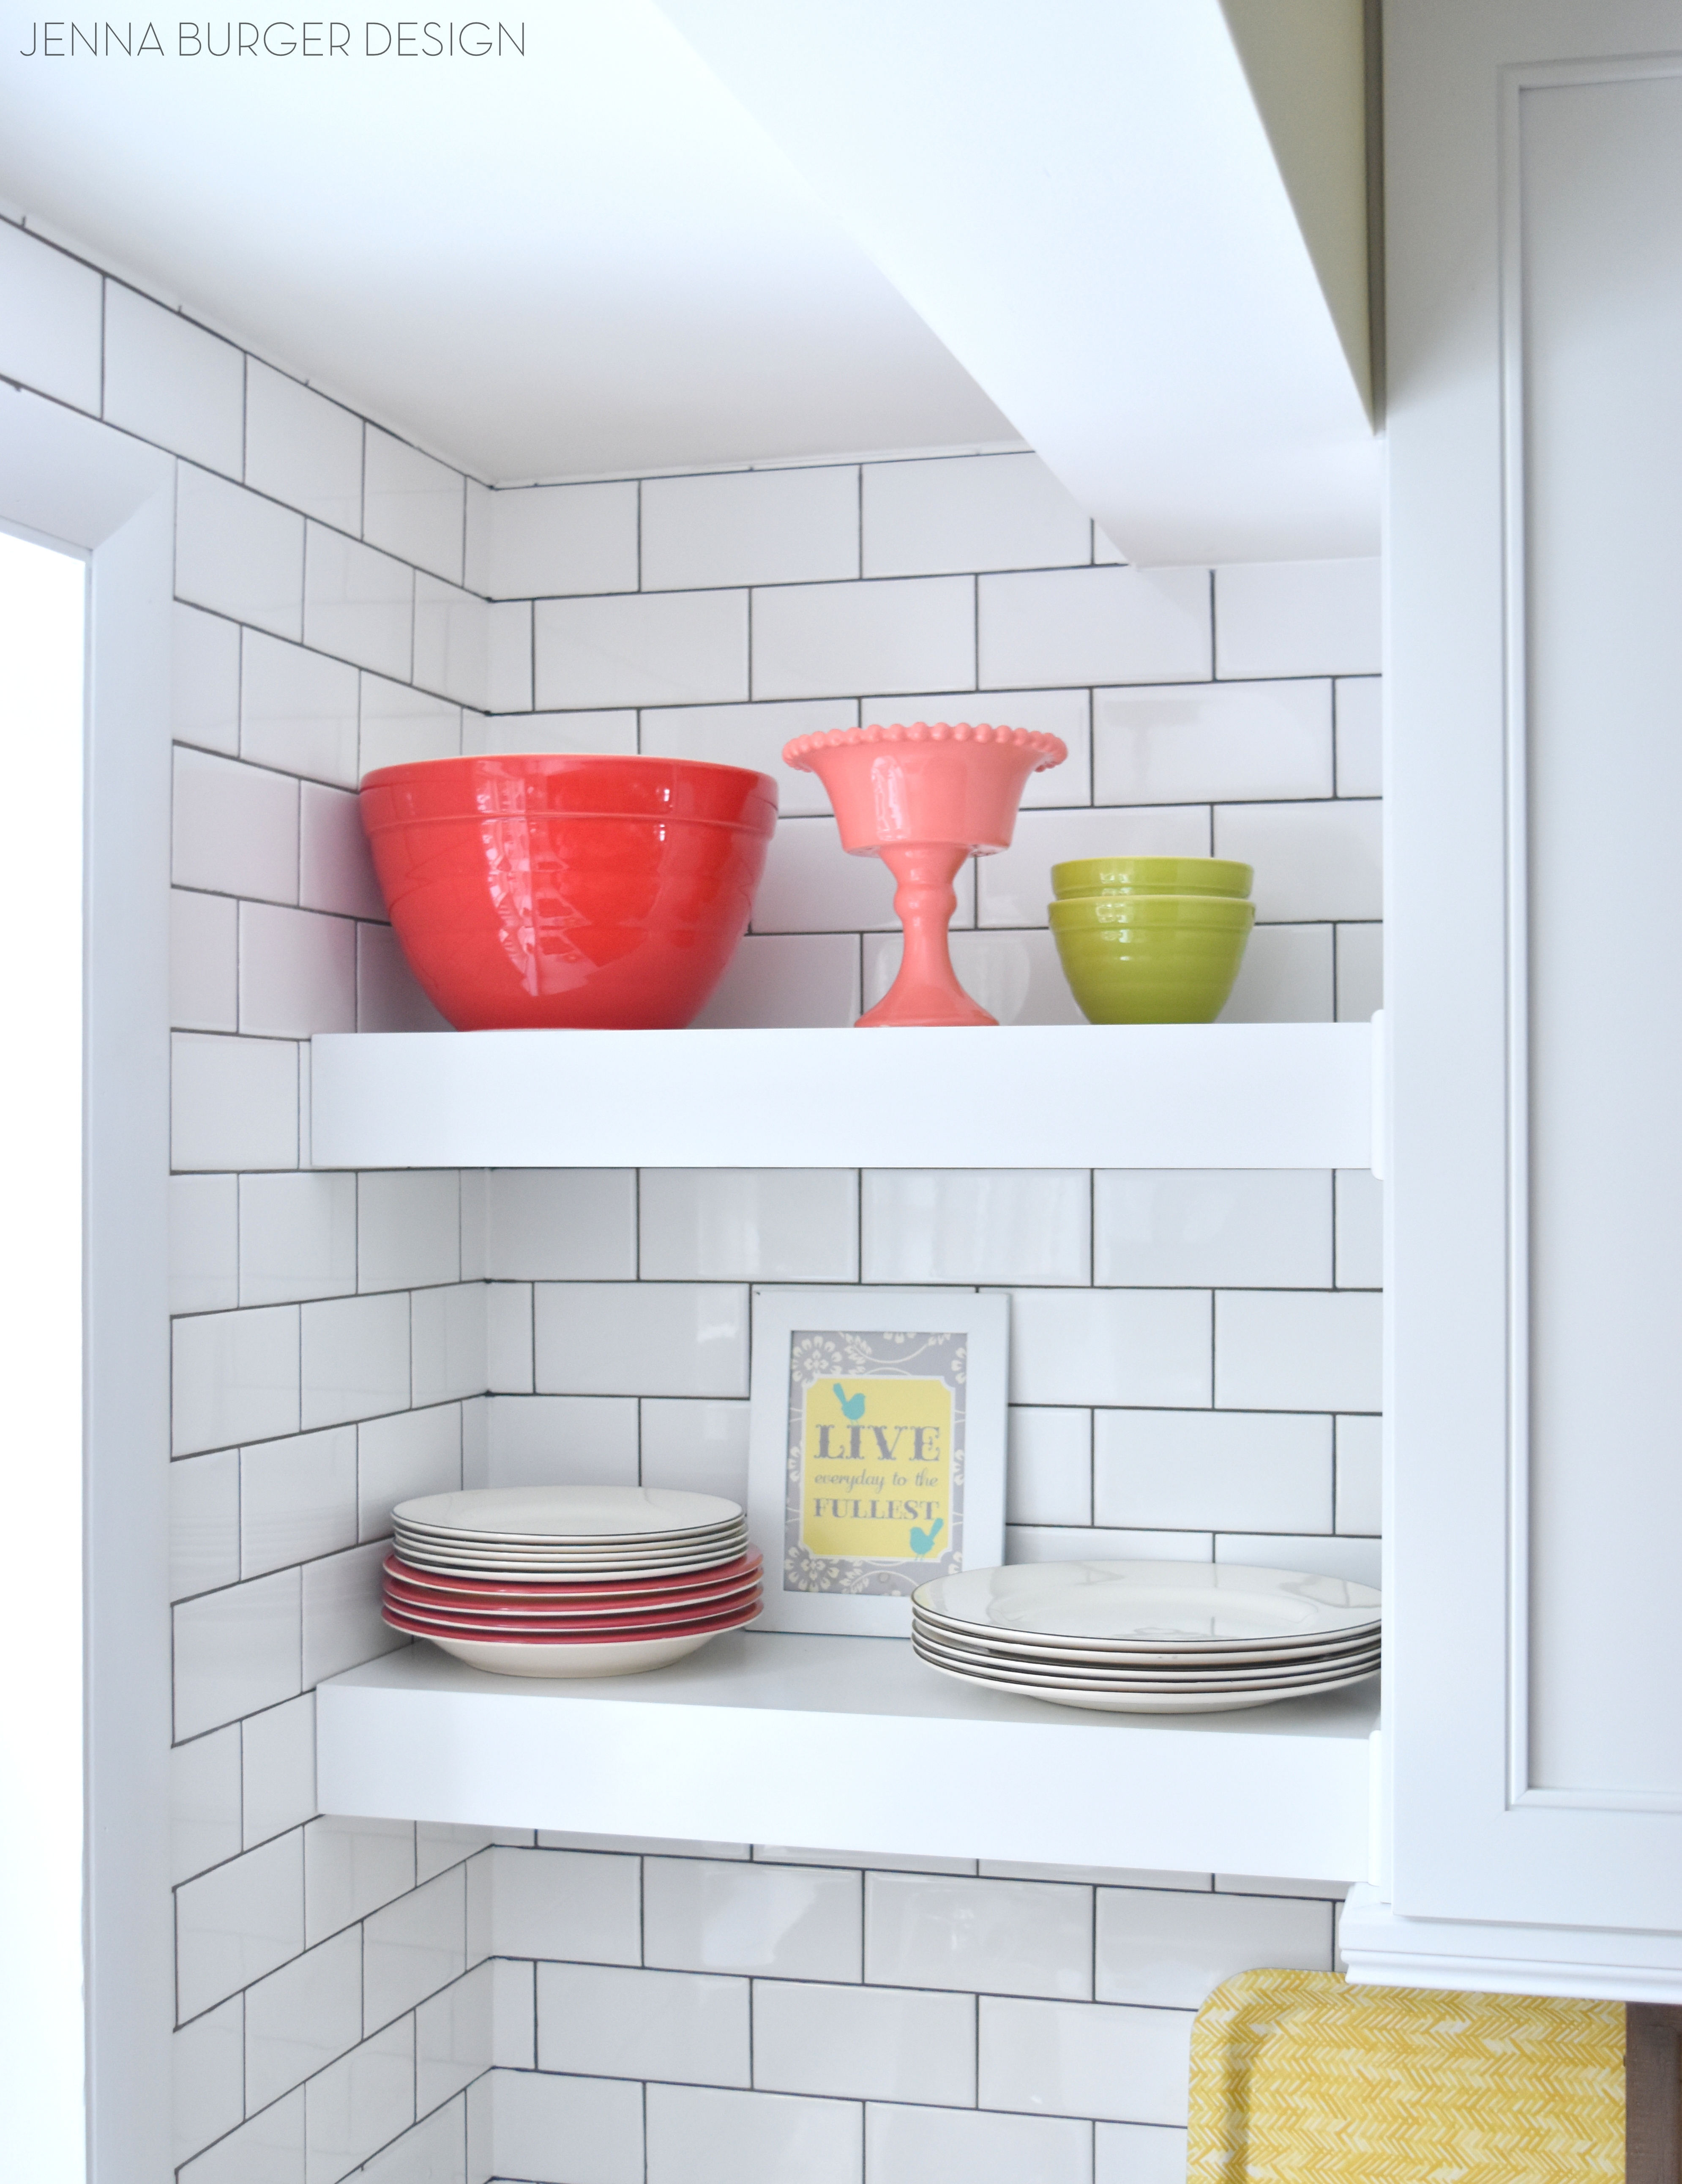
Instead of having a lower cabinet under the soffit, it was decided that open shelves would be best – for aesthetics + function.
I love the open + airy feel that the 10″ deep thick shelves give to this section of the kitchen. Plus the 3″ thick shelves are ultra beafy (I confirmed this many times with the contractor) so they hold all the large dishes + small plates and bowls. Super easy to access and grab.

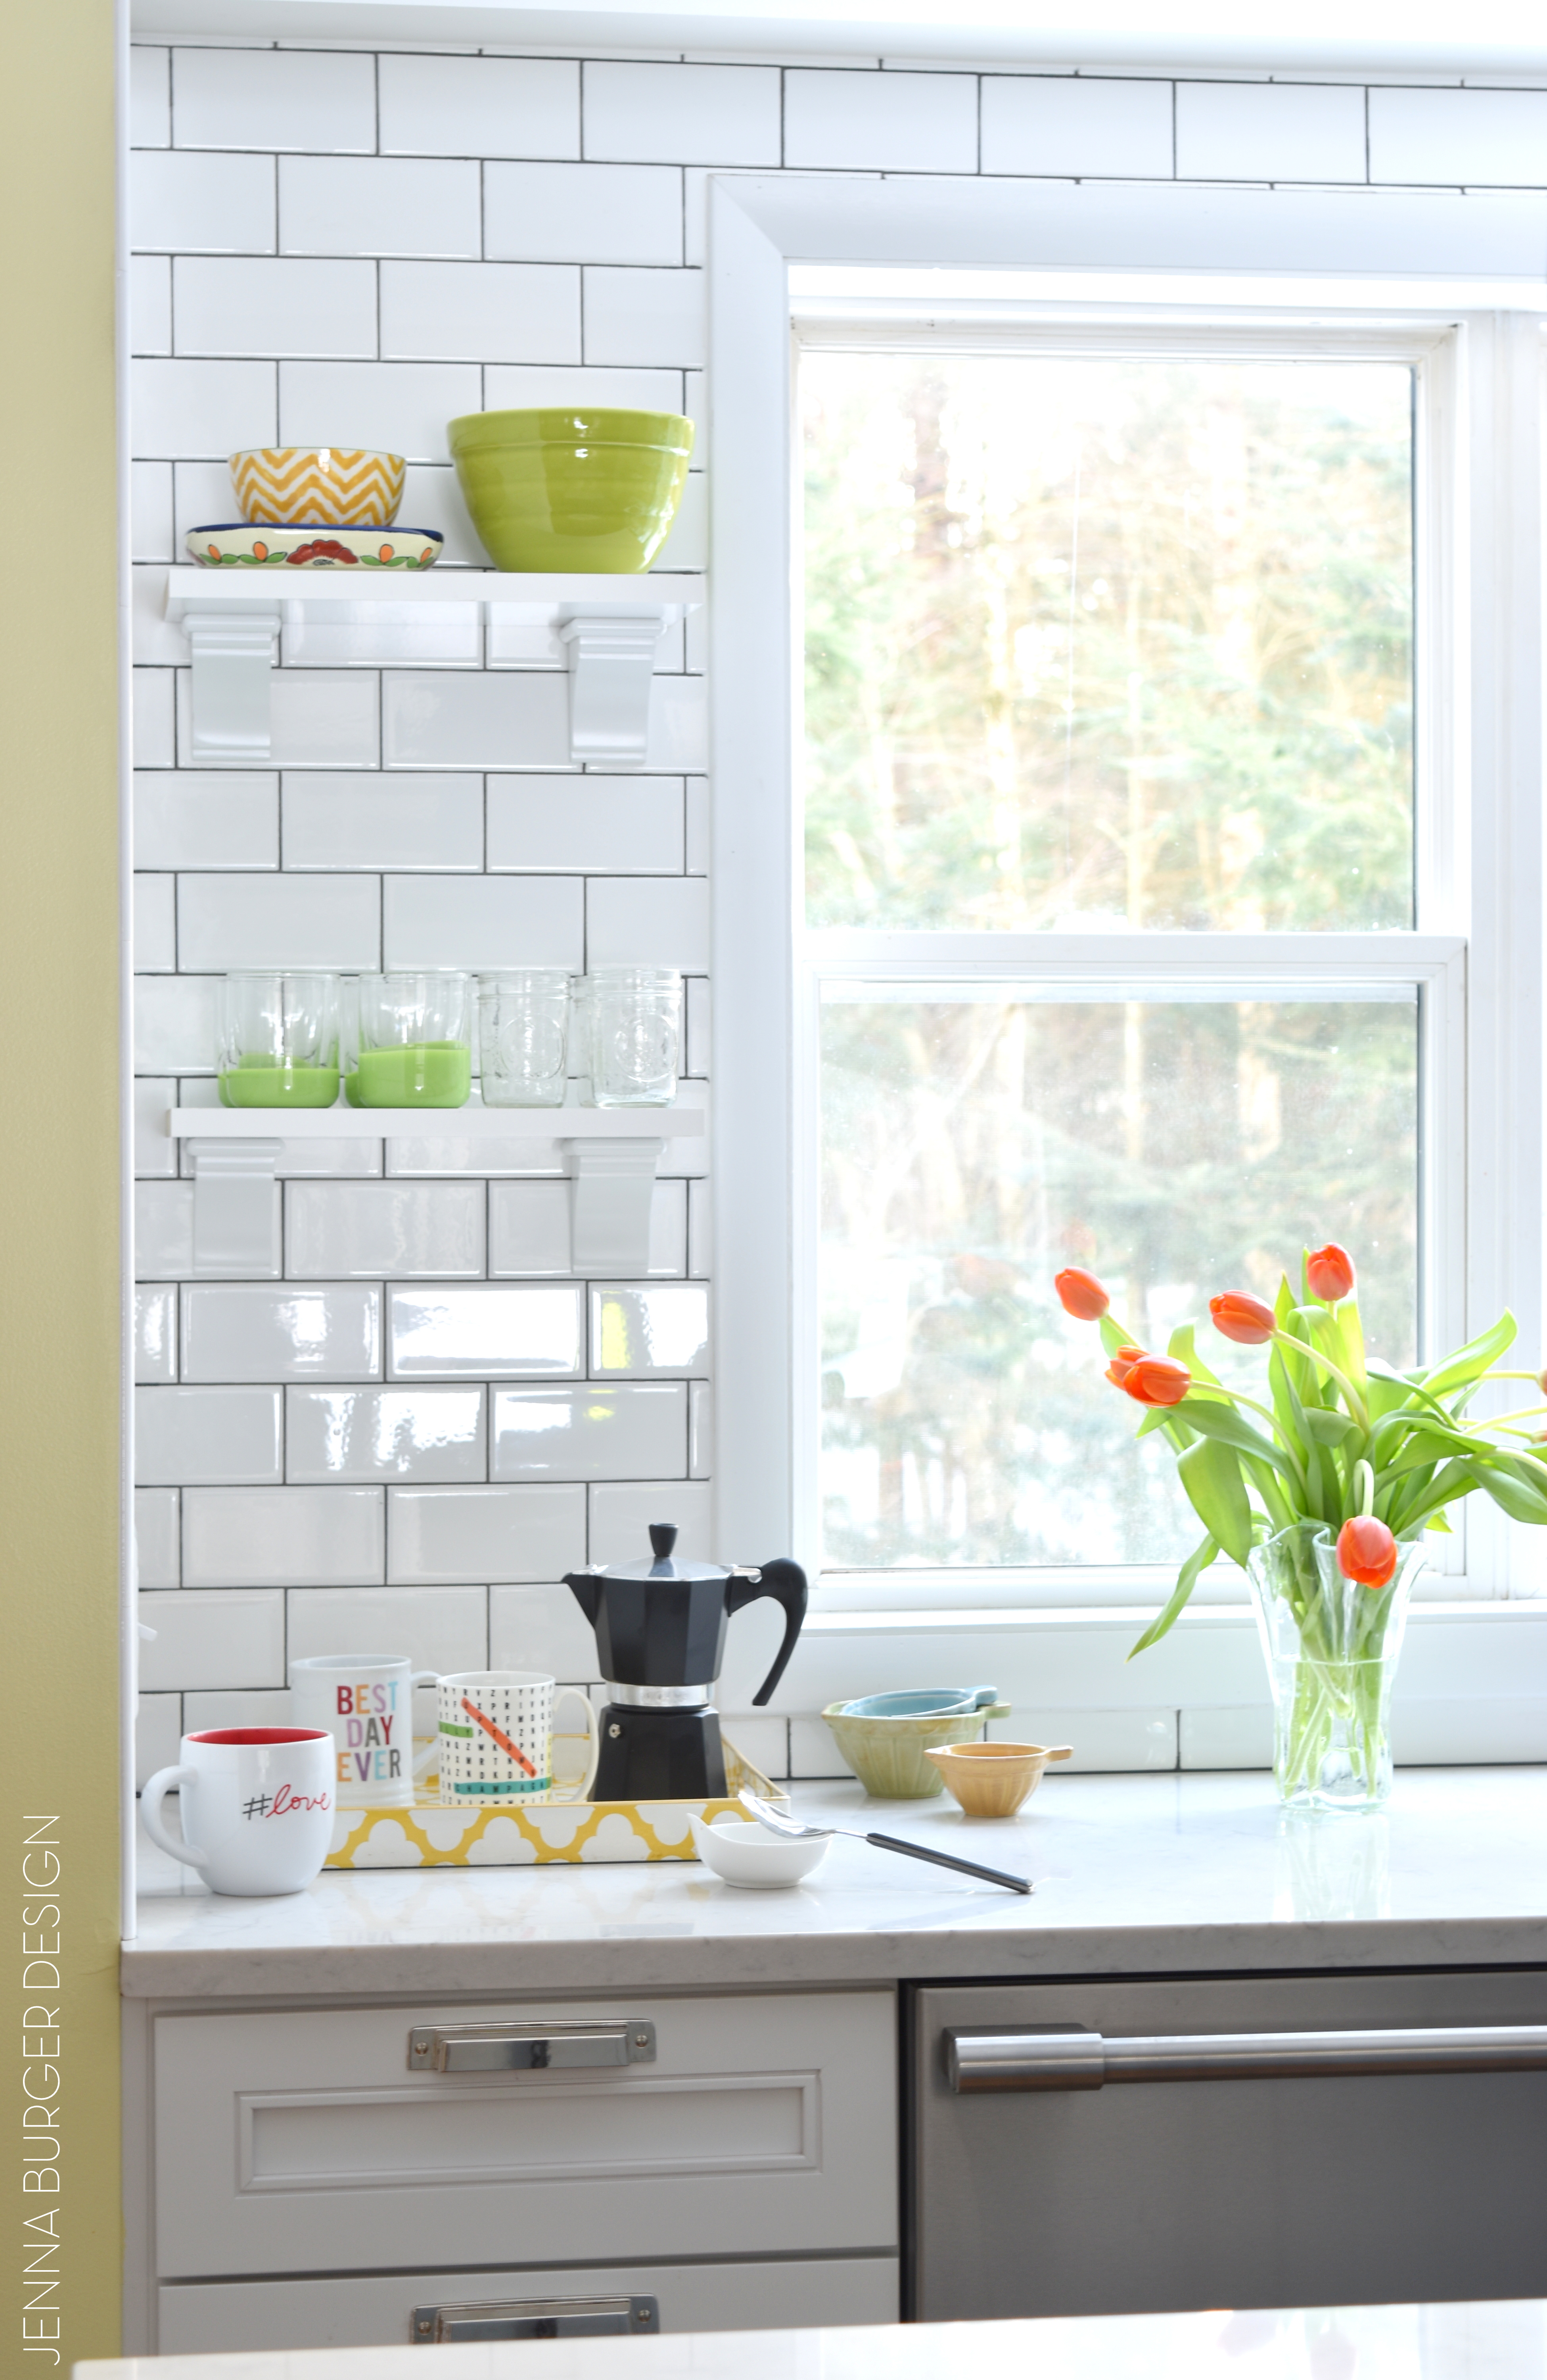
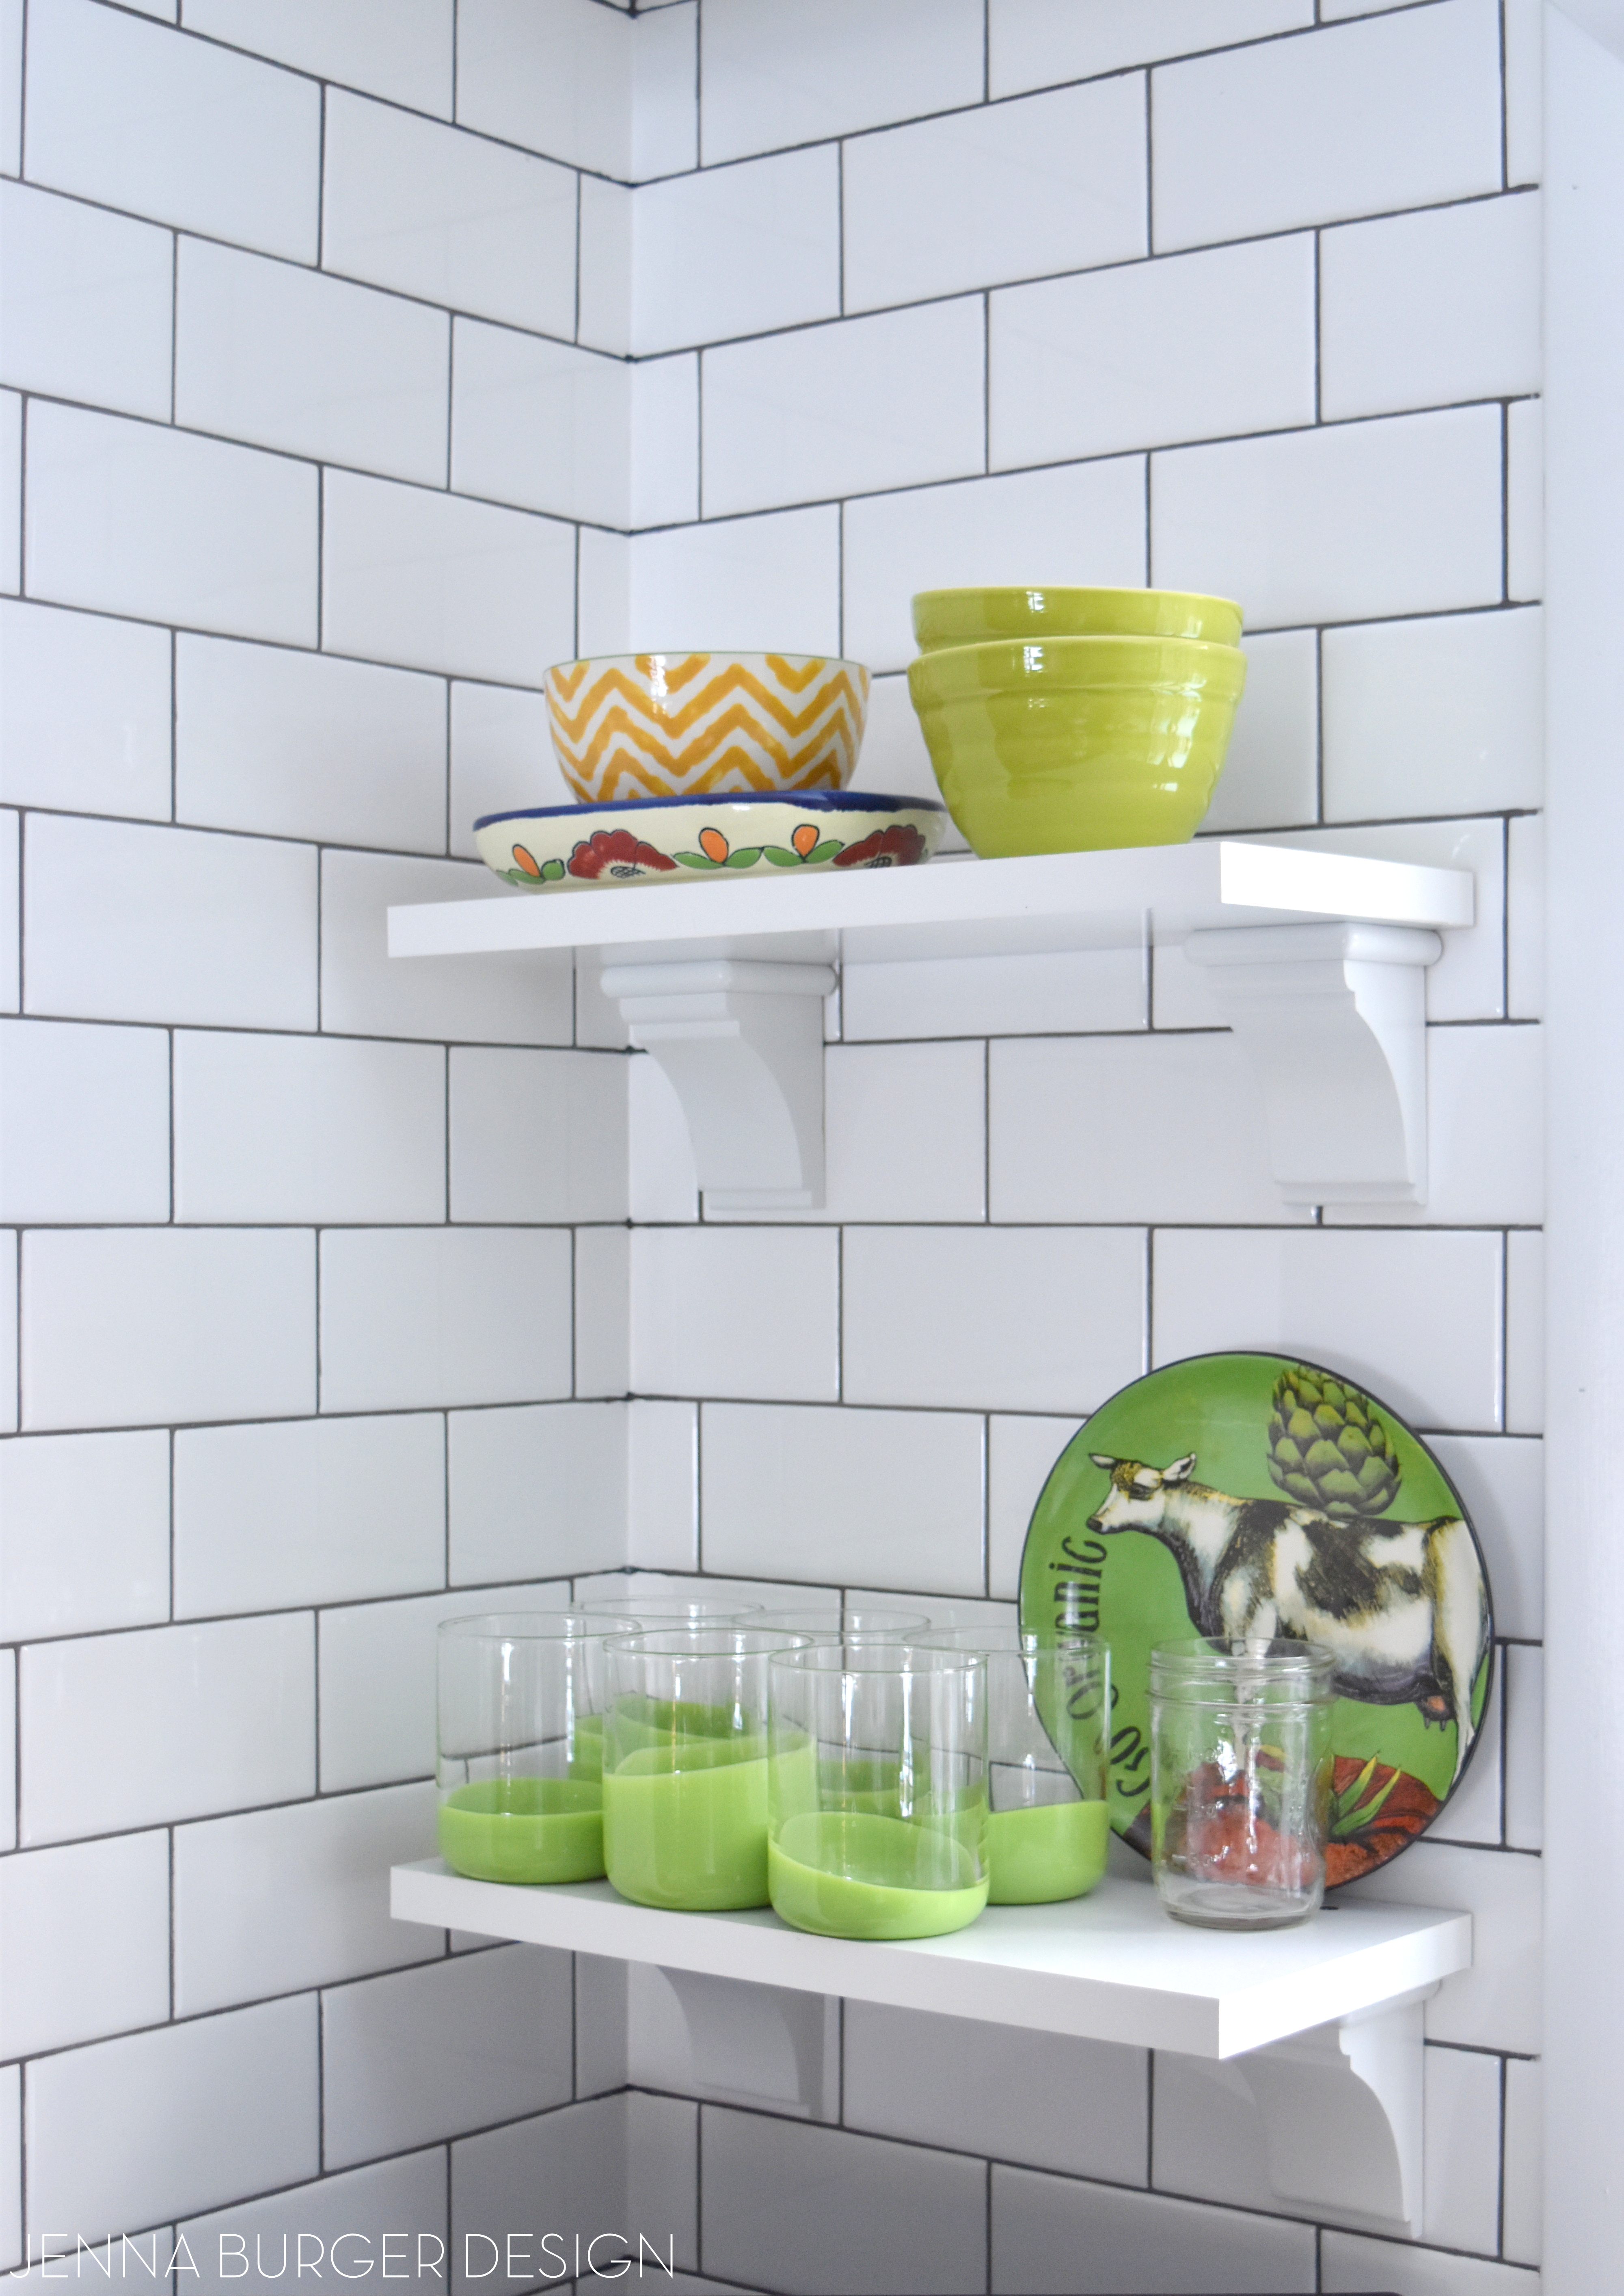
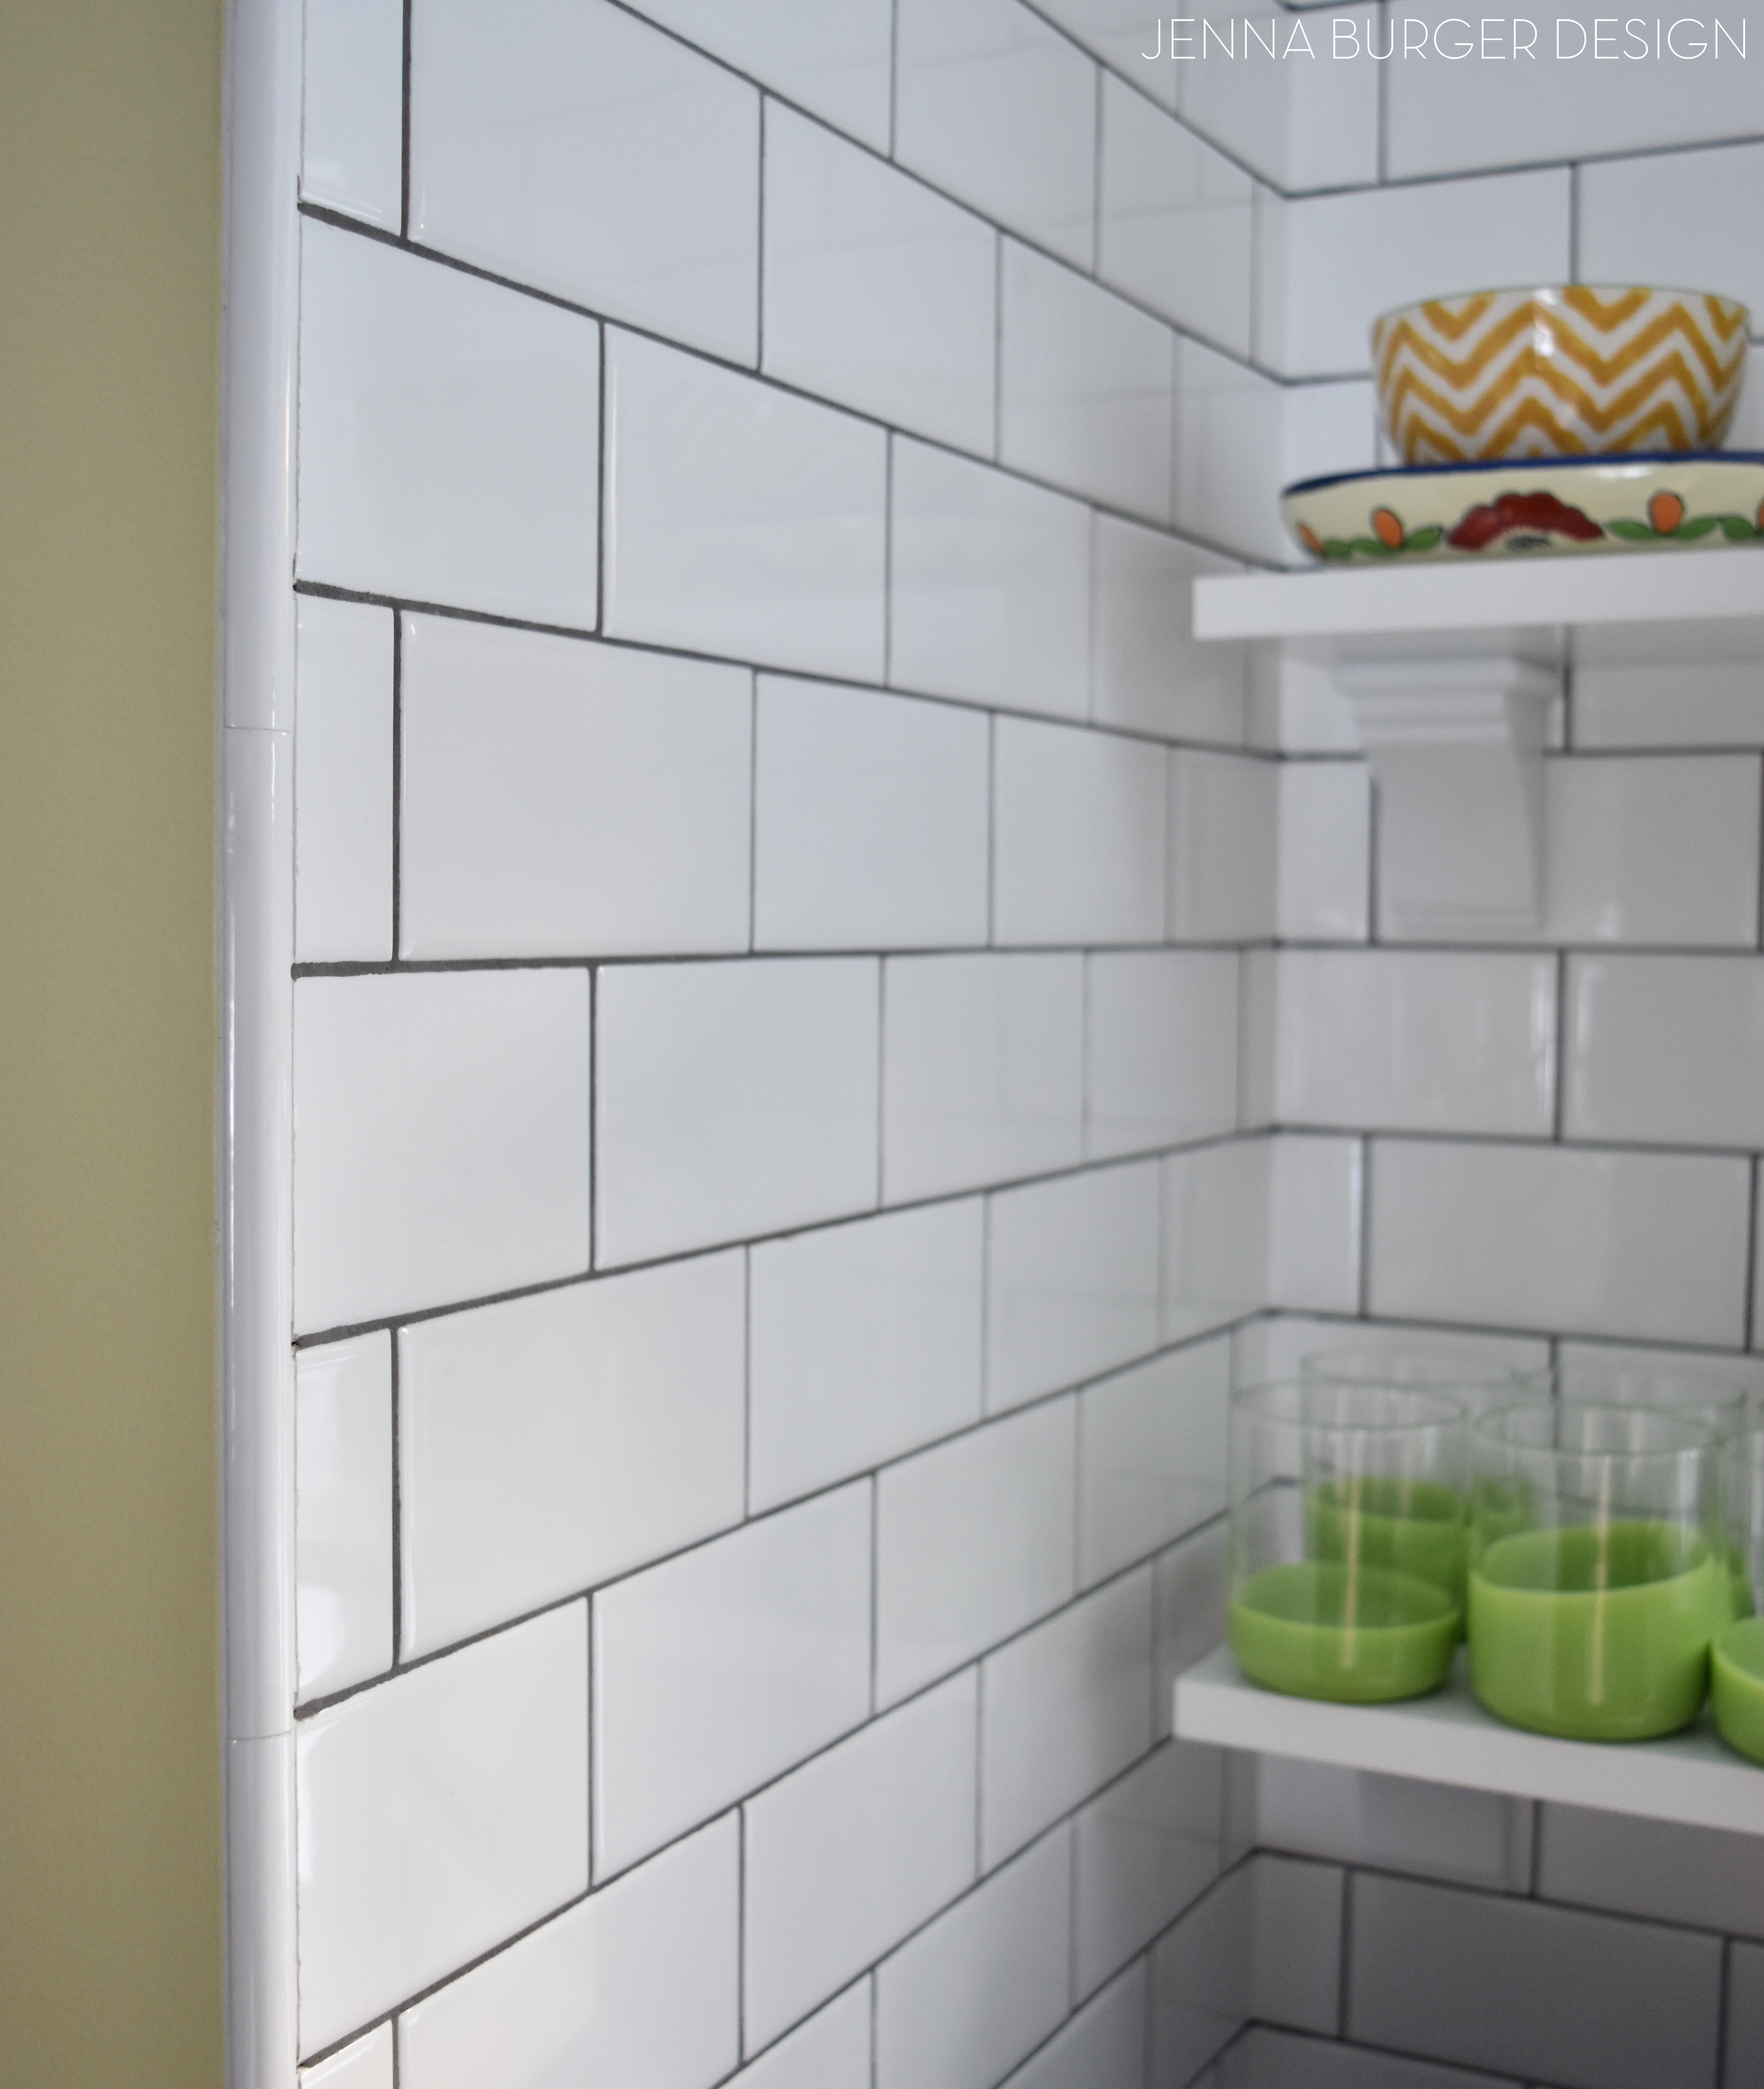
On the other side of the window, the left side, there are two additional shelves with decorative corbels. These shelves are only about 7″ deep and can’t hold as much weight, so they’re perfect for glasses + smaller light-weight bowls. Again, so easy to access.

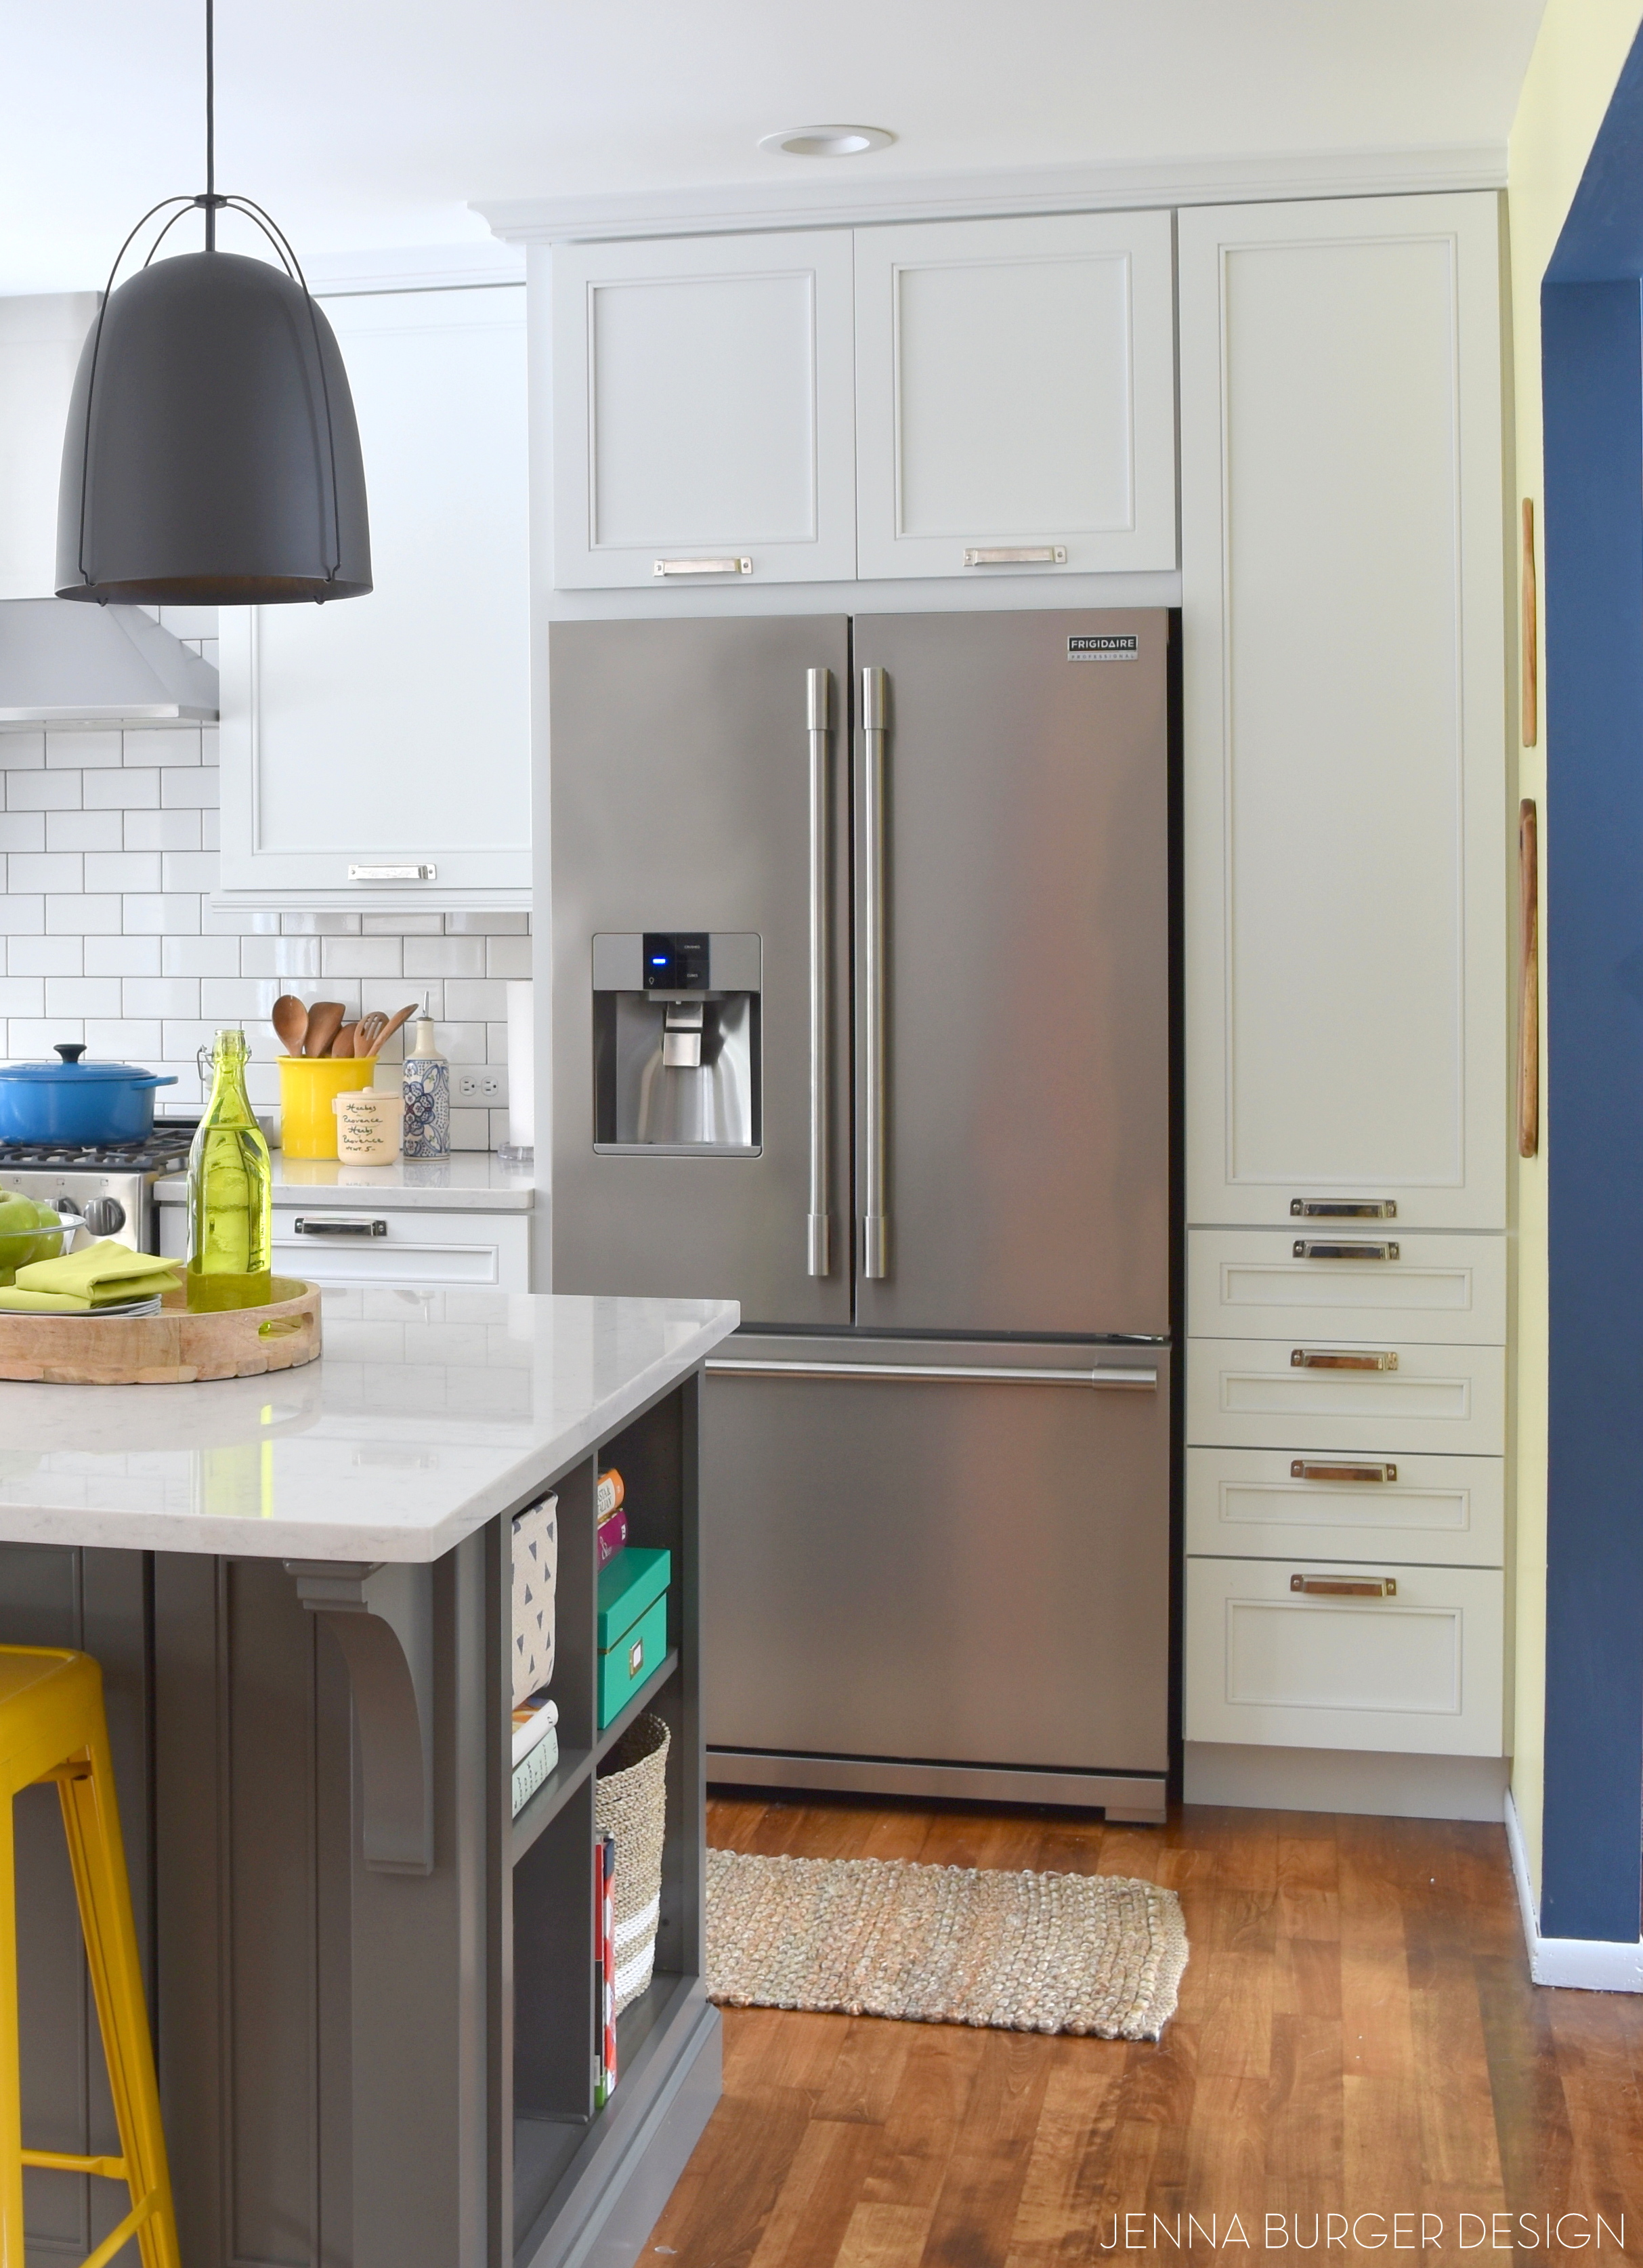
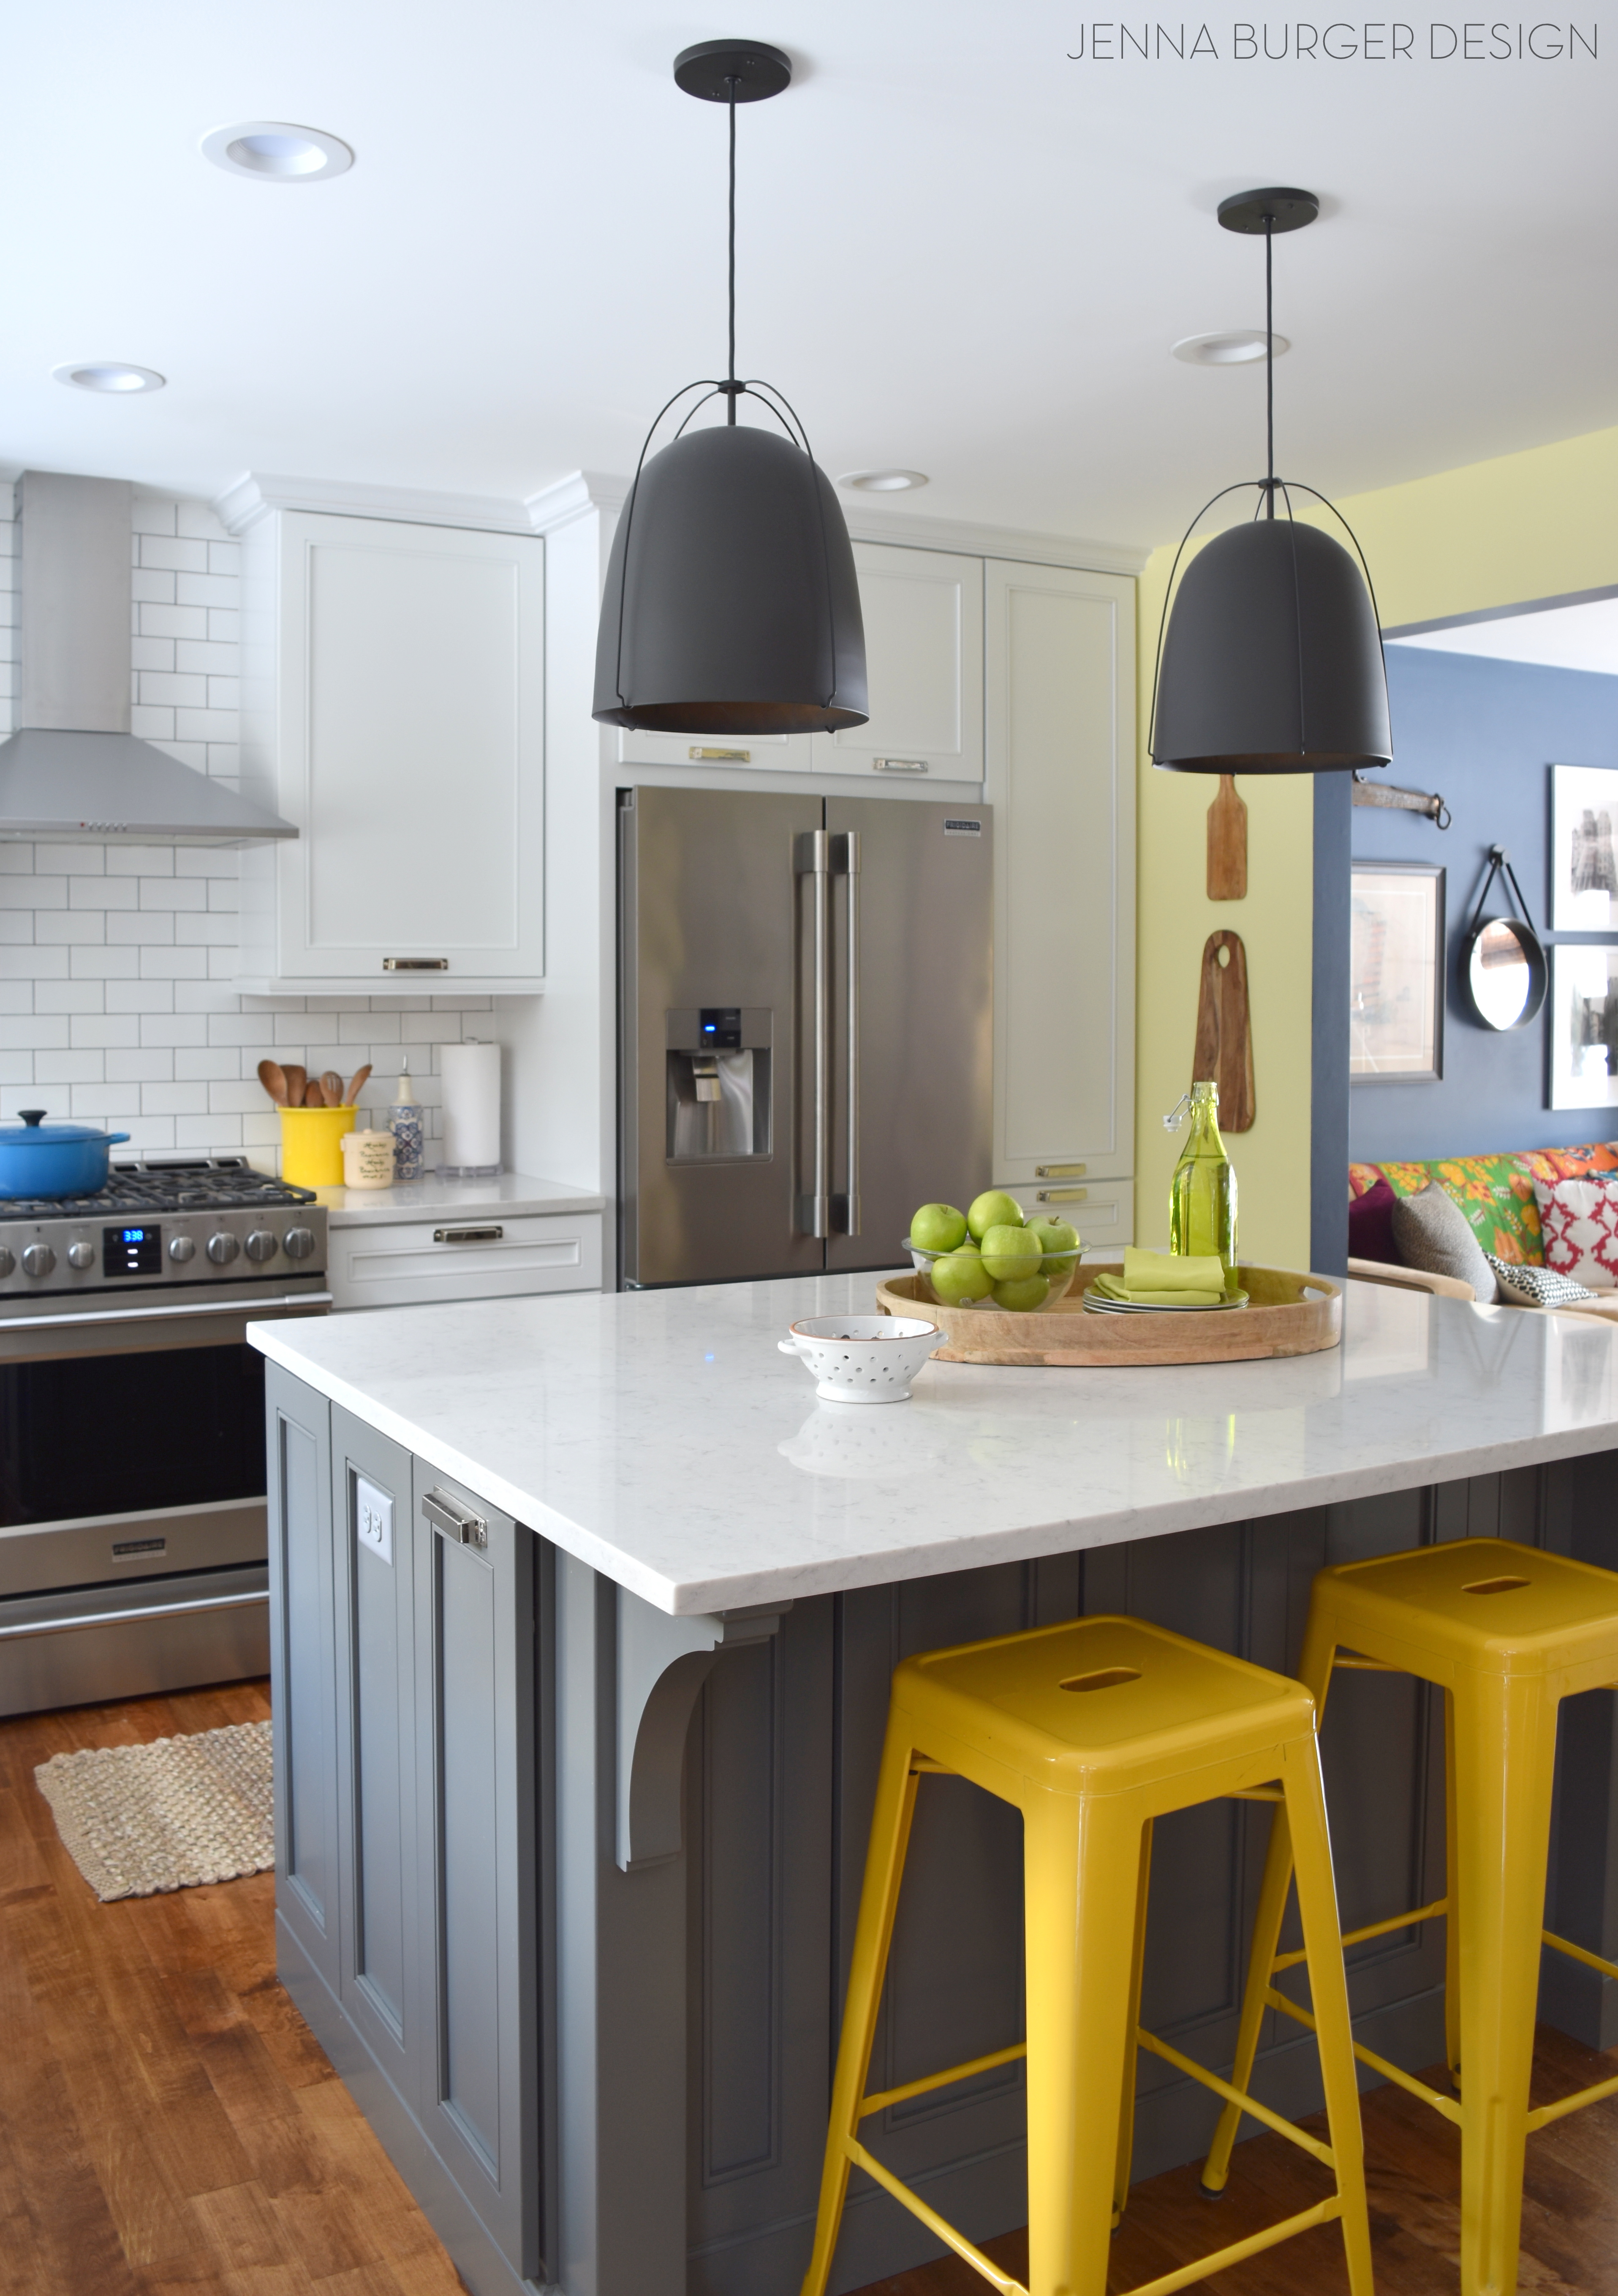
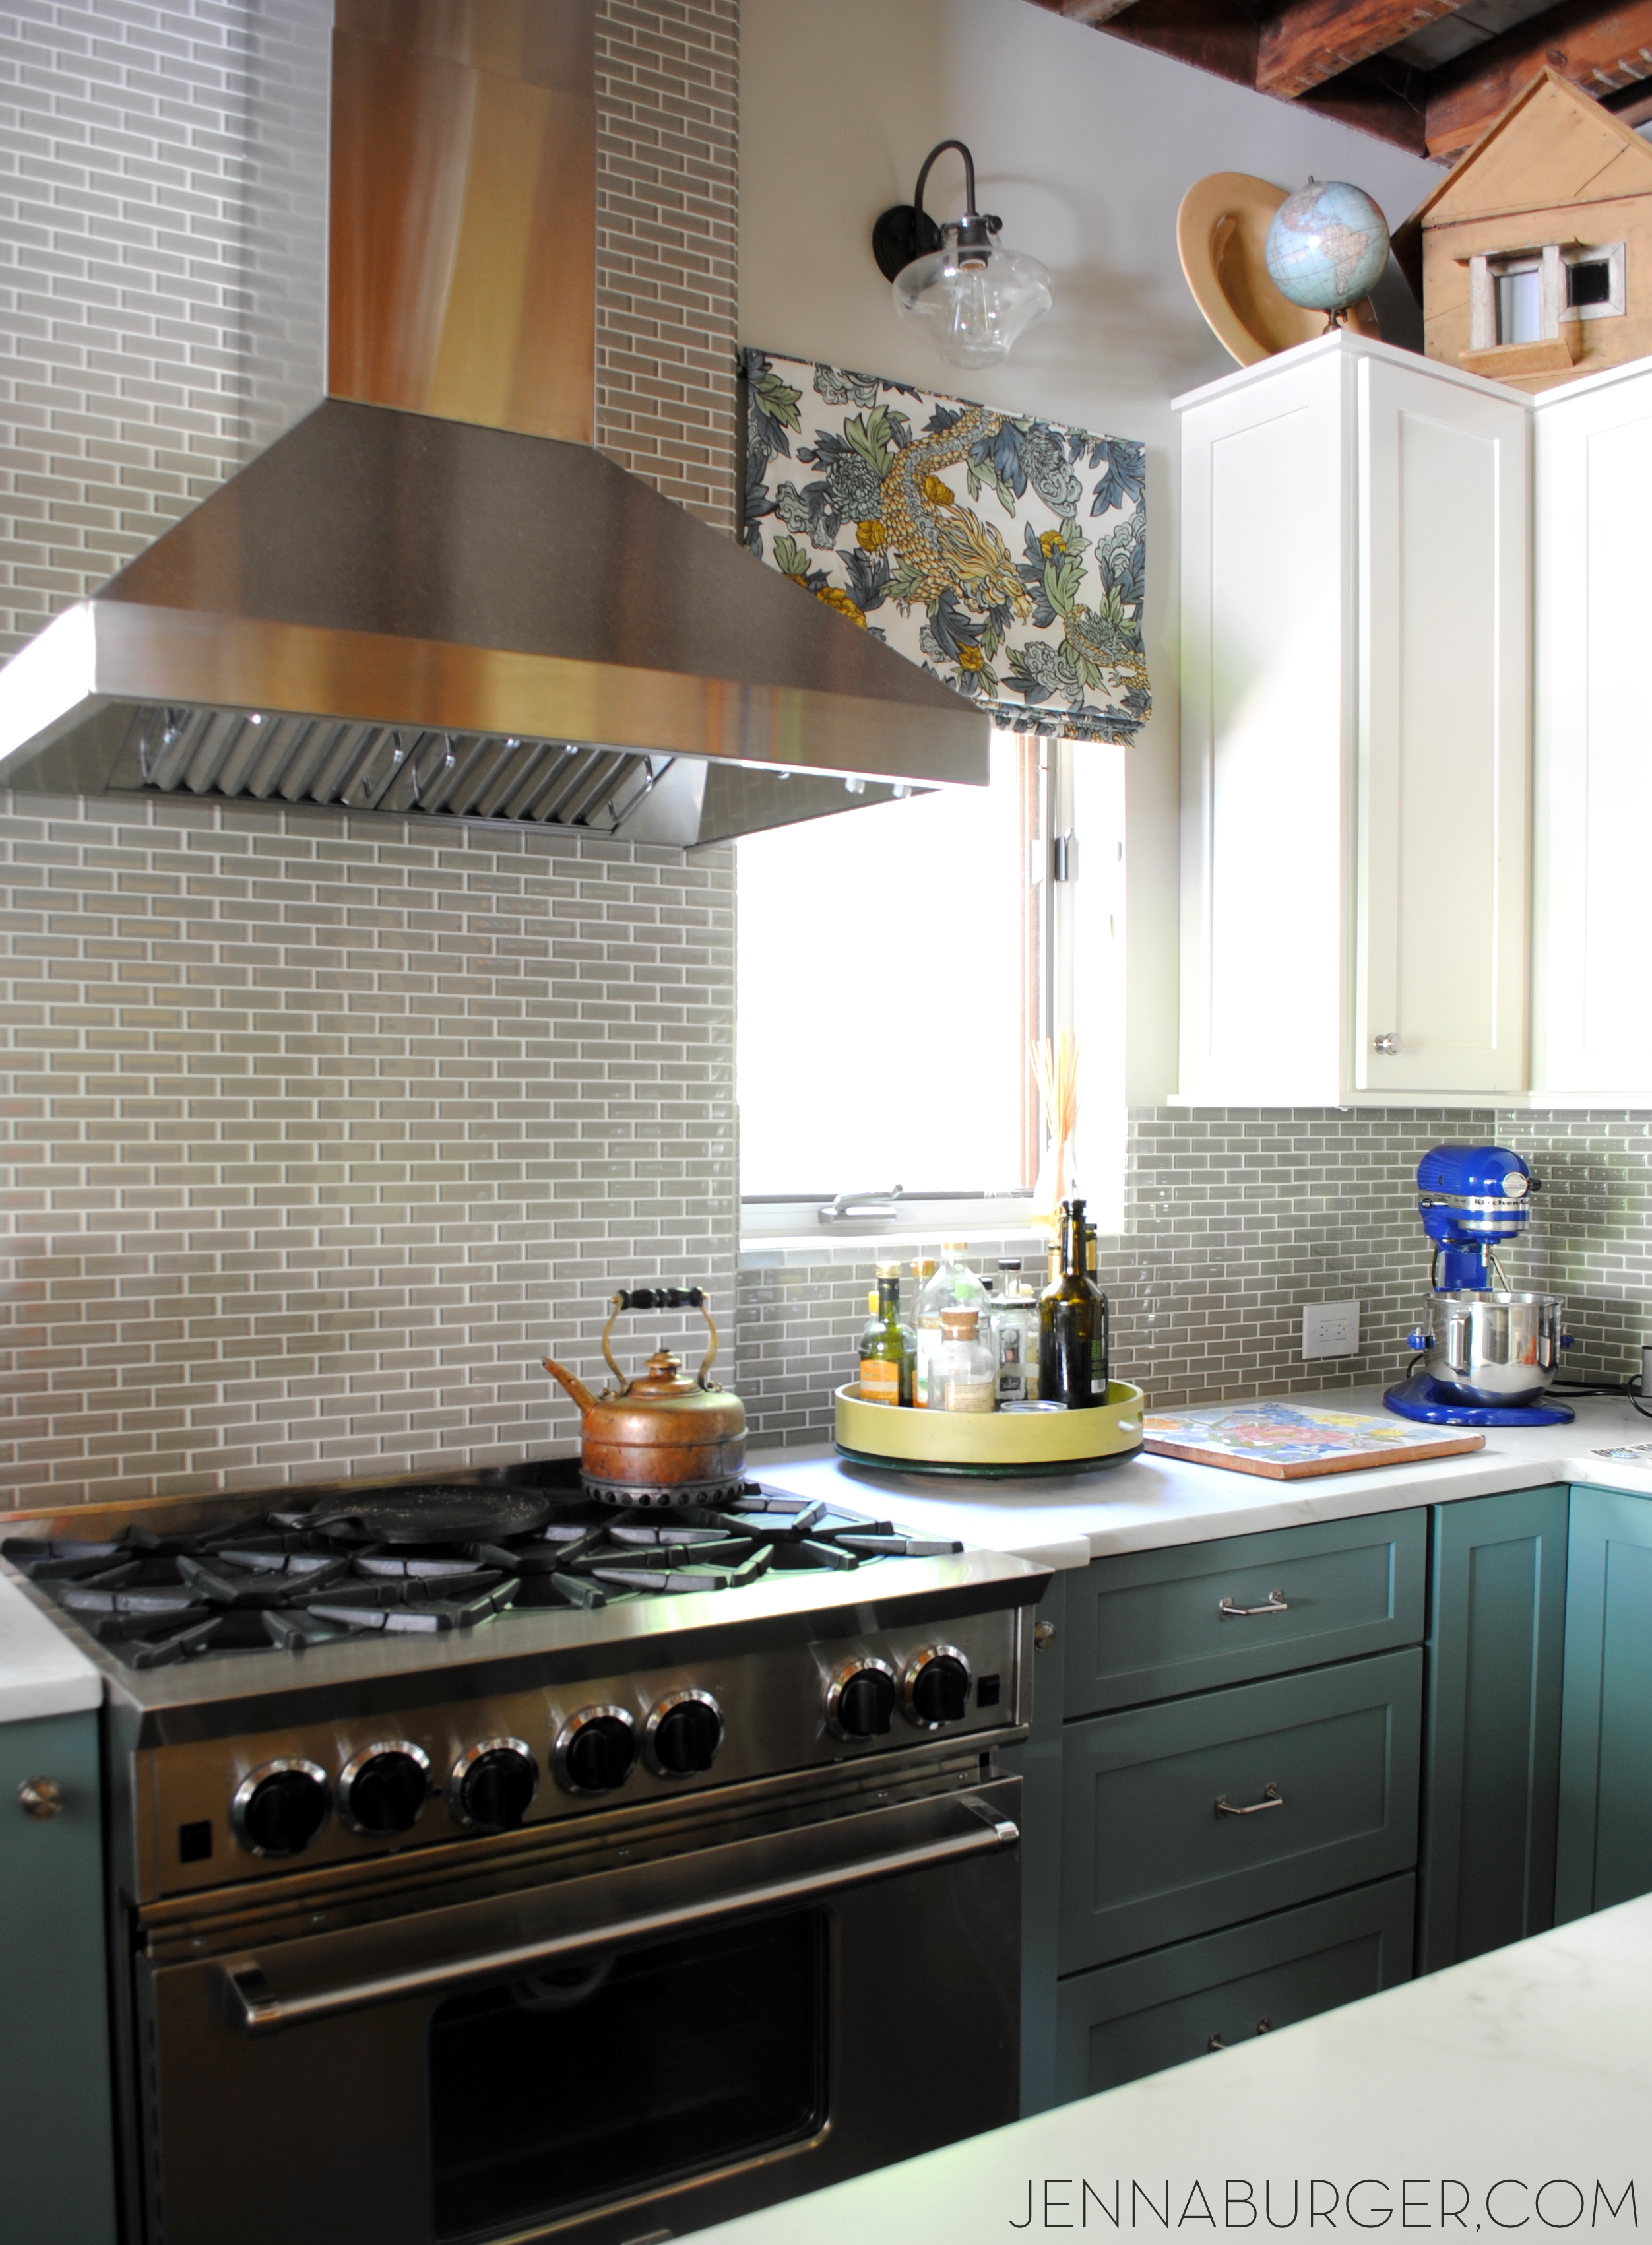
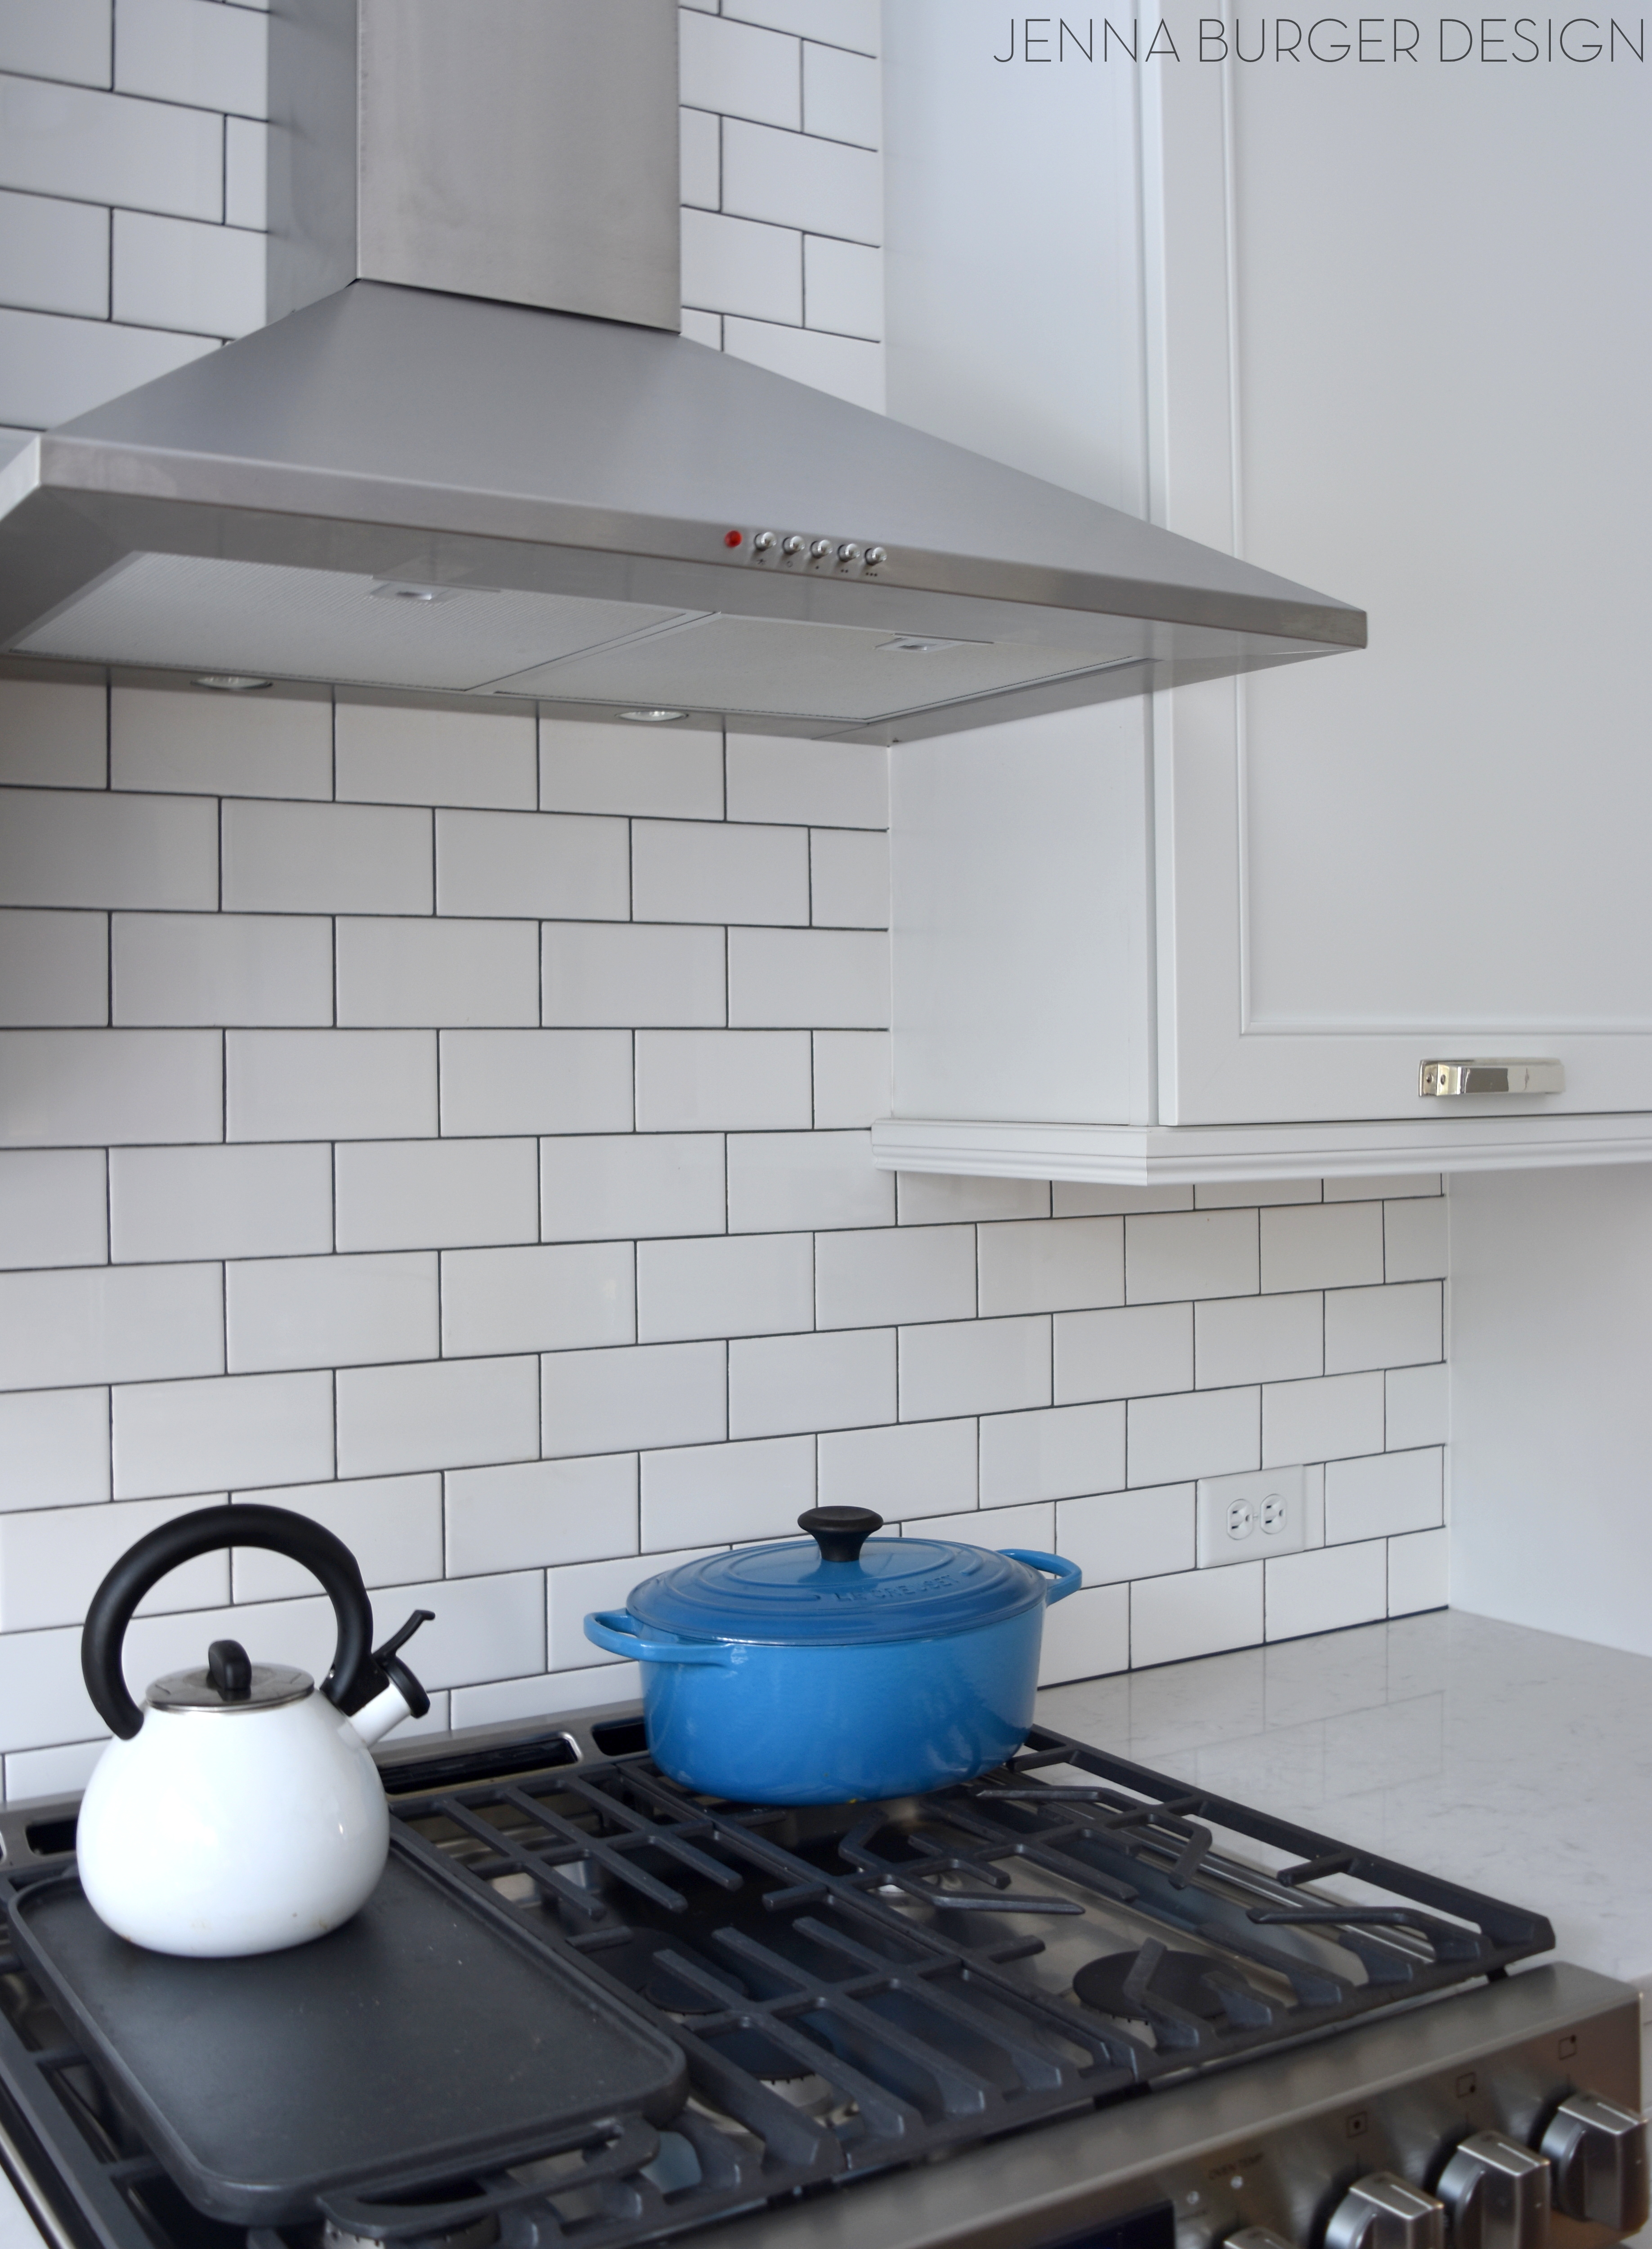
As we continue around the kitchen, the range + exposed hood are flanked by 2 closed upper cabinets that now are full height to the ceiling and hold the glasses (left cabinet) and pantry food (right cabinet).
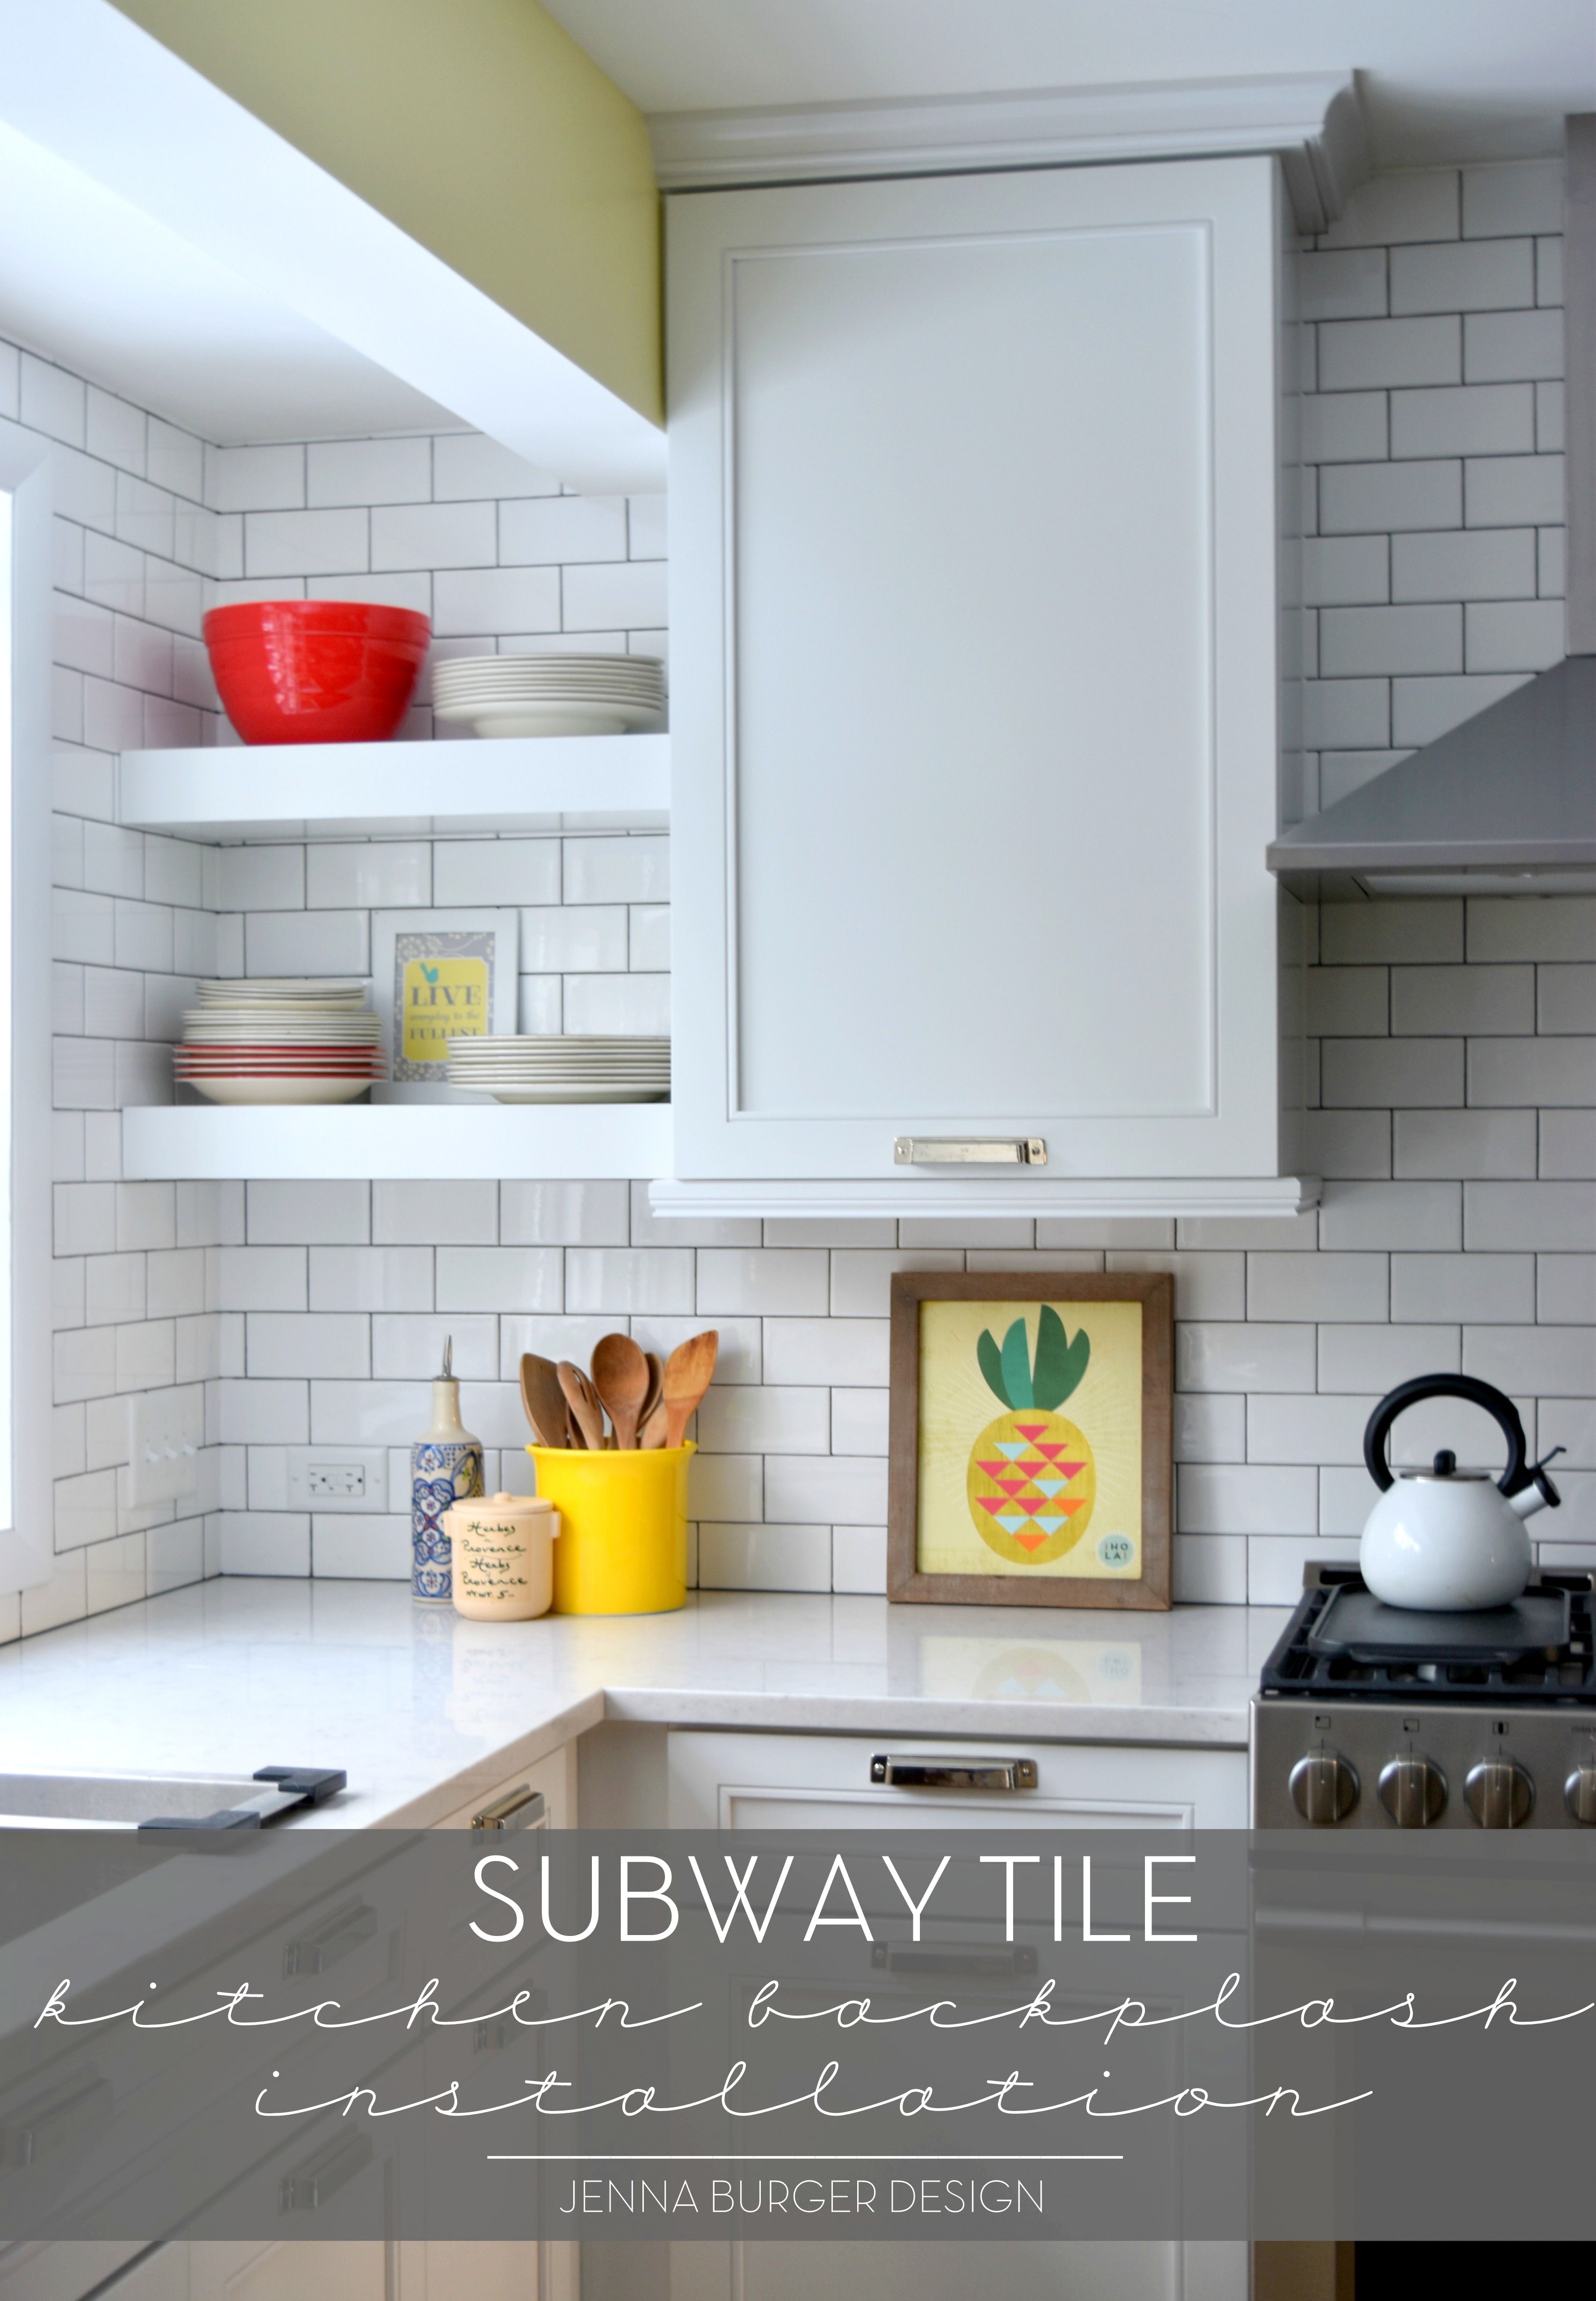
Continuing the subway tile backsplash up the wall behind the hood was an absolute. Again, another way to heighten the overall space and not have the wall start / stop at a certain point.

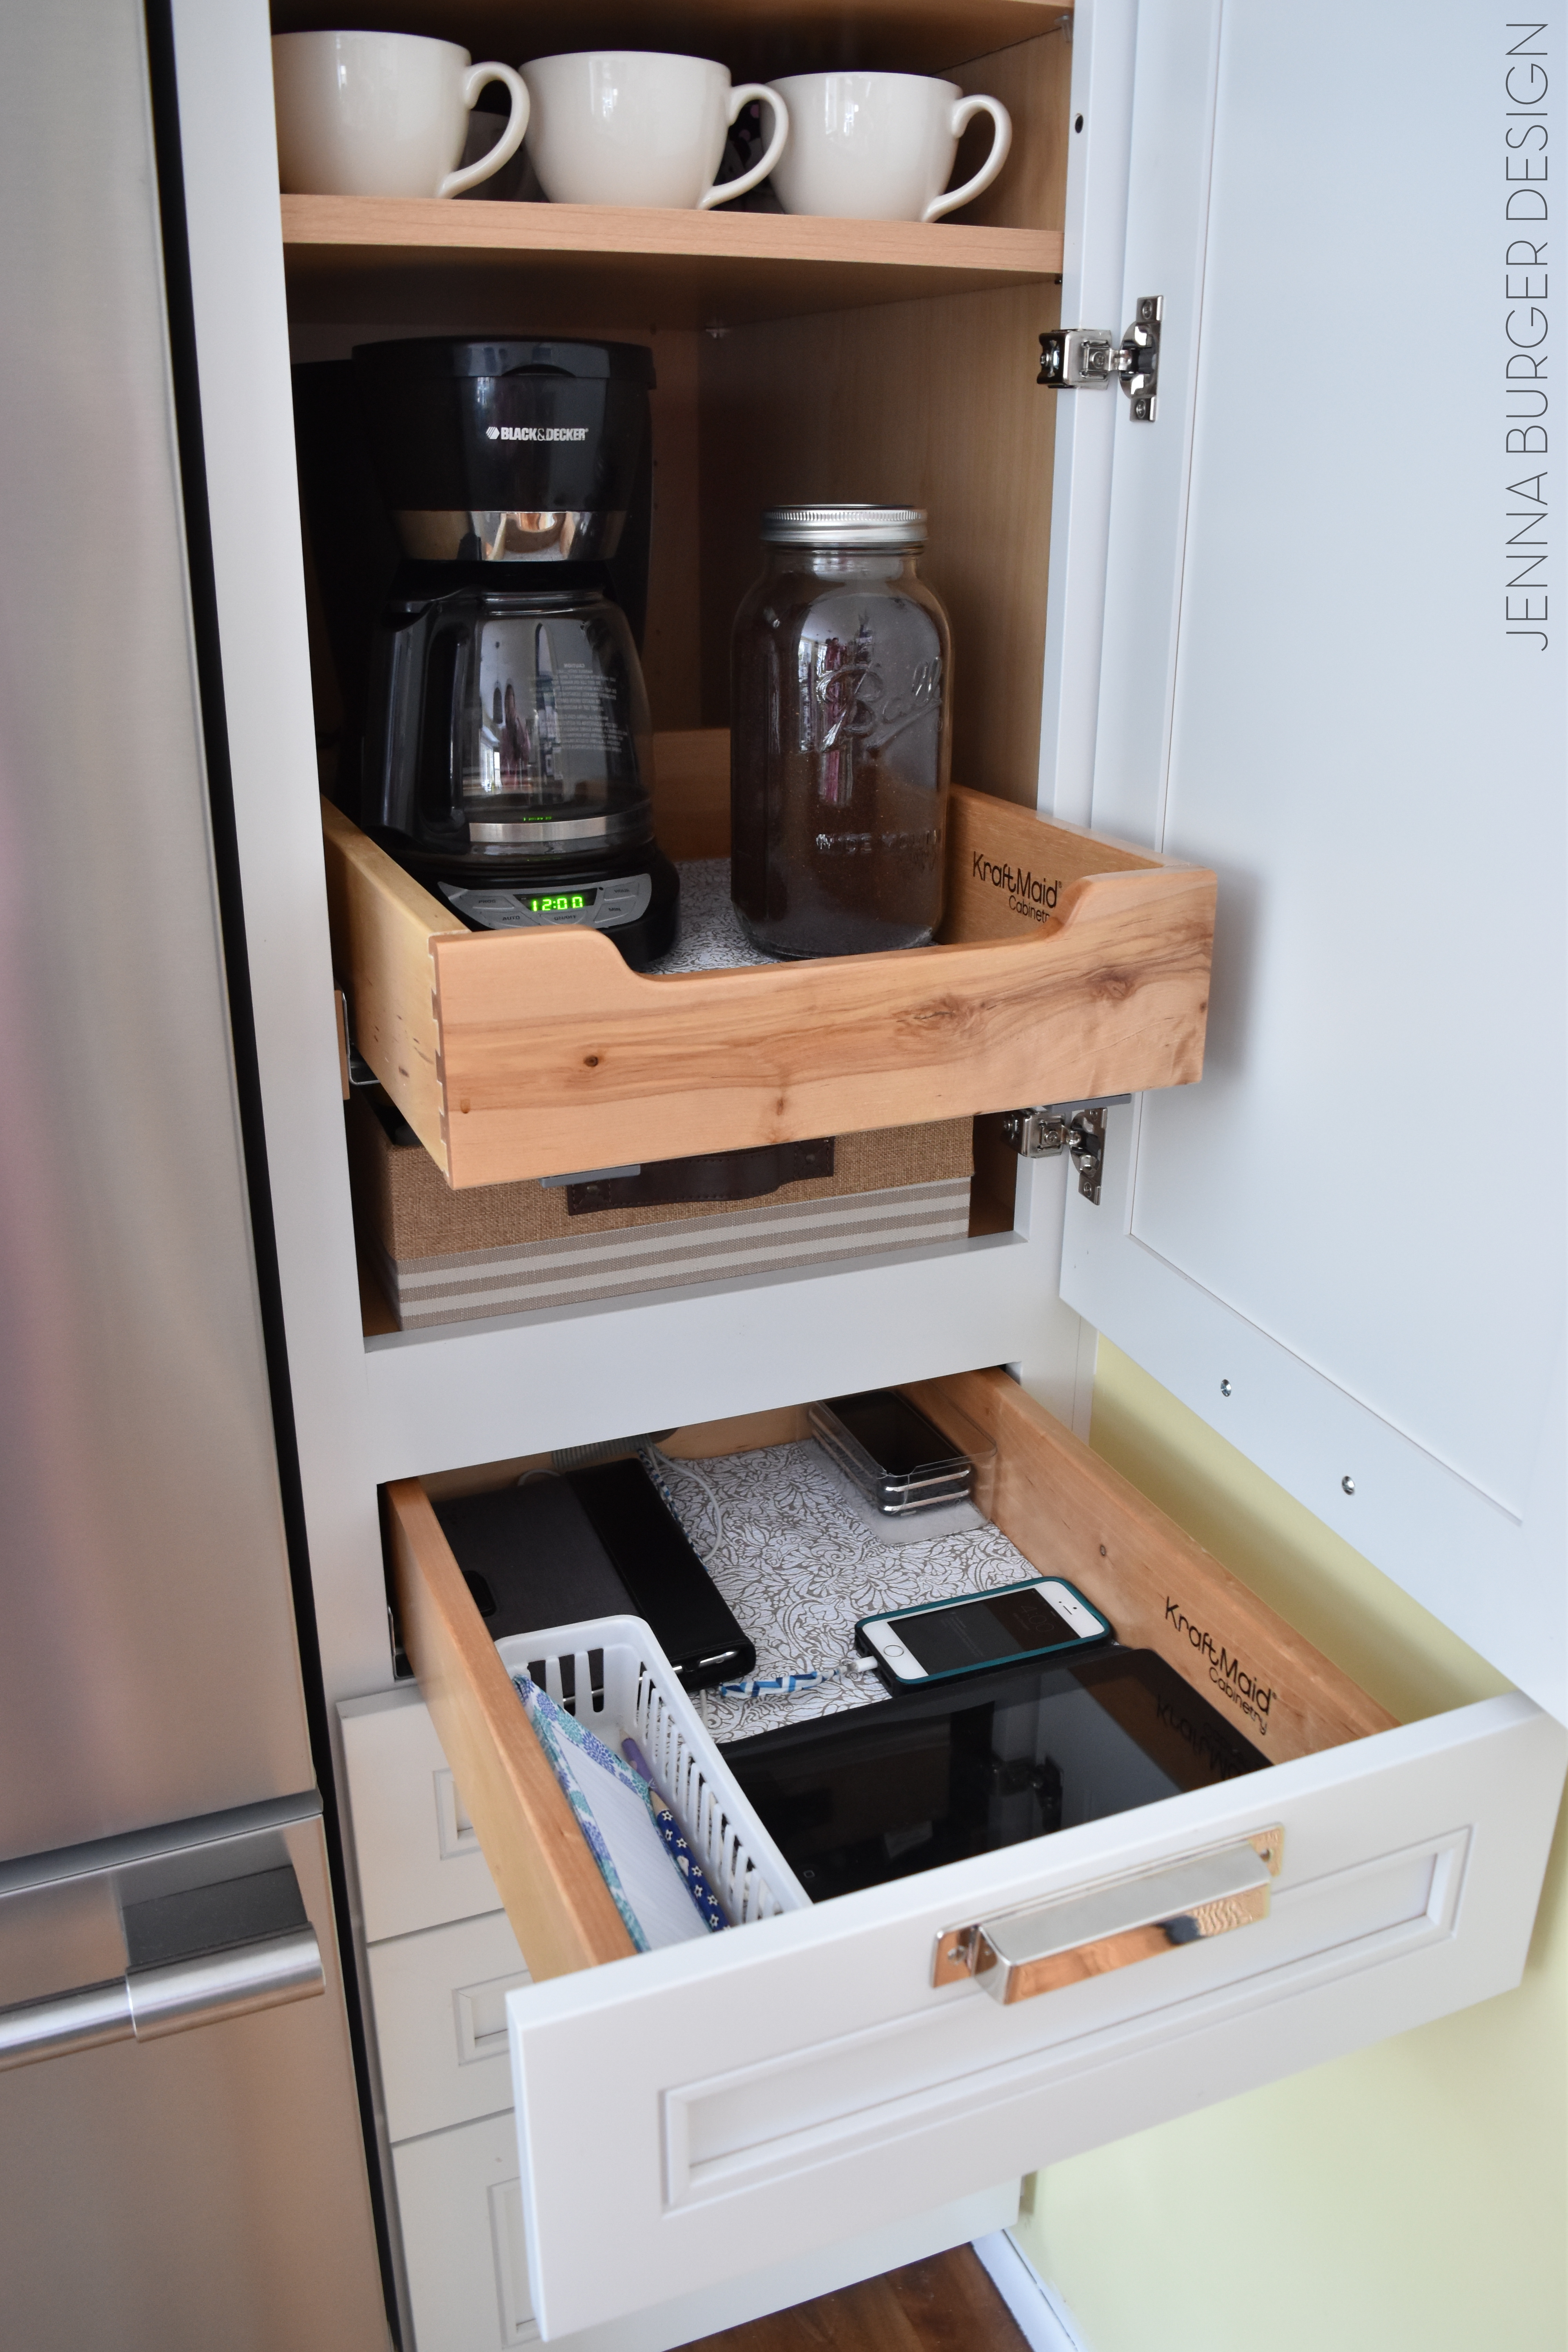
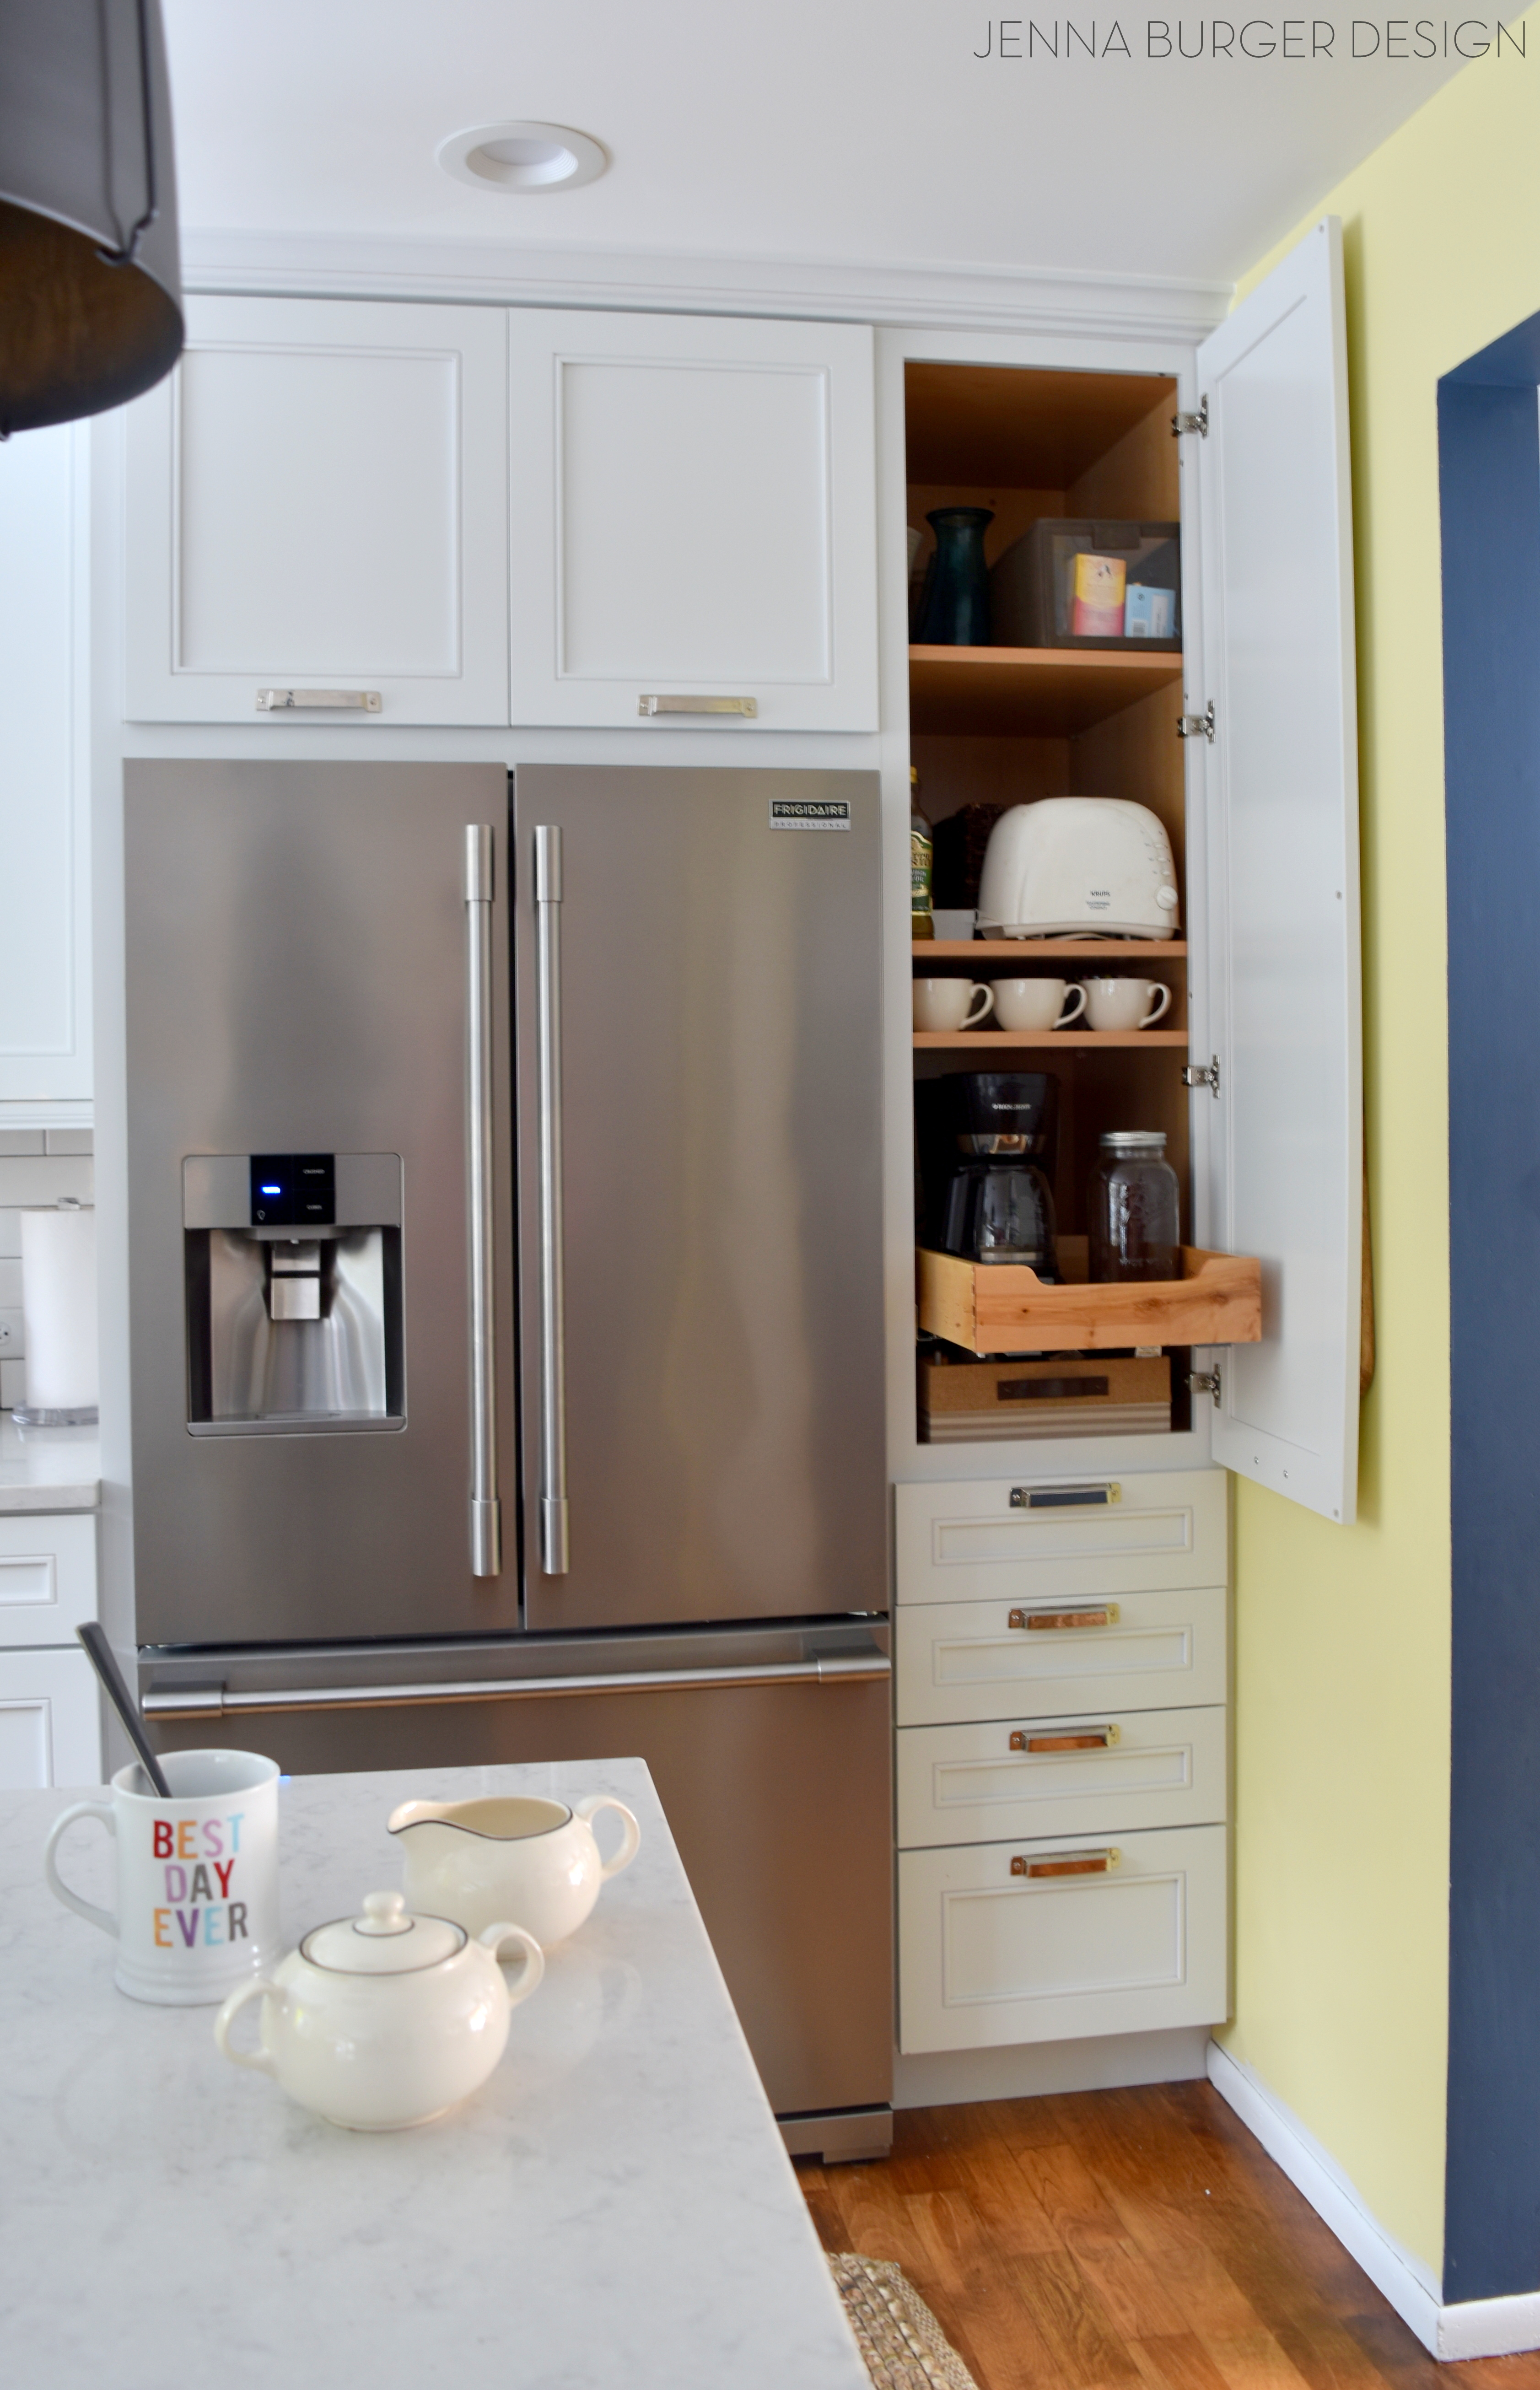
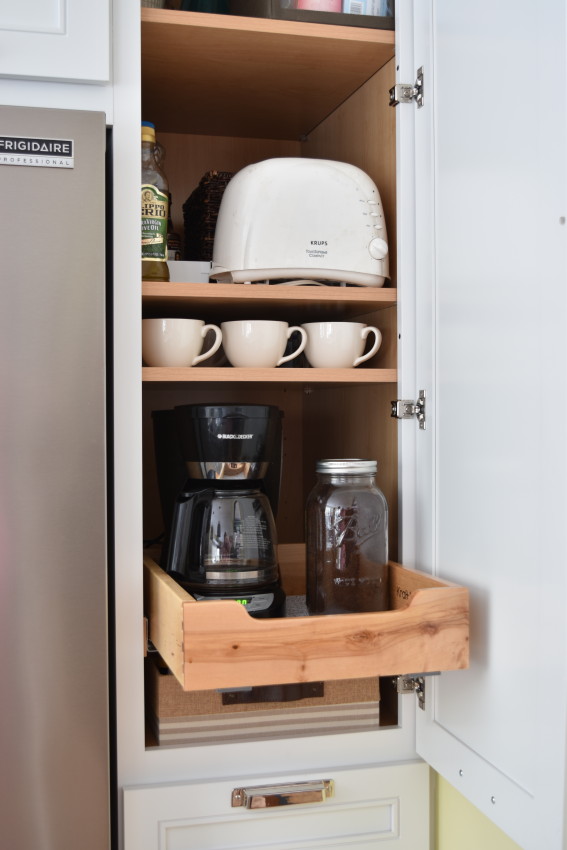
In the new kitchen, the refrigerator moved about 18″ to the left to create a full depth pantry that touches the side wall. Ahhh, it’s wonderful. Singing-from-the-hilltops incredible! I love it because there is so much storage.

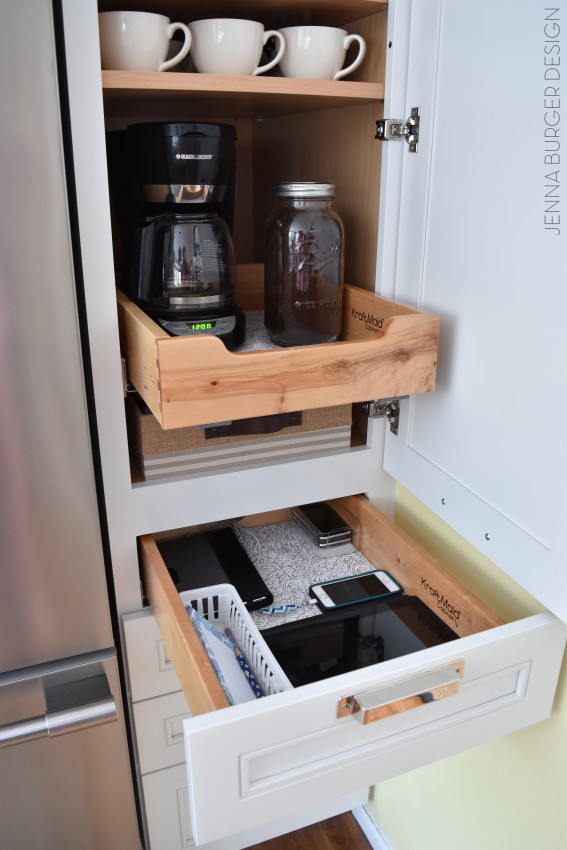
The 24″ deep pantry is the same depth as the refrigerator + cabinet above and holds some of the small appliances like the coffee maker + toaster. The coffee maker sits on a roll-out shelf and there is an outlet in the cabinet back, which makes mornings so easy for brewing our cup of joe.

Also in the bank of pantry cabinets is a charging station for our various electronics including the cell phones, ipads, etc. Another outlet was installed for these components in the back of the cabinet and a grommet was drilled in the back of the drawer for the wires to pull through.
Having a ‘home’ for all these kitchen essentials has really cleared off the counters to leave open space for what a kitchen is really used for… cooking.
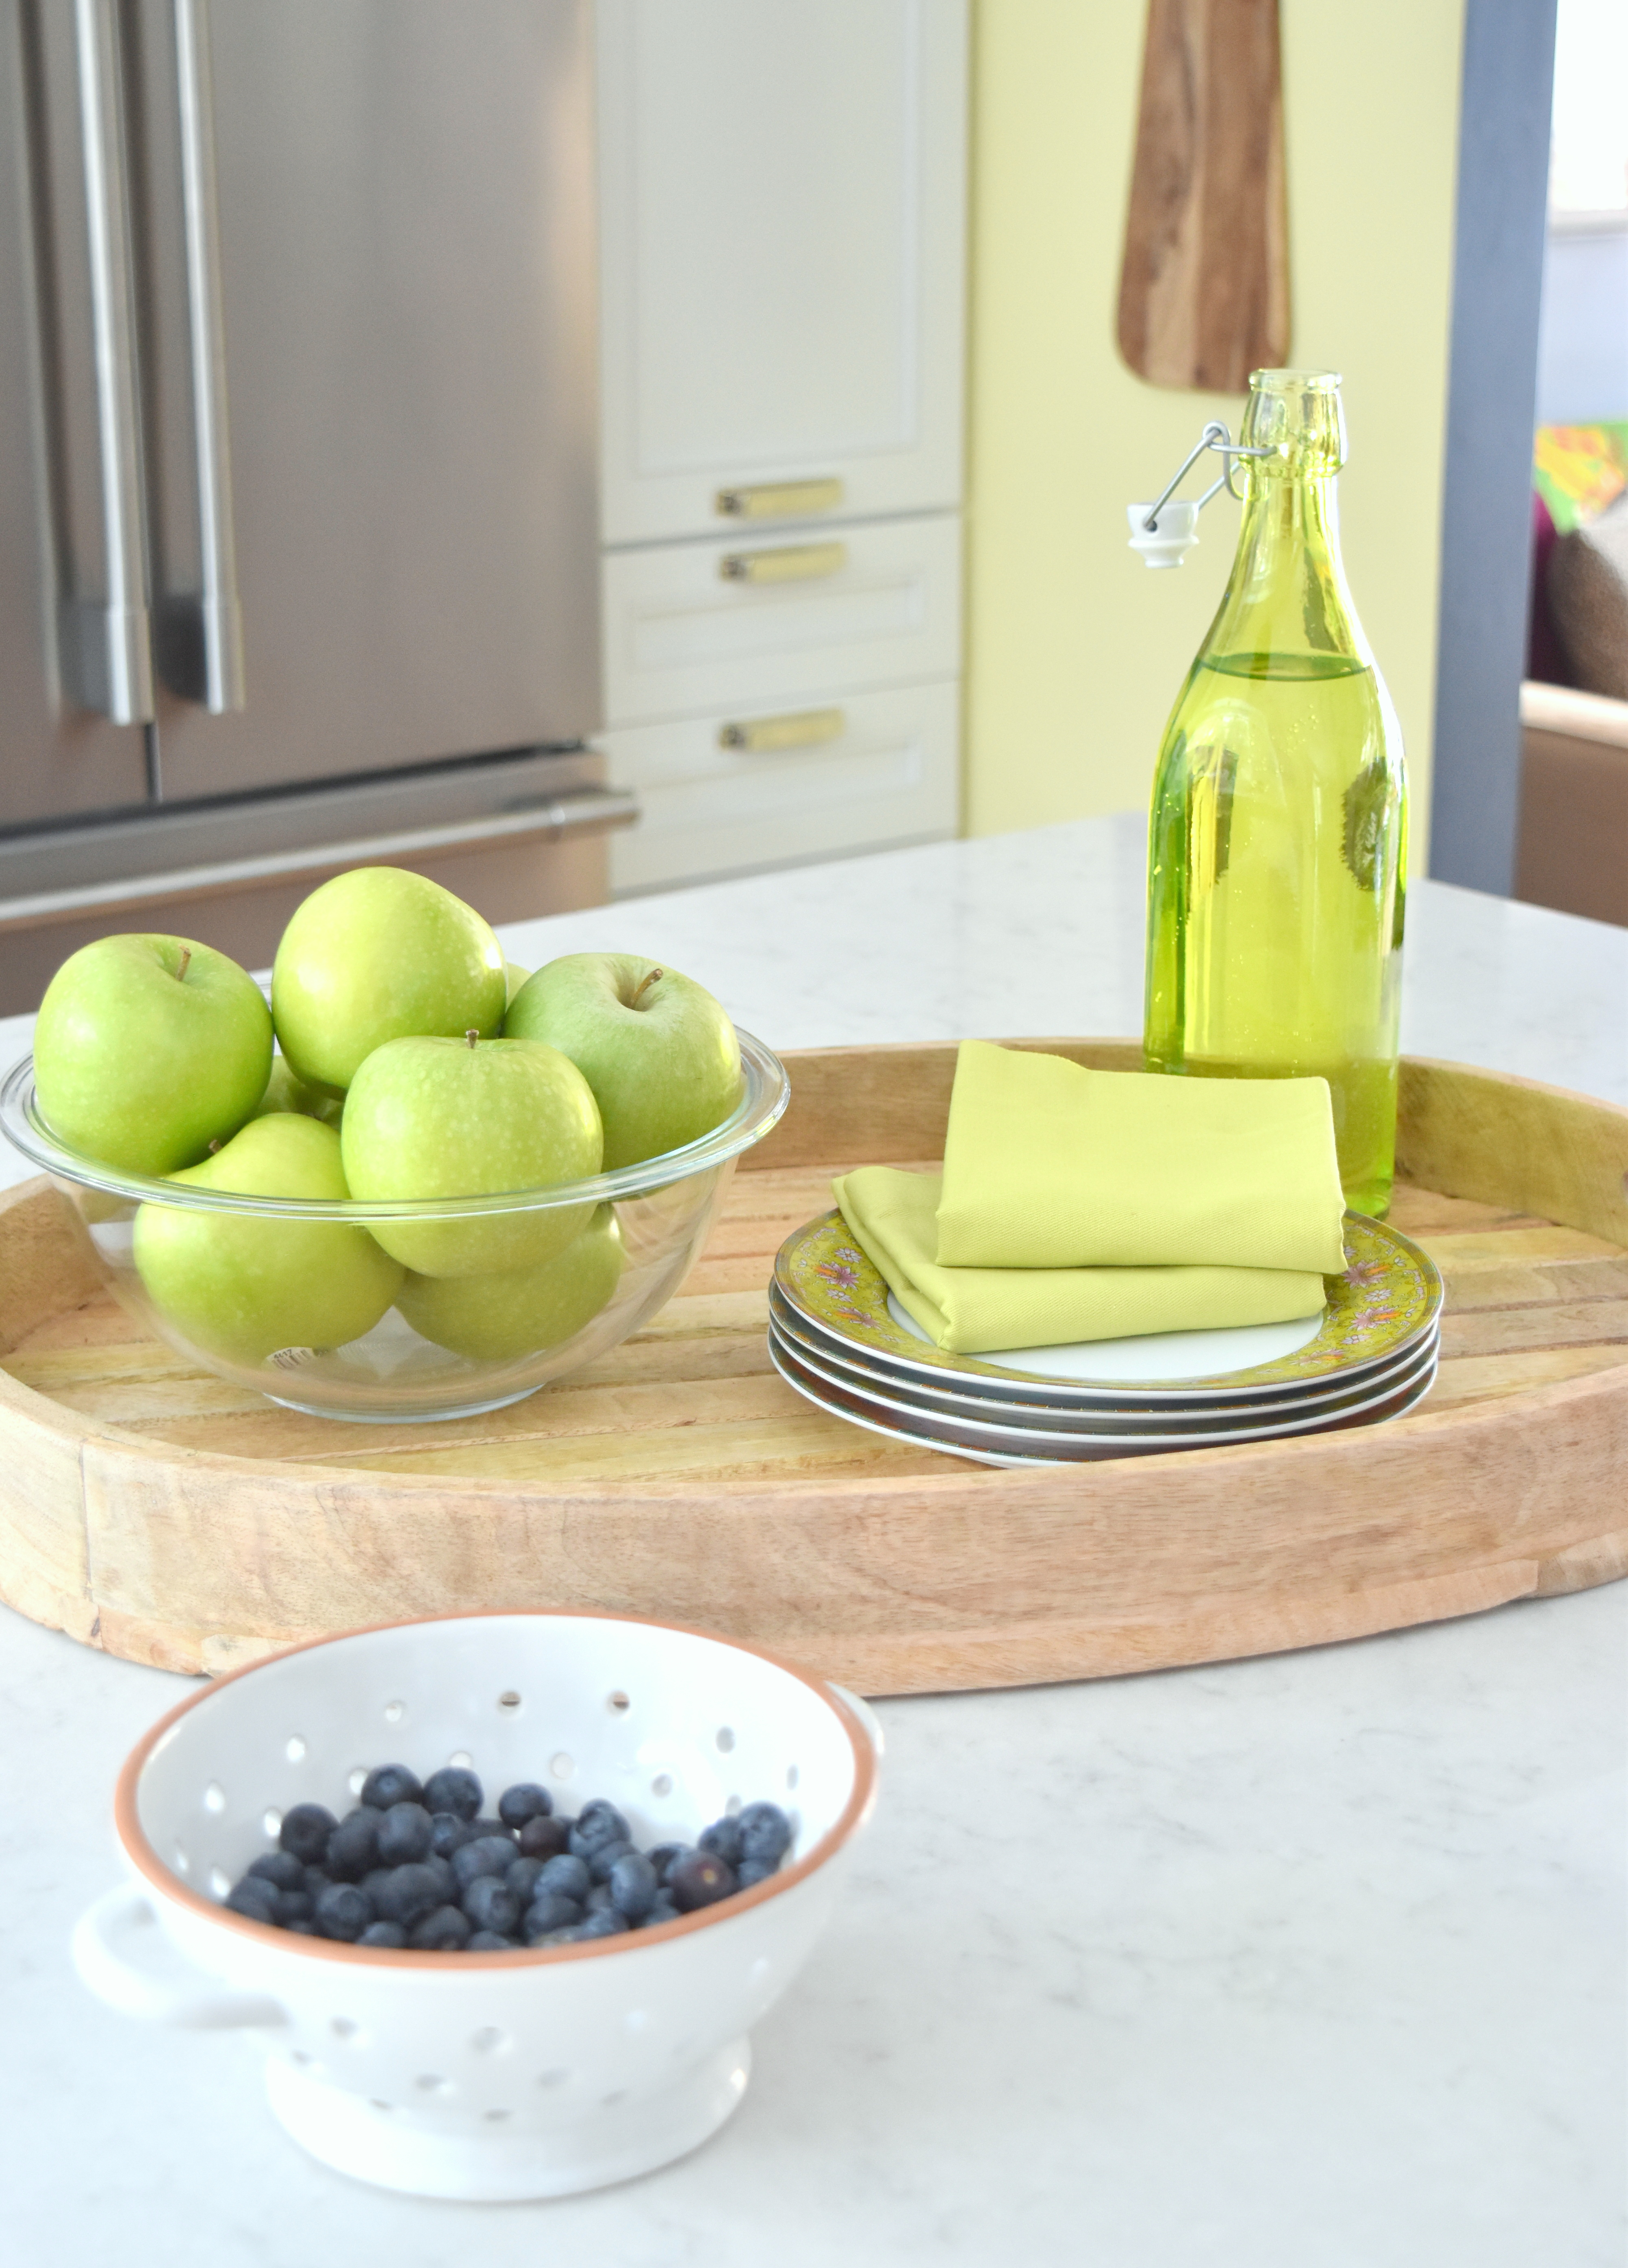
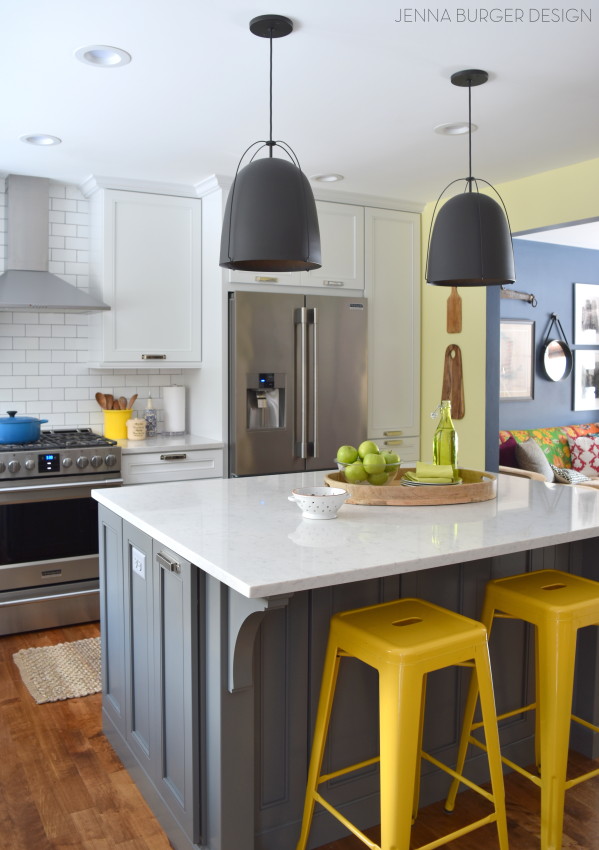
Talking about cooking, I basically prep + do everything for our meals on the island. The Island. The huge island that I always dreamed of and still can’t believe I have.
It’s wonderful.
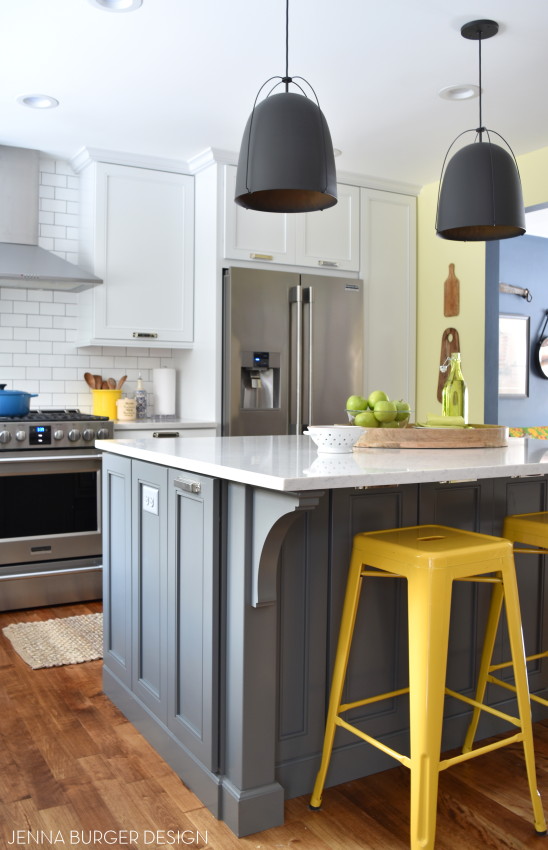
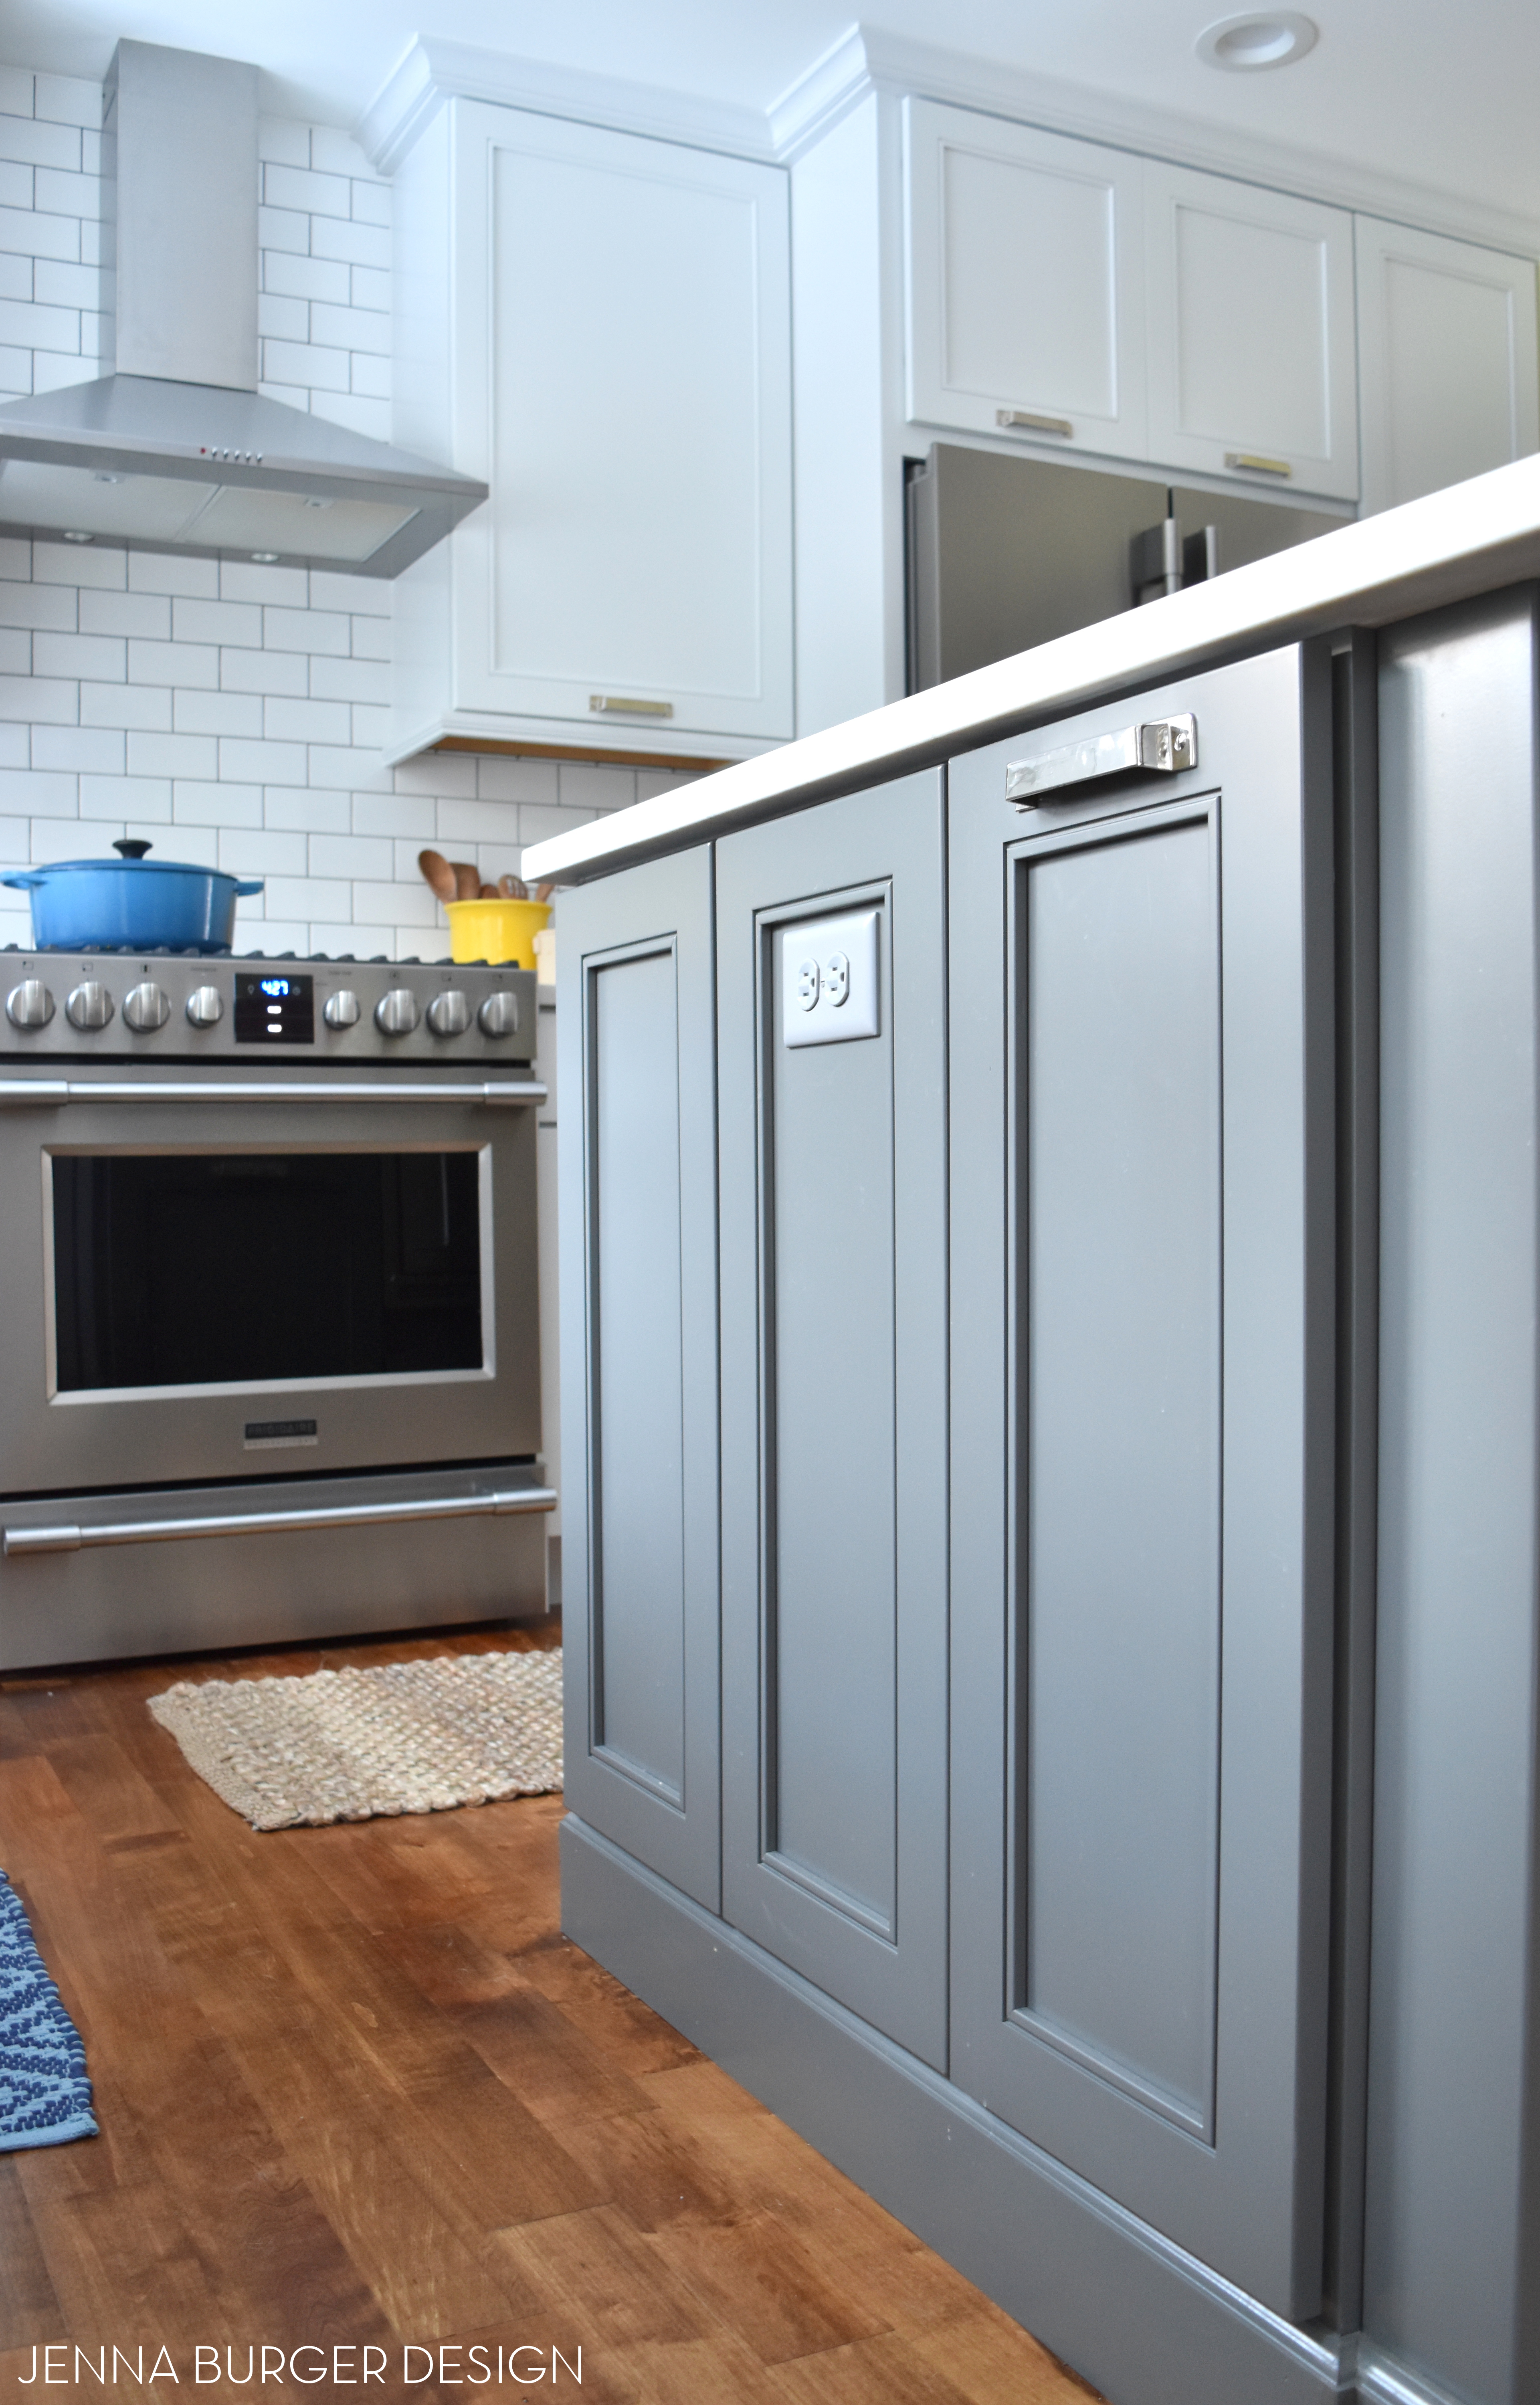
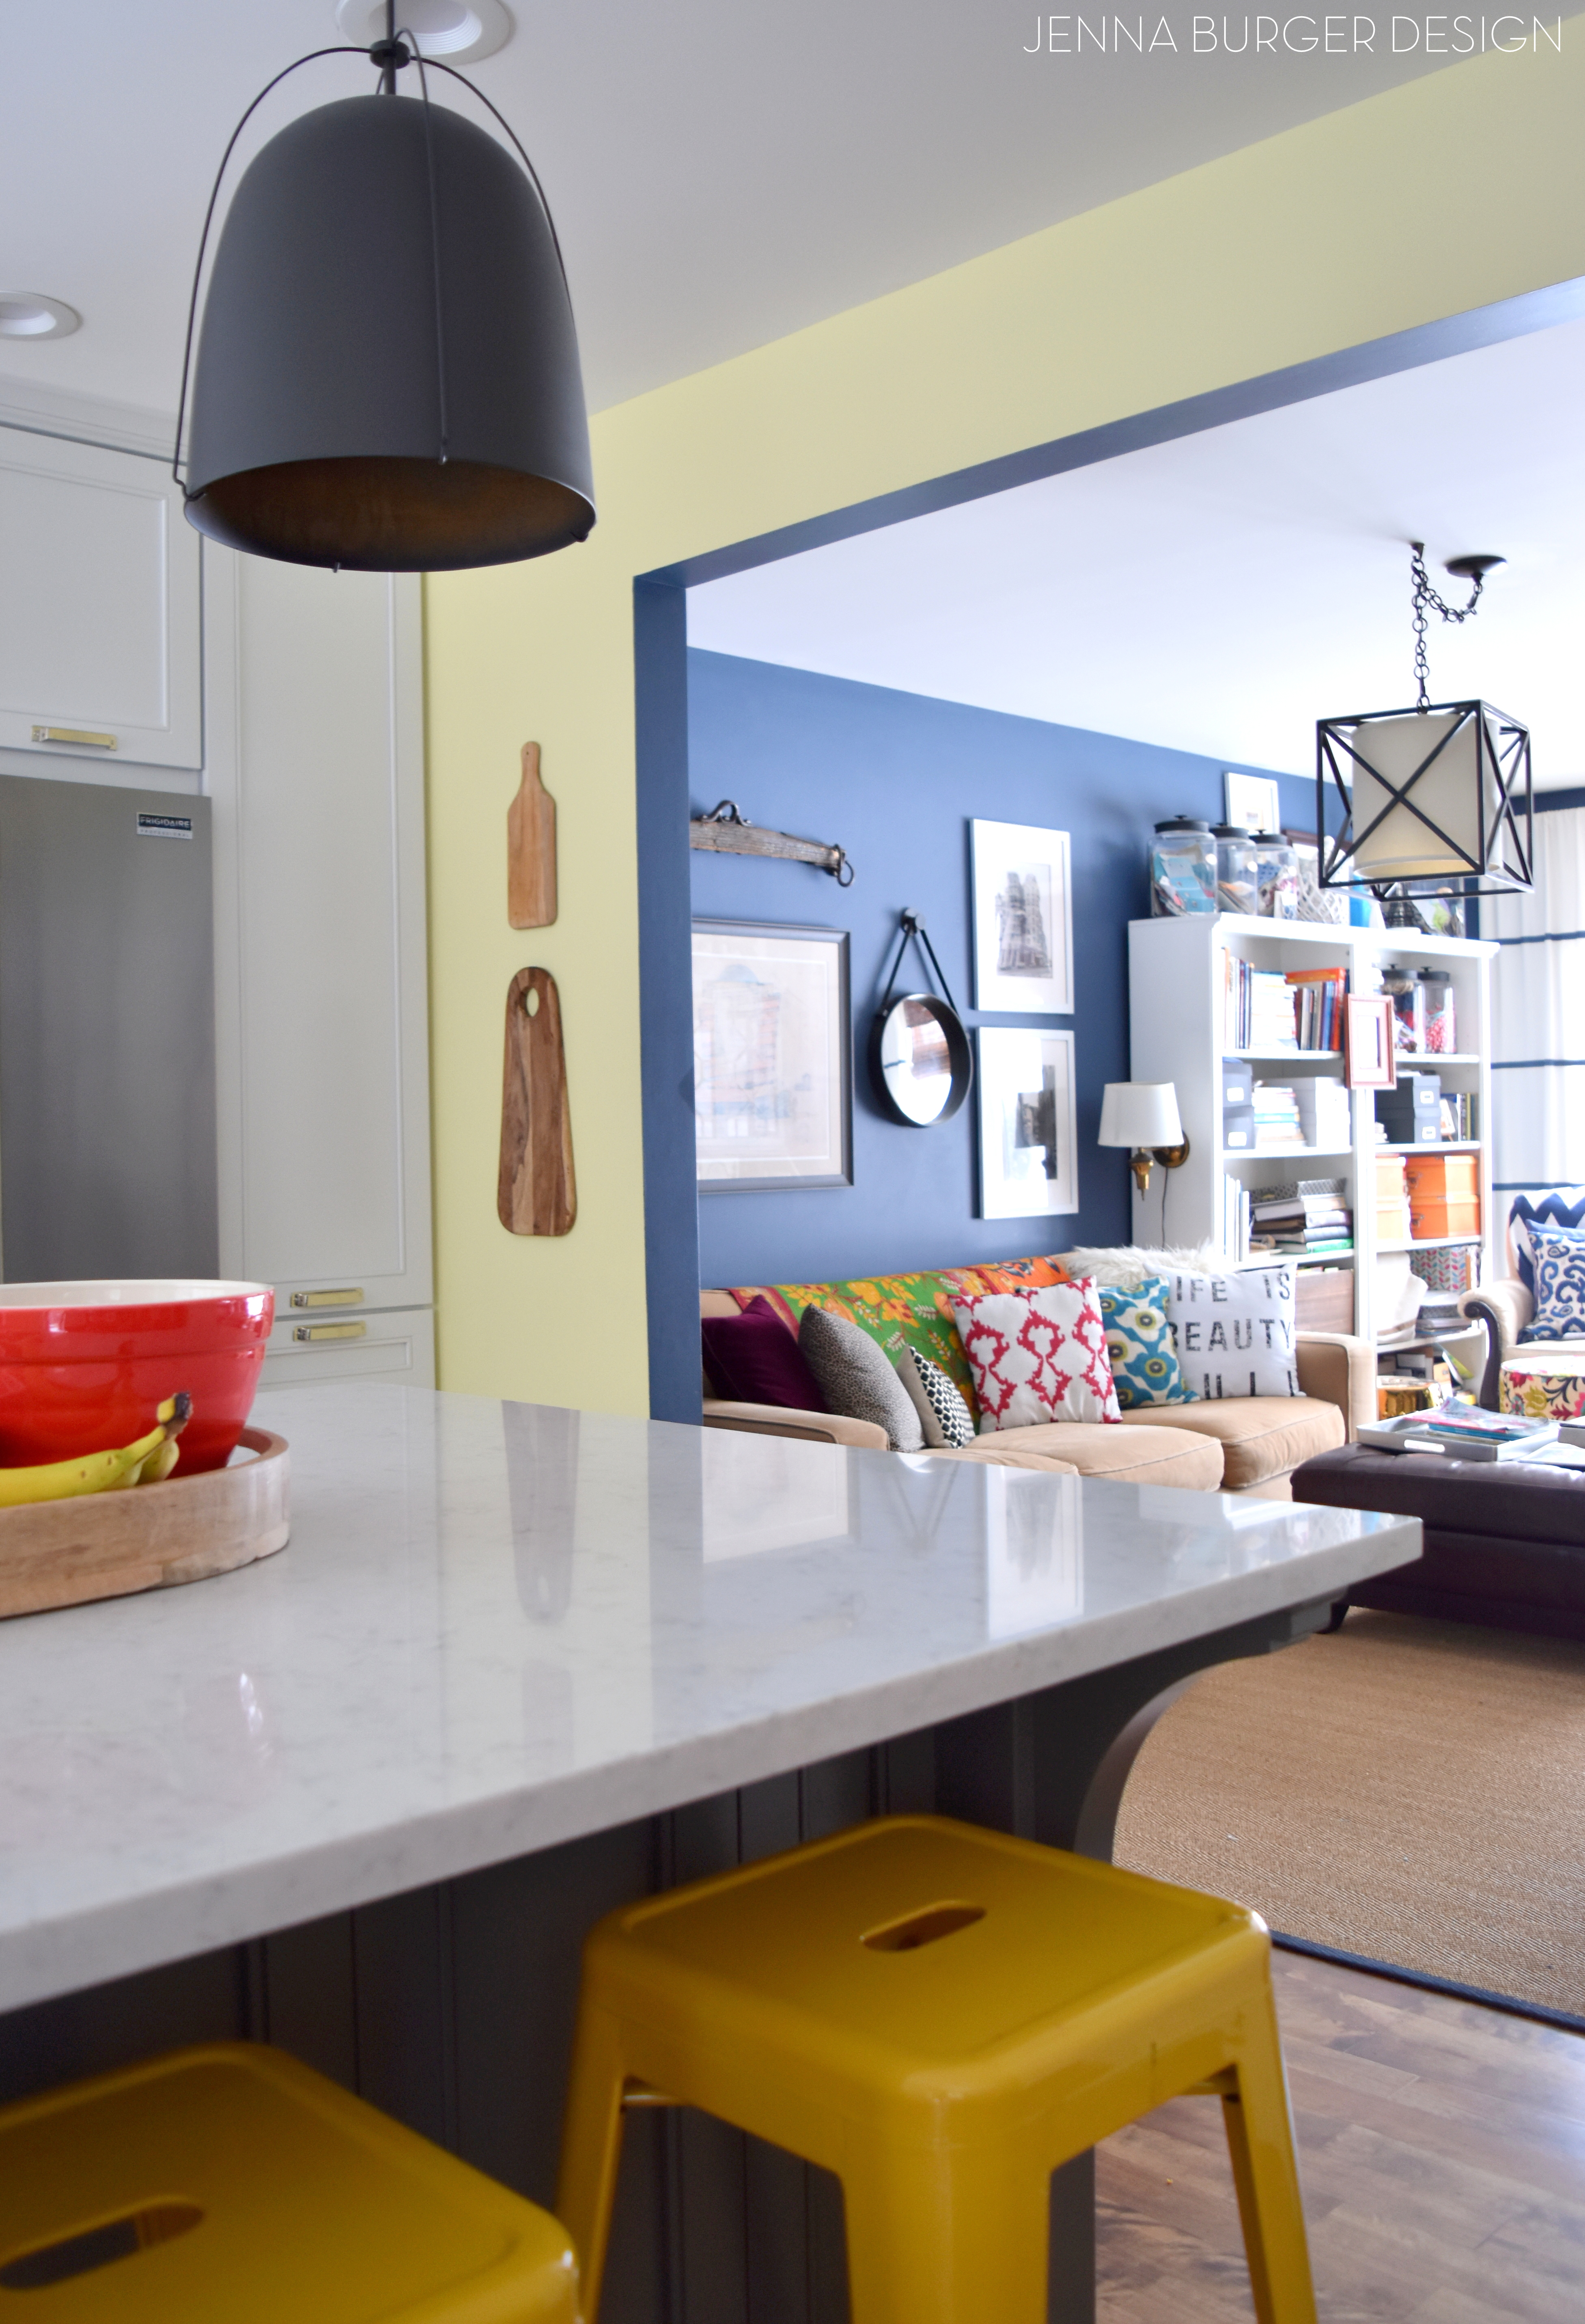
The Kraftmaid cabinetry on the perimeter cabinets is Dove White and on the island is a deep + rich grey/blue hue called Greyloft. Never having an island before, I didn’t know what to do with myself when it was installed. It provides so much storage and in the island is also where the microwave now sits.

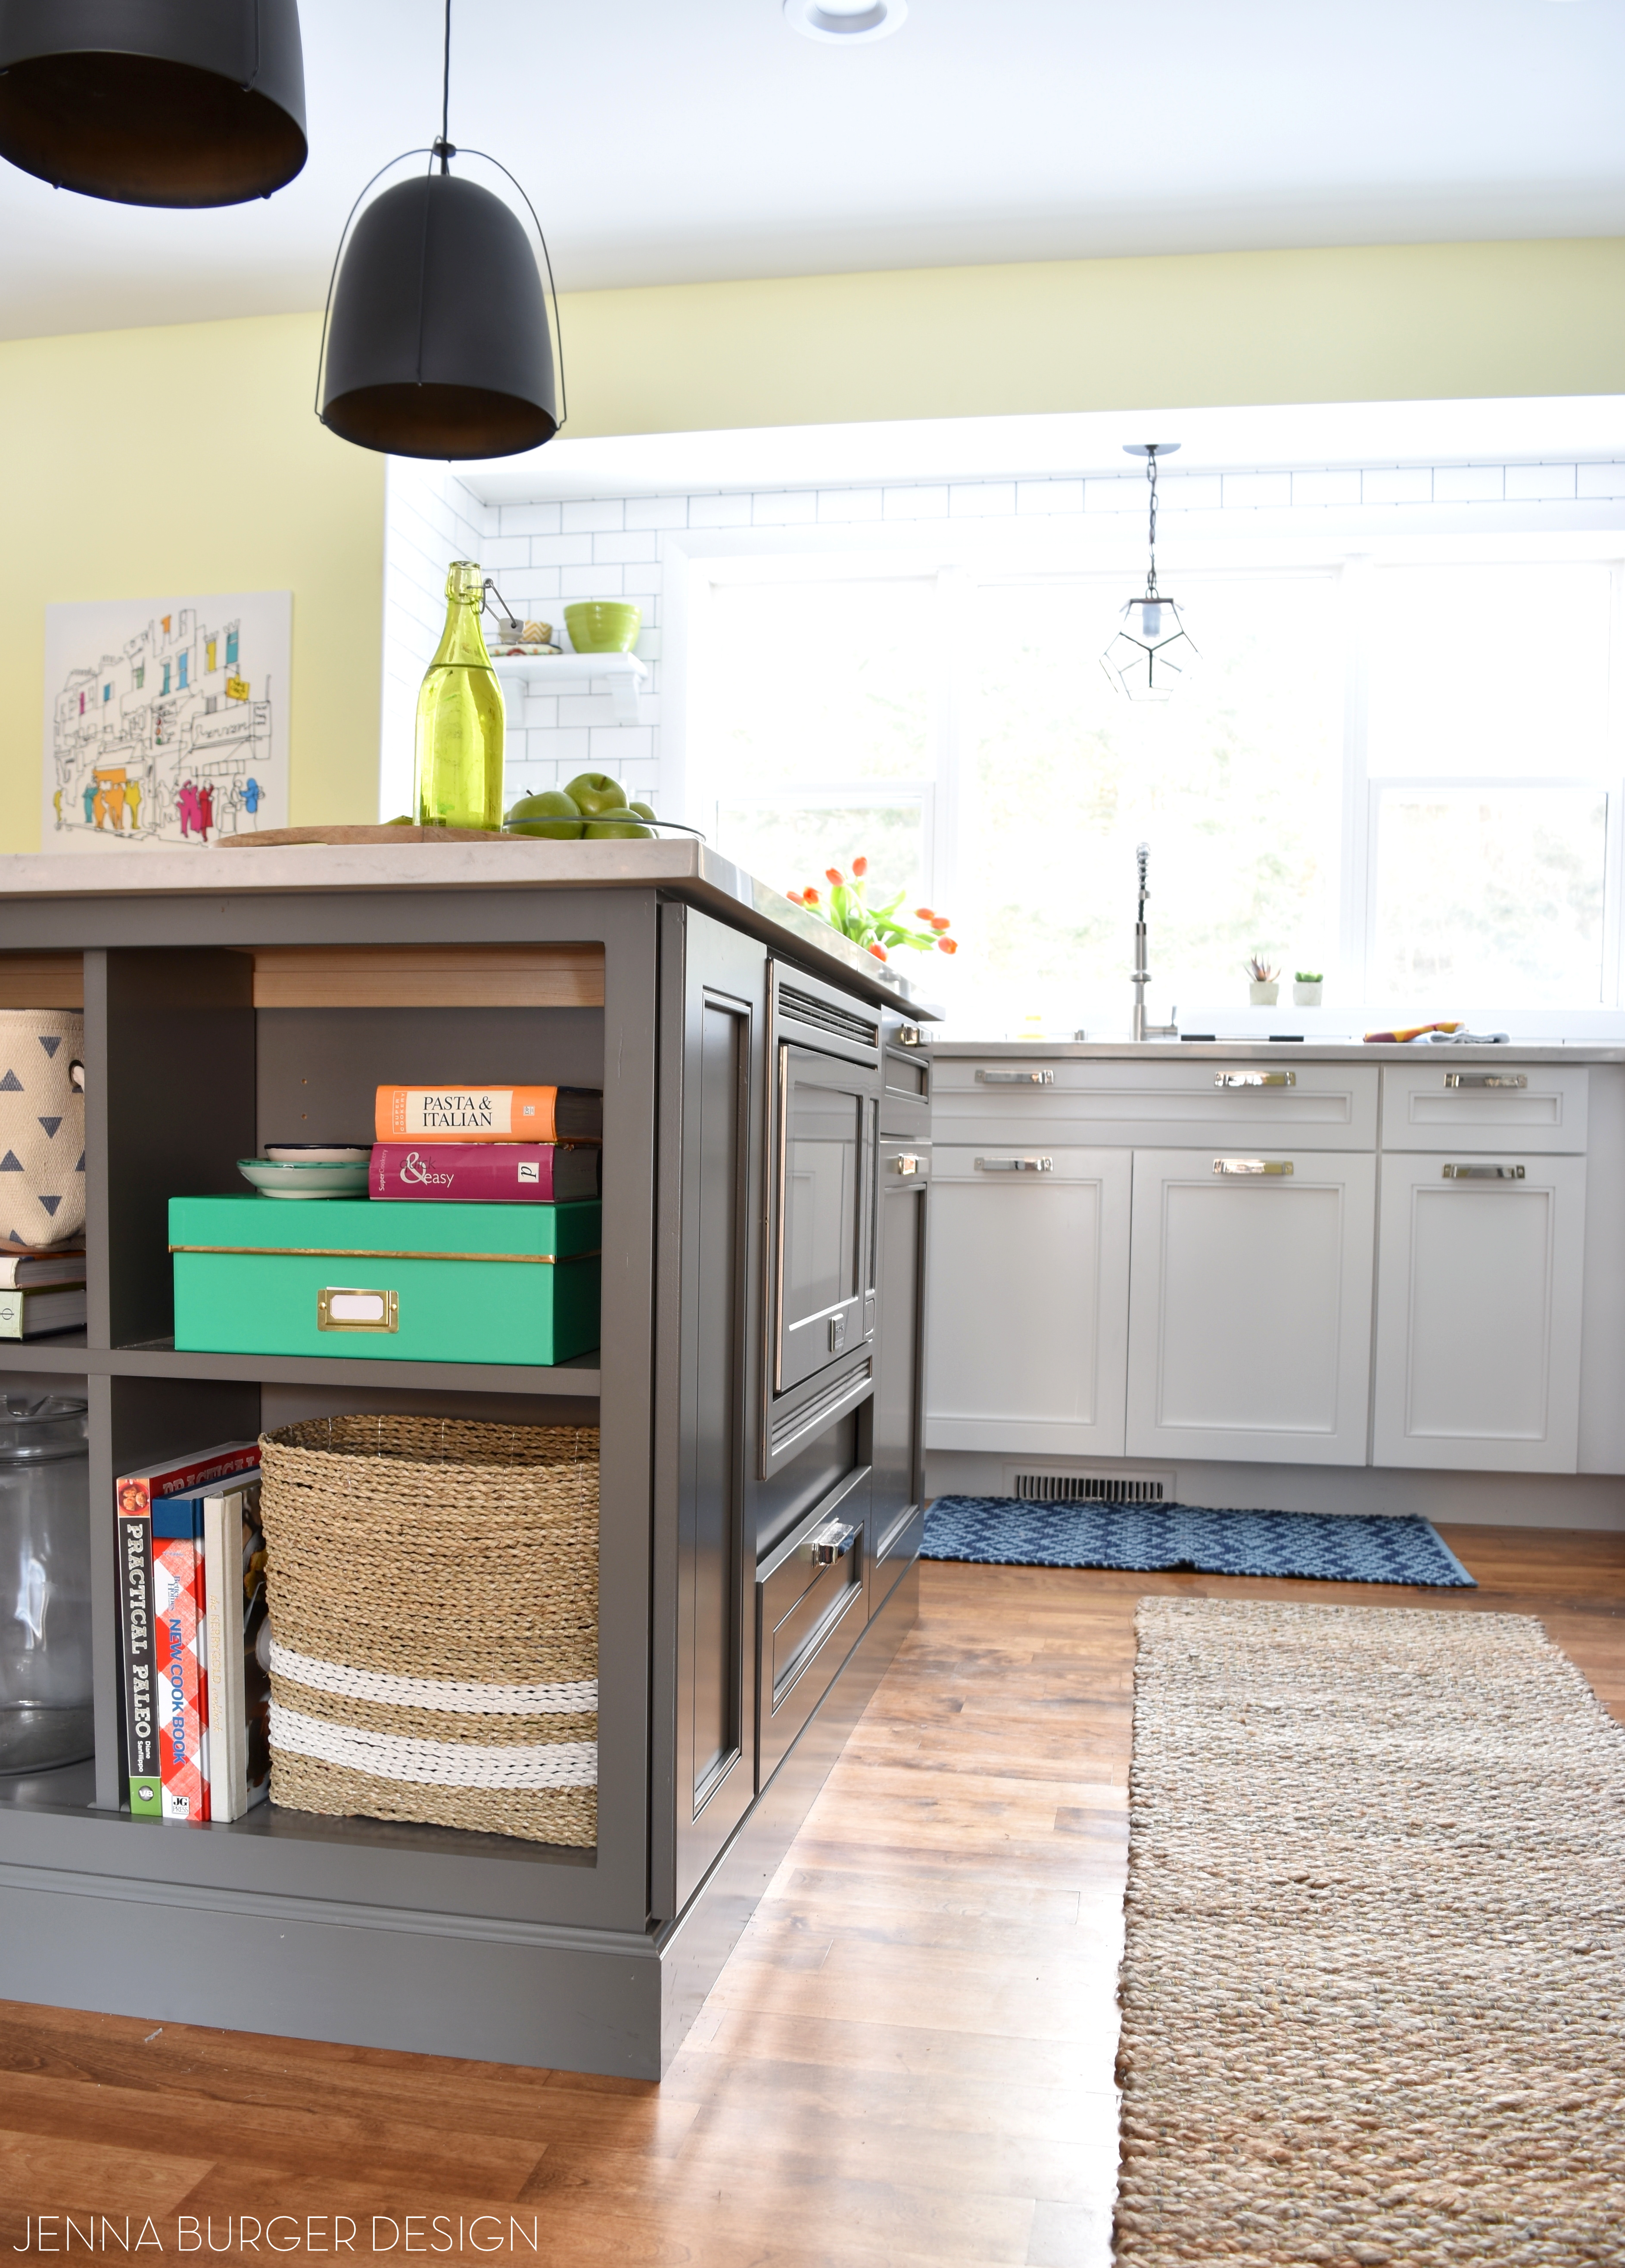
On the far end of the island that faces the living room, I chose to have open shelves instead of closed cabinetry. I thought it would be the perfect spot for my many cookbooks + basket storage for dishclothes, cloth napkins, etc.
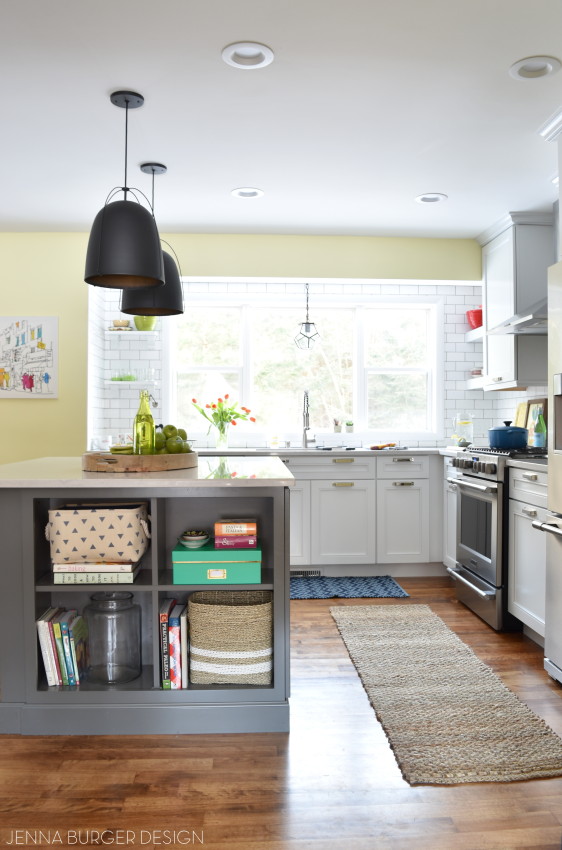
Having open shelving also allows the ability to bring color into the kitchen. Instead of the solid, one-tone look of cabinets, open shelving adds depth and a way to introduce color.
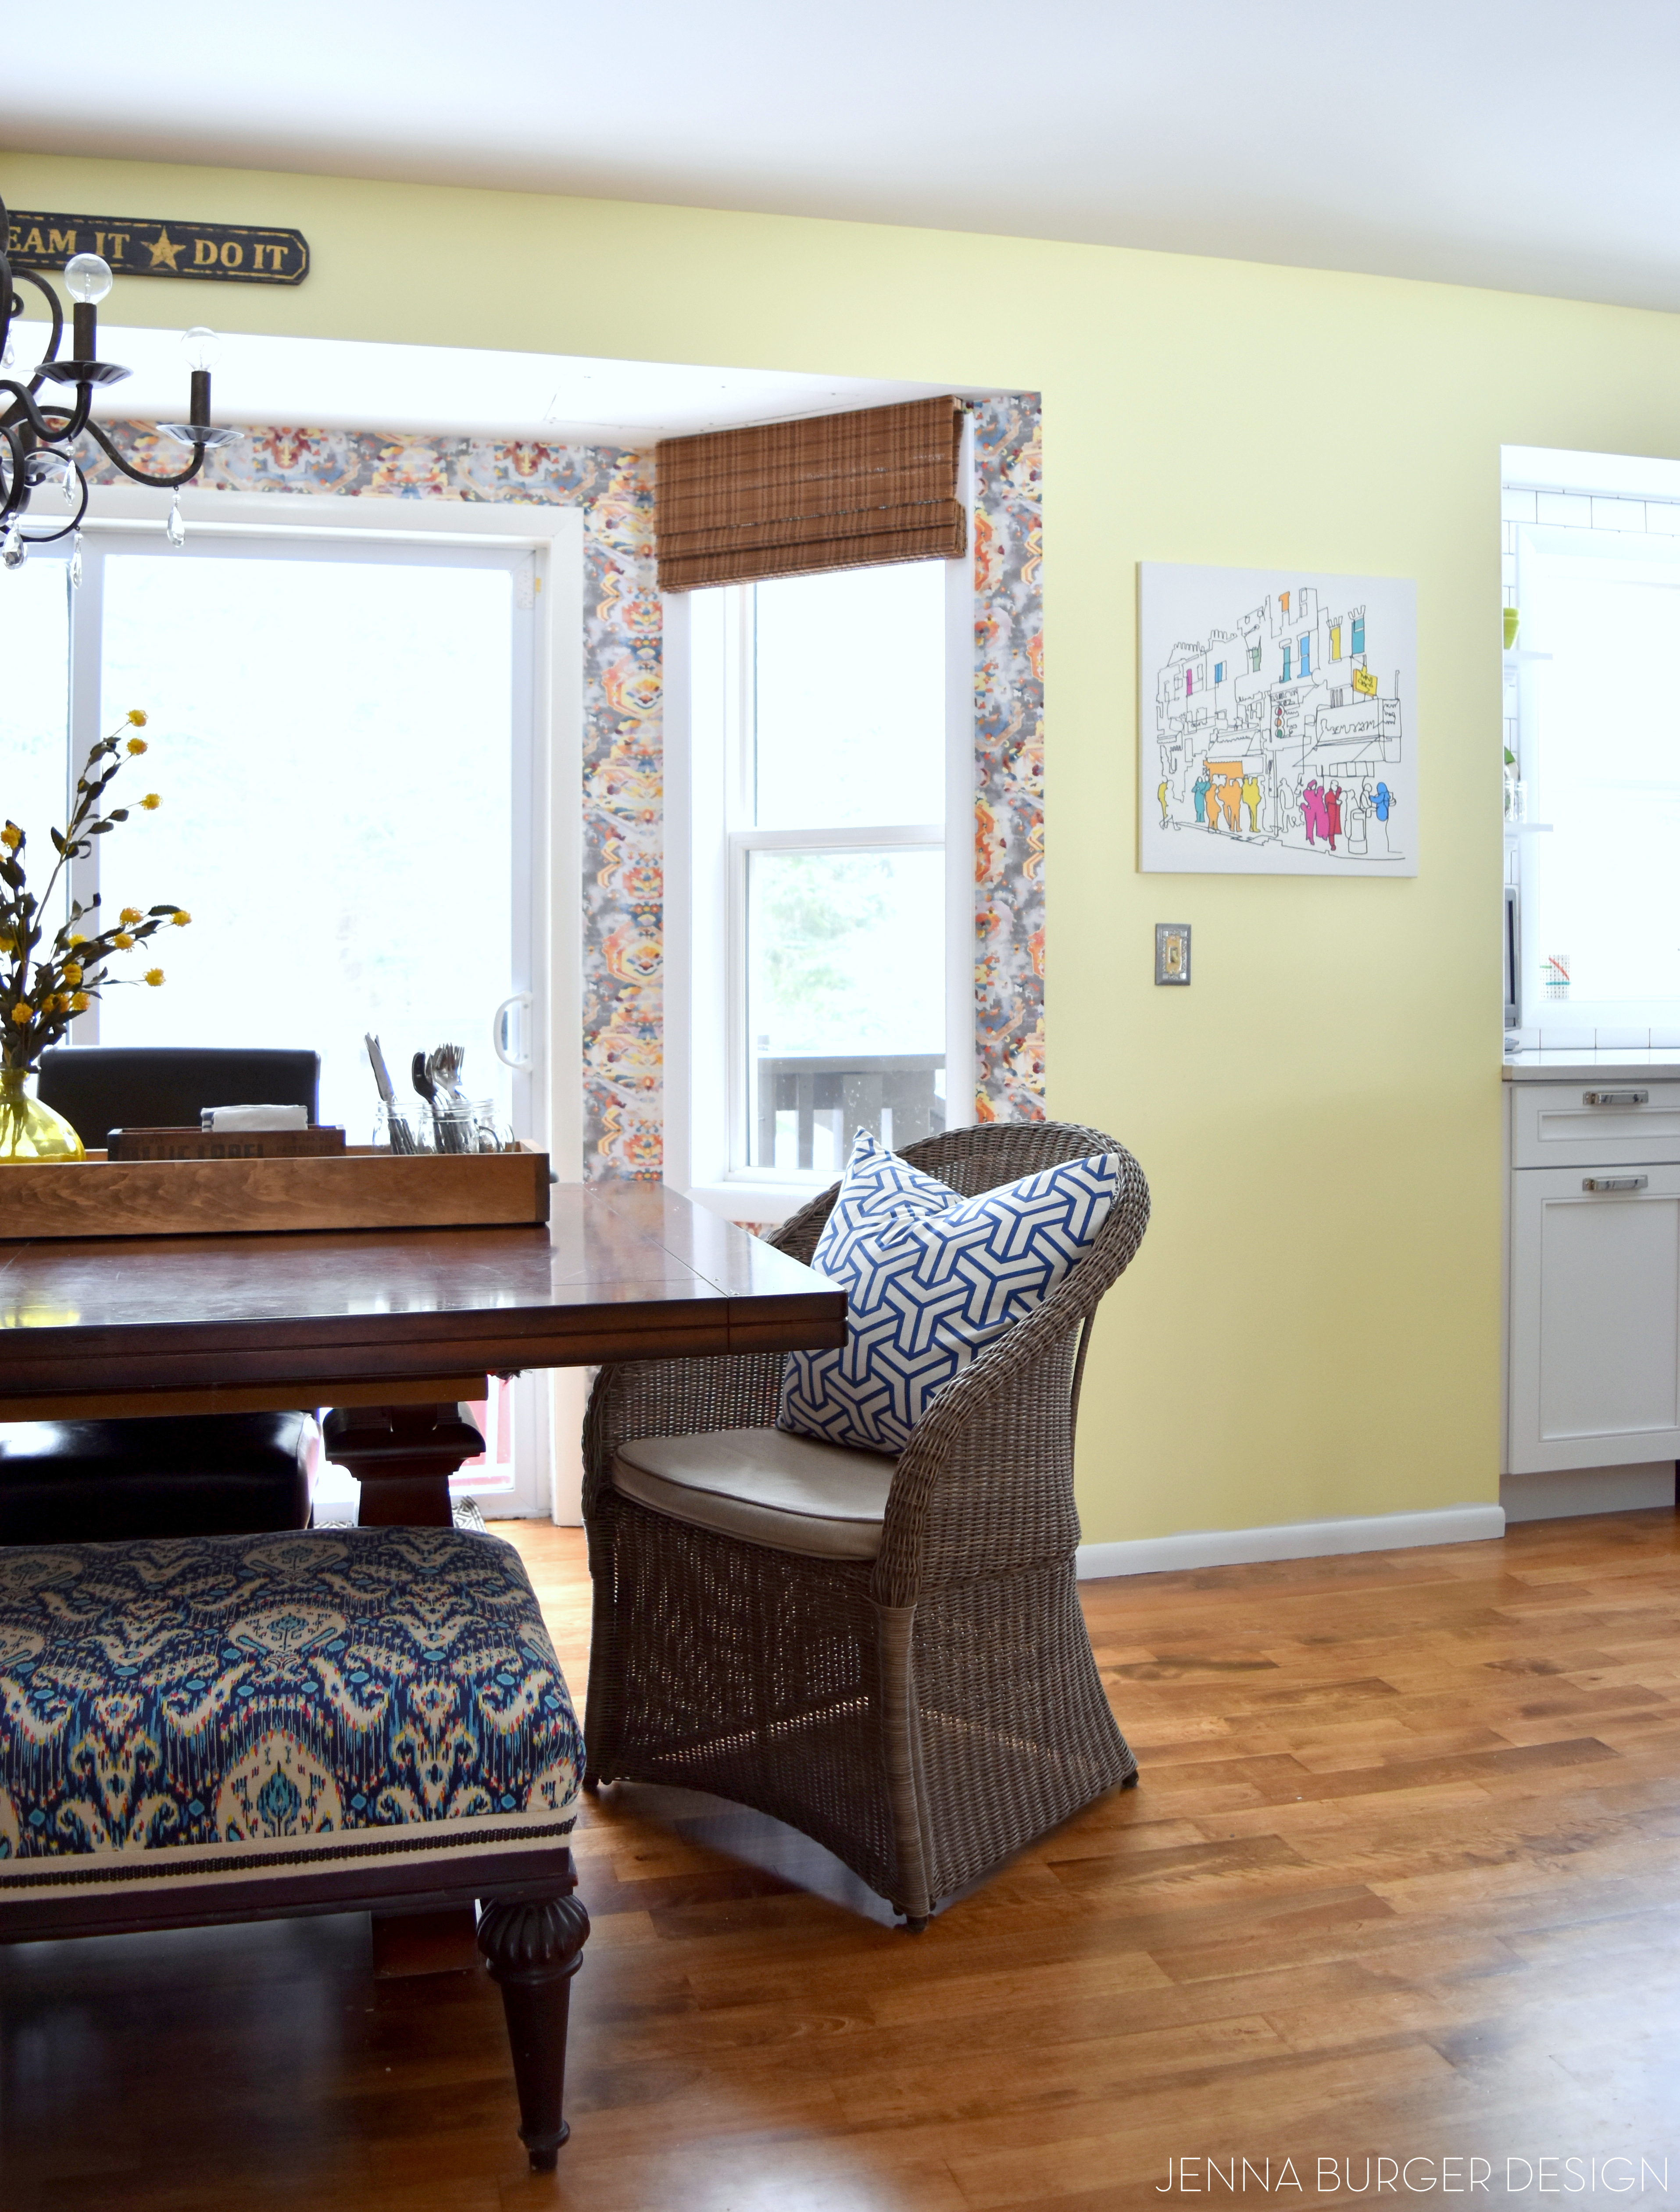
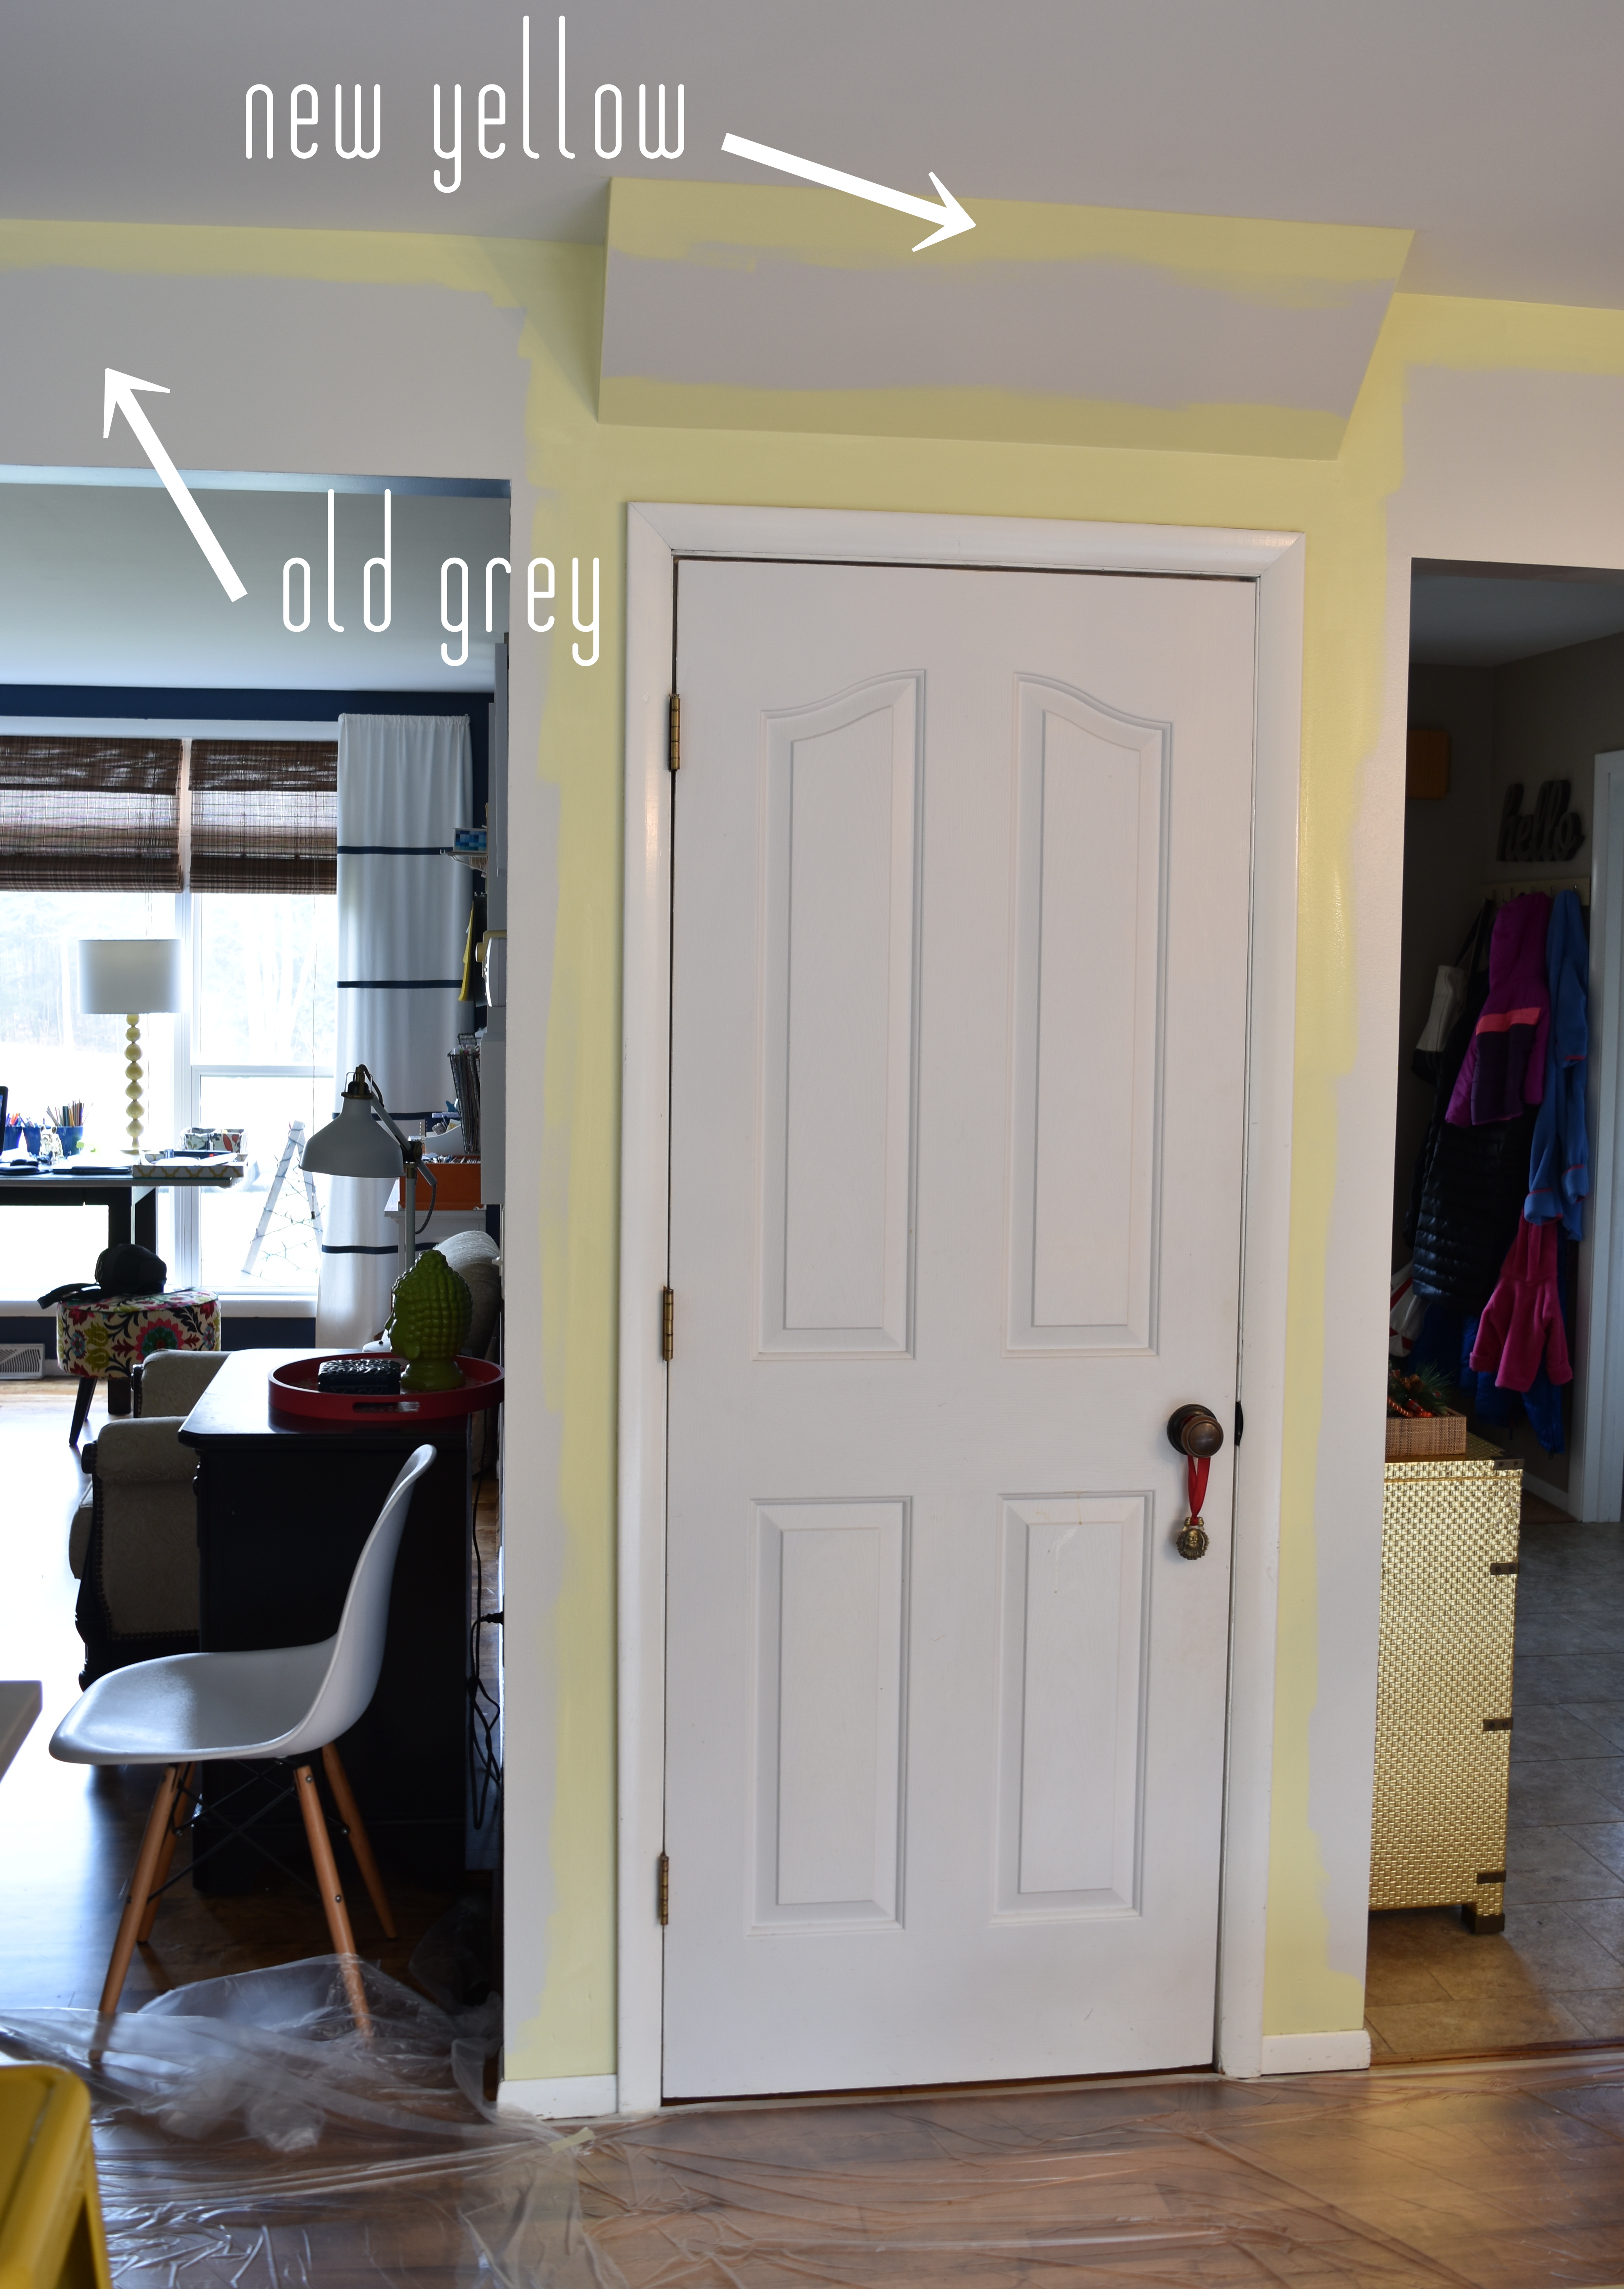
Another way to bring in color amongst the sea of white was on the walls. The old kitchen paint color was yellow and for the new wall paint I chose a light gray. Wrong choice. In the end, I went back to yellow, but this time the sunshine yellow color is a completely different hue – much more lighter & brighter.
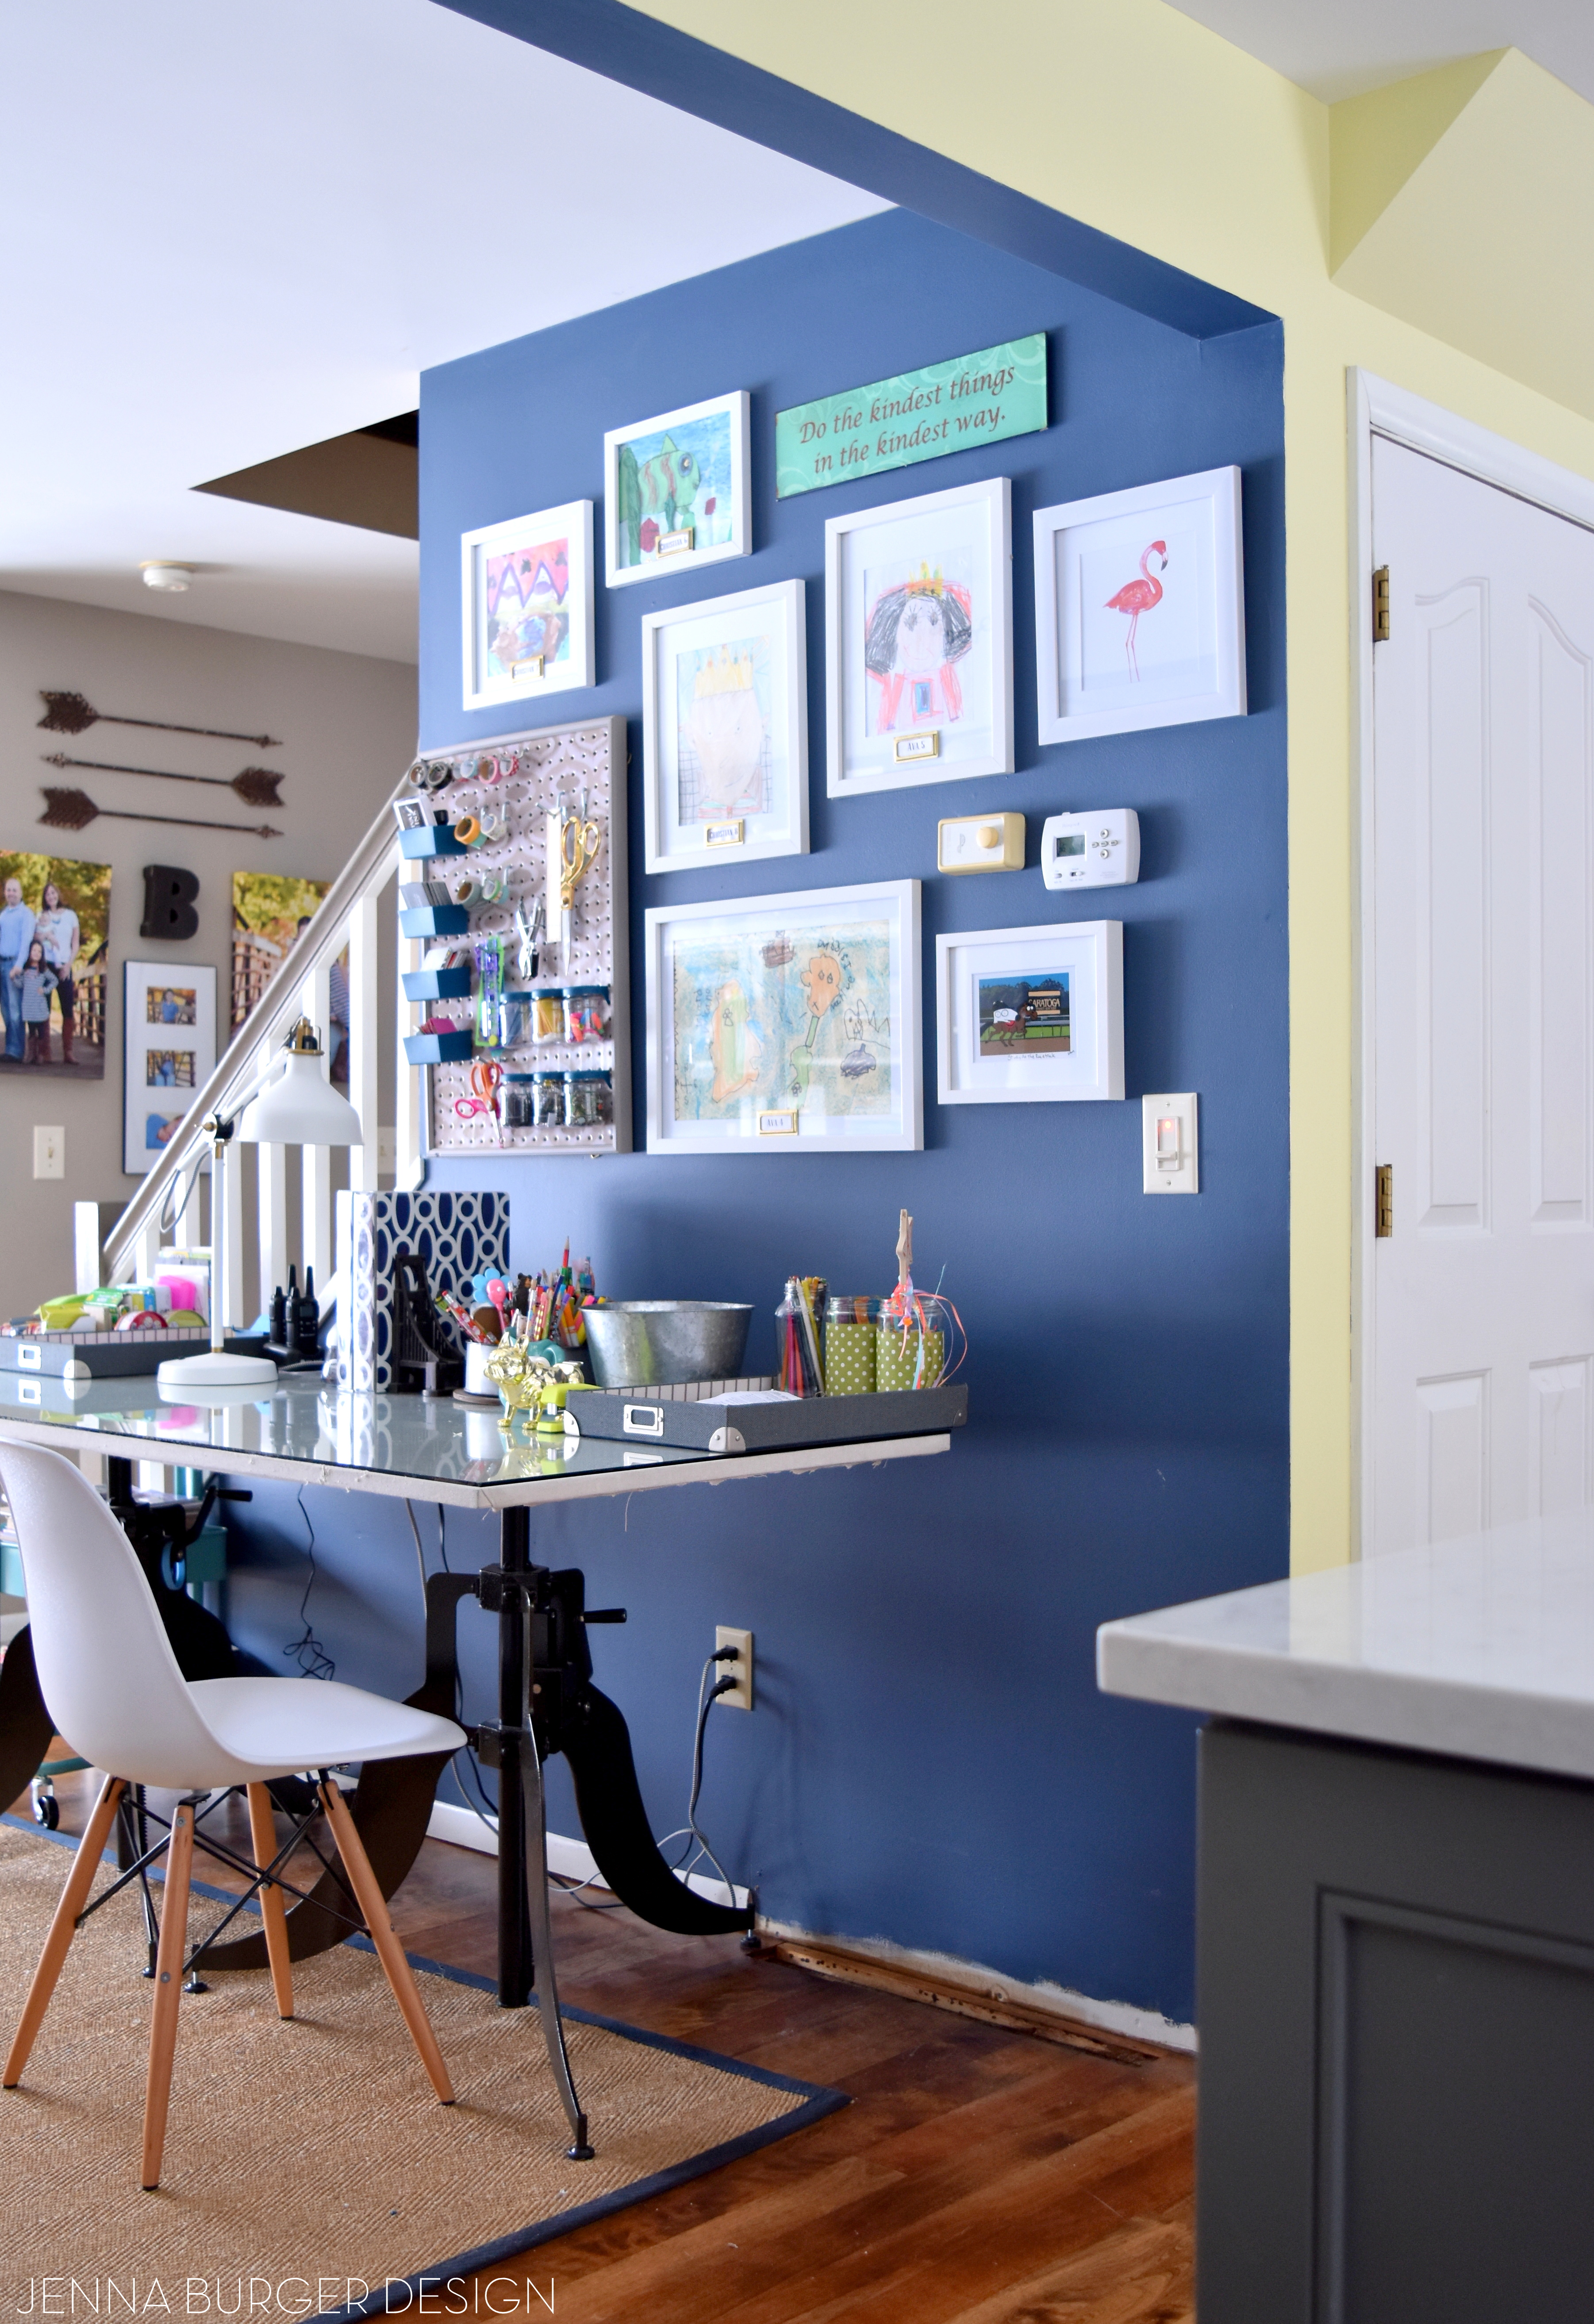
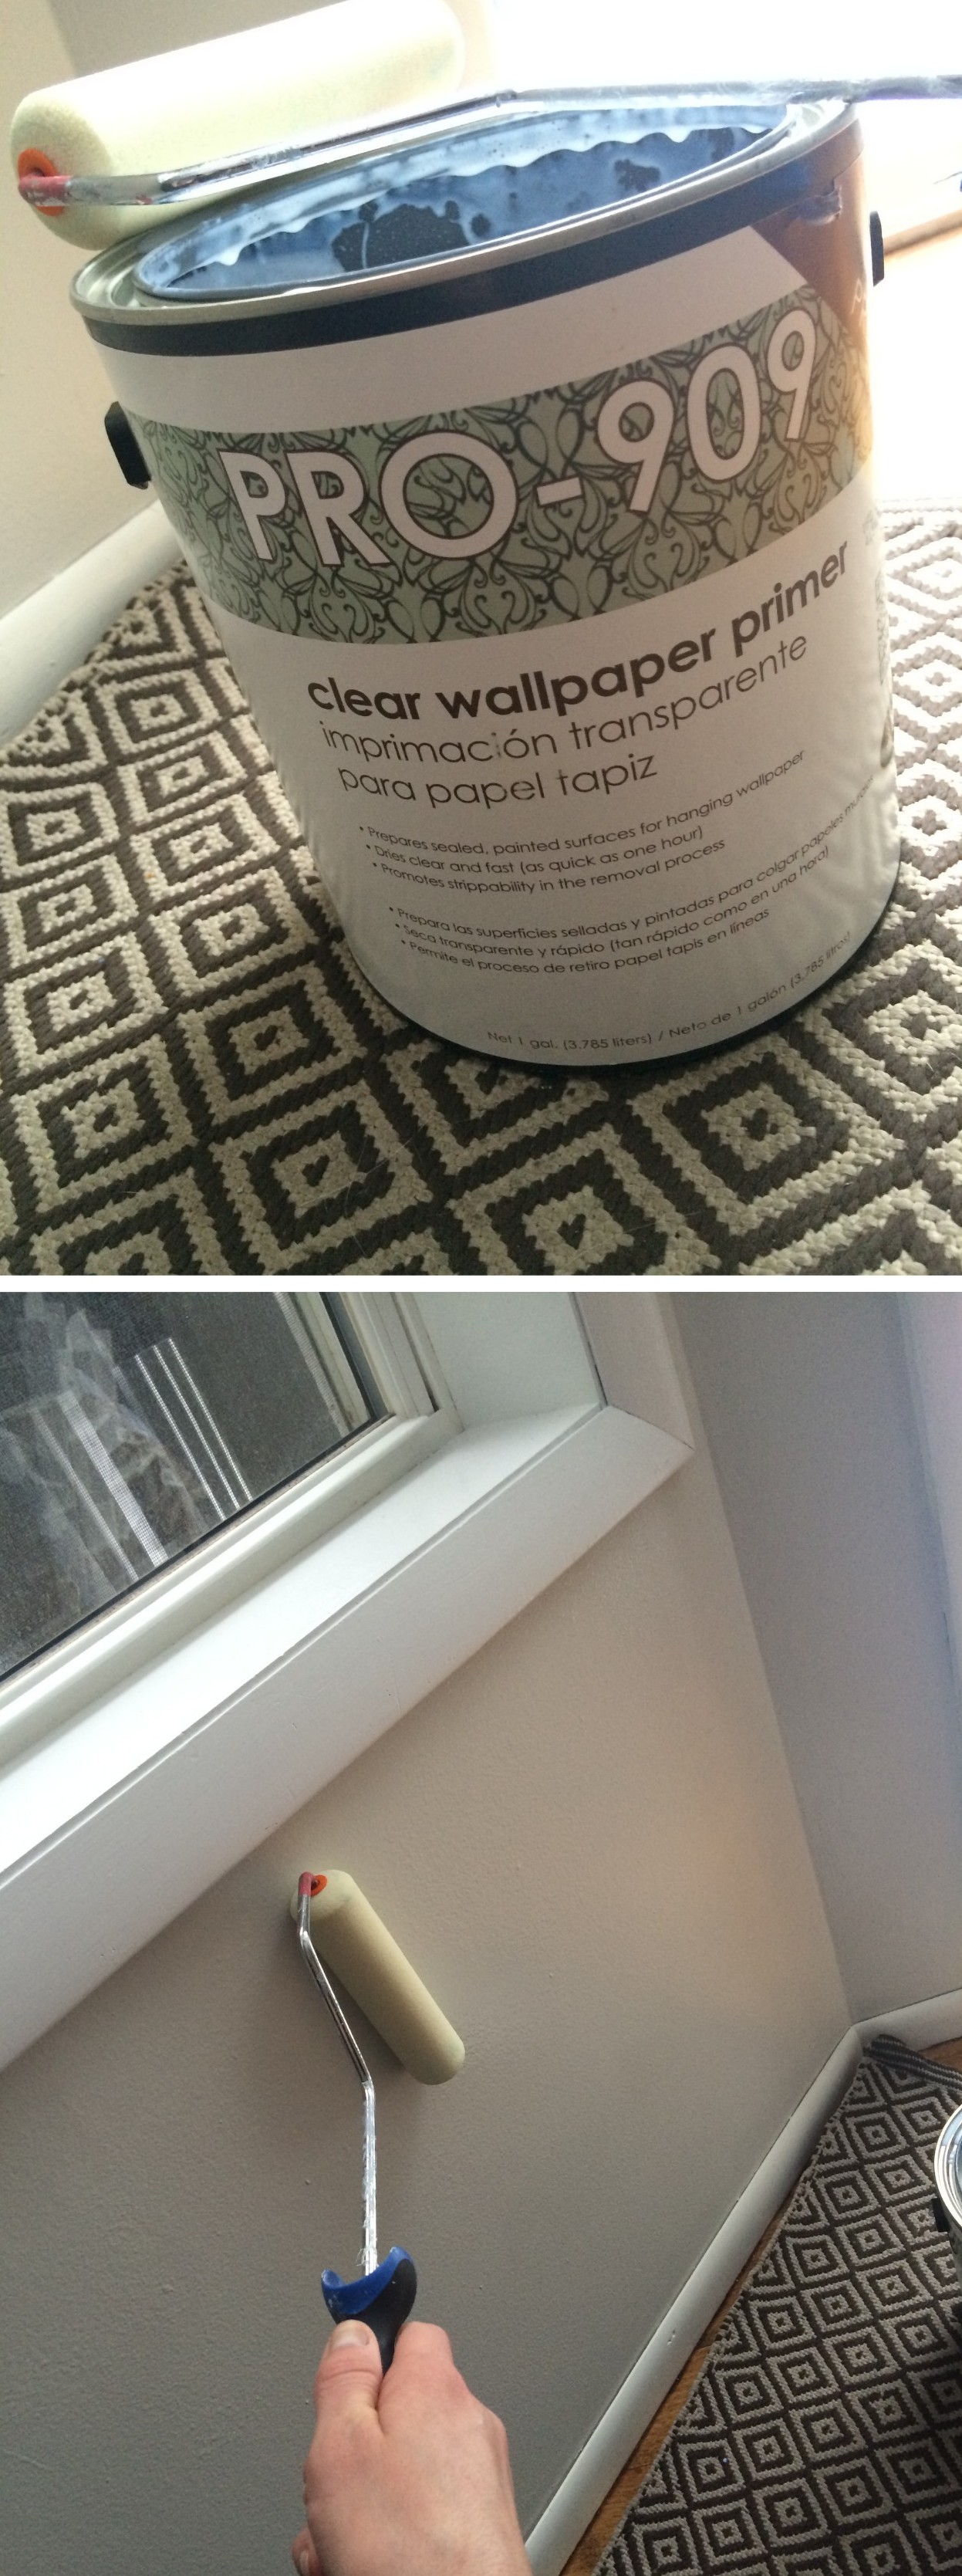
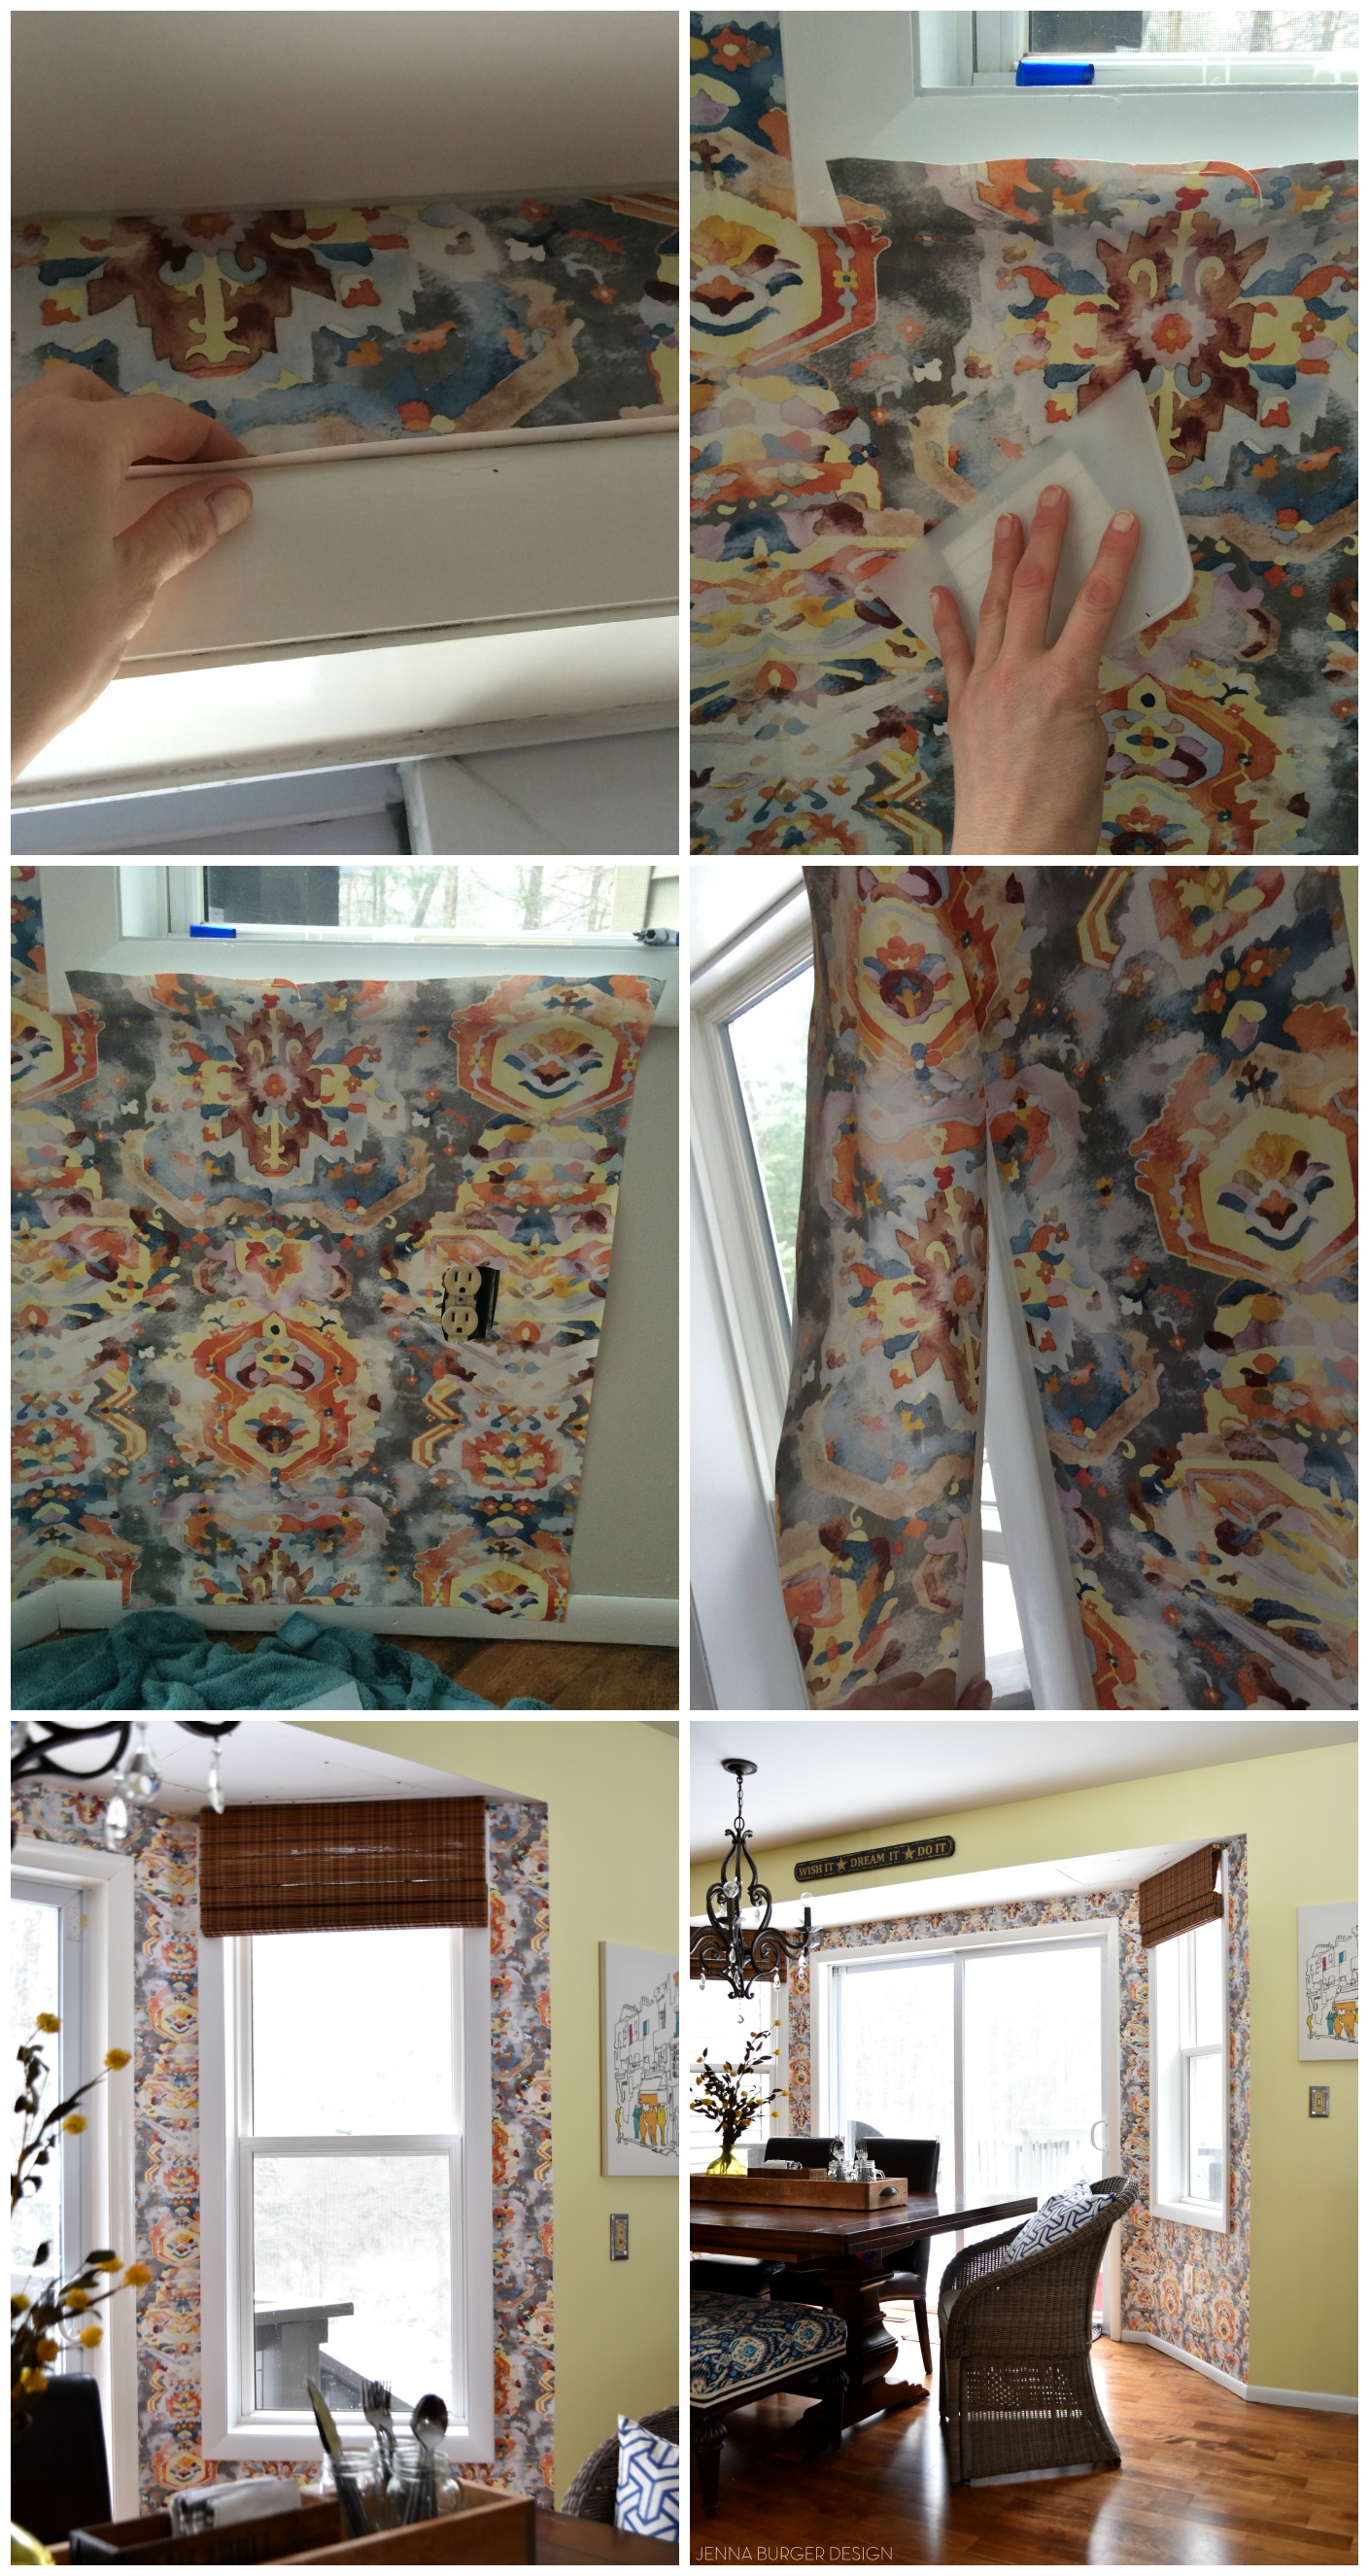
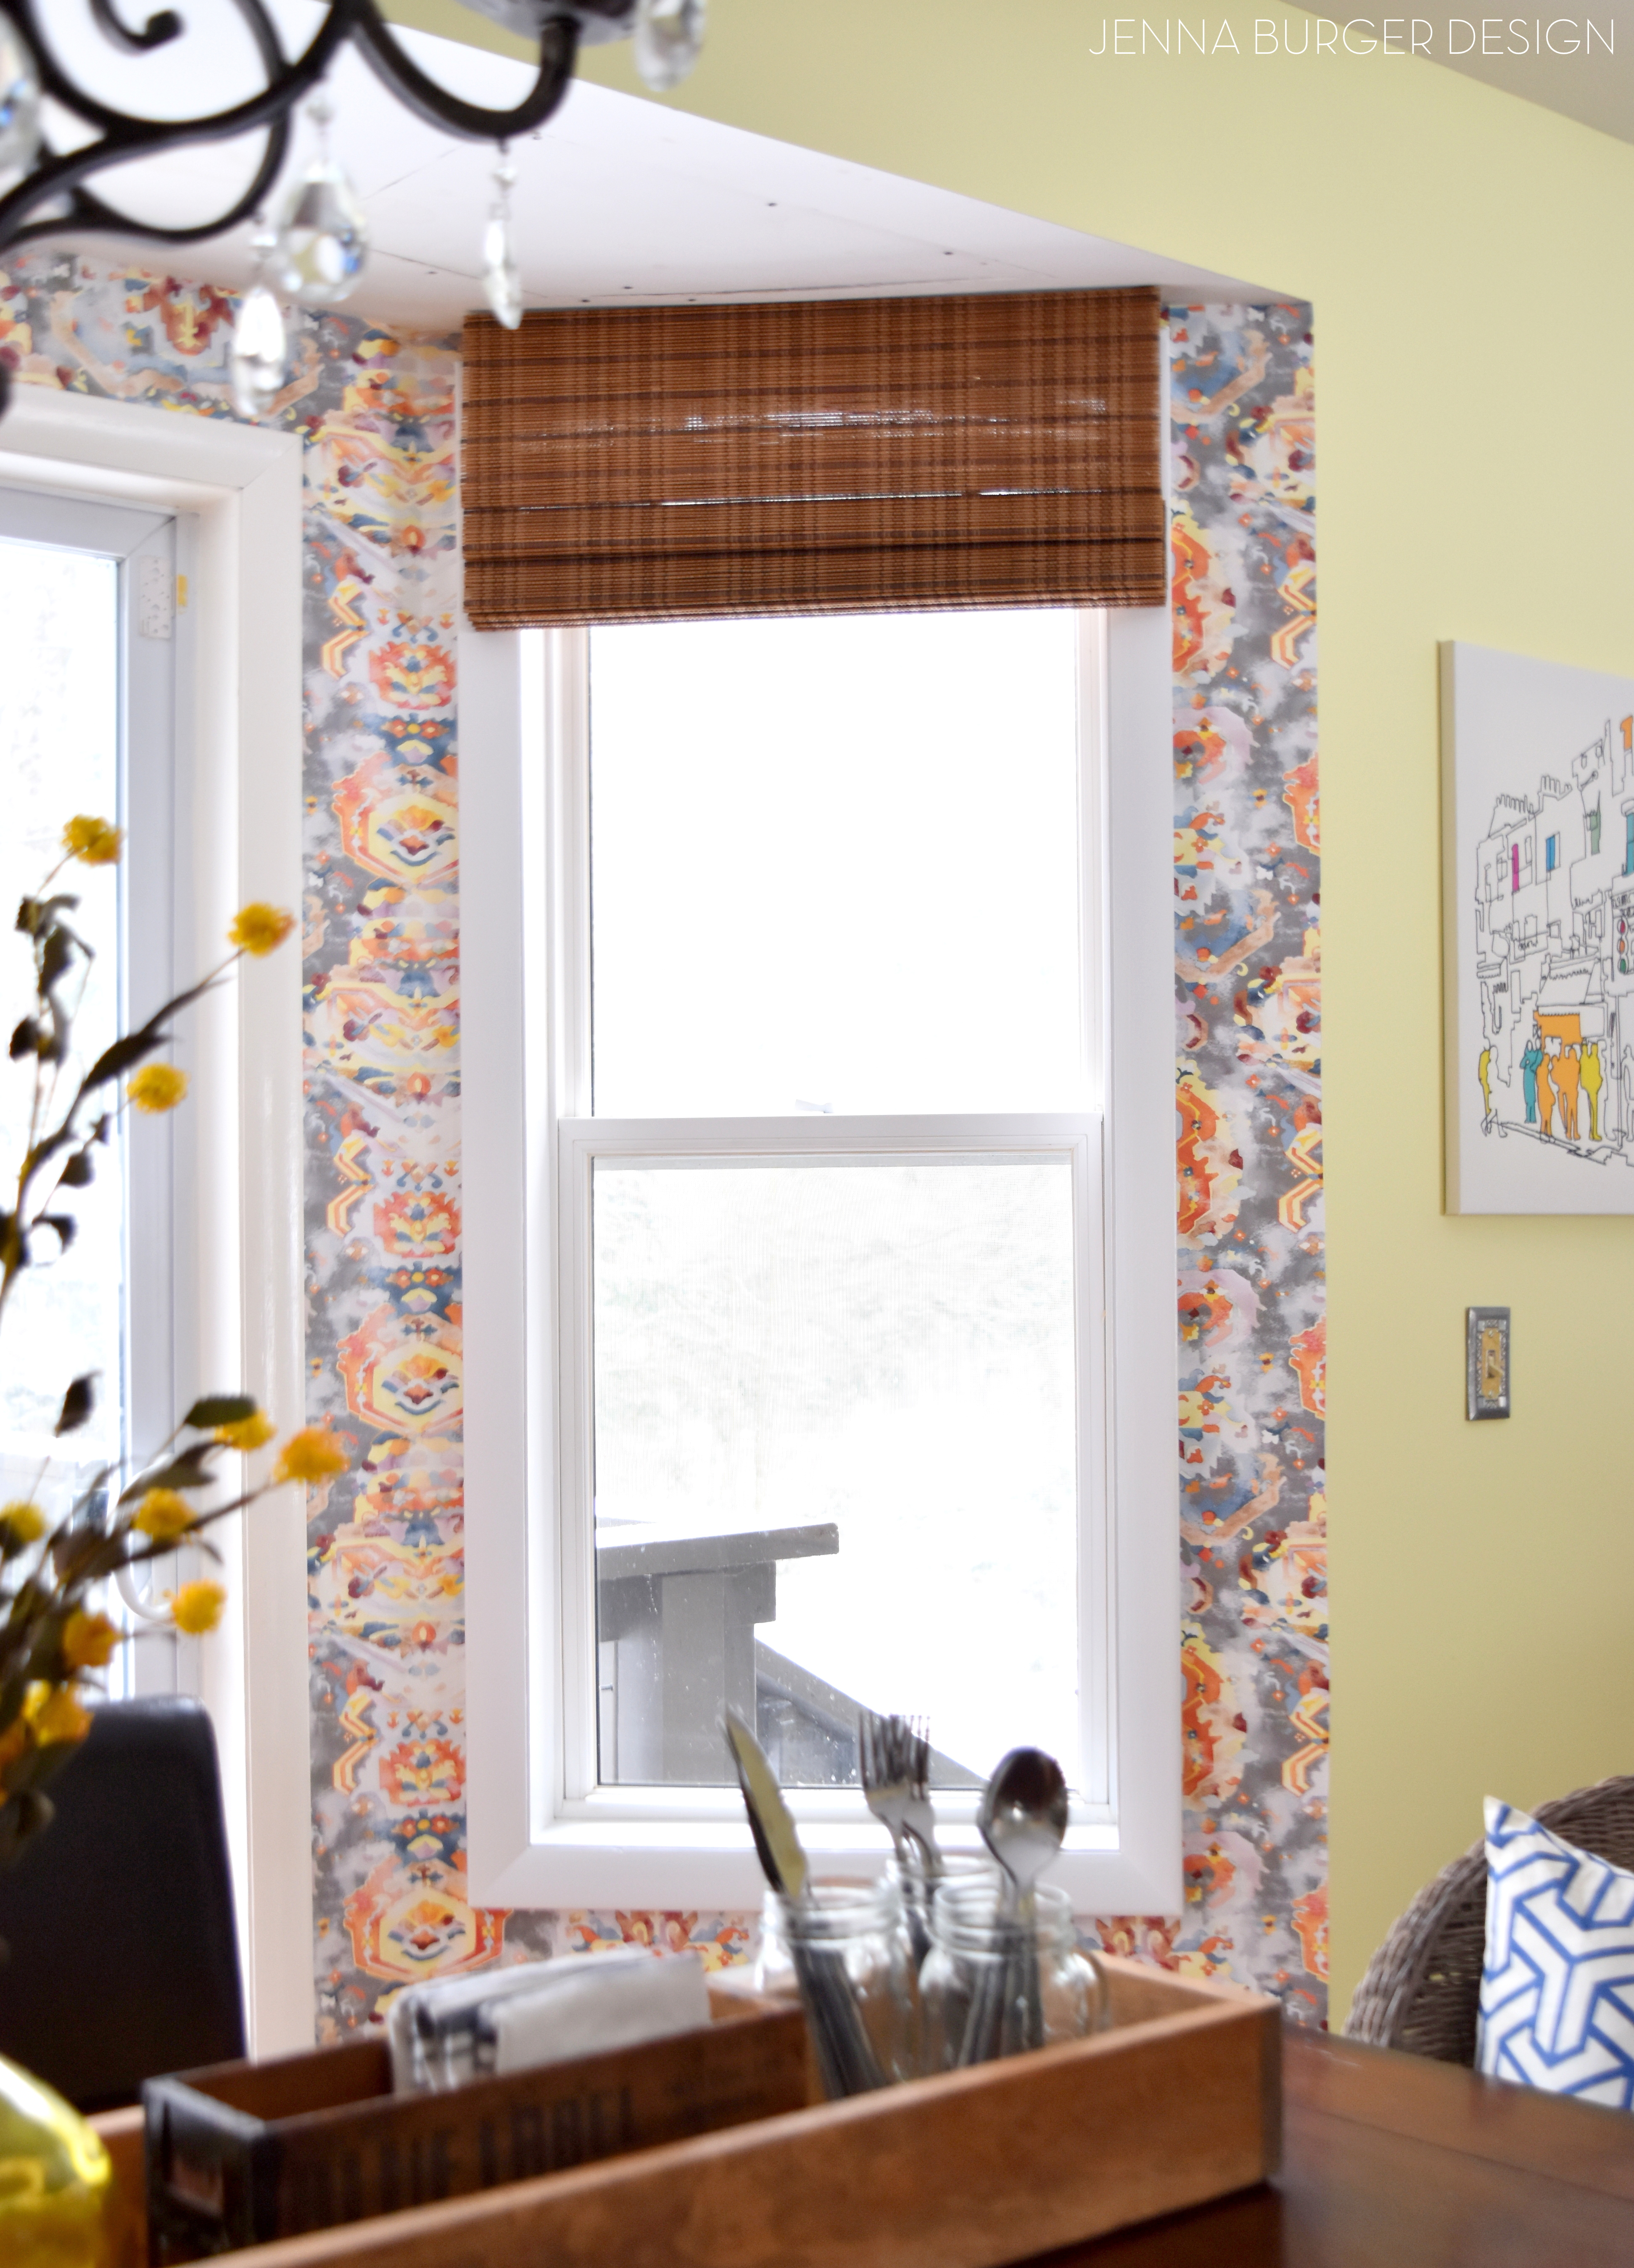
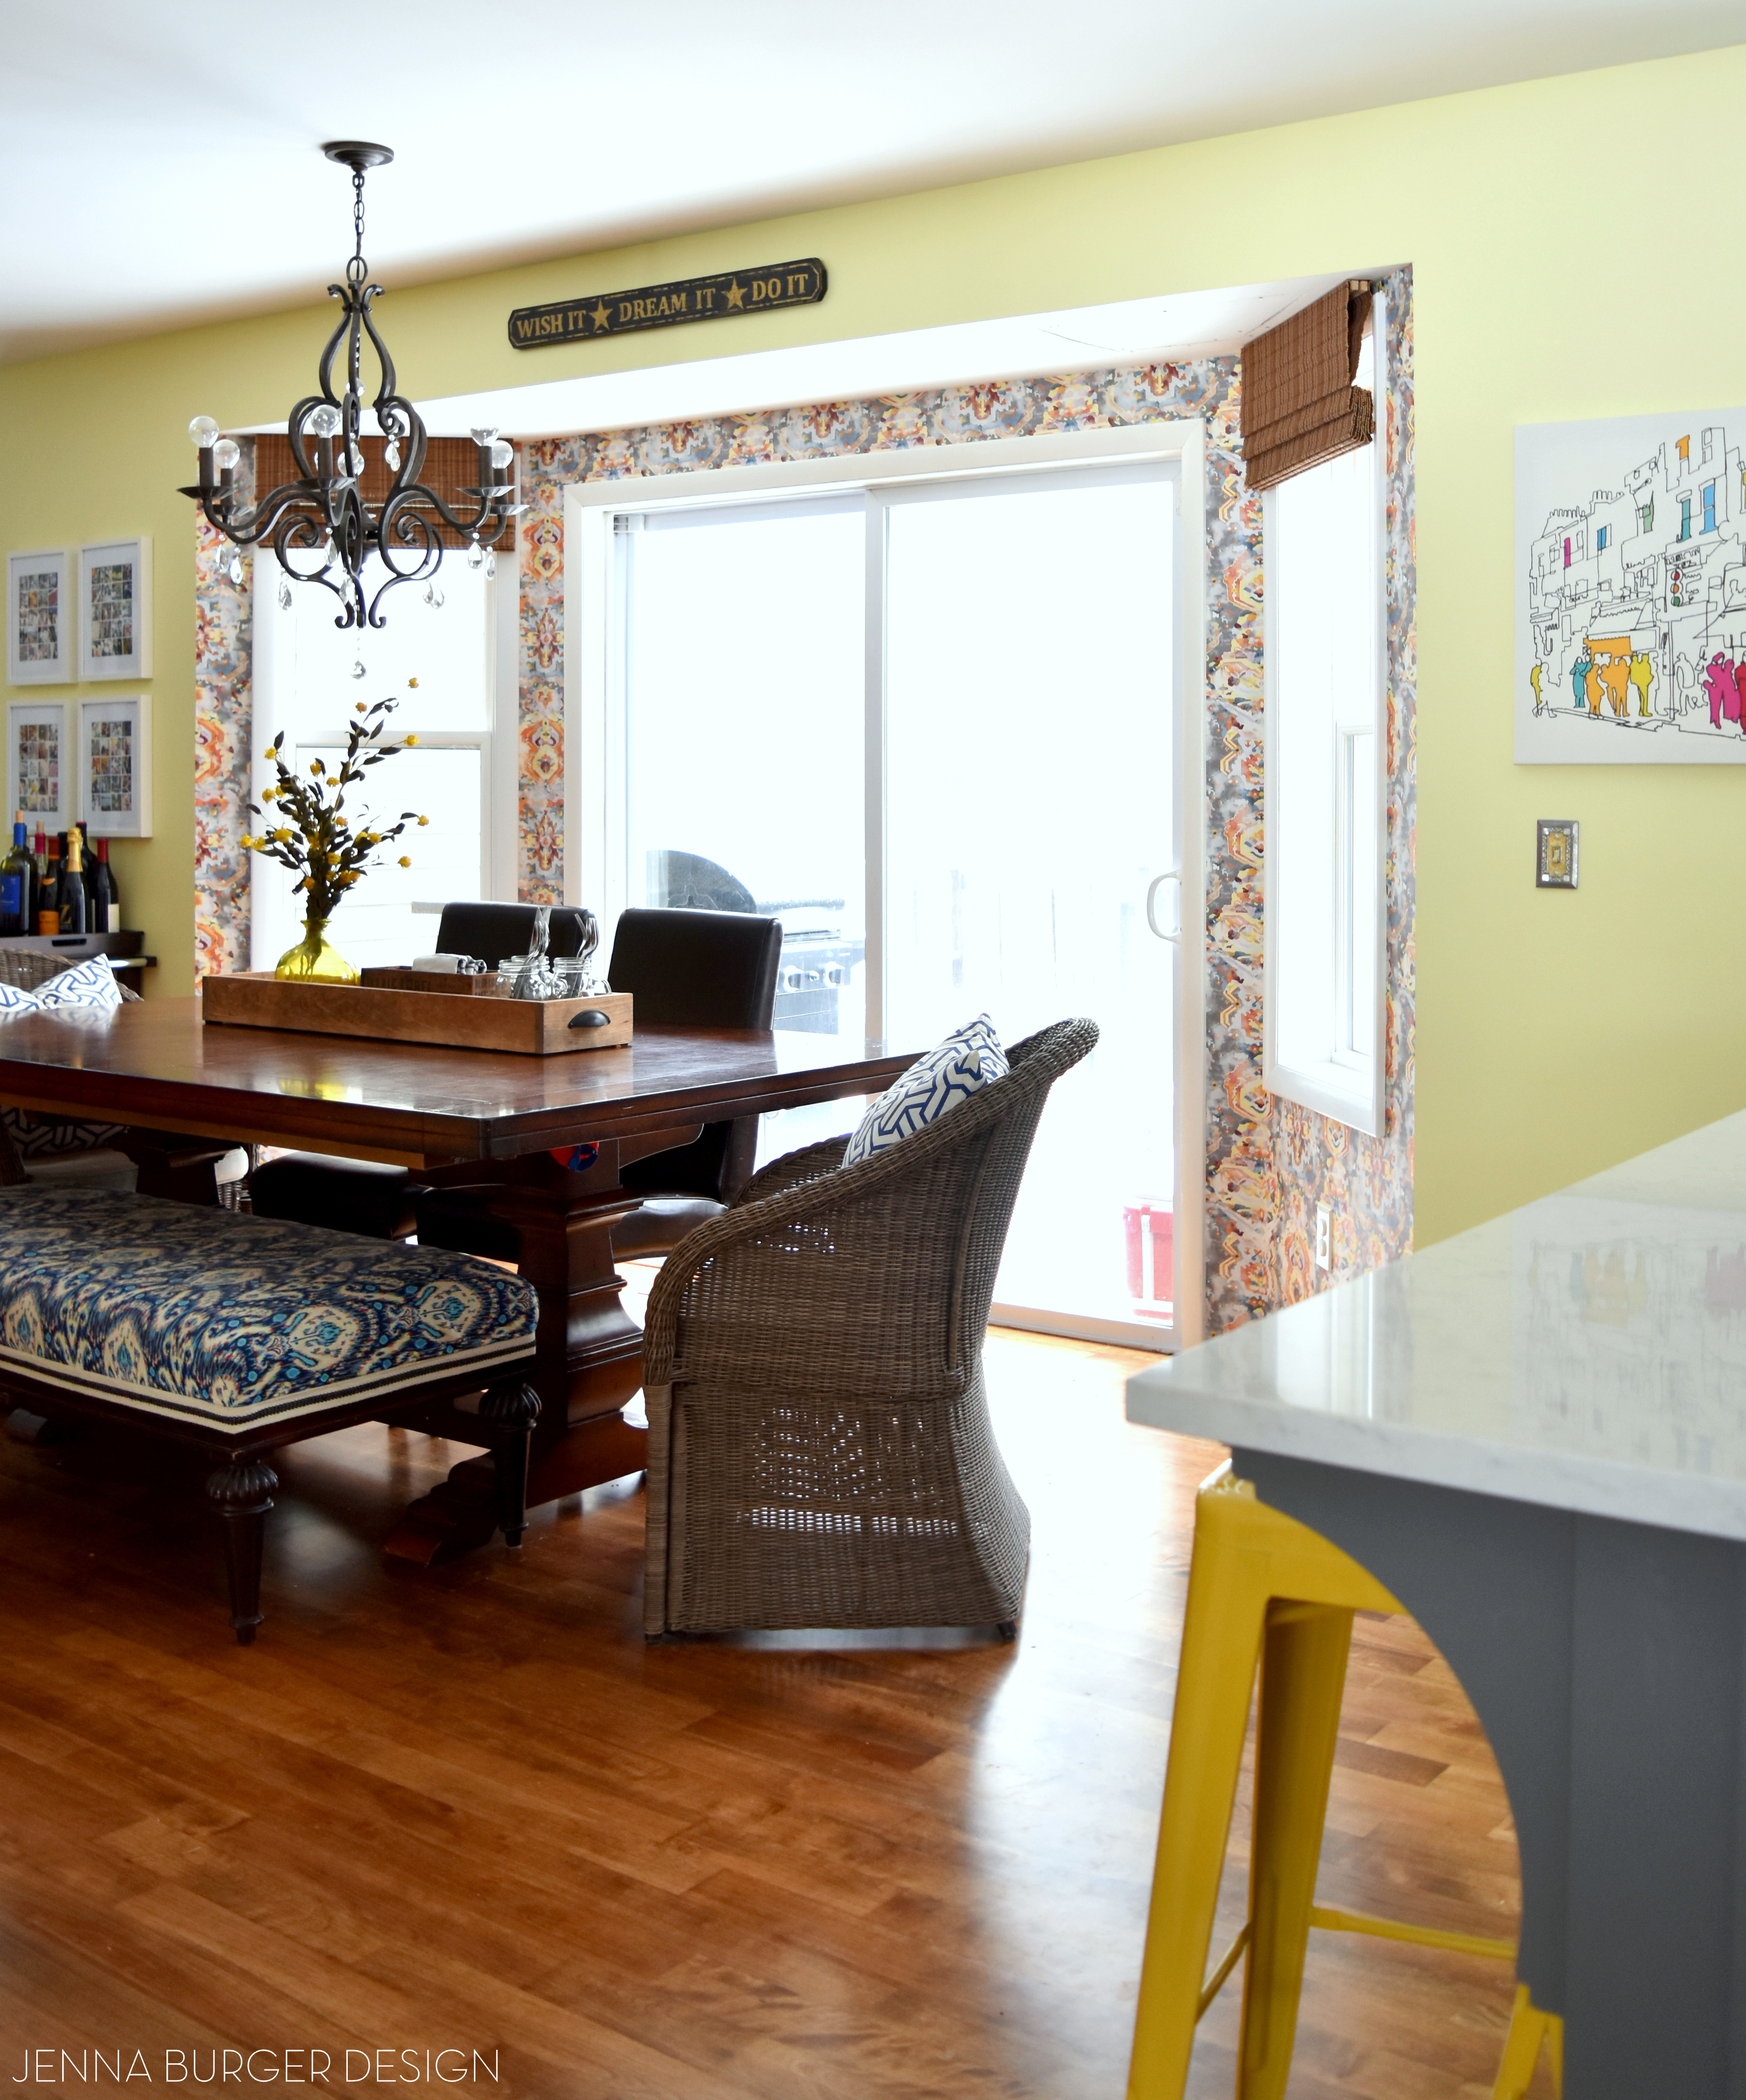
And check out the colorful + bold wallpaper in the dining room. It adds a gorgeous focal point to the overall open space.

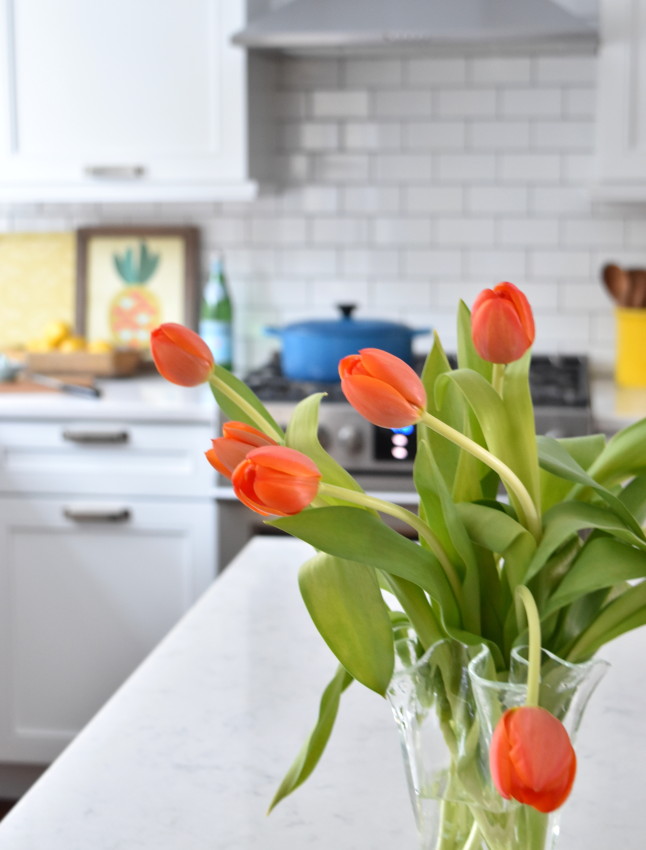
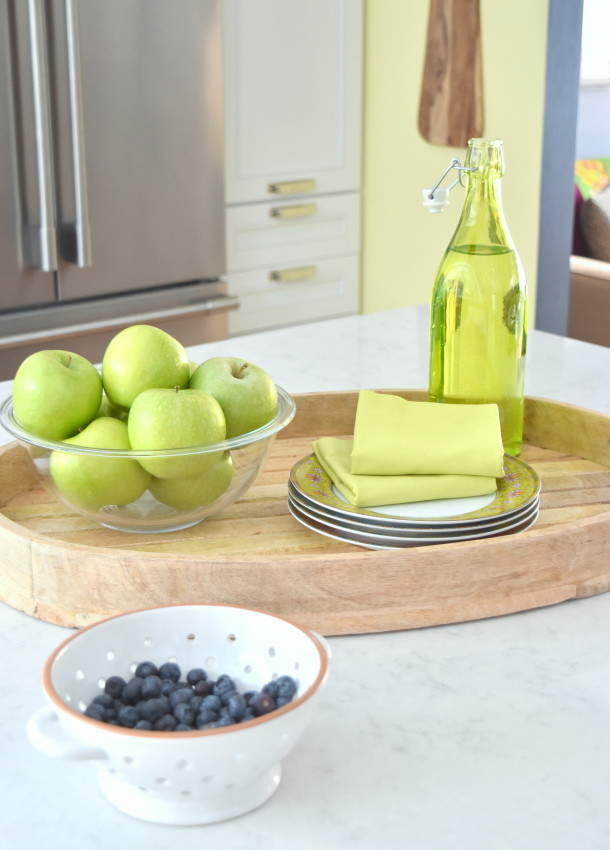
The marble-looking countertops are quartz and truly complete the clean + simple aesthetic of the kitchen.
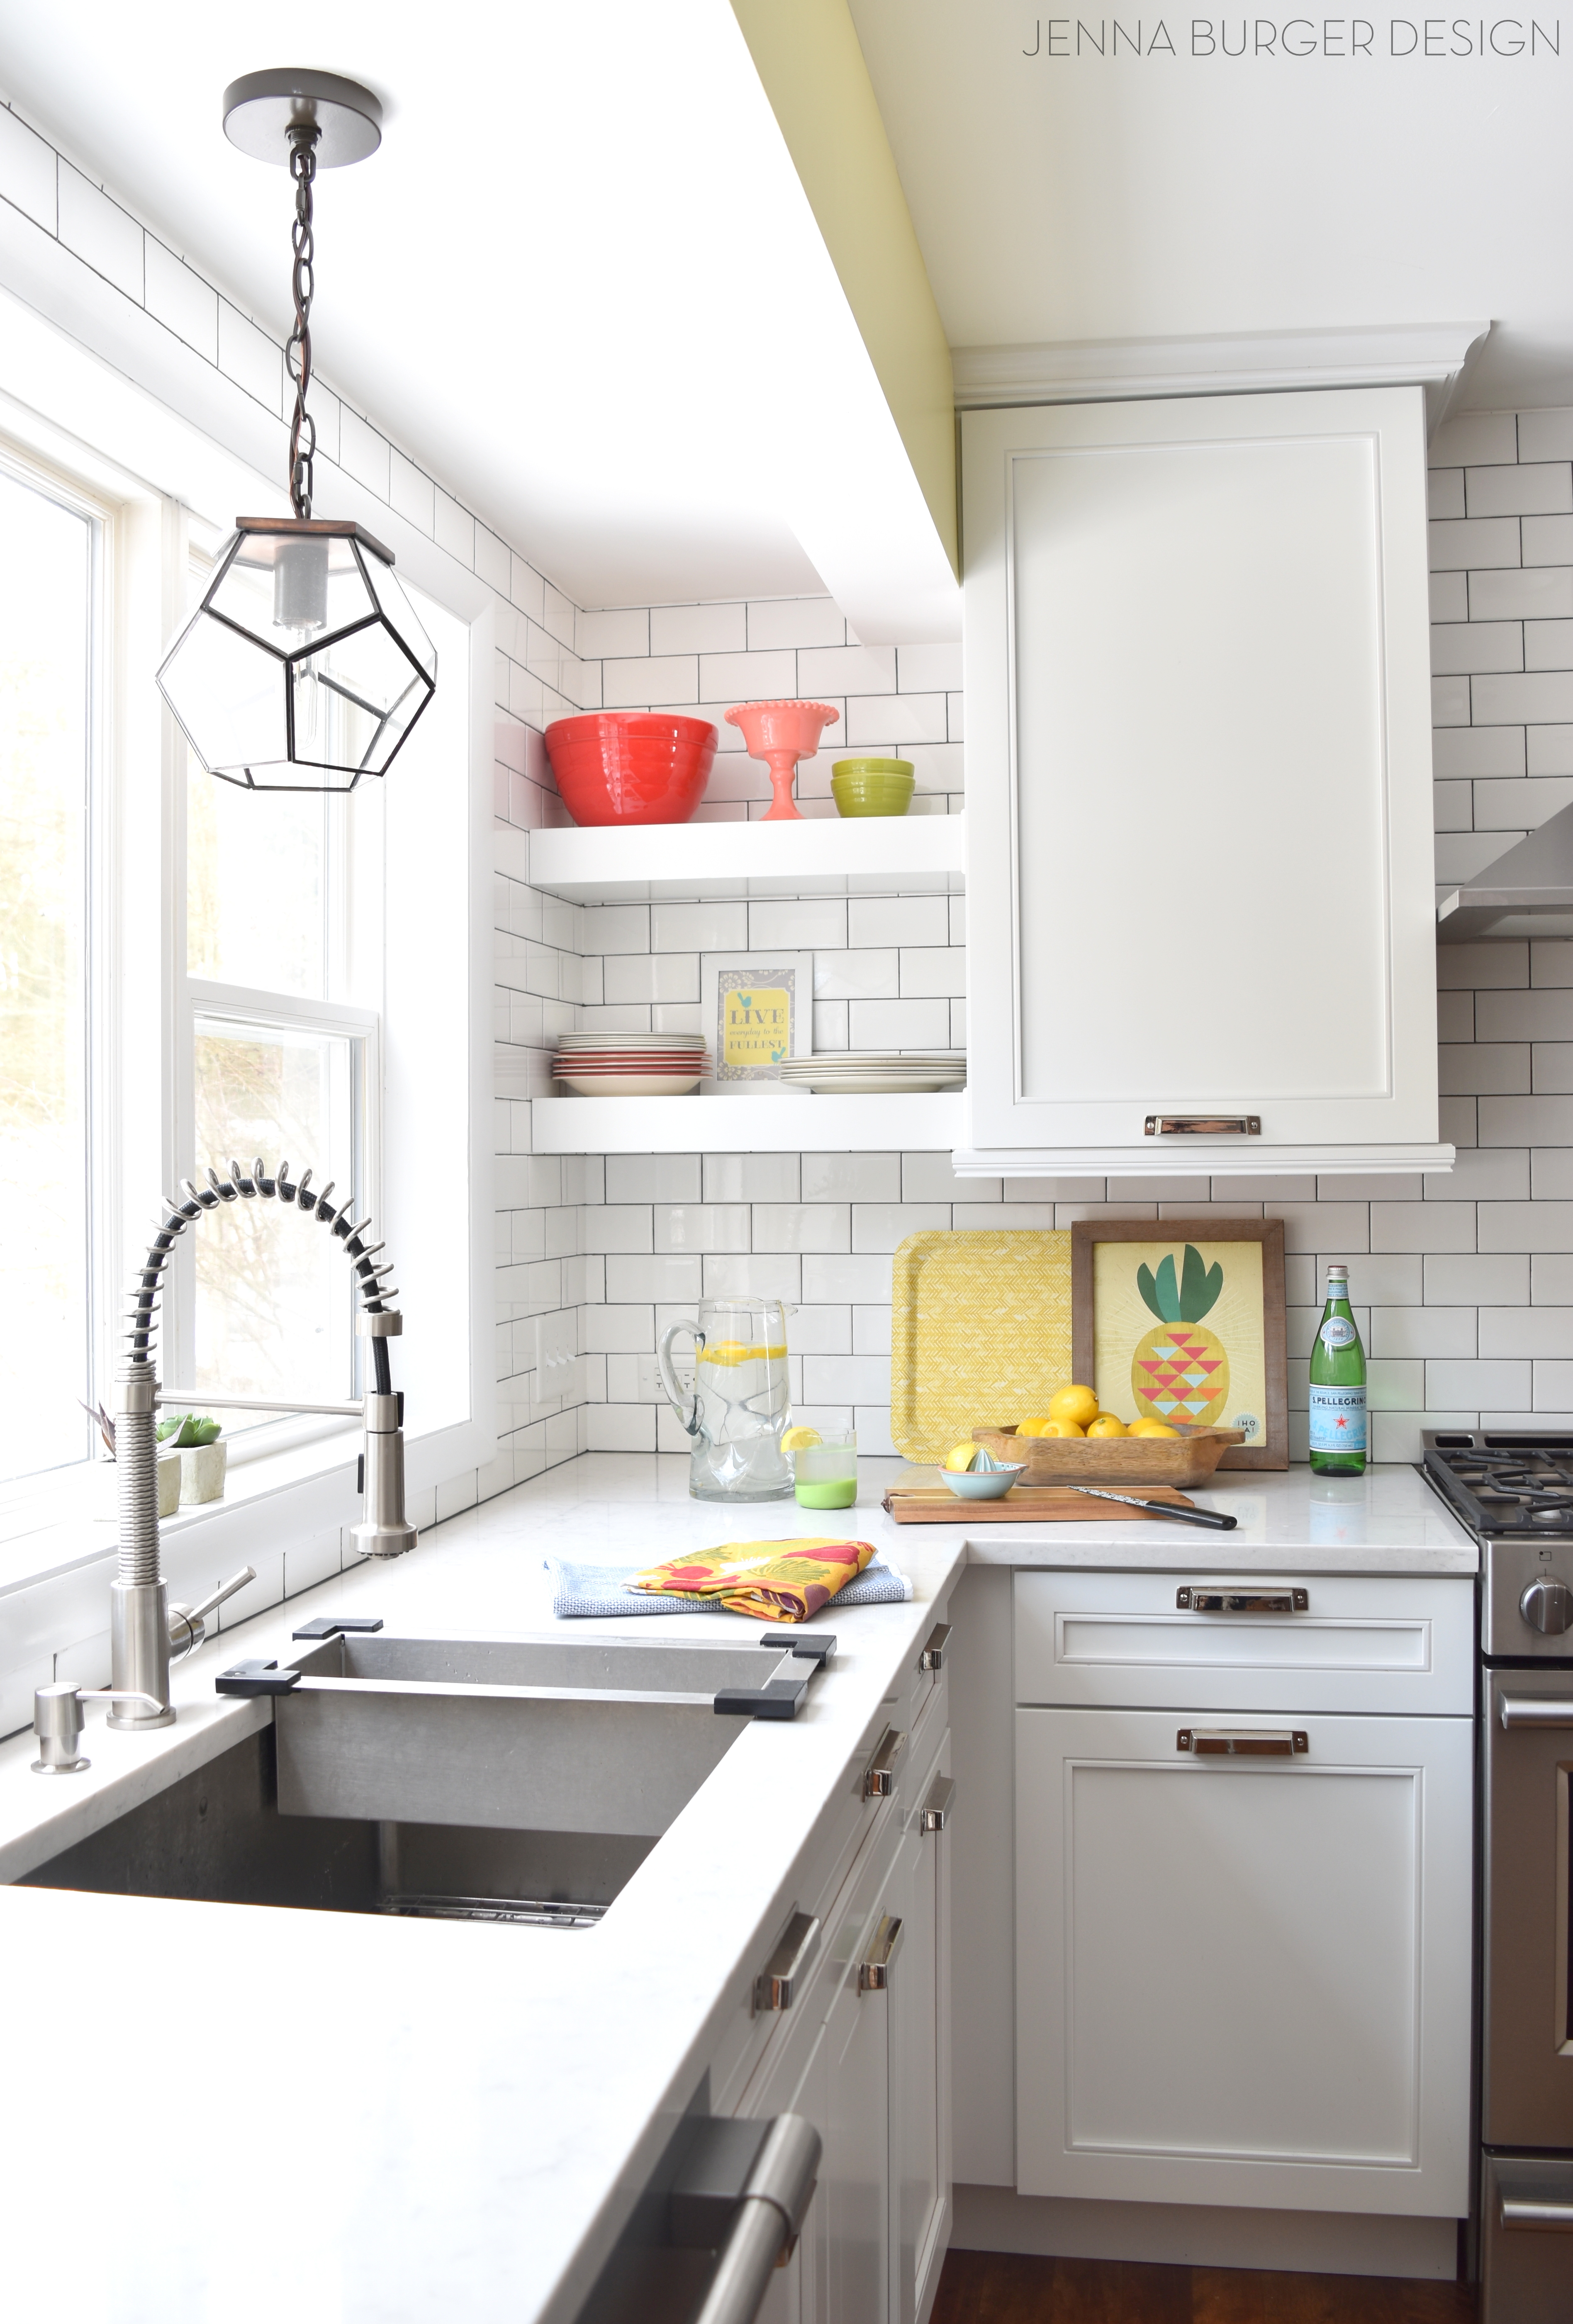
And let me not forget to discuss the lighting…
I am a major light-aholic! Lighting is SO IMPORTANT. Lighting makes a statement and with my home, I wasn’t going to skimp.
Go Big or Go Home!
Being completely honest, I had a difficult time choosing the right lighting. With the cabinetry hardware being polished nickel, I questioned the lighting style + finish. In the end, I chose these amazing matte black dome style pendants from Rejuvenation for over the island.

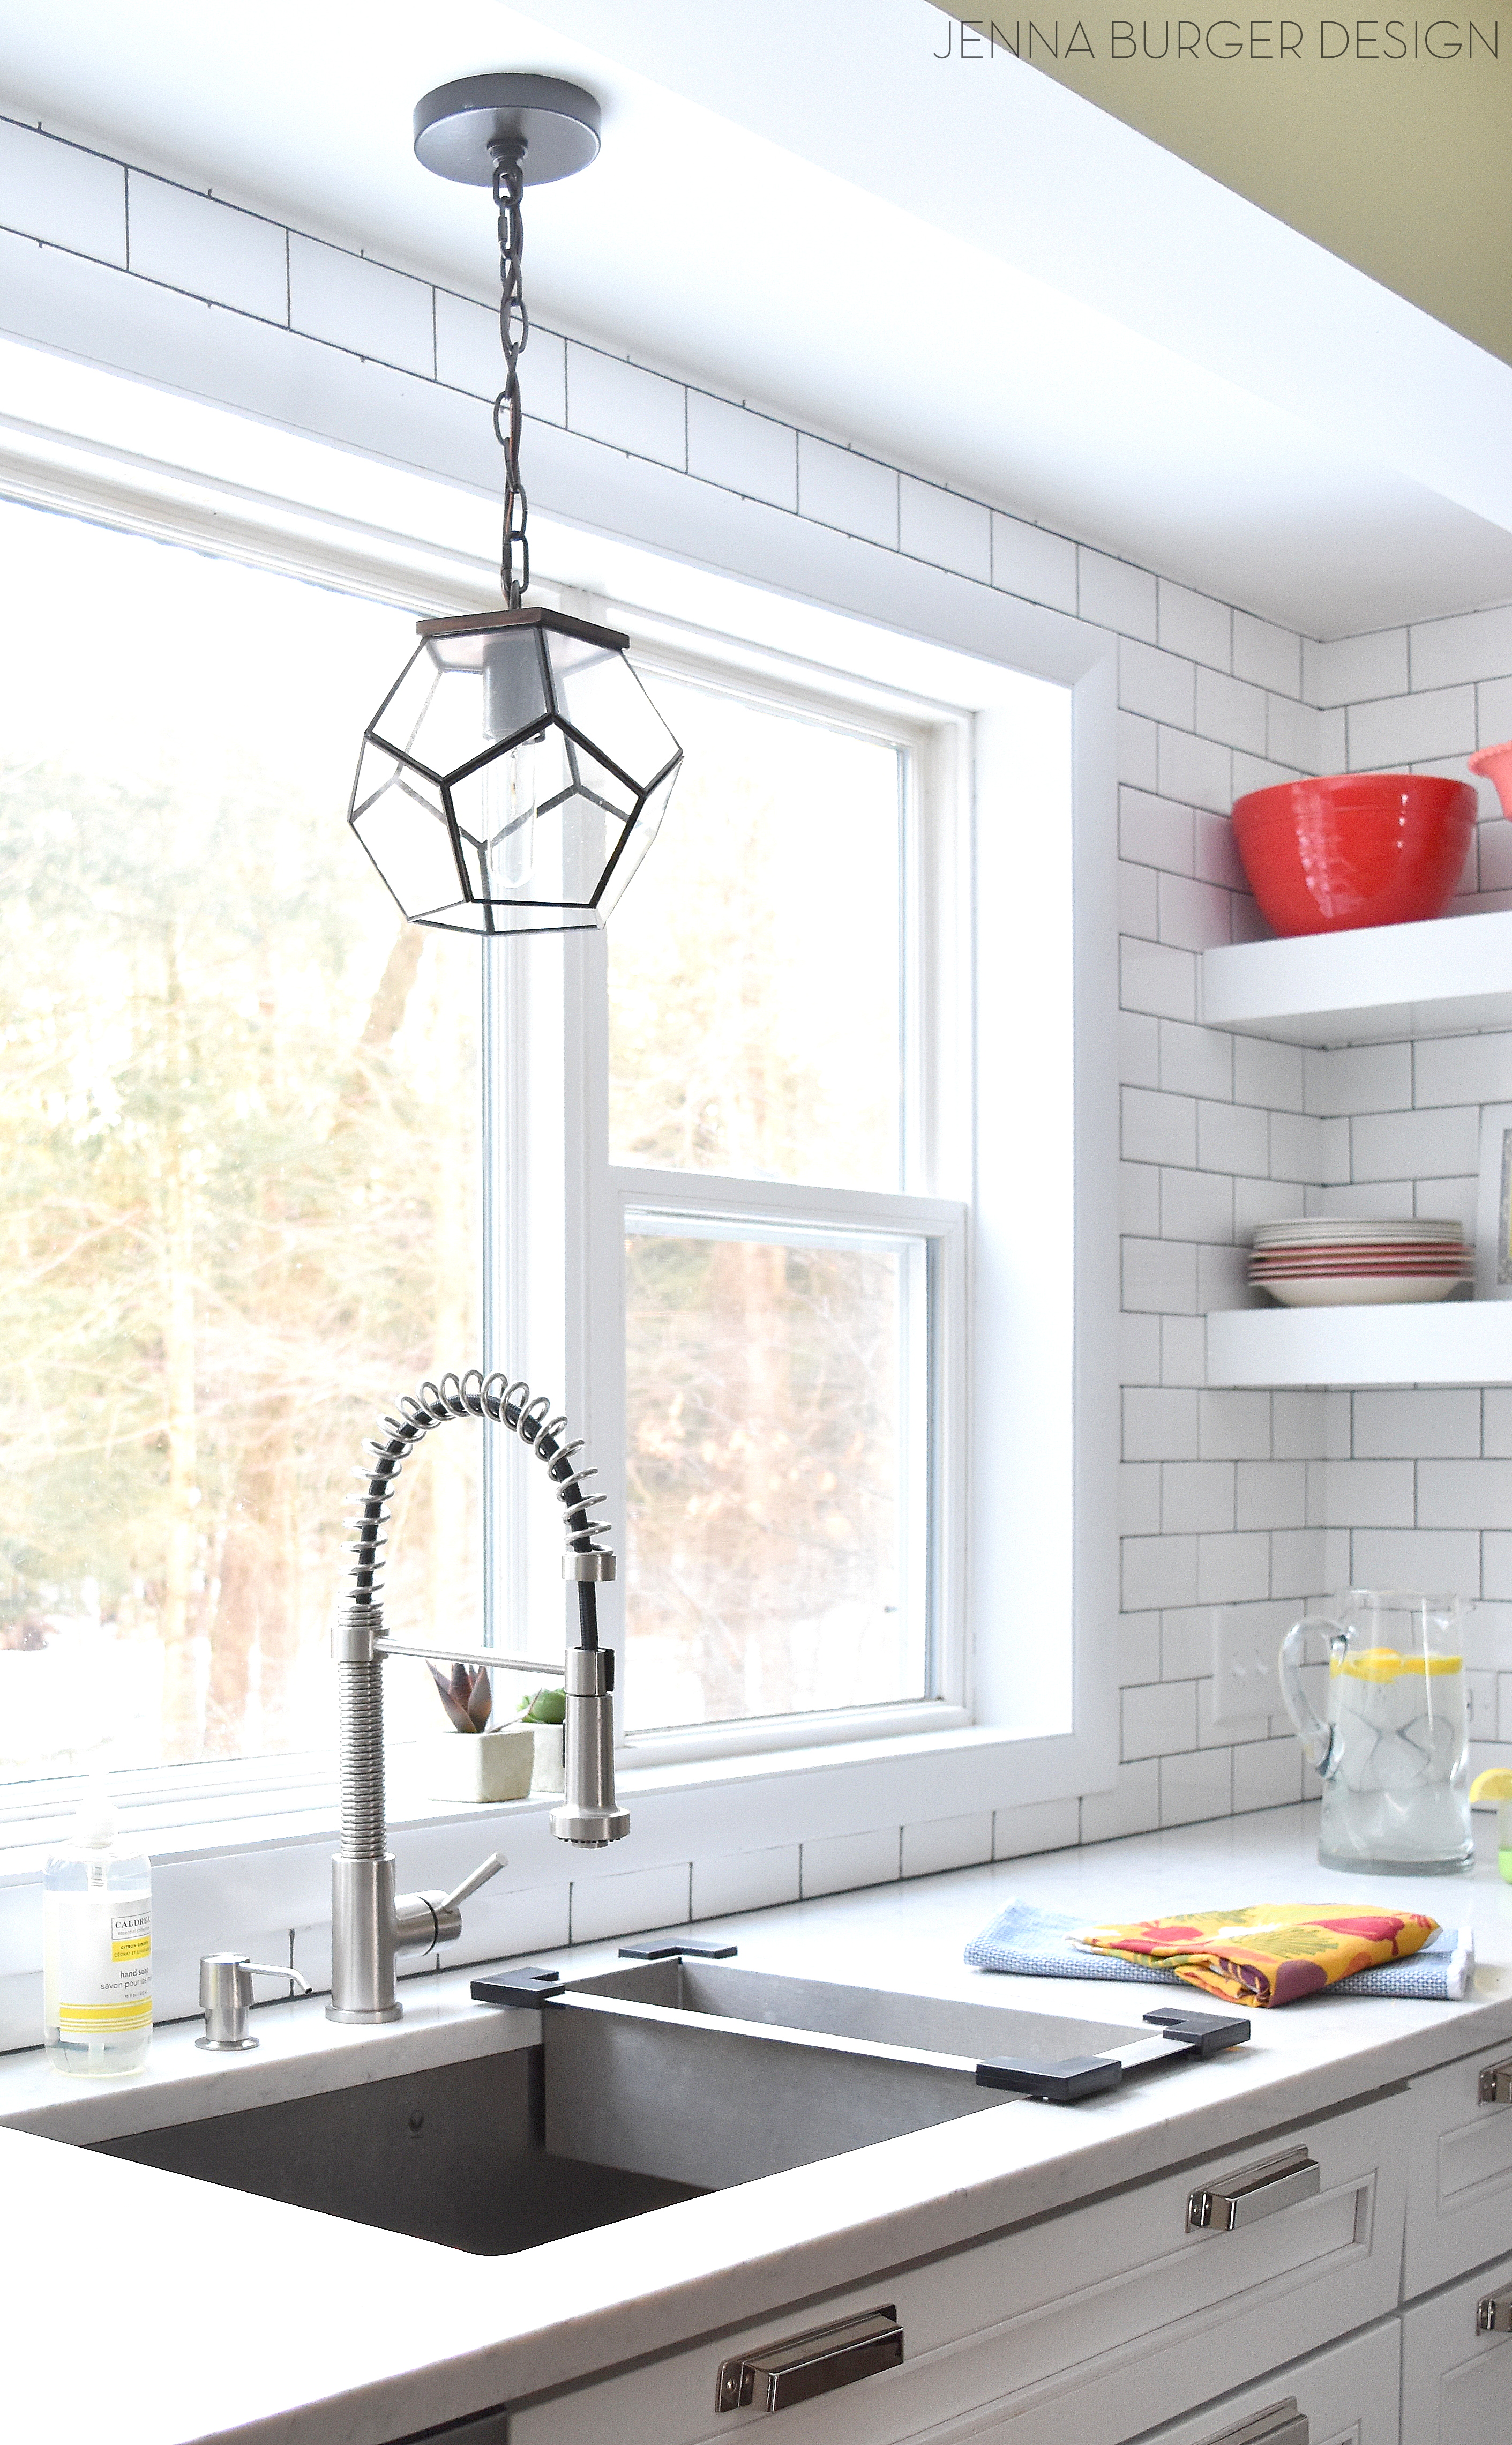
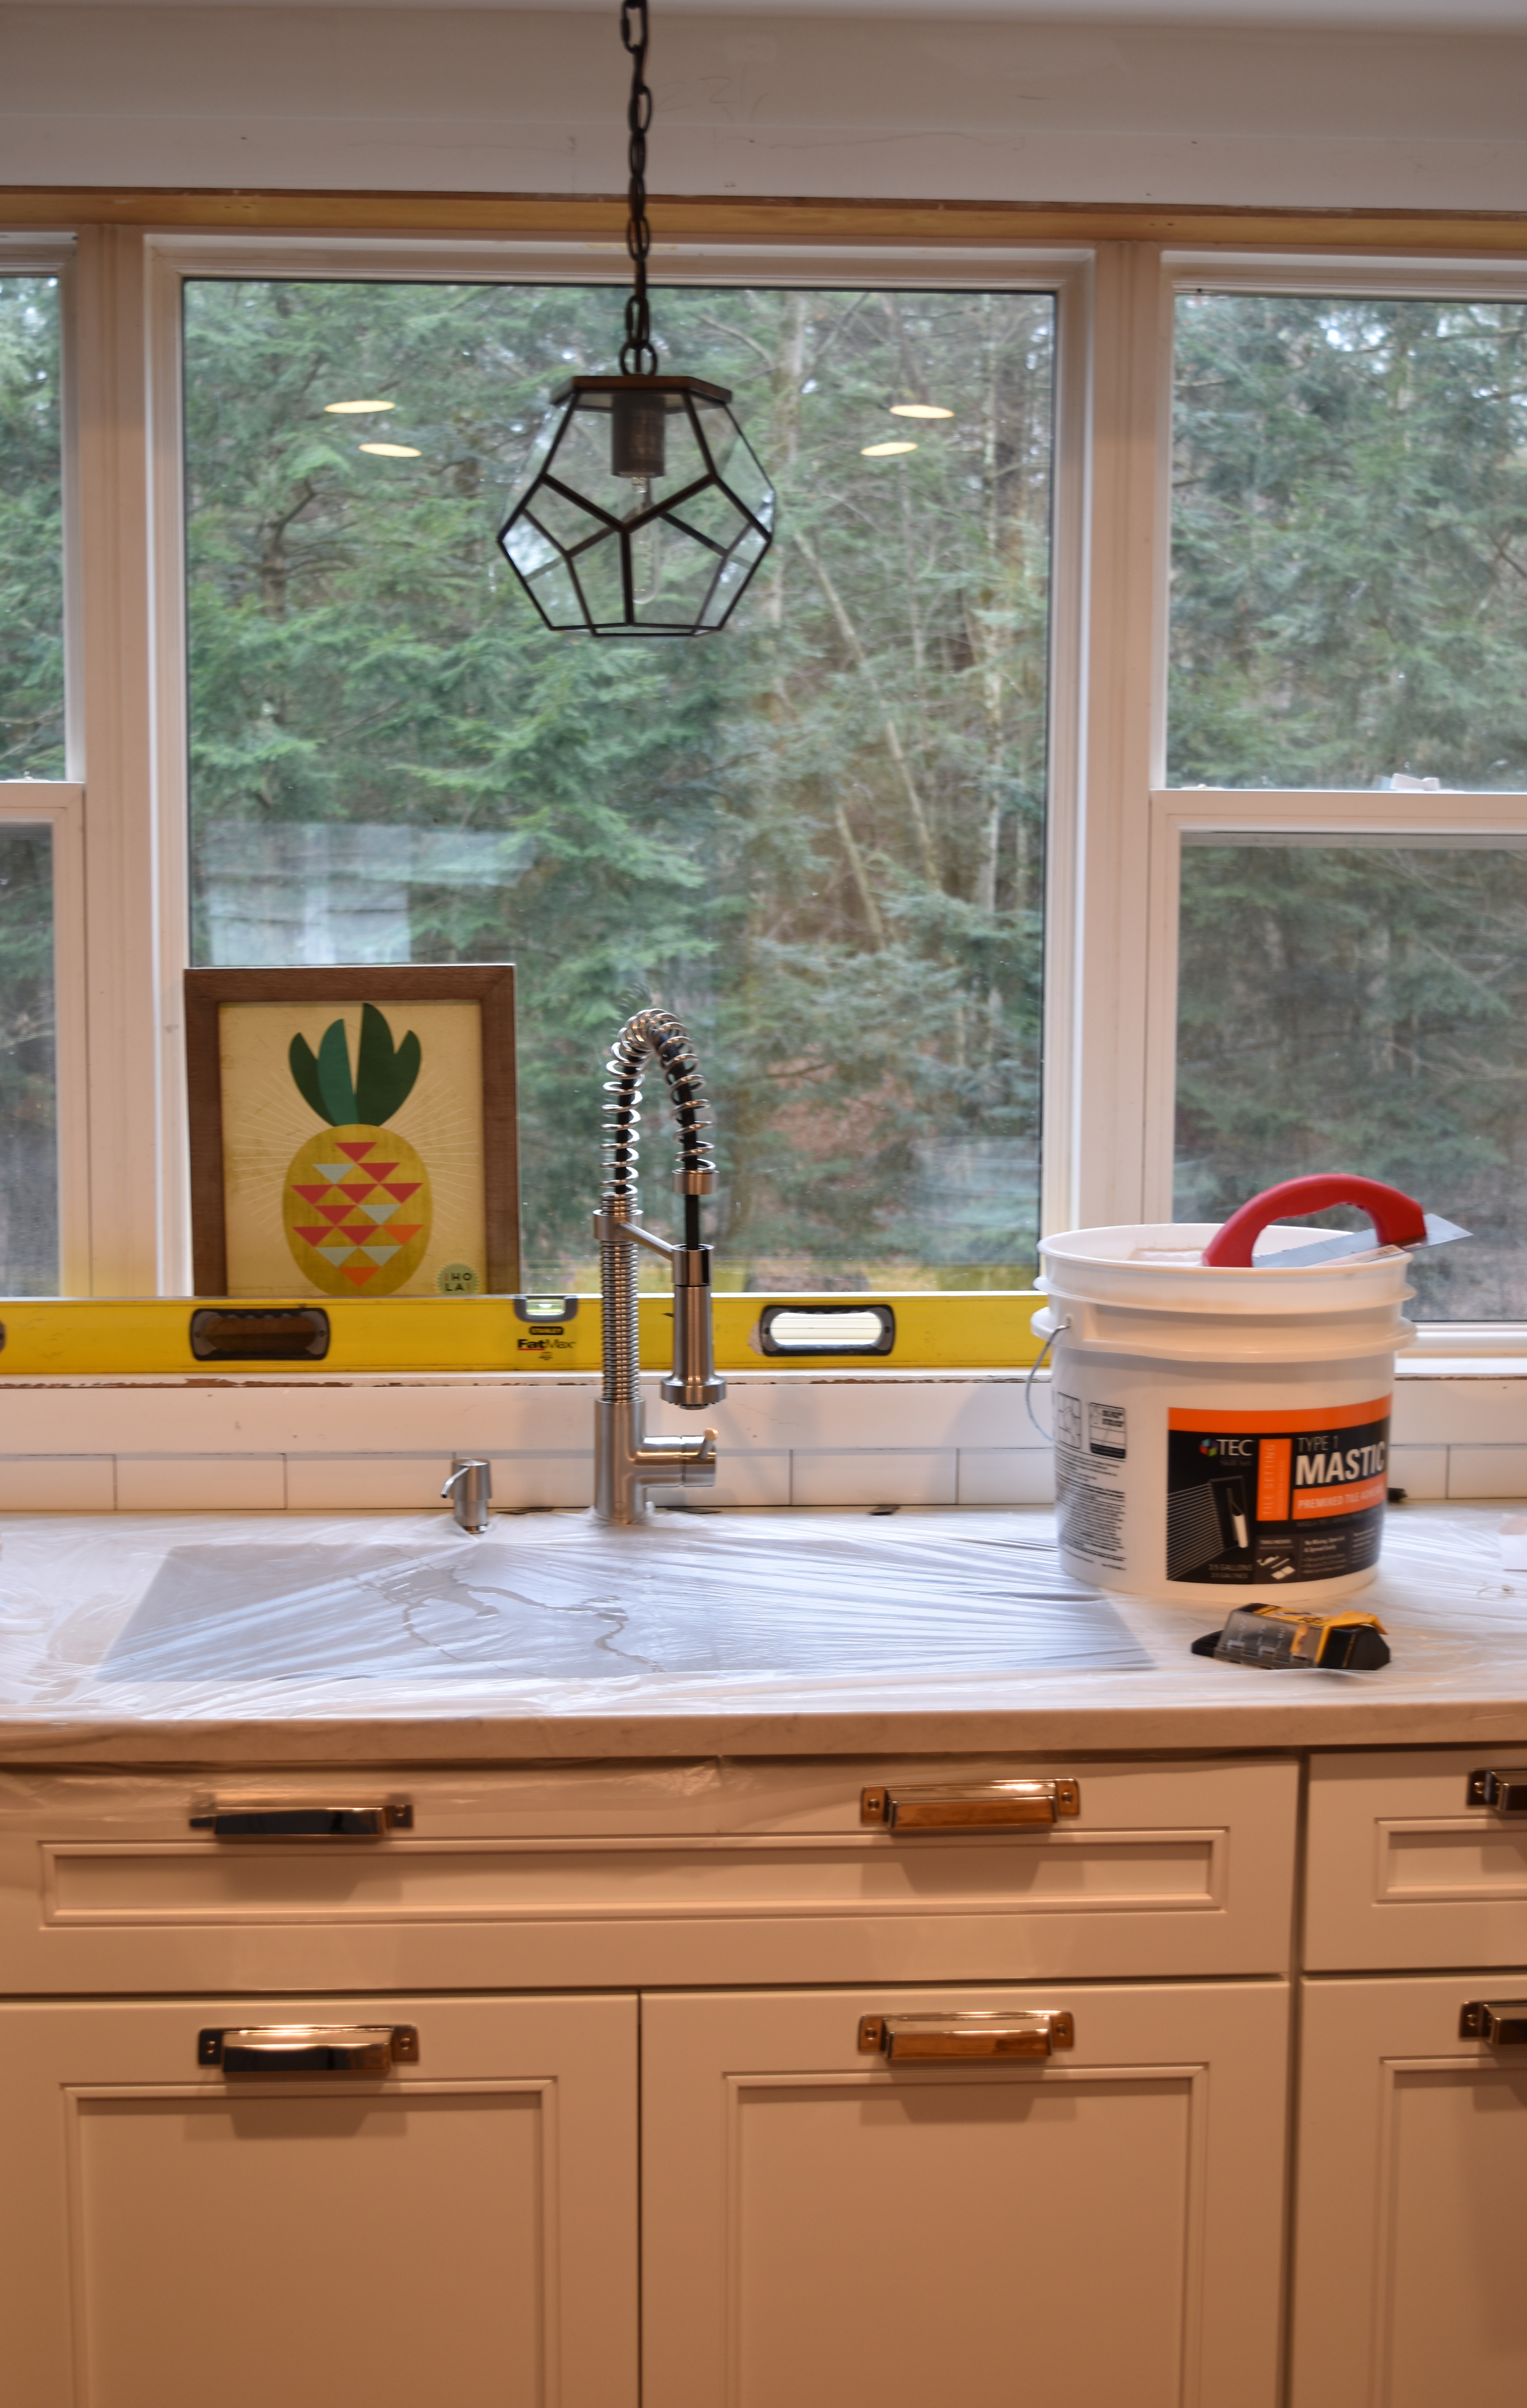
And for the light above the sink, I decided on this open style glass pendant from Shades of Light.
They are both amazing, compliment each other perfectly, and overall I am in love with the many different finishes in this kitchen.

There you have it…
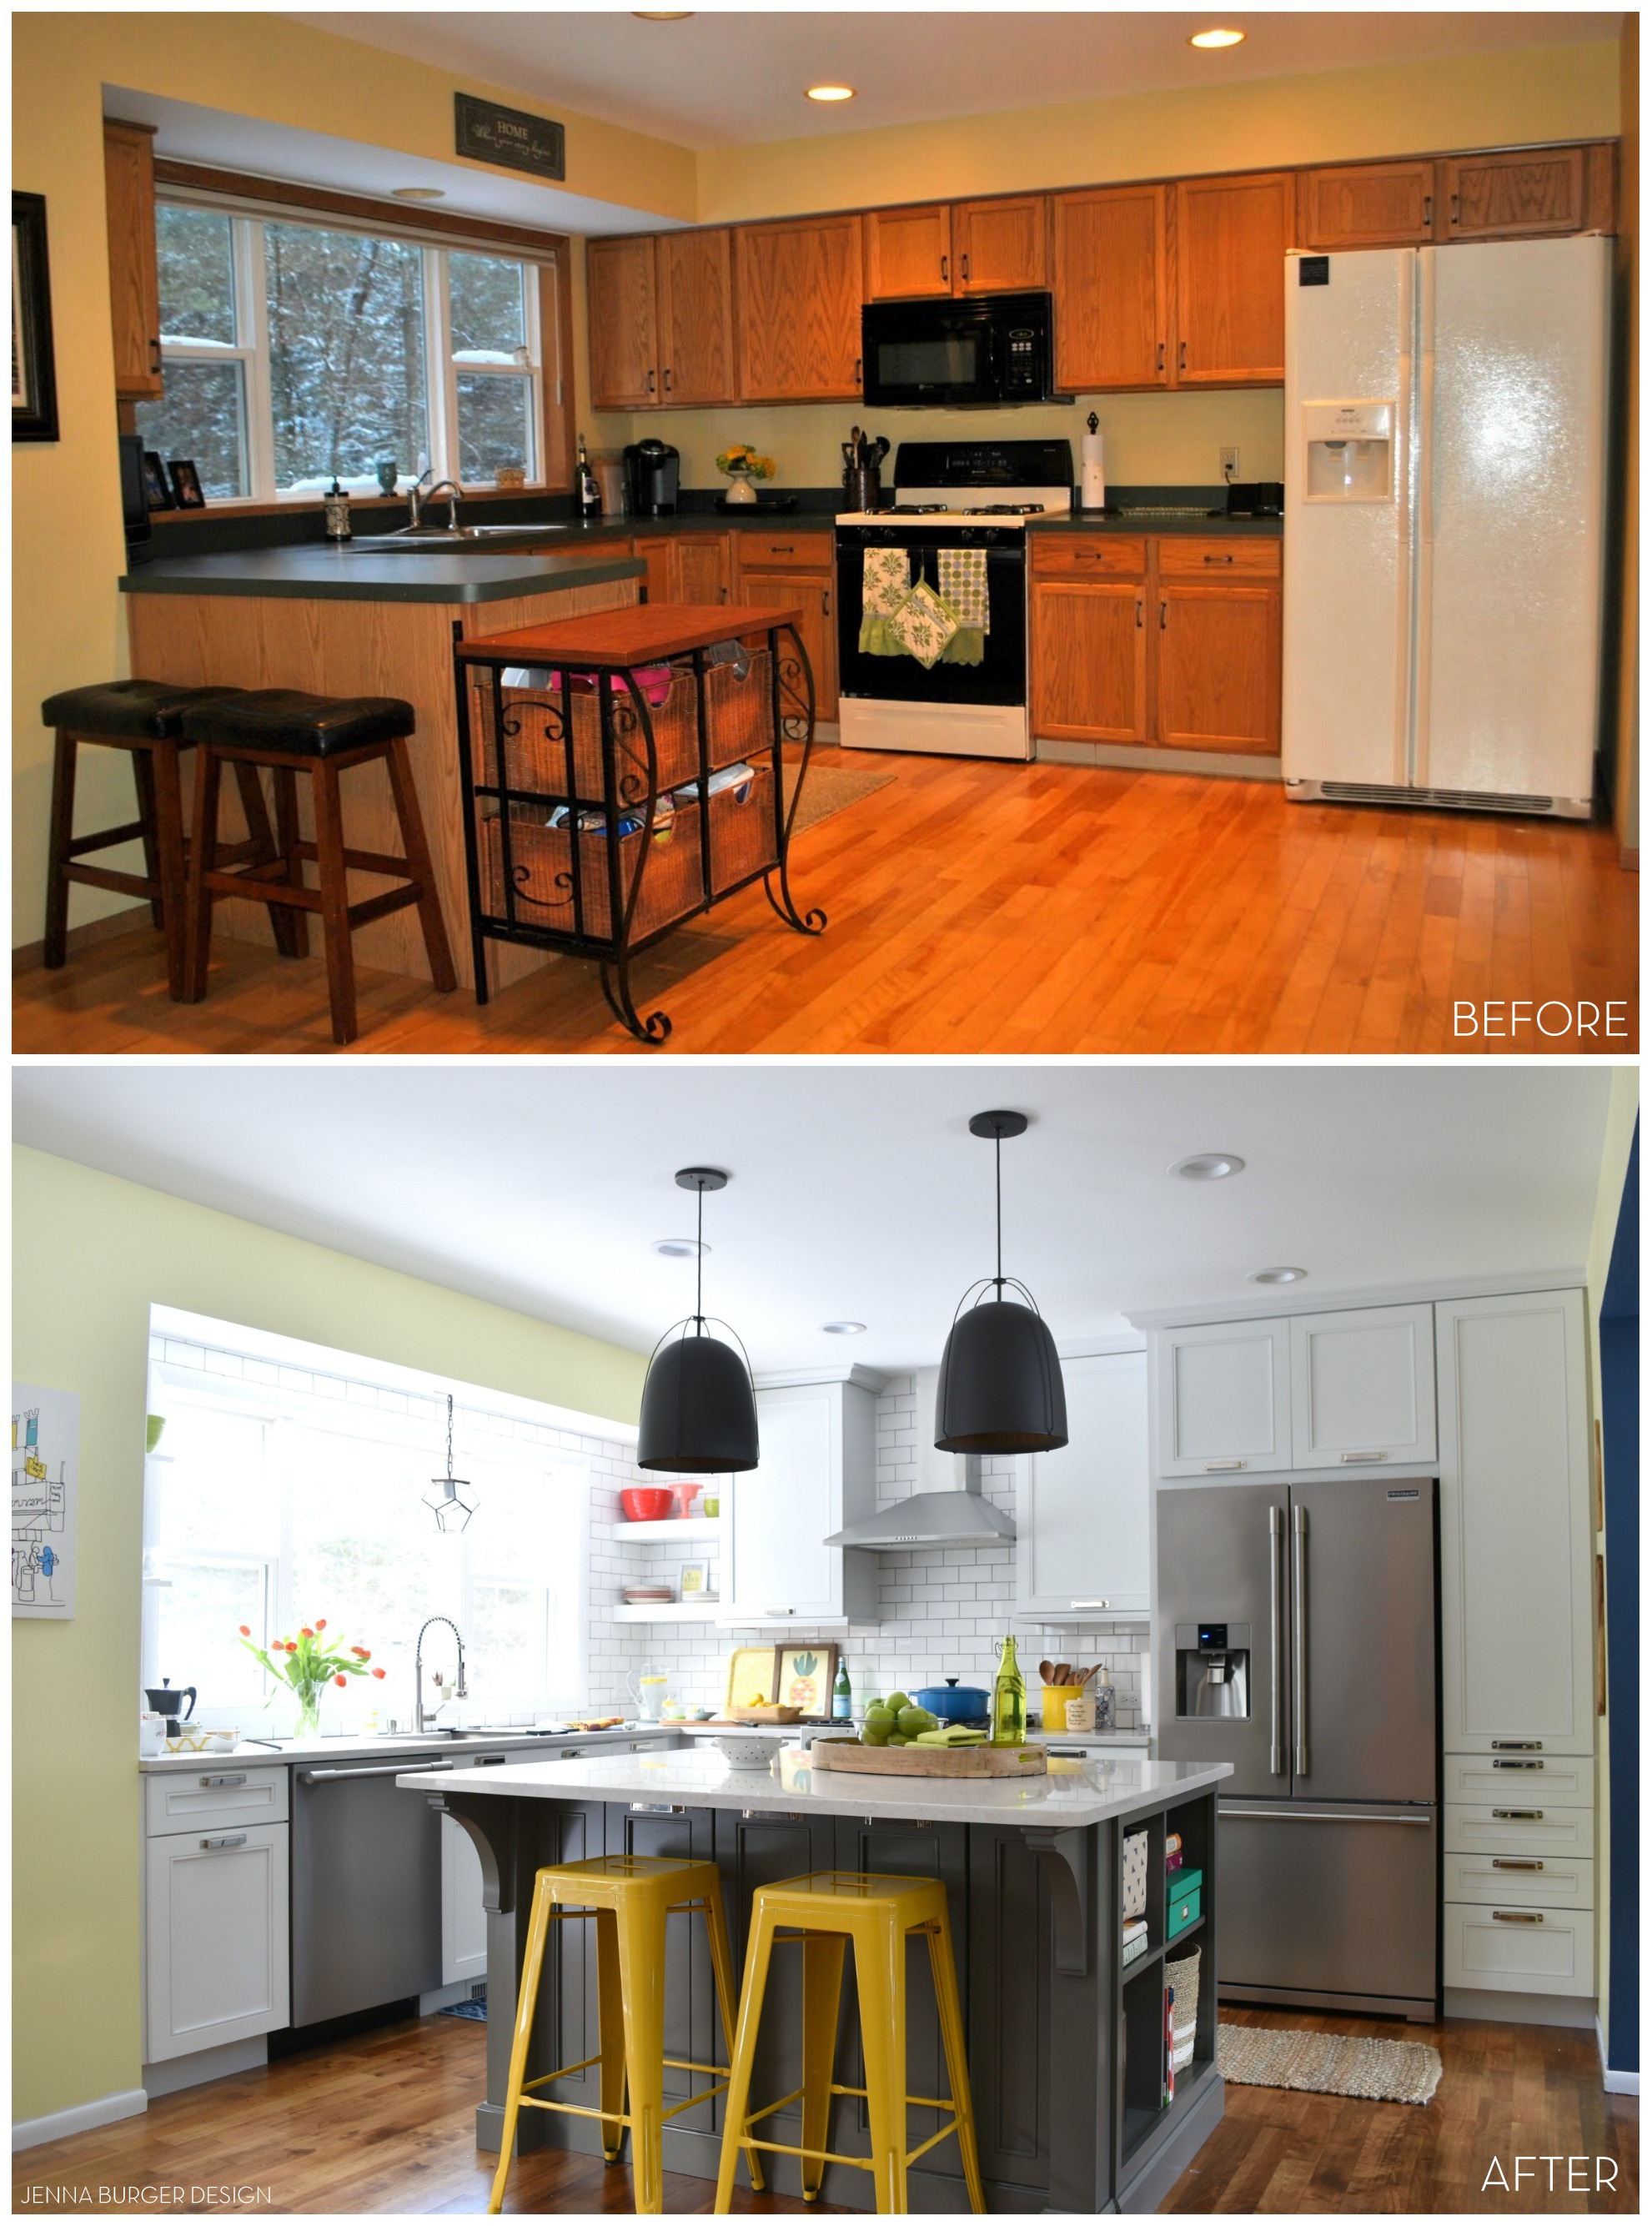
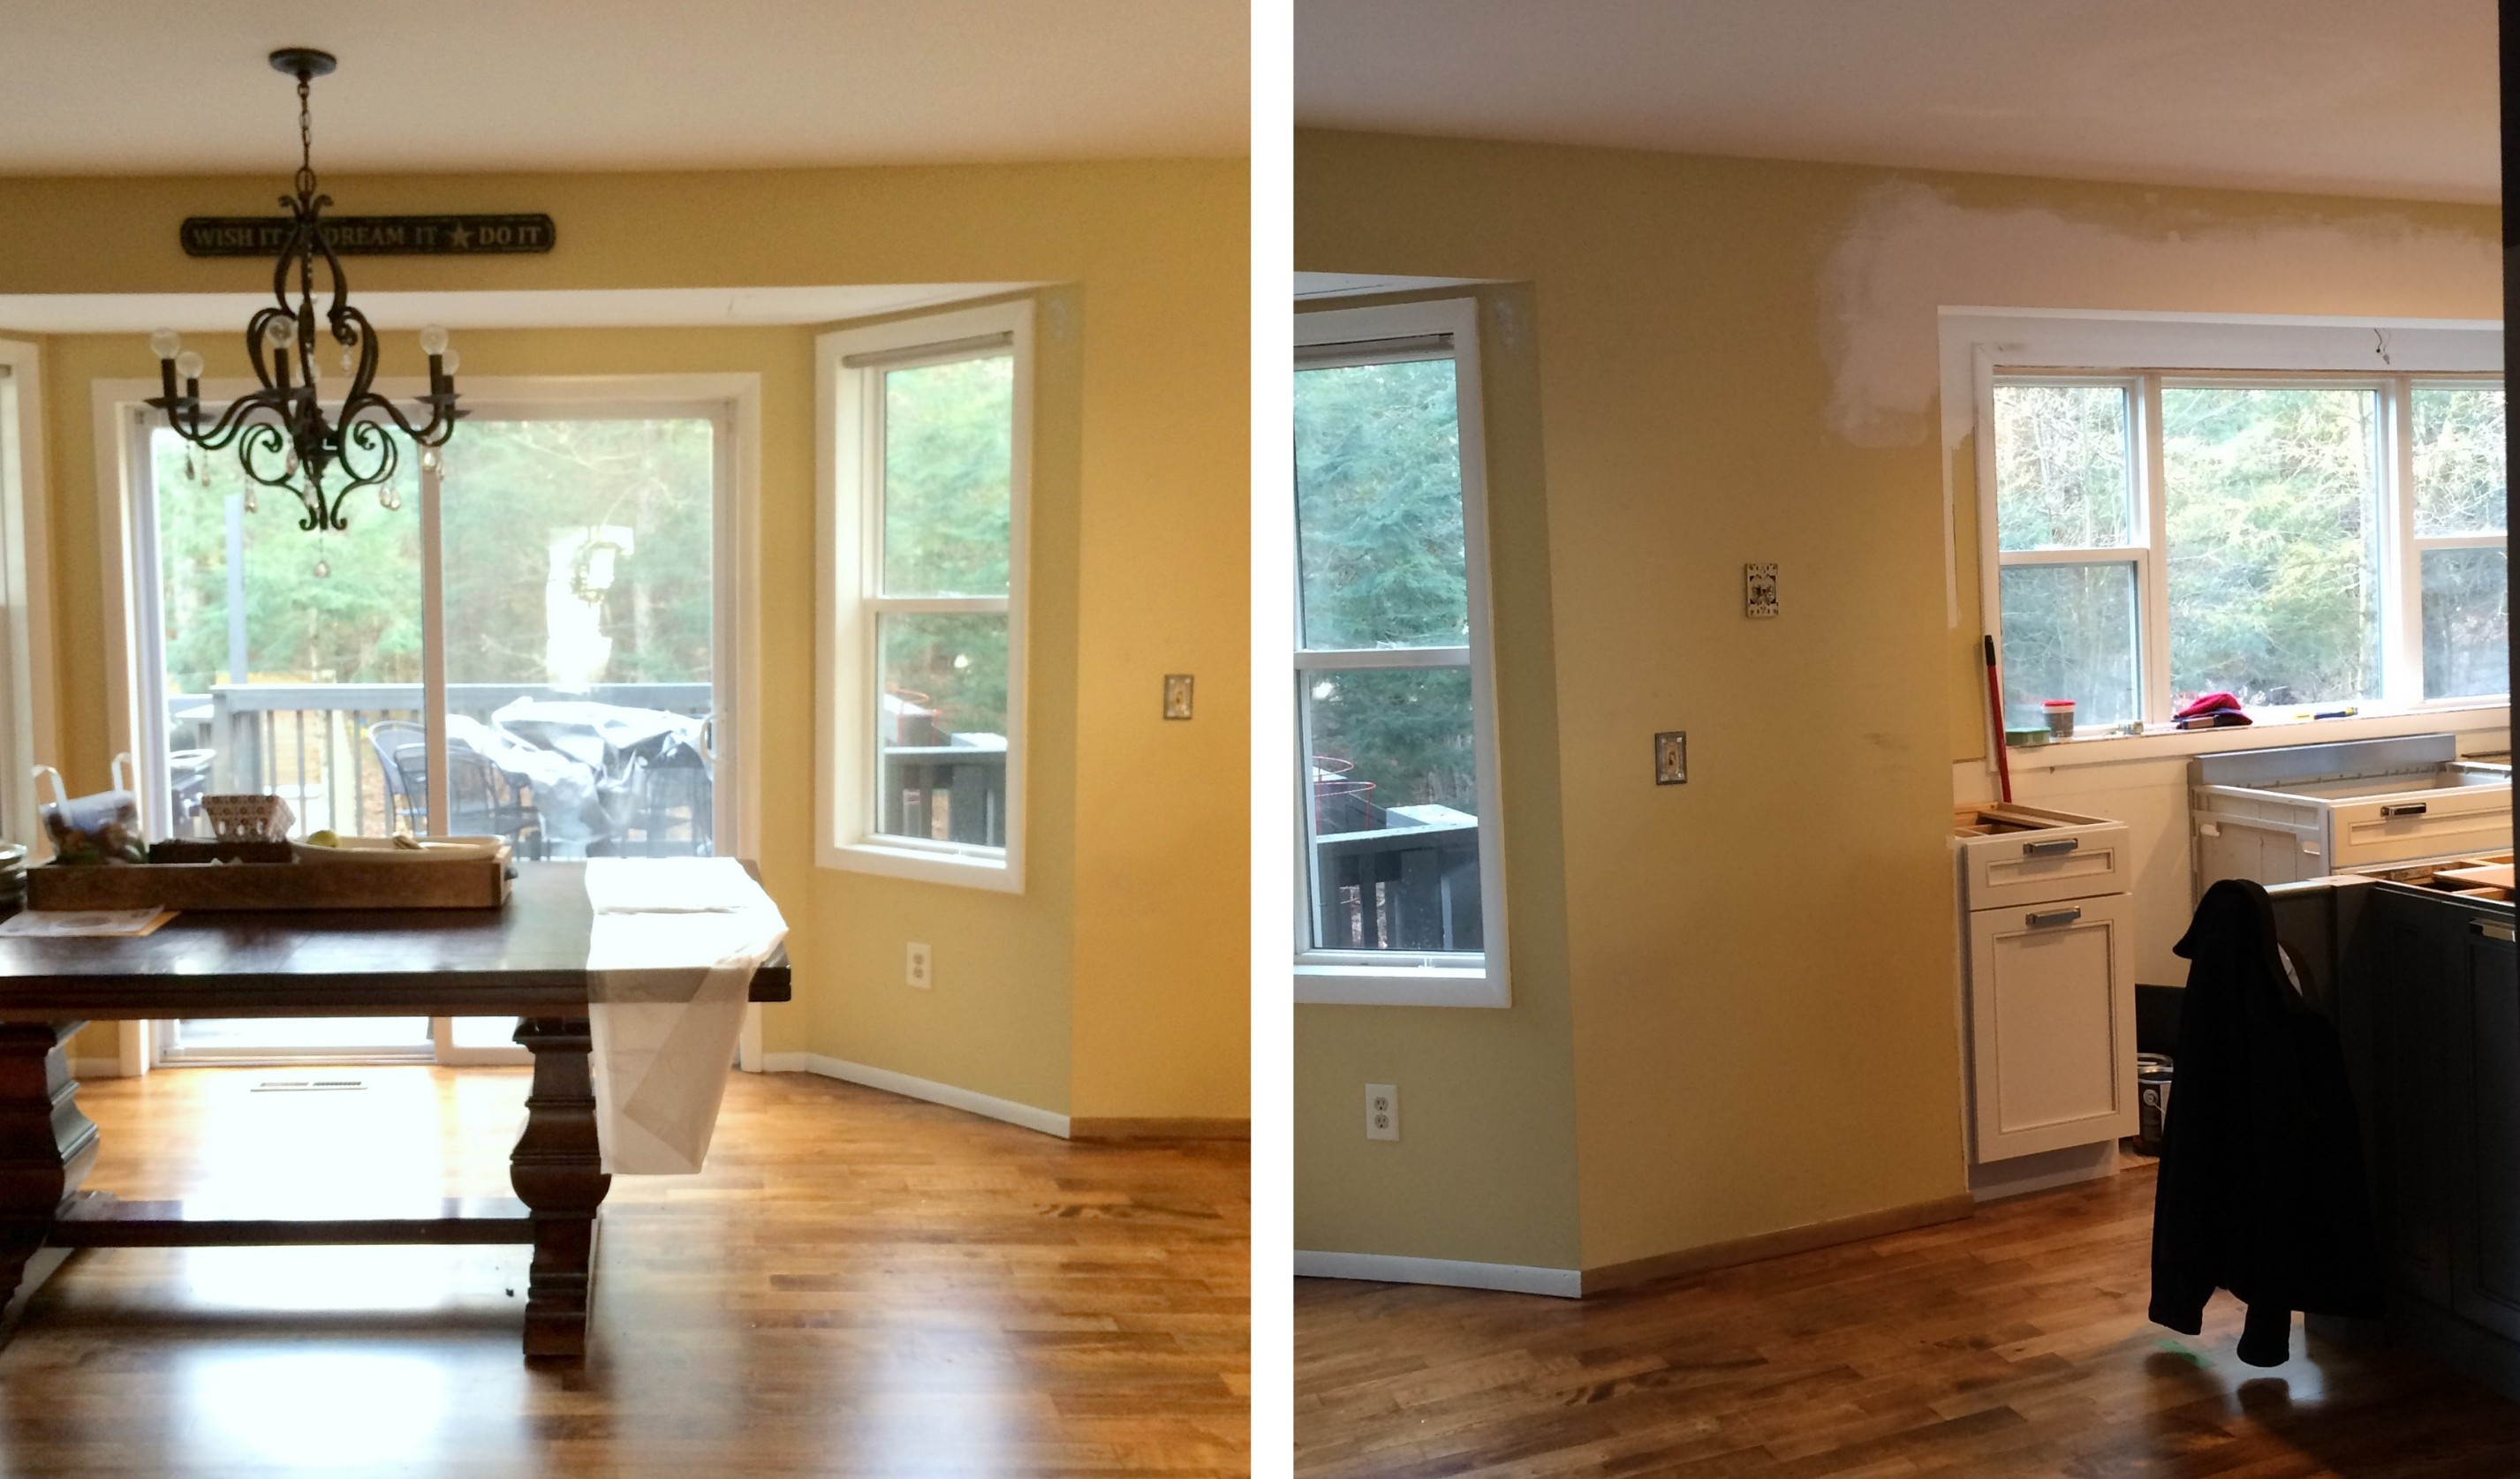
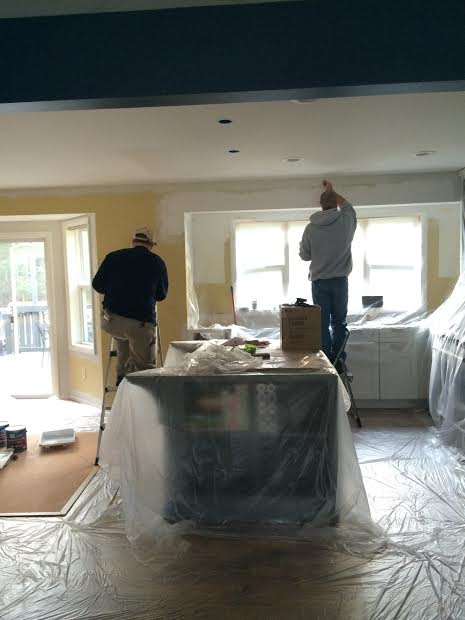
We have to look at a before & after comparison. Check out how far this space has come in 6 years…

Do you see how / why I’m in disbelief that this makeover really happened?!
Here’s another walk down memory lane view…

This has been a strenuous – what big renovation isn’t? – but wonderful renovation process. I won’t lie, I’m glad it’s DONE, but I can’t ask for anything better. And that is a project labeled SUCCESS.
RESOURCES
I’ve showed you what the kitchen looks like, and now it’s time to share the scoop on the sources…
Cabinets
Perimeter Cabinets: Kraftmaid, color – Dove White, door style – Cayden
Island: Kraftmaid; color – Greyloft, door style – Cayden
Appliances
Frigidaire: Smudge-Proof Stainless
Countertop
Quartz: Silestone, color: Lagoon
Cabinet Hardware
Kraftmaid, Fordham Bin Pull, Polished Nickel
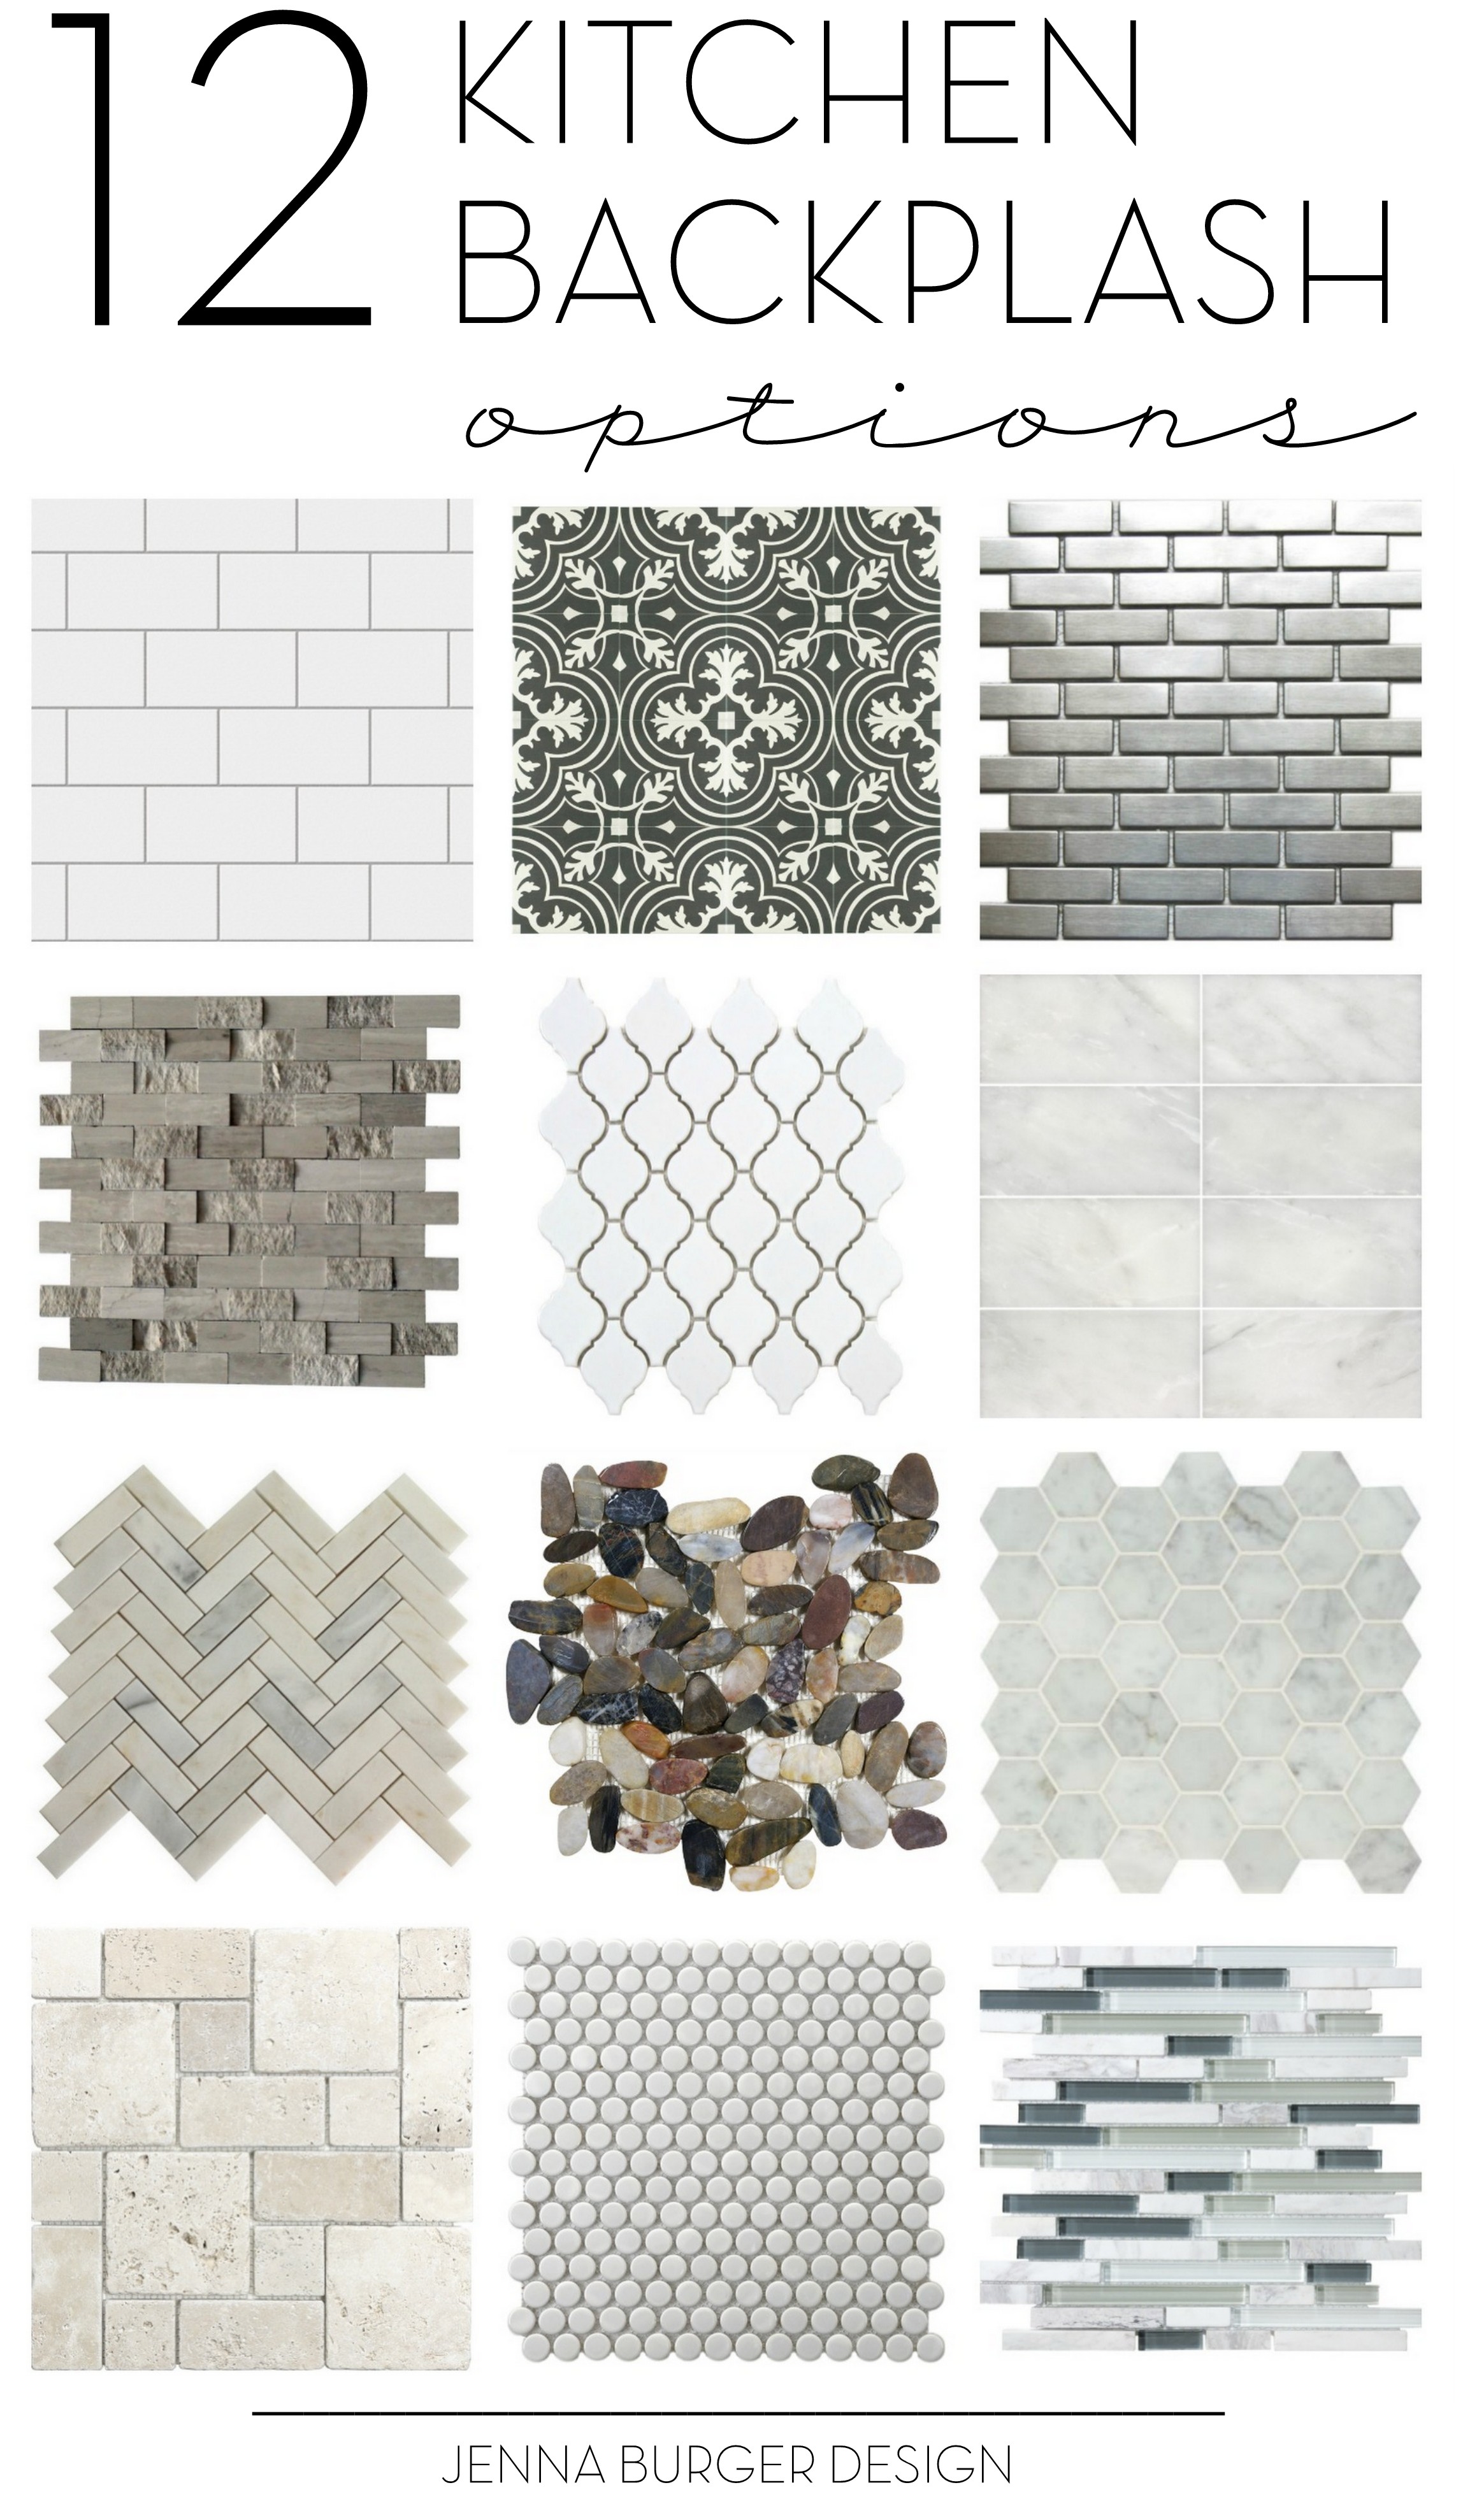
Backsplash
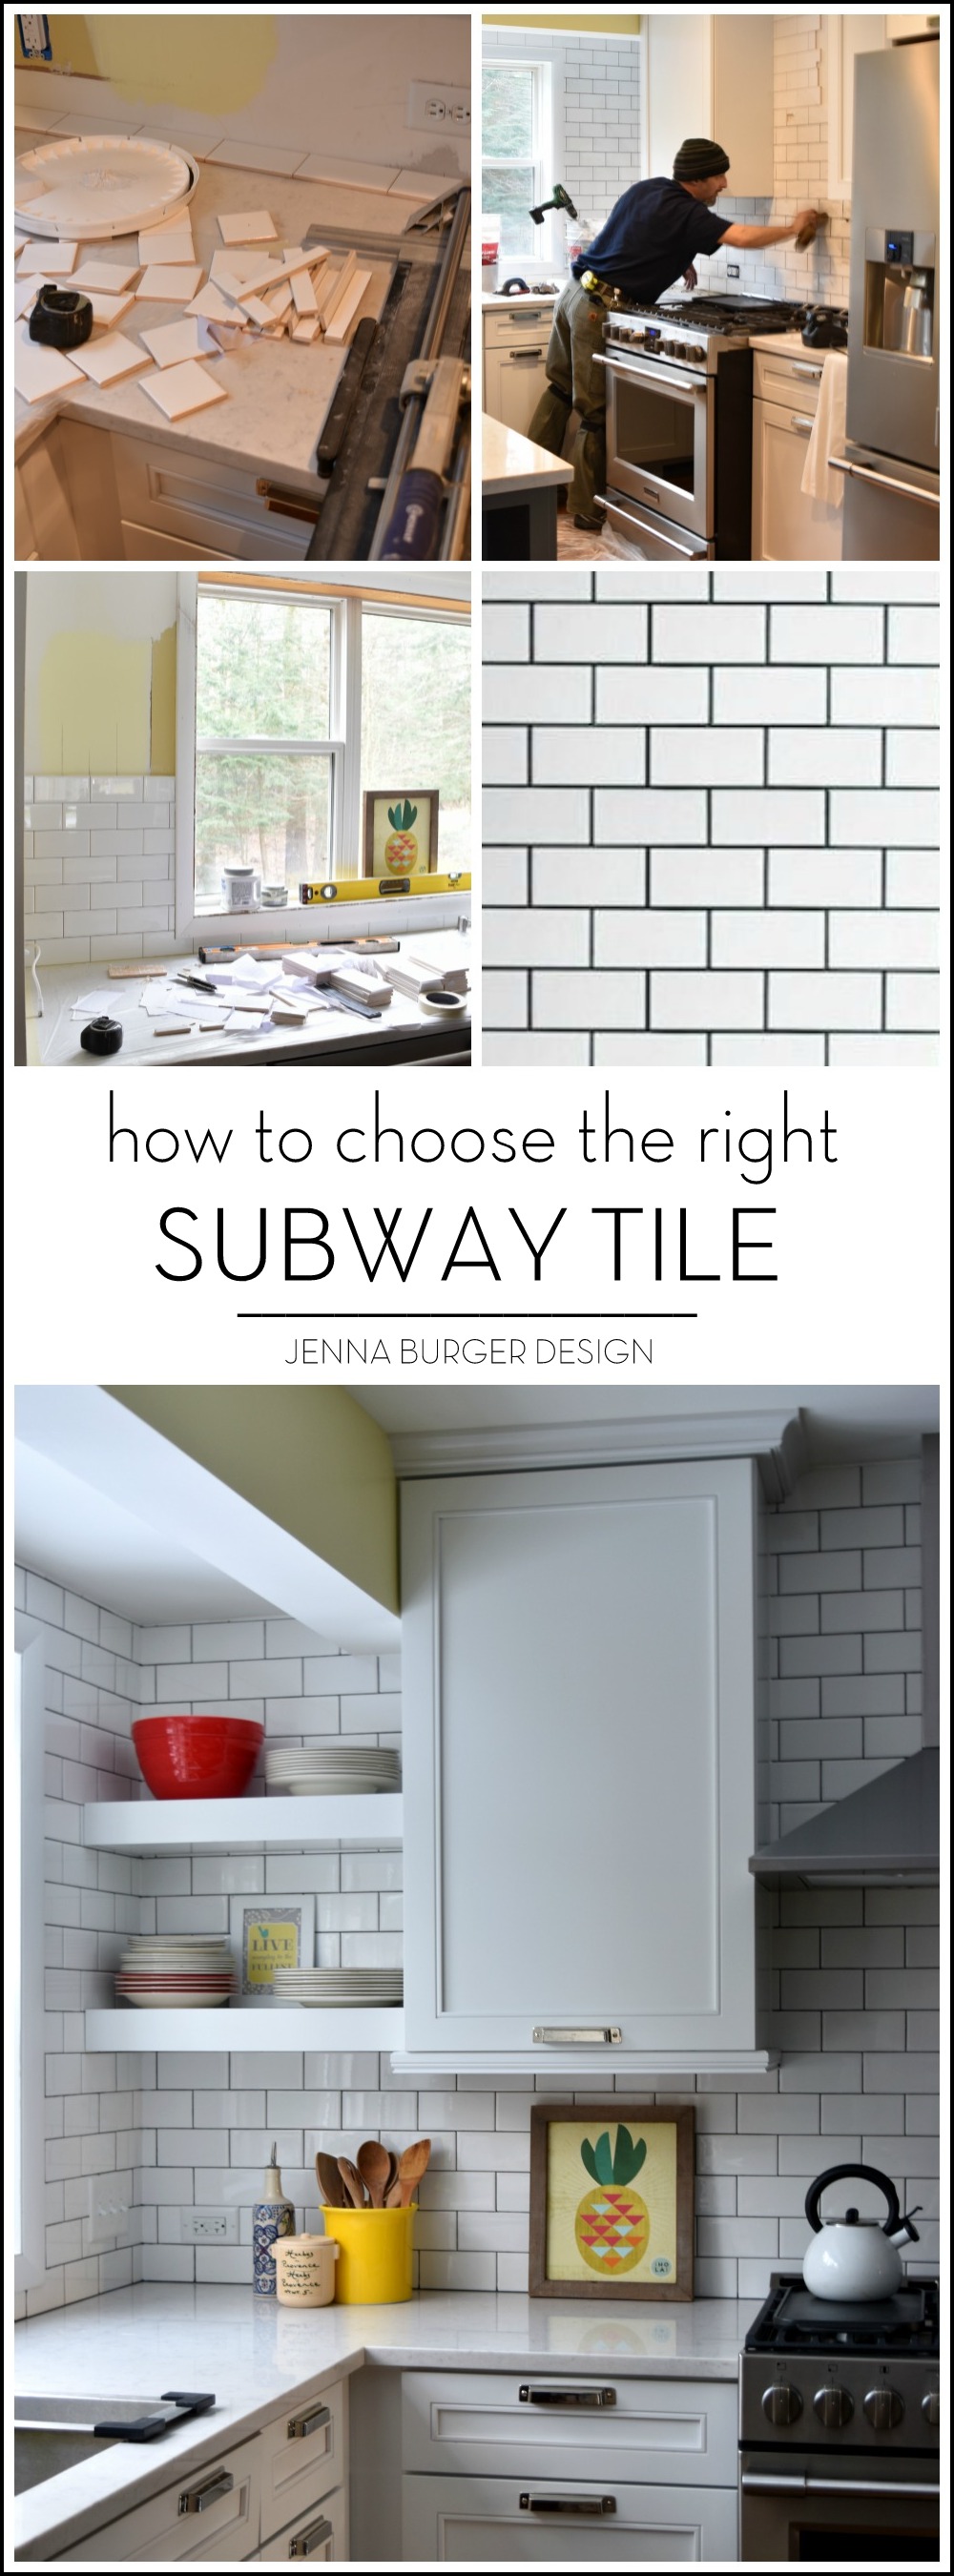
Tile: Allen + Roth 3×6 white subway tile; Grey grout color
Paint Color
Wall Paint: HGTV Home by Sherwin Williams, color – White Citrus, finish – satin
Pendants over Island
Rejuvenation, Haleigh Wire Dome Pendant 12-inch, oil rubbed bronze
Pendant over Sink
Shades of Light, Clear Glass Prism Pentagon Pendant
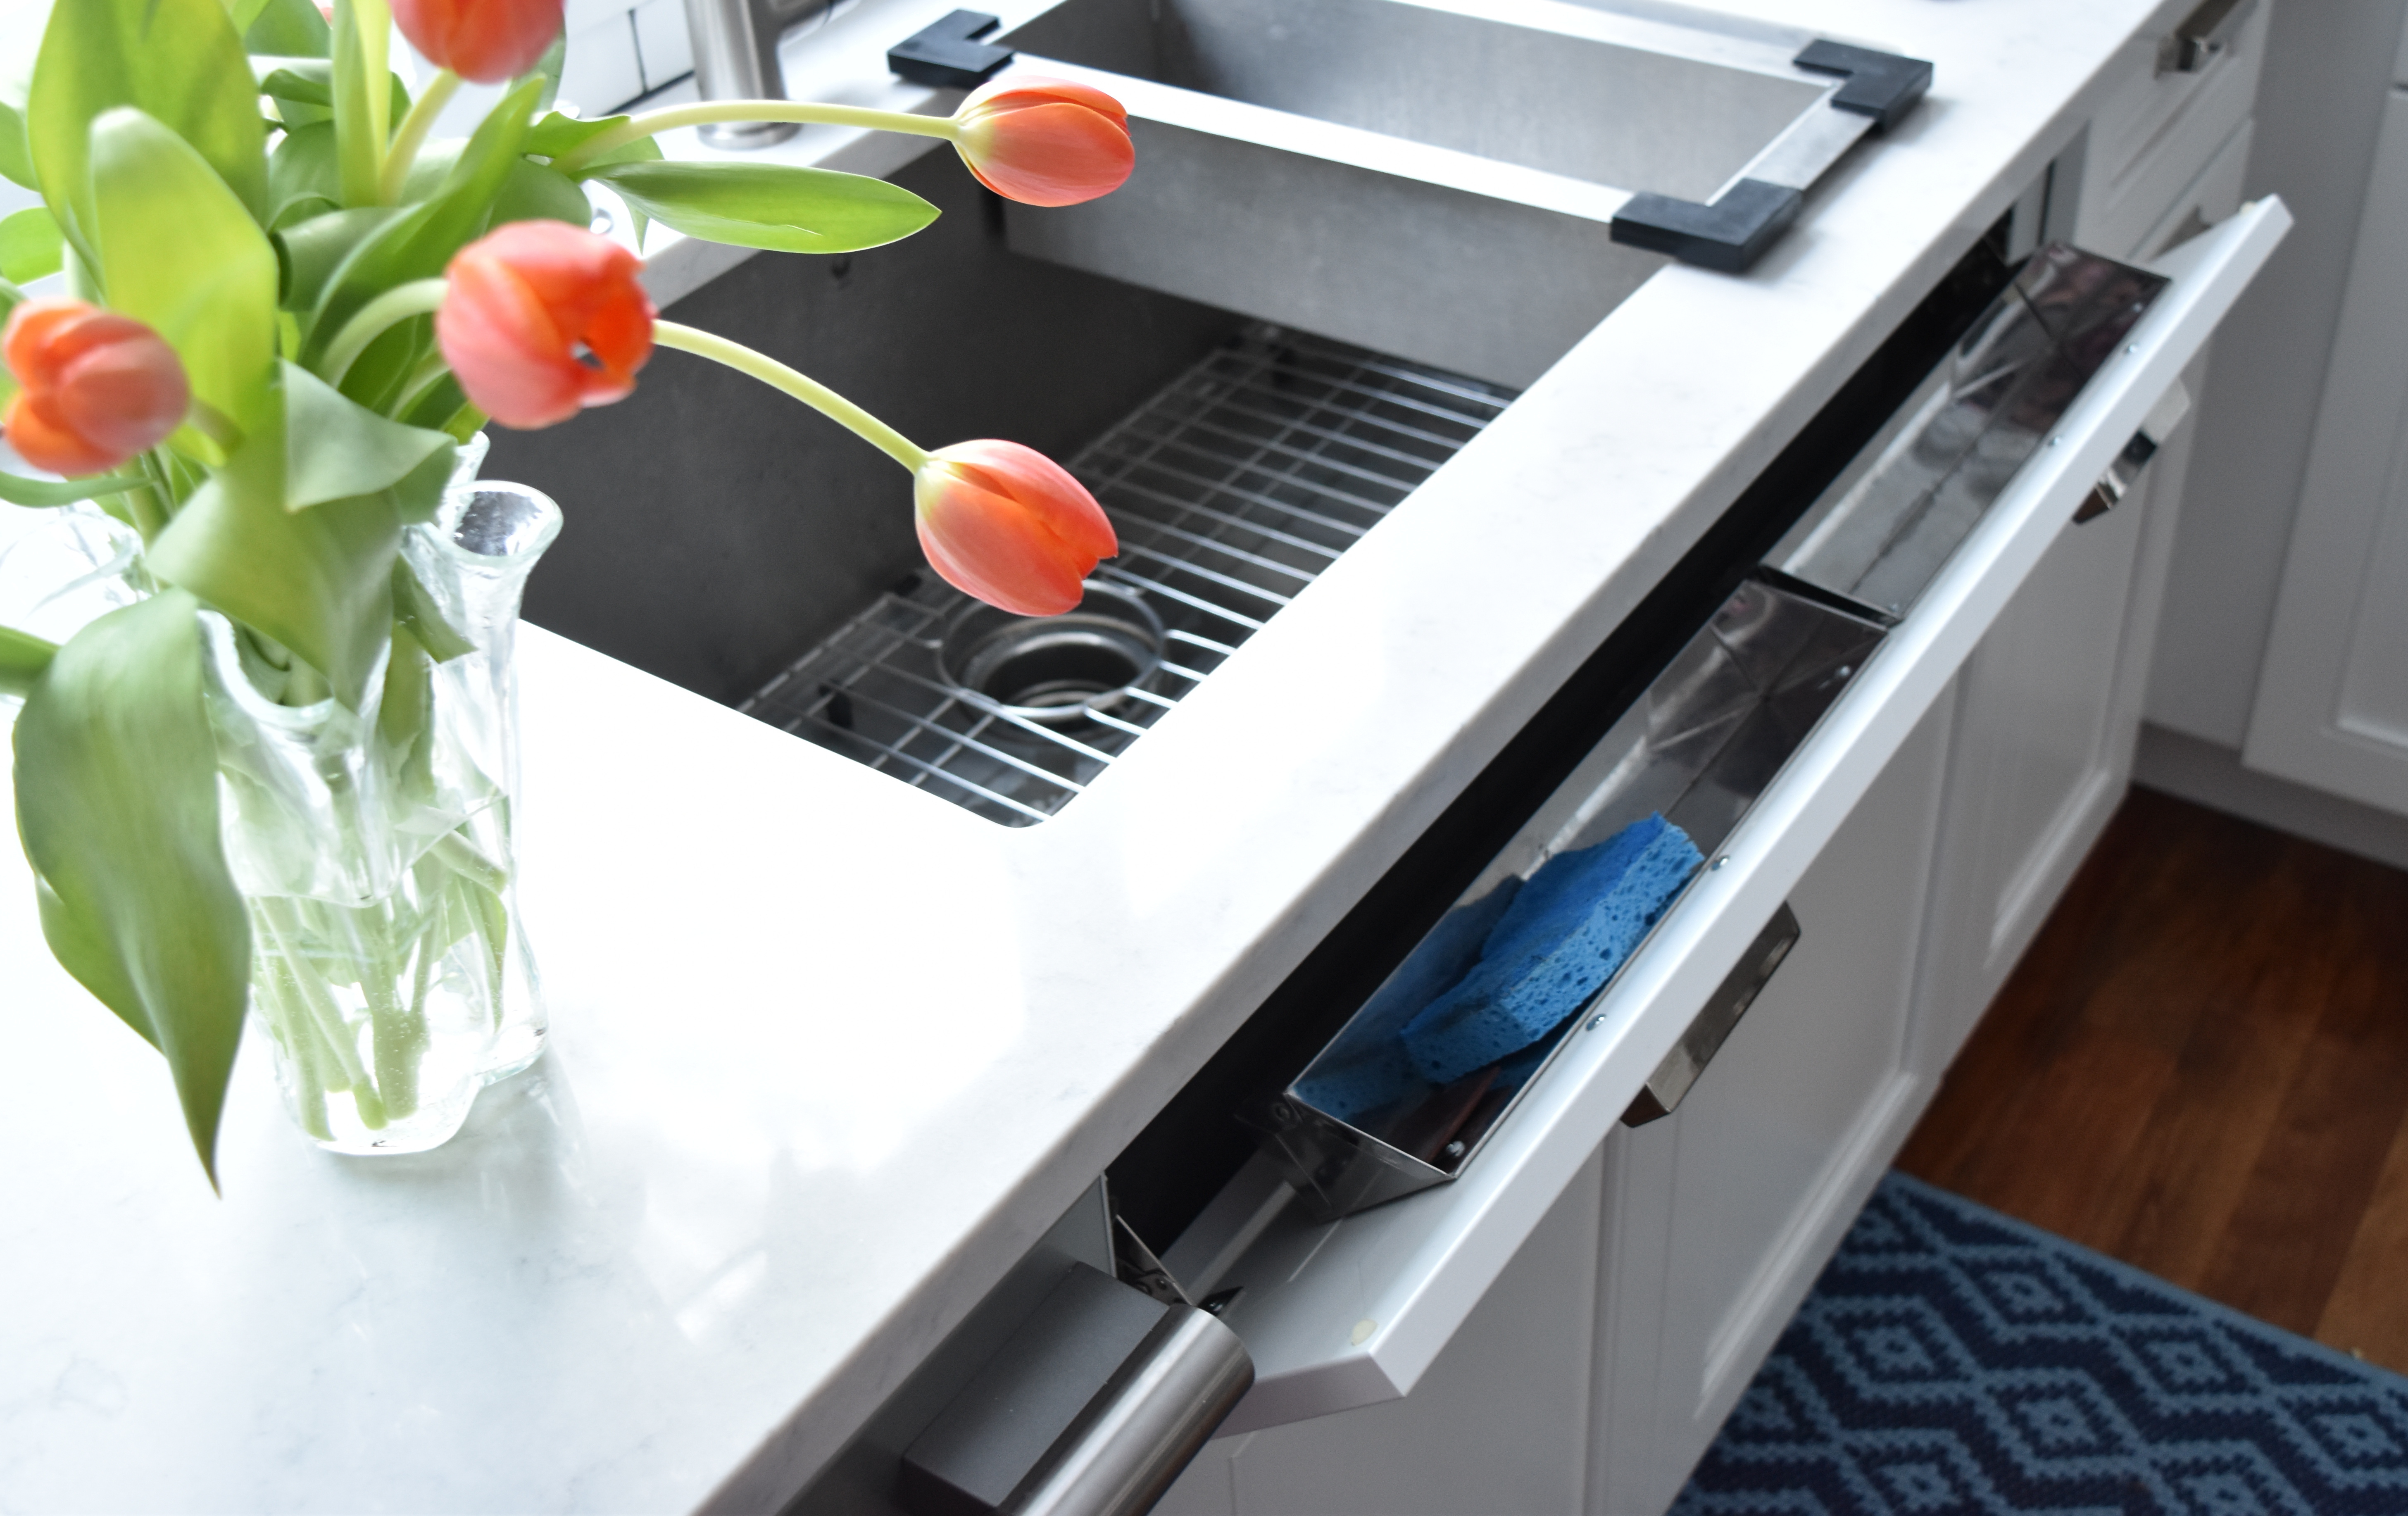
Sink + Faucet
Lowes, Vigo 32″ x 19″ Stainless single-basin Undermount with Industrial Faucet
Wallpaper (in dining area)
Anthropologie, Frosted Kaleidoscope
Accessories
Pineapple Art – Hobby Lobby
Blue Geometric Rug – Target
Sisal Runner – Target
Bowls – Crate & Barrel, Homegoods
Cutting Boards – World Market
Yellow Industrial Barstools – Target
I think that wraps it up. Something you liked and want details on… email me!

If you want to see all the posts documenting the kitchen renovation, here they are from start to finish:
Wonderful White Kitchen Inspiration
Kitchen Remodel: Before + Plan of Action
Demo Day: Steps for Demolishing the Kitchen
Kitchen Progress: Staining Hardwood Floors
The Cabinets Arrive + Get Installed
Natural Quartz Countertops in the Kitchen
10 Countertop Materials to Consider for the Kitchen
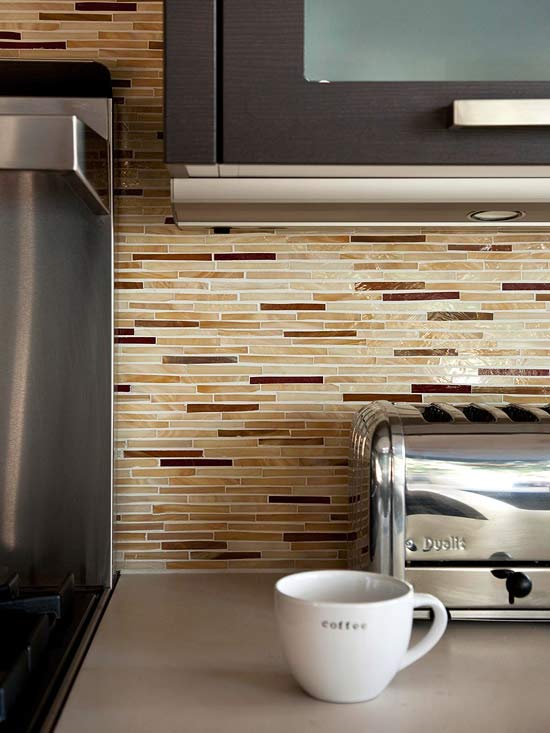
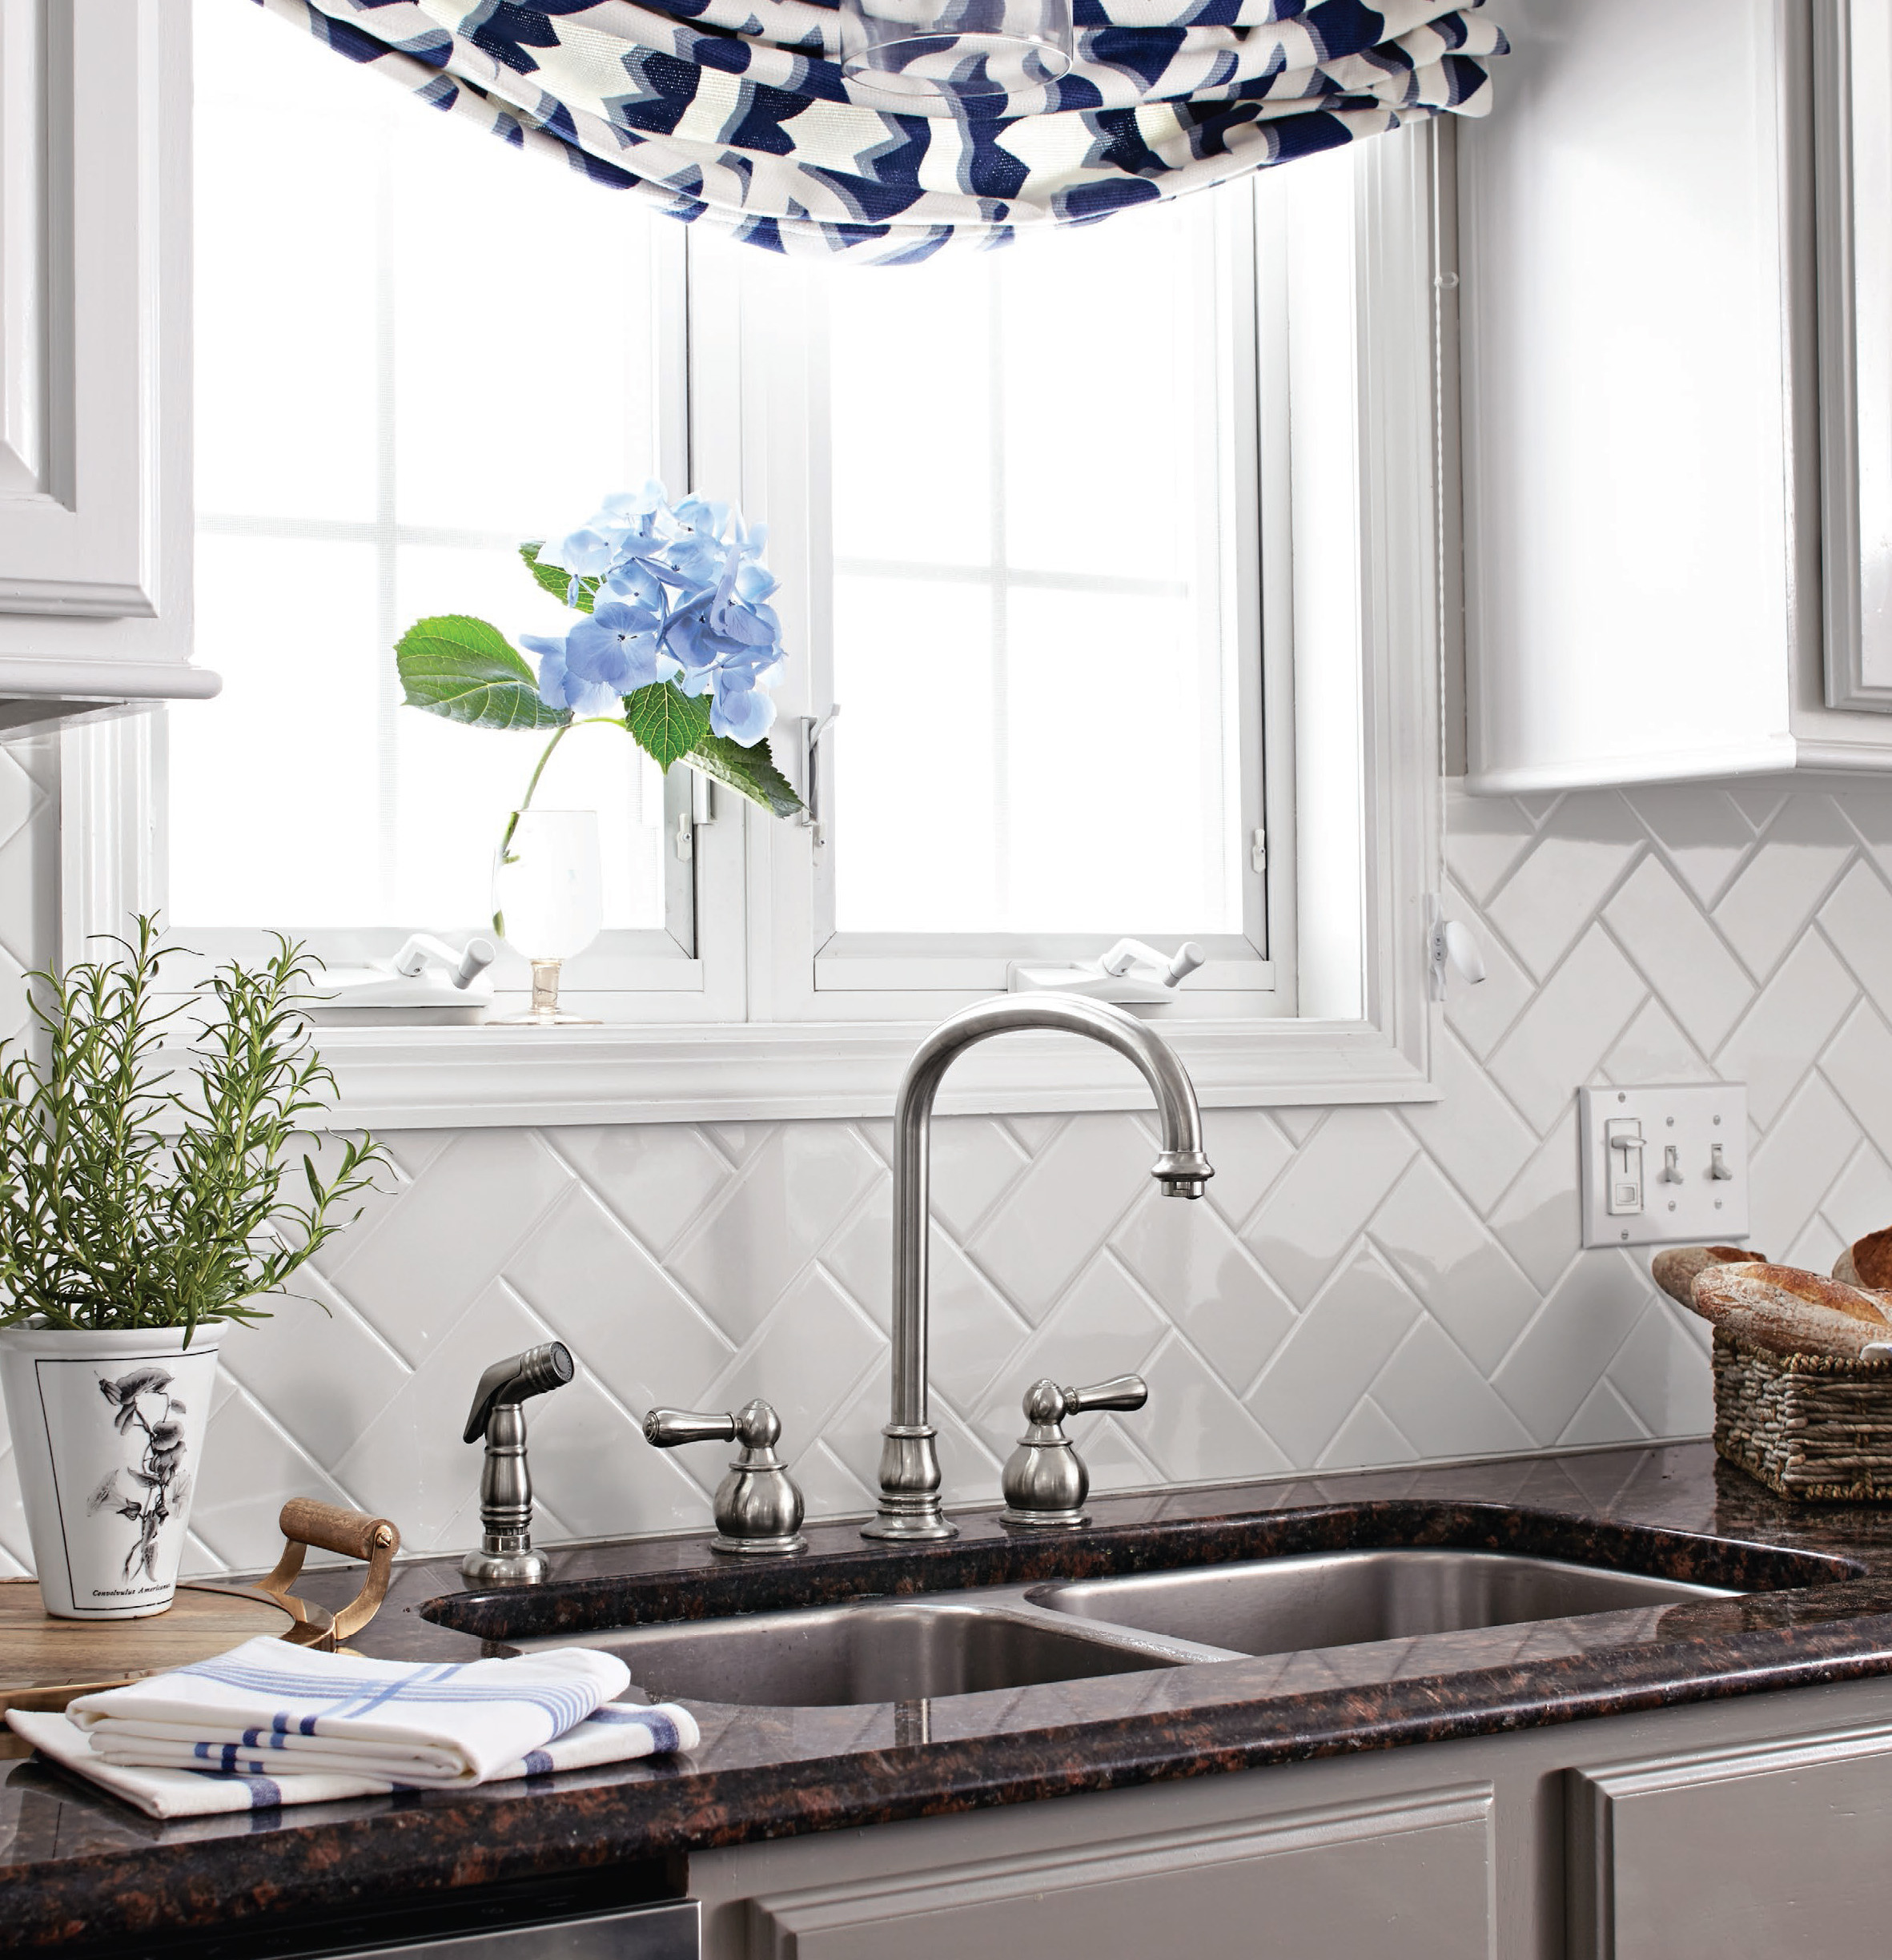
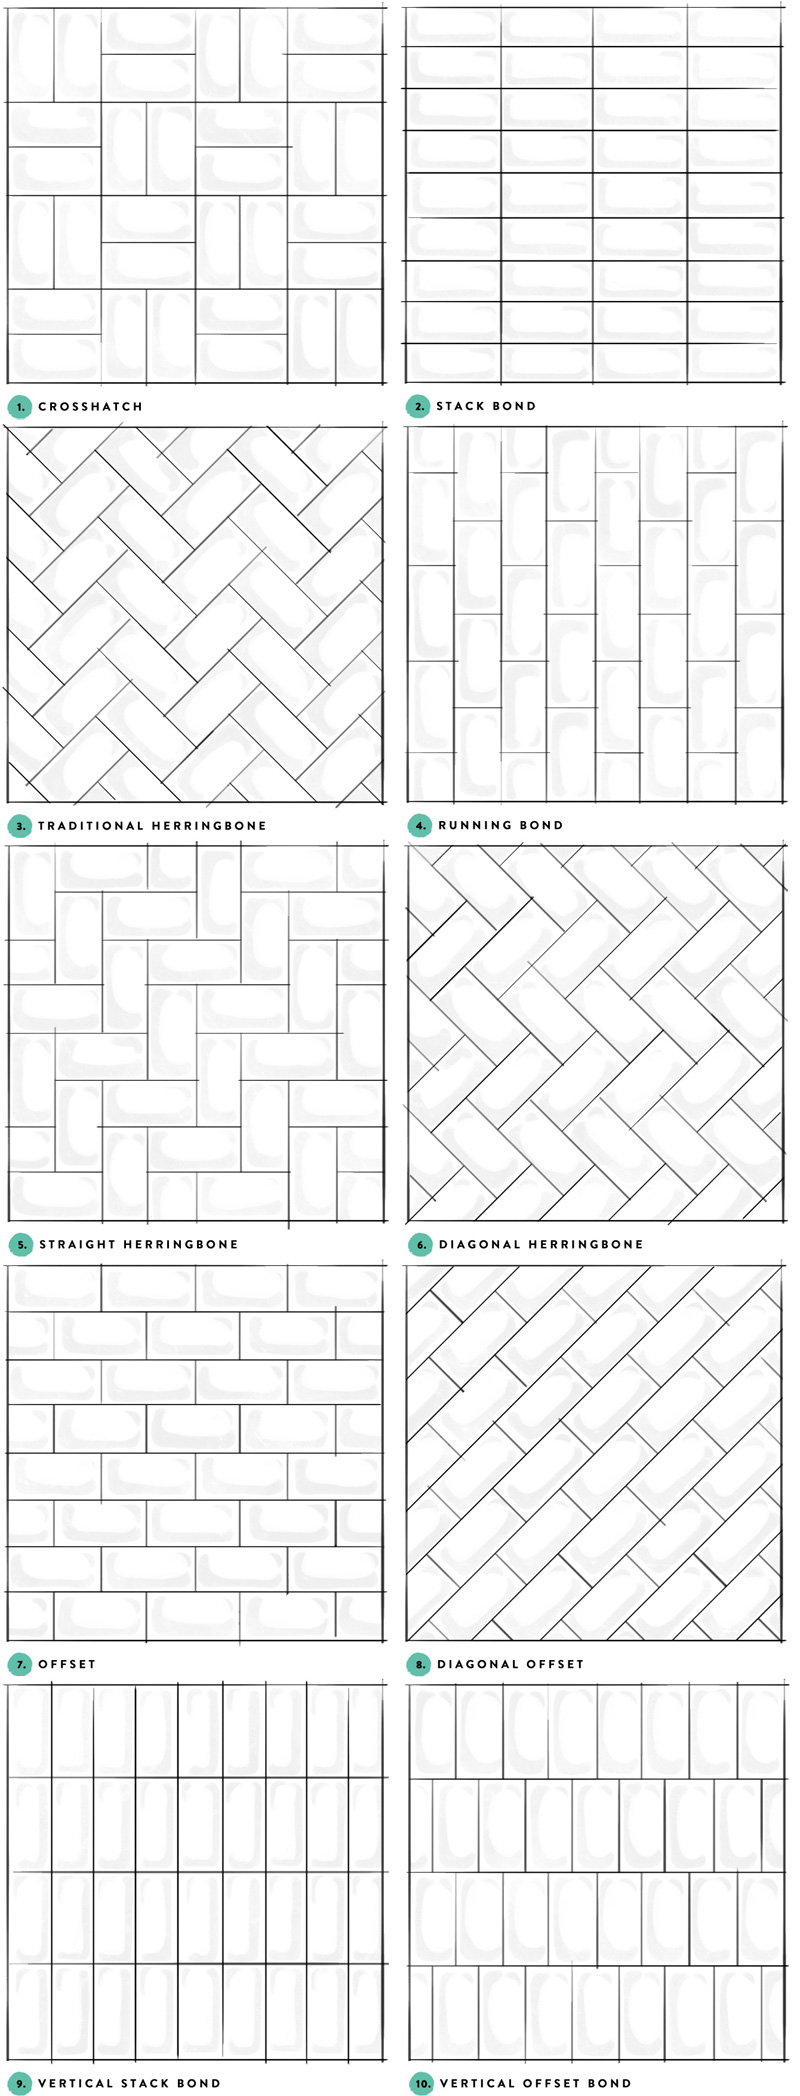
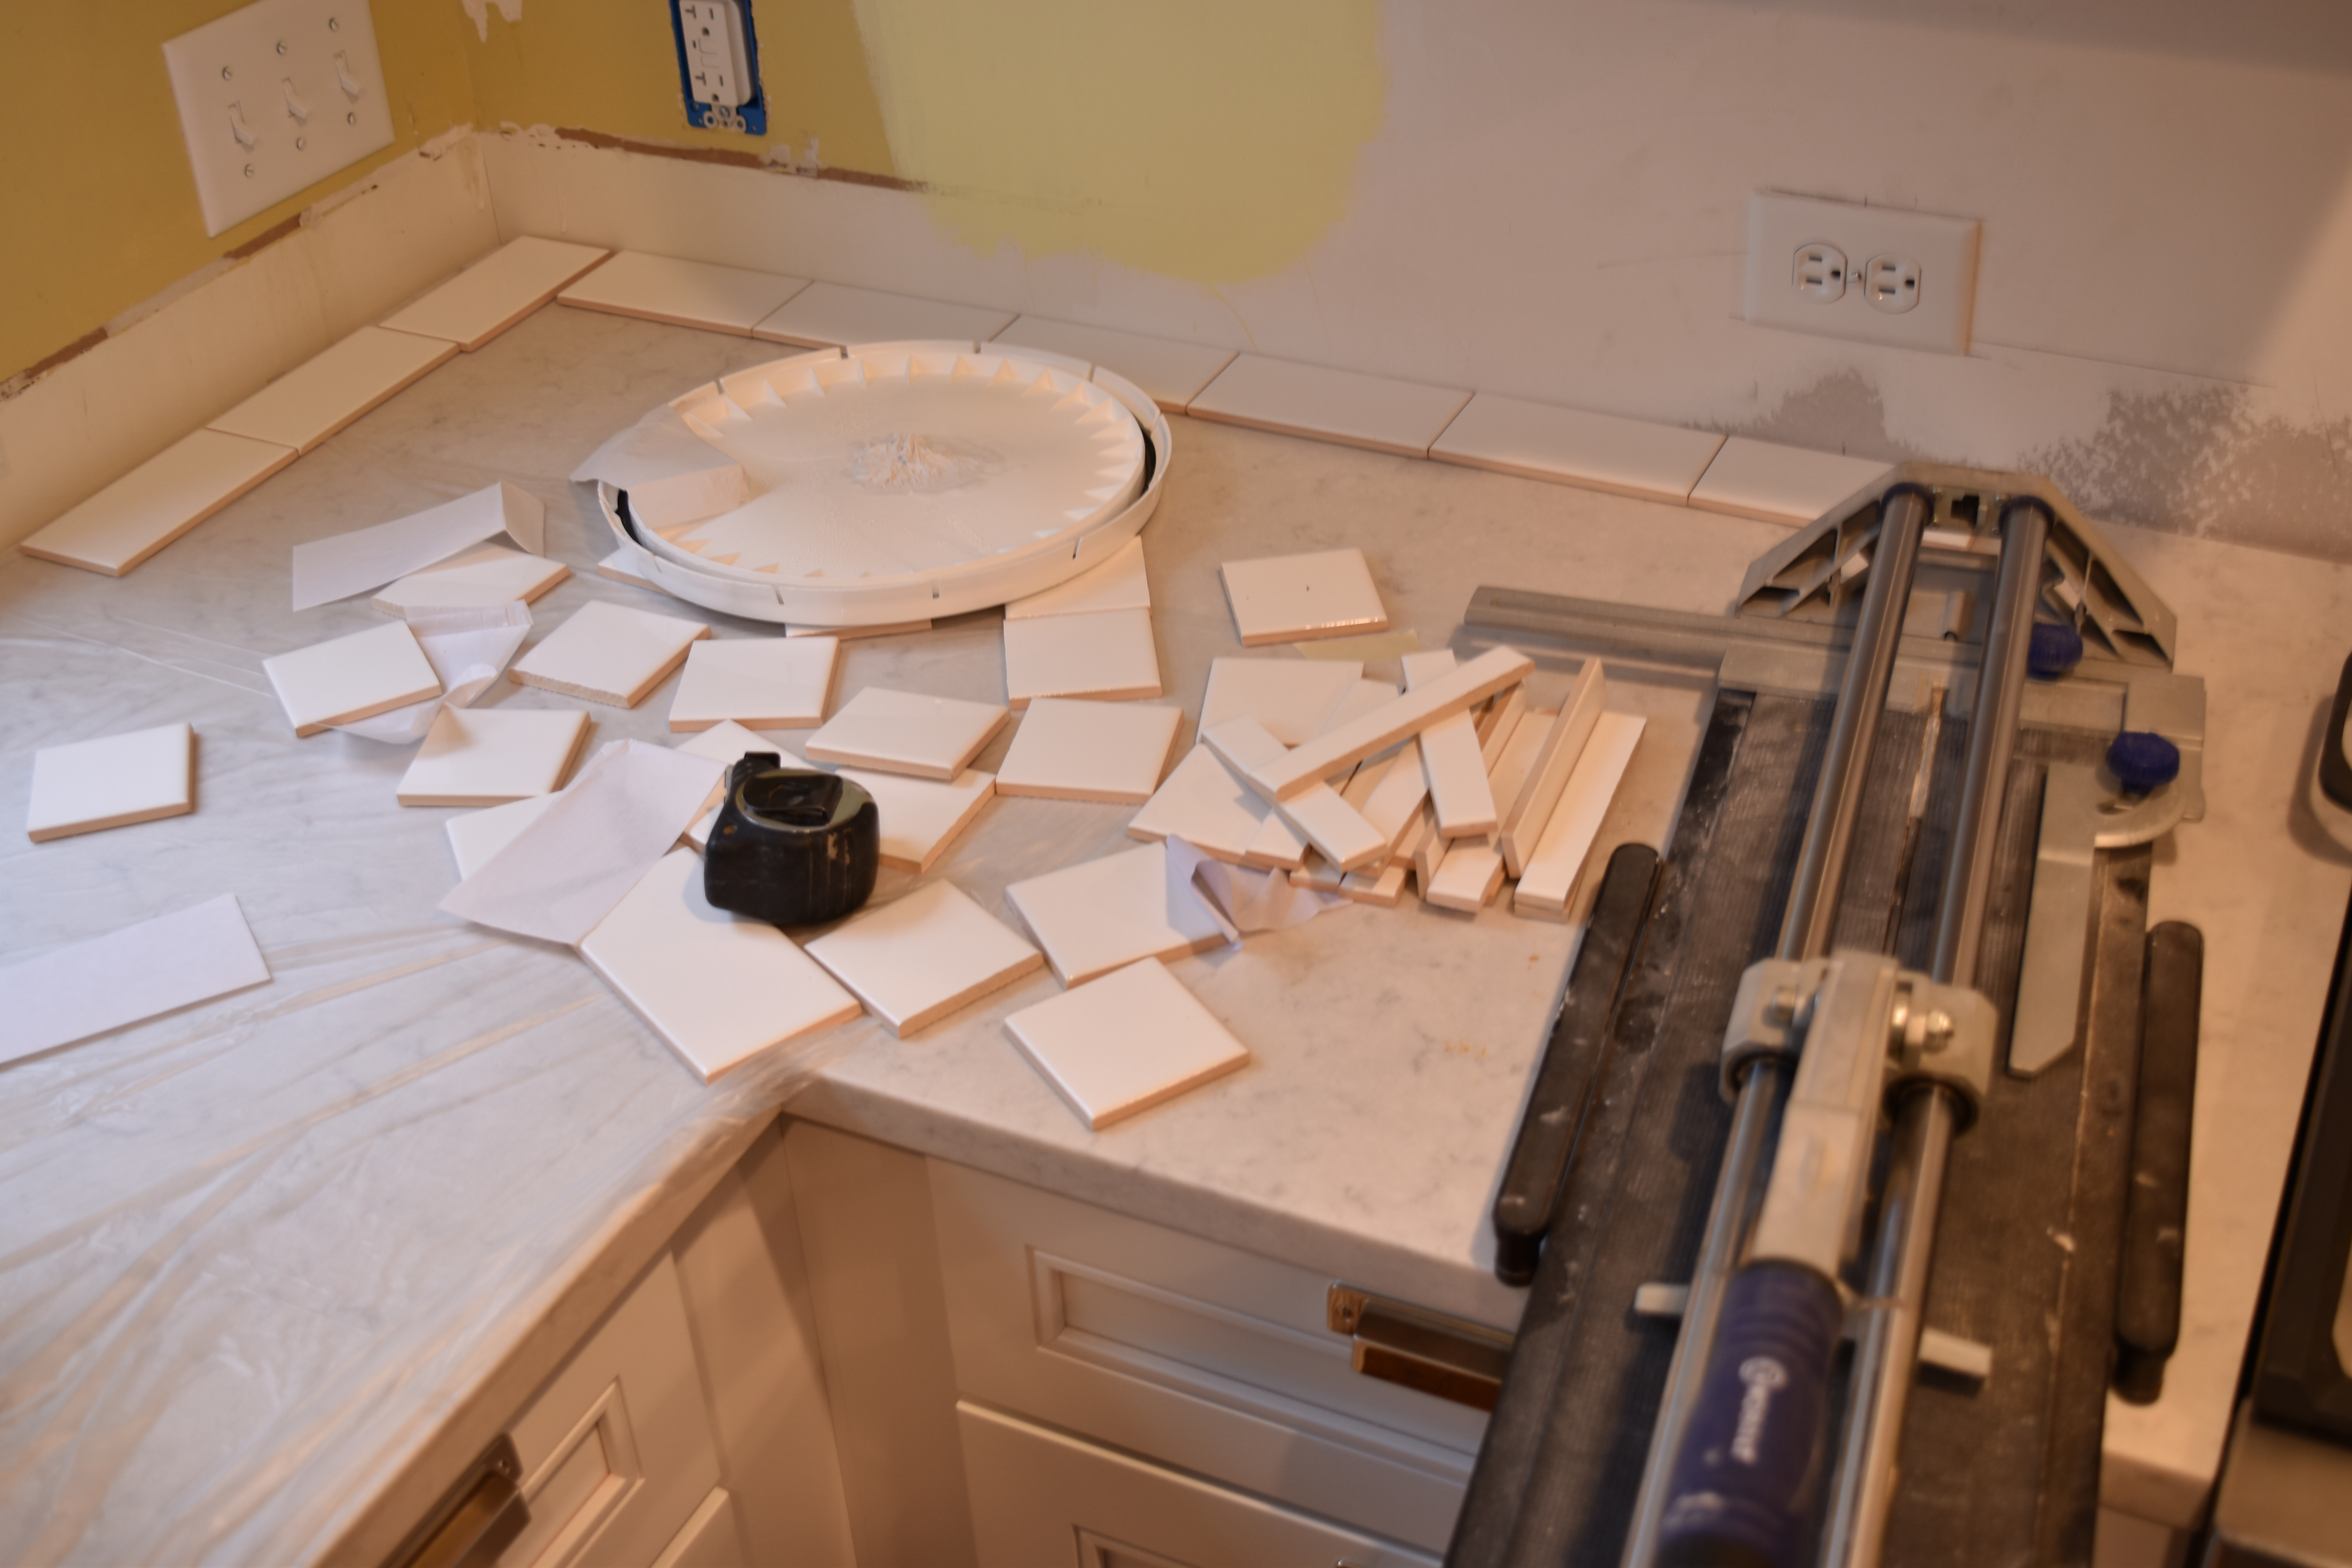
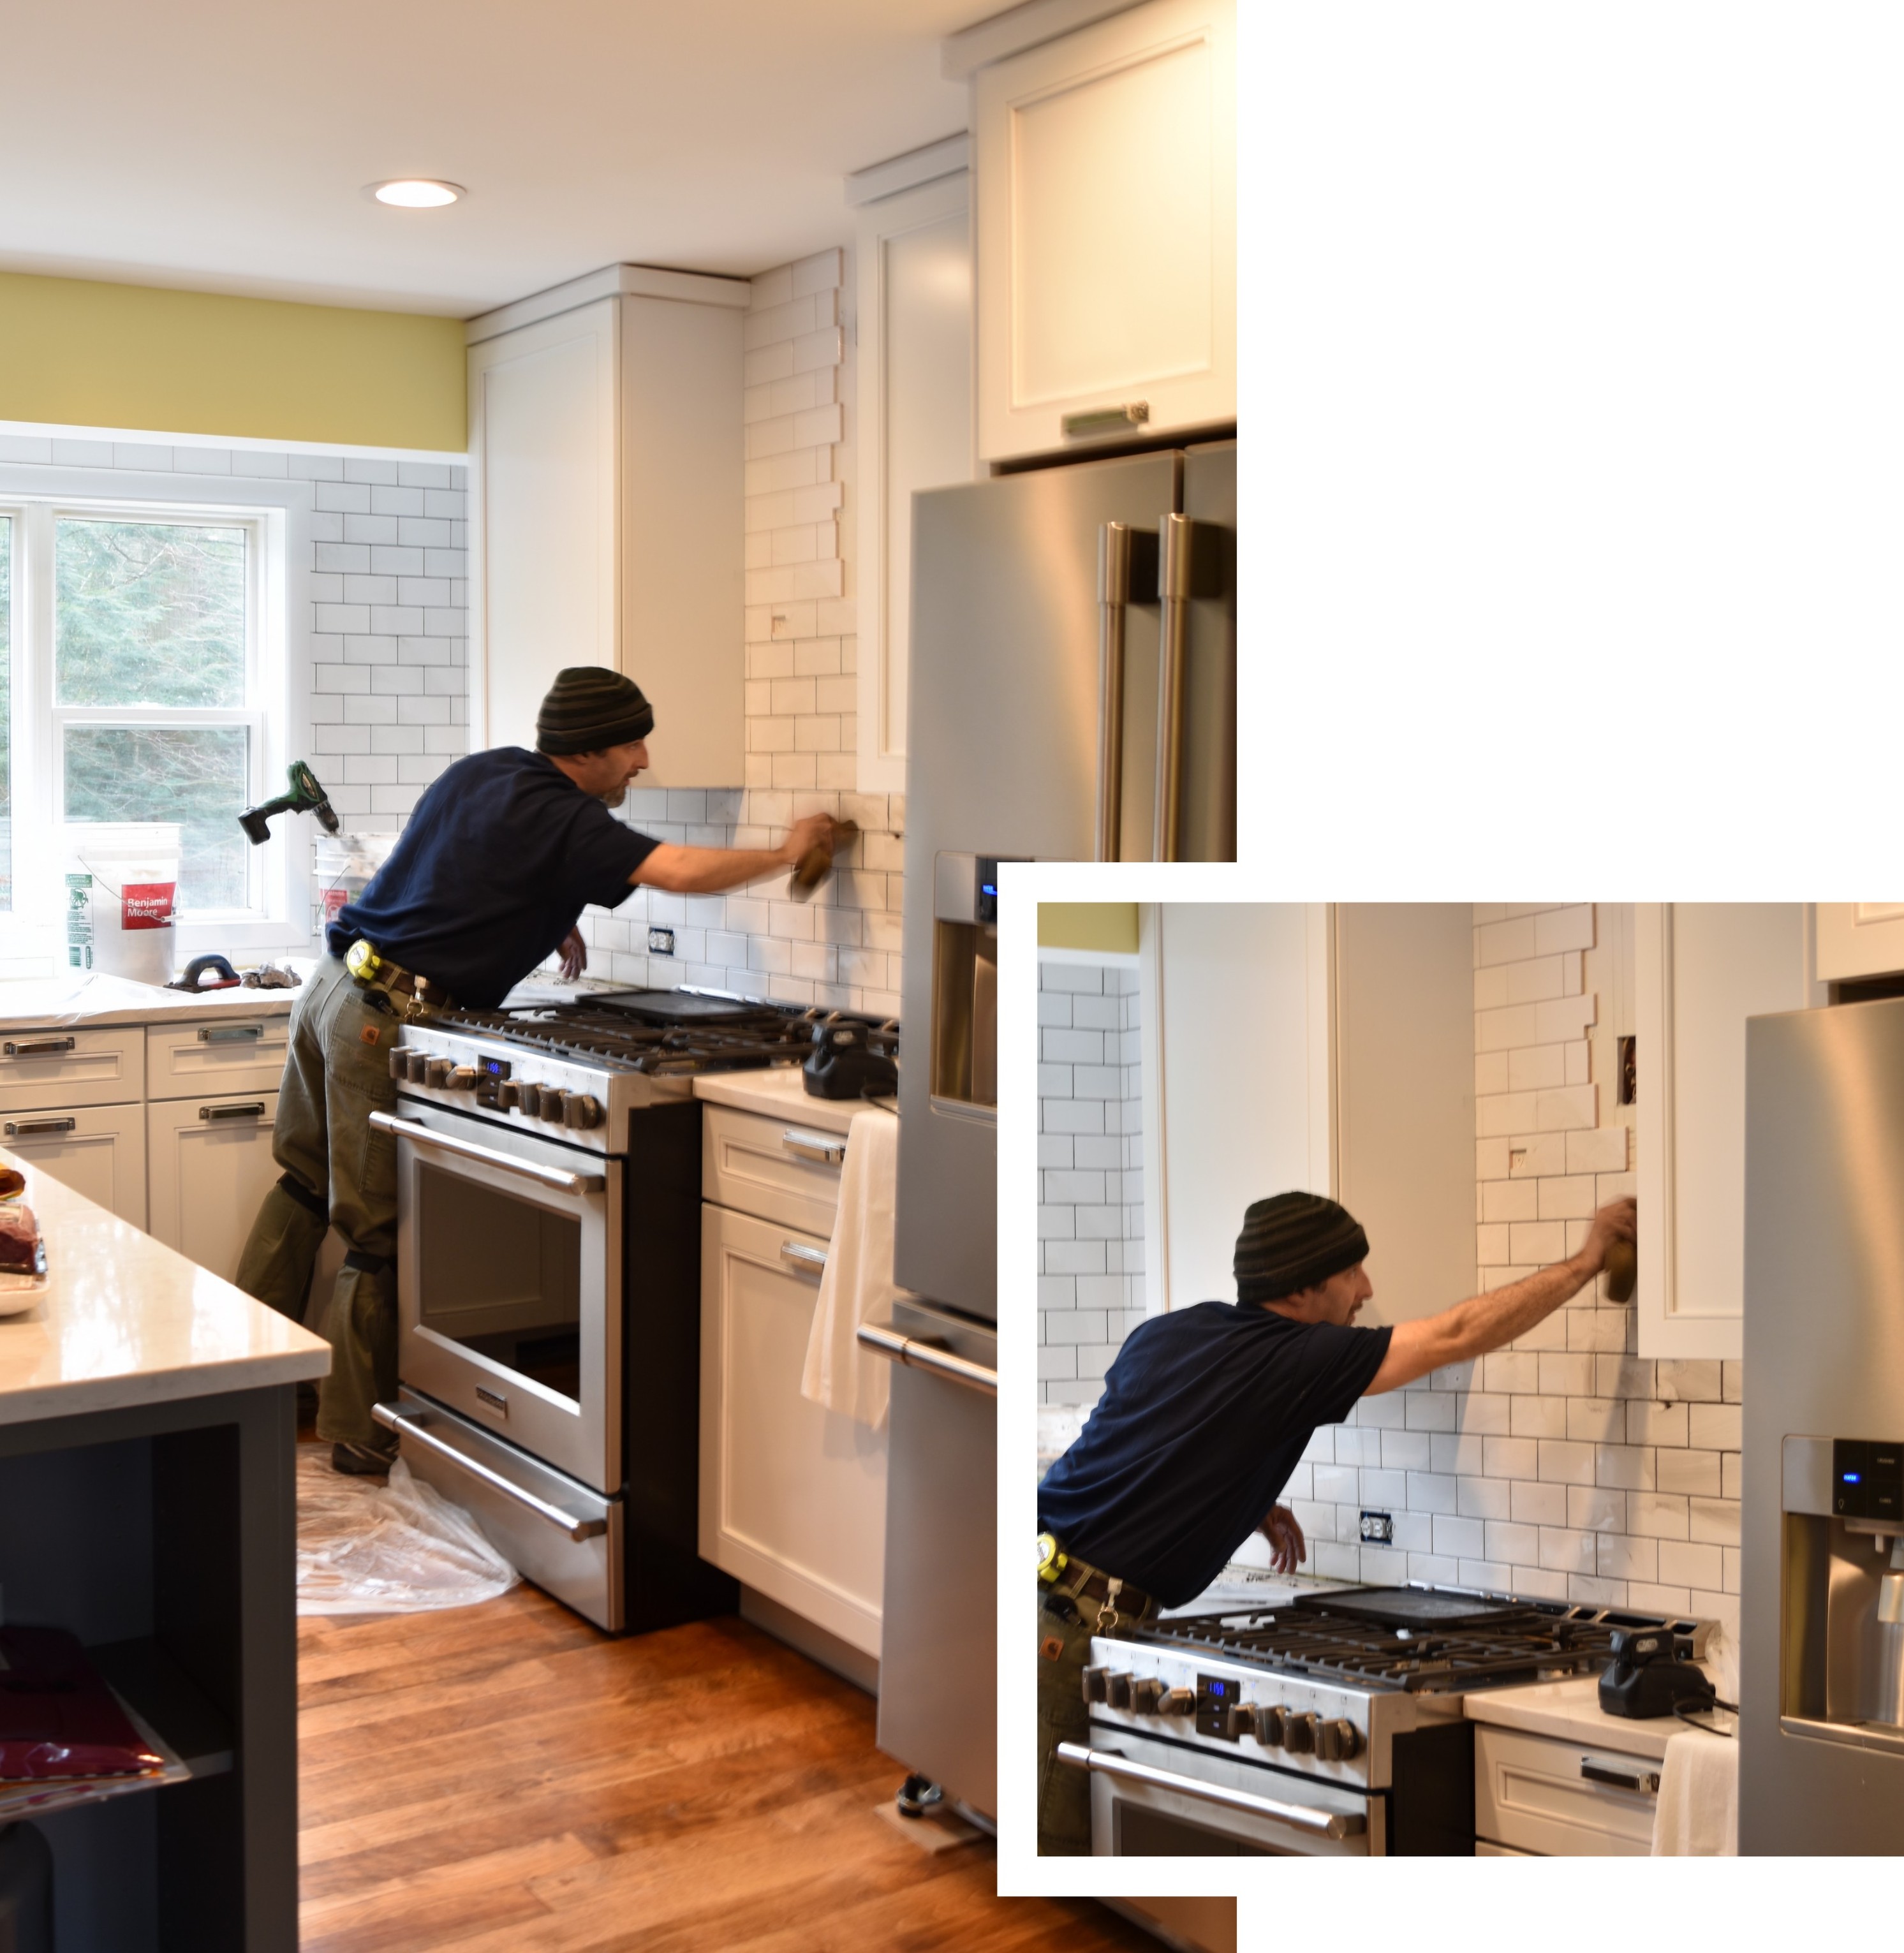
Subway Tile Installation + Choosing the RIGHT Subway
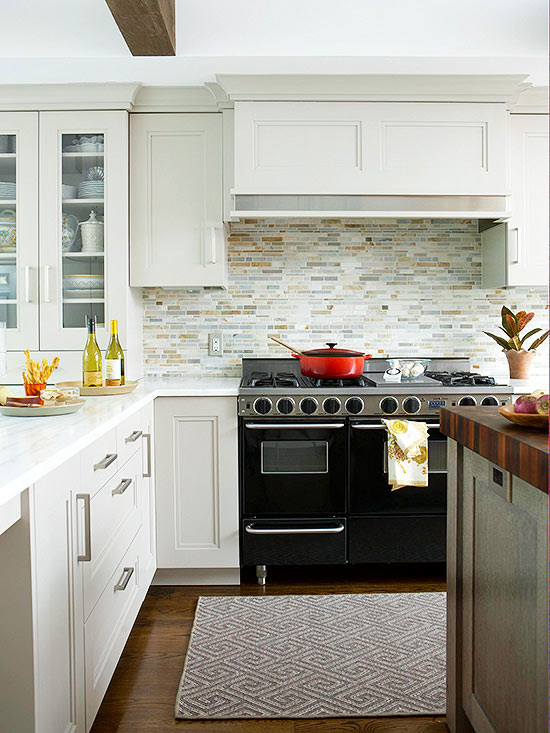
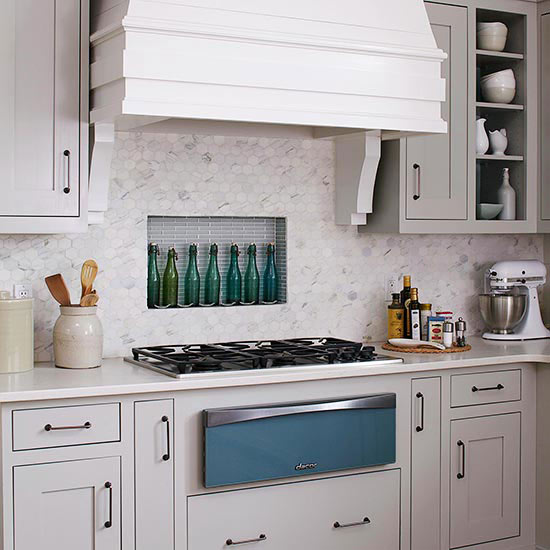
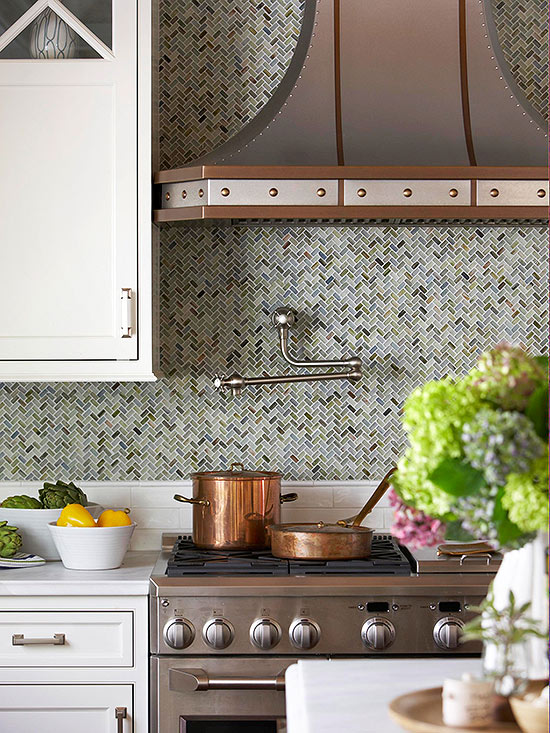
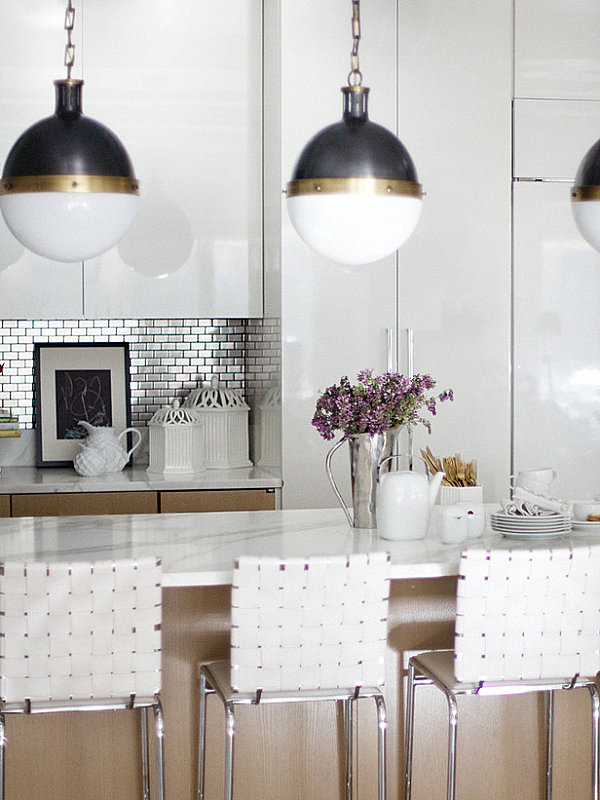
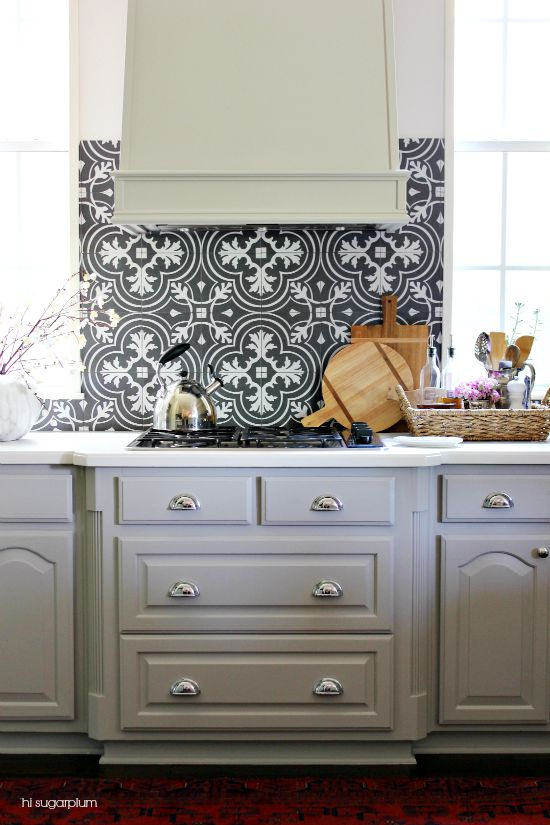
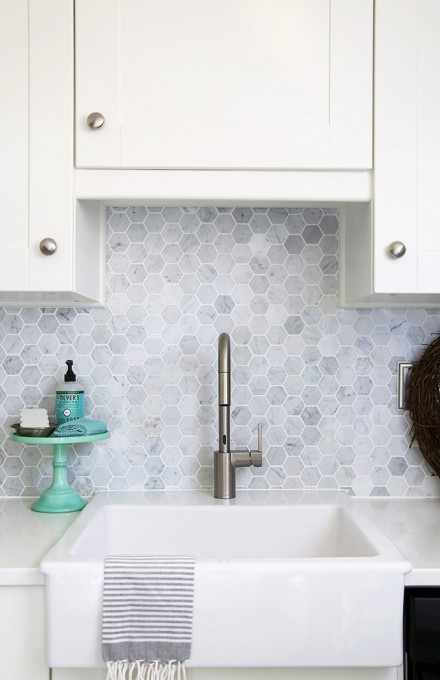
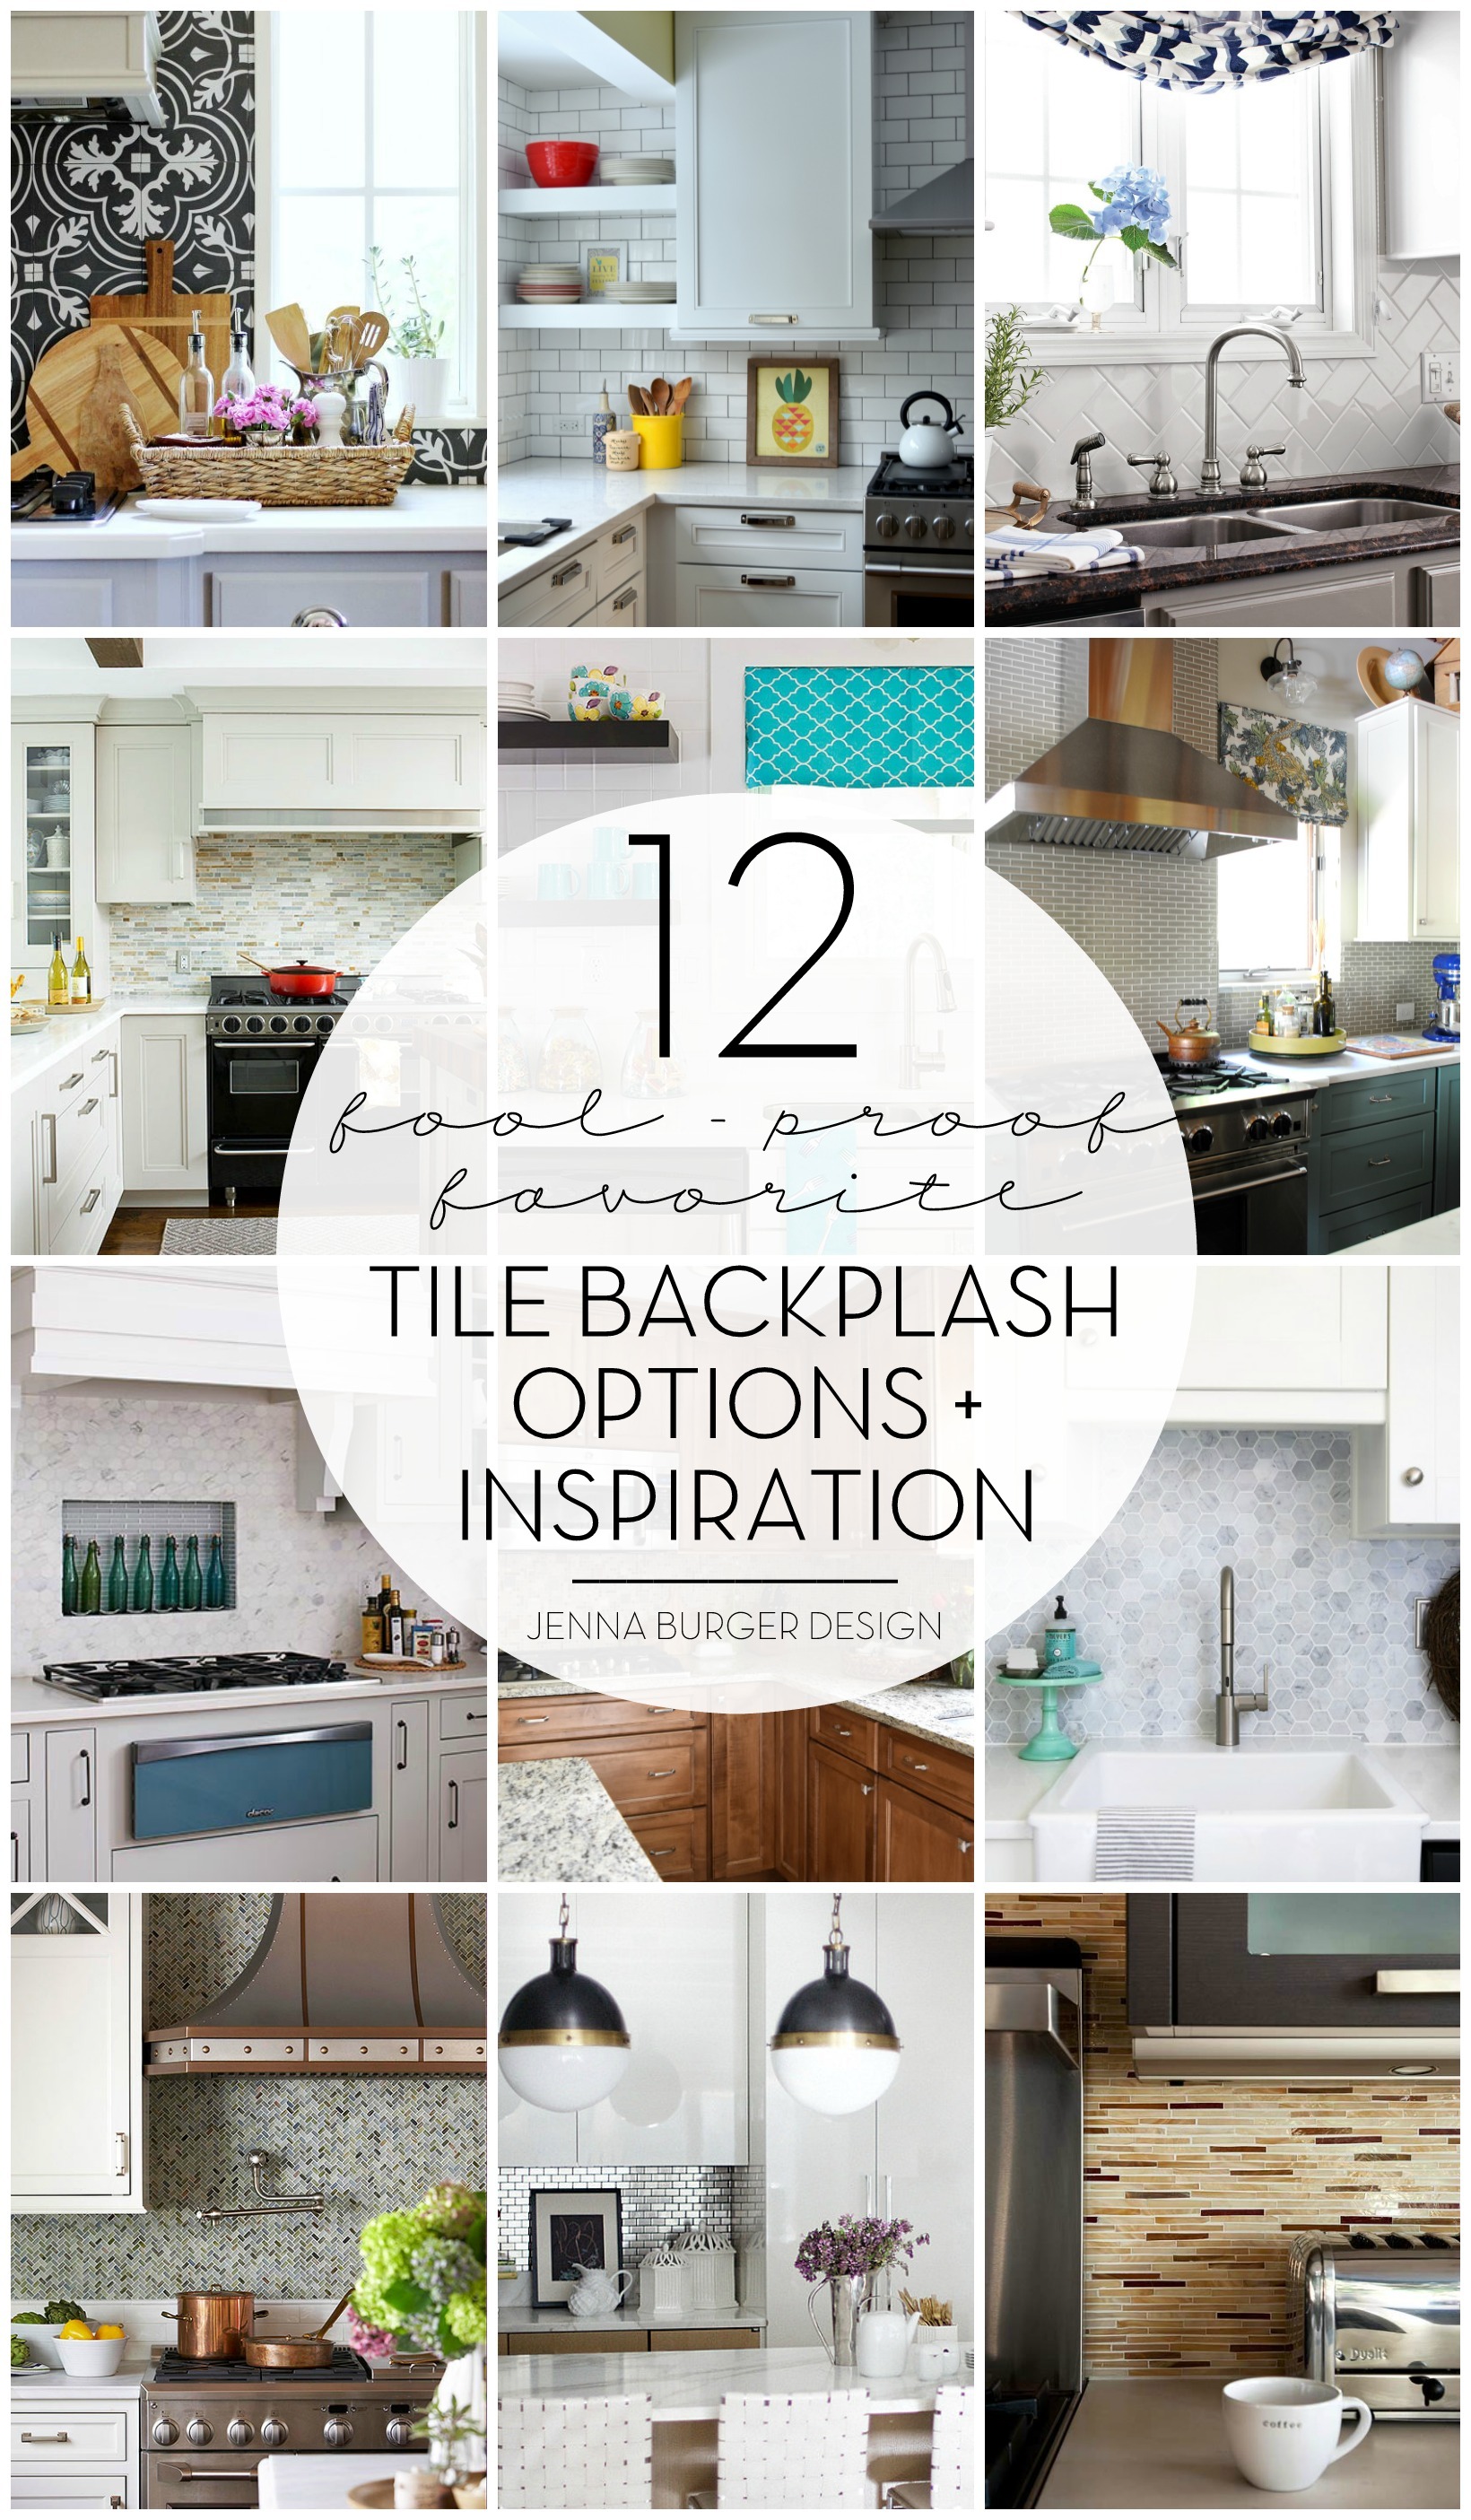
Kitchen Backsplash Tile Options + Inspiration
Choosing a Paint Color + Wallpaper for the Kitchen and Dining Room
Kitchen Renovation: The Appliances
Dissecting the Details
Kitchen Renovation: REVEAL + RESOURCES
DISCLAIMER: THIS KITCHEN RENOVATION IS A COLLABORATION WITH LOWE’S, KRAFTMAID, FRIGIDAIRE, AND HGTV HOME BY SHERWIN WILLIAMS. ALL OPINIONS + SELECTIONS ARE MY OWN WITH THE ASSISTANCE OF THE LOWE’S DESIGN TEAM.