


DIY: Rolling Barn Door
I am putting the final touches on the kitchen cabinets, but in the meantime I’ve been working on a slew of other projects for the brick ranch fixer upper. It’s been a busy couple months with moving, the holidays, and client projects, but thankfully with the recent freezing temps, we’ve been homebound most weekends which has allowed me to tackle my growing list of big and small projects around the new homestead.
One of my recent endeavours, which I am crazy in love with, are adding rolling barn doors to the family room which got the most TLC during the renovation. If you remember back, this is how the space looked when we moved in…
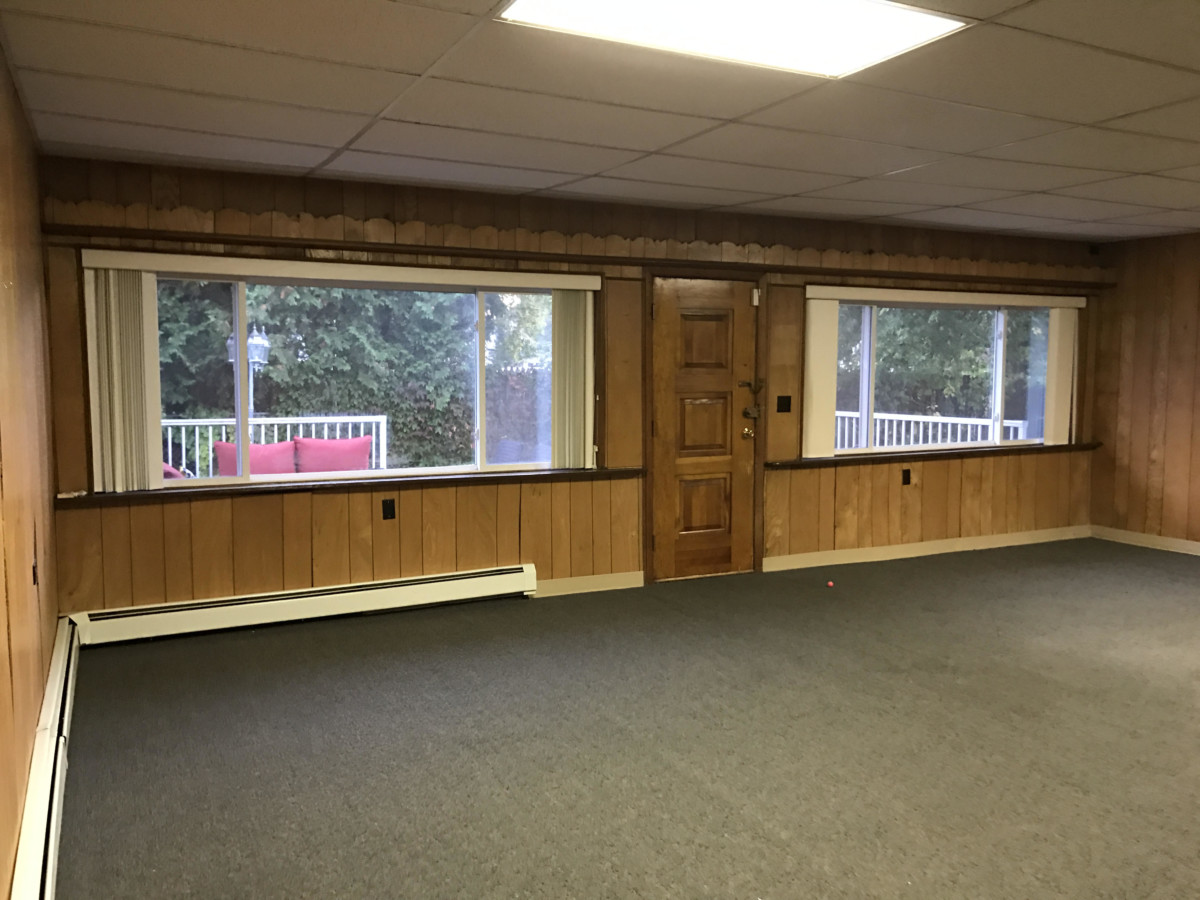
The door opening, seen in the picture below, used to have a hinged door to access the room. Our plan when renovating the space, was to add a rolling barn door at this opening and the other opening from the kitchen so the spaces flowed better…

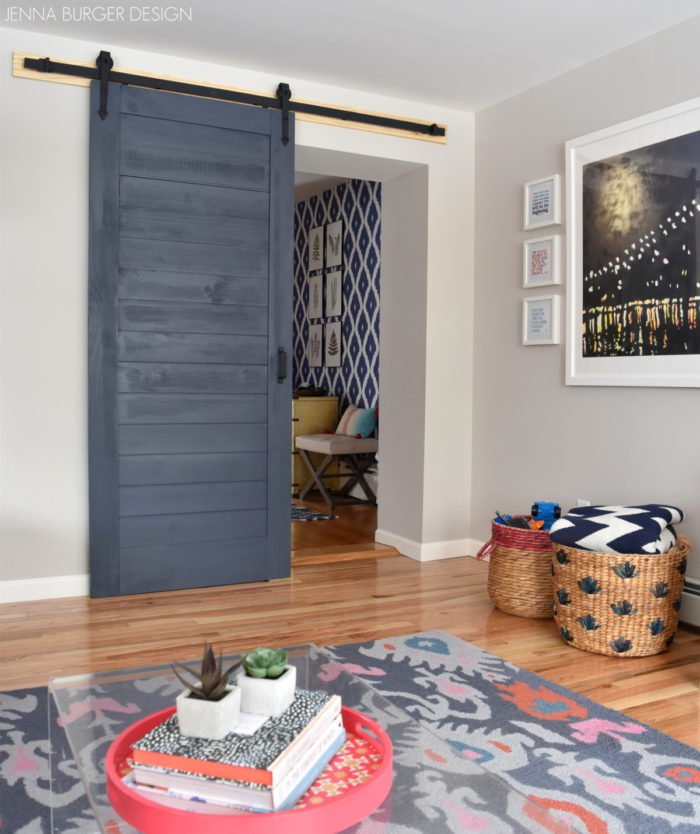
This is how the door opening with the new rolling barn door looks now…

Quite the transformation!
The rolling barn door, which was a complete kit – door + hardware – that we found at Lowe’s, has been a wonderful addition to the space. Functionally + aesthetically, the door has added height, privacy, and a pop of color. The deep navy color, Valspar Mystified 4011-8, on the door is the same as the kitchen cabinets that I painted. I wanted to use this darker hue throughout the house to tie the spaces together + to give contrast to the lighter wall tone.
And check out the amazing wallpaper in the distance. That’s the foyer… More on that coming soon.
THE INSTALLATION
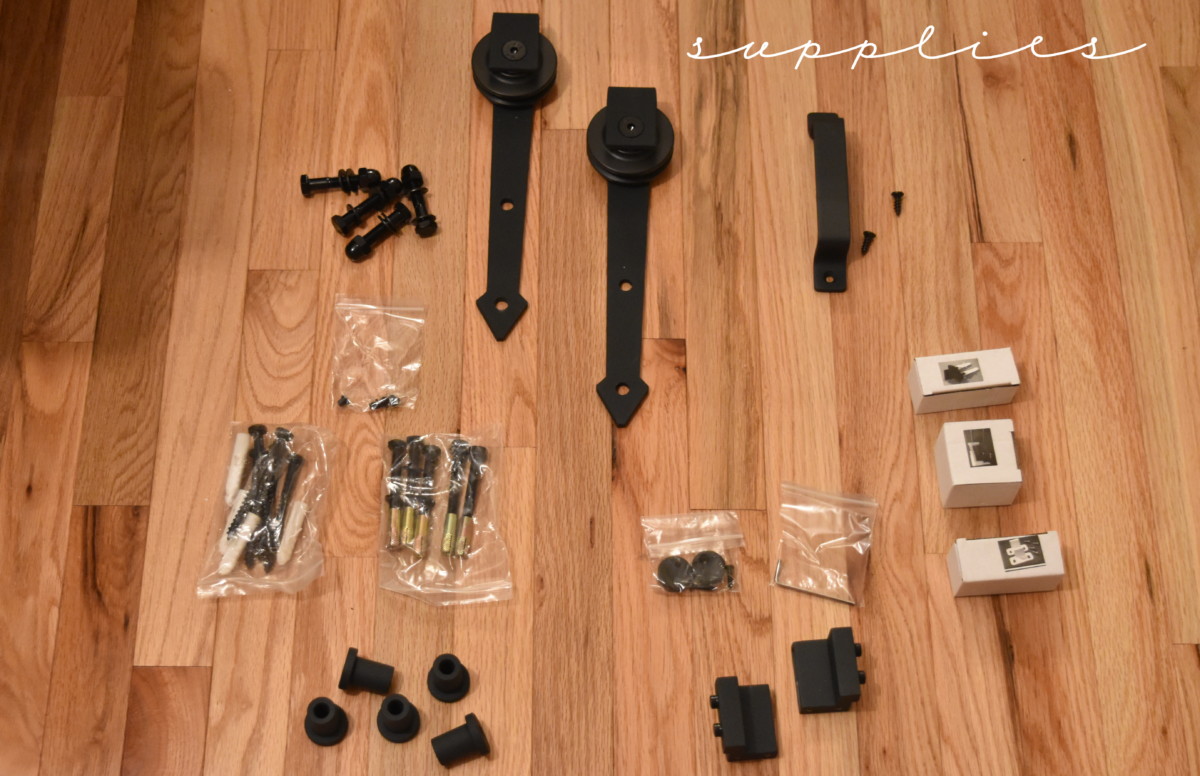
This is the rolling door kit we chose to use. The design of the door was simple and not overly rustic + it was unfinished so any paint (or stain) color could be used.
 The mister and I were a bit nervous to tackle installing the barn door hardware, but the directions were easy to navigate and the process for installation wasn’t as challenging as anticipated. Phew…
Since we had planned for the barn doors during the construction process, we had blocking added in the stud wall above the doors – yes there are two openings into the family room. By adding blocking (extra framing) in the wall we knew there was no need to use anchors; the screws could go straight into the sheetrock with the blocking behind.
If you decide to tackle a similar project, you may need to use anchors which would add a few additional steps.
To start off, we painted the side of the door that would be facing the wall. This was important because otherwise we wouldn’t have access to the whole side to paint once installed.
Using a combination of a brush for the corners and a roller for the flat surfaces, I painted the one side.
Once the paint was dry, we laid out all the hardware on a flat surface.
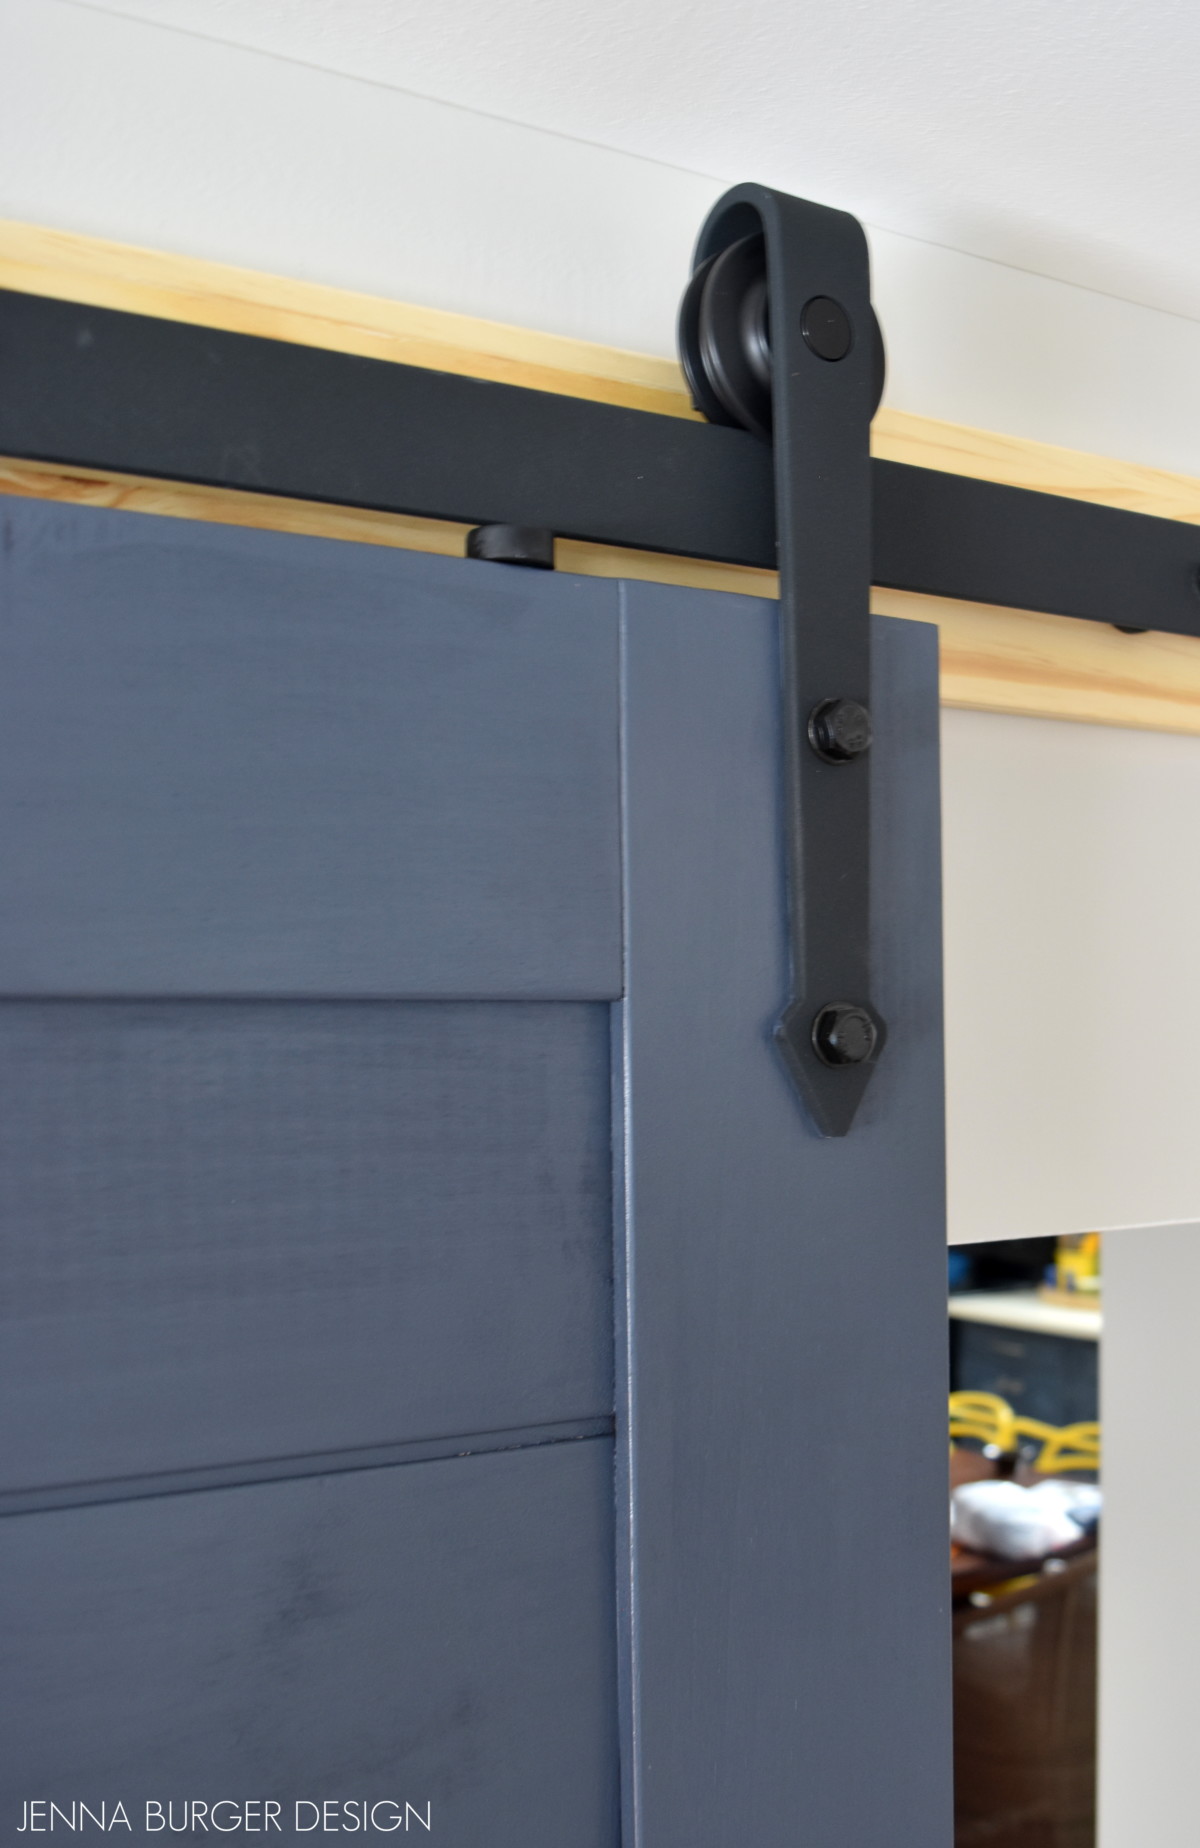
We then followed the directions to add the long track to the unfinished piece of wood which would be used to hang the door.

Then we added the 2 rolling brackets to the door. The door had predrilled holes, which made the process effortless + easy.


There were a few additional steps to hang the door onto the track, but it was fairly straight forward. The directions gave us multiple installation options, which took some time to review + anaylze. The first door took about an hour from start to finish, but the second door was a breeze since we knew the steps to take.
Once the door was hung, I finished painting the exposed side.

Once the paint dried, I added the handle, and it was complete.

I was really impressed with the ease of installation + the beautiful look that the doors bring to the space. Having the door included with the hardware also made the process so much easier.

Door open…
Door closed…

As I mentioned, there are two doors in this space. Here’s the other…

I can’t wait to share the completed room and another fun color I brought into this space!
Shop the space…
DISCLAIMER: THIS POST IS A COLLABORATION WITH LOWE’S. ALL OPINIONS + SELECTIONS ARE MY OWN.
Comments are closed.