


KITCHEN: Cabinet Makeover Reveal
It’s been quite the process, but I am so excited to finally share the reveal of the DIY kitchen cabinet makeover. The steps to transforming the kitchen cabinets started when we first purchased our brick ranch fixer upper in the late Fall.
Steps included removing, prepping + sanding the cabinet doors and face frames, followed by priming + painting the doors a moody navy hue.
Here’s a peek at what the space once looked like…

This was the plan of action…

And the vision board…

This is the result of the kitchen cabinet makeover…

Alot went into this do it yourself kitchen makeover, but there is still more to tackle in the space – more on that later. For the moment, let’s take a look at what has been accomplished.
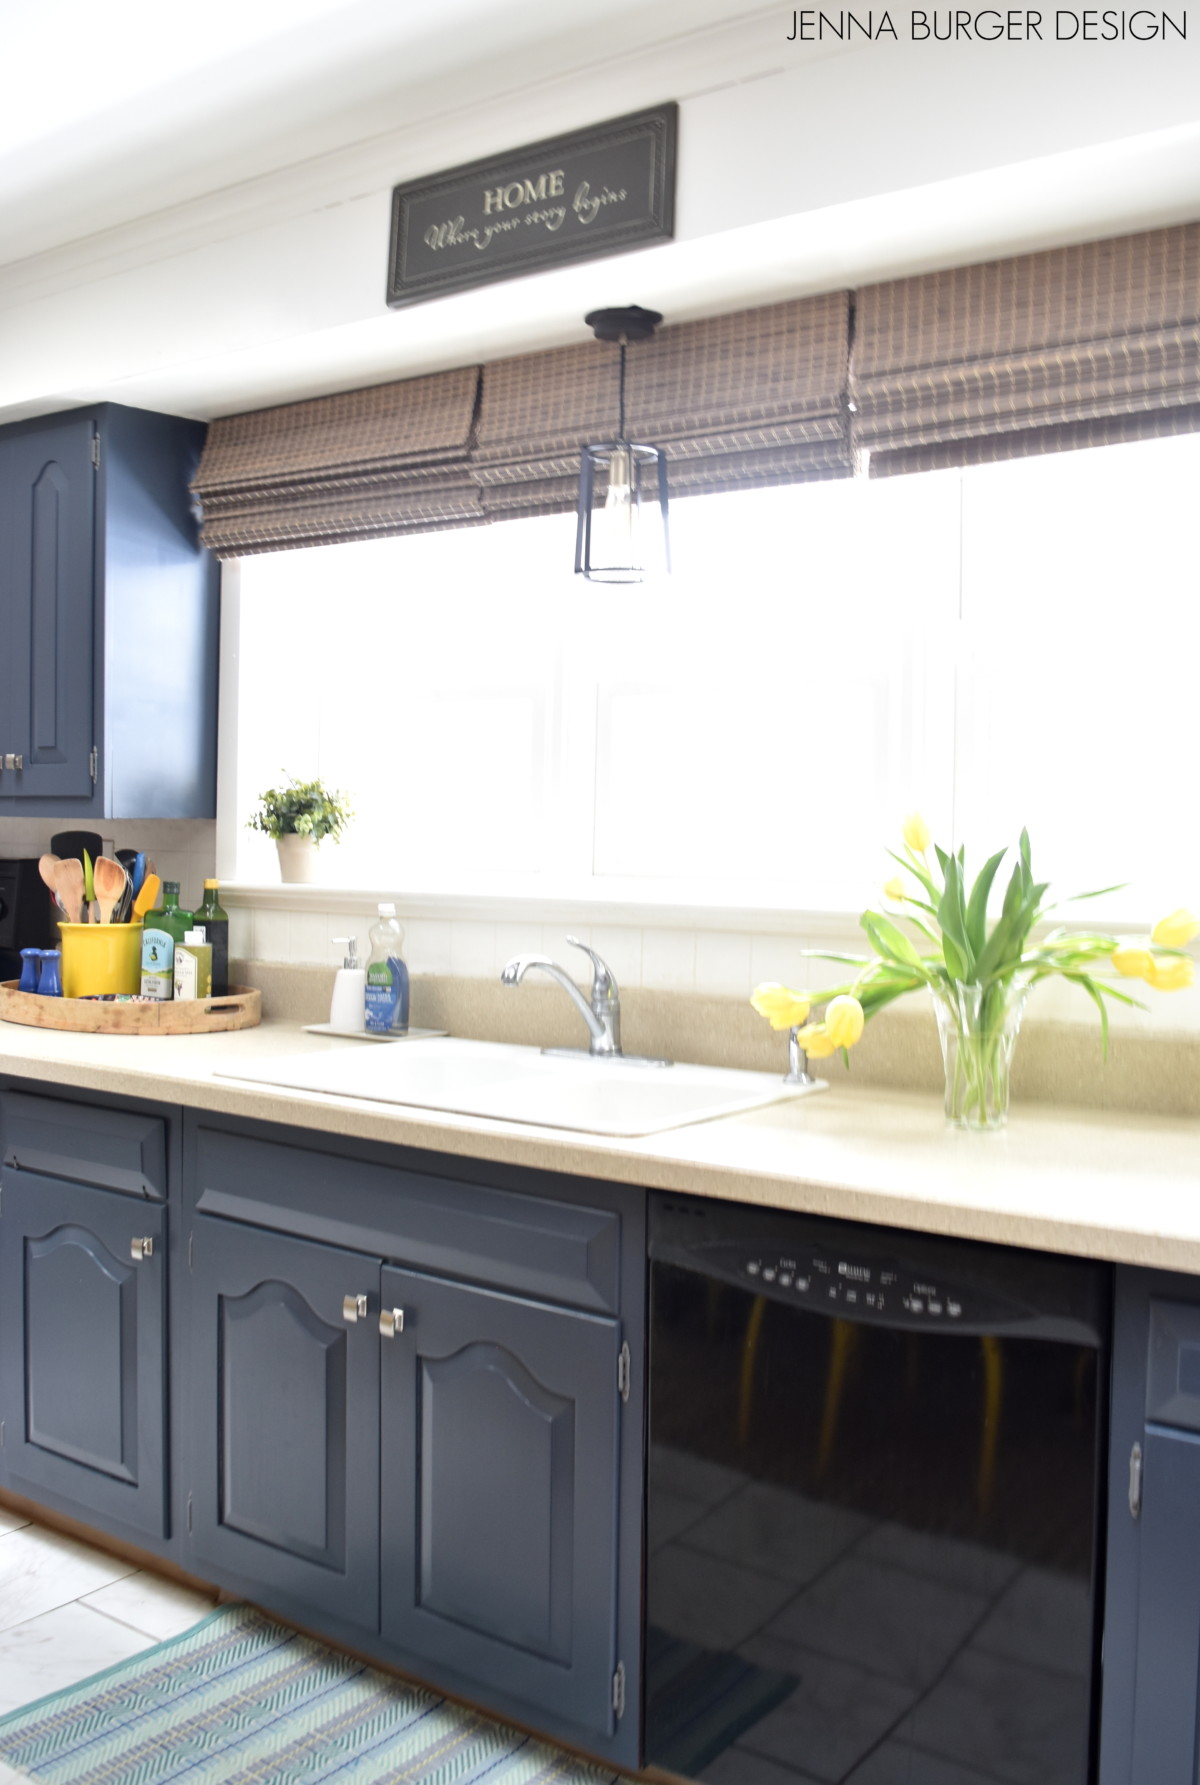
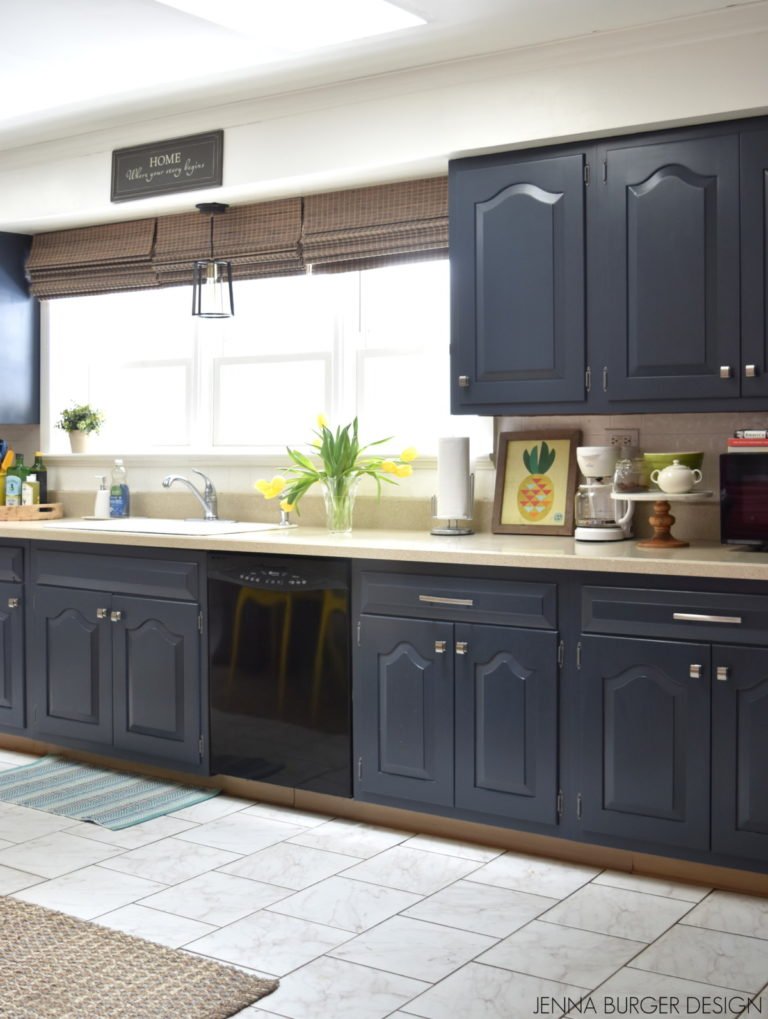
Despite the dark color on the cabinets, the space feels light + bright with the other lighter hues in the room. The window draws in beautiful natural light, along with the two skylights in the ceiling. The space is also offset by many lighter tones including a light brown laminate countertop, white subway tile, a light colored floor, and white paneling around the room – all of which is existing.

Aside from loving this deep moody hue, one of the reasons I thought the navy color would work well was to conceal the black appliances. They aren’t overly attractive (ie: they’re old and will eventually need replacing) so I thought a dark cabinet color would make the appliances blend in versus adding contrast as light or white cabinets would.

The kitchen space is significantly large and the cabinets run the full wall length. From one end to the other is about 20′. I’ve organized and reorganized the cabinet interiors a few times already to create as much function as possible while cooking. It’s amazing how many times I run back and forth to each end while making dinner – refrigerator, stove, refrigerator stove. This set up with one row of cabinets isn’t really the most ideal kitchen triangle, but it’ll work for now.

When we first started the makeover, one of the cabinet parts that had to go was the valance which was connecting the upper cabinets over the windows and concealing the fluorescent light behind. The scalloped valance was purely decorative and when removed, the space really opened up the window area. The fluorescent light was removed and in it’s place, I hung a new simple modern pendant.
The wallpaper border that was added to the bulkhead above the upper cabinets was also removed and the wall then had to get repaired and painted.
At the windows, I installed cordless roman shades in a driftwood color. The bamboo style shades add such beautiful texture and warmth. Being cordless it makes it so easy to lift and lower for privacy.

The cabinets and drawers adorn new stain nickel knobs and new stain nickel pulls, while the hinges were removed, cleaned up, spray painted, and reinstalled. It’s amazing what a freshened look new hardware can bring cabinetry.
The paint color of the cabinets is: Valspar Mystified 4011-8

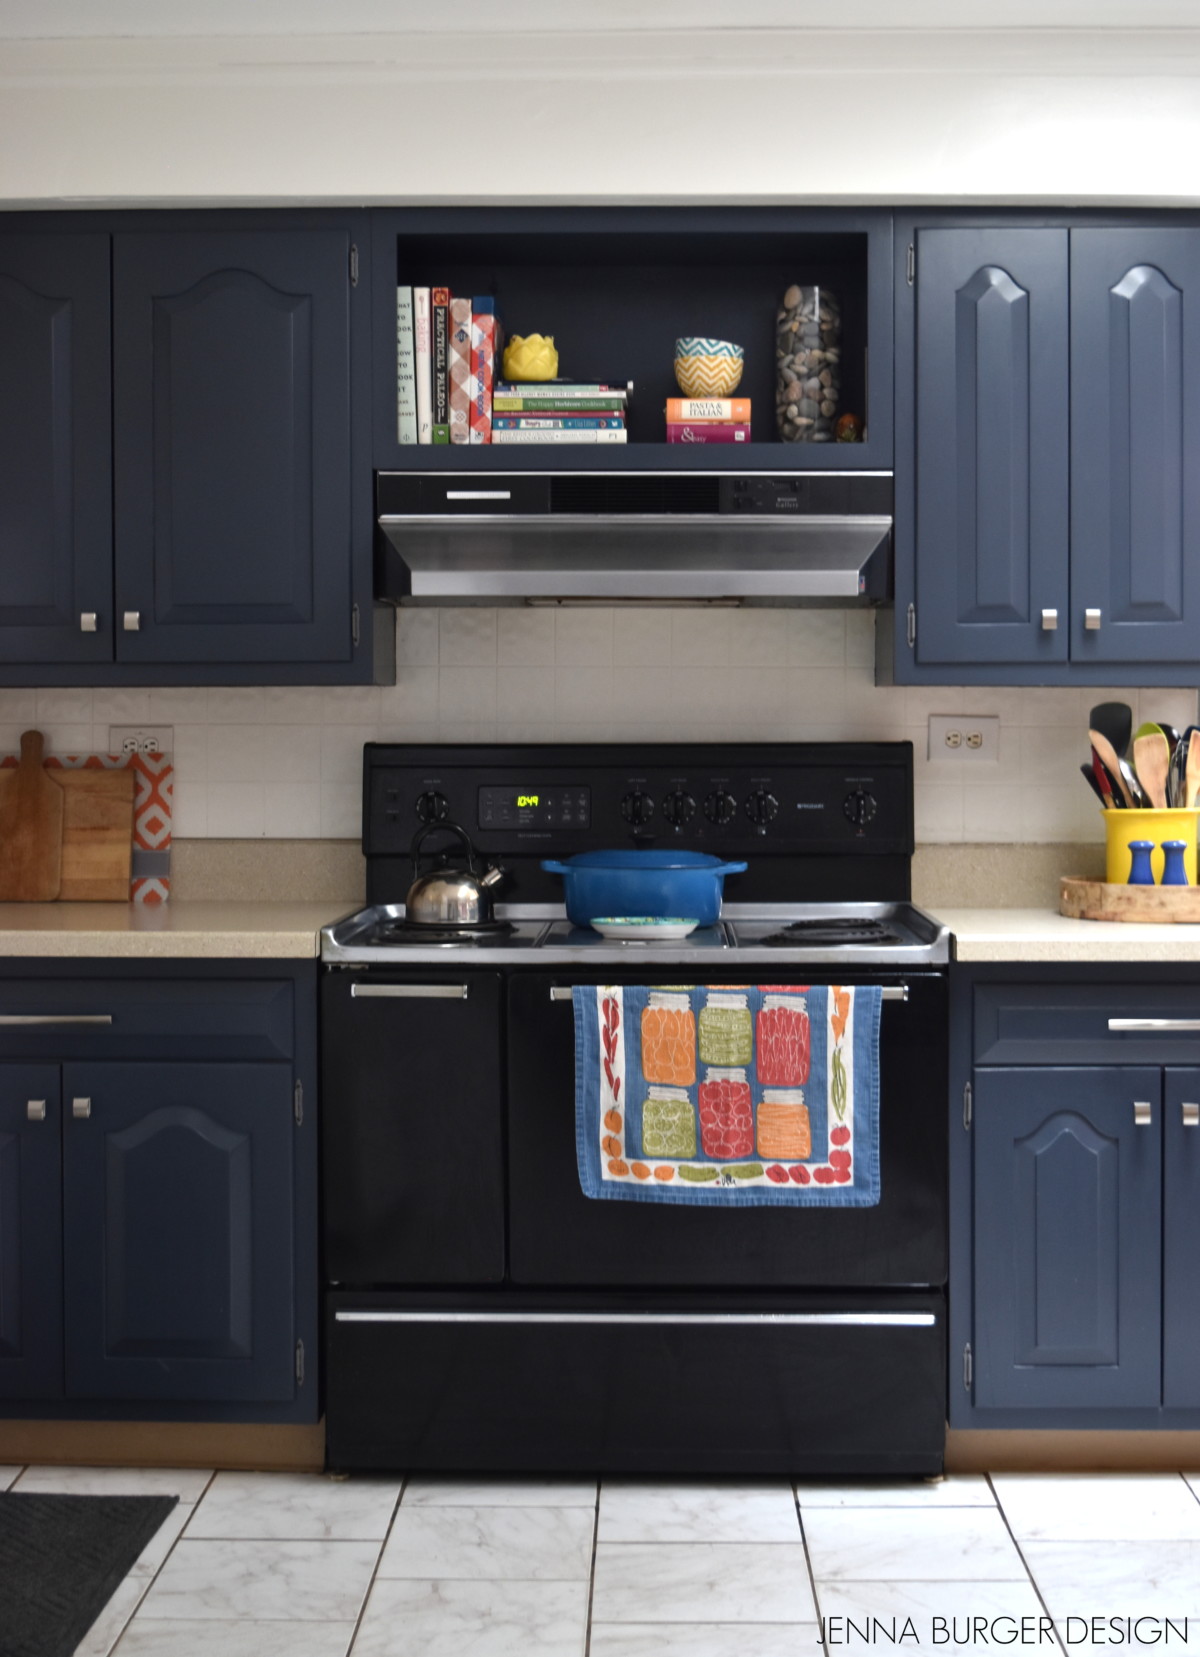
The cabinet above the range hood and the refrigerator are now open. Instead of reinstalling the doors, I chose to paint the interior of the two cabinets to display cookbooks, bowls, and kitchen items. I adored the open shelving in my last kitchen, so I took the opportunity to do something similar with this space. The bindings on the cookbooks and the colorful bowl exteriors give the space depth and a pop of interest.

The light cocoa colored counter is filled with many favorites including cutting boards that I use daily, a large yellow holder for utensils, olive oils that I use often for cooking, and of course tulips because this time of year we need a little sunshine in our lives!
This kitchen is a large space and it also duals as our dining area. The chandelier, dining table, chairs, and bench are all items we brought with us from our previous home. I was excited that they integrated so well in this new setting.

One new addition to the dining setting is the jute rug. The white floor isn’t ideal – it looks somewhat fake and dated in person – and there is a lot of it, so to break up the monotony, I brought in this rug which fits perfectly under the table. It’s soft on the feet and like the roman shades, it brings texture and warmth to the space.

So let’s chat about the refrigerator. It’s placement is very quirky. I’d love to know the backstory behind it’s positioning because for some reason, someone chose to create an alcove in the wall because the refrigerator was too wide to fit. I’m not sure why the cabinets couldn’t have been been shortened (there’s only 20’+ of cabinets), but this was their solution. Anyway, this is a funky part of the existing kitchen…
When we moved to this kitchen, we had to invest in a microwave. I loved my under-the-counter microwave in our last home. It was out of the way and rarely used, except to reheat coffee, but I had it. About a month into living here, I was tired of daily cold coffee, so a new micro was a must. I decided to tuck it away and position it next to the refrigerator so it wasn’t so striking and bulky on the countertop. It’s actually ideal because it creates a small nook to store large platters and trays.


My beloved coral colored china cabinet wasn’t left behind and is also beautifully displayed in the kitchen space. Another reason I chose the deep navy color for the cabinets is that navy and coral are a beautiful complimentary color palette. I knew they’d work well and be happy together in the same setting.

As a recap, a few before and after looks at the kitchen…


There is quite a bit more work that needs to go into fully finishing the kitchen. Up next is removing the wallpaper, painting the walls, replacing the base mouldings, and creating a command center like in our last home.
Overall, I am thrilled with the result of the painted cabinets. As in our last home when we DIYed the kitchen, it lasted about 5 years before we actually tackled a full-on kitchen renovation. I don’t foresee this being the forever kitchen in this home, but for now it’s a beautiful upgrade. Before taking on a big renovation, I am taking this time to understand how the kitchen would work and function best – it being so large and serving multiple purposes, it’s a tricky space.
Thanks for following along on this kitchen cabinet makeover! If you’re inspired and want to try making upgrades to your kitchen, shop the look…

DISCLAIMER: THIS KITCHEN REMODEL IS A COLLABORATION WITH LOWE’S. ALL OPINIONS + SELECTIONS ARE MY OWN.