
Tag: Bathroom Remodel

Master Bathroom Renovation: Tile + Grout

It’s been a few weeks and lots of progress has been made on the master bathroom renovation!

Last I left off, I shared details on the demo (which we hired a contractor to do) + the steps to prep the space for tile.  Once that part of the job was complete, it was my turn to step in.  Thankfully I’ve tiled before so there wasn’t too much of a learning curve, but I knew tiling 3 large walls from floor to ceiling would be time consuming…

And it was!  BUT… it’s so worth it.  Check out where I left you last time…

…And what the bathroom looks like now…

Woah! Big Difference!!

Once the tub was removed removal and the new shower pan + cement board walls were installed, it was time to tile!   To start, I chose the center point of the shower space – the back wall – and worked my way out and around the room using a 4″ x 12″ tile.  I marked out a level line at the base of the tile so the tile would be as plumb as possible.

It’s important for the first row to be about 1/8 – 1/4″ above the shower (same for a tub deck) – I used shims so the tile would not slide down.  Instead of filling the 1/8″ gap with typical grout (which could crack), I used an expandable caulk once the tile was completely installed.

I continued my way around the base of the shower pan and installed the tile on the plumb line. At that point I stopped for the evening (yes, most all of the tiling was installed at night when the kiddos were in bed) to let the first row of tile set.

HELPFUL HINT: Subway tile is the only tile that has a slight bevel, so there is no need to add a spacing/ joint between tiles. If you added a joint (using a spacer), the joints would be very large.  The ‘pro’ for using subway tile is they stack one on top of the other.  The ‘con’ for using subway tile is you have no wiggle room.  If a tile is off (when using spacers), you can cheat on the next tile or the next row, but not with subway since every tile butts next to each other.

The next evening I was back to work installing one tile at a time… row by row as I made my way around the shower.

Master Bathroom Renovation: DEMO!

Hi All!

Last I left you, I mentioned we were about to undergo a major renovation of the master bathroom. It was a space that got a DIY makeover a few years back, but with wear + tear it was time for an overhaul.

As much as I adore color, I could only image this new bathroom to be soft + serene and clean + calm. The overall aesthetic will be based more on texture rather than color. Plus layers will add an important element to give the overall space contract + depth.

Just to share a reminder of the ‘before’ space…

Master Bathroom 'BEFORE' the renovation, JENNA BURGER DESIGN

The morning of demo day, I snapped the picture above of the bathroom, and in no time the contractors got to work…

Demo Day for the Master Bathroom renovation, JENNA BURGER DESIGN

From the tub to the vanity to the toilet, everything was ripped out!

As I mentioned in my last post, this renovation is a dual endeavour.  Due lack of time + components outside our skill set, we are taking on some areas of the renovation, while other areas will be performed by a contractor.  As I previously said, I don’t want to be without a bathroom for months AND I want to stay sane (somewhat).

The contractors are tackling the major areas including demo + installing the main components – shower pan + fittings, toilet, vanity + faucet.

DAY ONE

On the first day, the three-man crew removed the existing pre-fab tub, the sheetrock above the tub, the toilet, and the vanity.  It’s a small space, but by lunch time, the space was cleared out…

Instead of installing a new tub, we decided to use the 30″ x 60″ outcove for a shower.  After the tub + sheetrock was removed, the space was ready for the new shower pan.  For the new tile to adhere to, hardiboard (also known as cement board or backerboard) was installed.

Sheetrock is still a great product for the walls and ceiling of a bathroom, just not in the tub/shower area. Cement board is made with actual cement + a firberglass mesh exterior, so it’s waterproof and won’t deteriorate over time when/if it comes in contact with water.

Additionally, the new vanity that I chose is 48″ whereas the existing is 36″… I’m gaining 12″ of counterspace – I’m over the moon! Because of this change, the electrical wiring for the light needs to be moved so it will be centered on the new 48″ space.

By days end, this was the result…

Demo Day for the Master Bathroom renovation, JENNA BURGER DESIGN

Demo Day for the Master Bathroom renovation, JENNA BURGER DESIGN

Check out the purple wall color that was behind the toilet…  it was from before we renovated the last bathroom…  Gosh that color is ghastly and I was hoping to never see it again, ha.

DAY TWO

On the second day of renovation, the new shower pan was installed and the remainder of the space got prepped for tile.  After another day’s work, it was my turn to step in to install the tile.

Here’s a peak of how the finished cement board looks upon installation with the new shower pan…

It’s ready for me to tile!

Installing the tile for a master bathroom renovation, JENNA BURGER DESIGN

More details of the master bathroom renovation coming soon.

I gotta get back to tiling…

Oh, and I’m still deciding on the accent tile.  Any suggestions?  What do you like best??

Accent Tile Options

DISCLAIMER: THIS BATHROOM RENOVATION IS A COLLABORATION WITH LOWE’S. ALL OPINIONS + SELECTIONS ARE MY OWN.

Master Bathroom Renovation: Plan + Mood Board

It’s been quite some time – about a year – since we tackled a full-on big room renovation.  To put it plain + simple, the kitchen remodel last Fall just wiped me out… and we didn’t even do too much on our own. When it was done, I was desperate for a break.  Then life got busy. Sports. Work. School. Appointments. You know the drill…  But when this past Summer turned into Fall and the kids were back to school and a everyday routine was once again established, I was finally feeling the itch to get my hands dirty… again.

If you remember back about 4-1/2 years ago, one of the last spaces in our home to get attention after moving in was the master bathroom.  The walls were a horrendous purple/pink hue with dated + dusty brass accents.  It all had to go…

Master Bathroom 'before' renovation - JENNA BURGER DESIGN

…but it didn’t all go.

With a few cans of paint, I transformed the walls, the trim, and the cabinet with a whole new color palette. Then to finish it, I laid a new floor using luxury vinyl tile, hung a new mirror, and changed the light. A few hundred dollars later, and the space was completely transformed… for the most part.

DIY Master Bathroom renovation - JENNA BURGER DESIGN

DIY Projects:
How to Paint + Glaze a Cabinet
How to Make a Curtain into a Shower Curtain
How to Install Luxury Vinyl Tile (to look like ceramic tile)

And if you can believe it, the renovated space even ended up in a national publication, Kitchen + Bath makeovers, Fall/Winter 2014 

Better Homes & Garden Kitchen + Bath Makeover magazine - SAS Interiors Kitchen and Master Bath feature

Bathroom Makeover featured in KBMO Fall/Winter 2014, produced by Donna Talley & photographed by John Bessler

But after 4 years of using the bathroom day in + day out, it needed a makeover. A real makeover. The pre-fab tub was drear and the builder-grade cabinet had seen it’s life span.

I envisioned Carrara. White. Clean. Fresh. Fun…

…And created a vision board.

Master Bathroom Renovation mood board - JENNA BURGER DESIGN

eek!  It’s all so pretty and fabulous.

Sophisticated, but casual.

Elegant, but inviting.

I am really excited about this new bathroom. You know me, I adore a striking + bold color, but for this space, I need it to feel tranquil and serene.  With being pulled in 92 directions each day, I want to start off and end each precious day in a calming way.

Thanks to my friends at Lowe’s, who I have worked with for years, for choosing to partner with me on this project to create an inviting and peaceful place.

Here is what I have planned…

> The tub will be changing from a pre-fab bathtub to a shower with a frameless rolling glass door

> New Tile will be added from floor to ceiling in the tub space and will continue on the entire wall of the vanity

> The main tile will be 4 x 12 white subway with an accent glass/natural mosaic tile

> The walls will be painted a light mint green hue

> The 36″ vanity will be replaced with a 48″ vanity in a dark gray finish to give contrast and a white cararra countertop will be added to give a finished luxury look

> To finish the space, artwork and a fabric window valance in hues of blue will add pattern and color

These are the specific items I plan to use (and are shown in the mood board above):

Vanity
Toilet
Shower Door
Main Subway Tile
Glass Mosaic Tile
Sconce
Mirror
Artwork
Fabric Valance

This is the overall layout plan + elevations that I created:

Floor Plan

Bathroom Elevation

DIY + Calling in the PROS!

This bathroom renovation, like the last one I tackled, isn’t going to be a devoted do-it-yourself project.  For 2 reasons.  One, I don’t want to be without a bathroom for months AND I want to stay somewhat sane. Two, other than the basics, the Mister & I don’t know much about plumbing and leave those things to the experts.

As with the previous bathroom renovation, we worked with a contractor to demo the bathroom and install the major components.  What is on our list to tackle for this renovation is: tile installation (there’s A LOT of tile!), paint, baseboard, installing the light, installing the accessories, hanging artwork, etc.

By splitting up a project with tackling some of it on our own and calling in the pros where needed, we’ll save money AND our sanity (i hope)!

There you have it… for now.

Demo has begun.  Wish me luck.  I’ll need it 😉

DISCLAIMER: THIS BATHROOM RENOVATION IS A COLLABORATION WITH LOWE’S. ALL OPINIONS + SELECTIONS ARE MY OWN.

Budget Bathroom Renovation Reveal

What a whirlwind of a week. Renovation of the kitchen is underway, which is keeping me busy, but I had a few moments over the past days to sit + reflect + appreciate all the kind comments that were left on the blog + + Instagram & Facebook about the plan of action for the new space. It’s going to quite a ride over the coming weeks. More on that soon!

In the meantime, I am excited to share a before & after bathroom renovation that I recently completed for a client / friend.

Budget BATHROOM RENOVATION Reveal: Before + After of this cool-toned cottage style bathroom by www.JennaBurger.com

This bathroom remodel was a labor of love! With a tight budget in mind, smart solutions + affordable, yet stylish choices were a must. Some elements had to stay, but others – like the vintage clawfoot tub – were a MUST TO GO!

When my friend reached out to me about freshening up the bathroom space – which is the only bathroom on the 2nd floor of her 1920s home – the major need/want was a new tub. The overall look & feel of the space were also important and for that I created a Vision Board that suited their style & was an extension of the rest of their home.

Design Board for the Budget BATHROOM RENOVATION Reveal: Before + After of this cool-toned cottage style bathroom by www.JennaBurger.com

Let’s take a step back to see what the ‘before’ space looked like…

BEFORE.

With budget in mind, all the plumbing fixtures needed to stay in the existing locations but be upgraded.

The toilet would be swapped out…

Before Bathroom

The pedestal sink (with absolutely NO surface space) would be changed out for a new 5′ long cabinet with storage!

Before Bathroom

The clawfoot tub, which looked beautiful but wasn’t functional at all for this family of 4, was the main focus for this bathroom renovation. The tub went from a clawfoot style to a built-in tub with custom tile surround – more on that in a bit.

Before Bathroom

Before Bathroom

Additionally, different decor was added to the walls, the laundry area got a fresh coat of paint, and a new mirror + light were installed.

Once the design was complete, the items were ordered + delivered, the contractor was able to get started. Of course, with all renovations there were a few hiccups along the way, but the renovated bathroom was soon complete and has been the highlight ever since!

AFTER.

Welcome to this new serene + sophisticated cottage-style bathroom…

Budget BATHROOM RENOVATION Reveal: Before + After of this cool-toned cottage style bathroom by www.JennaBurger.com

What a change!

The pedestal was replaced with a 5′ long vanity that not only has more surface area for getting ready in the morning, but there is plenty of storage below – closed and open.

One tricky part of this bathroom was the existing baseboard heaters. With a 20″ distance between the heaters, the pedestal base fit just perfect. But a vanity wouldn’t. The challenged lied in finding a vanity that not only fit the aesthetic for the space, but also had legs that could be removed / notched in the back to fit around the heaters. Take a 2nd look at the picture above… Do you see the missing legs in the back?

Budget BATHROOM RENOVATION Reveal: Before + After of this cool-toned cottage style bathroom by www.JennaBurger.com

Another challenge was the small space – again only about 24″ – between the 2 windows to fit a new mirror and light. The mirror width just fit.

Tile was added to the backsplash above the vanity, which was a beautiful addition that ties into the tile in the tub.

Budget BATHROOM RENOVATION Reveal: Before + After of this cool-toned cottage style bathroom by www.JennaBurger.com

Budget BATHROOM RENOVATION Reveal: Before + After of this cool-toned cottage style bathroom by www.JennaBurger.com

The toilet was an easy switch to a new style. Above, floating decorative shelves were installed to hold baskets and fun layers.

Making way around the new bathroom, the clients chose to hang their vintage horse hooks for the towels. This was in their previous bathroom and I love that they reused them in this new space.

Budget BATHROOM RENOVATION Reveal: Before + After of this cool-toned cottage style bathroom by www.JennaBurger.com

Above are black and white pictures from their travels.

Budget BATHROOM RENOVATION Reveal: Before + After of this cool-toned cottage style bathroom by www.JennaBurger.com

Budget BATHROOM RENOVATION Reveal: Before + After of this cool-toned cottage style bathroom by www.JennaBurger.com

Budget BATHROOM RENOVATION Reveal: Before + After of this cool-toned cottage style bathroom by www.JennaBurger.com

Ah, the new tub area! What a big change. No more clinging plastic shower curtains while in the tub.

For this area of the bathroom, we designed a wall to the right of the entry door which allowed the new tub to be tiled on 3 sides. The new wall was built thicker than a typical 4″ wall and a vertical niche was created for holding shampoos, soaps, etc.

Budget BATHROOM RENOVATION Reveal: Before + After of this cool-toned cottage style bathroom by www.JennaBurger.com

The main tile in the tub area is a white 3 x 6 subway and a glass accent tile was added on the 3 walls as border + was used in the backs of the niches.

This accent tile is what was also used for the backsplash above the vanity.

Budget BATHROOM RENOVATION Reveal: Before + After of this cool-toned cottage style bathroom by www.JennaBurger.com

Budget BATHROOM RENOVATION Reveal: Before + After of this cool-toned cottage style bathroom by www.JennaBurger.com

As I shared above, this bathroom is really big, but it’s also the only bathroom on the 2nd floor. It not is filled with bathroom essentials, but also houses the laundry area.

The washer + dryer sit side-by-side and fit in a closet with shelving above. A large, luxe laundry would have been ideal in a dream world, but it wasn’t feasible, so we upgraded the space.

LAUNDRY BEFORE.

Beore Bathroom + Laundry

The walls of the laundry were painted a deep turquoise color & new sturdier shelving was hung. A clean space was created using beautiful baskets.

LAUNDRY AFTER.

Budget BATHROOM RENOVATION Reveal: Before + After of this cool-toned cottage style bathroom by www.JennaBurger.com

Budget BATHROOM RENOVATION Reveal: Before + After of this cool-toned cottage style bathroom by www.JennaBurger.com[this laundry makeover was actually the inspiration for my laundry revamp]

Lastly, the one element that was an eye sore before, but took on a new life after the renovation was the floor. The ceramic tile on the floor was discussed a lot and at length. In the end, because of the size of the bathroom, the cost to remove + replace the floor with new material would have cost way too much. Plus the additional time without a working bathroom would have been just shy of a nightmare.

Once all the new fittings + fixtures were installed, the client had the grout professionally cleaned and with a new rug – a 4′ round jute – was added. Today, with the new cooler colors + all the other beauty in the space, your eye never steers to the floor.

Budget BATHROOM RENOVATION Reveal: Before + After of this cool-toned cottage style bathroom by www.JennaBurger.com

And that’s a wrap, except for 2 pictures I couldn’t resist sharing… On the day of photoshooting this bathroom renovation, I brought my daughter with me. In true style, Bring Your Daughter to Work day!

Budget BATHROOM RENOVATION Reveal: Before + After of this cool-toned cottage style bathroom by www.JennaBurger.com

Budget BATHROOM RENOVATION Reveal: Before + After of this cool-toned cottage style bathroom by www.JennaBurger.com

Another blah to beautiful transformed space!

Looking for something similar in your home, check out the resource links below to get you started…

Design Board for the Budget BATHROOM RENOVATION Reveal: Before + After of this cool-toned cottage style bathroom by www.JennaBurger.com

// 1 – Paint Palette:
// 2 – Light Fixture
// 3 – Floating Shelves
// 4 – Black & White framed pictures (by client)
// 5 – Valance (I made them – DIY tutorial for simply box valance)
// 6 – Oval Tilt Mirror
// 7 – Vanity Top
// 8 – Cabinet
// 9 – Bathroom Faucet
// 10 – Toilet
// 11 – Accessories
// 12 – Tub / Shower Fittings
// 13 – Shower Curtain
// 14 – 3 x 6 White Subway Tile
// 15 – Glass Accent Tile
// 16 – 4′ Round Jute Rug
// 17 – 5′ Tub
// 18 – Basket

RECAP.

A before & after comparison…

Budget BATHROOM RENOVATION Reveal: Before + After of this cool-toned cottage style bathroom by www.JennaBurger.com

Budget BATHROOM RENOVATION Reveal: Before + After of this cool-toned cottage style bathroom by www.JennaBurger.com

Budget BATHROOM RENOVATION Reveal: Before + After of this cool-toned cottage style bathroom by www.JennaBurger.com

Thanks for checking out this budget bathroom reveal. It was such a great project to be a part of. I’ve worked on many client projects this year, which I will be sharing soon!

For now, I gotta get back to my kitchen reno…

Bathroom Makeover: Reveal

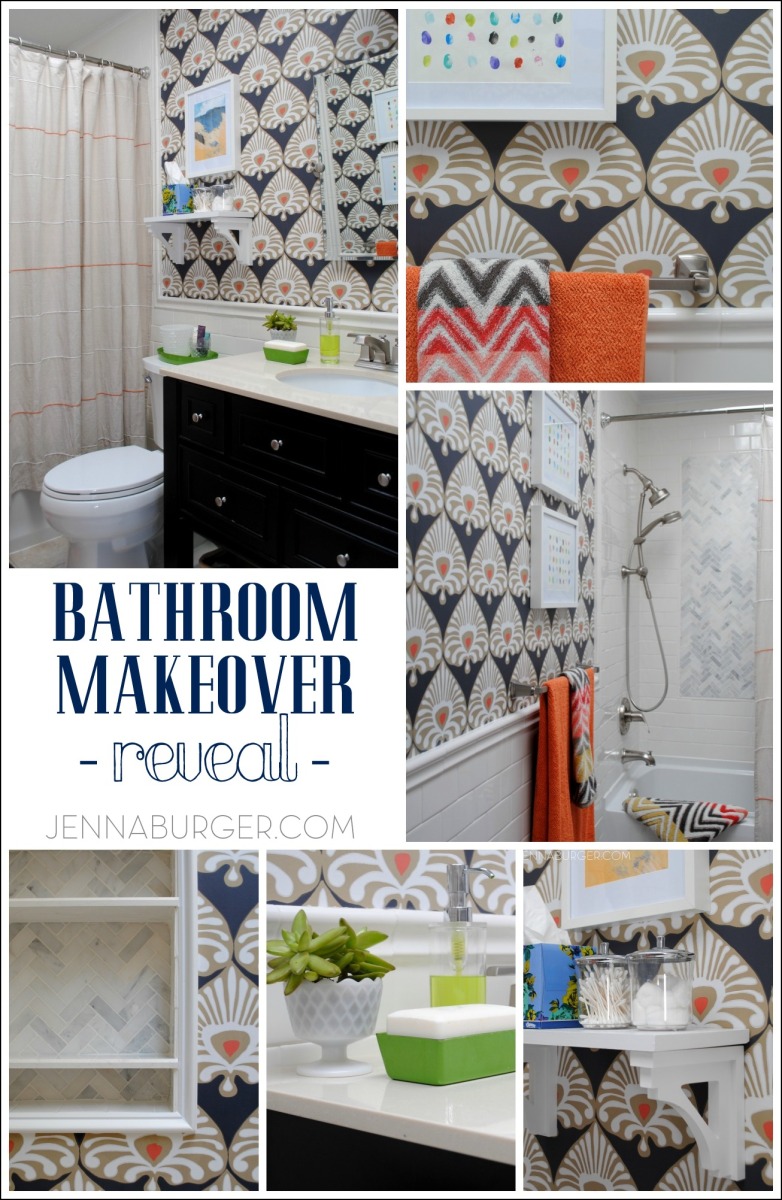
The day is finally here… reveal day of the Bathroom MakeoverThe project that I challenged myself to do in 30 days.  Keeping reading (till the end) to see if I accomplished the goal…

The finished space has taken a wee bit longer than planned to share, but with the holiday high, I got a bit sidetracked.  Good news, Good news… the bathroom is done and has been for a few weeks.  I was planning on sharing the reveal sooner, but thought it would be best to wait till after the Christmas craze.

Without further ado, here it is…

Bathroom Makover with 95% of the space being a DIY project - new tub + tile, vanity, wallpaper, and more!  Lots of details on this multi-post before & after.  Bathroom makeover by Jenna Burger Design www.jennaburger.com

As always, I love partnering with Lowe’s on projects and this bathroom makeover wasn’t any different.  I have worked with Lowe’s on so many projects over the years and not only am I thrilled to be apart of their Creative Team, but I truly love their product line.  Minus a few elements, this entire space was pretty much created using in-stock items that can be found in most of their stores.  How great is it not to have to order and wait 8 weeks for something to arrive?!  Grab & go today – that’s a bonus in my book. (I wasn’t paid to say any of that and am sharing my true, honest thoughts!)

Before sharing more of the ‘after’, I have to state that bathrooms – in my opinion – are so difficult to photograph because of the limited size of the space.  I’m not a pro photog, so I tried capturing it the best I could.  That being said, let’s get to it.

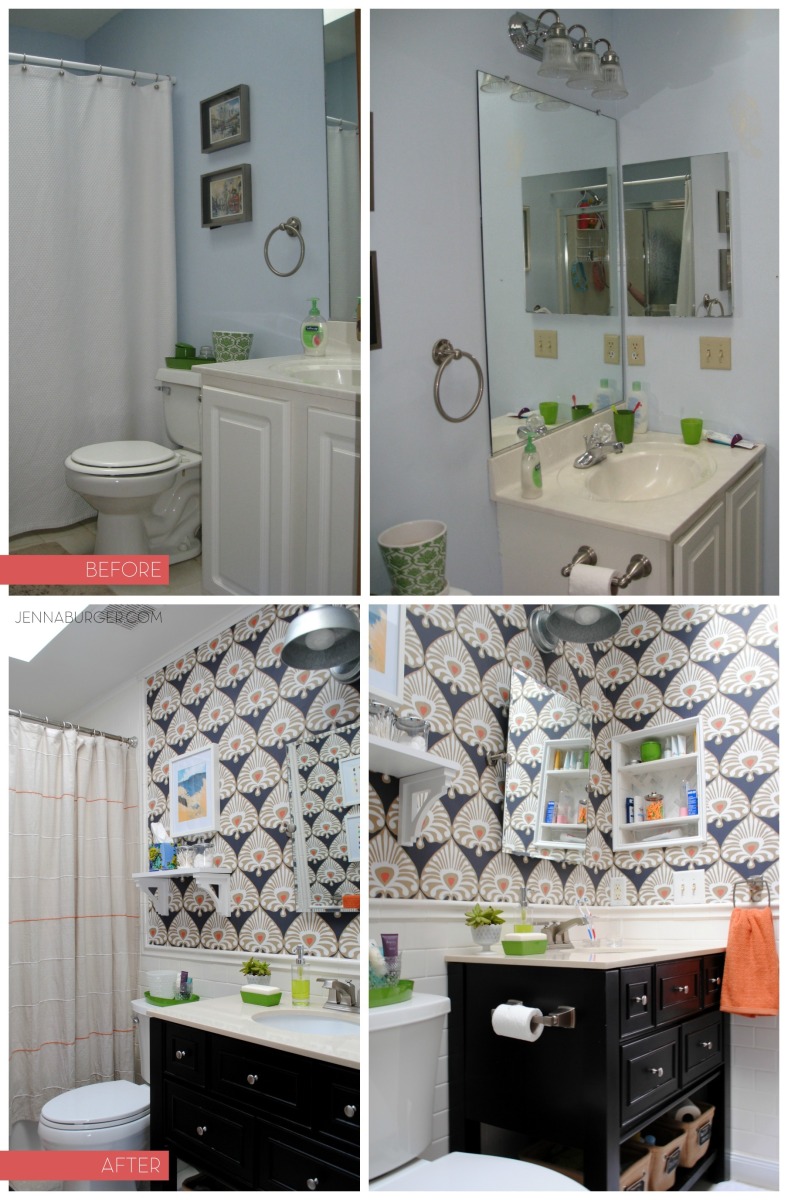
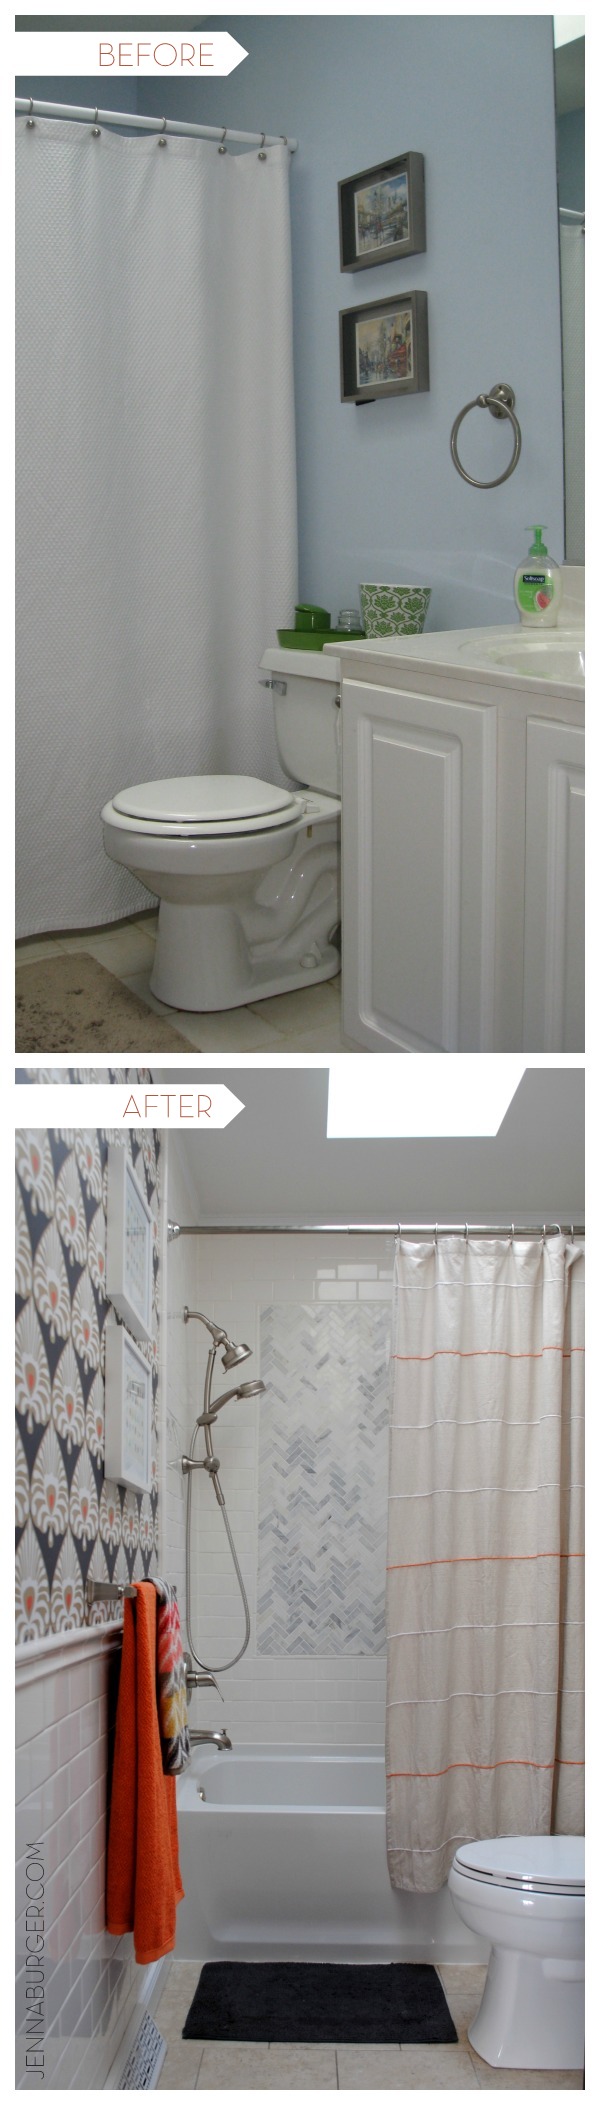
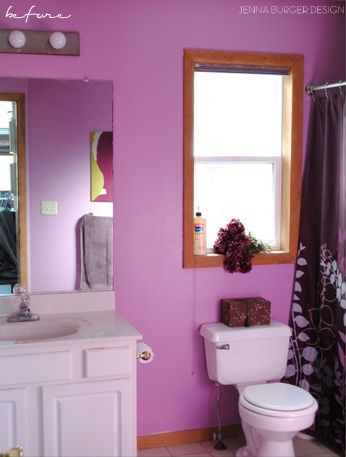
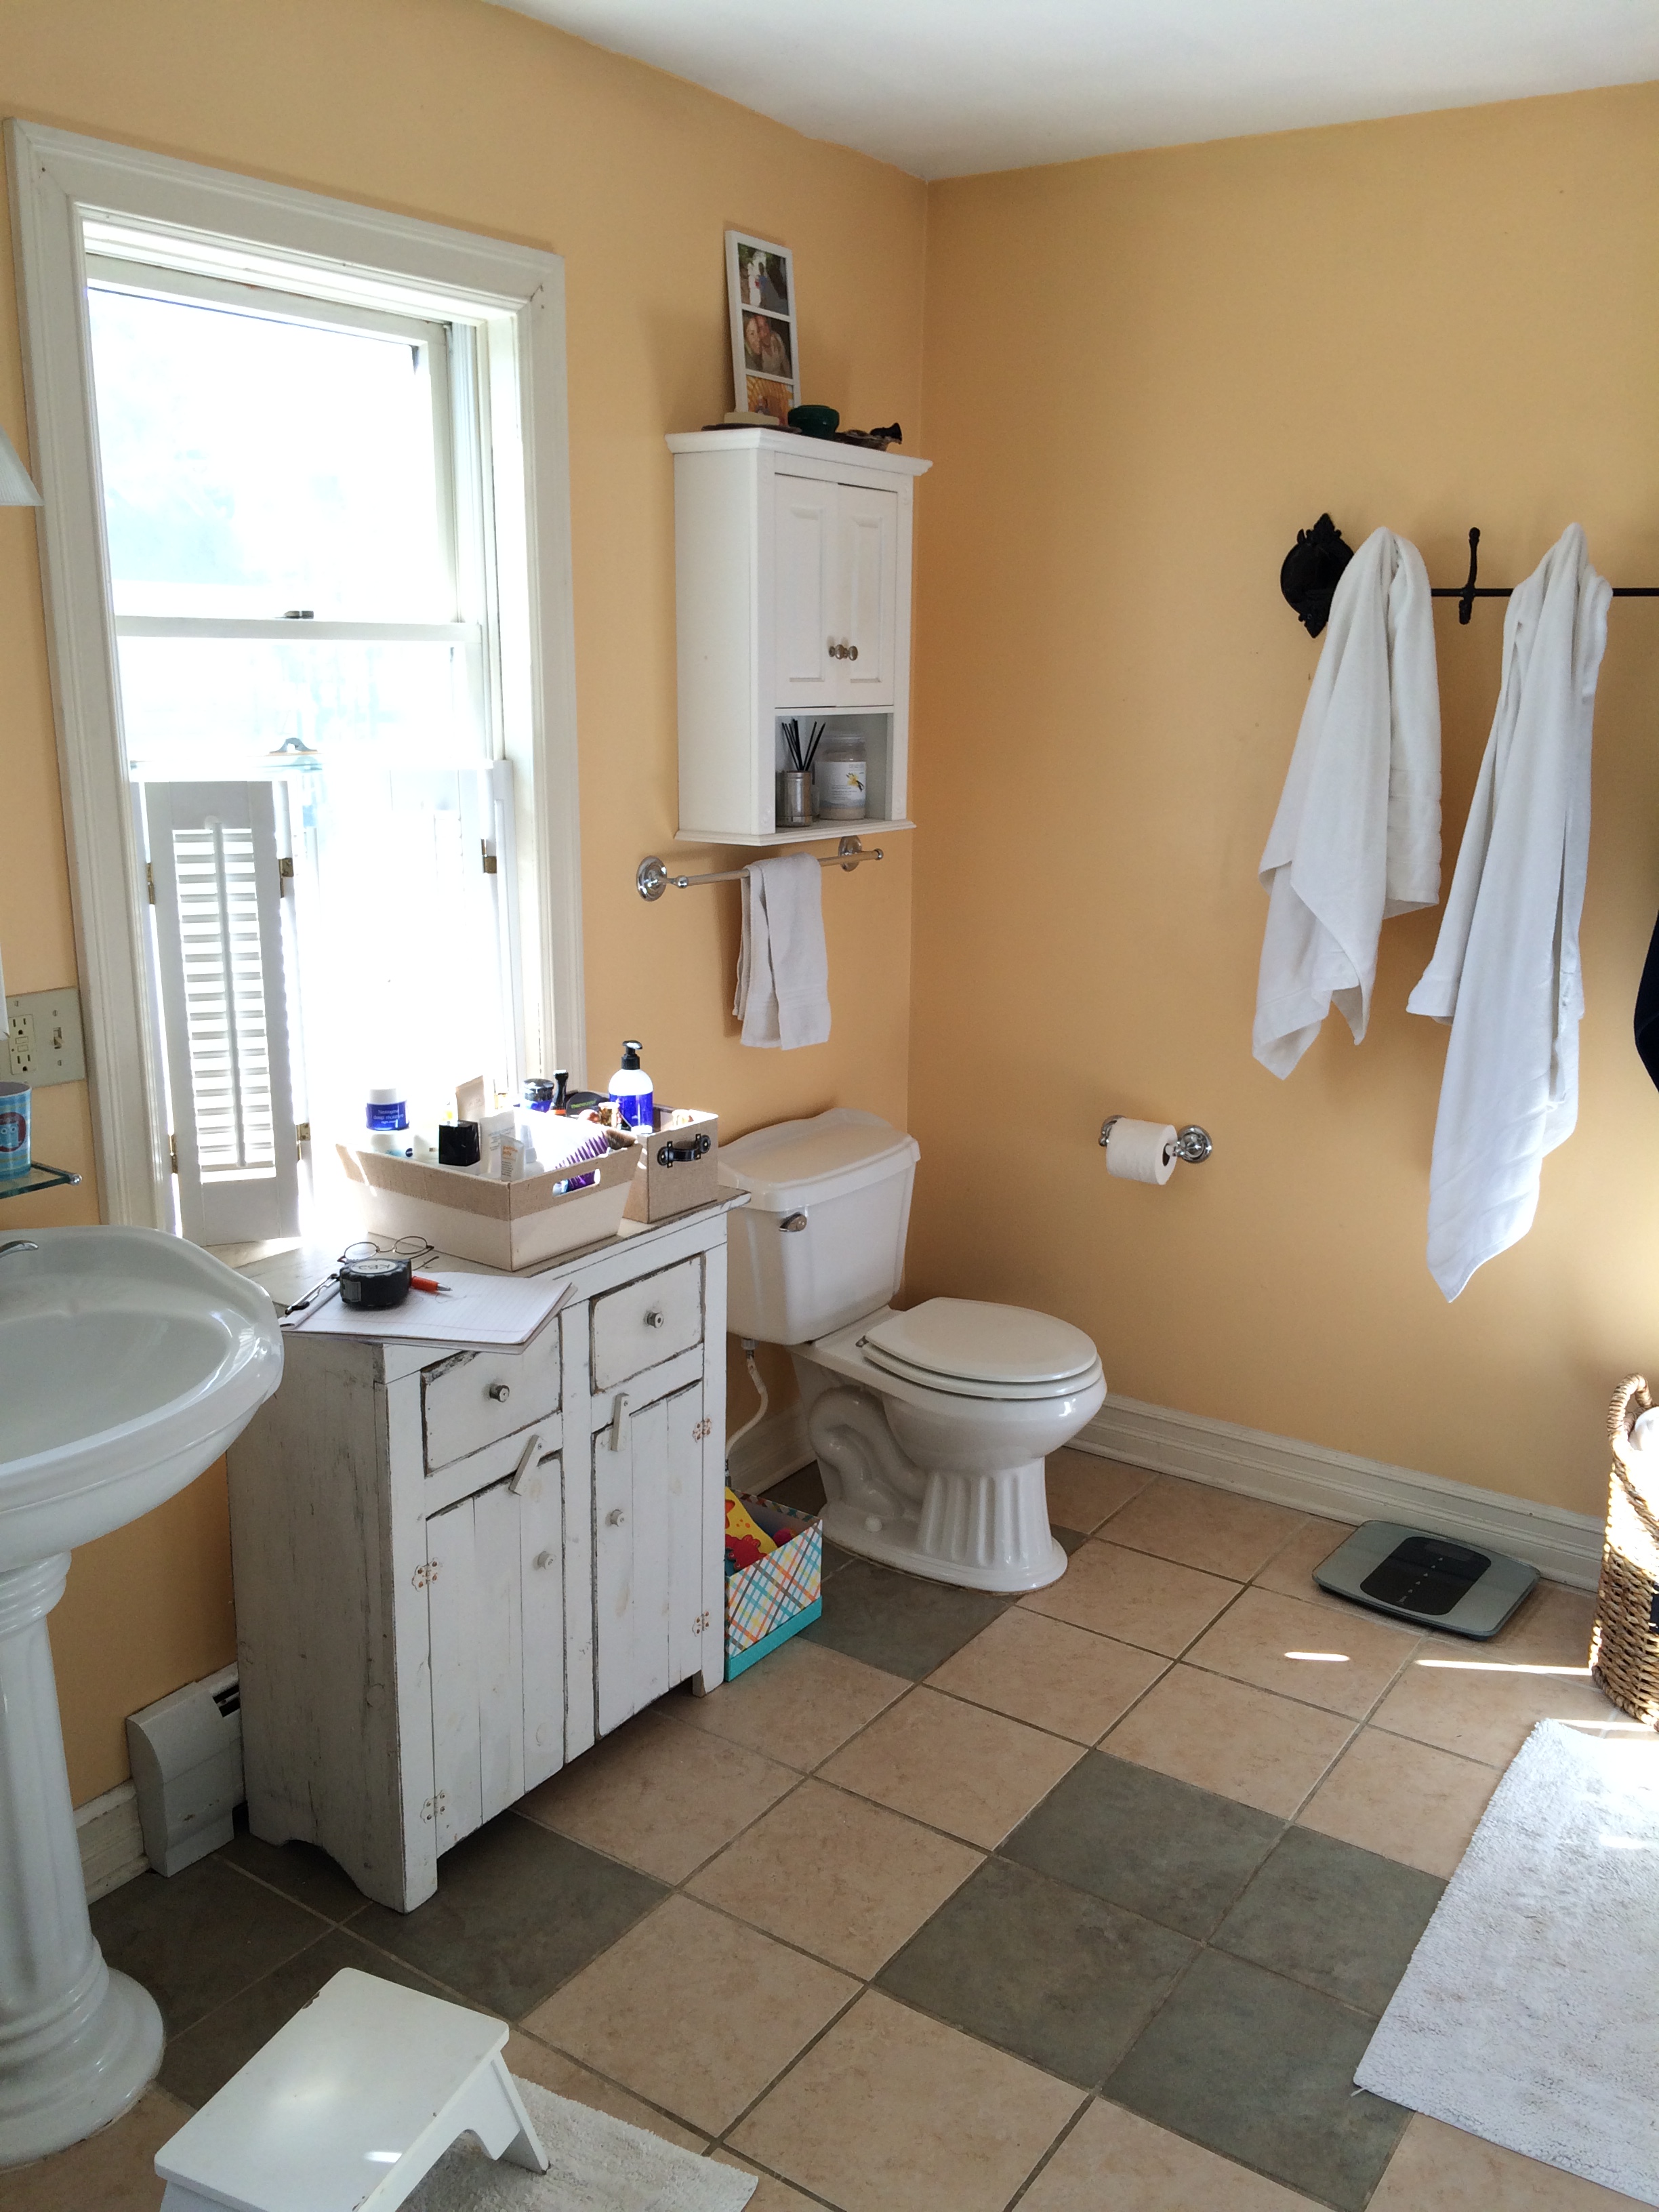
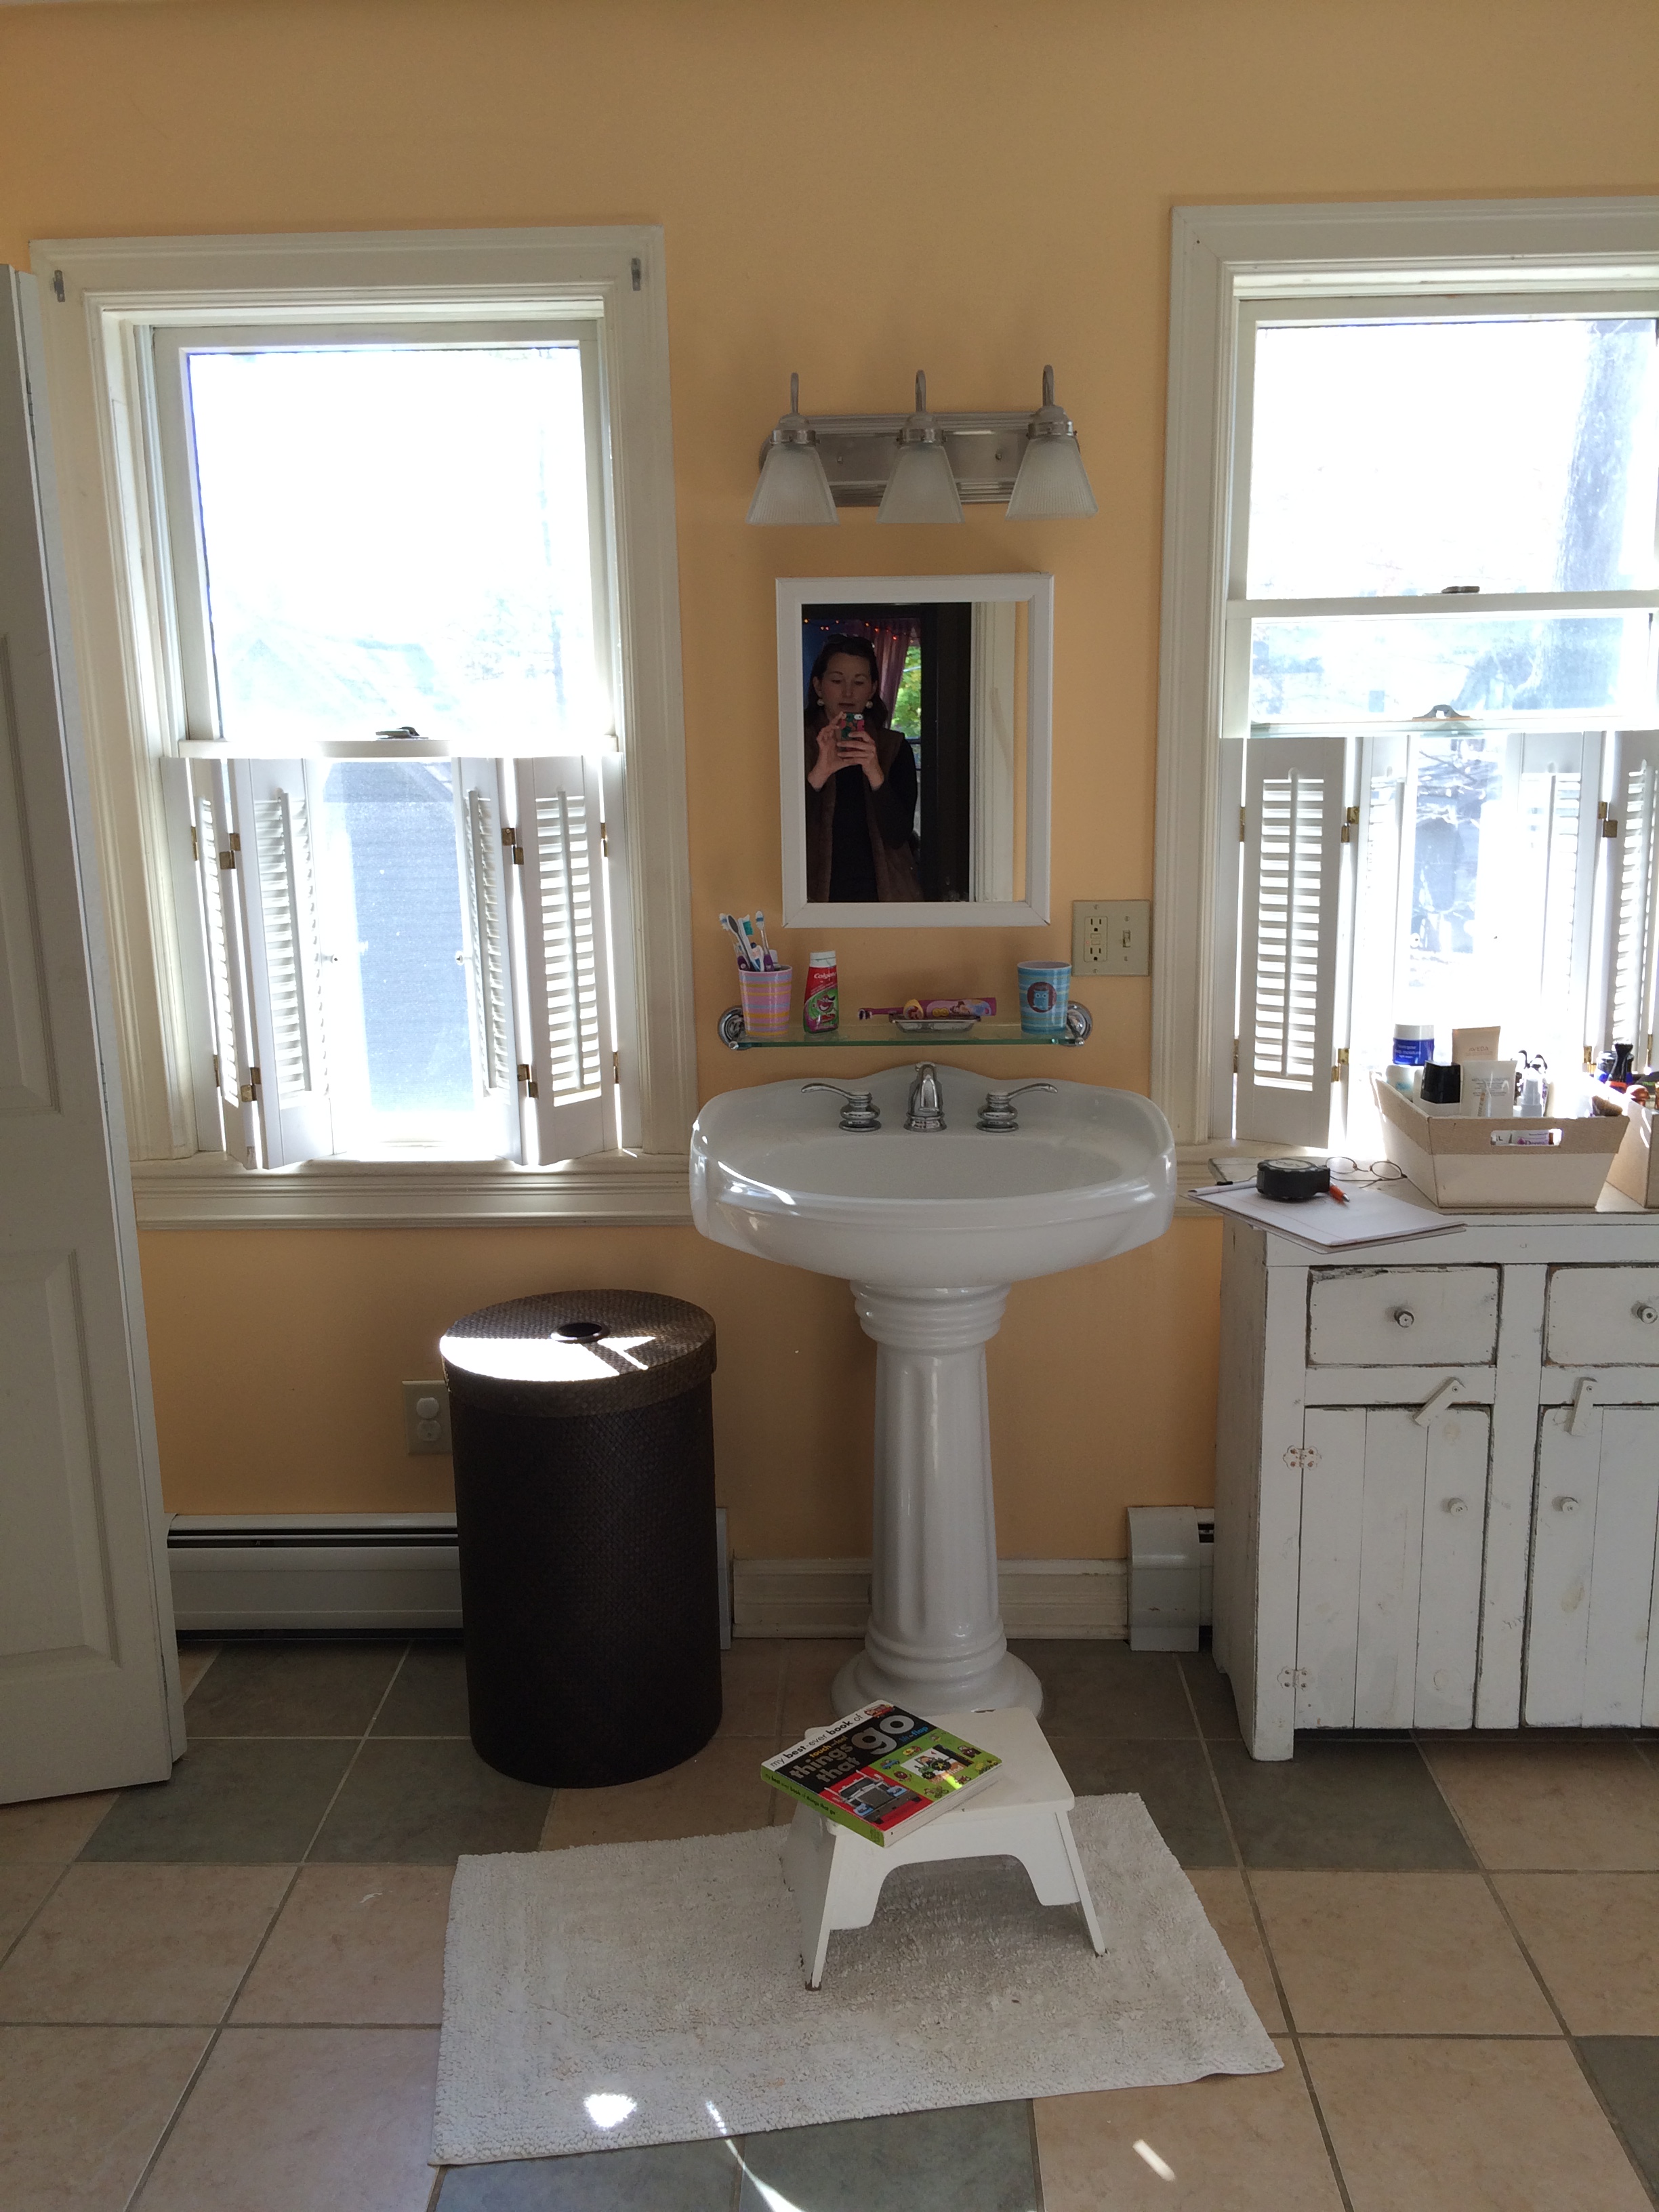
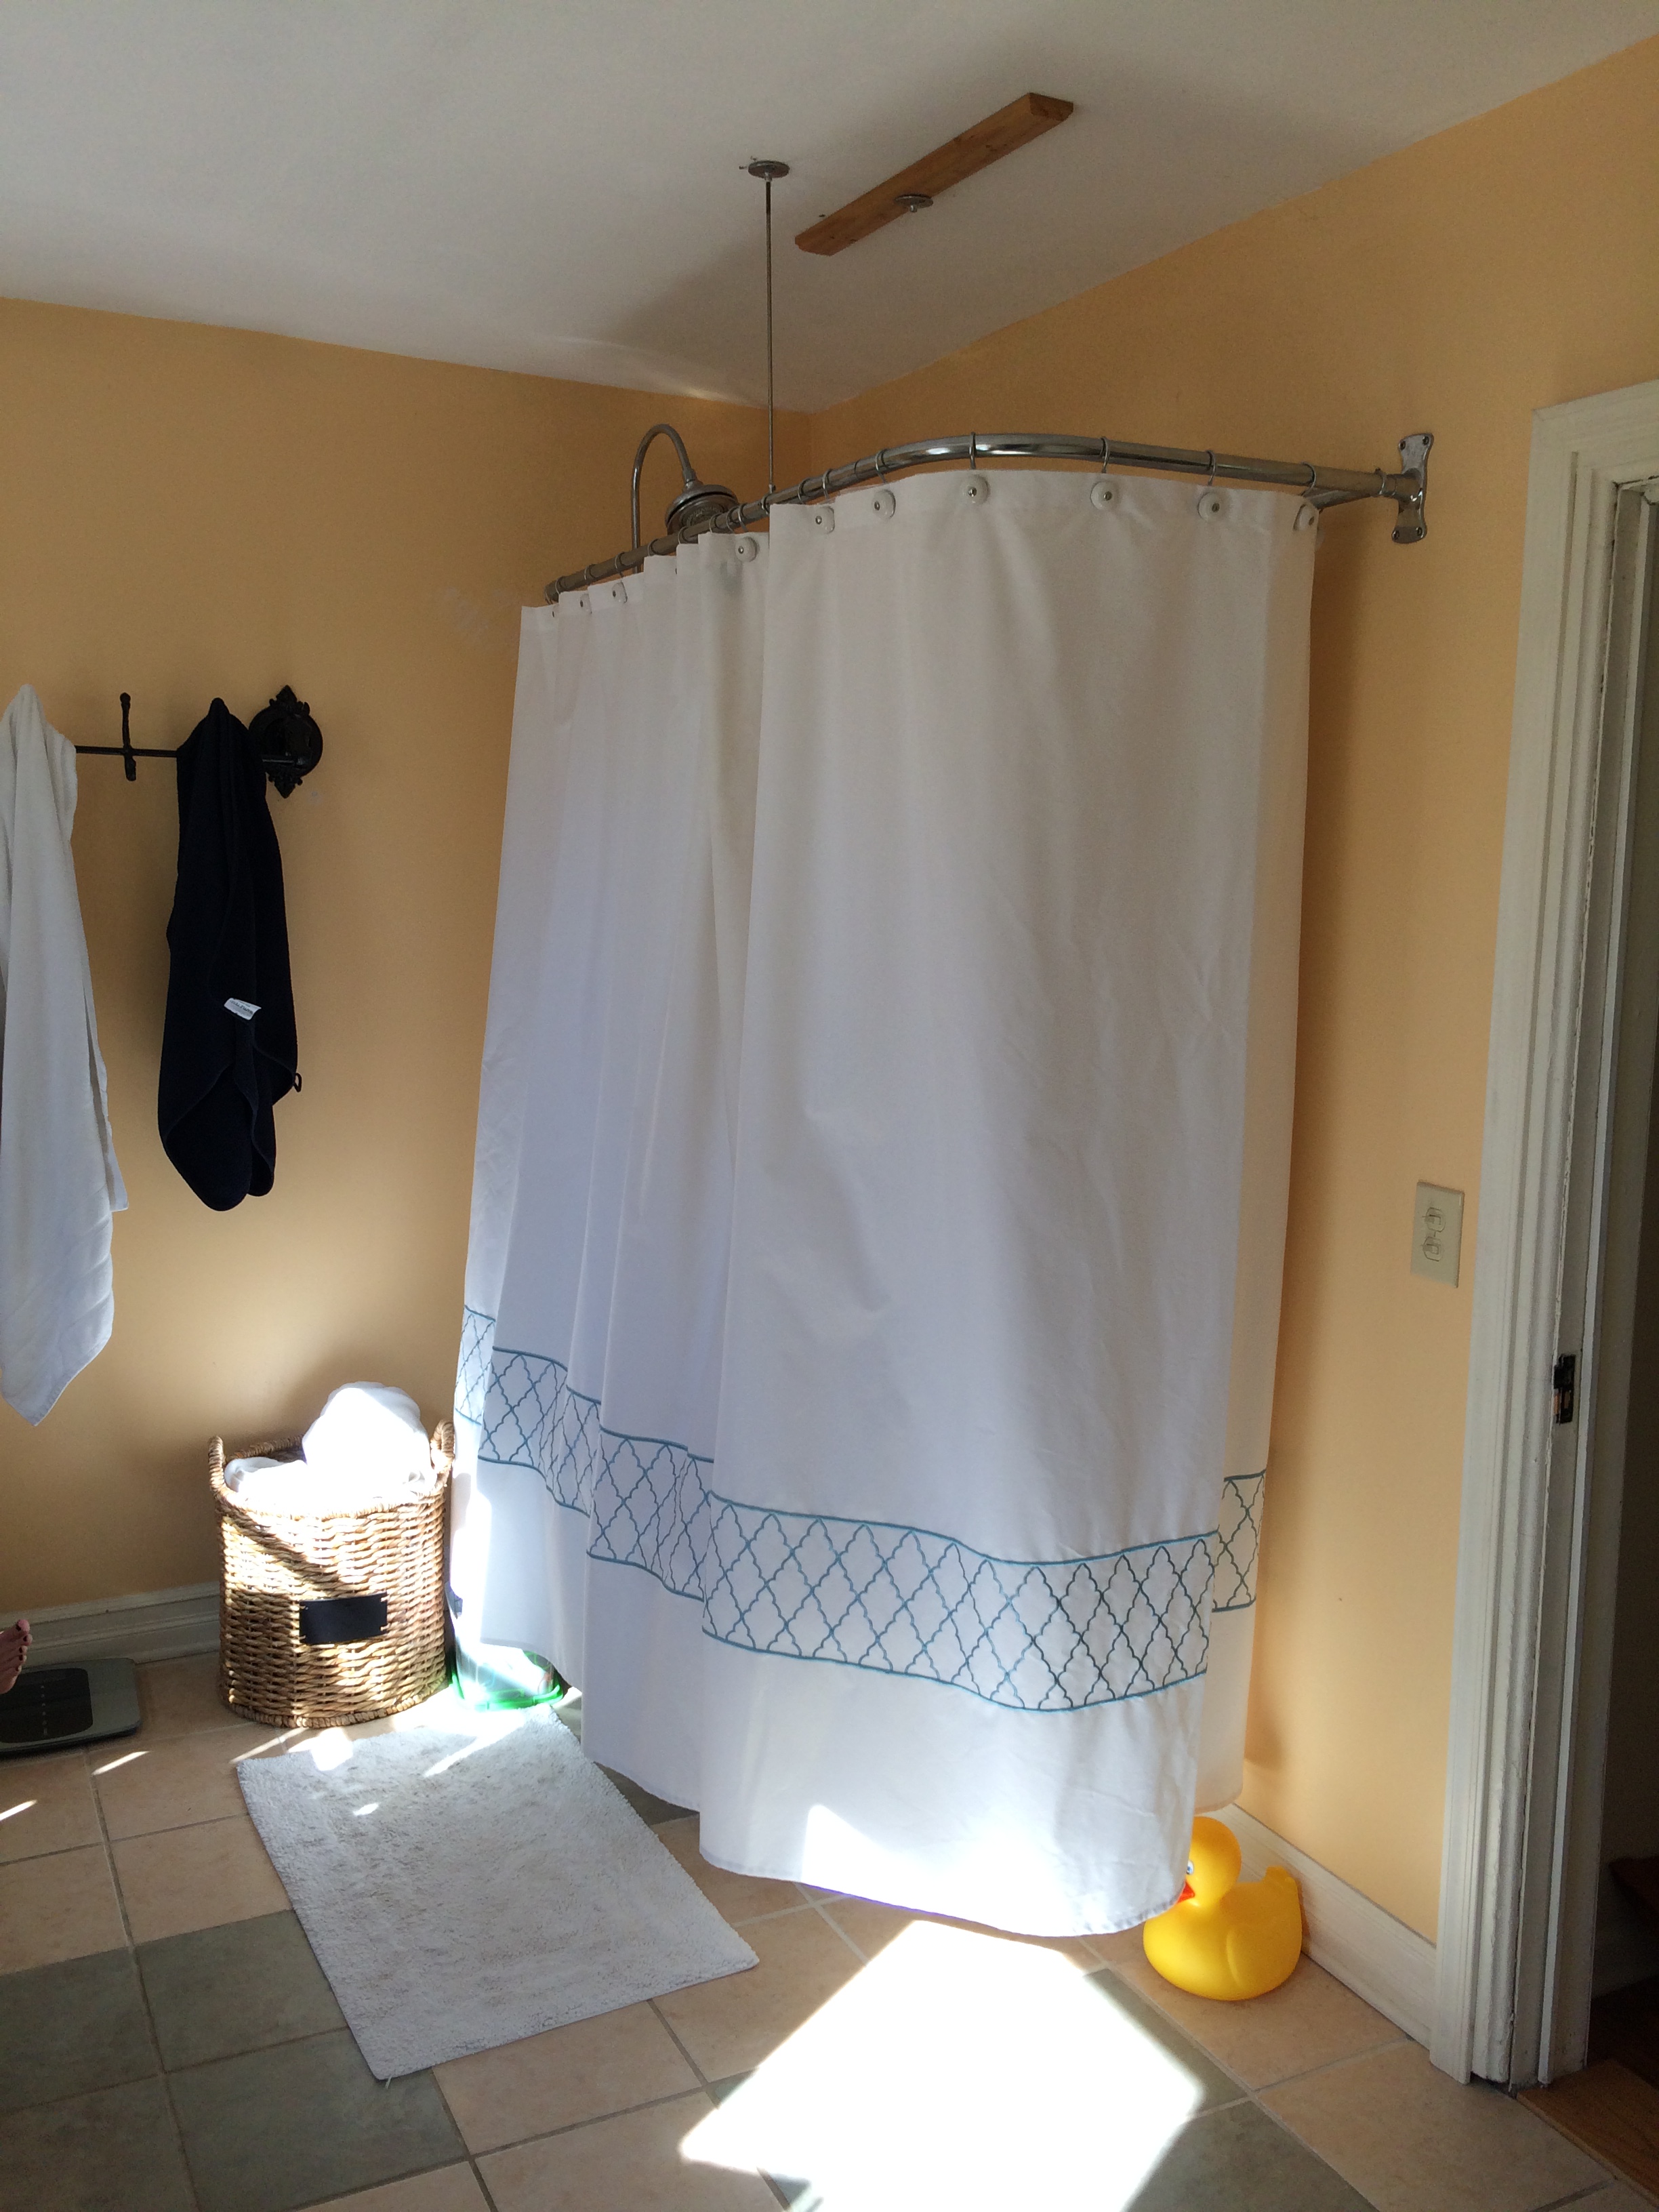
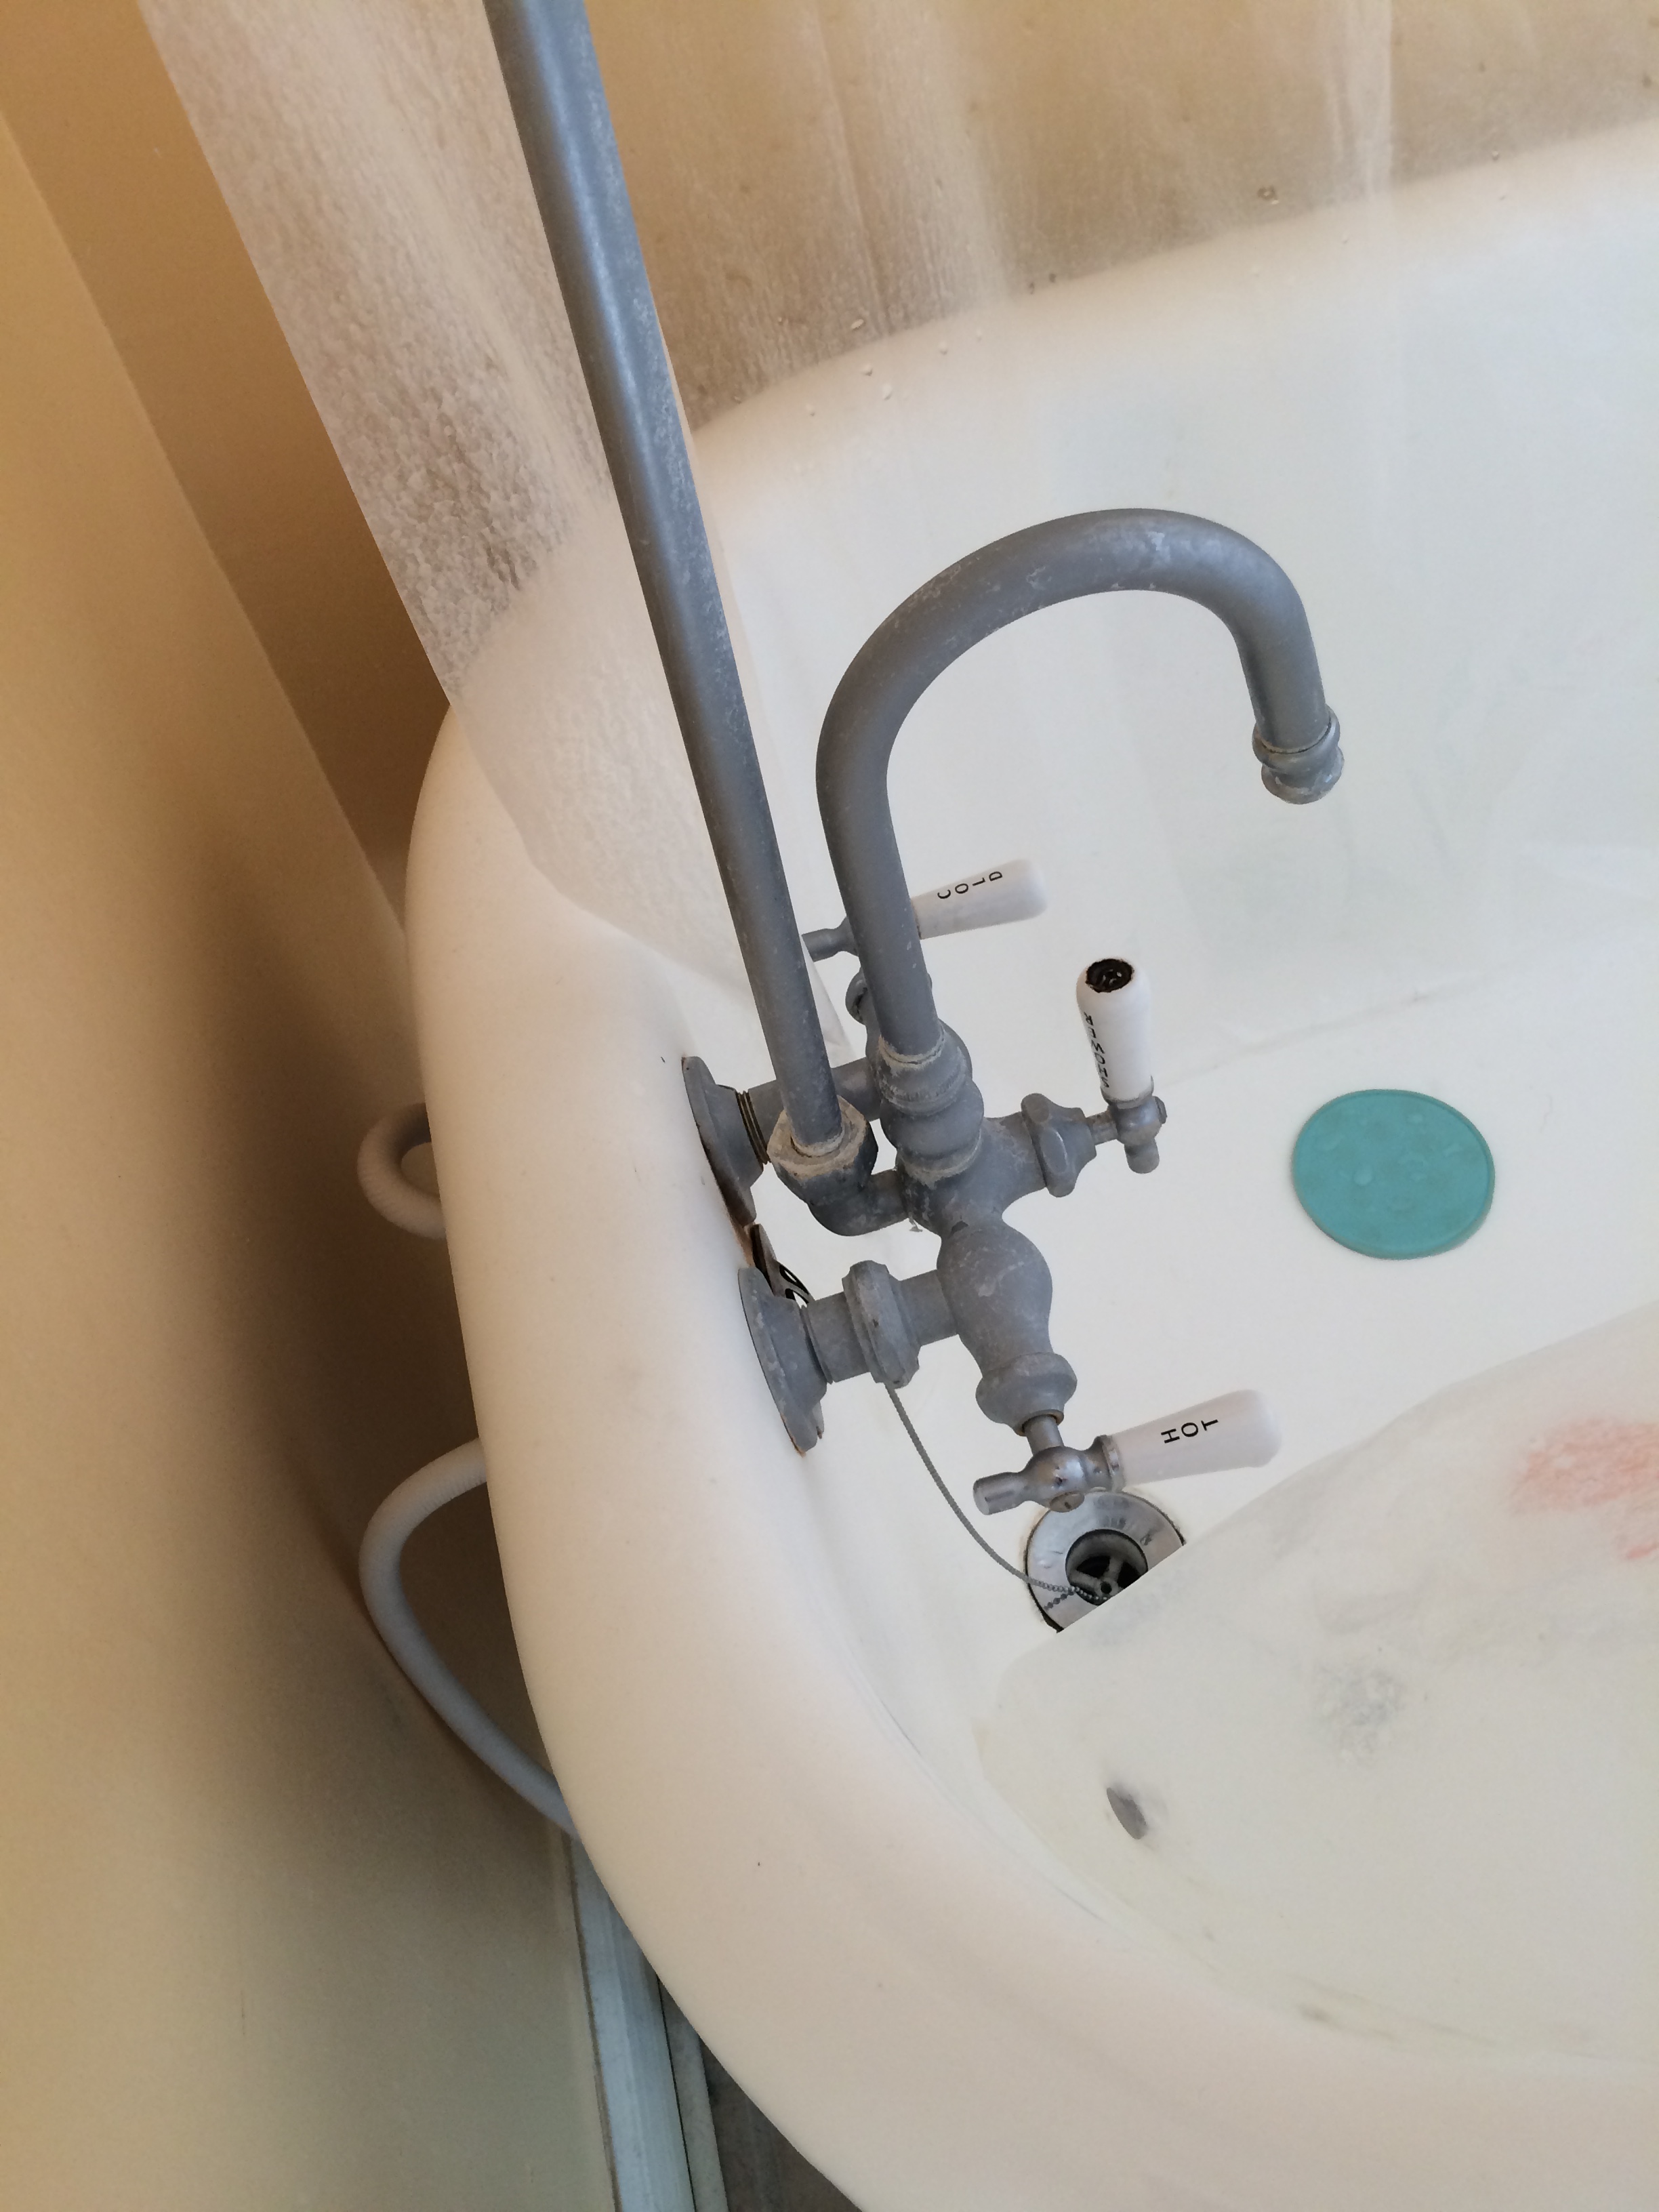
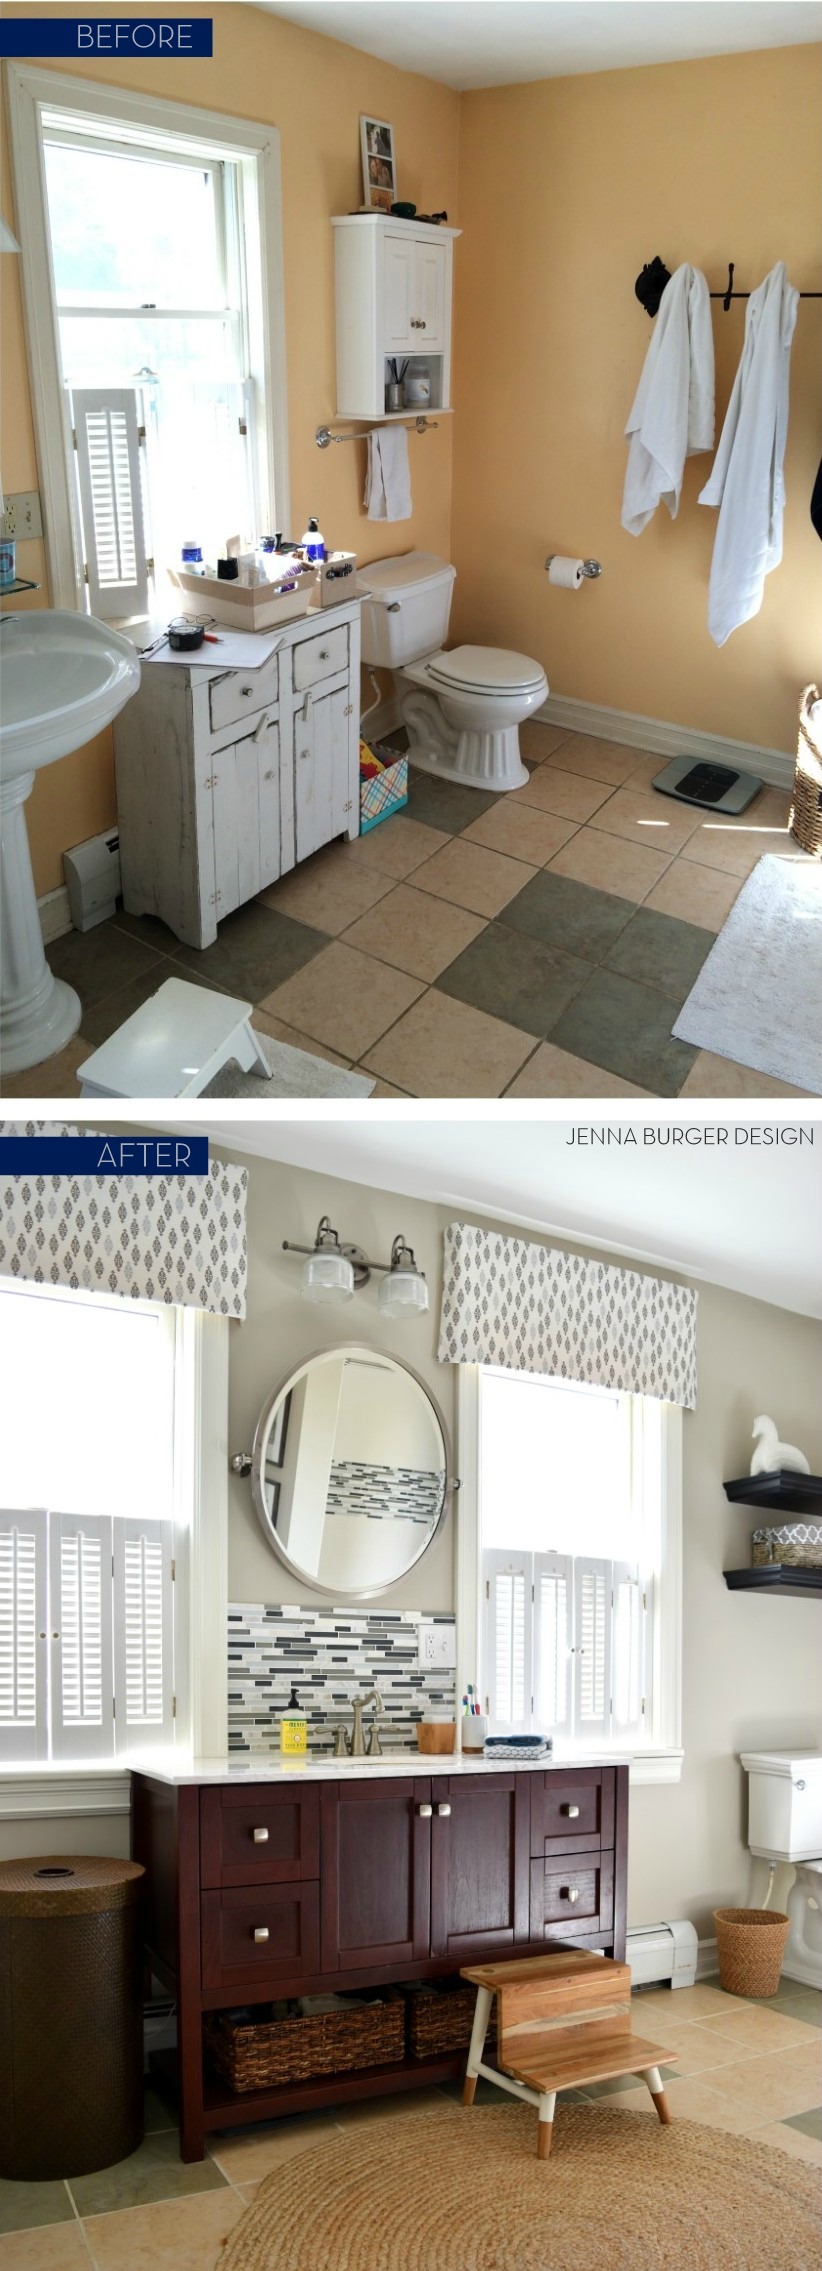
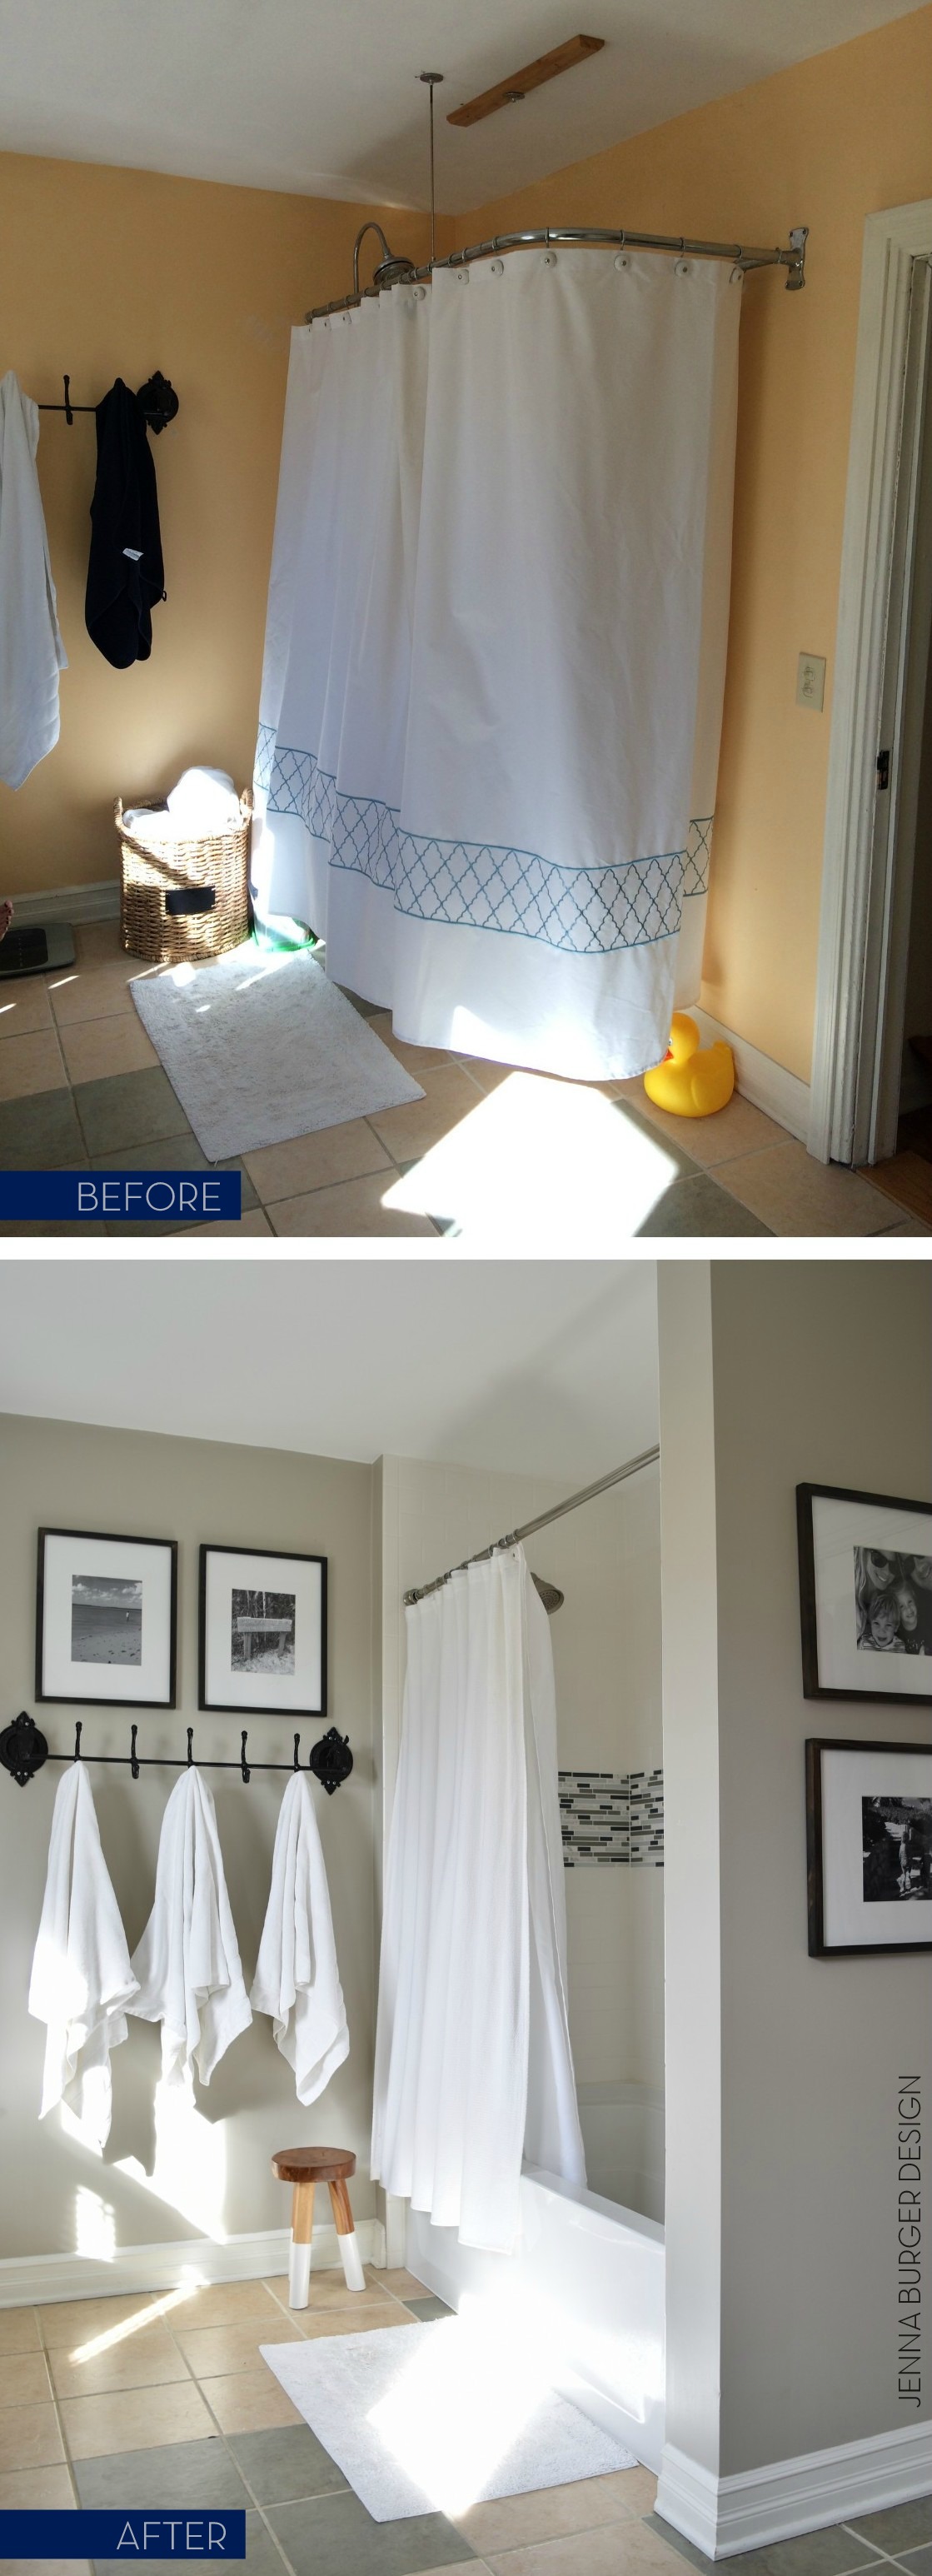
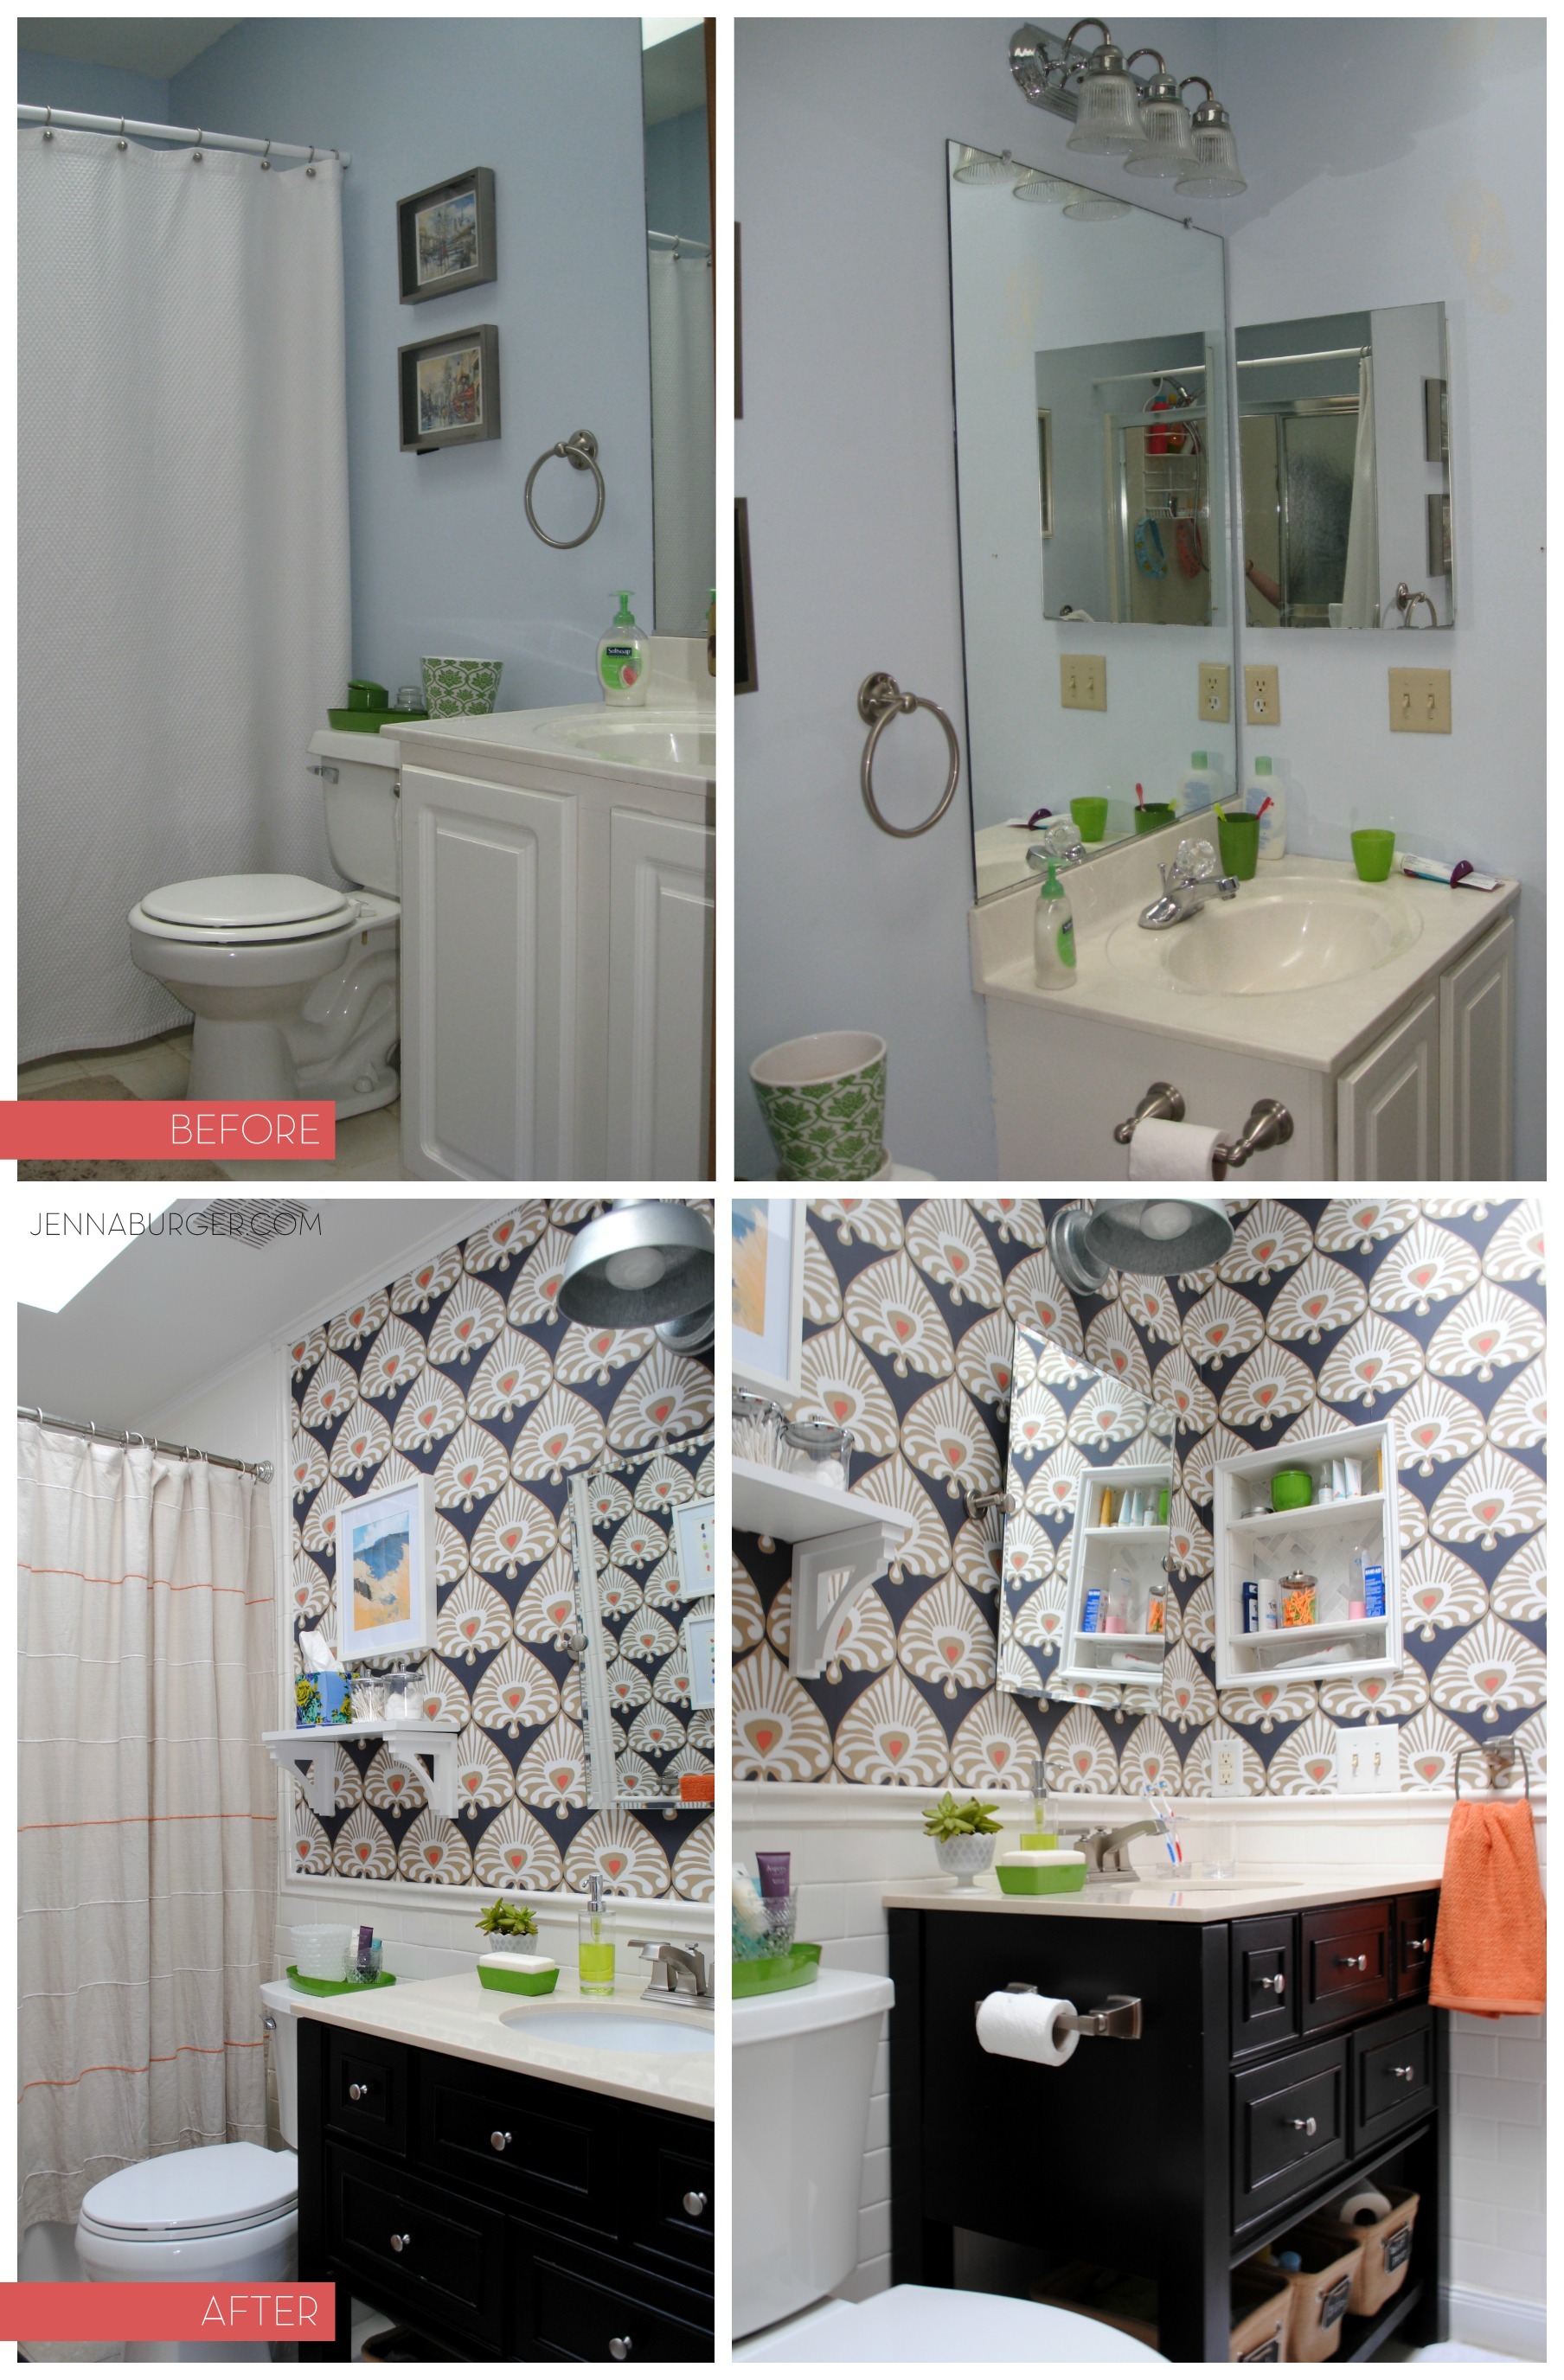
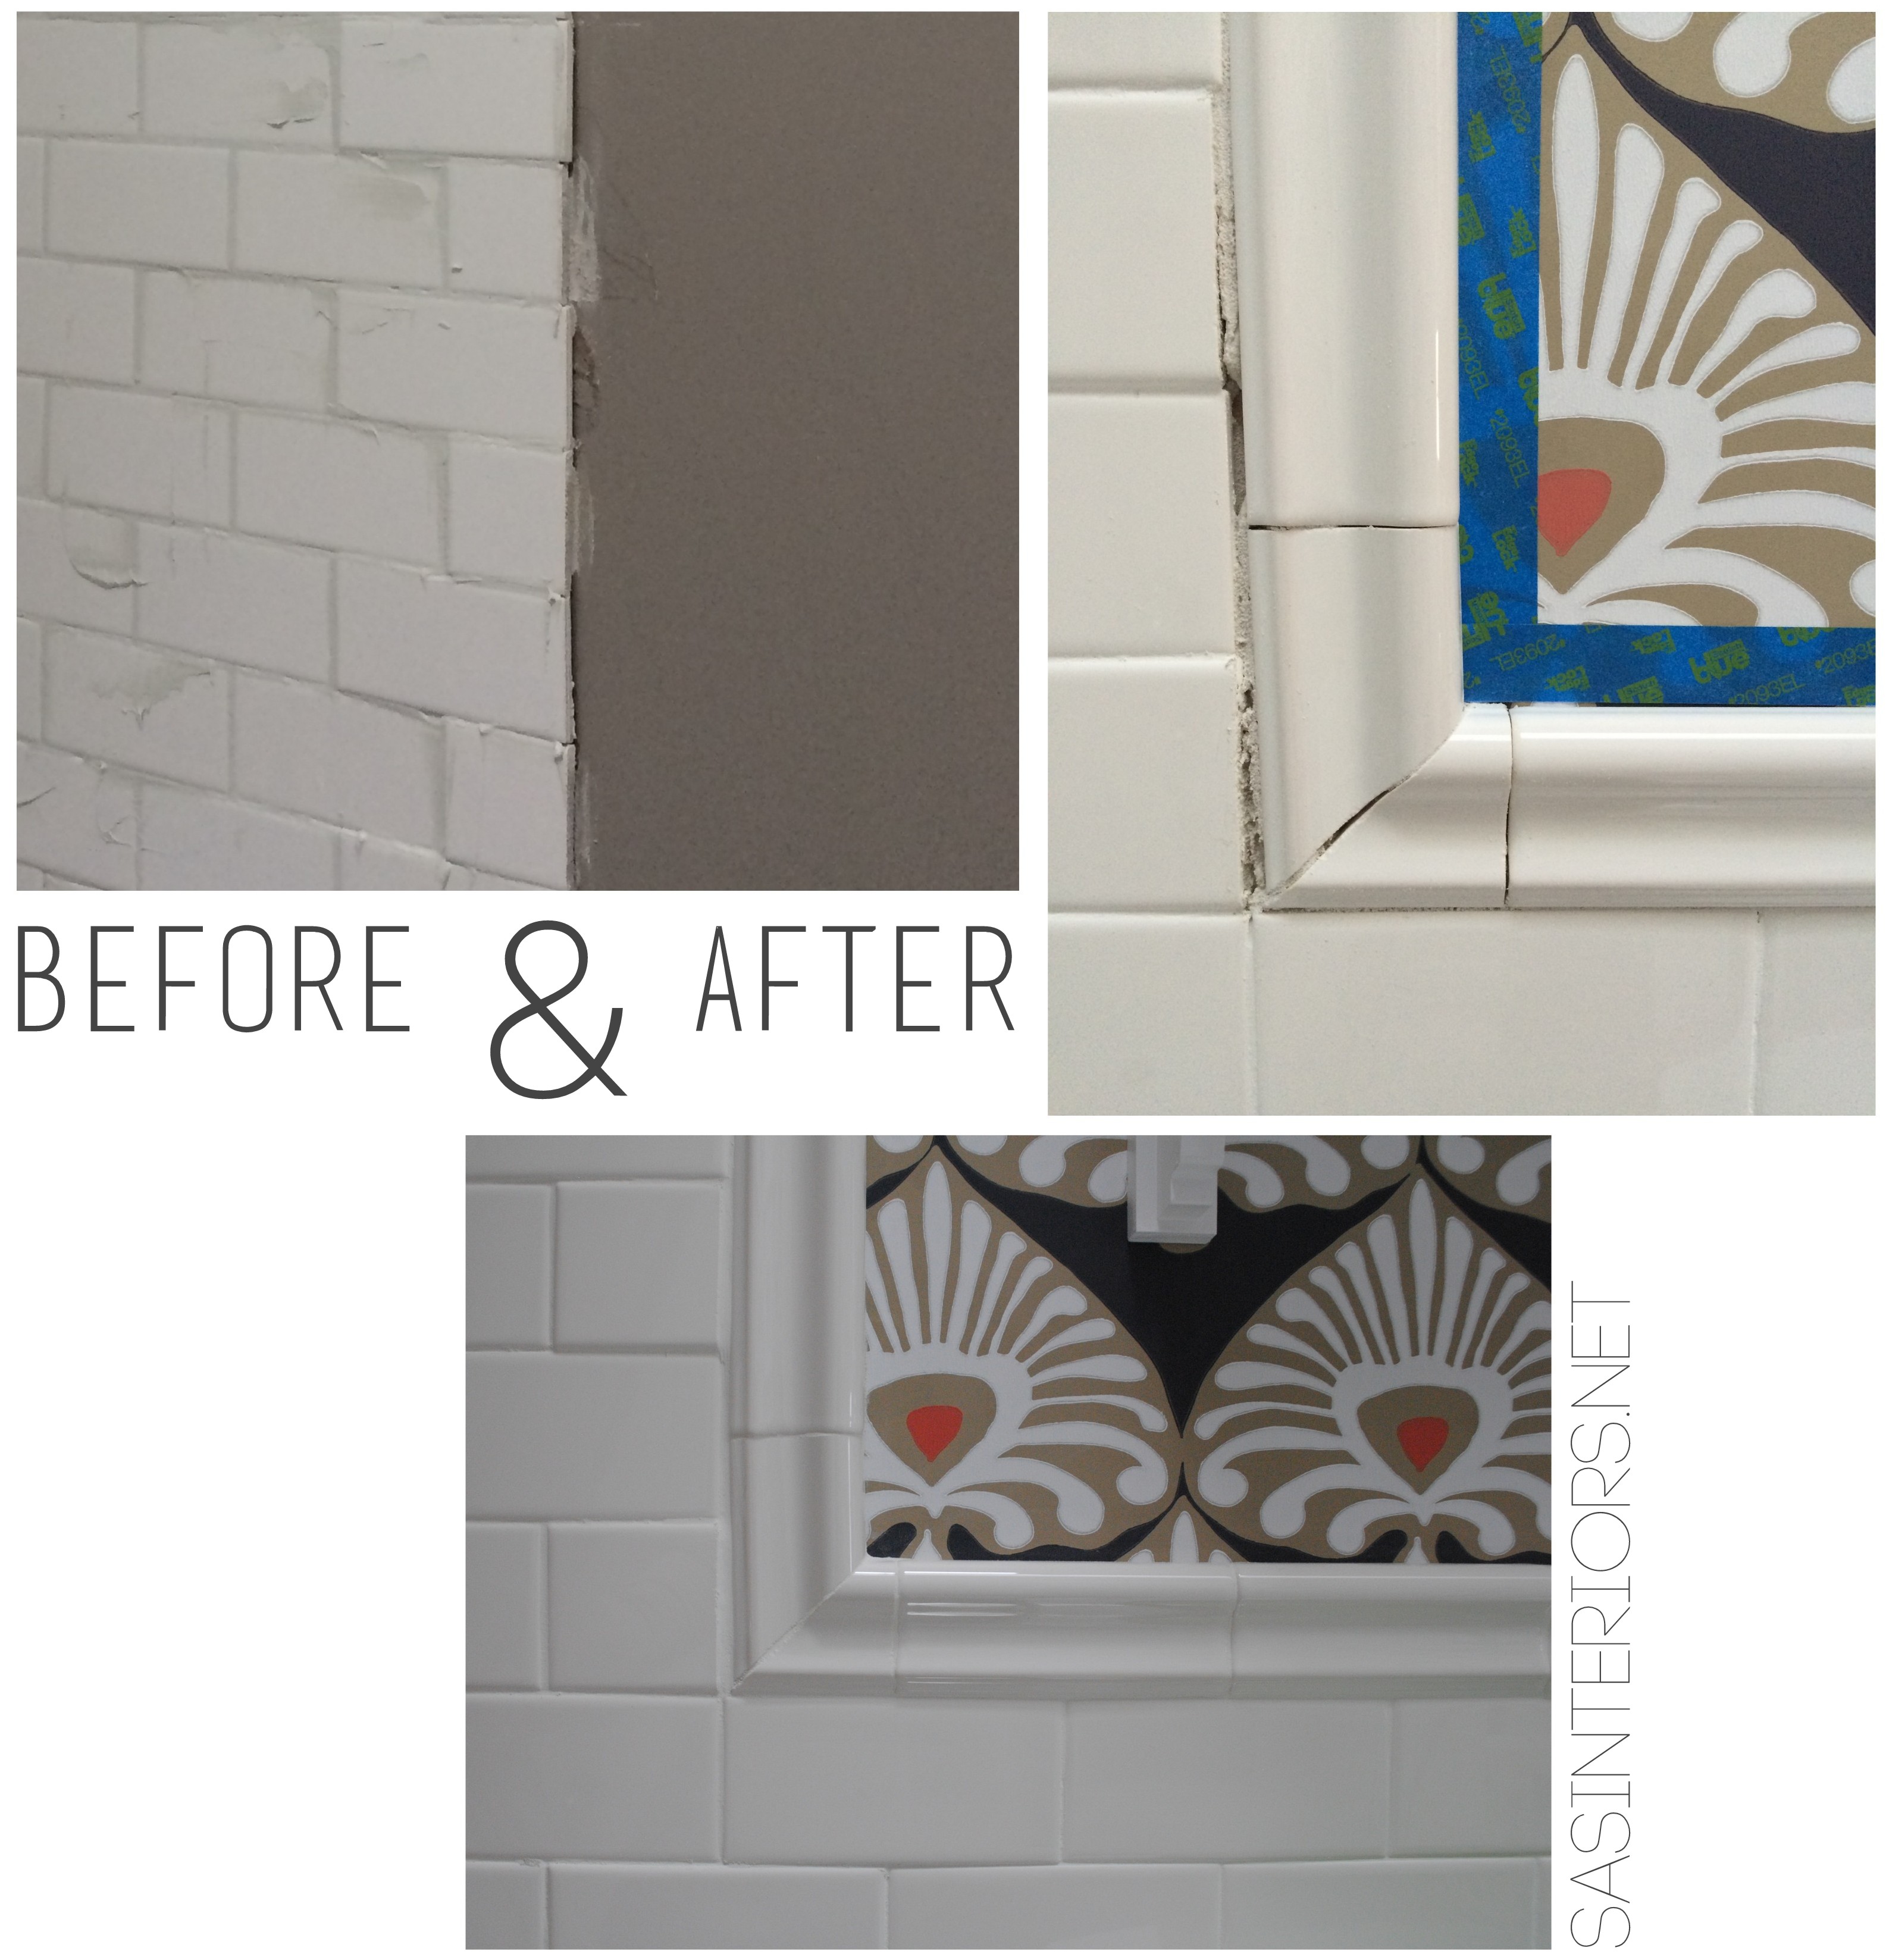
You can’t appreciate the after, without seeing the before.  This bathroom has had quite the evolution.  It was pretty sad when we moved in…

Before Bathroom

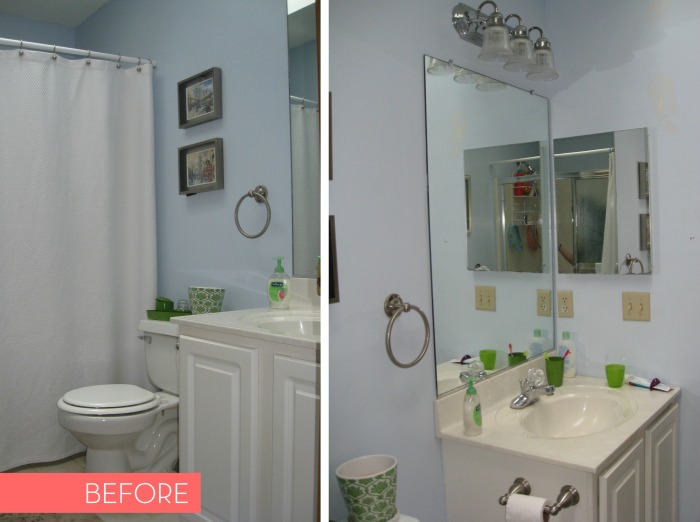
Within a year, it was painted & got a little refresh…

Before Bathroom

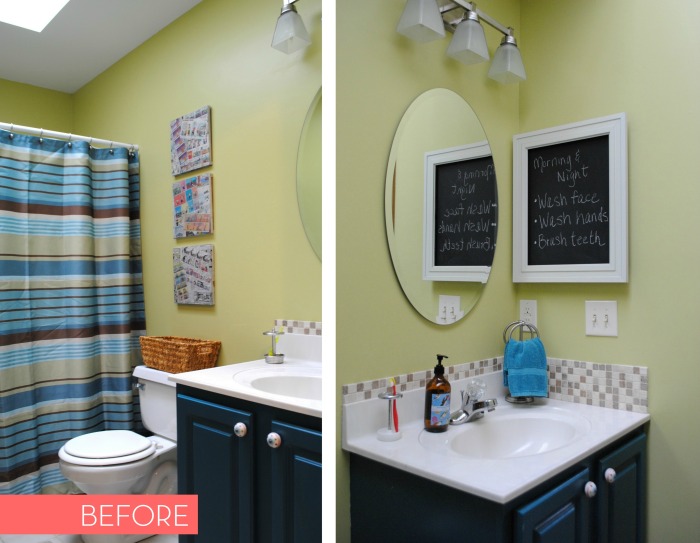
Since it’s heavily used by 2 young kiddos it got + gets quite the abuse on a daily basis.  After a while, the exposed walls (sheetrock) + the builder-grade melamine cabinet  just wasn’t fitting the bill anymore.

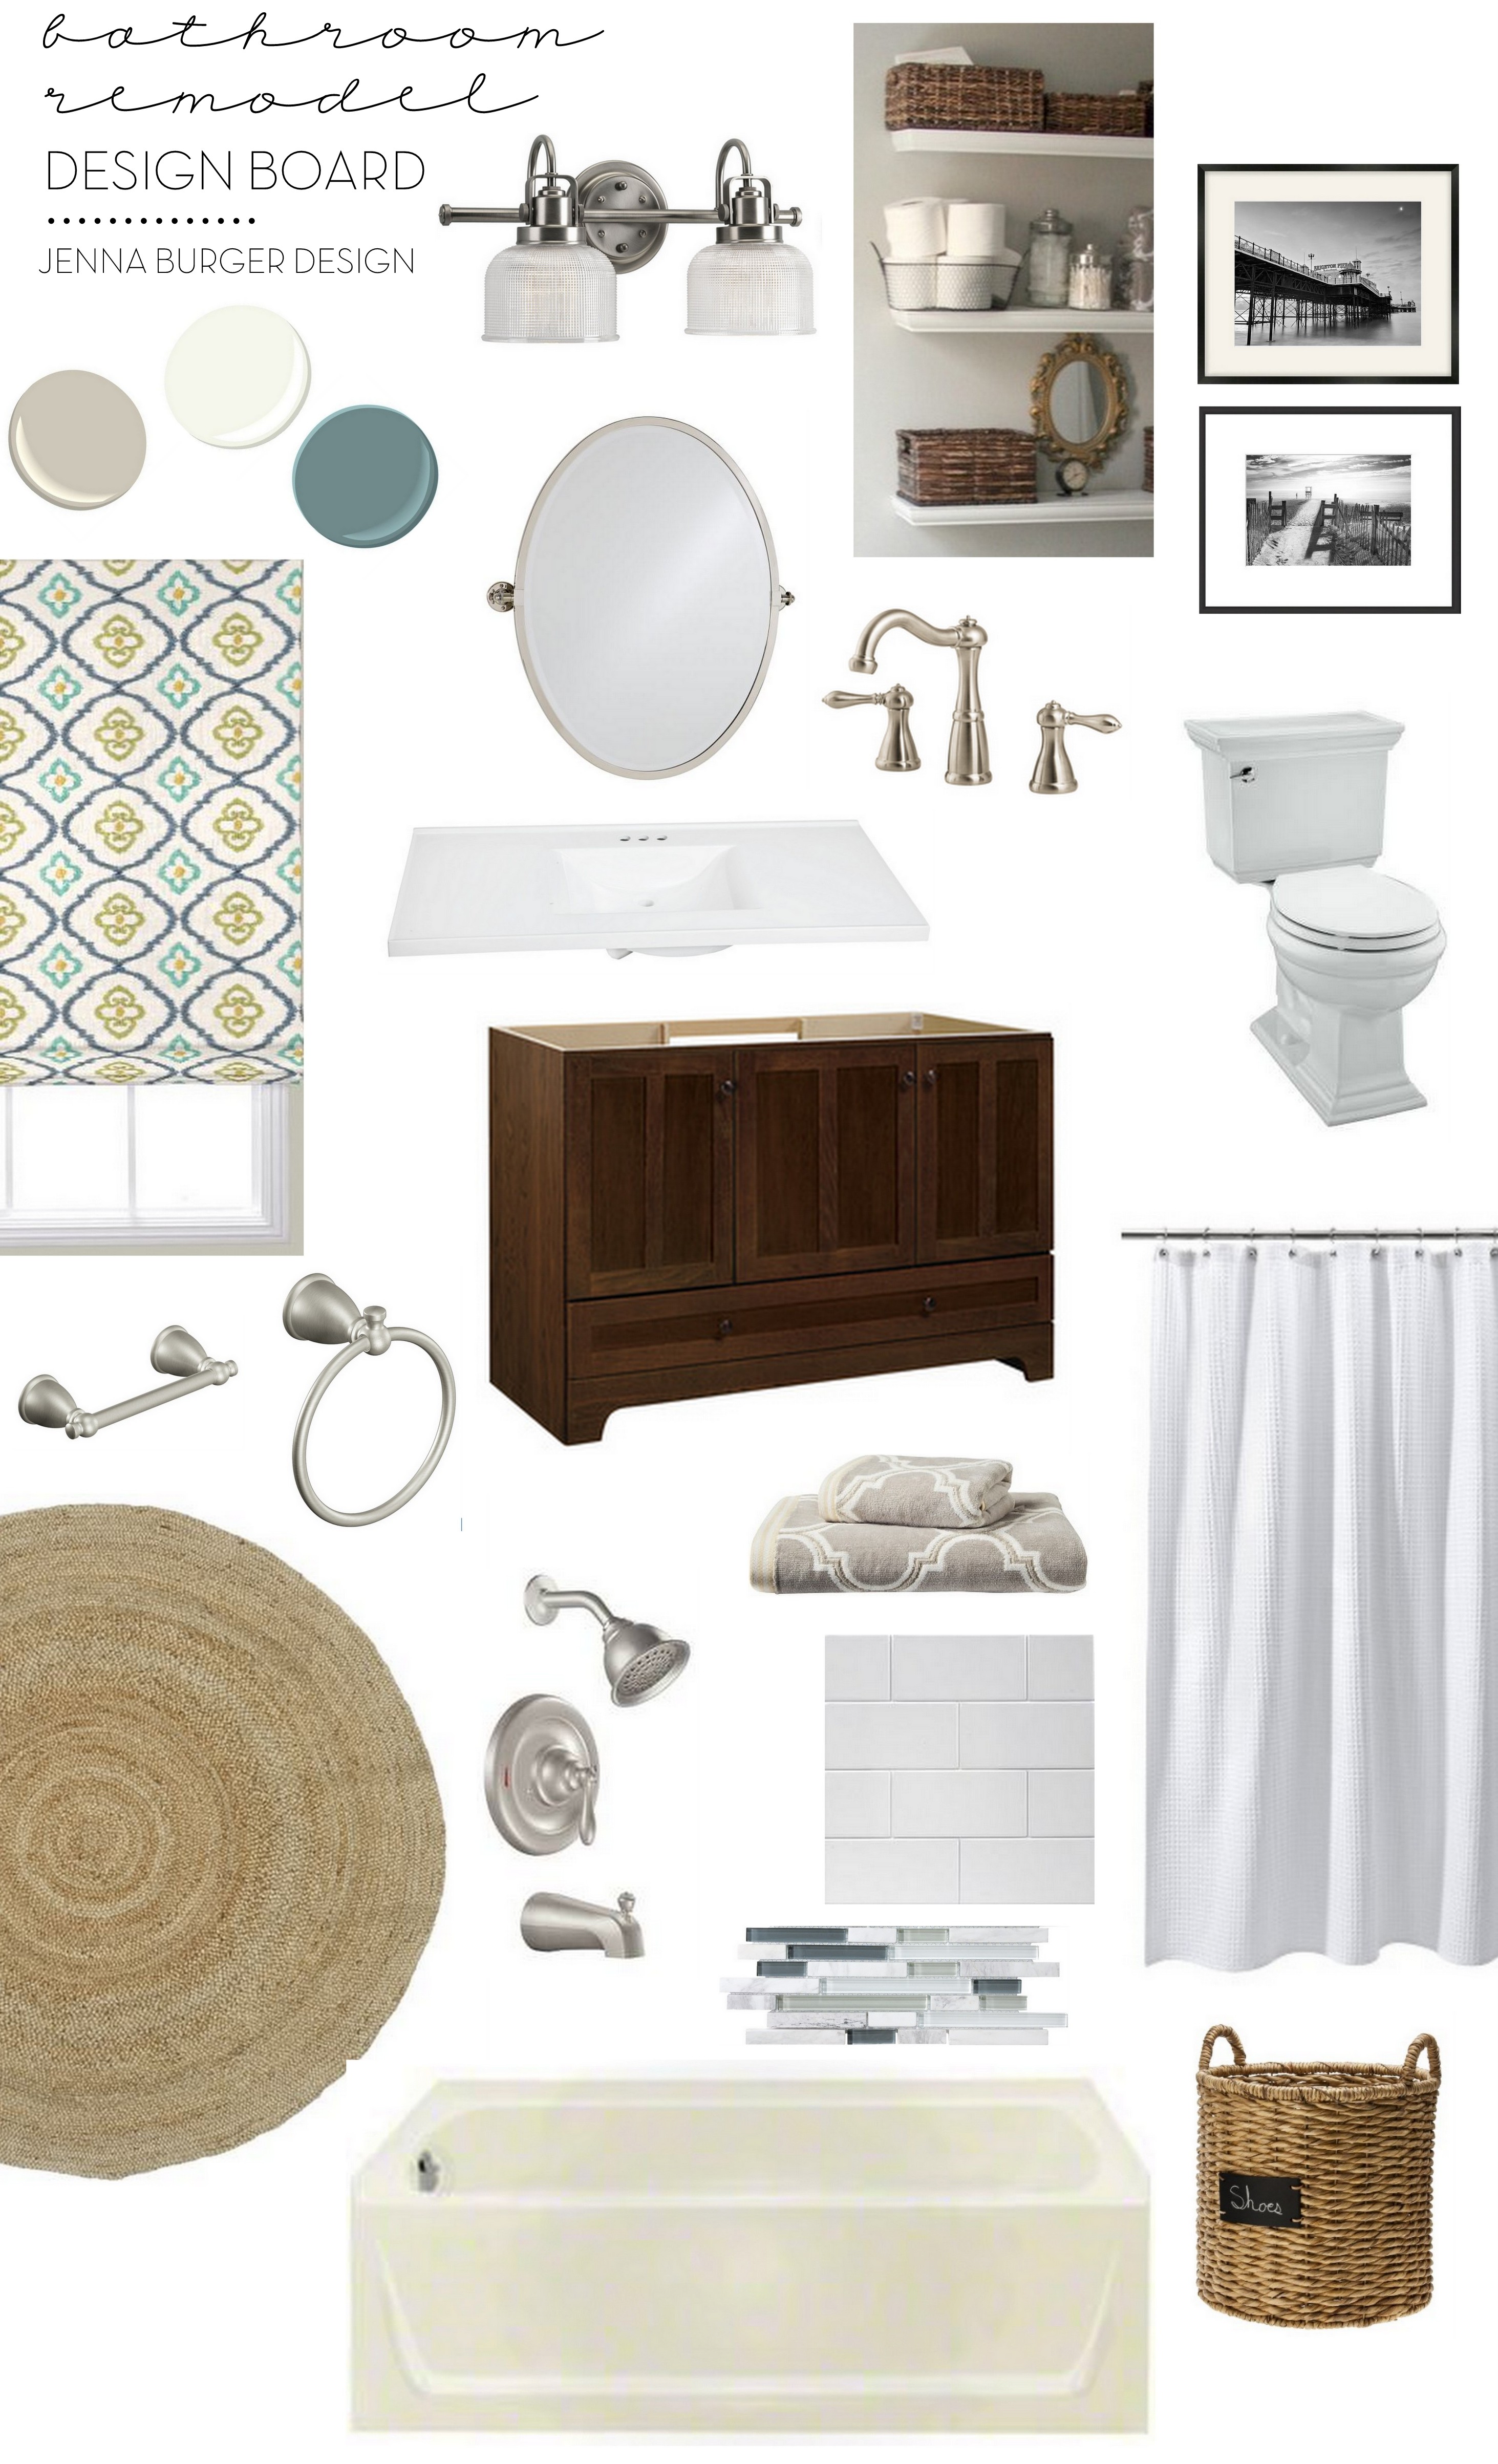
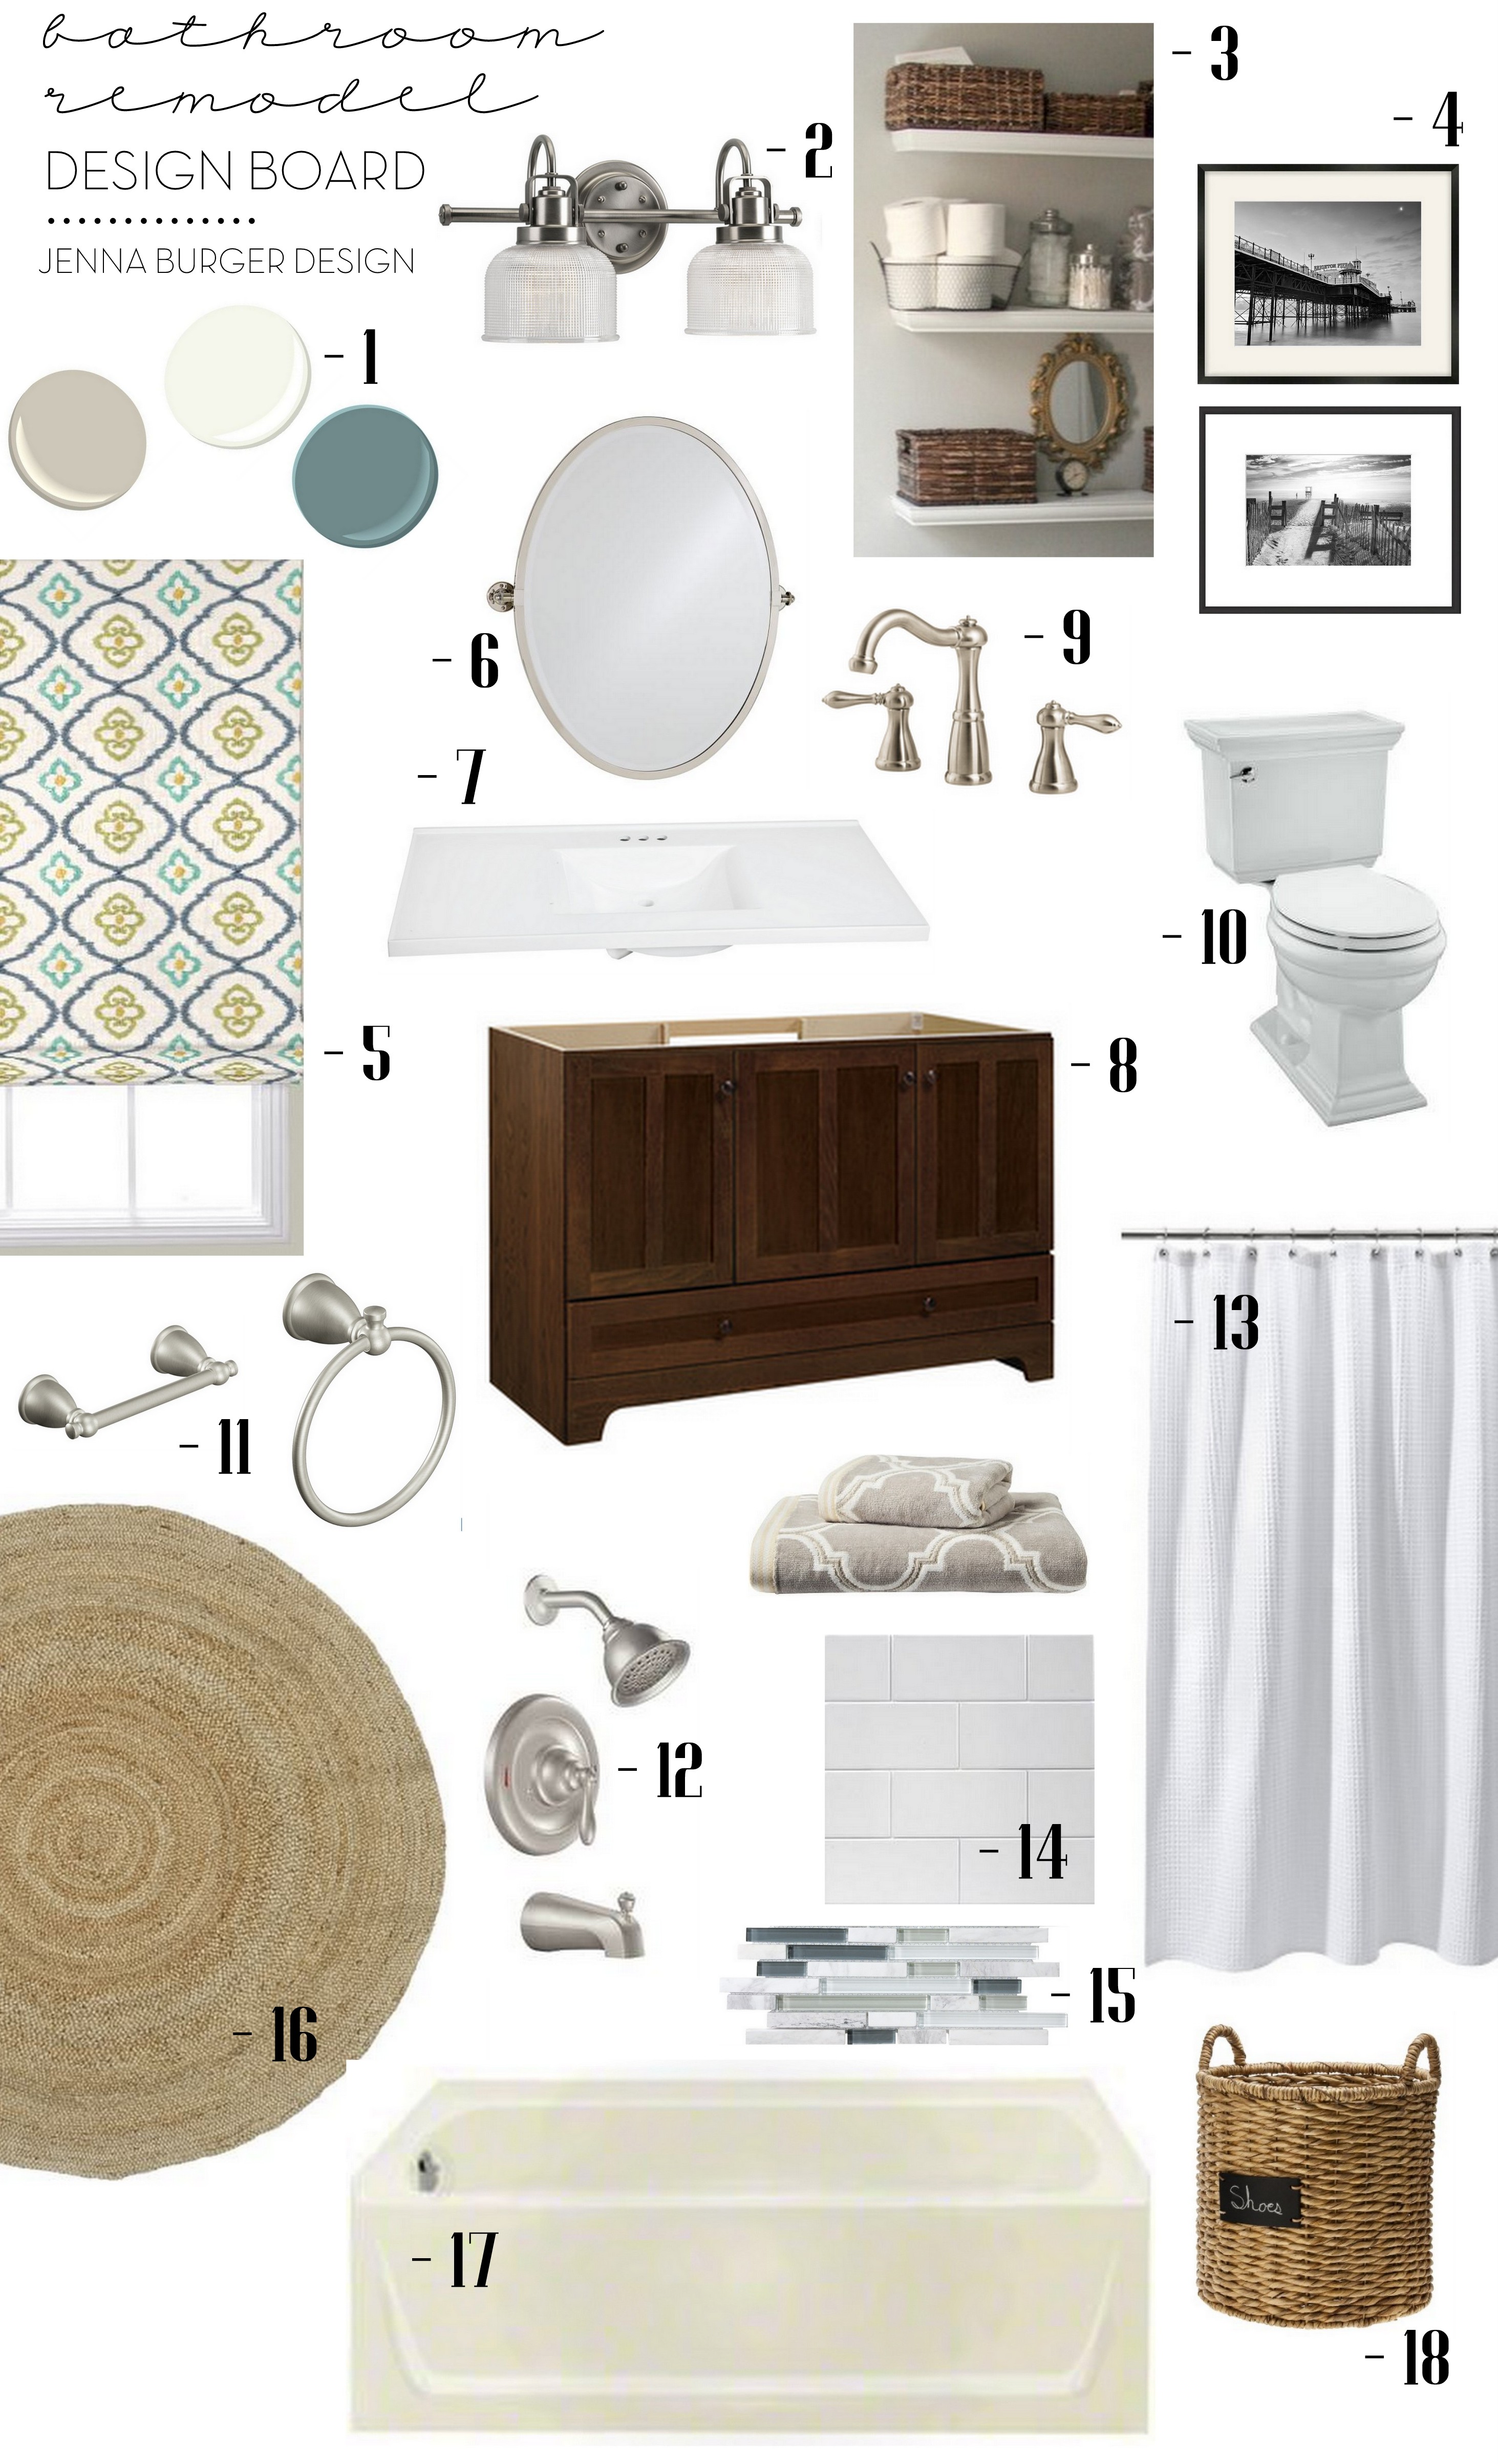
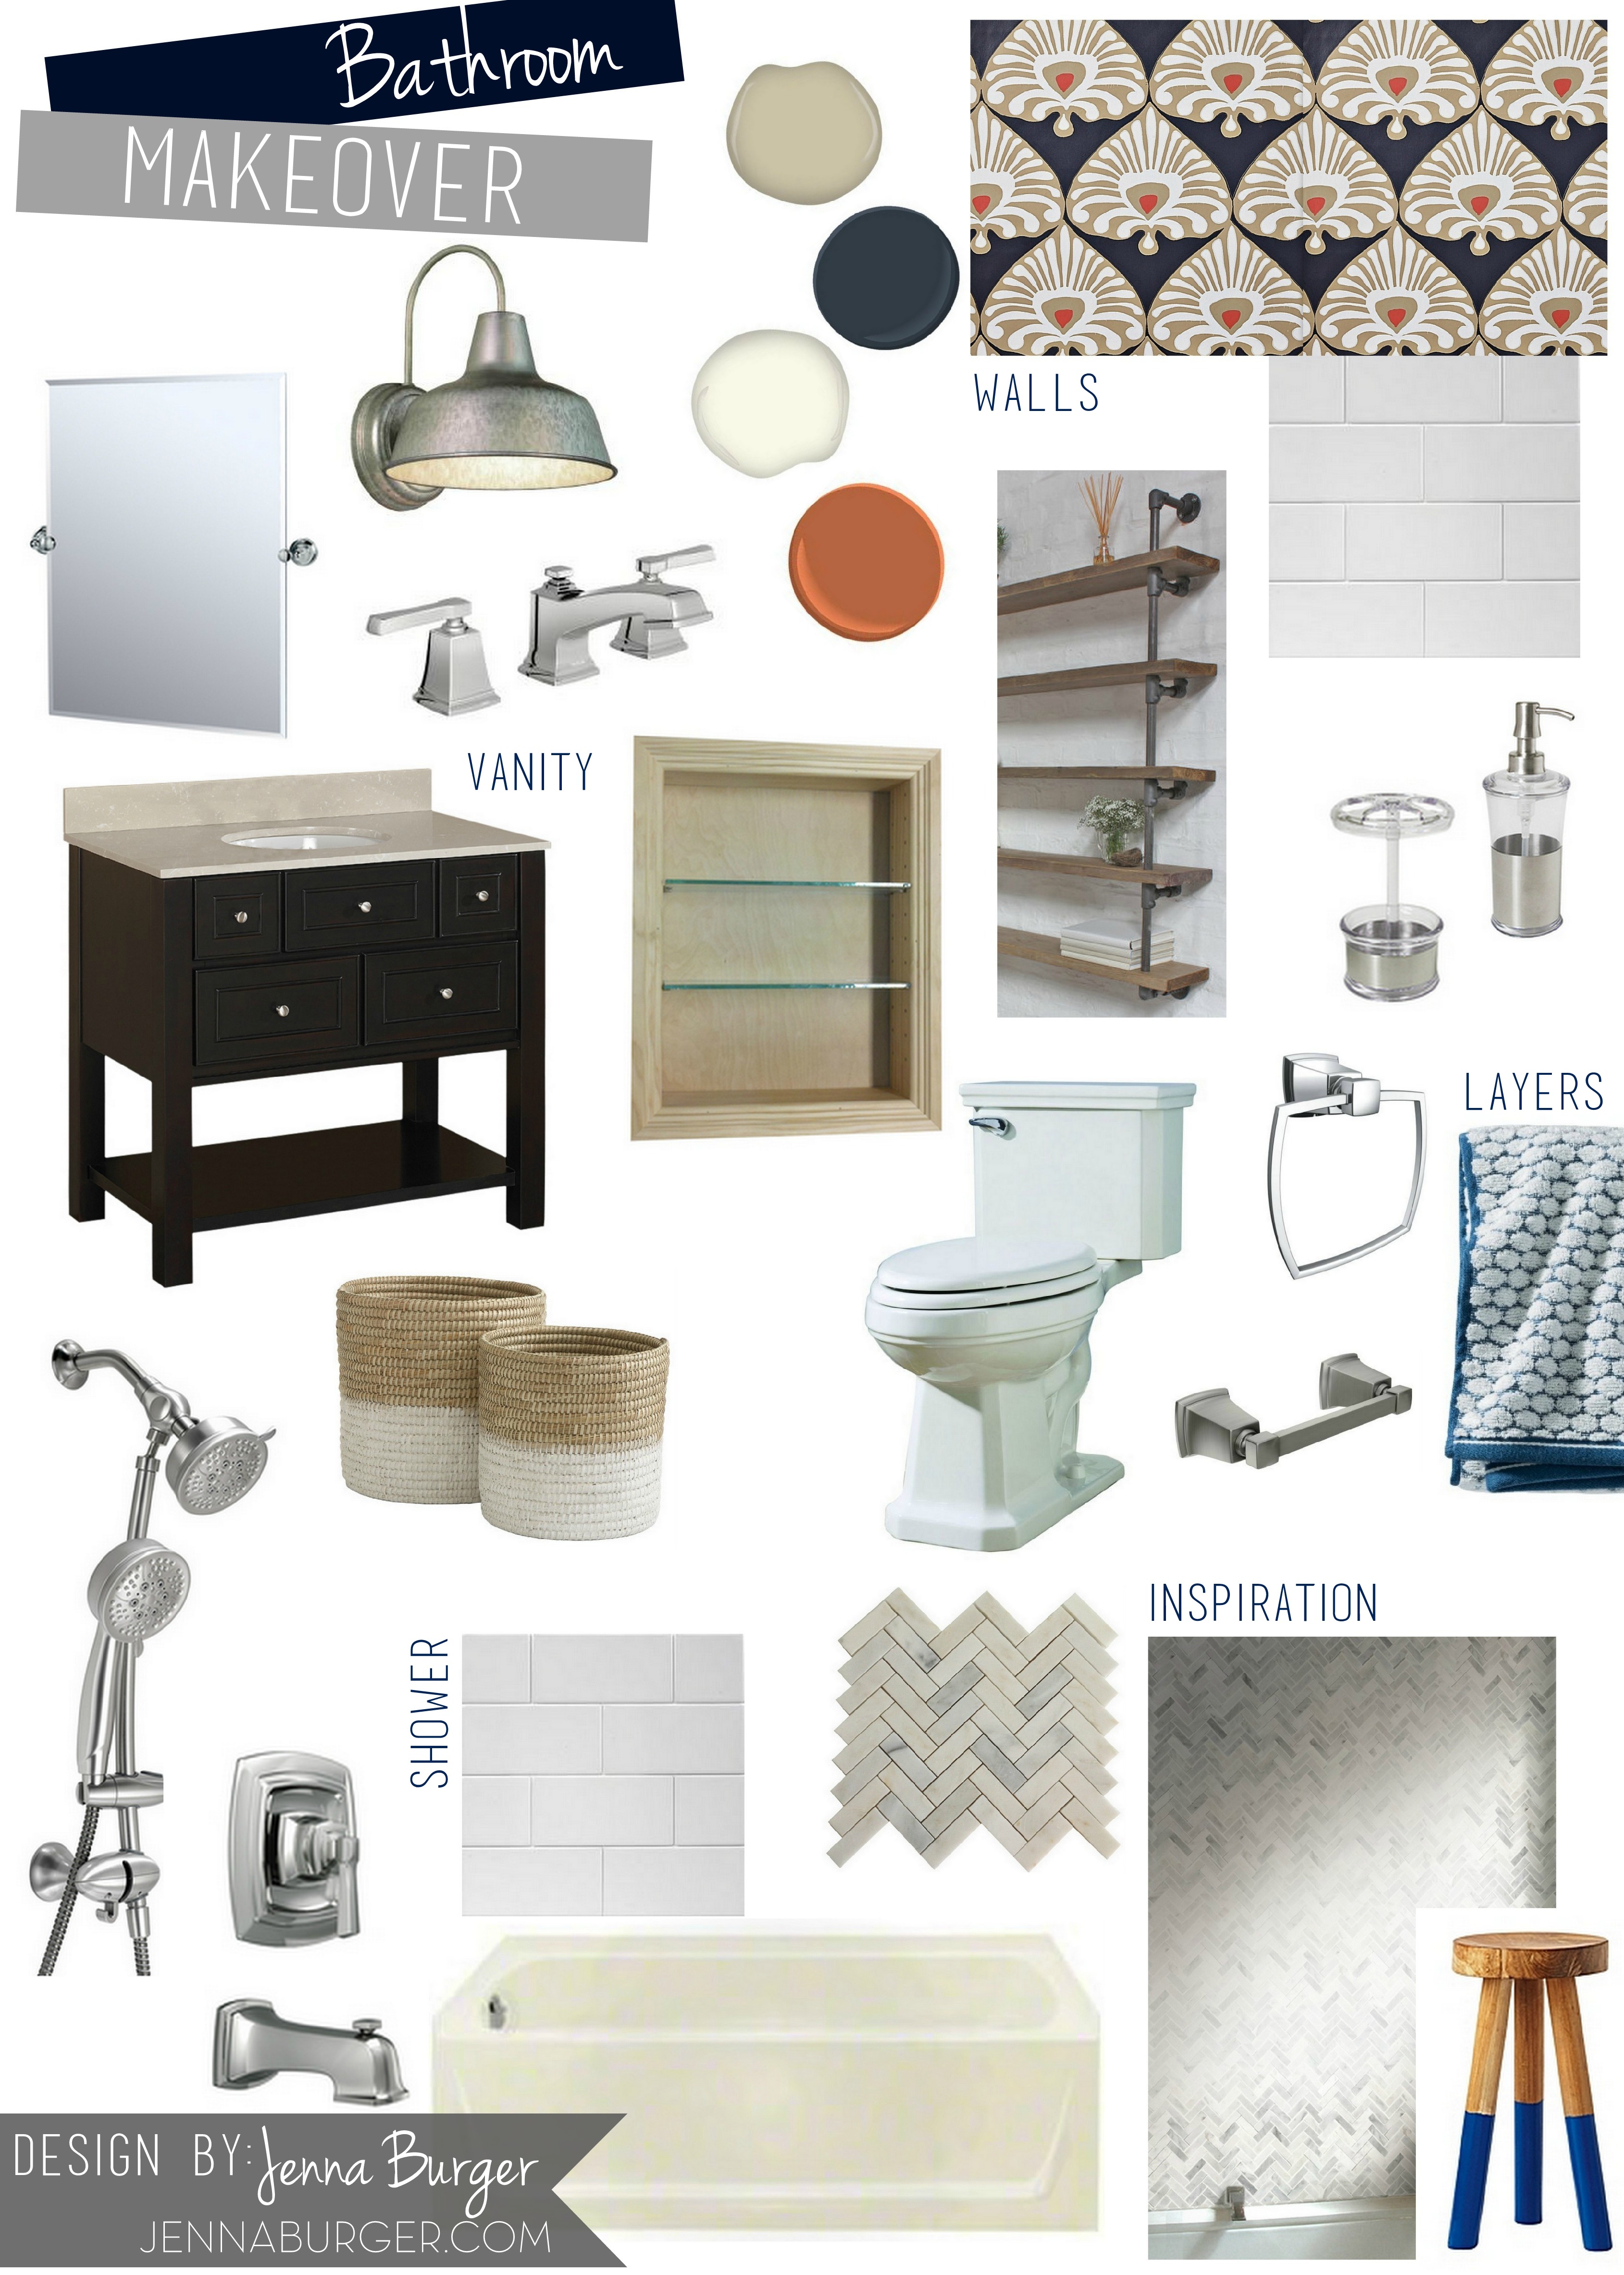
If you missed following along from the beginning, this was the mood board I created for the new space…

Bathroom Makeover Mood Board / Plan of Direction for space

A few changes had to be made along the way, but the main elements & more so, the main aesthetic / feel of the space, was absolutely achieved.

My goal was to create an updated, modern bathroom with a classic (live-a-long-time) background + lots of eye-popping, unexpected layers.  I am thrilled with the result not only because it’s super functional for the kids (with tile going half way up the walls), but it’s really a dynamic + fun space!

Come on in…

Bathroom Makover with 95% of the space being a DIY project - new tub + tile, vanity, wallpaper, and more!  Lots of details on this multi-post before & after.  Bathroom makeover by Jenna Burger Design www.jennaburger.com

Many have asked, “why did you choose to do the kids bath instead of the Master?”, and the reason for that is I see this bathroom much more throughout the day (plus it seemed more of a manageable DIY project because it’s a smaller space).

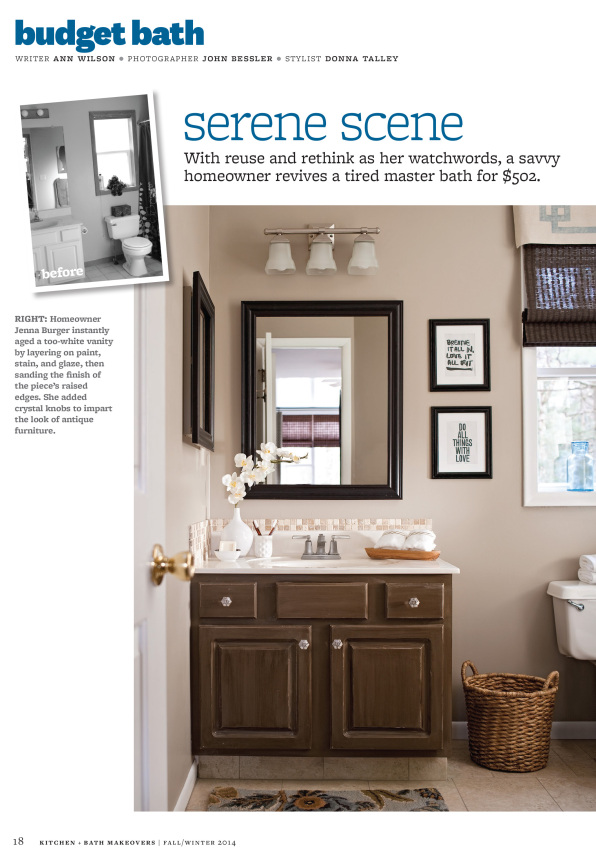
This bathroom is right at the top of the stairs and since I am up & down a lot on a daily basis, I wanted it to look & feel new, updated, and fresh.  I’ll get to the Master bath someday.  Even though it was featured in a national magazine, it does need some fixin’ up!

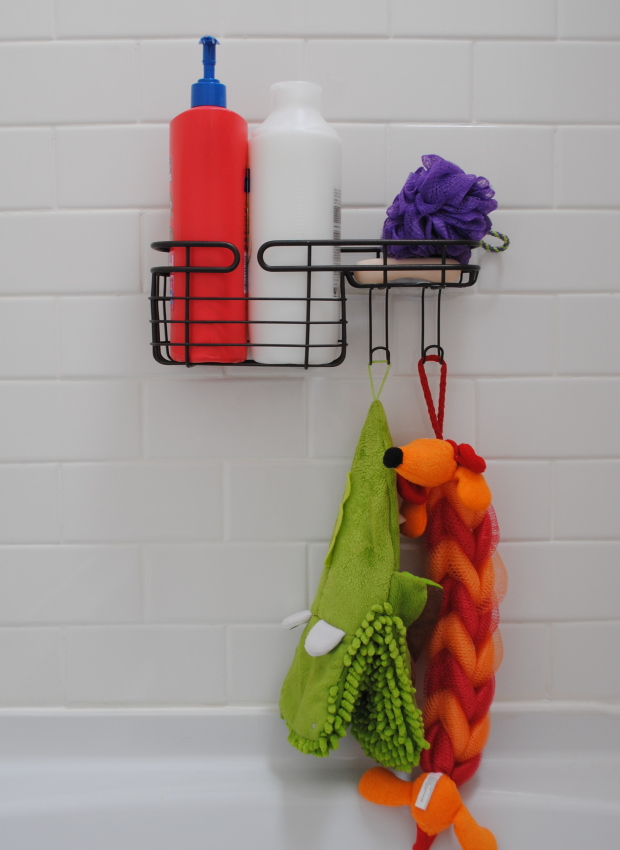
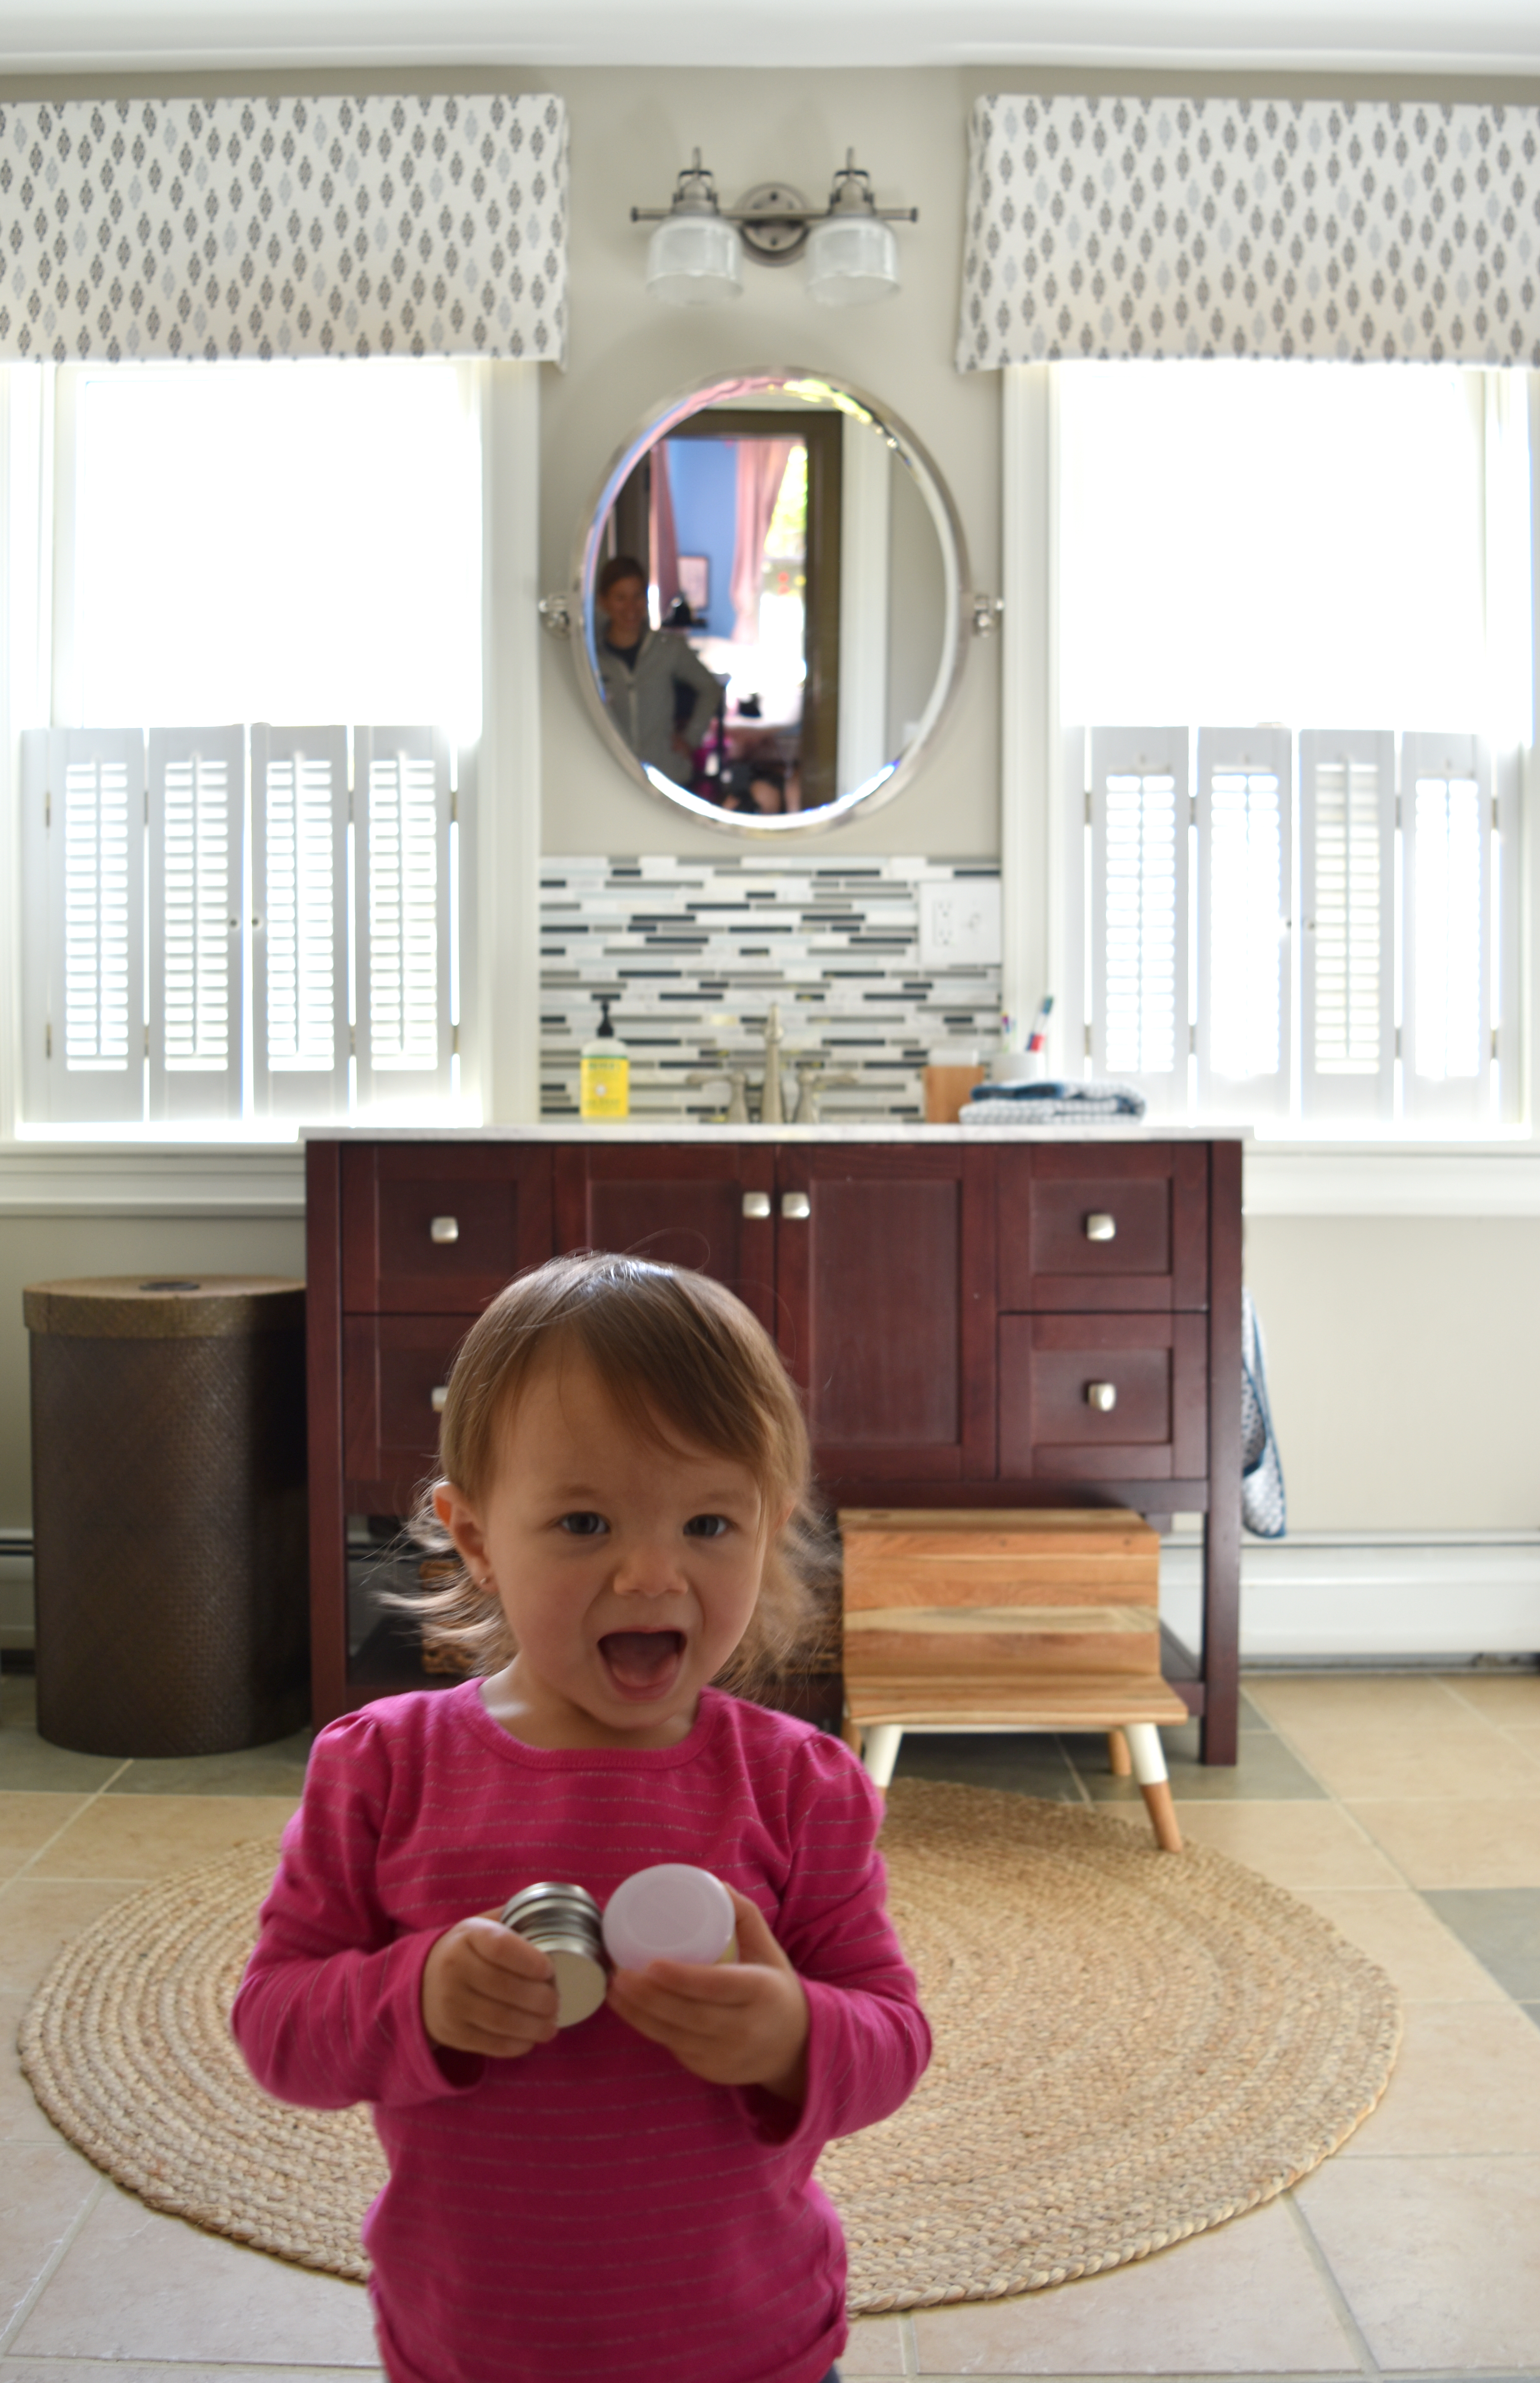
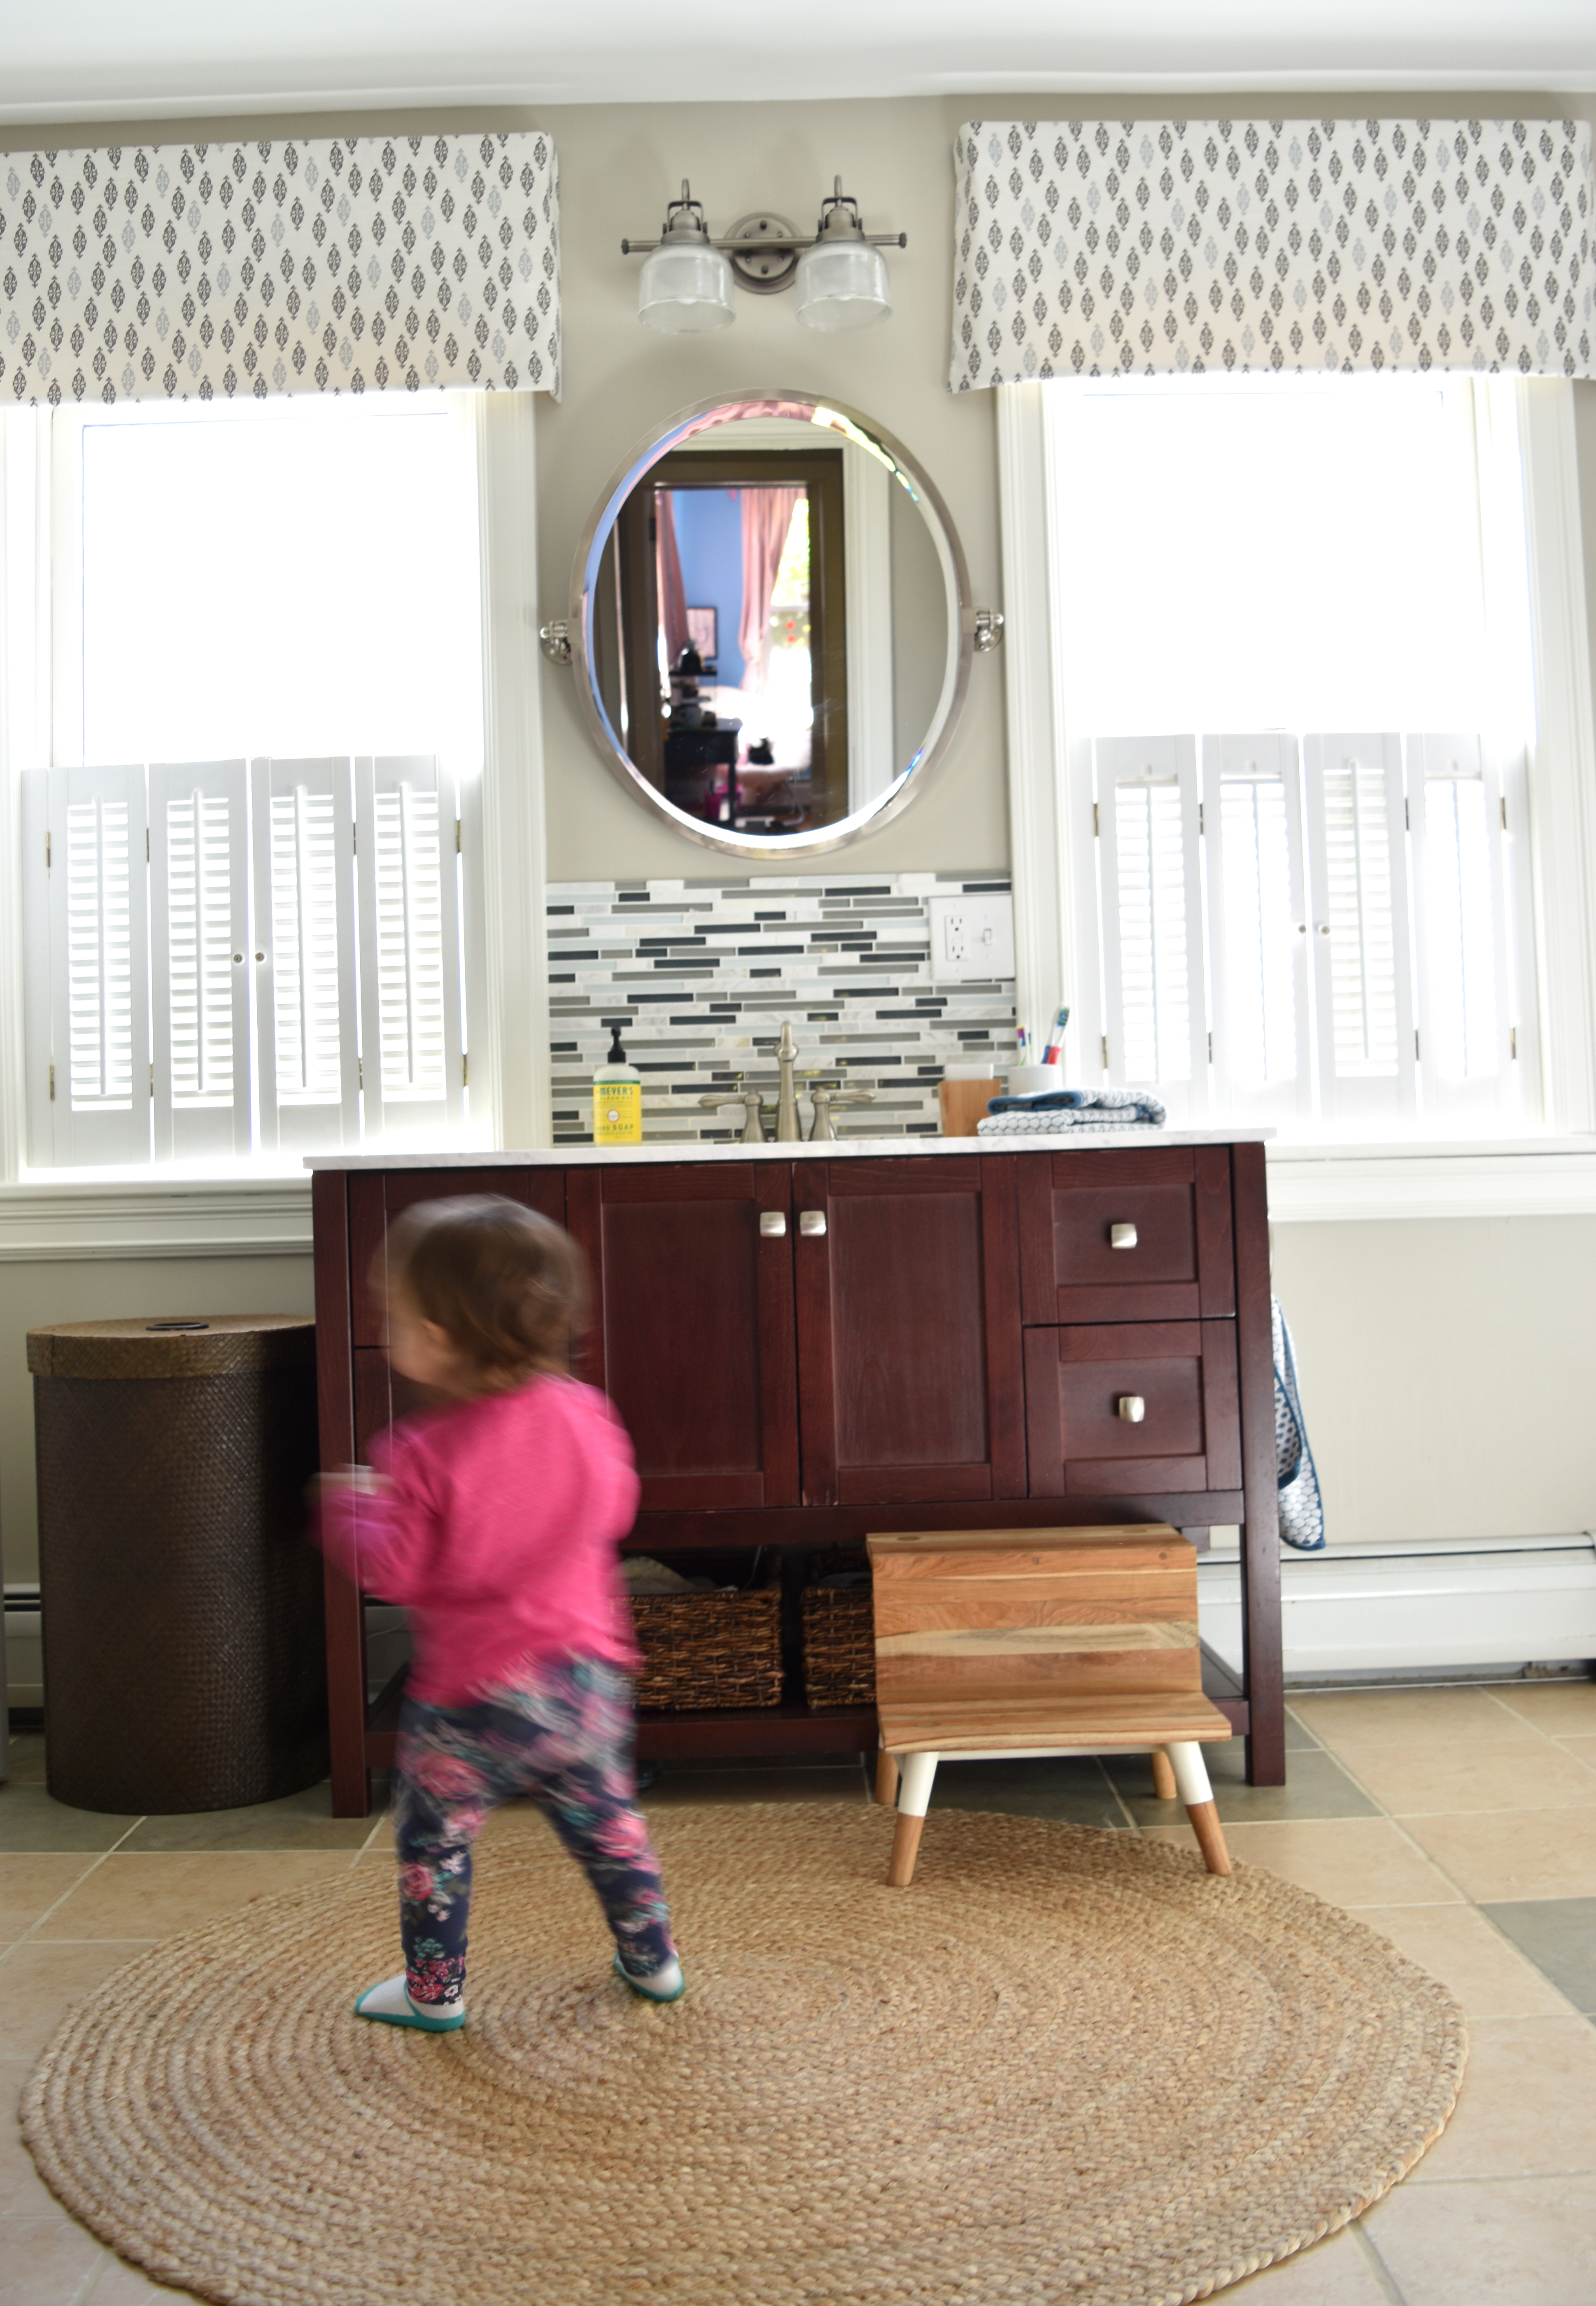
This is what I see each & every time I walk up the stairs…

snapshot from my phone The hallway entry into the remodeled bathroom space...

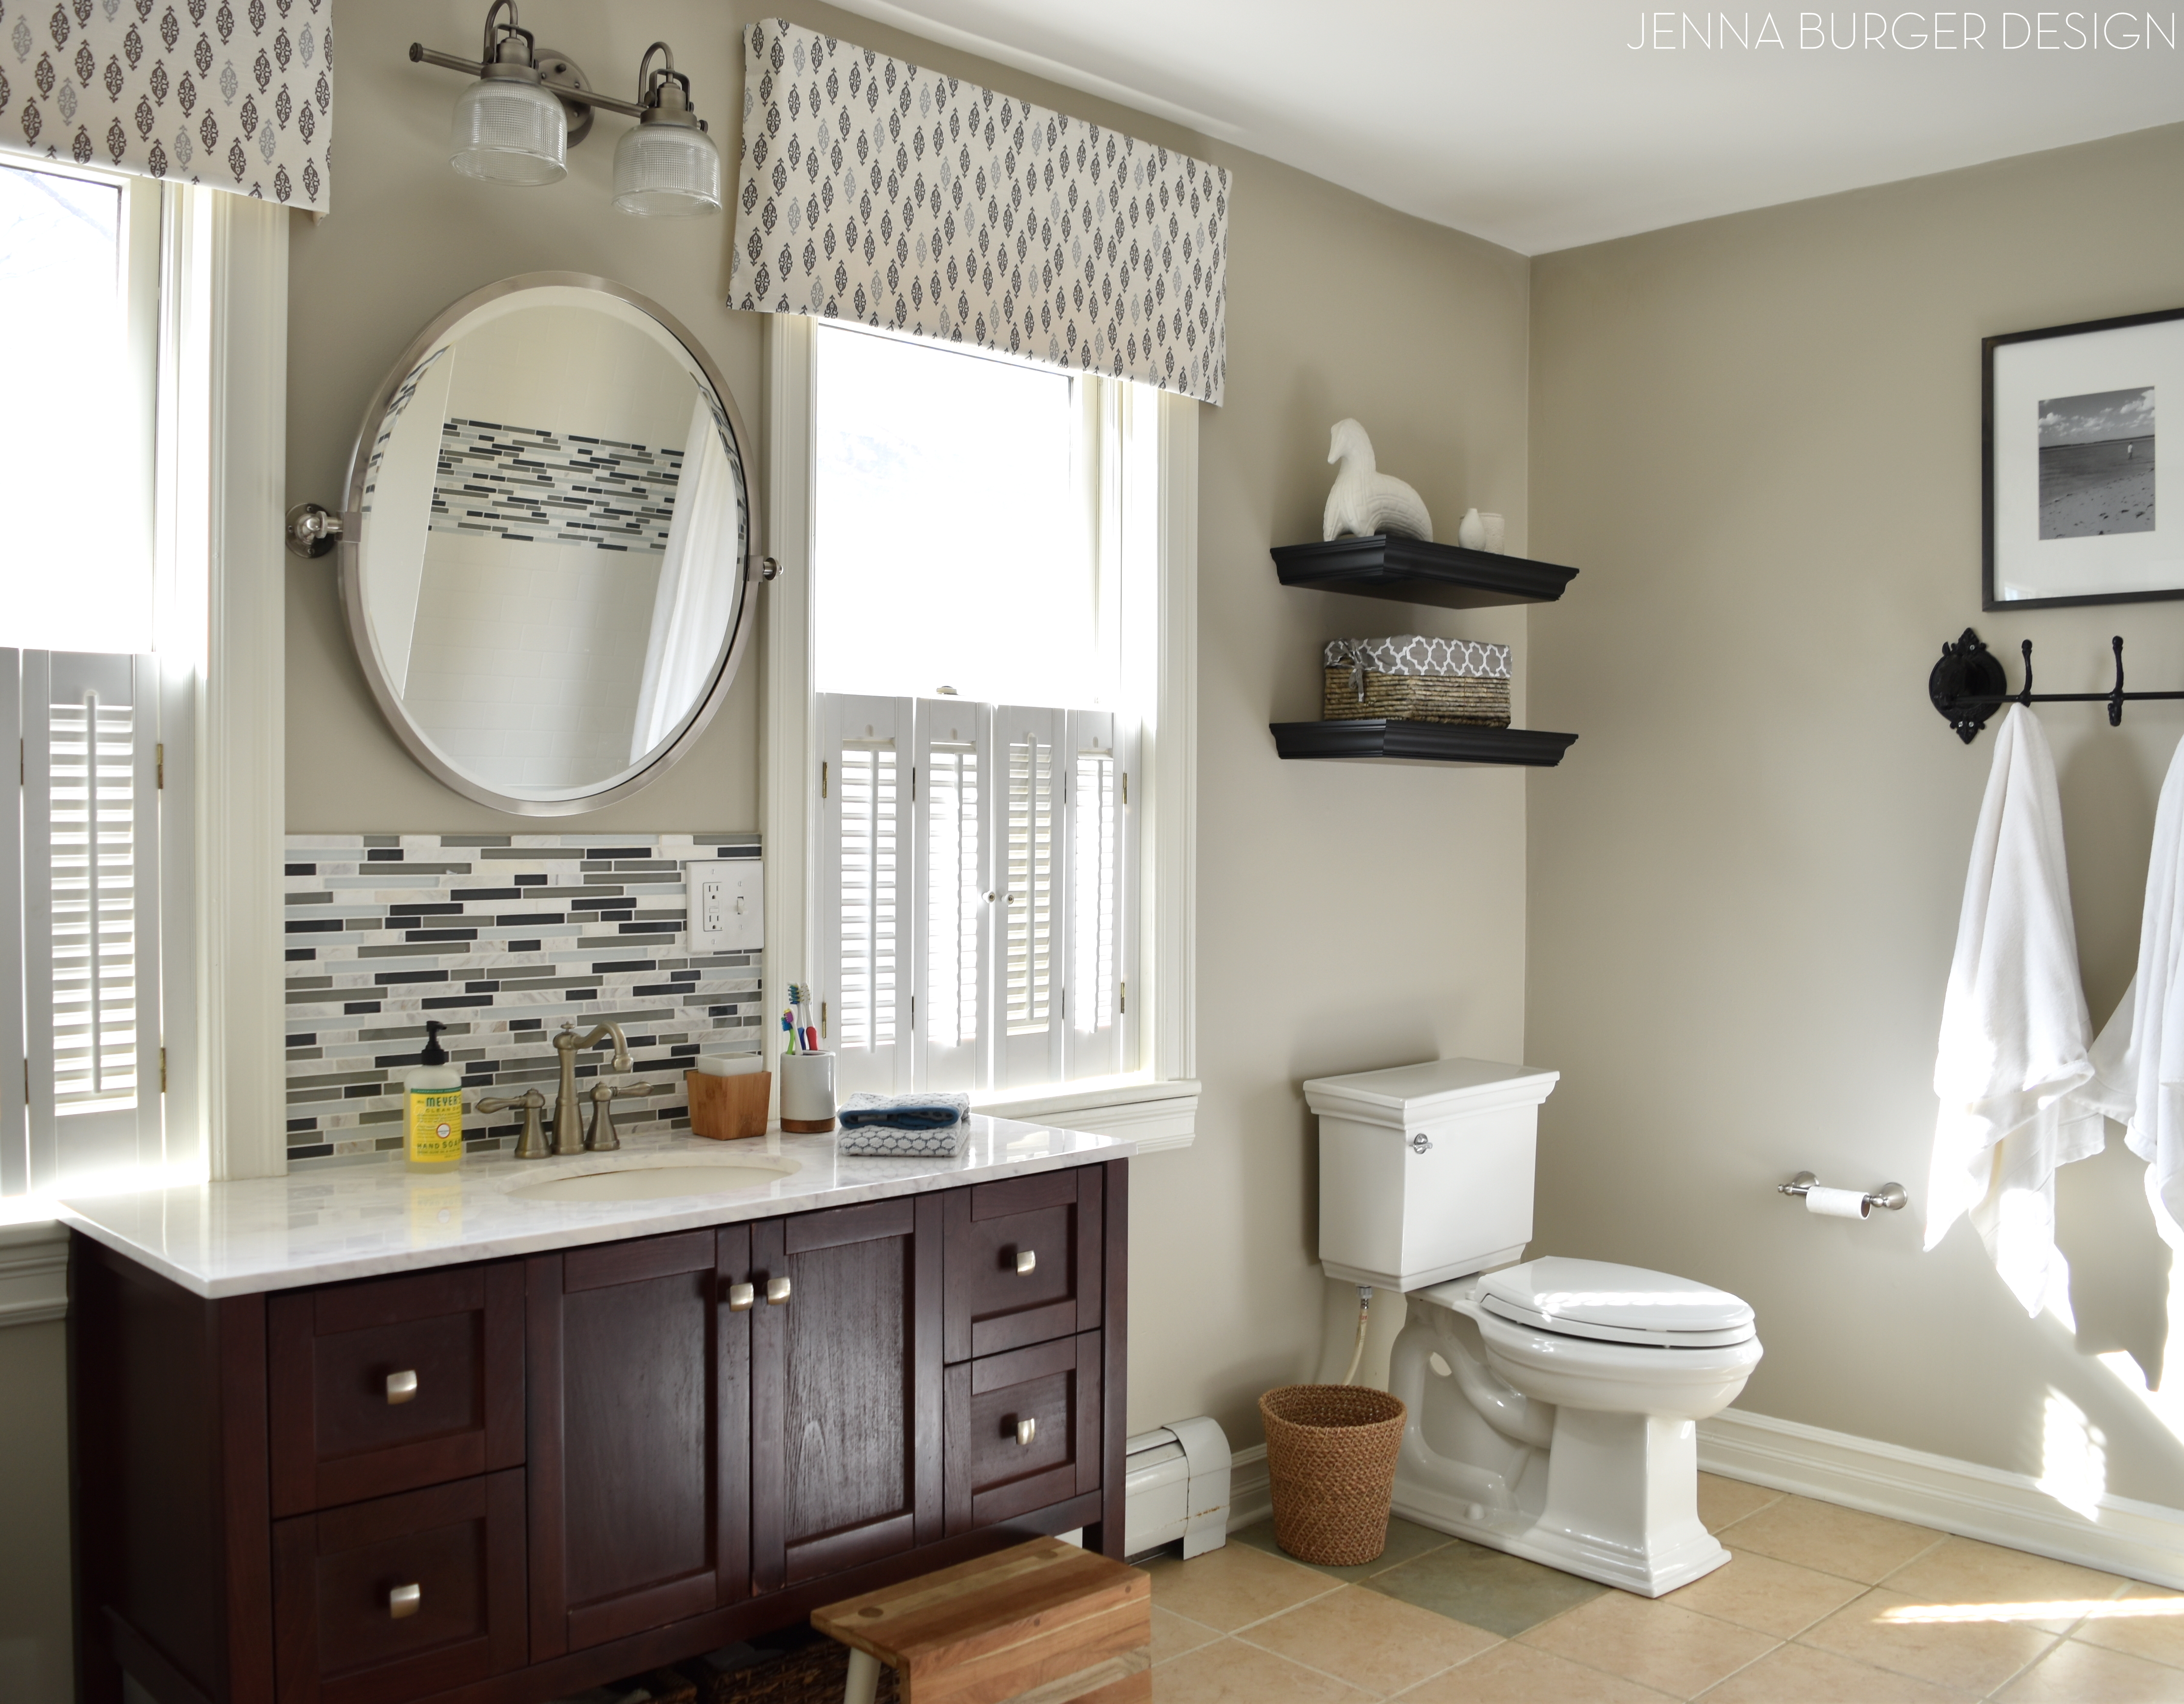
Let’s explore the new bath space more…

Bathroom Makover with 95% of the space being a DIY project - new tub + tile, vanity, wallpaper, and more!  Lots of details on this multi-post before & after.  Bathroom makeover by Jenna Burger Design www.jennaburger.com

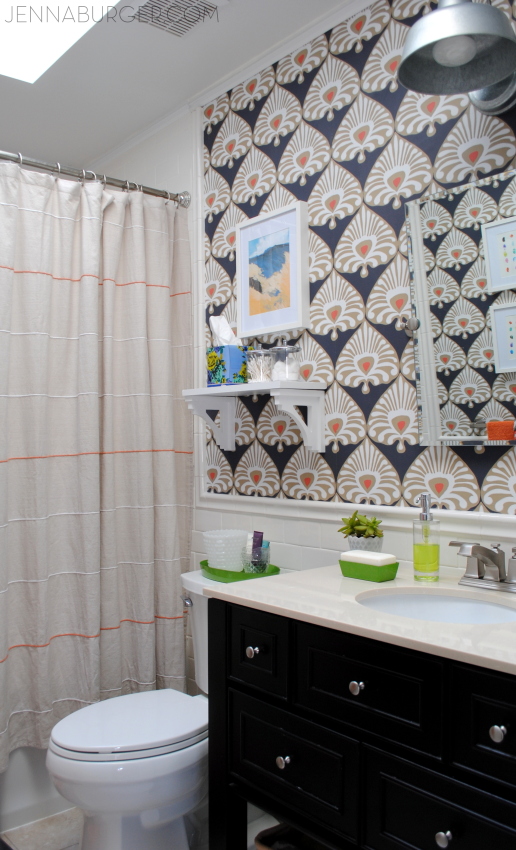
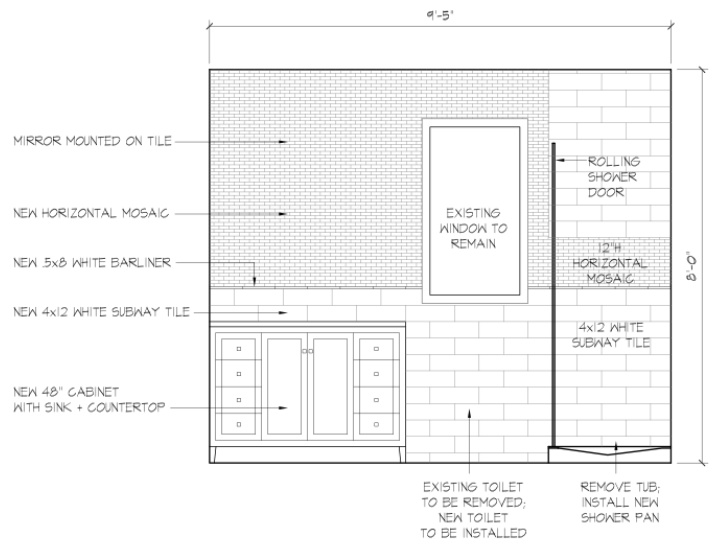
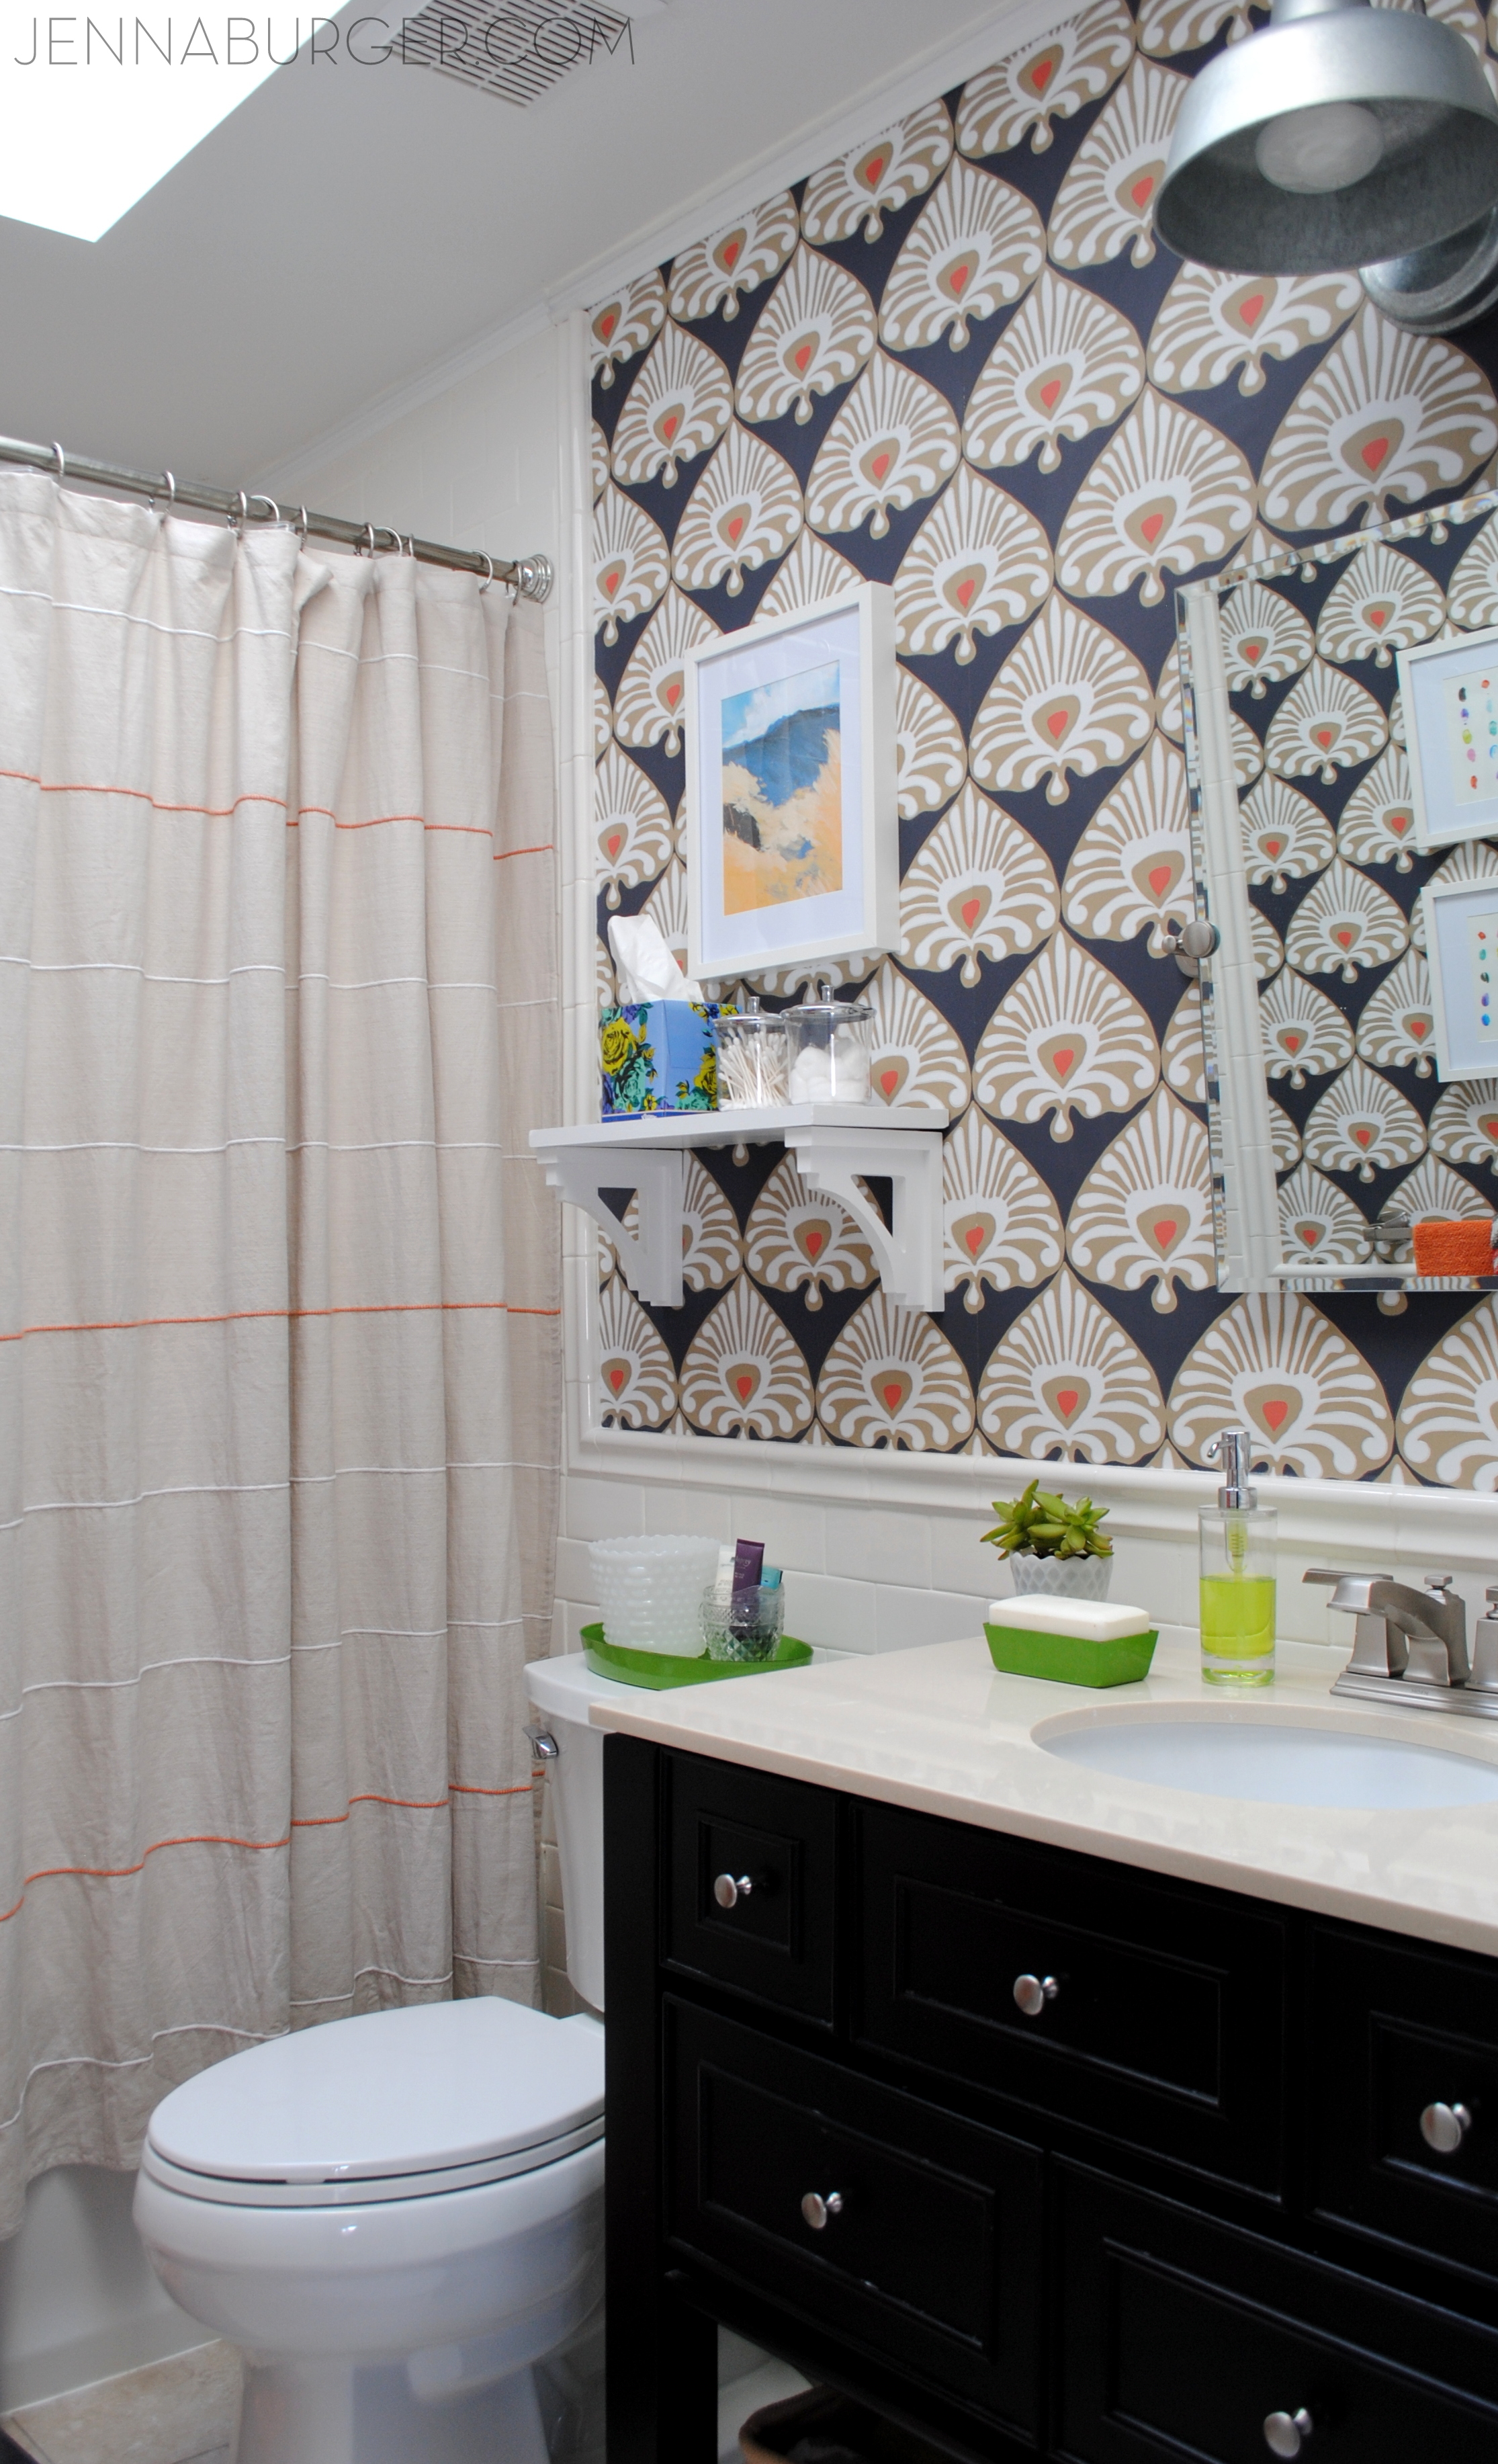
The space is a typical standard 5′ x 8′ bathroom with a sink, toilet, tub layout on one wall & then a straight wall on the other side.

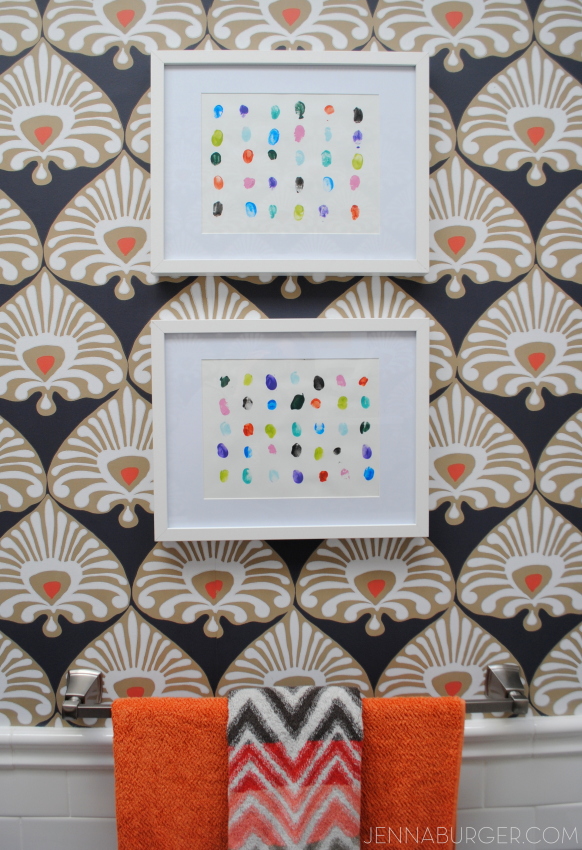
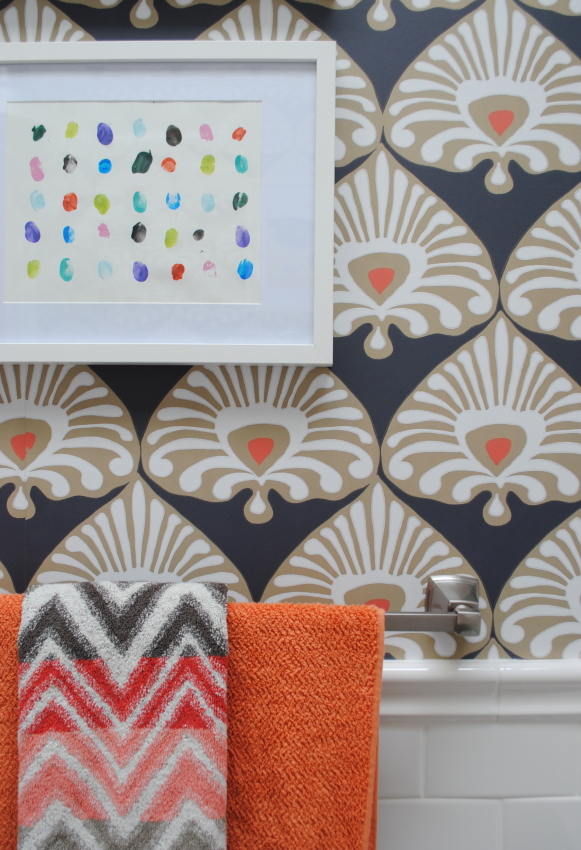
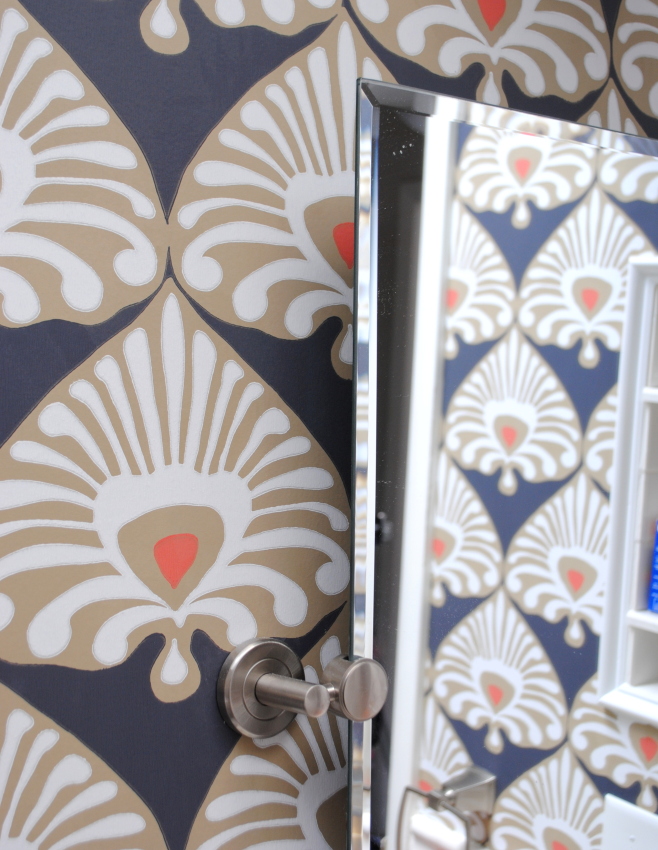
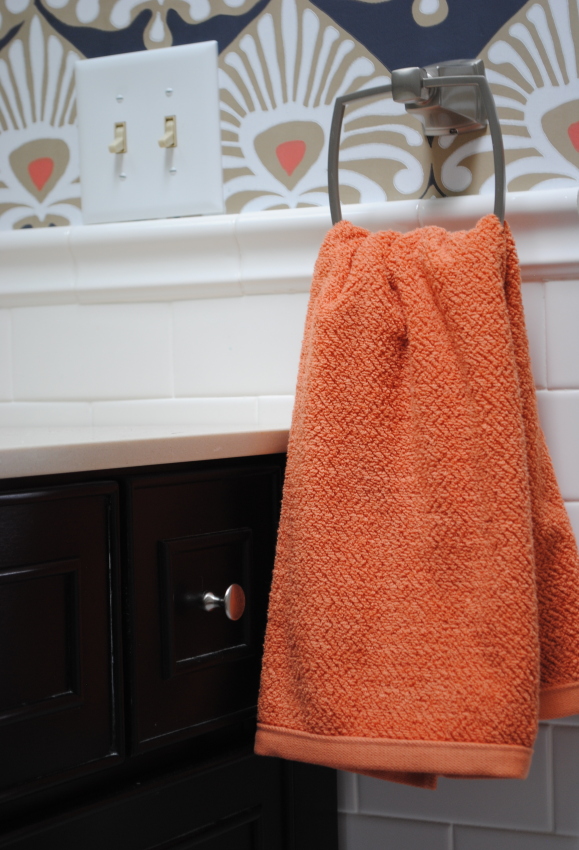
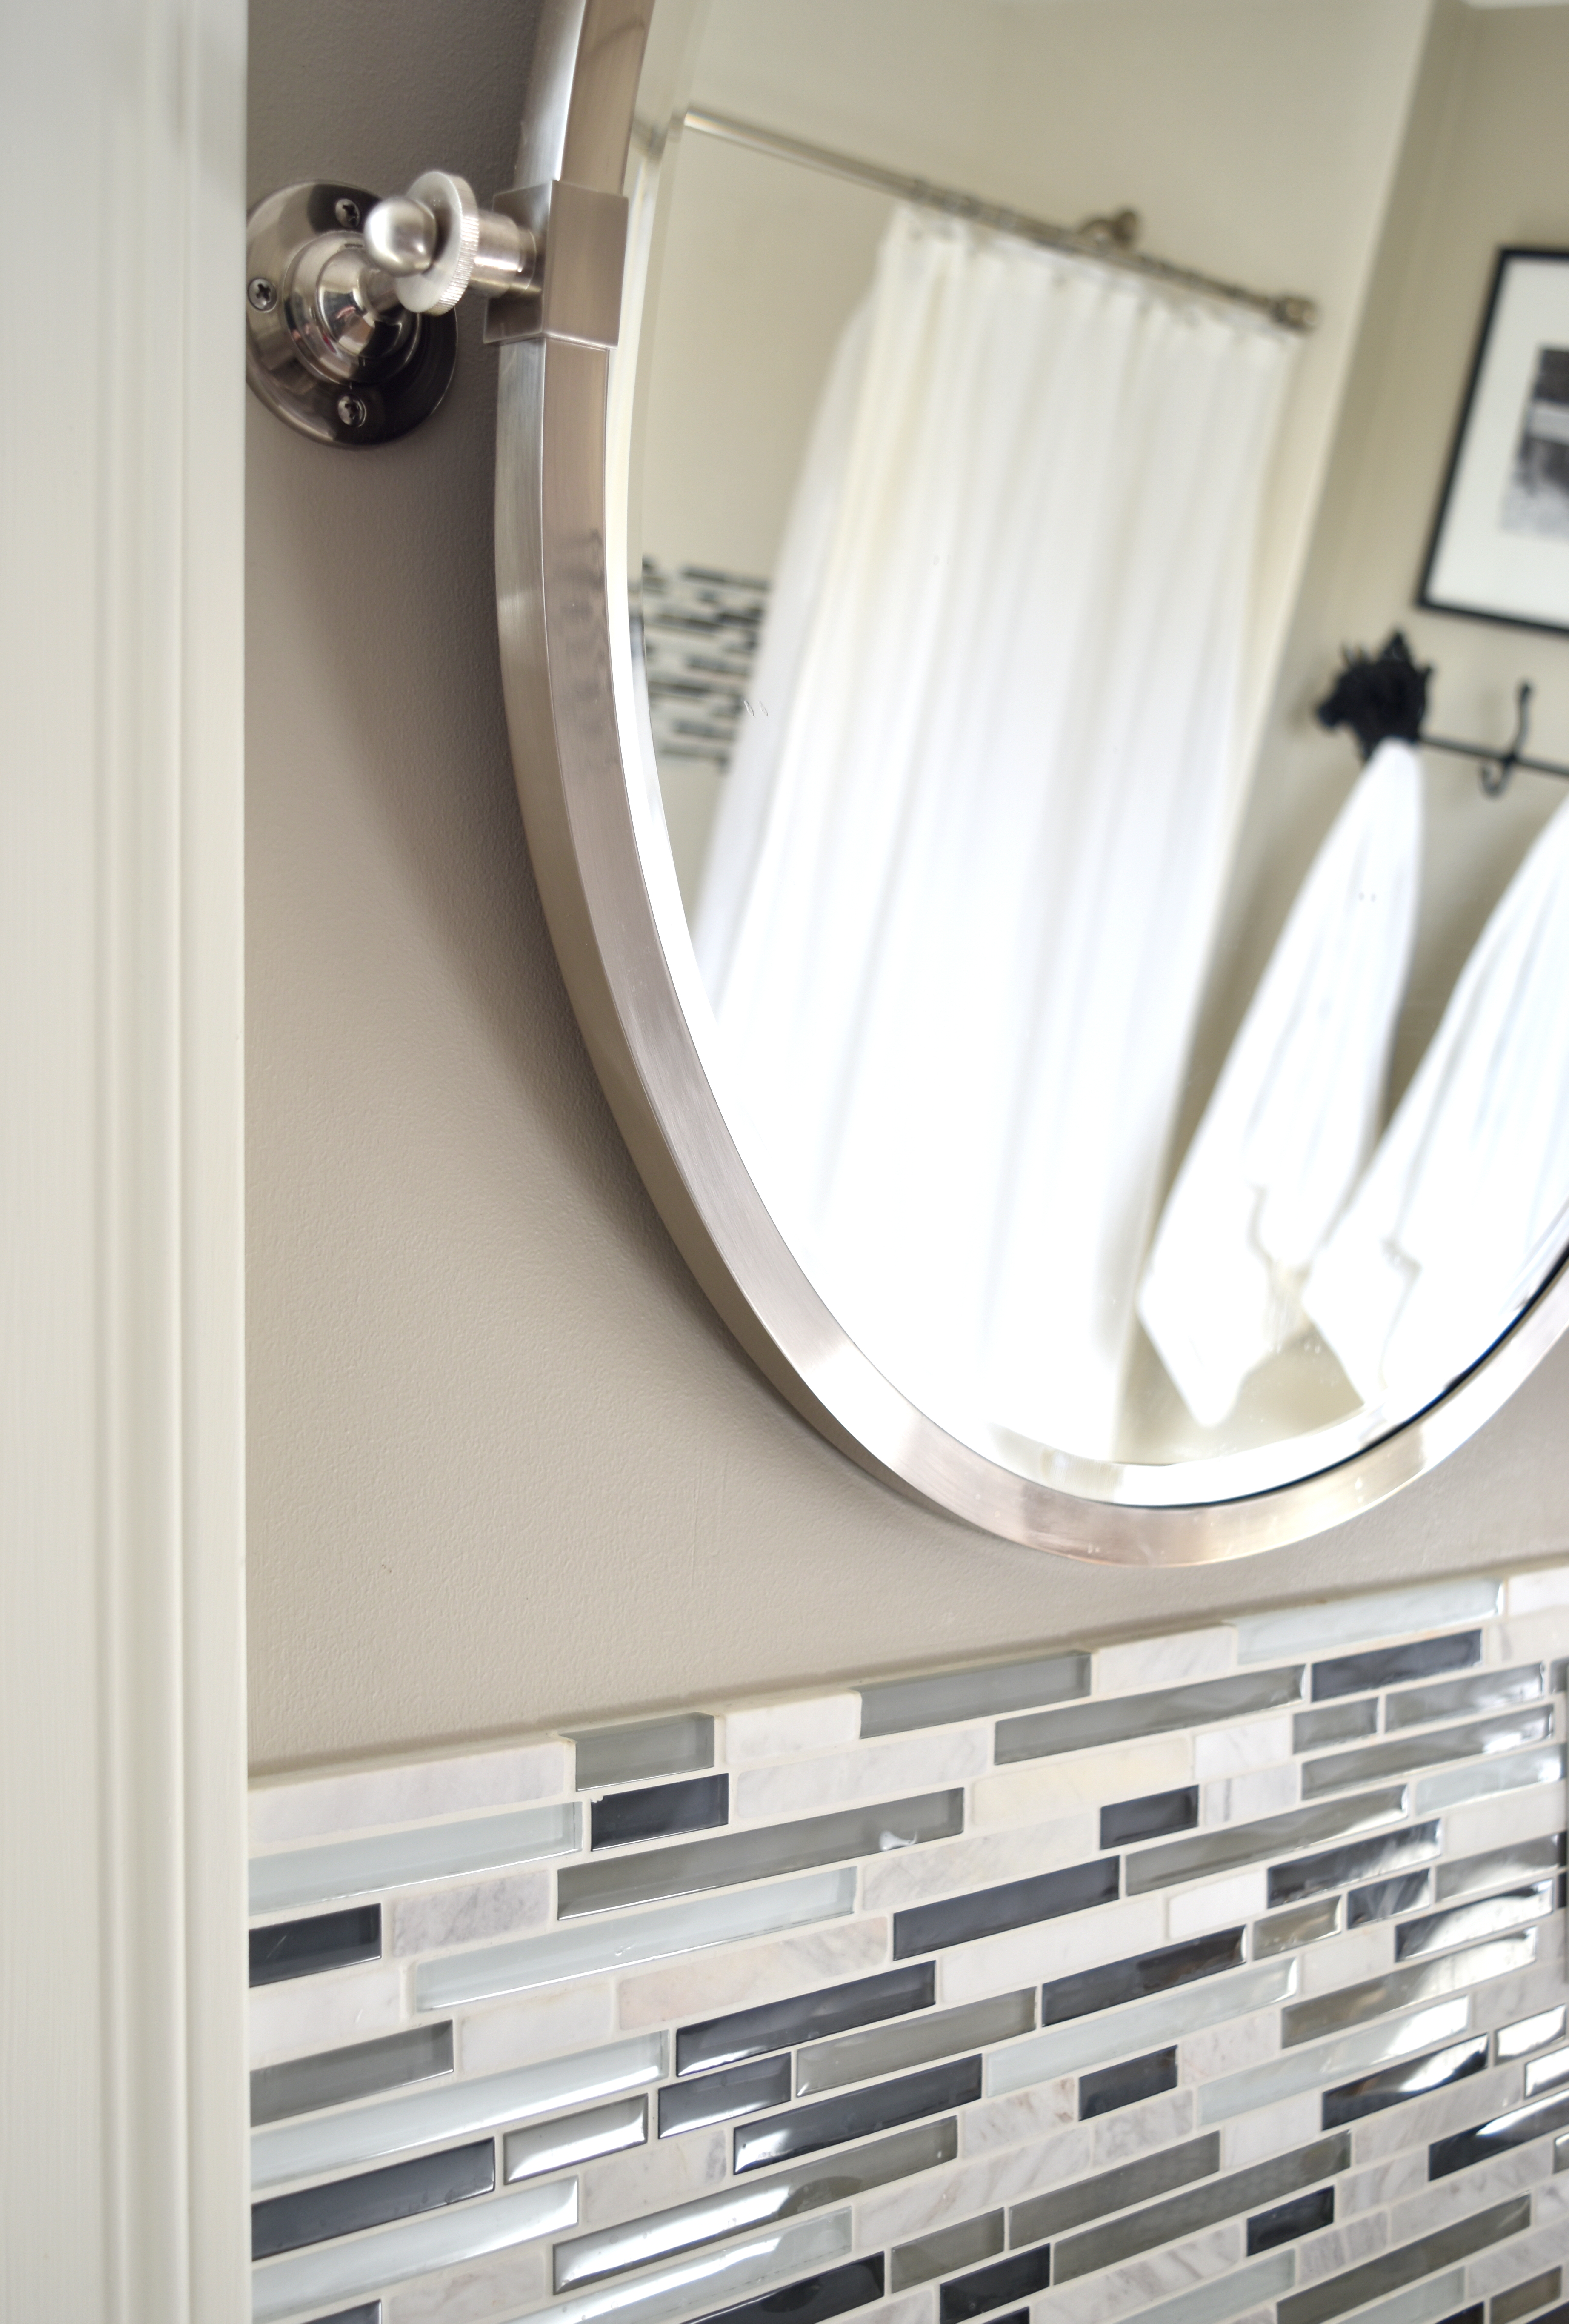
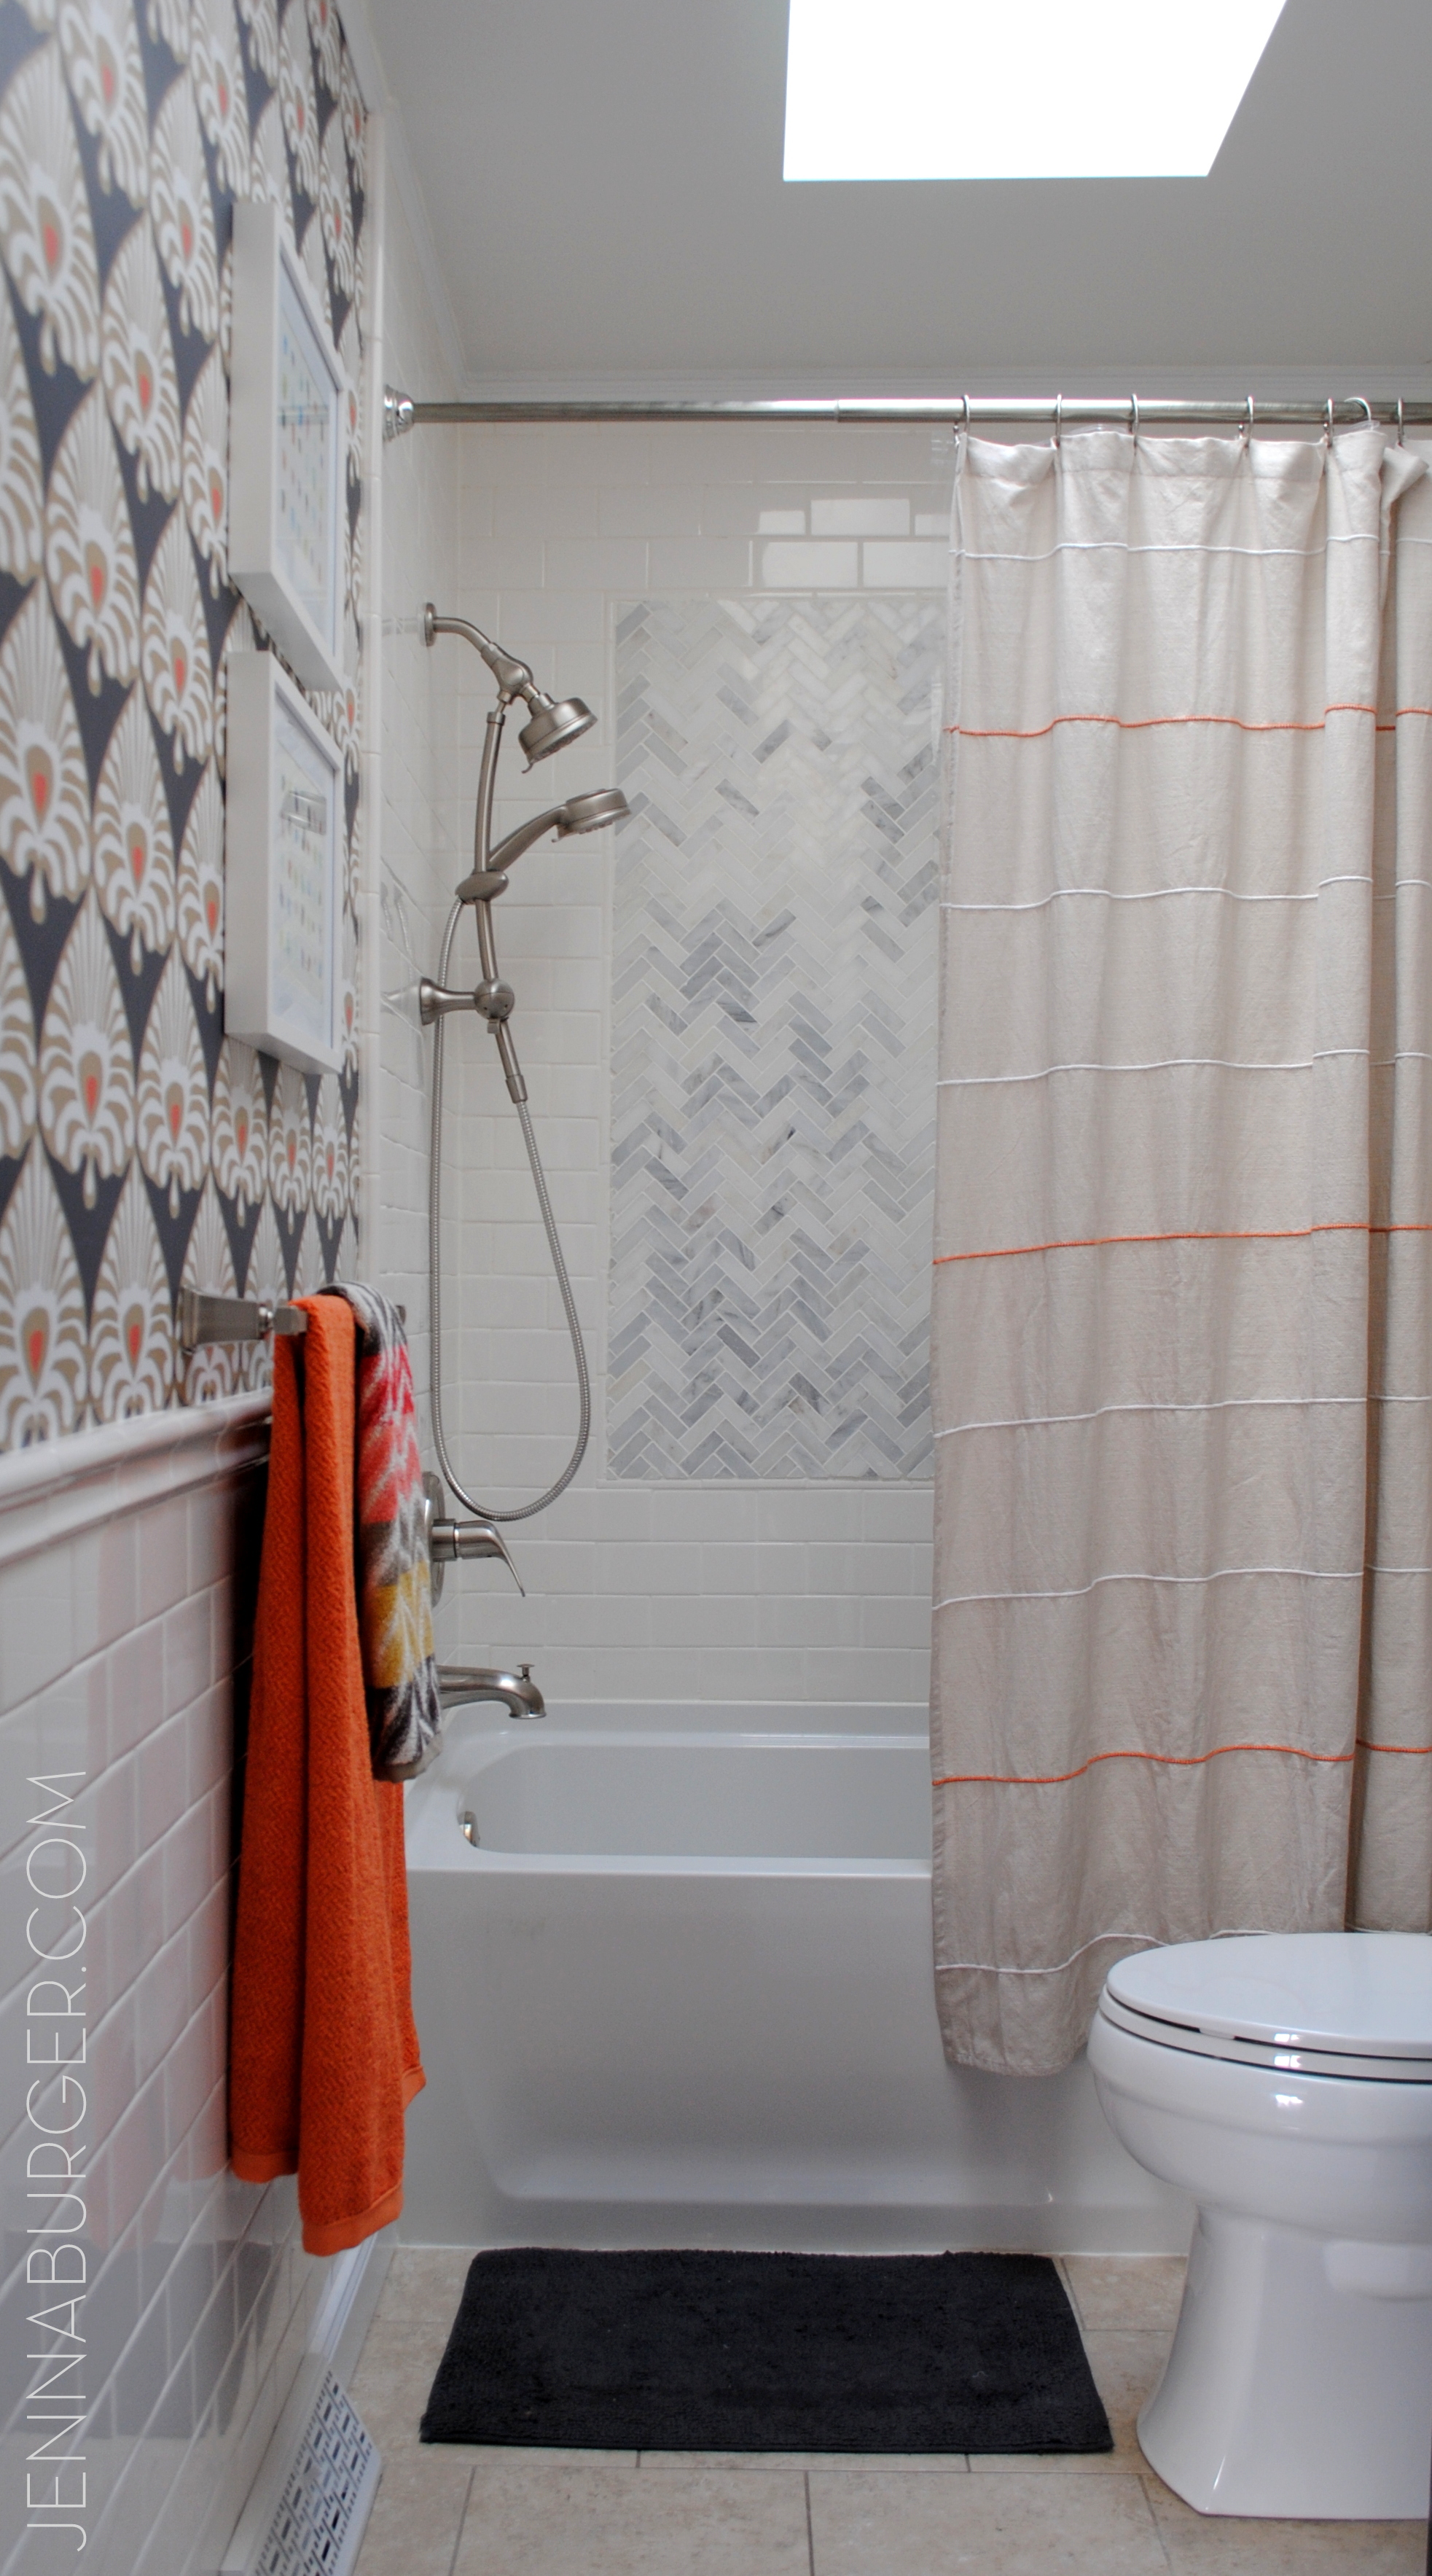
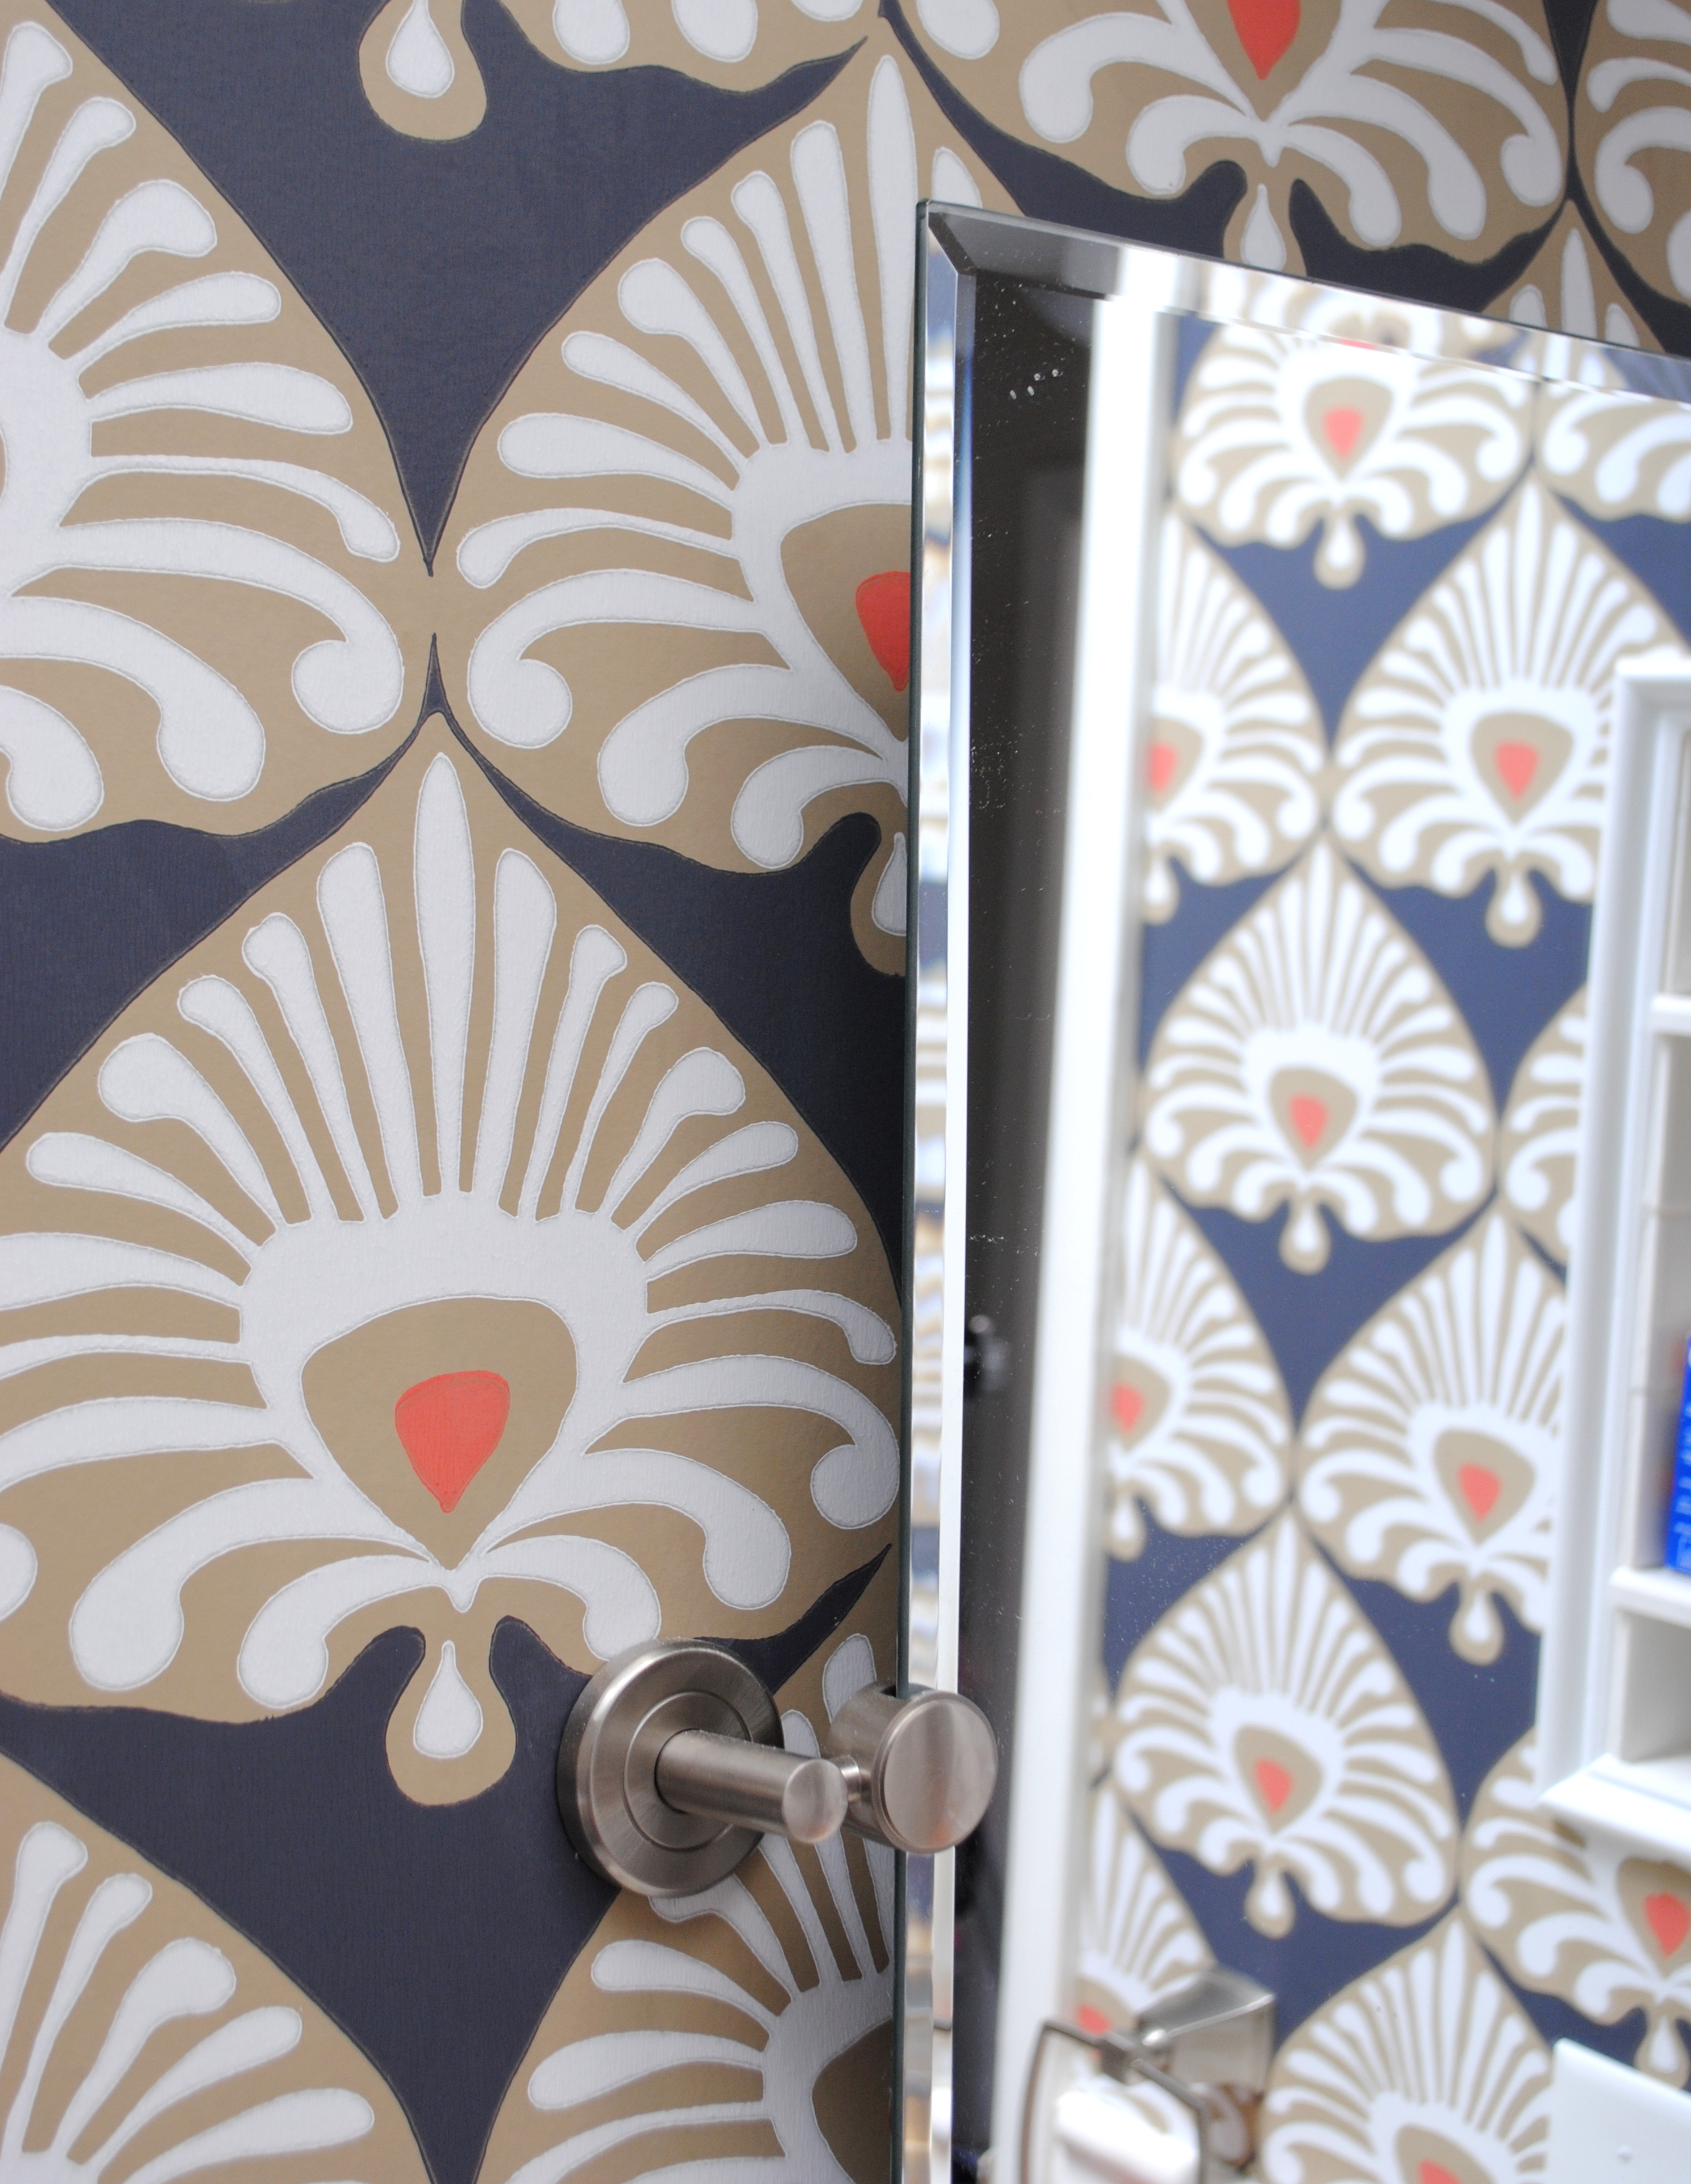
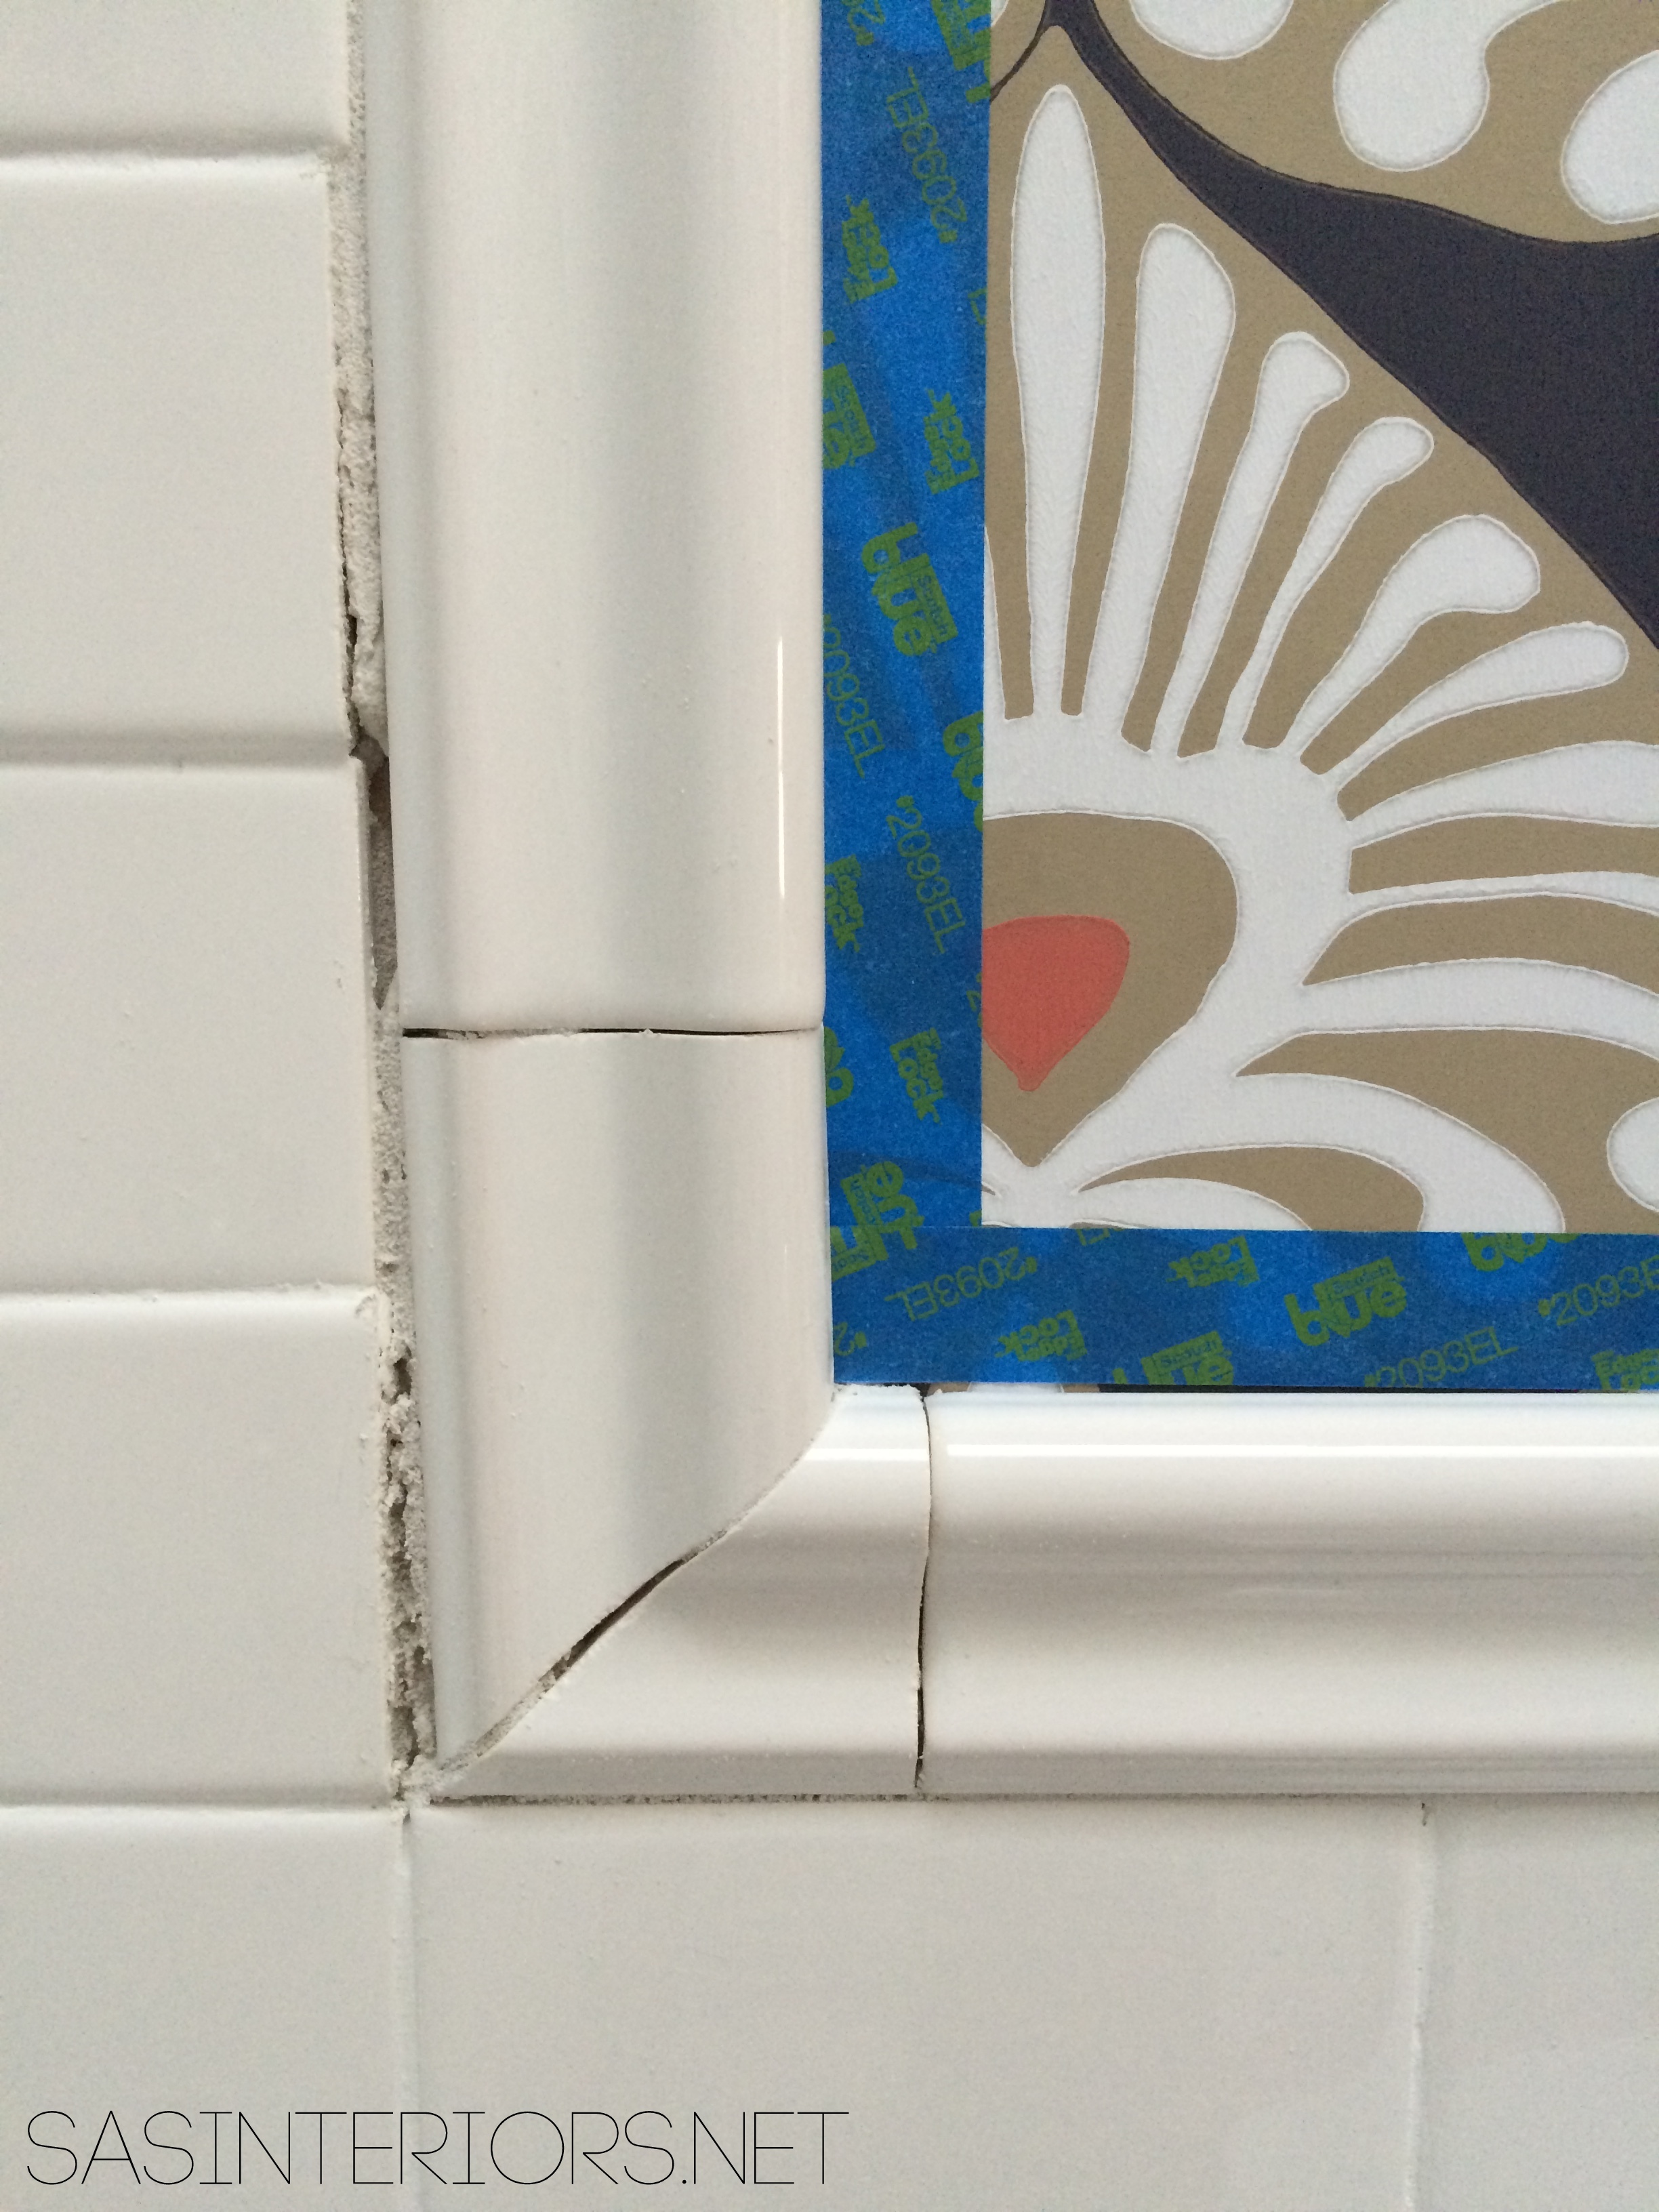
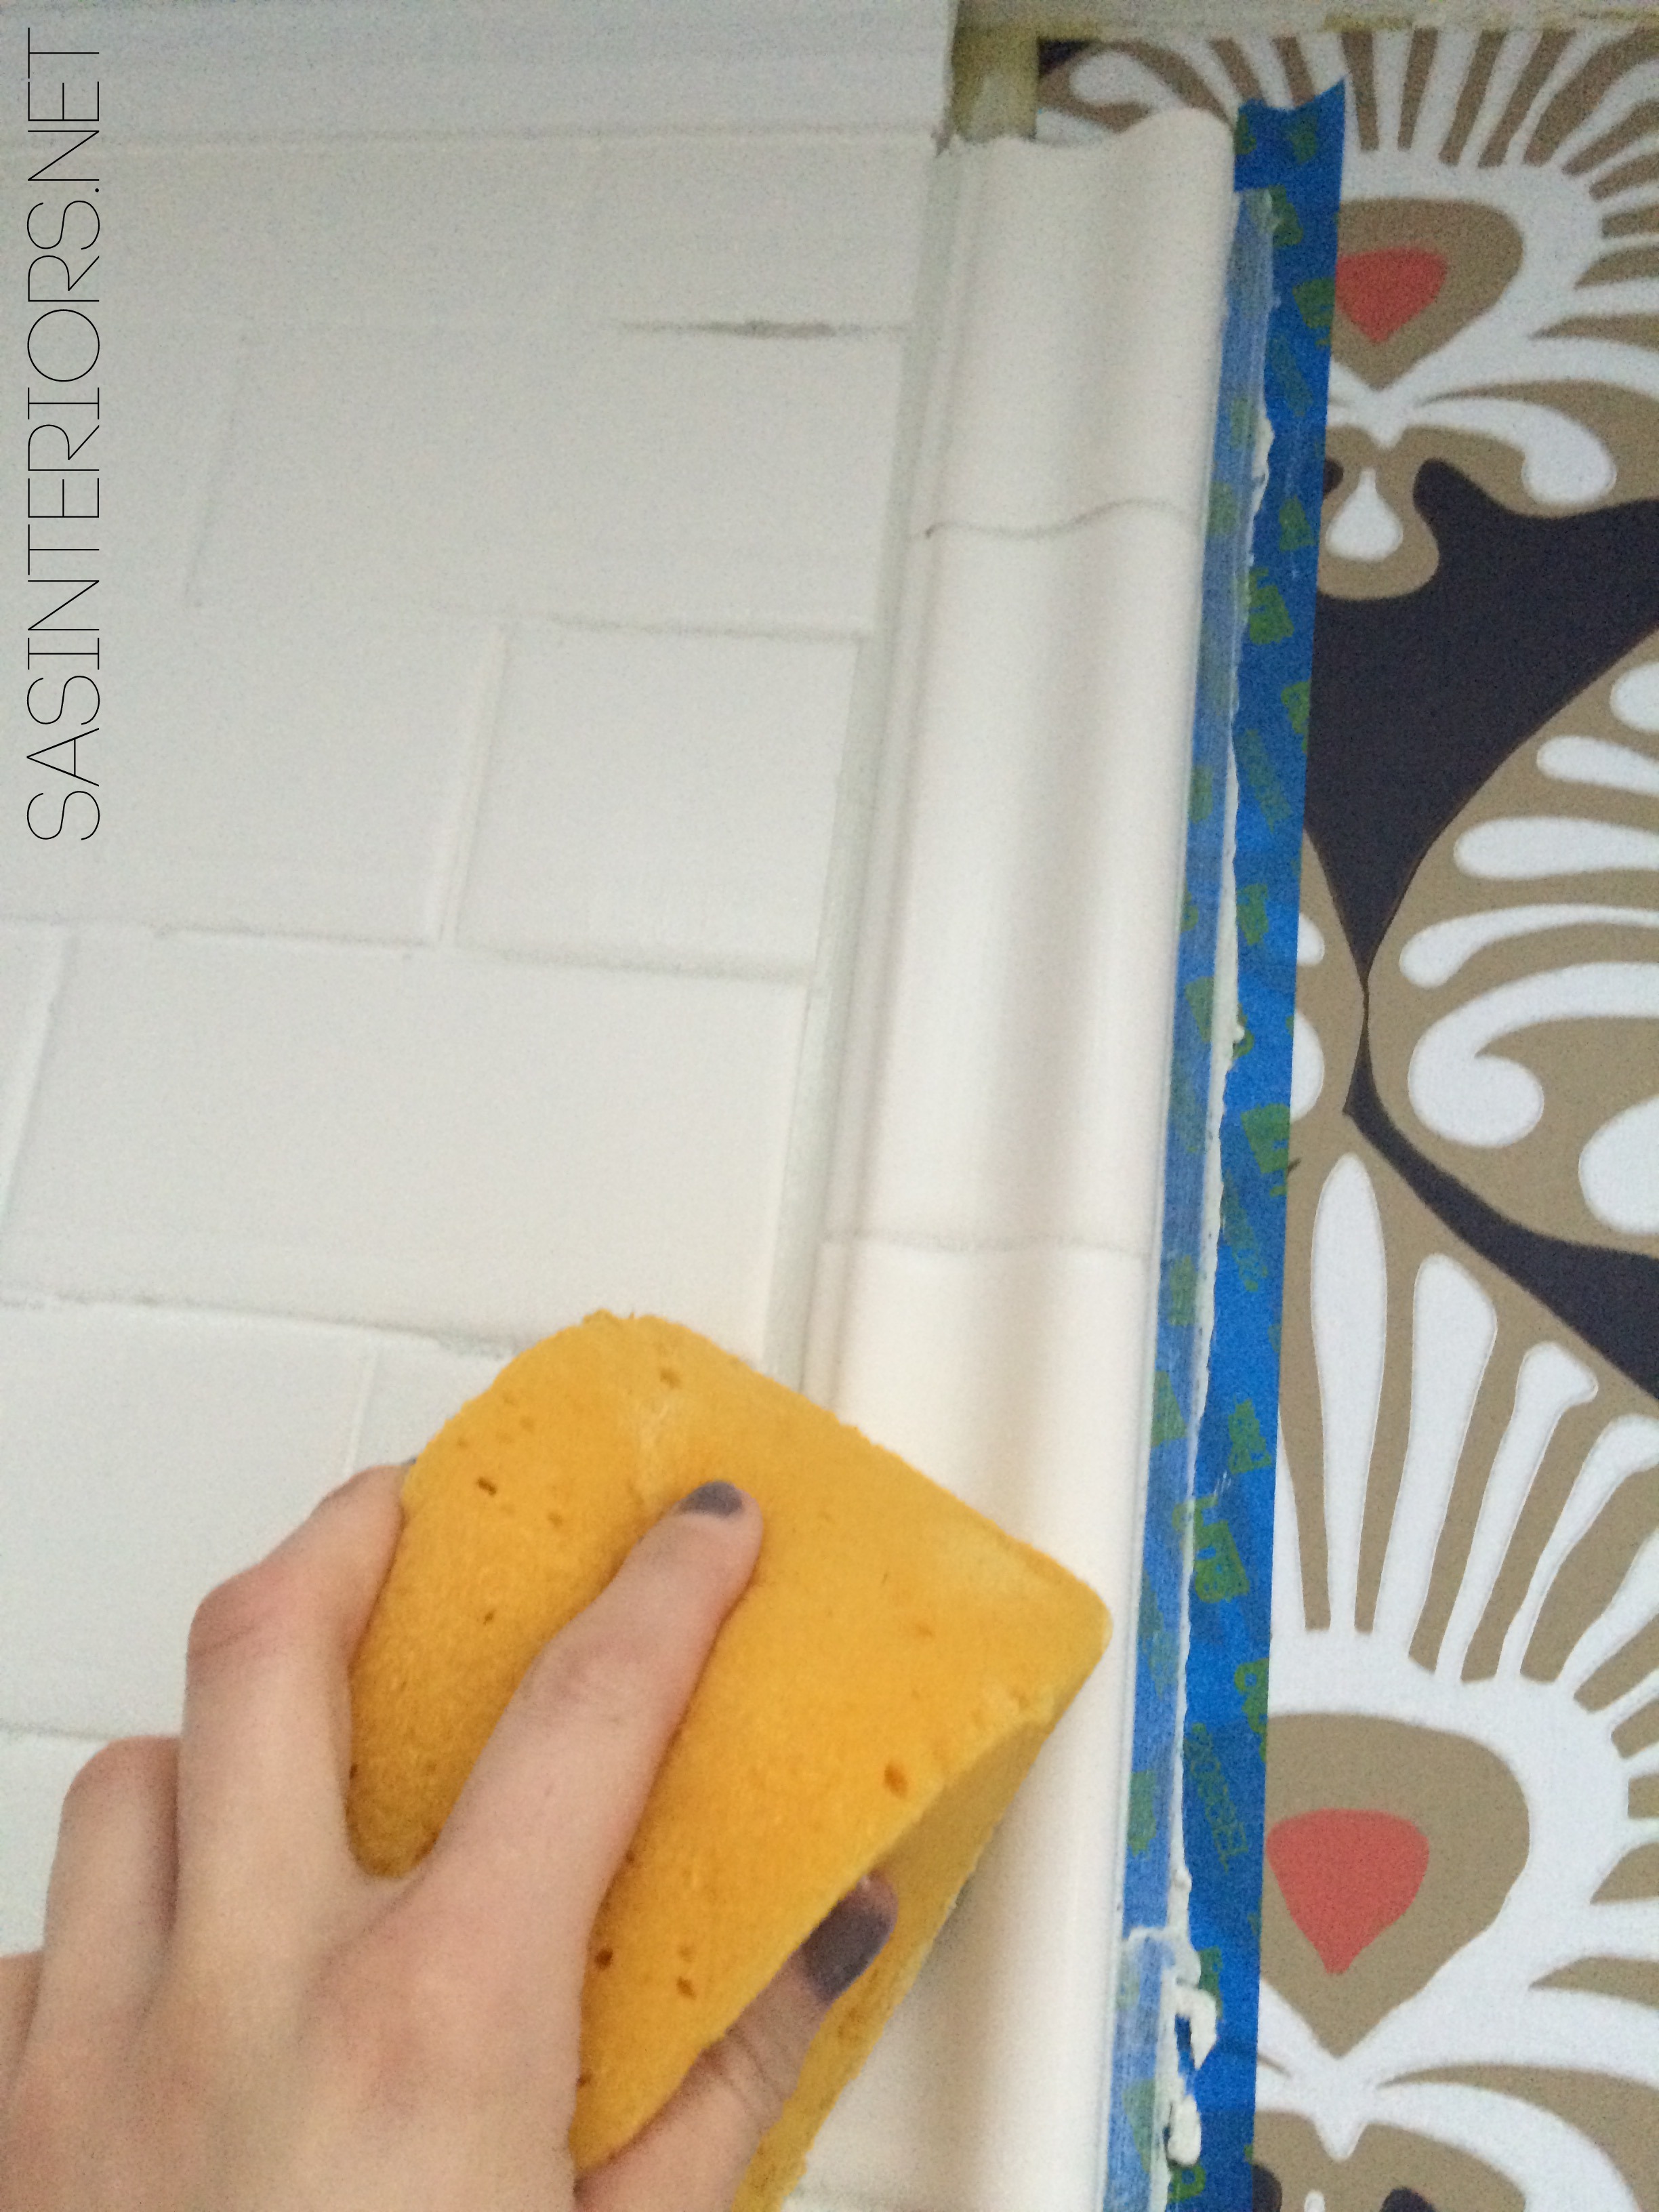
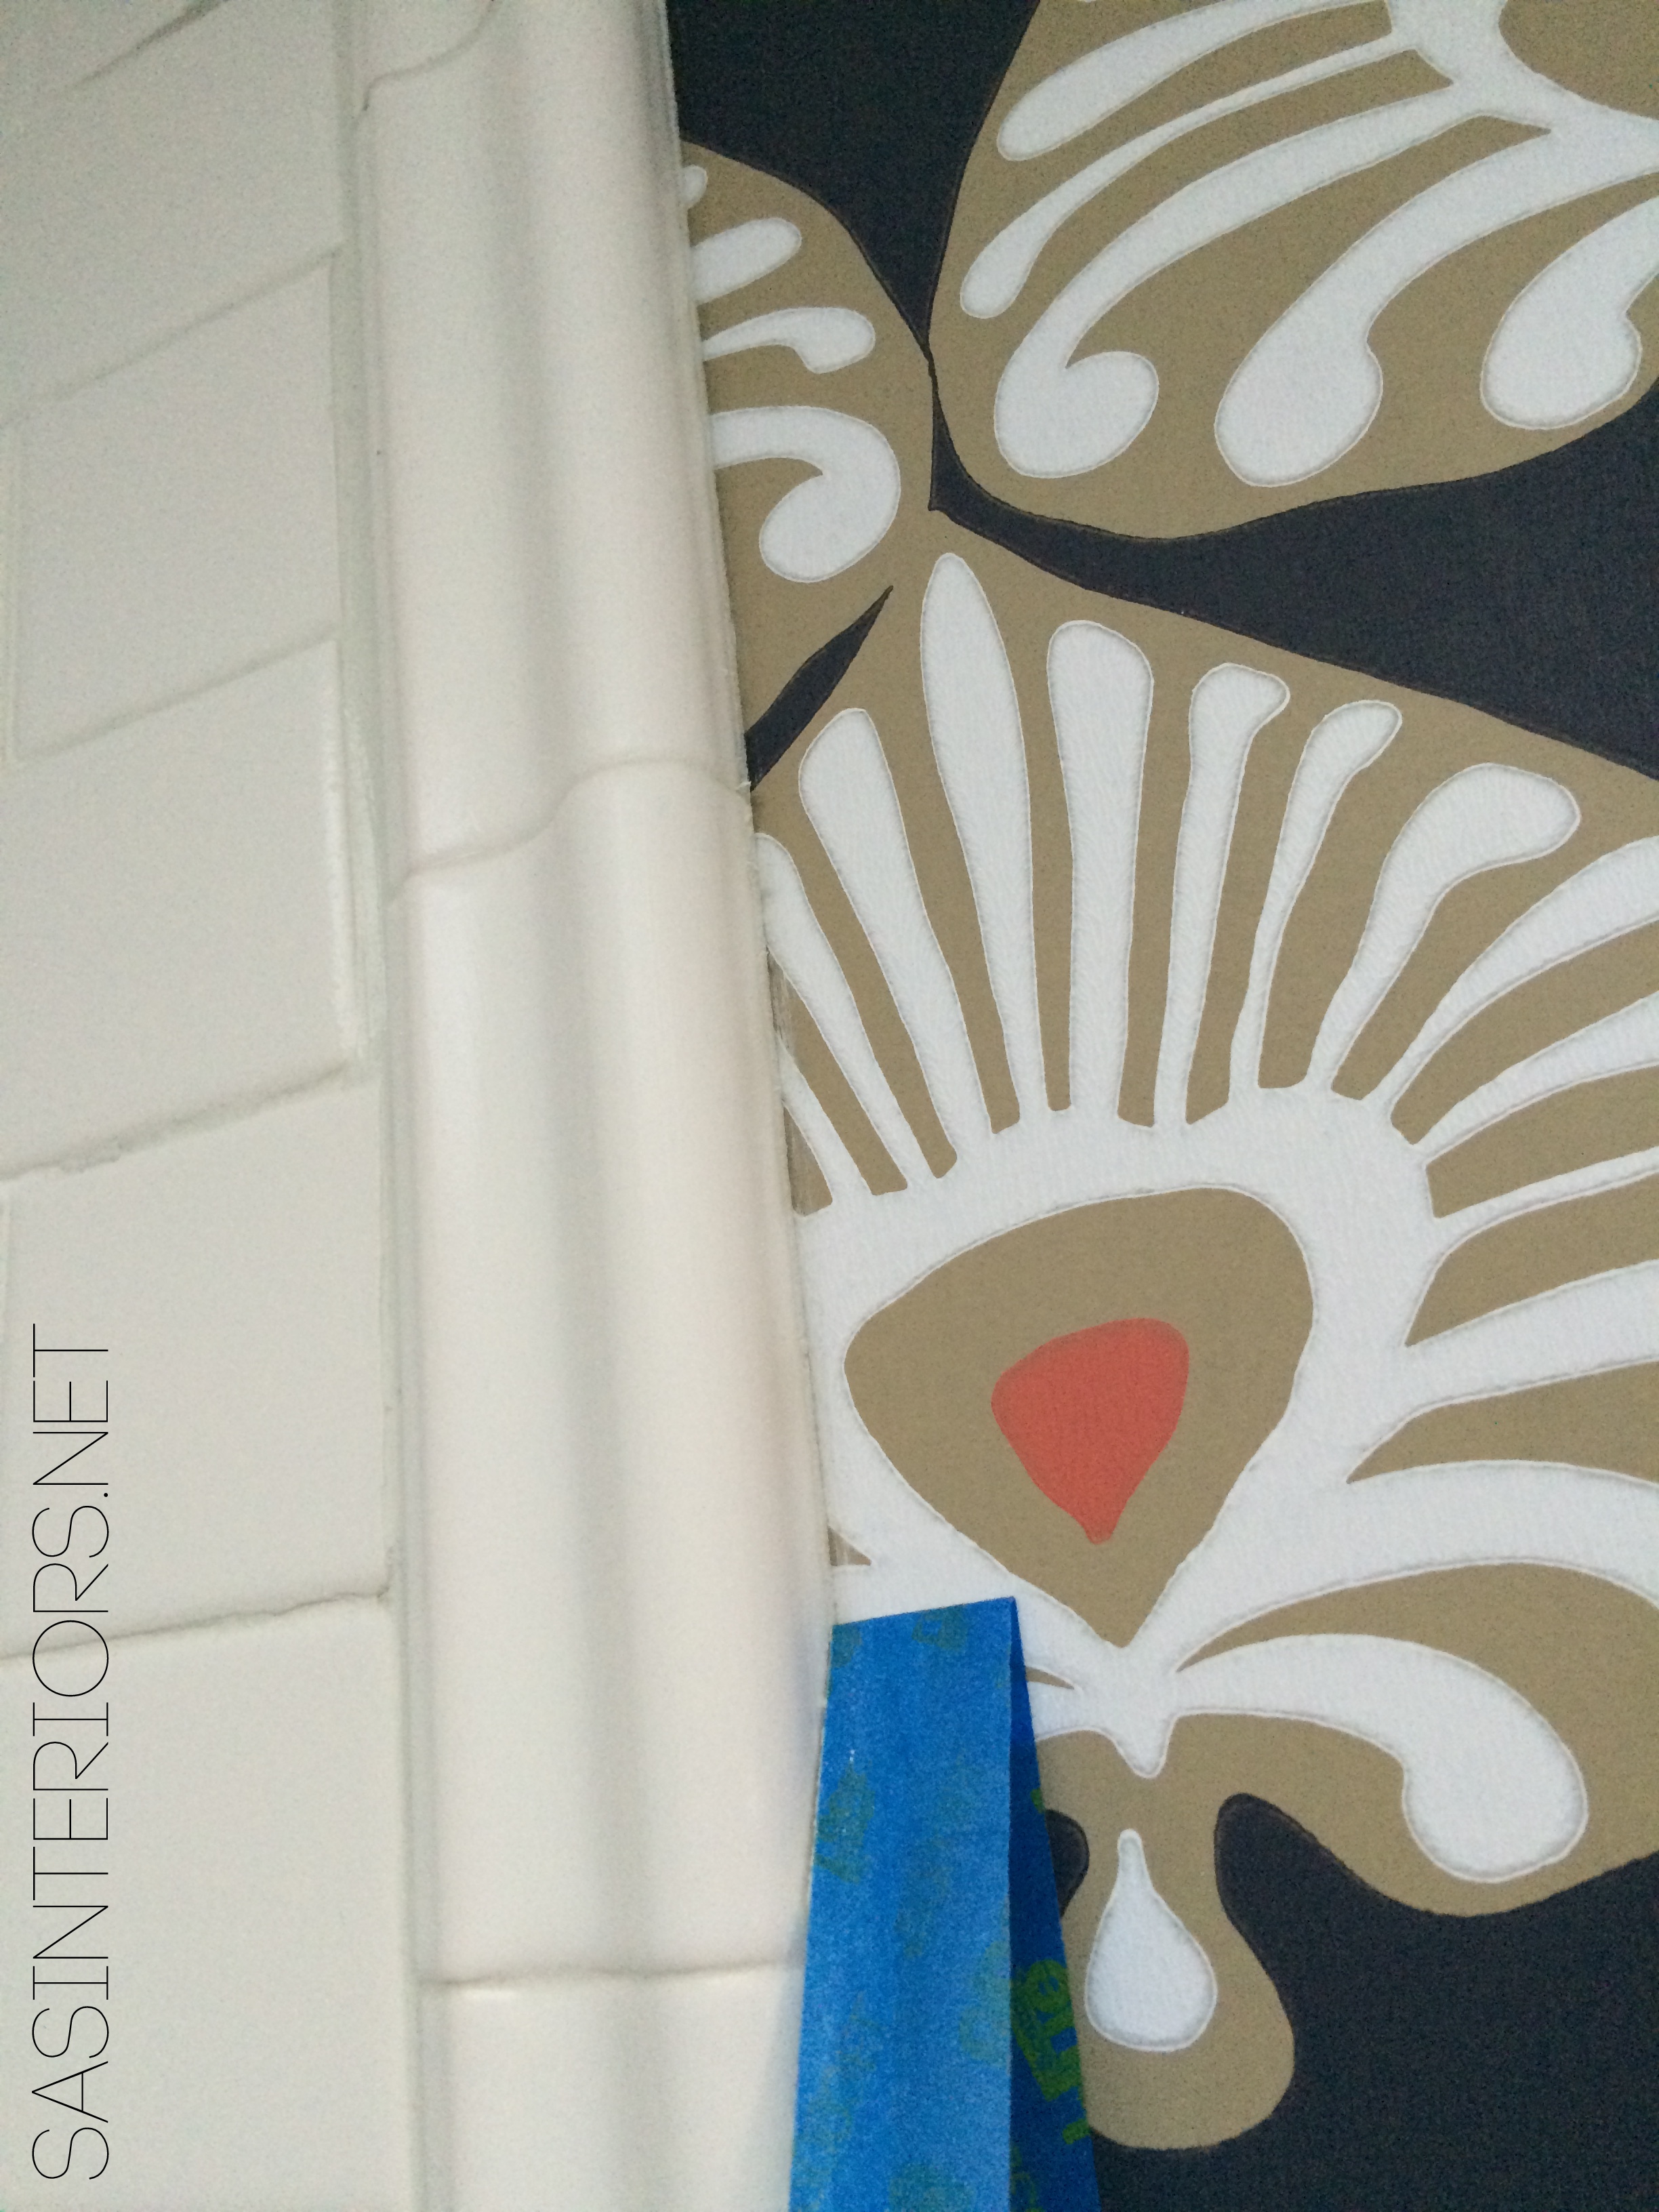
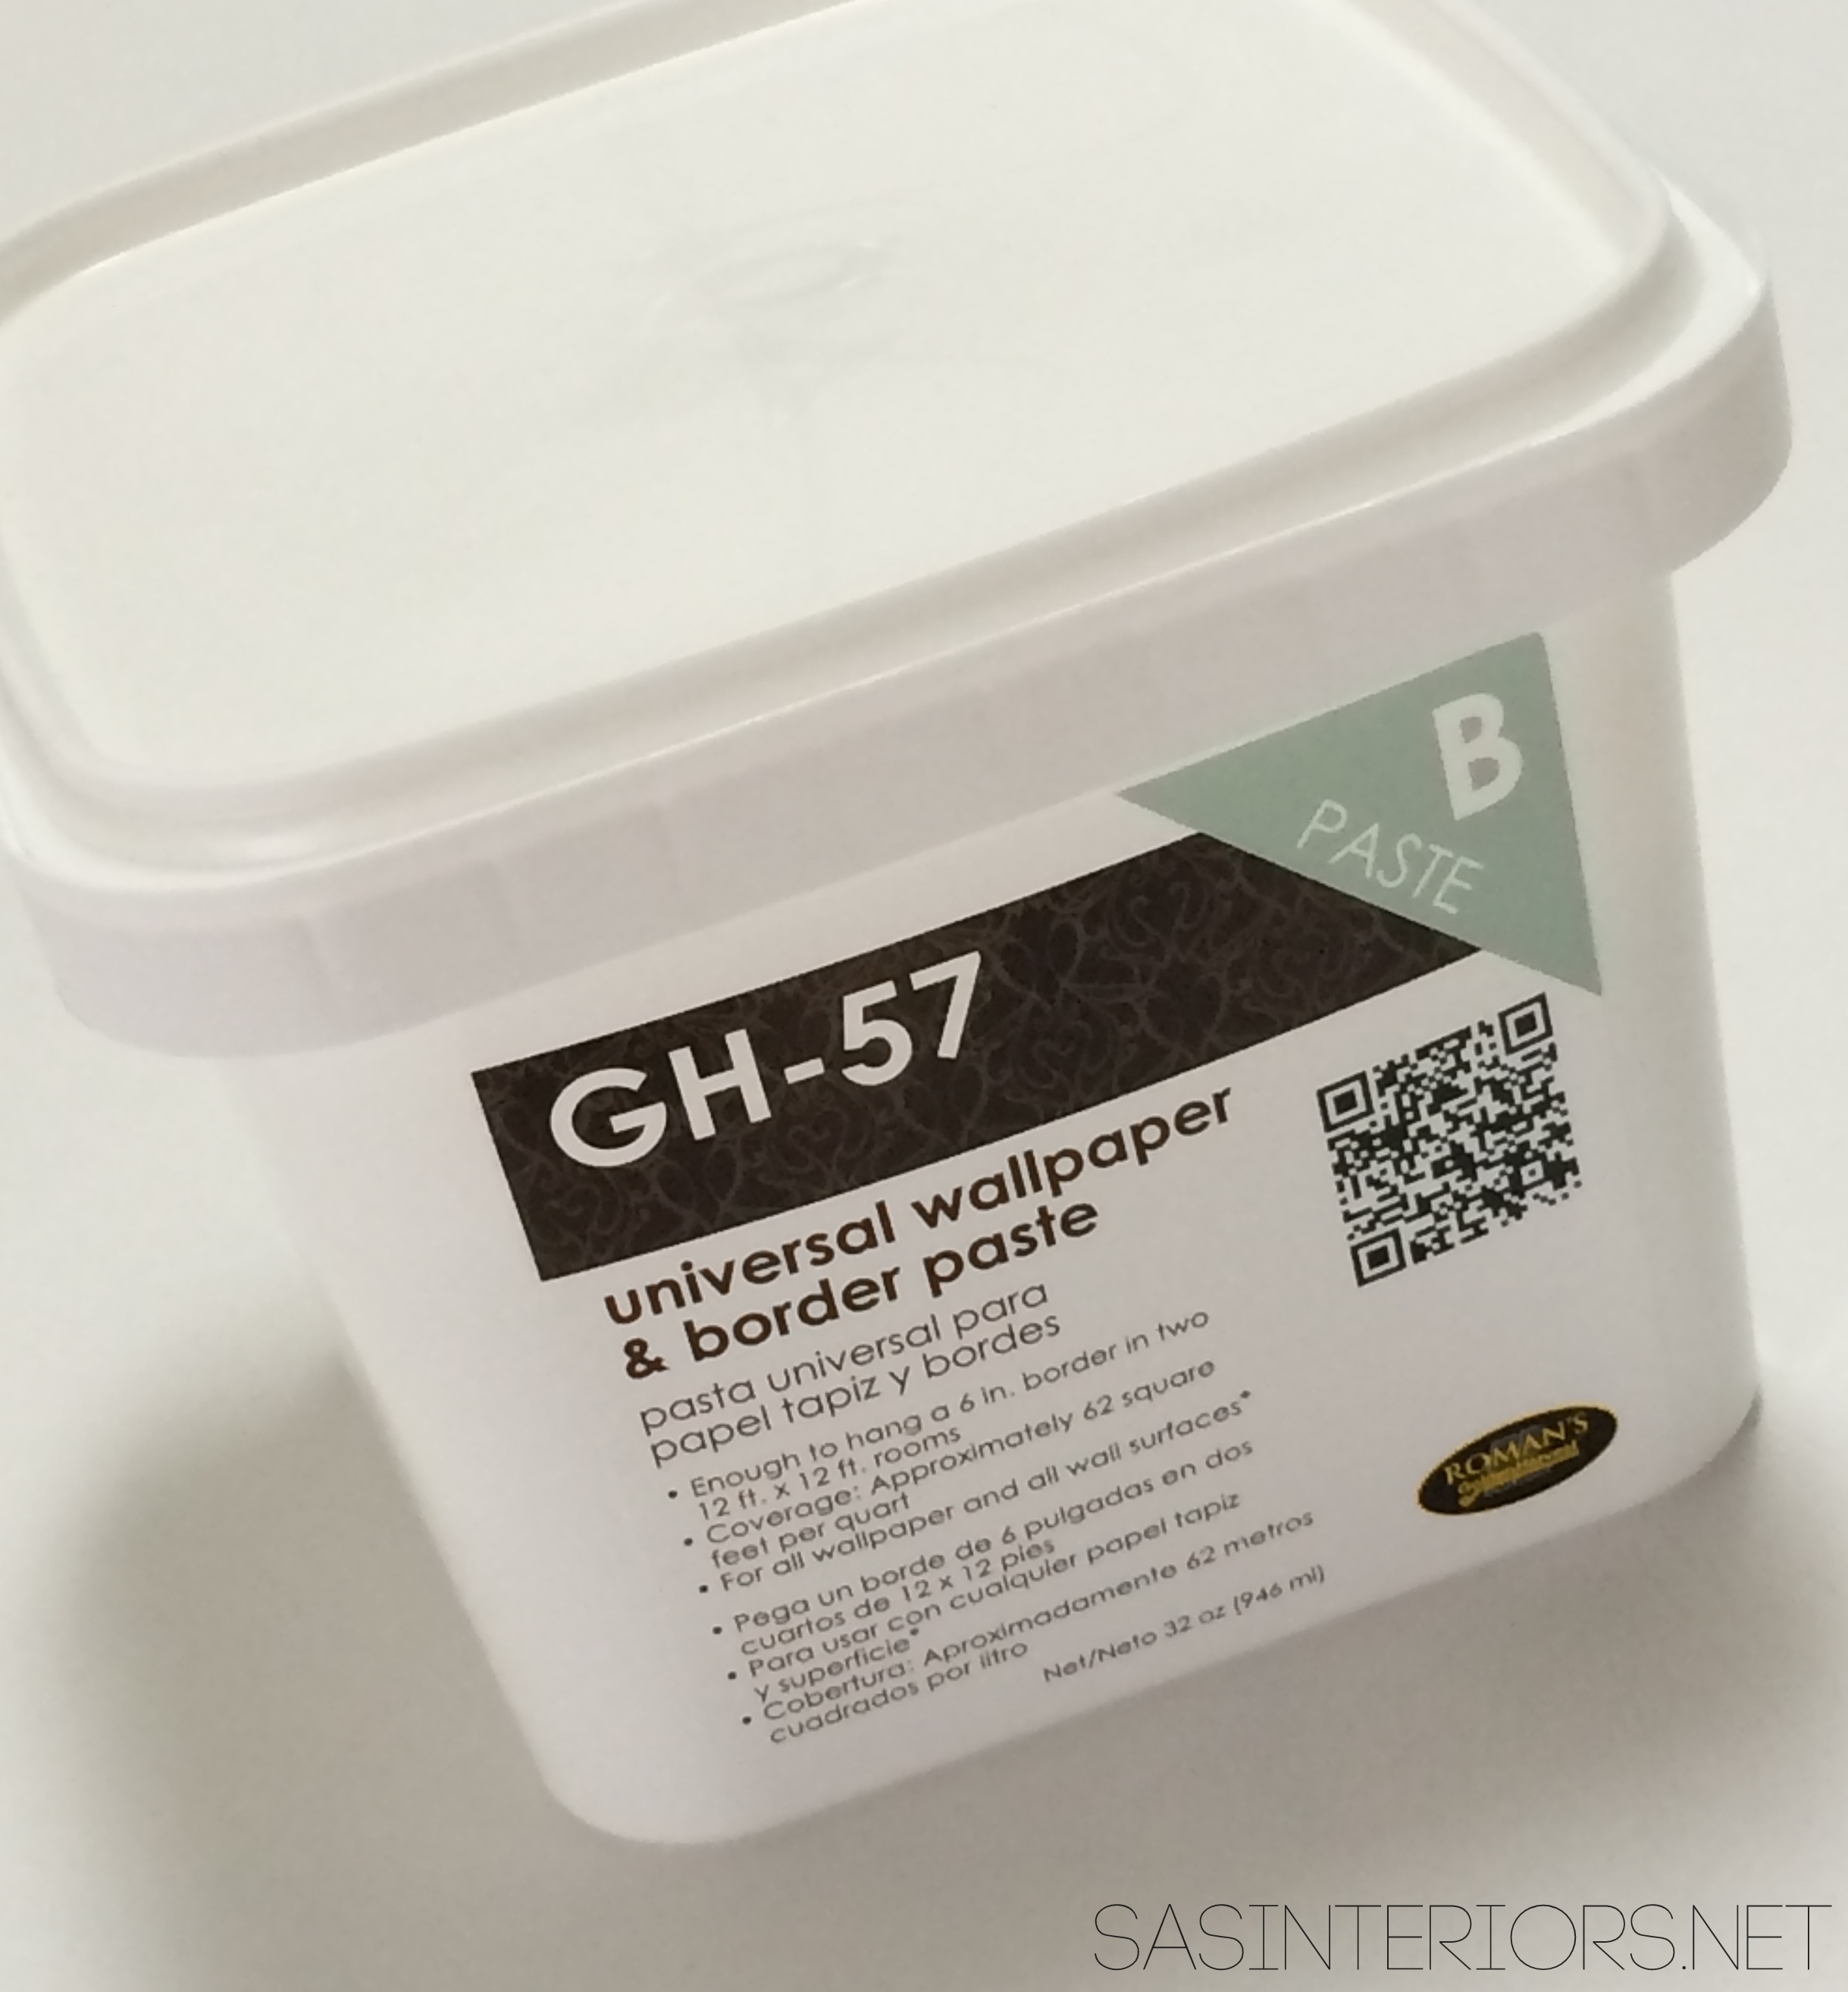
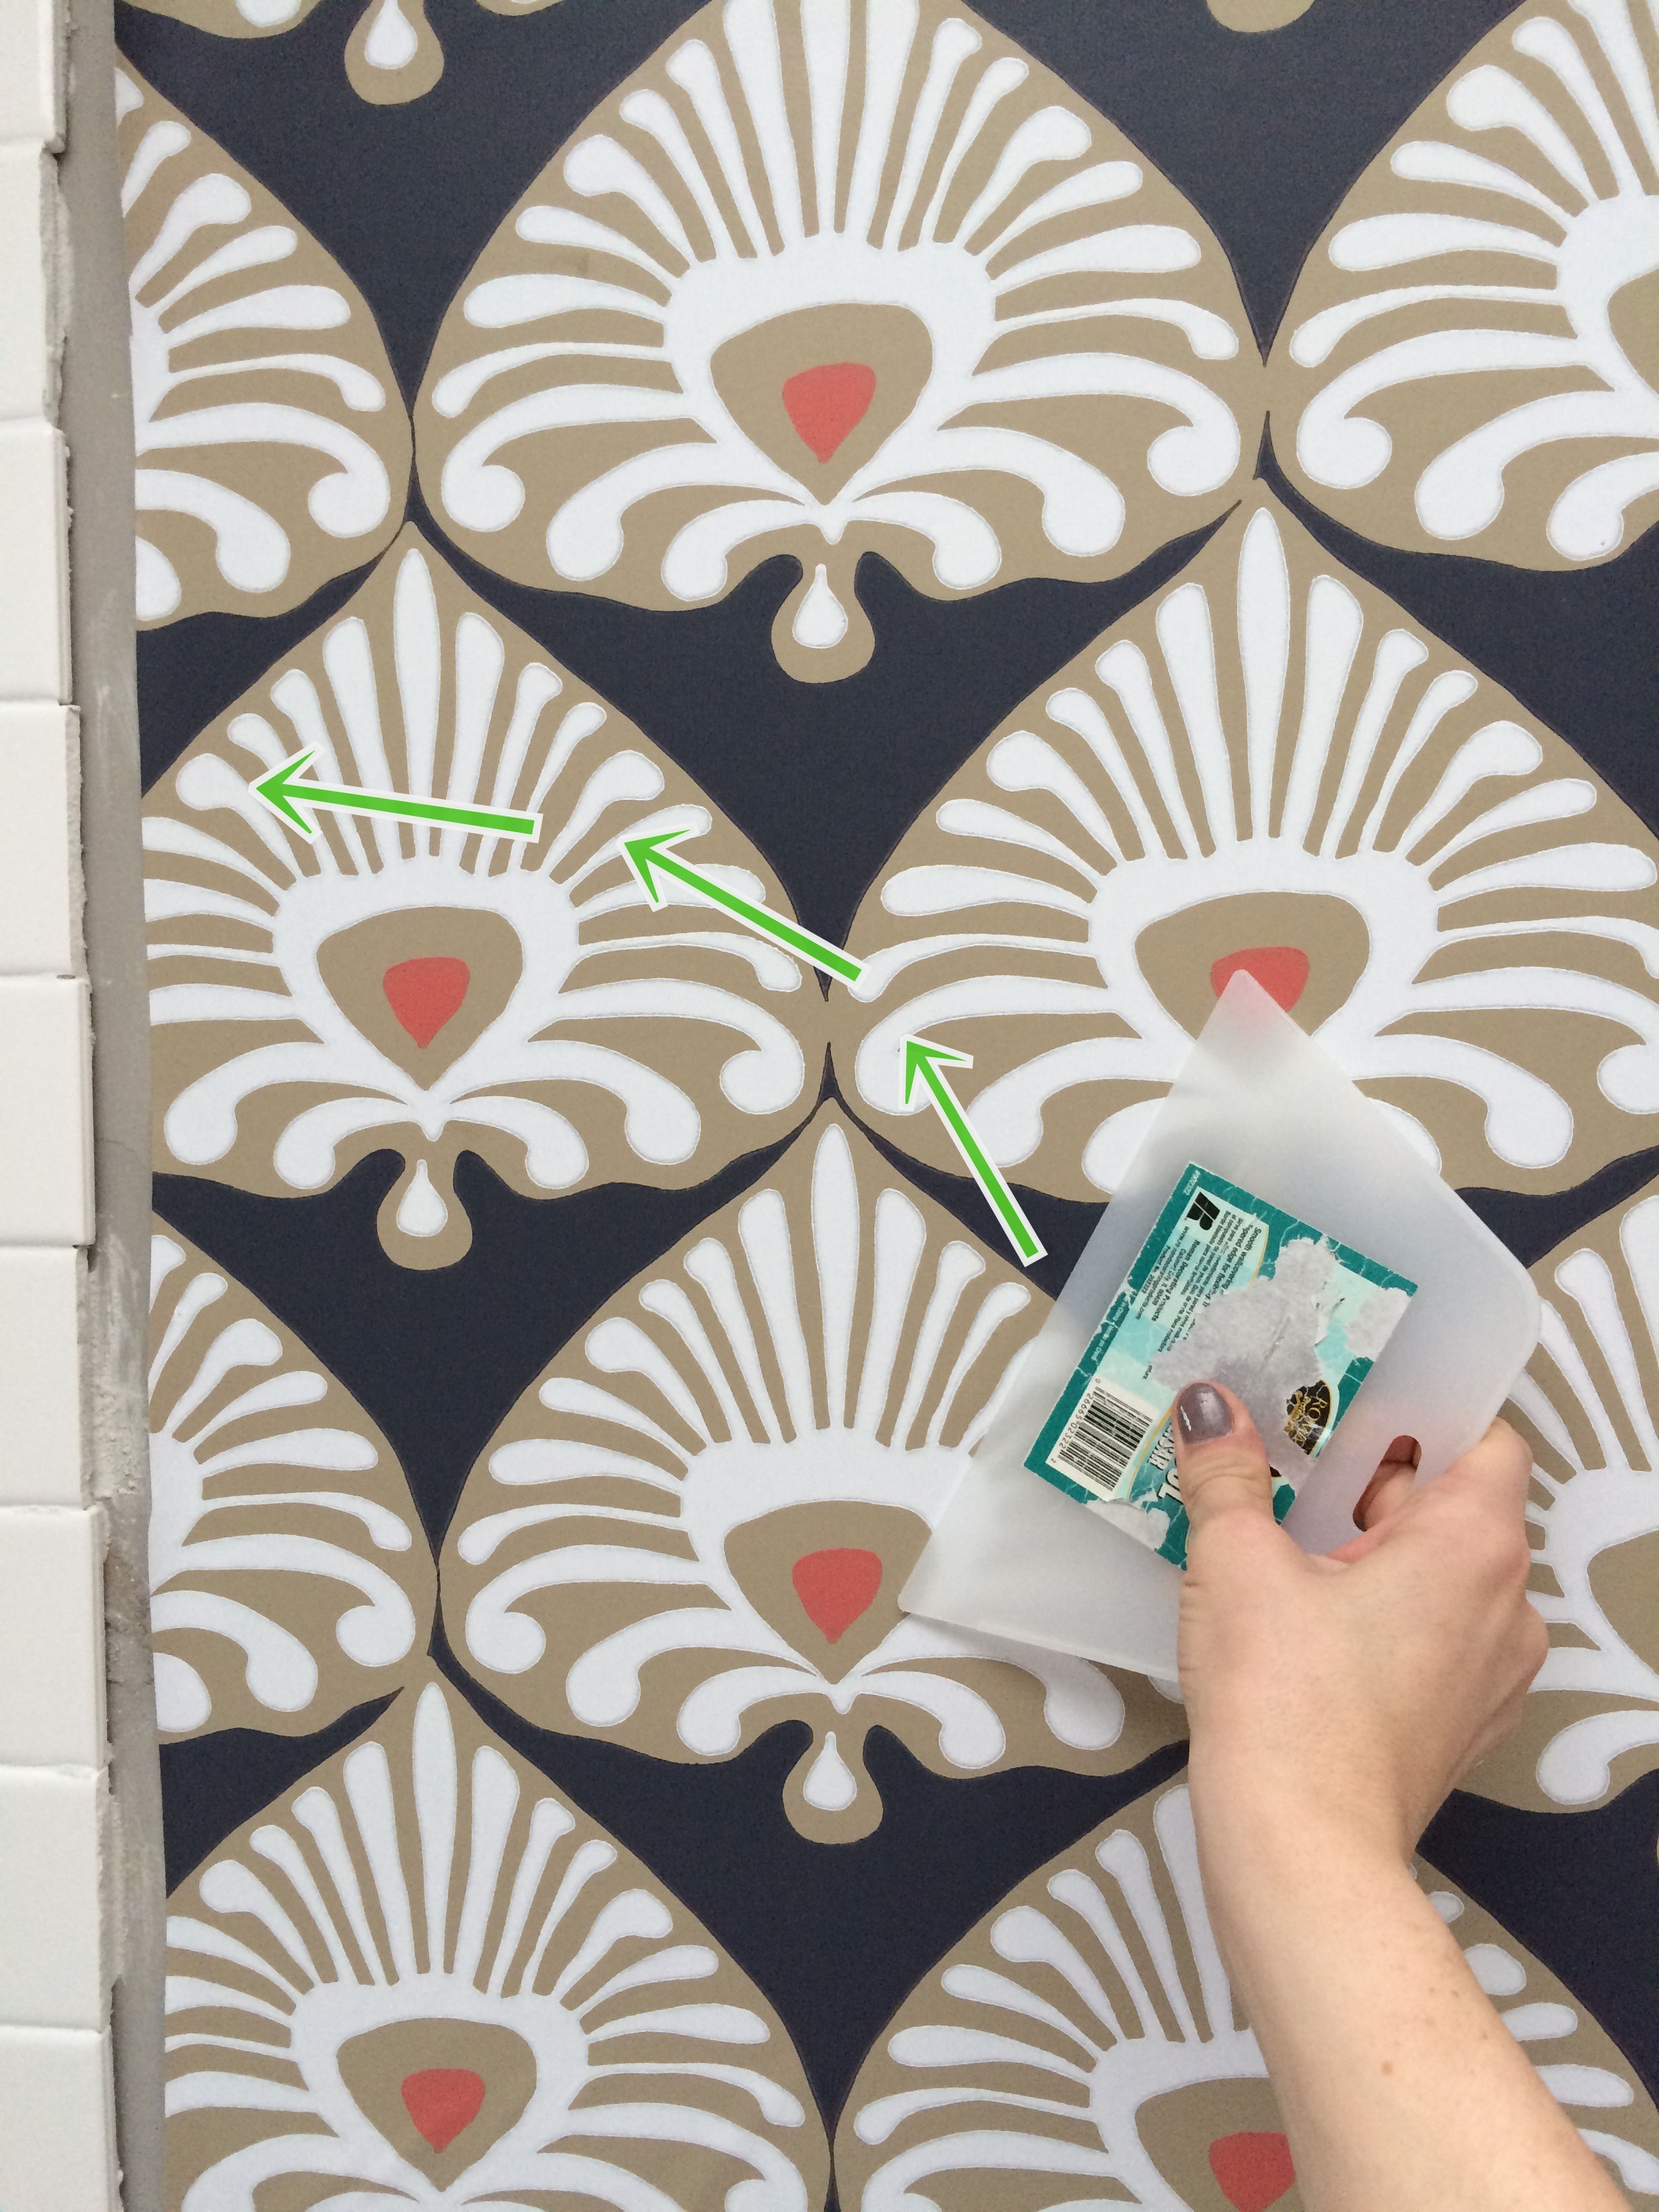
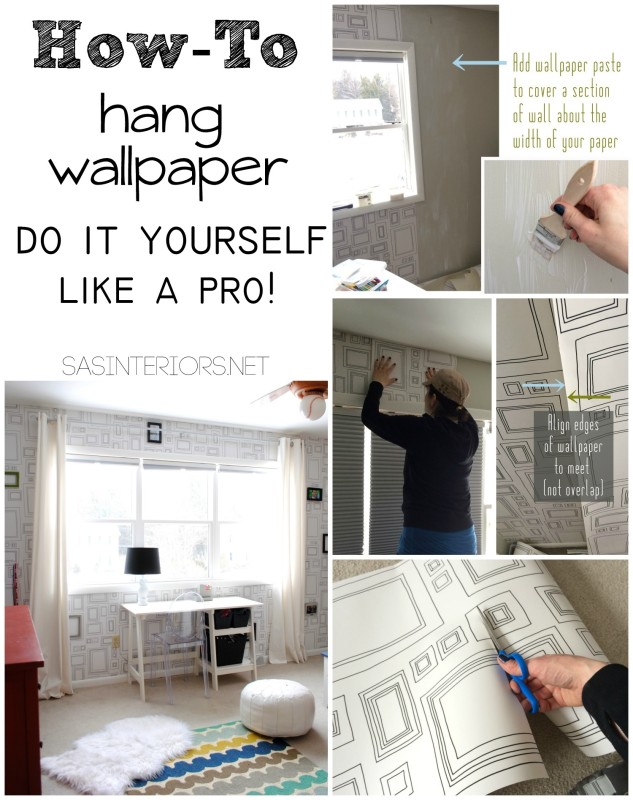
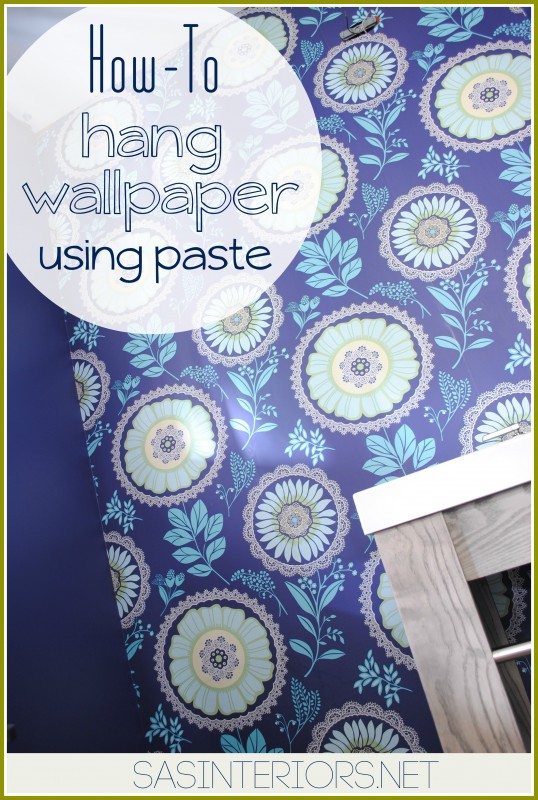
I installed 3×6 subway tile from the tub deck to the ceiling in the tub space and continued the tile about 3′ up the wall in the main part of the bathroom.  Above the tile, I installed a dynamic wallpaper in a beautiful damask pattern with colors of navy, beige, and orange.  It really is the art of the space so I didn’t add much more to the walls.

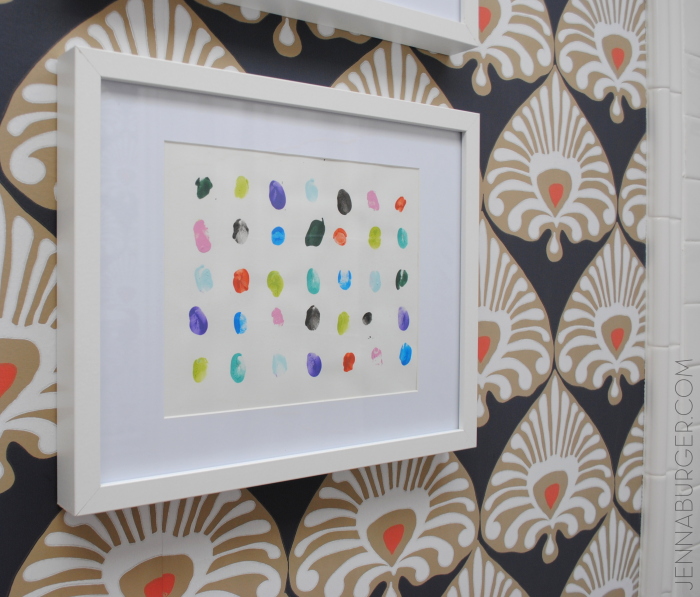
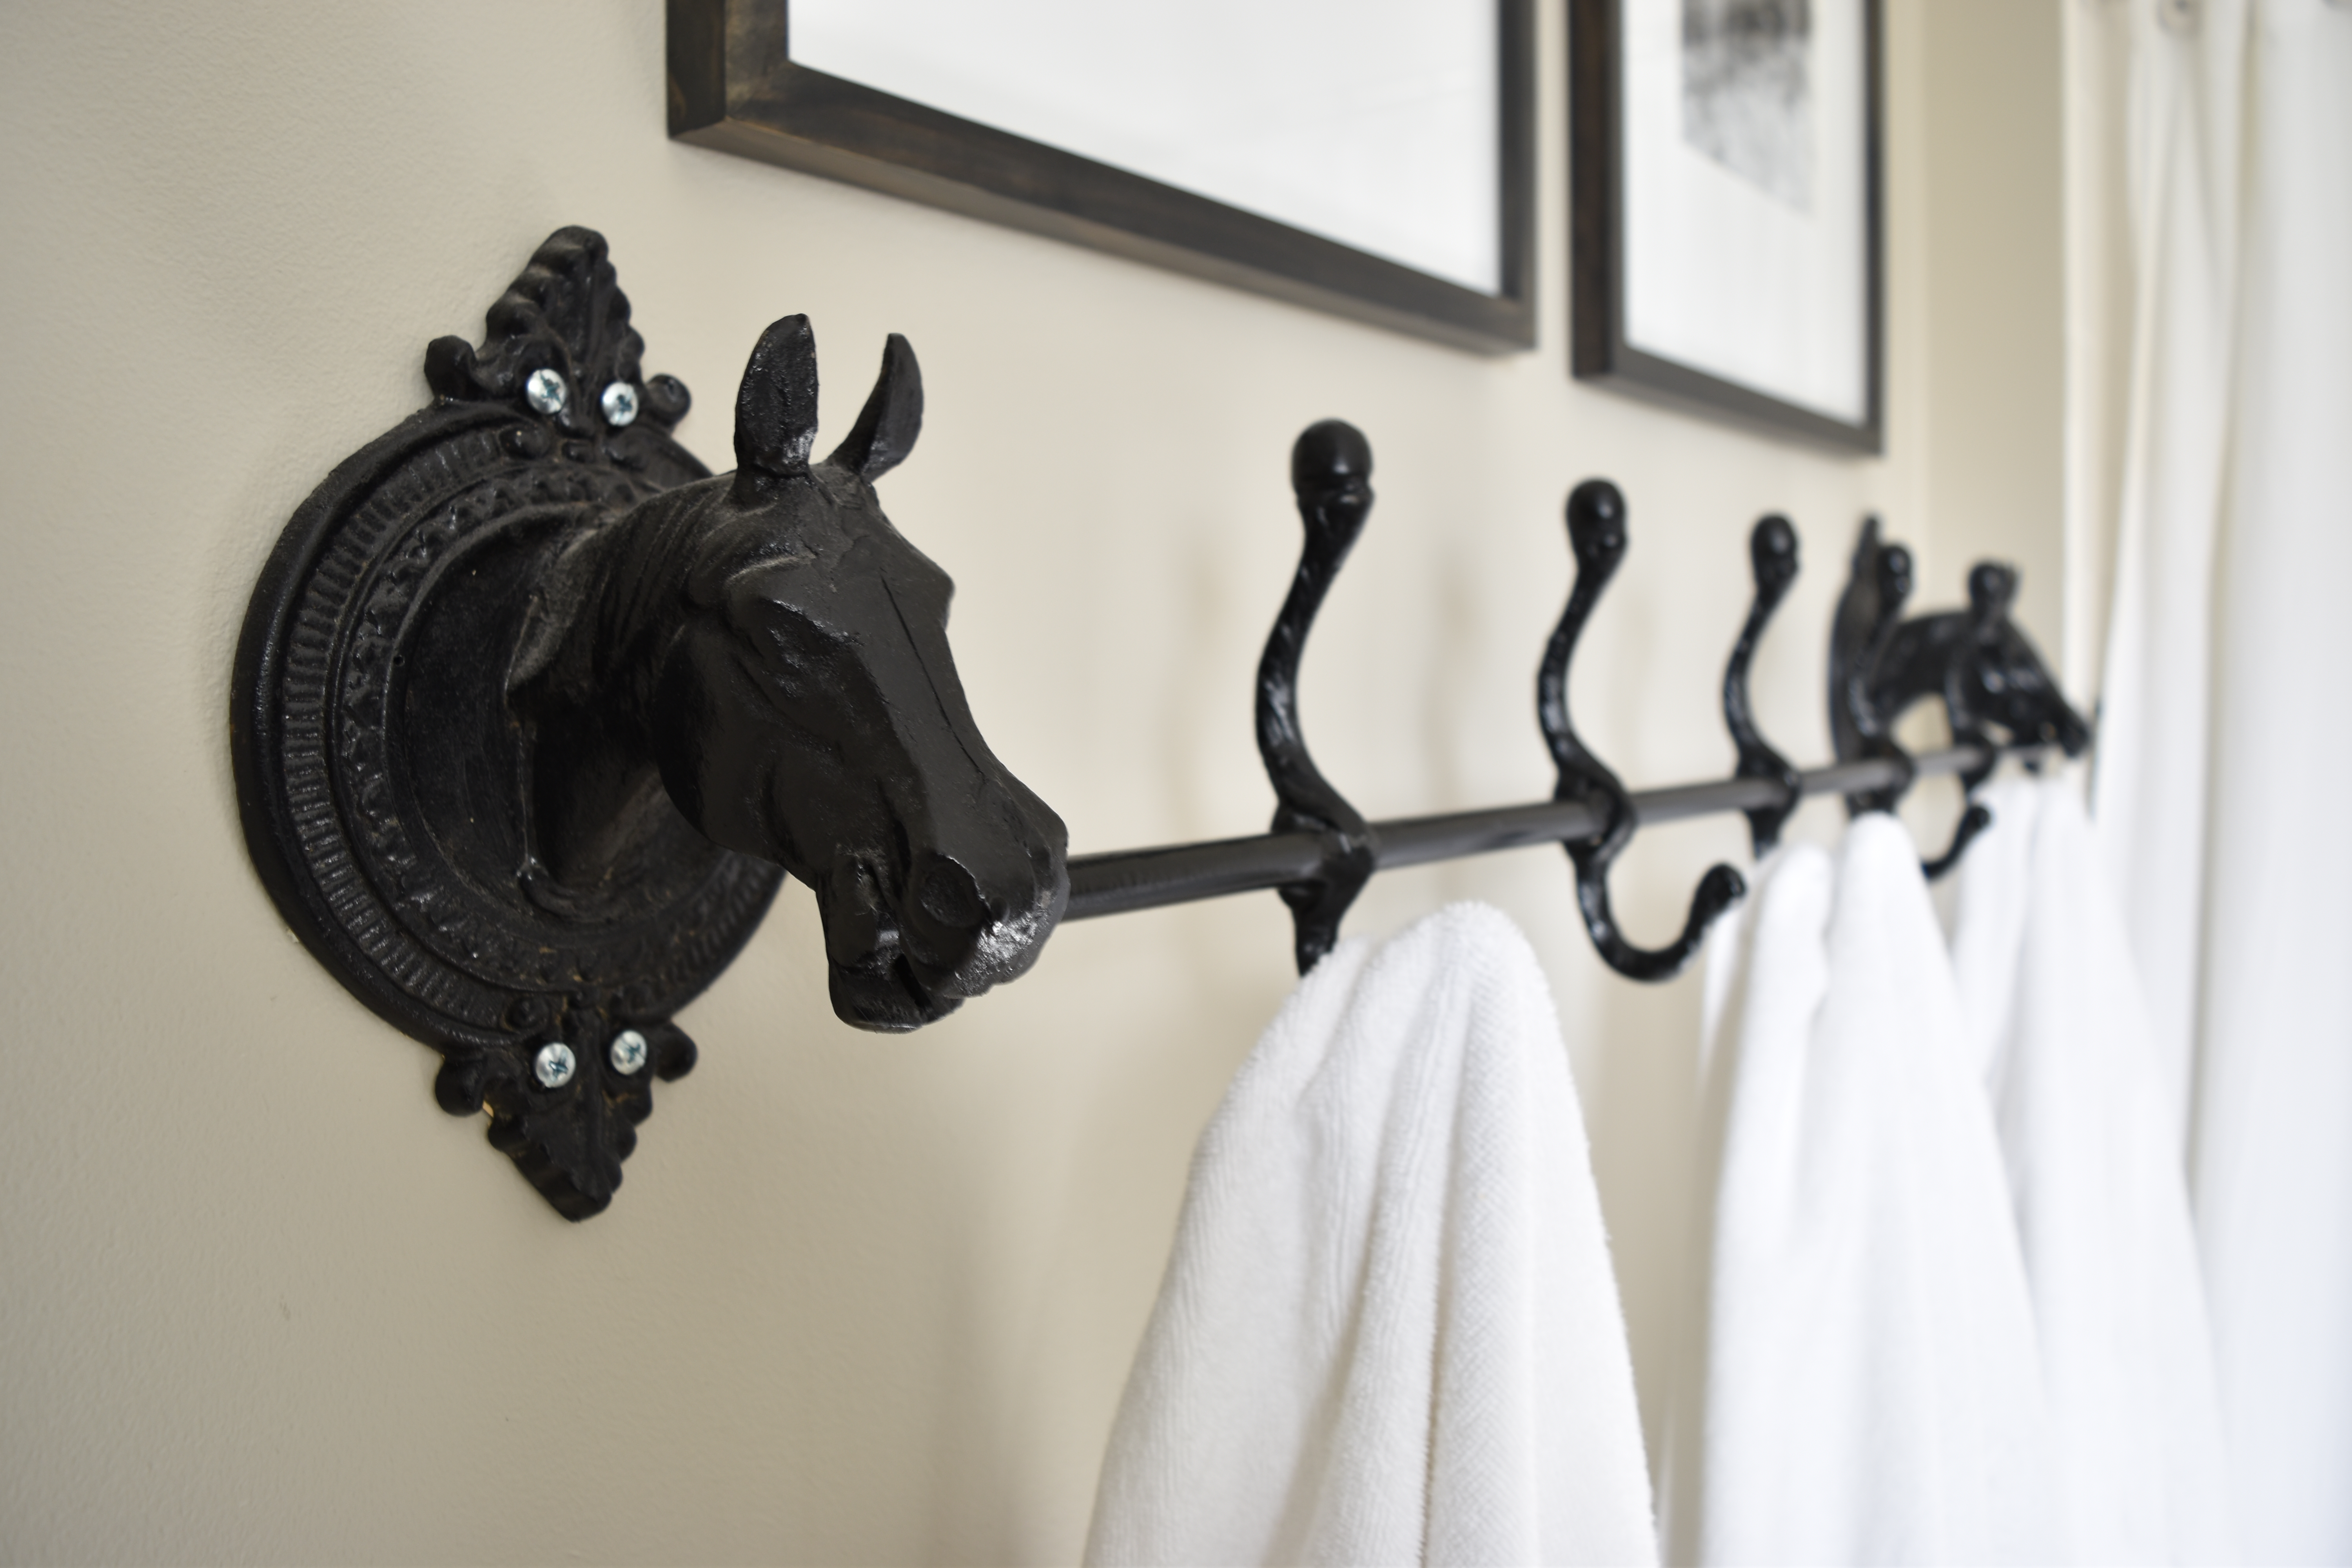
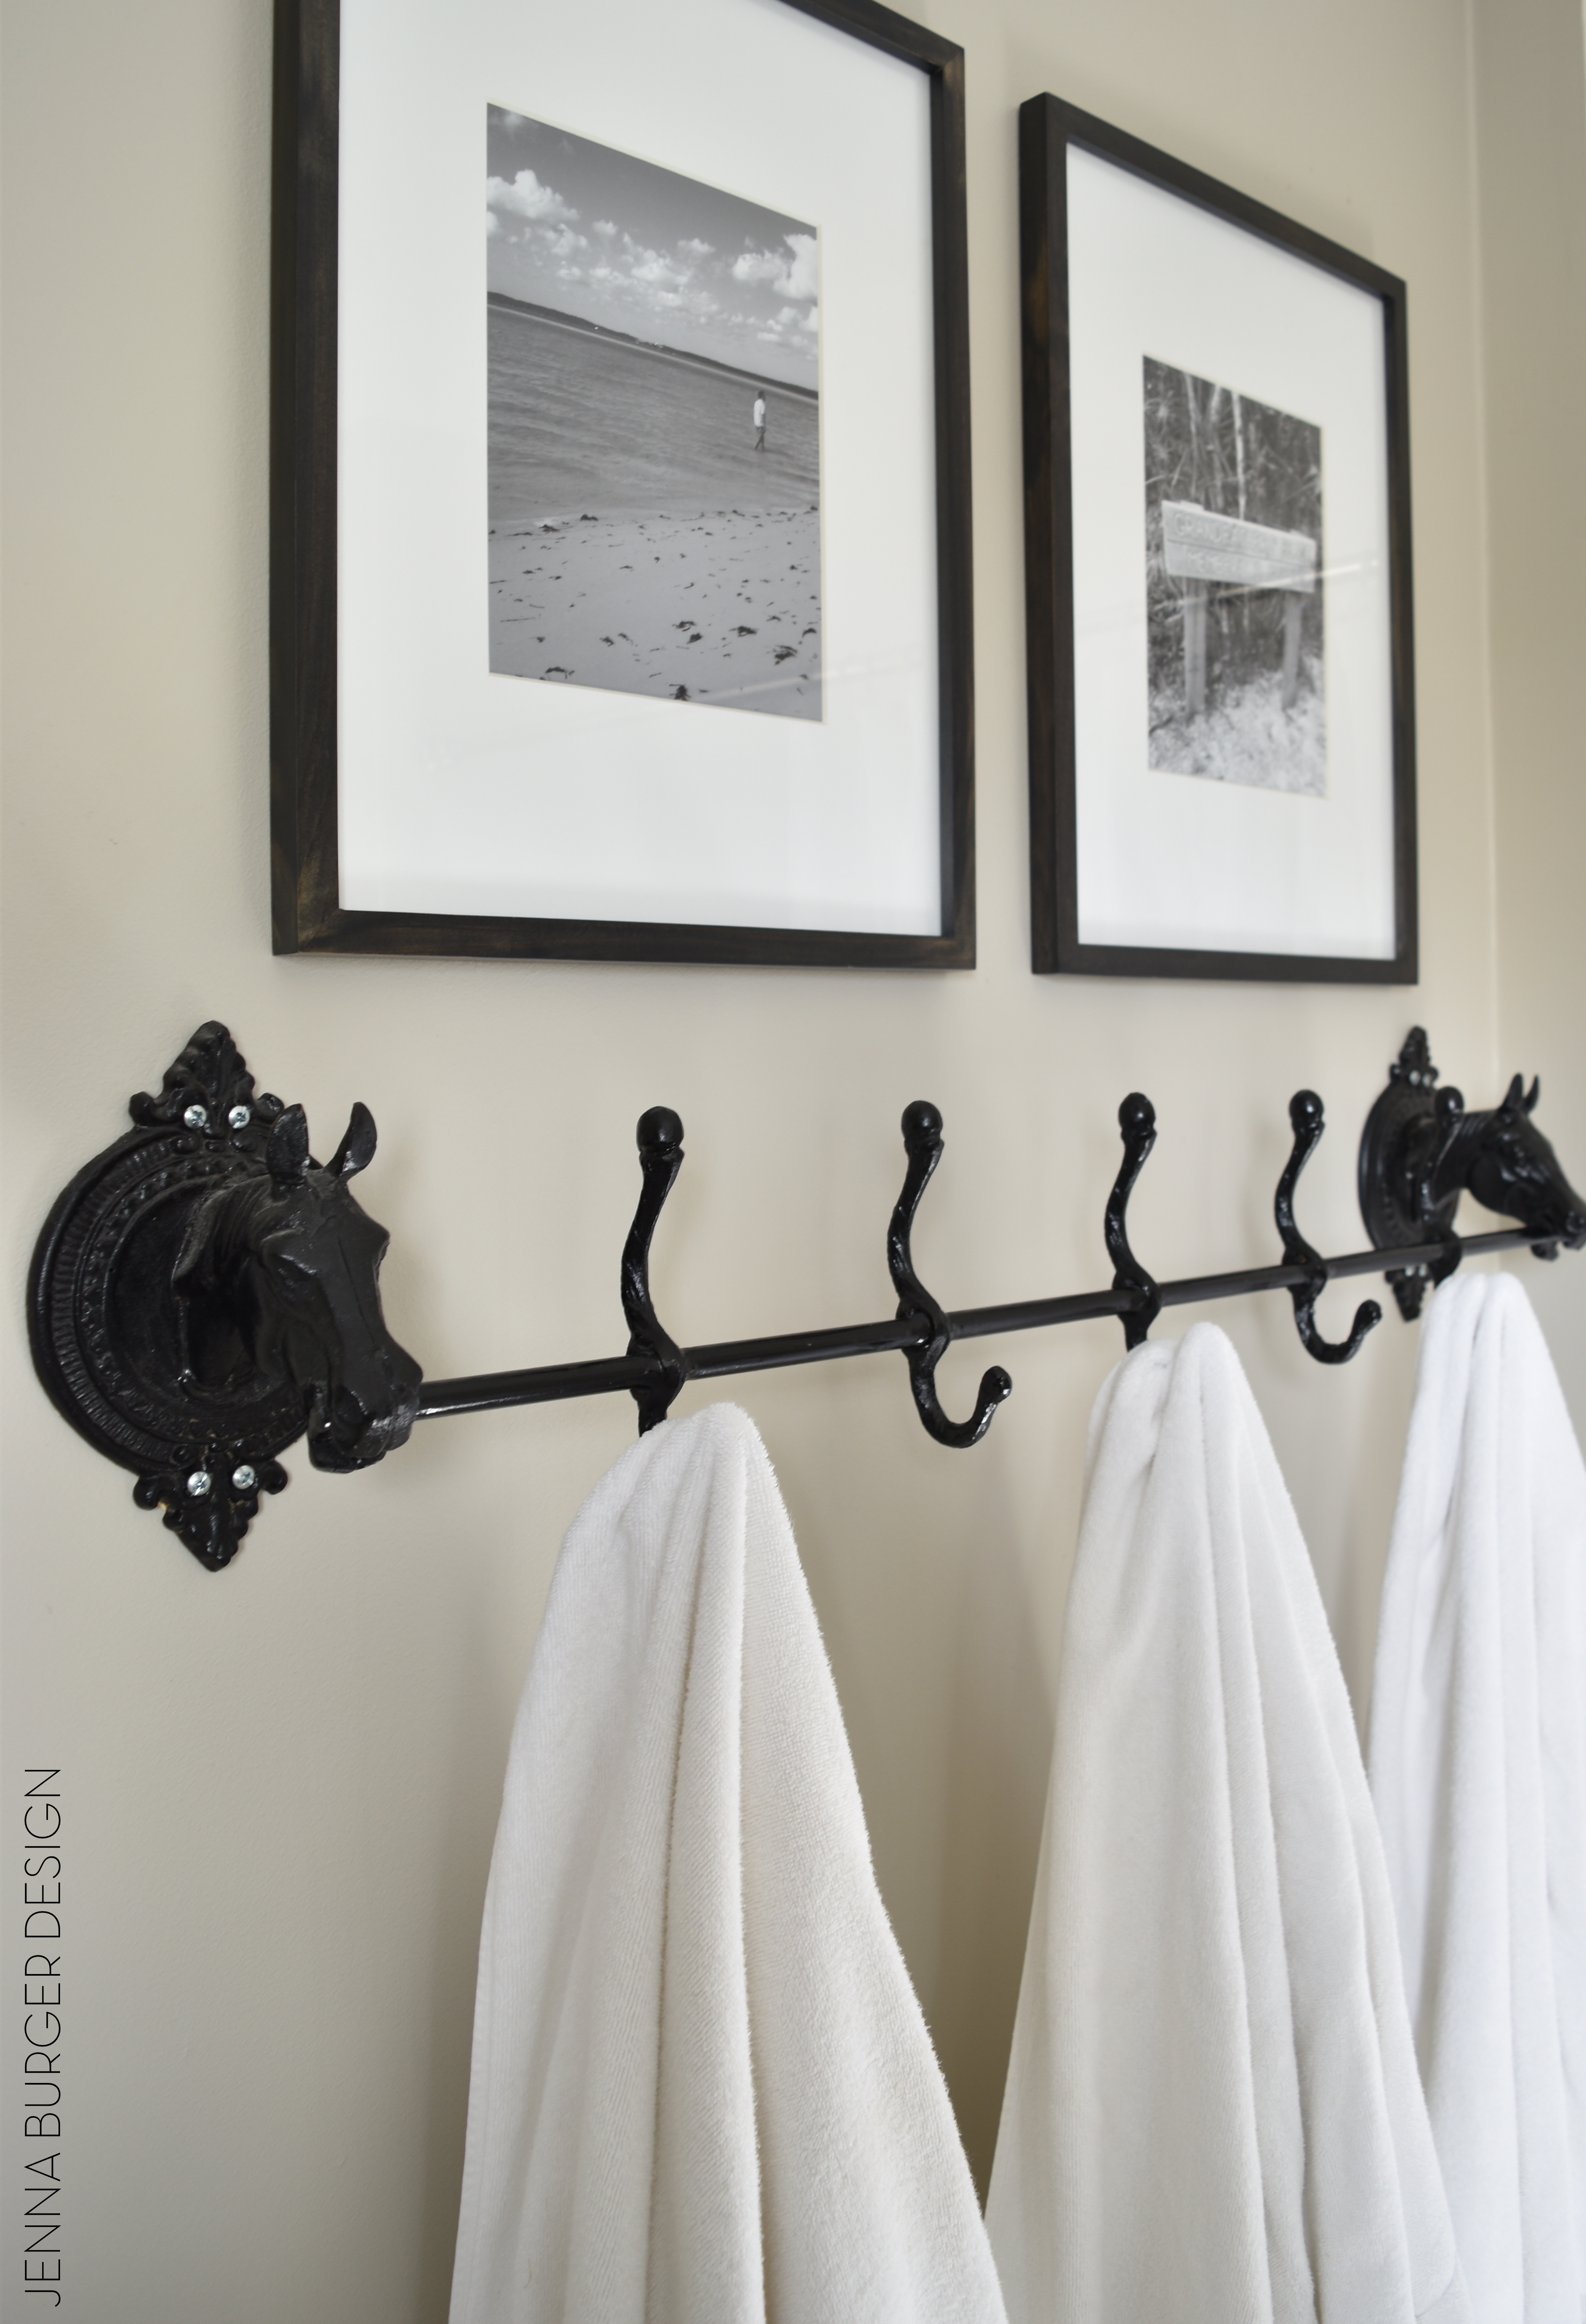
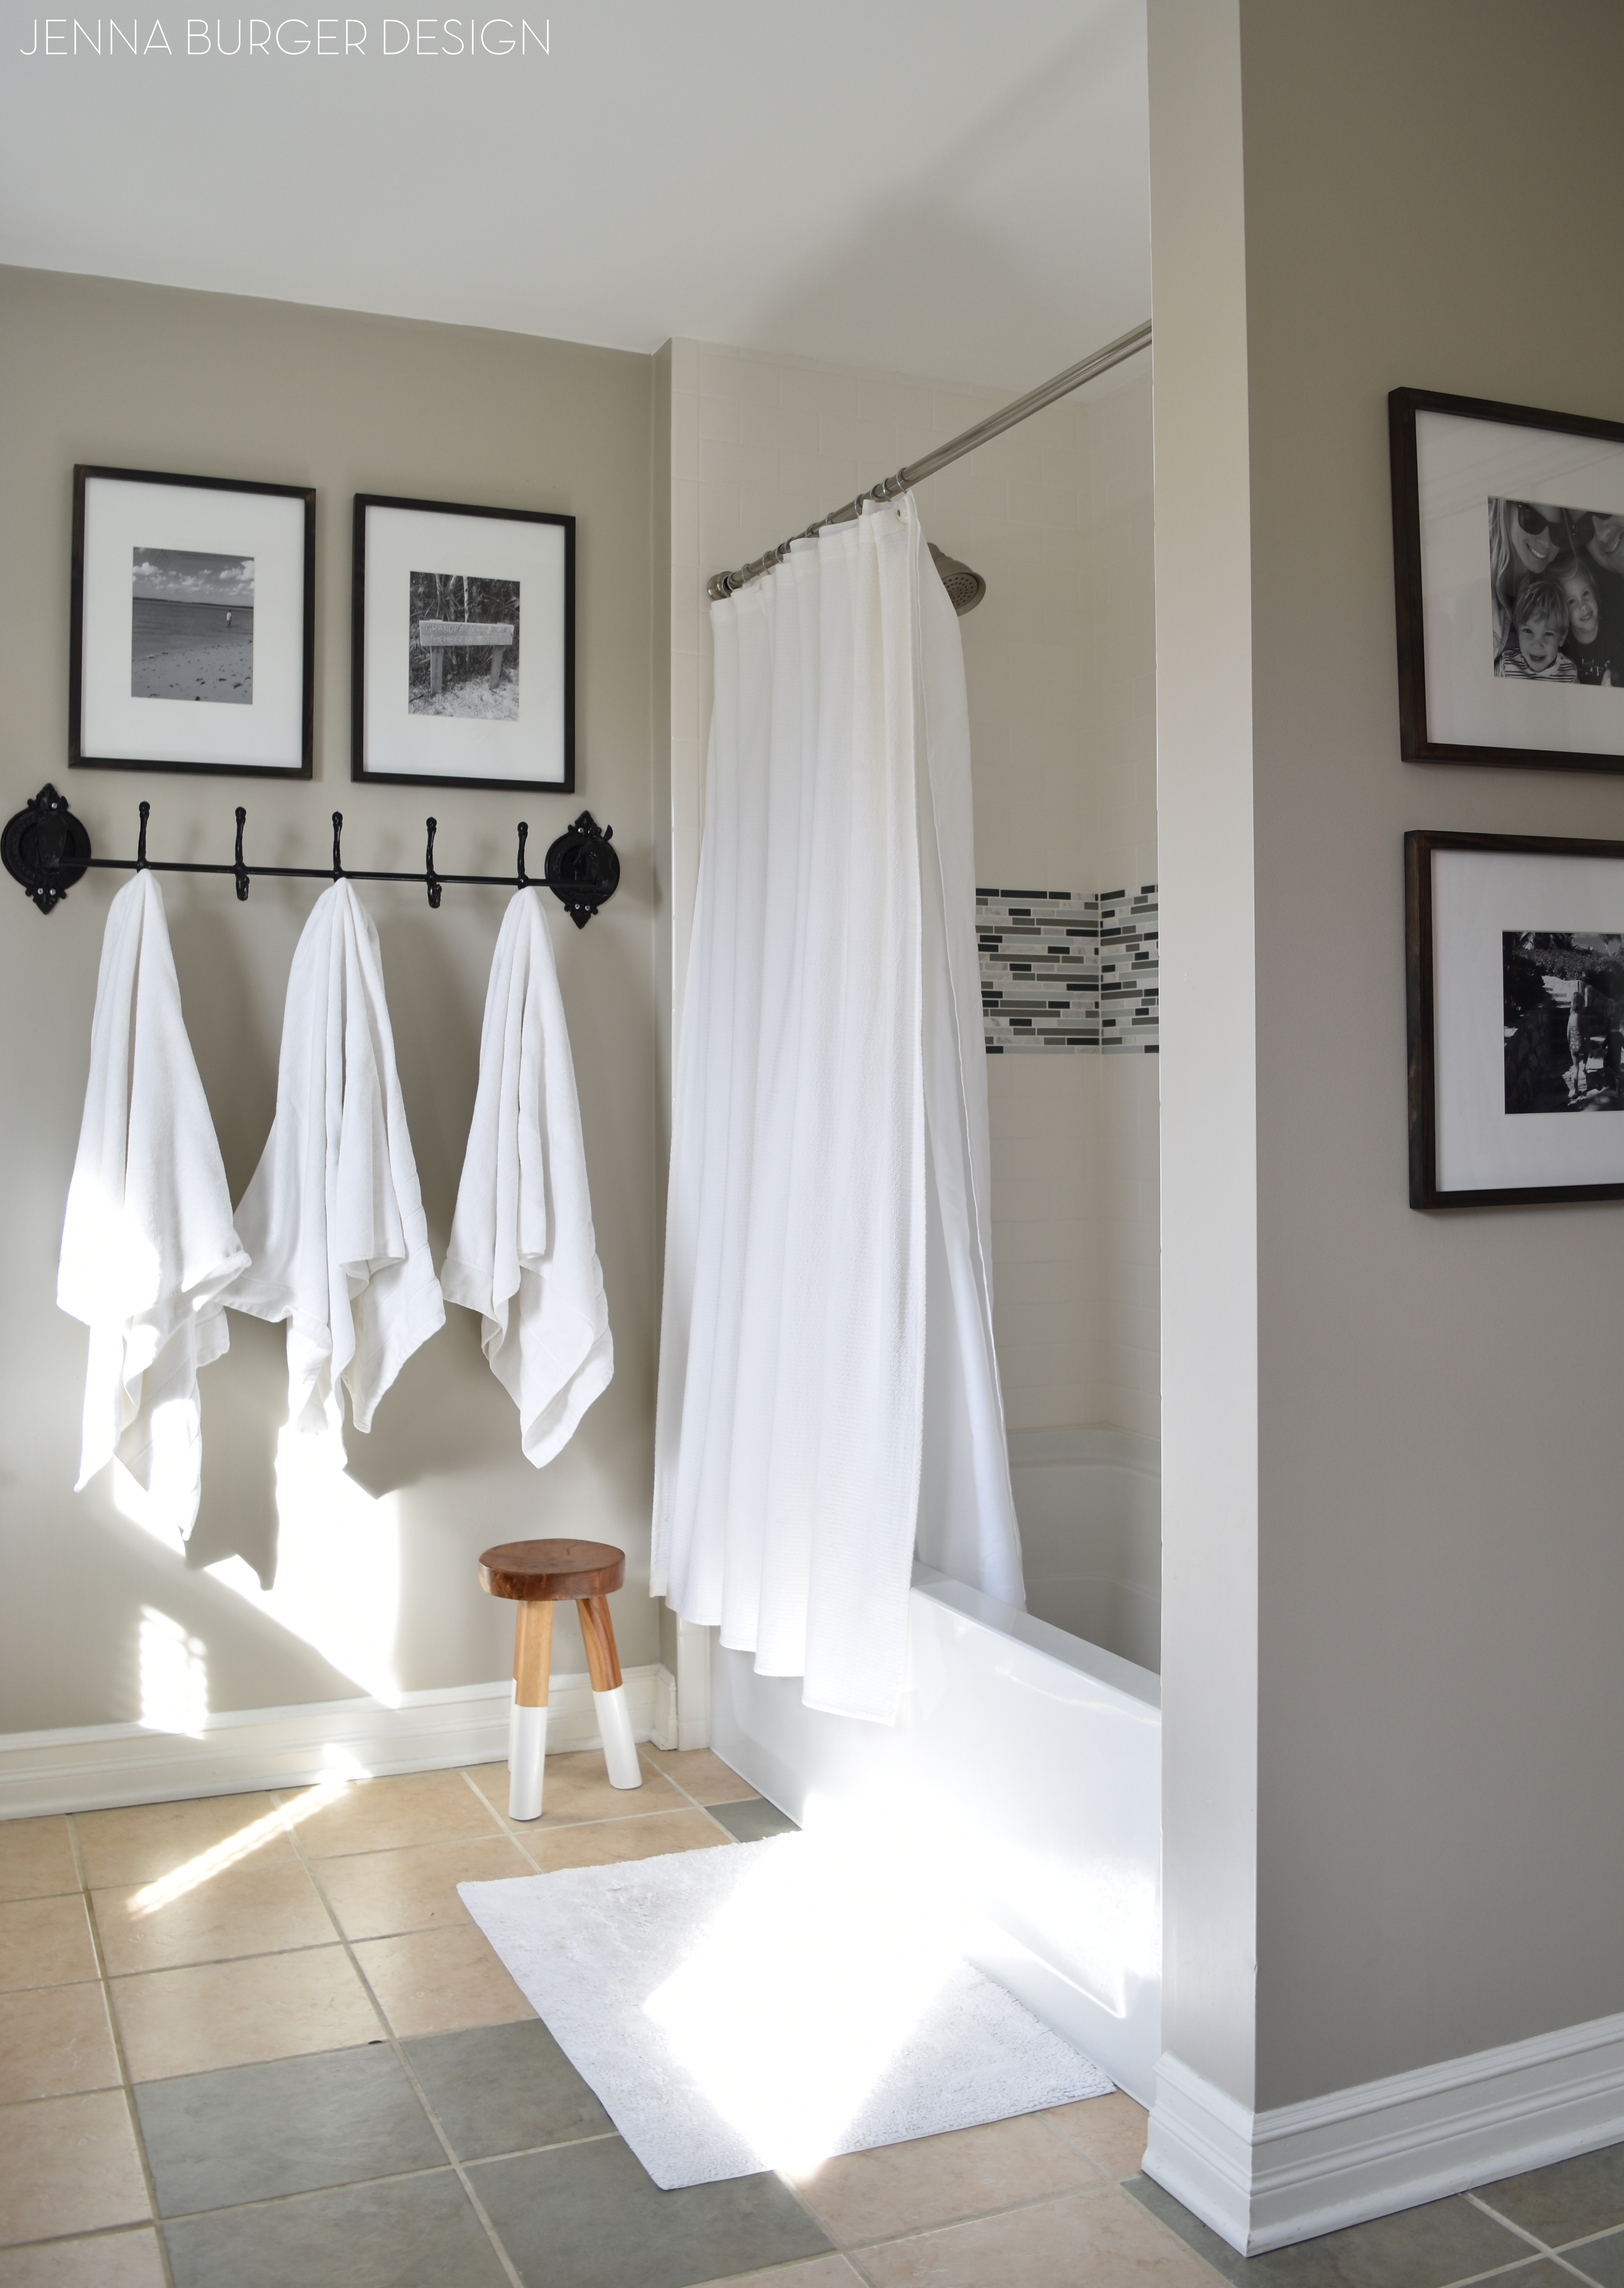
On the left side, above the towel bar, I hung two framed custom art pieces (created by my 2 older kiddos) which I will be sharing more details on soon.  The frames + matting are white & simple, the perfect contrast to the bold background.

Bathroom Makover with 95% of the space being a DIY project - new tub + tile, vanity, wallpaper, and more!  Lots of details on this multi-post before & after.  Bathroom makeover by Jenna Burger Design www.jennaburger.com

tutorial for >>> how to install wallpaper

Bathroom Makover with 95% of the space being a DIY project - new tub + tile, vanity, wallpaper, and more!  Lots of details on this multi-post before & after.  Bathroom makeover by Jenna Burger Design www.jennaburger.com

Bathroom Makover with 95% of the space being a DIY project - new tub + tile, vanity, wallpaper, and more!  Lots of details on this multi-post before & after.  Bathroom makeover by Jenna Burger Design www.jennaburger.com

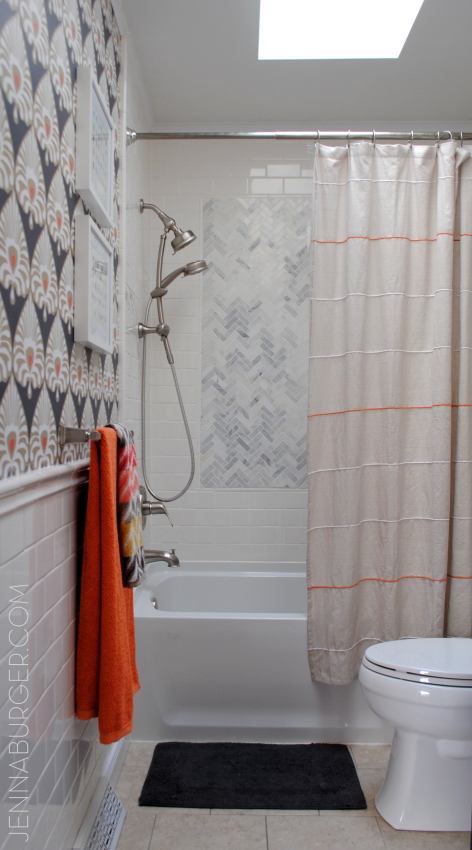
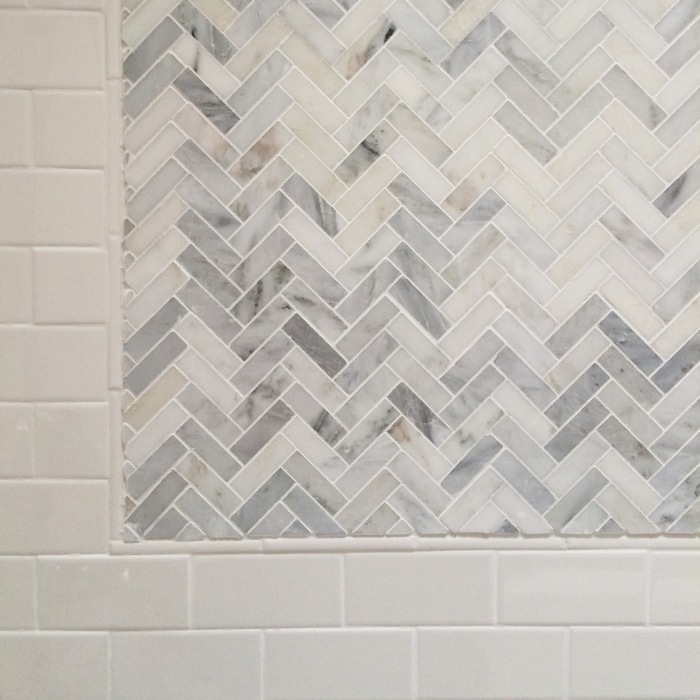
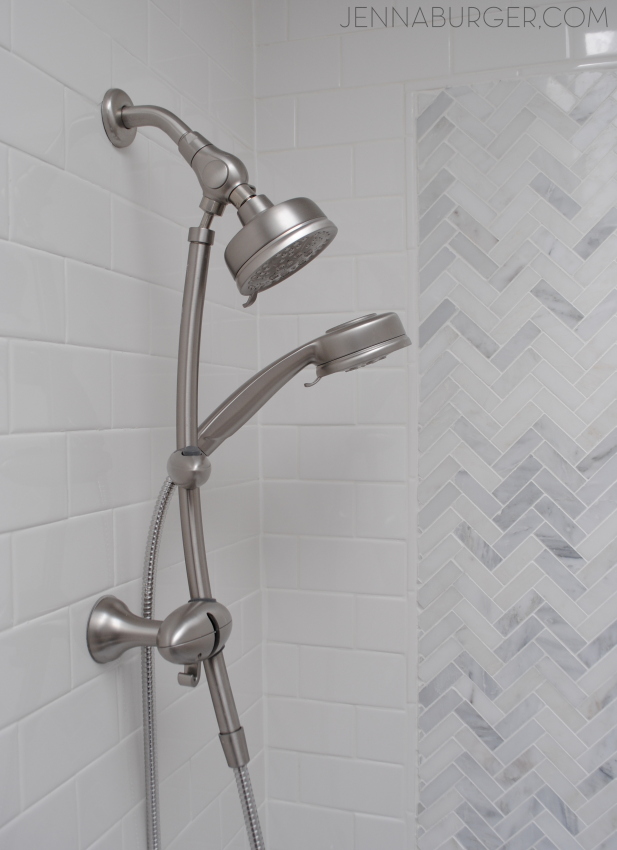
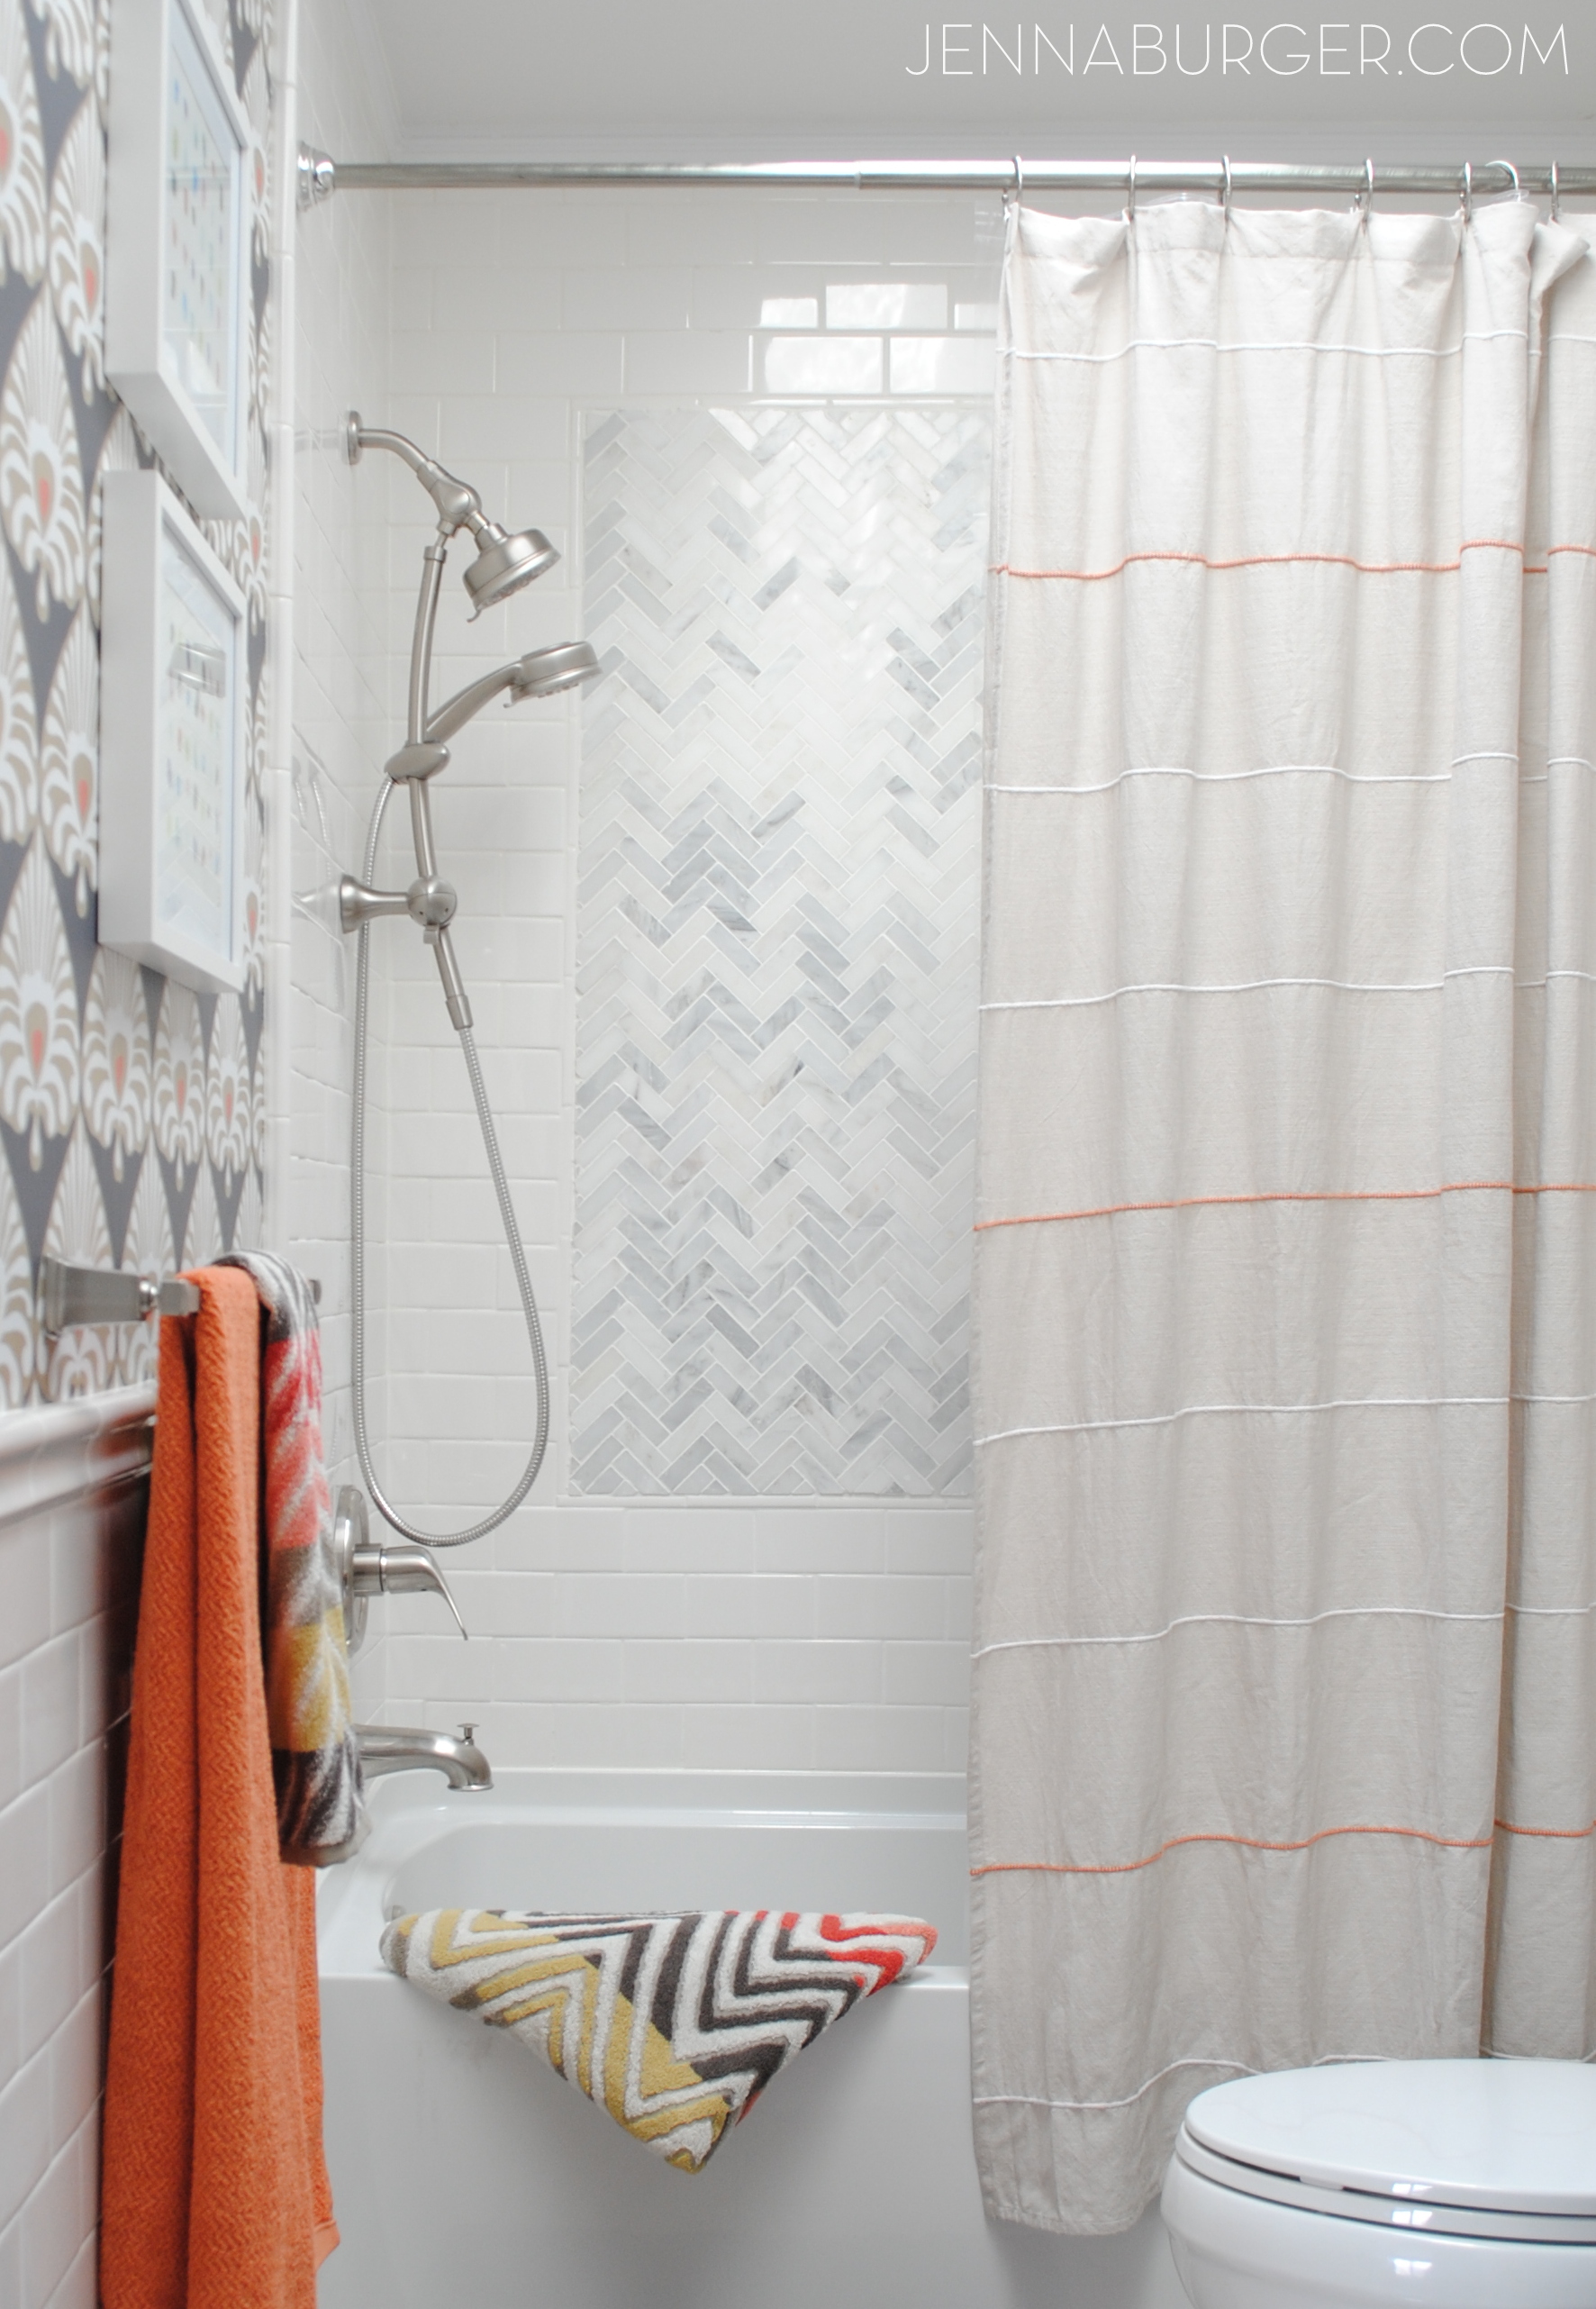
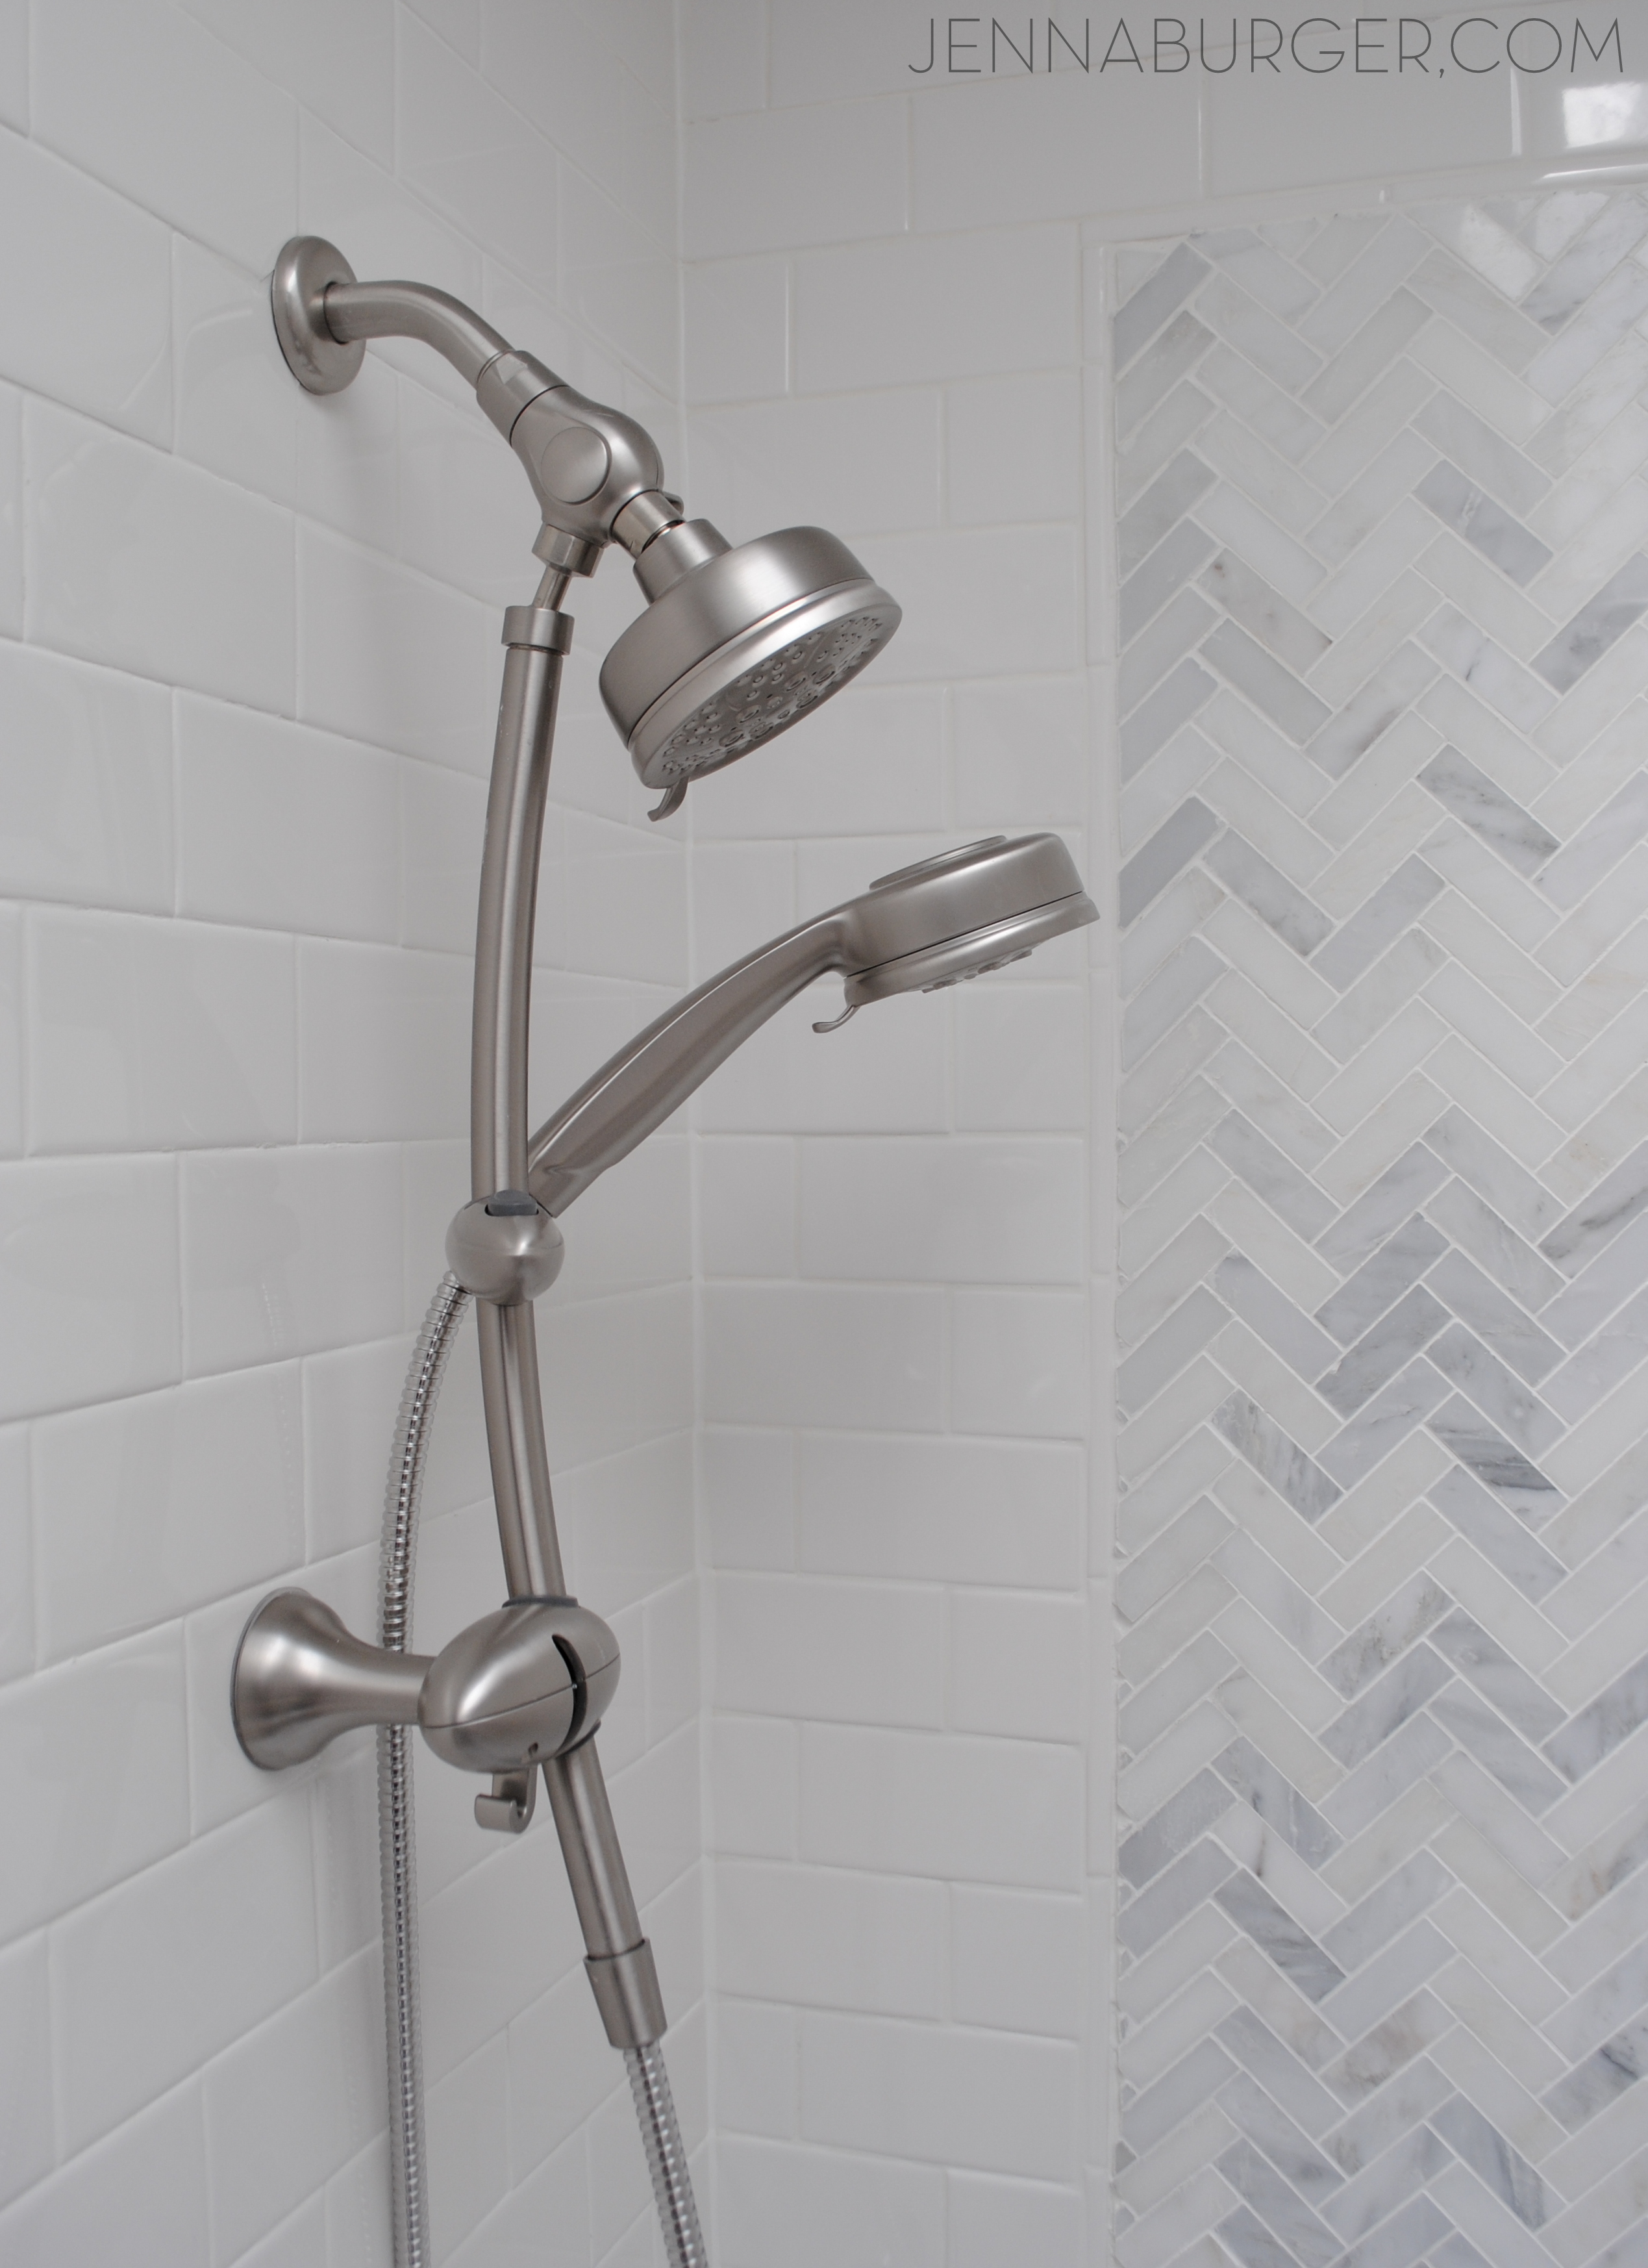
As you continue around the revamped bathroom,  you round the corner to the tub space.  This area is drastically different with new floor to ceiling tile (all installed by me – thank goodness my hands aren’t cracked anymore).

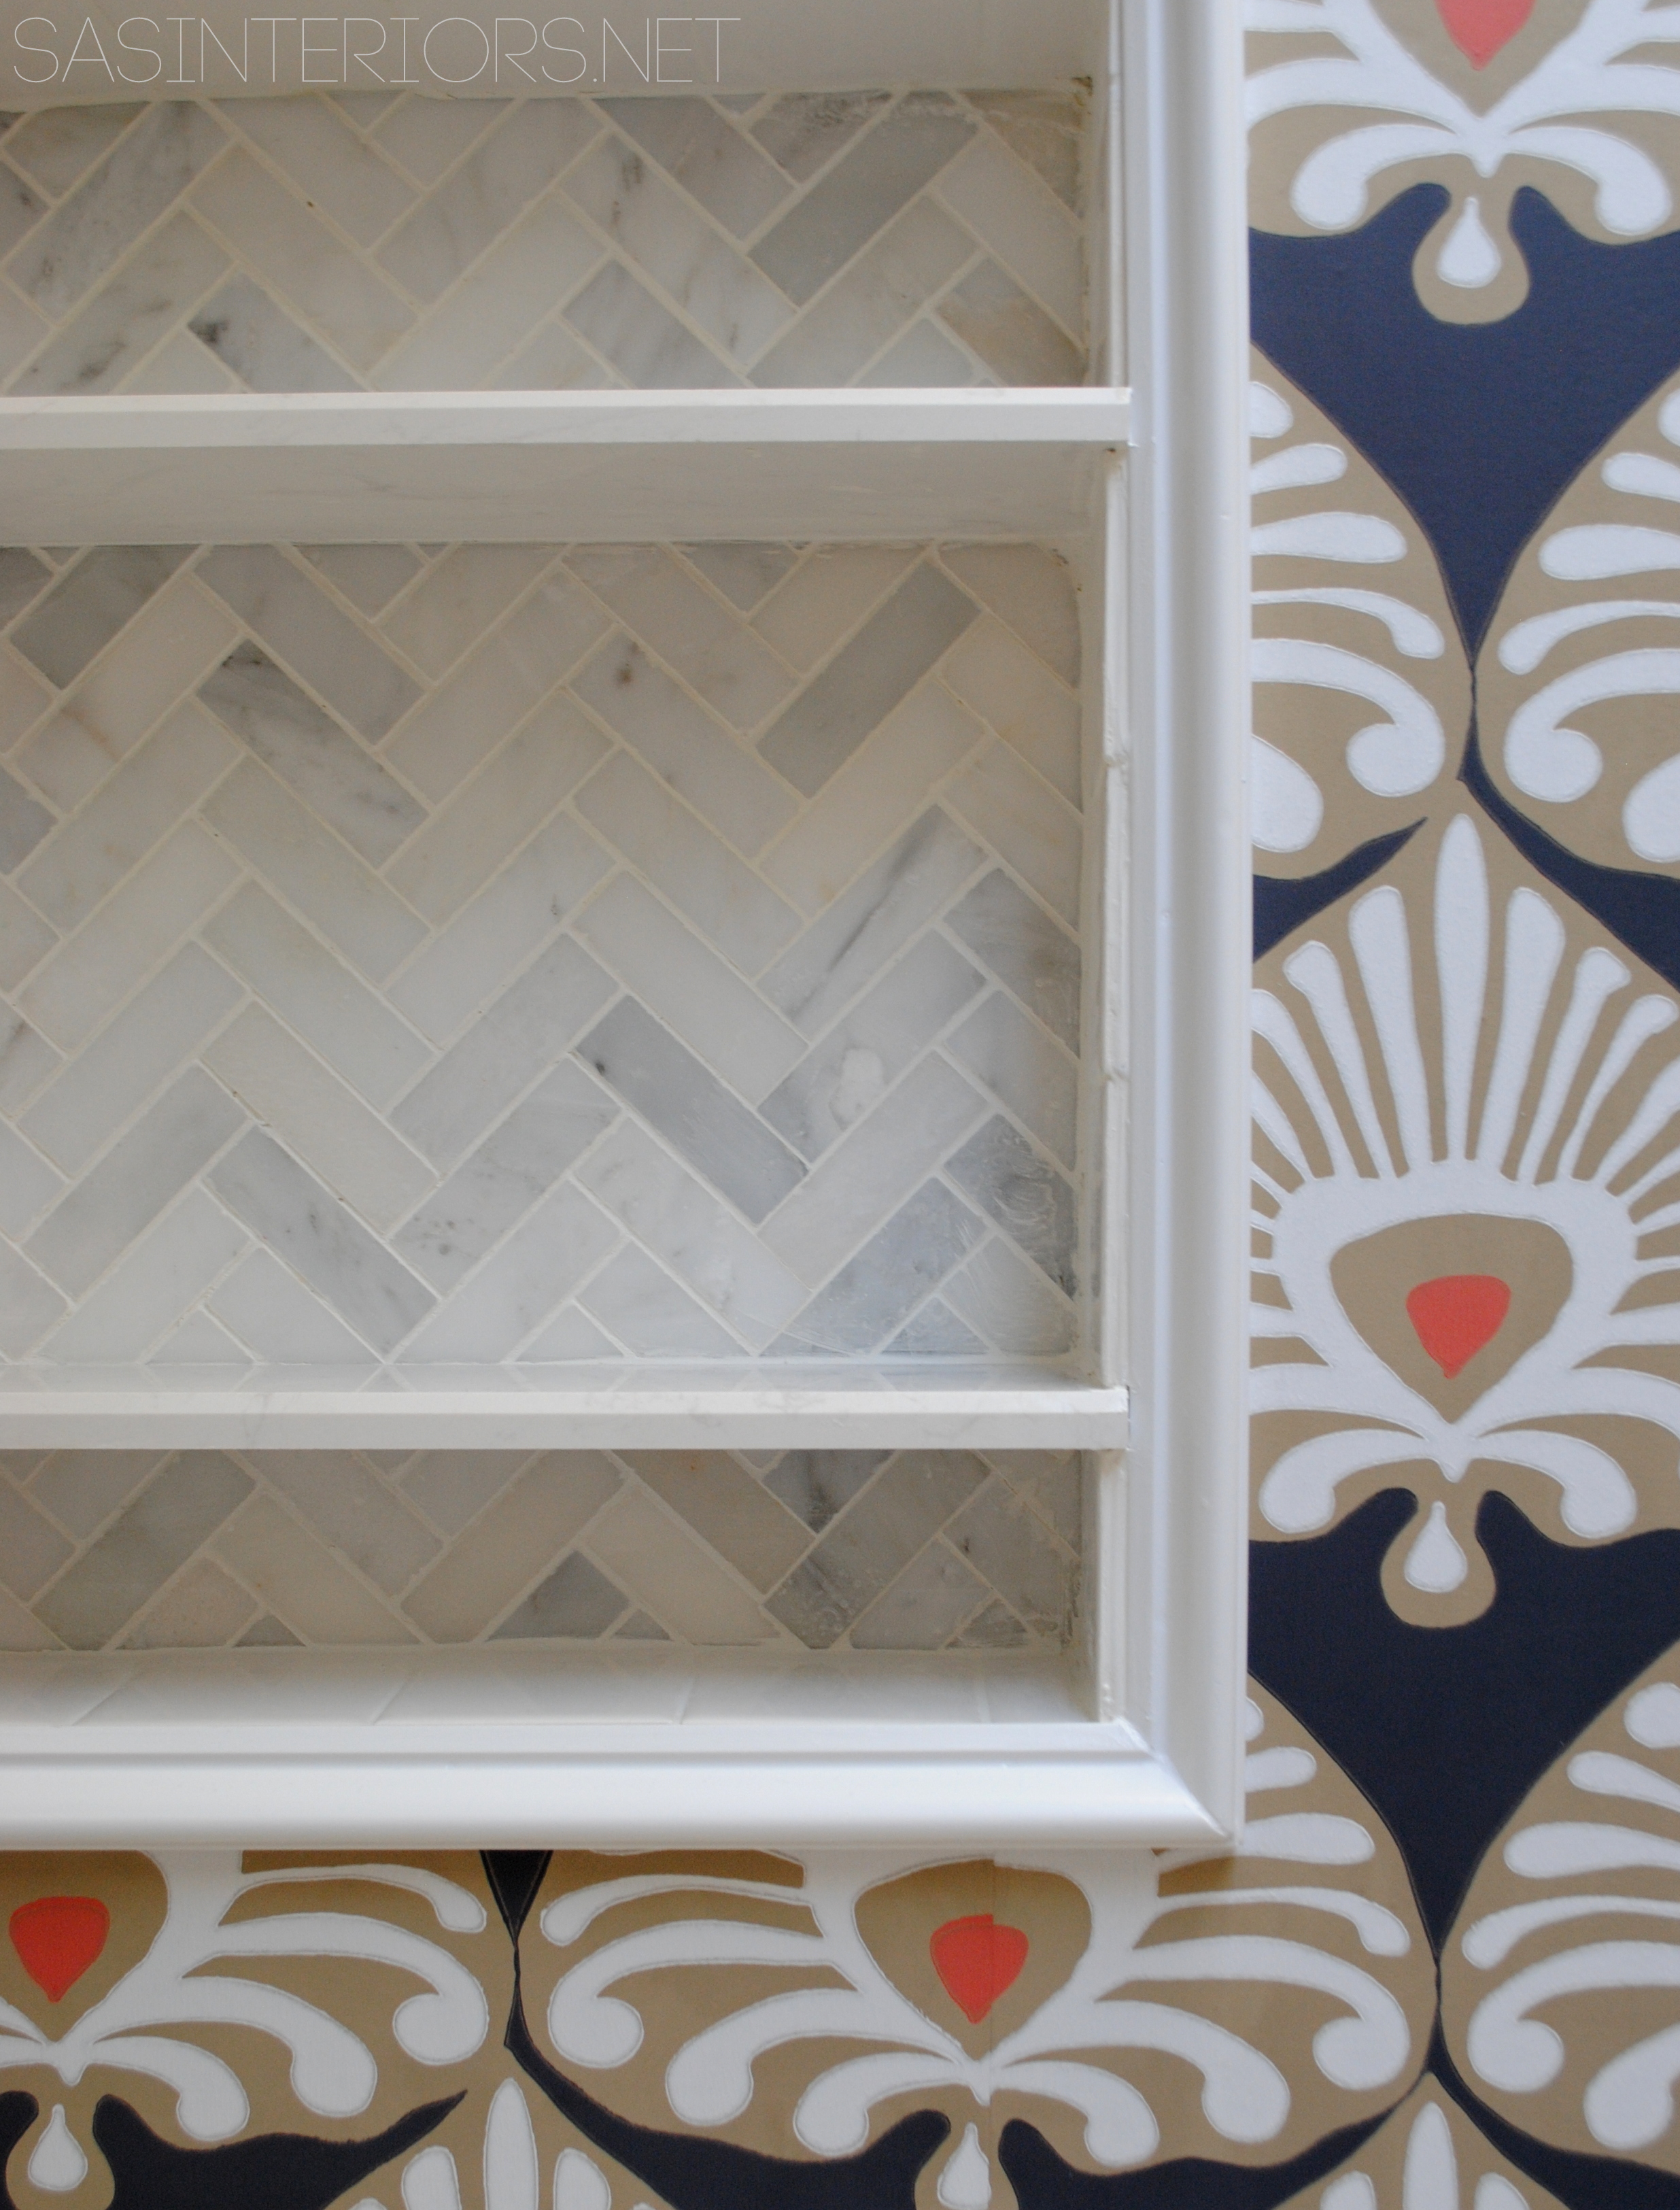
3×6 subway tile was used as the main tile material, which frames an accent tile of natural stone in a small herringbone pattern

Bathroom Makover with 95% of the space being a DIY project - new tub + tile, vanity, wallpaper, and more!  Lots of details on this multi-post before & after.  Bathroom makeover by Jenna Burger Design www.jennaburger.com

3 x 6 subway tile with herringbone accent tile in carrera

tutorial for >>> how to install tile + grout

Bathroom Makover with 95% of the space being a DIY project - new tub + tile, vanity, wallpaper, and more!  Lots of details on this multi-post before & after.  Bathroom makeover by Jenna Burger Design www.jennaburger.com

Bathroom Makover with 95% of the space being a DIY project - new tub + tile, vanity, wallpaper, and more!  Lots of details on this multi-post before & after.  Bathroom makeover by Jenna Burger Design www.jennaburger.com

Bathroom Makover with 95% of the space being a DIY project - new tub + tile, vanity, wallpaper, and more!  Lots of details on this multi-post before & after.  Bathroom makeover by Jenna Burger Design www.jennaburger.com

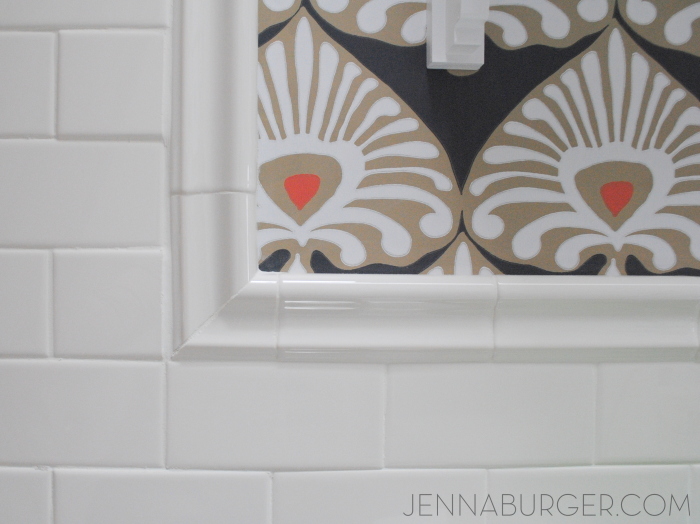
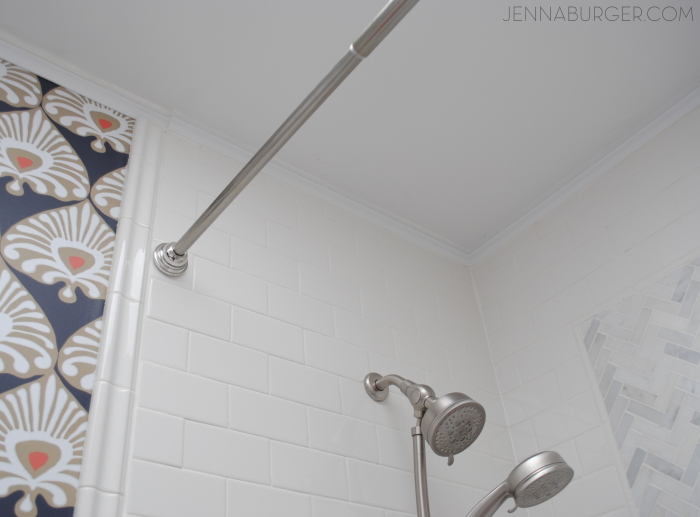
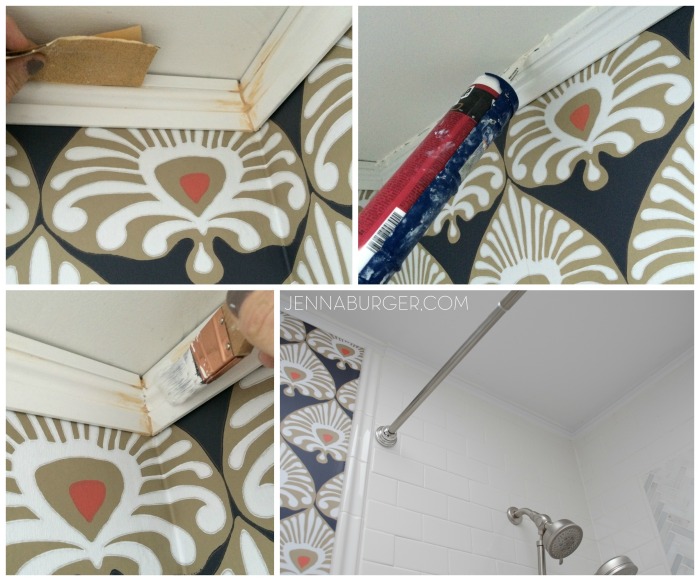
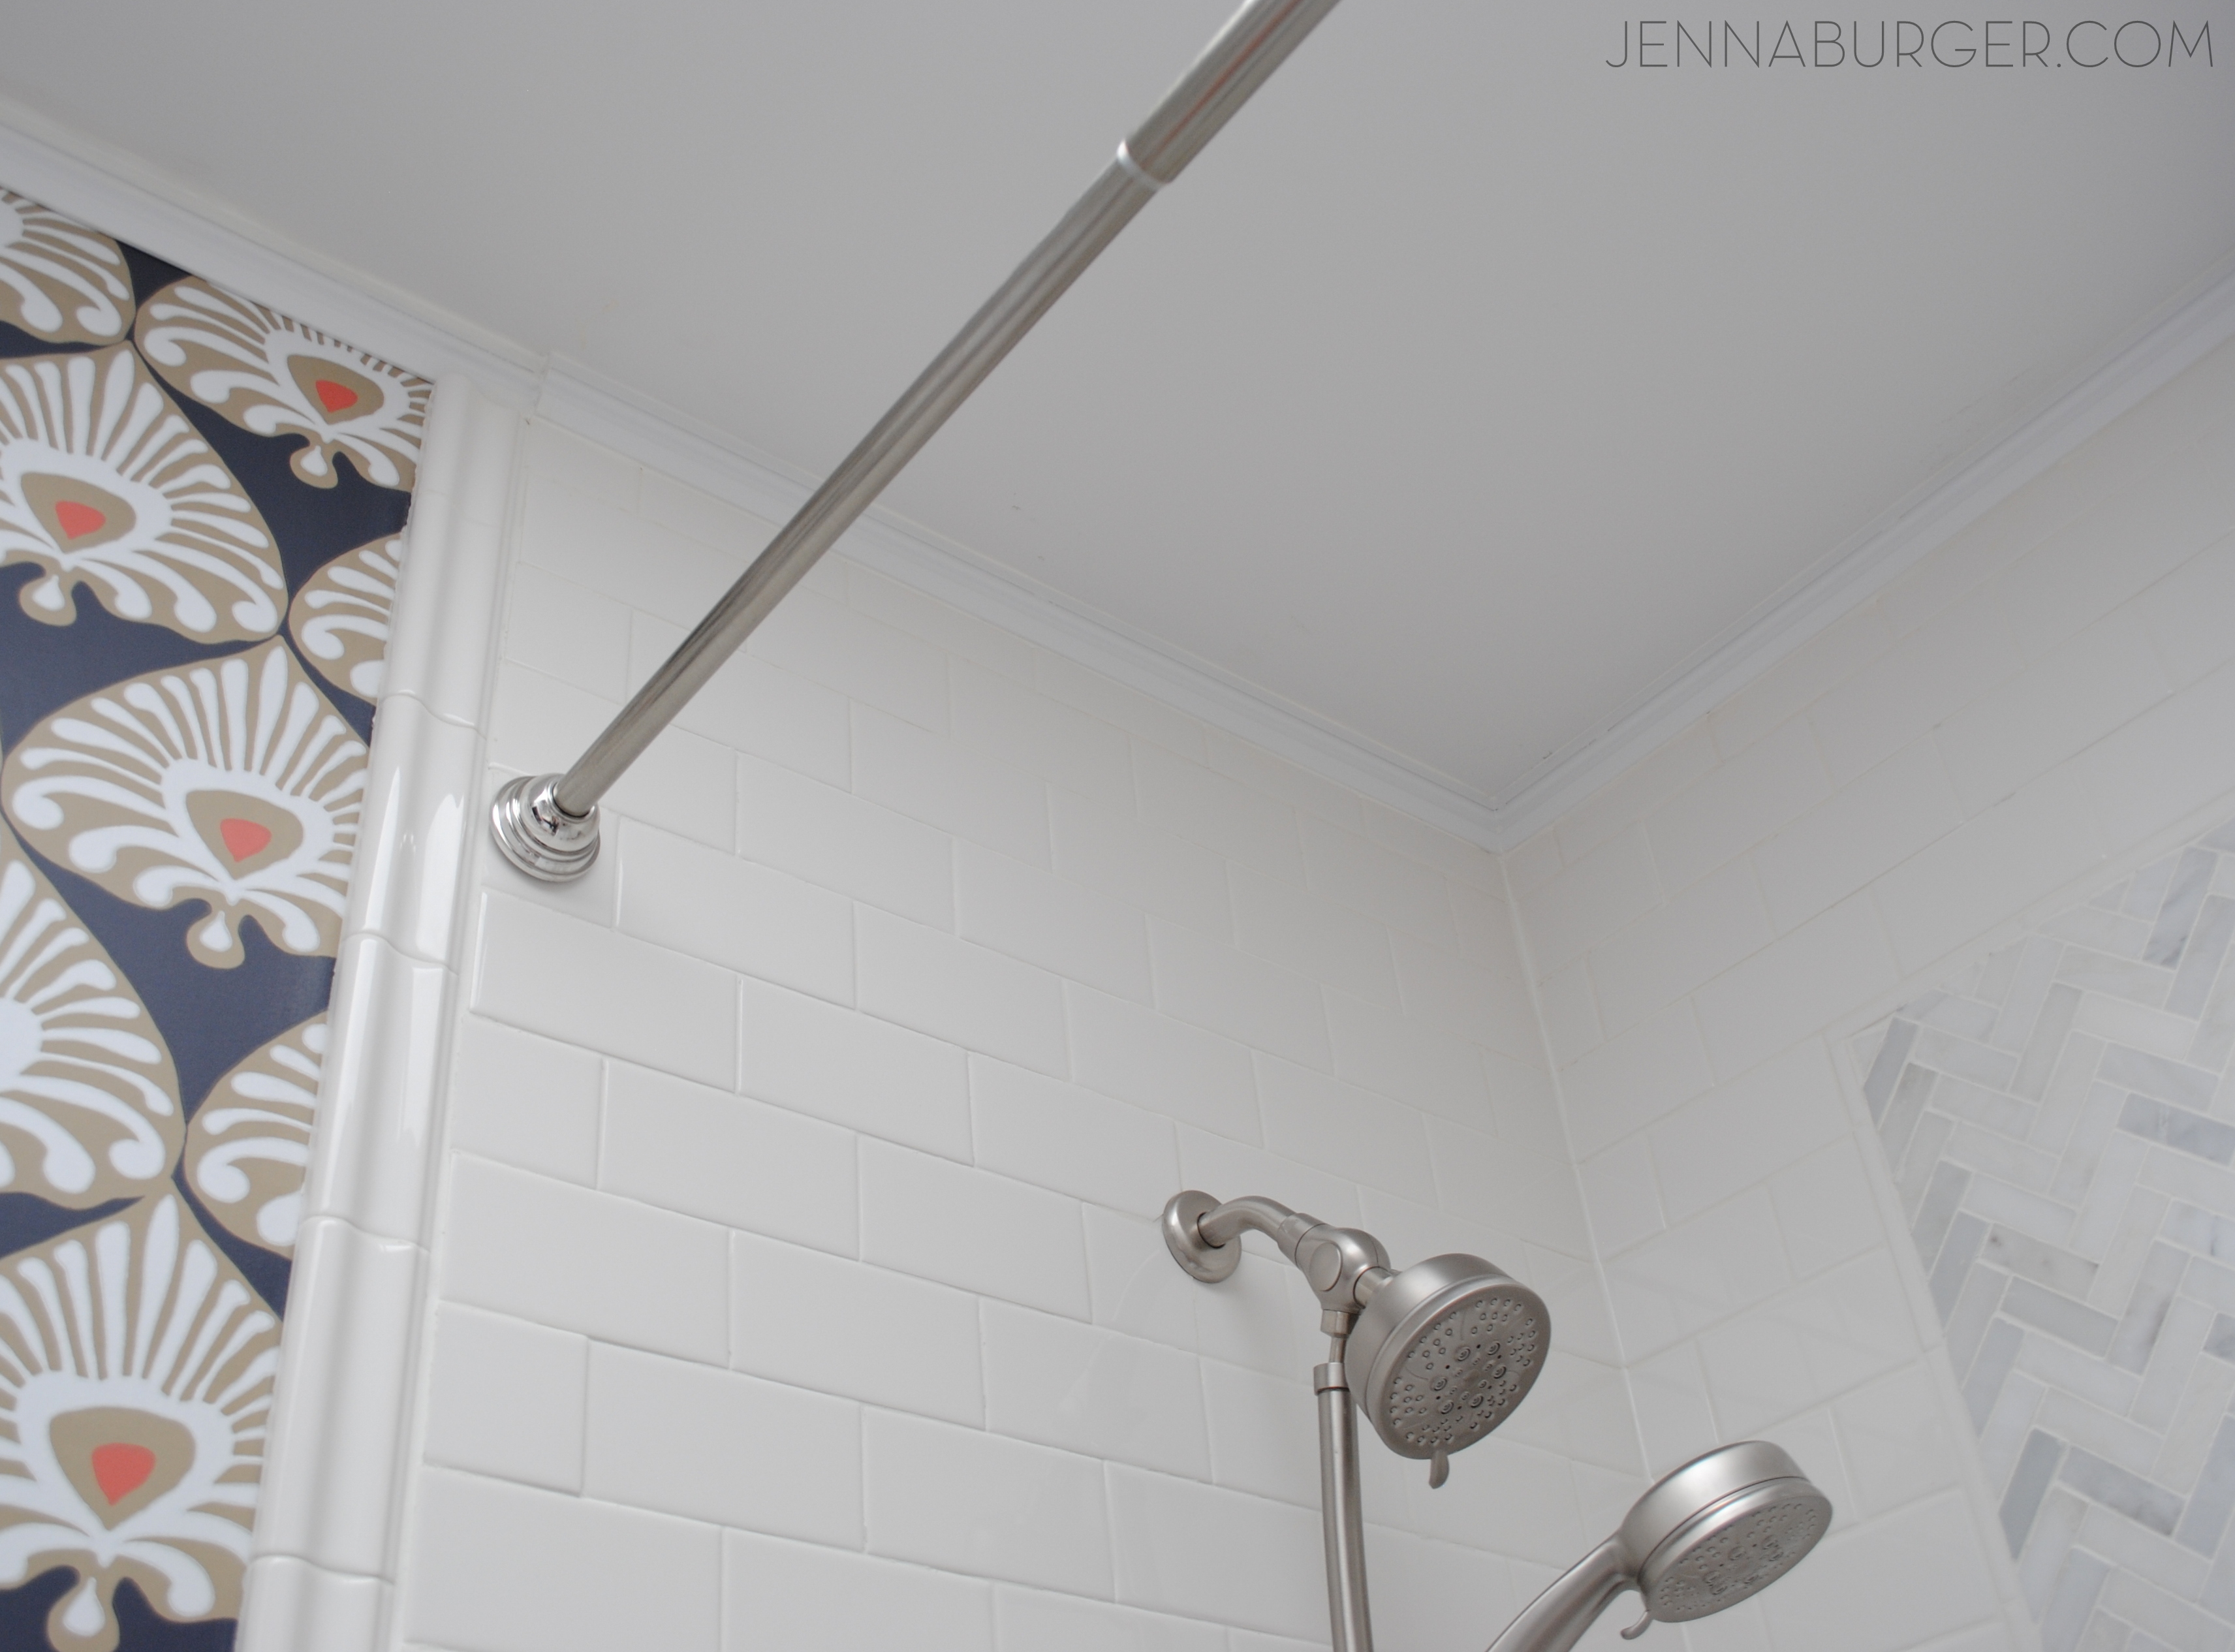
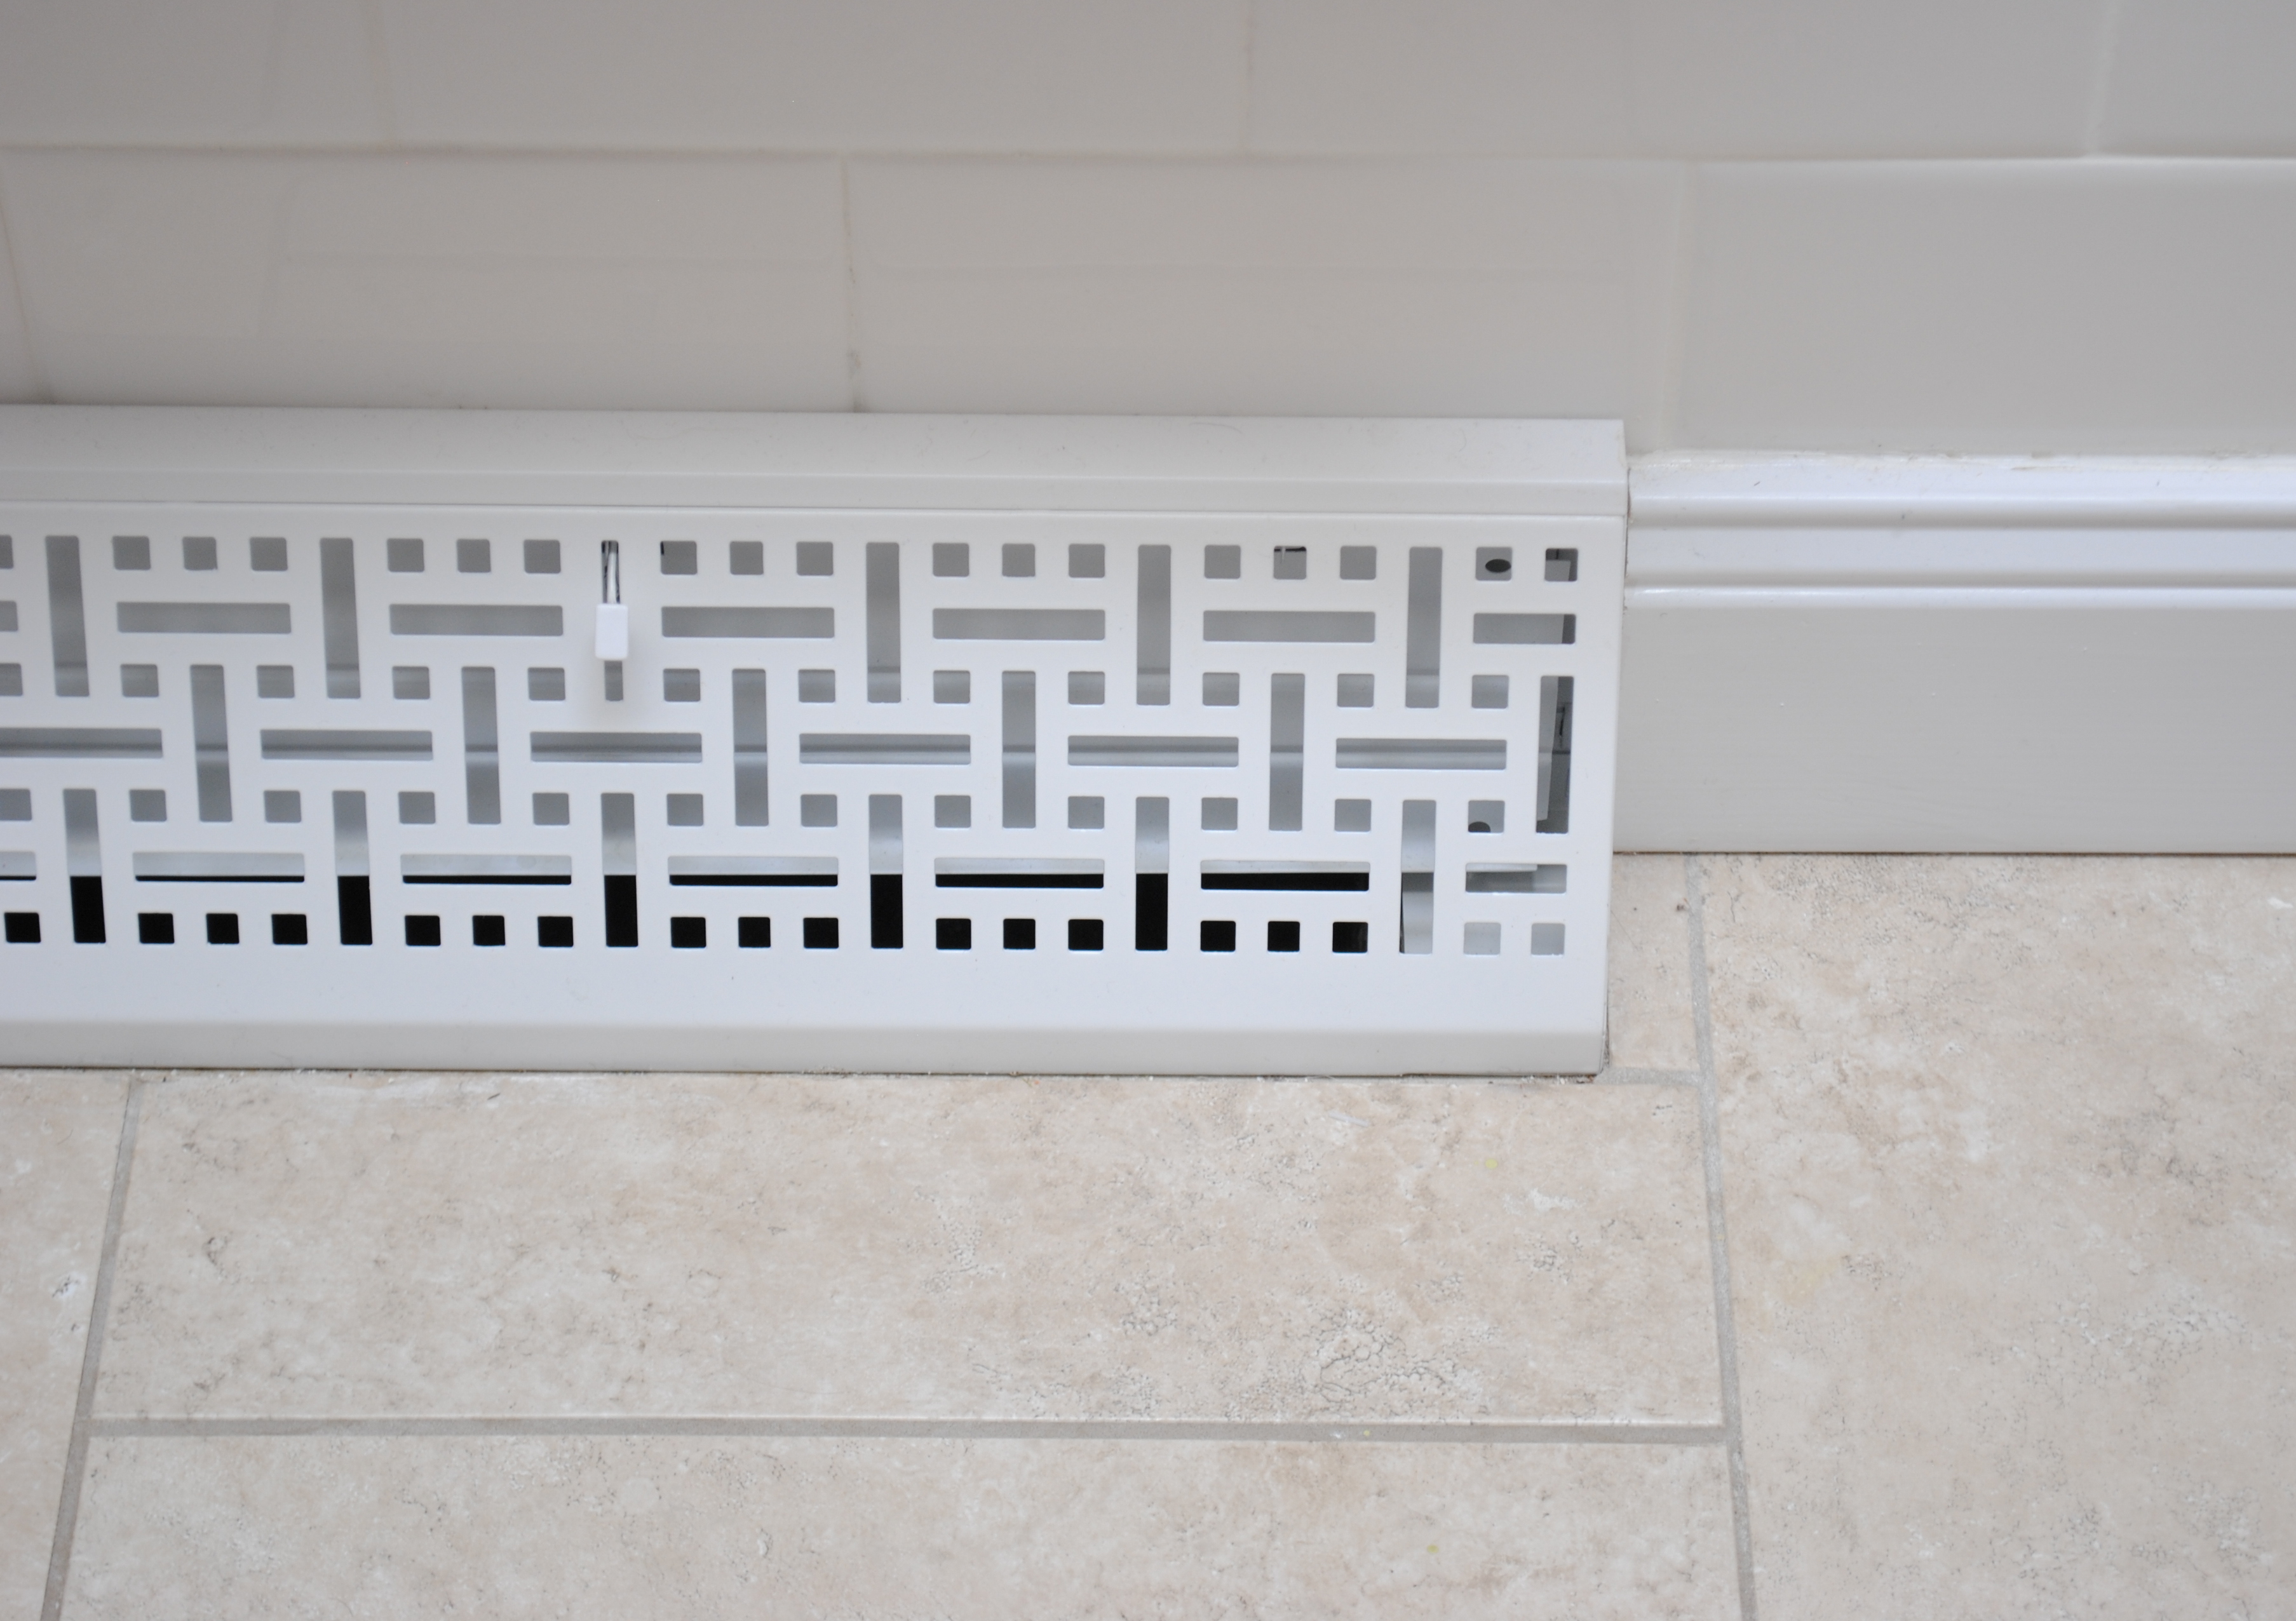
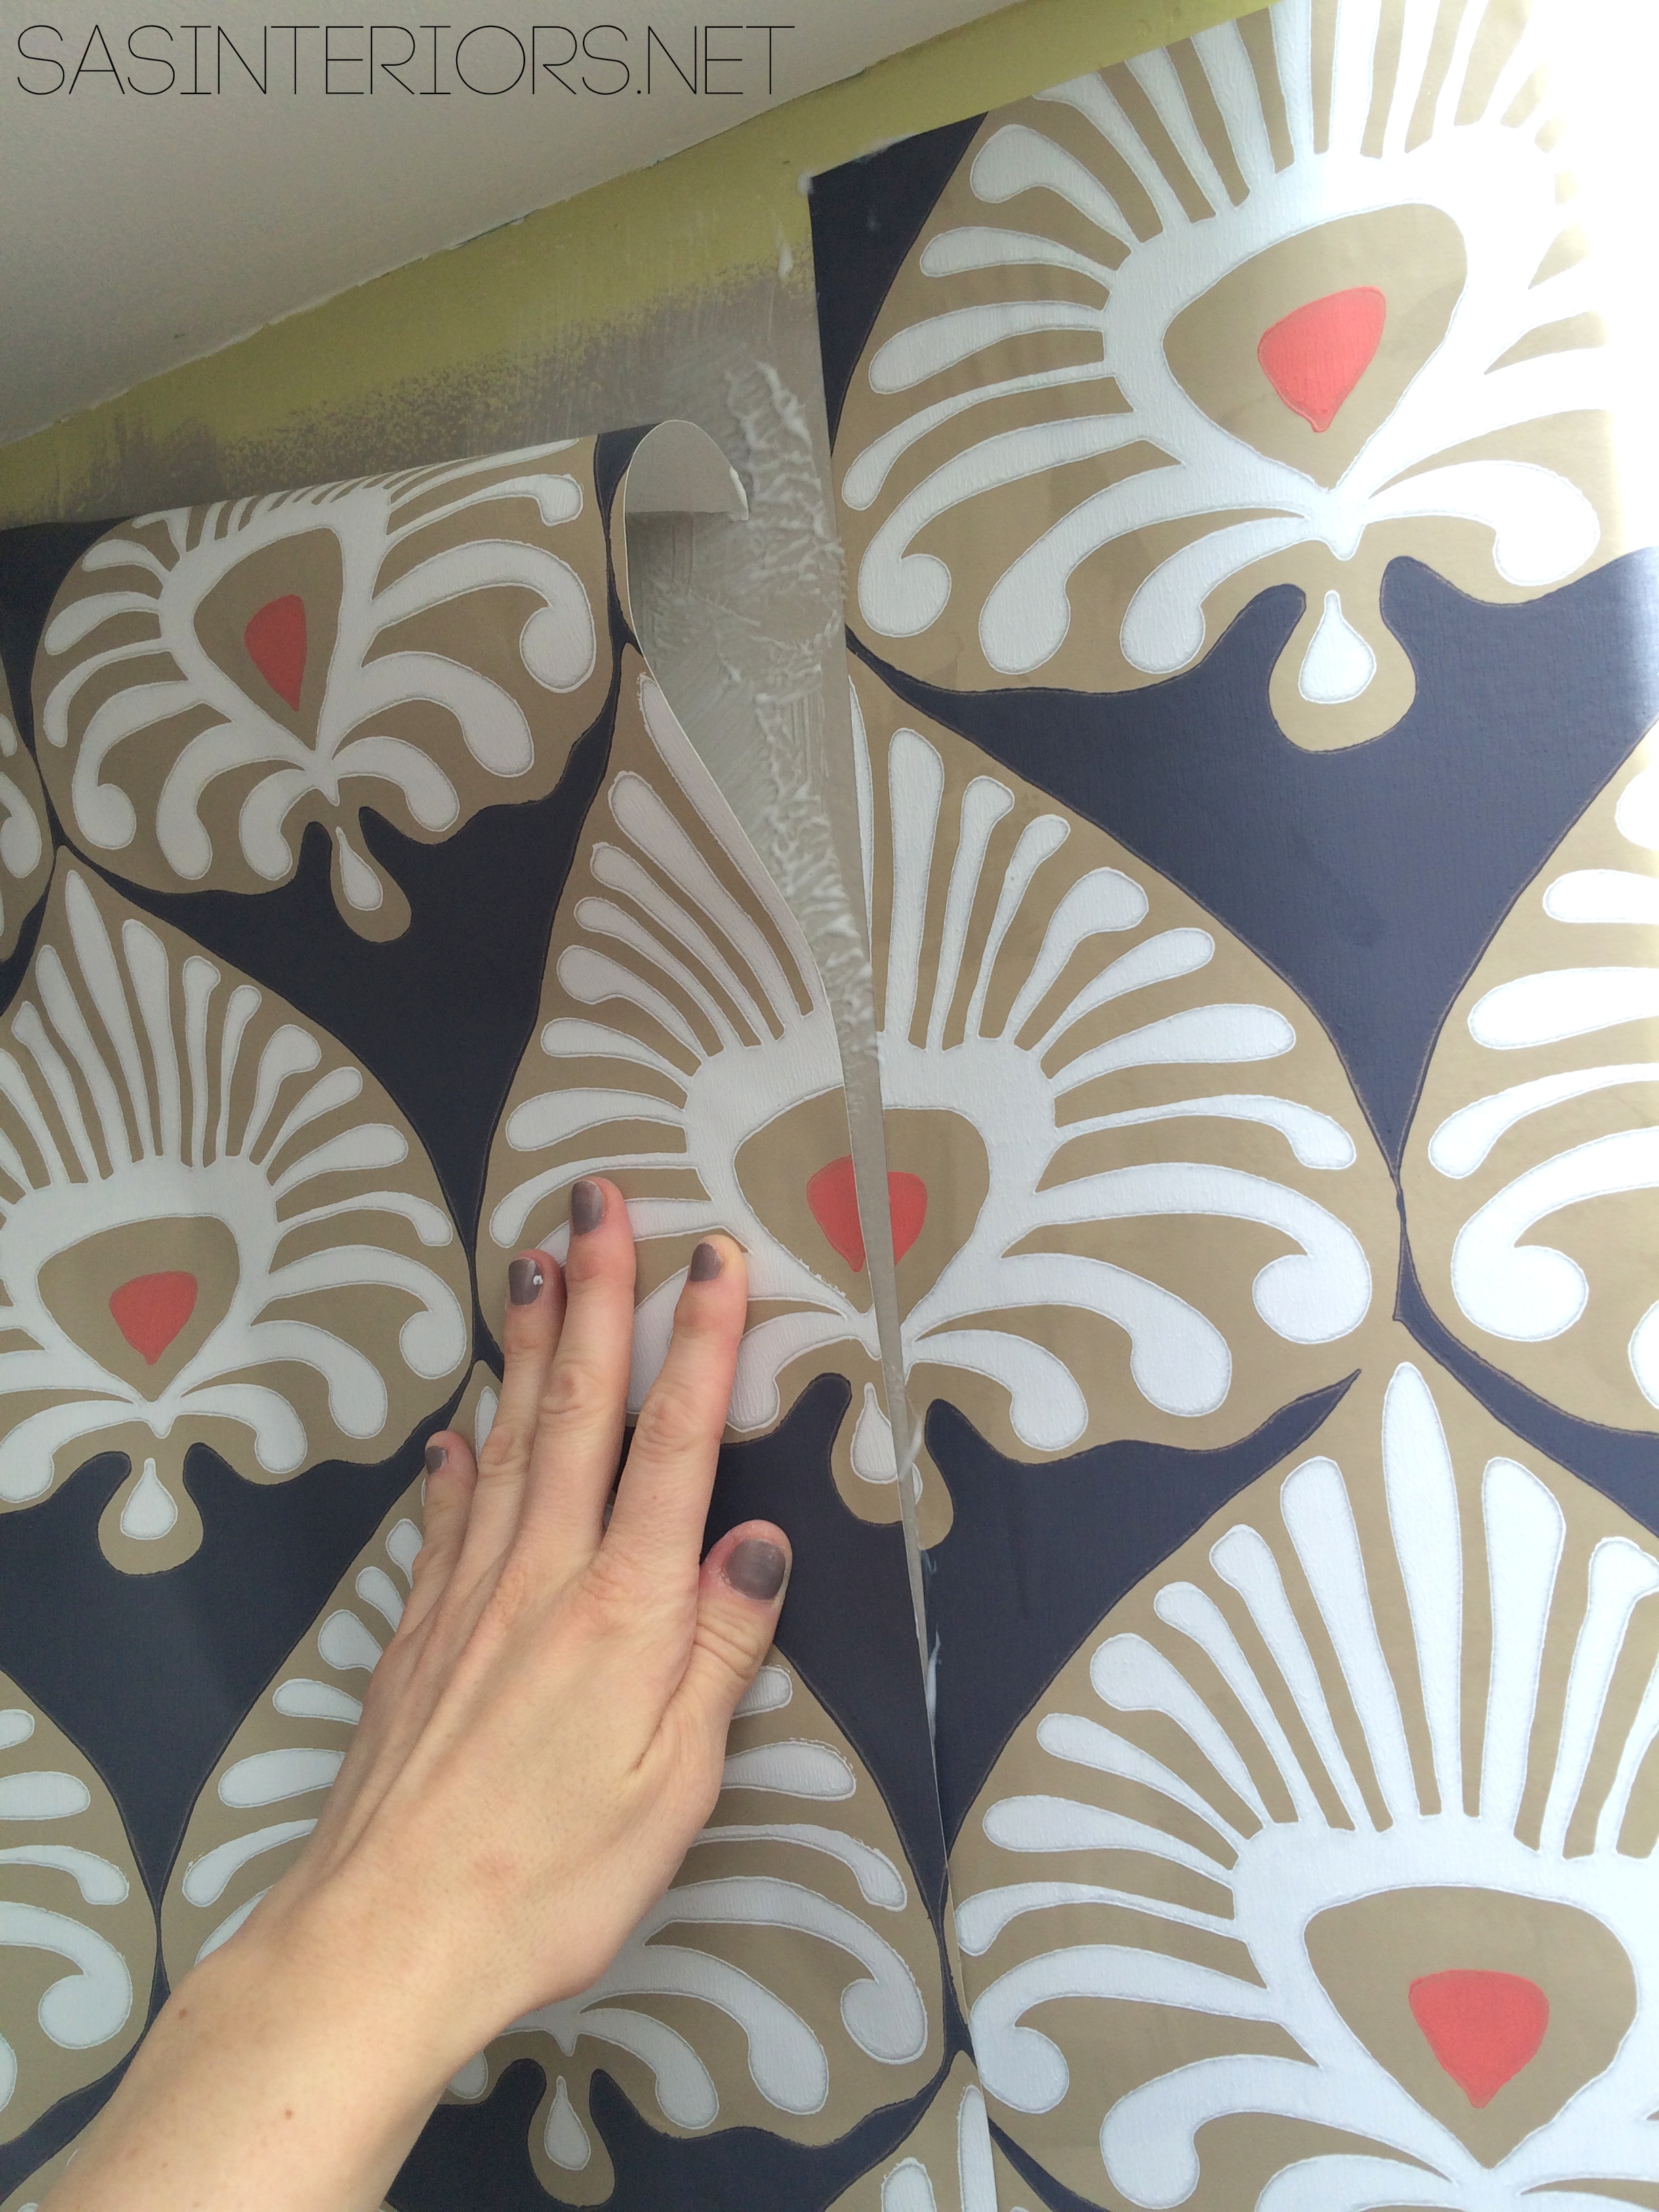
Where the wall meets the ceiling, I added a small decorative moulding, which really gave the space a finished, tailored look.  I am not very good with moulding (remember my troubles in the powder room), so this time I chose a moulding that had a 90 degree angle and it was much more manageable + easy to install since the cut was a simple 45.

Adding the moulding not only provides a finished look, but it allowed the install of the wallpaper to be easier – the wallpaper didn’t have to be perfect at the top because the moulding covered it.  Additionally, the moulding continues in the tub area where I was left with a 1/2″ gap between the last tile and the ceiling – a space too small to install tile.

Here I am installing it…

Installing Moulding in the Bathroom

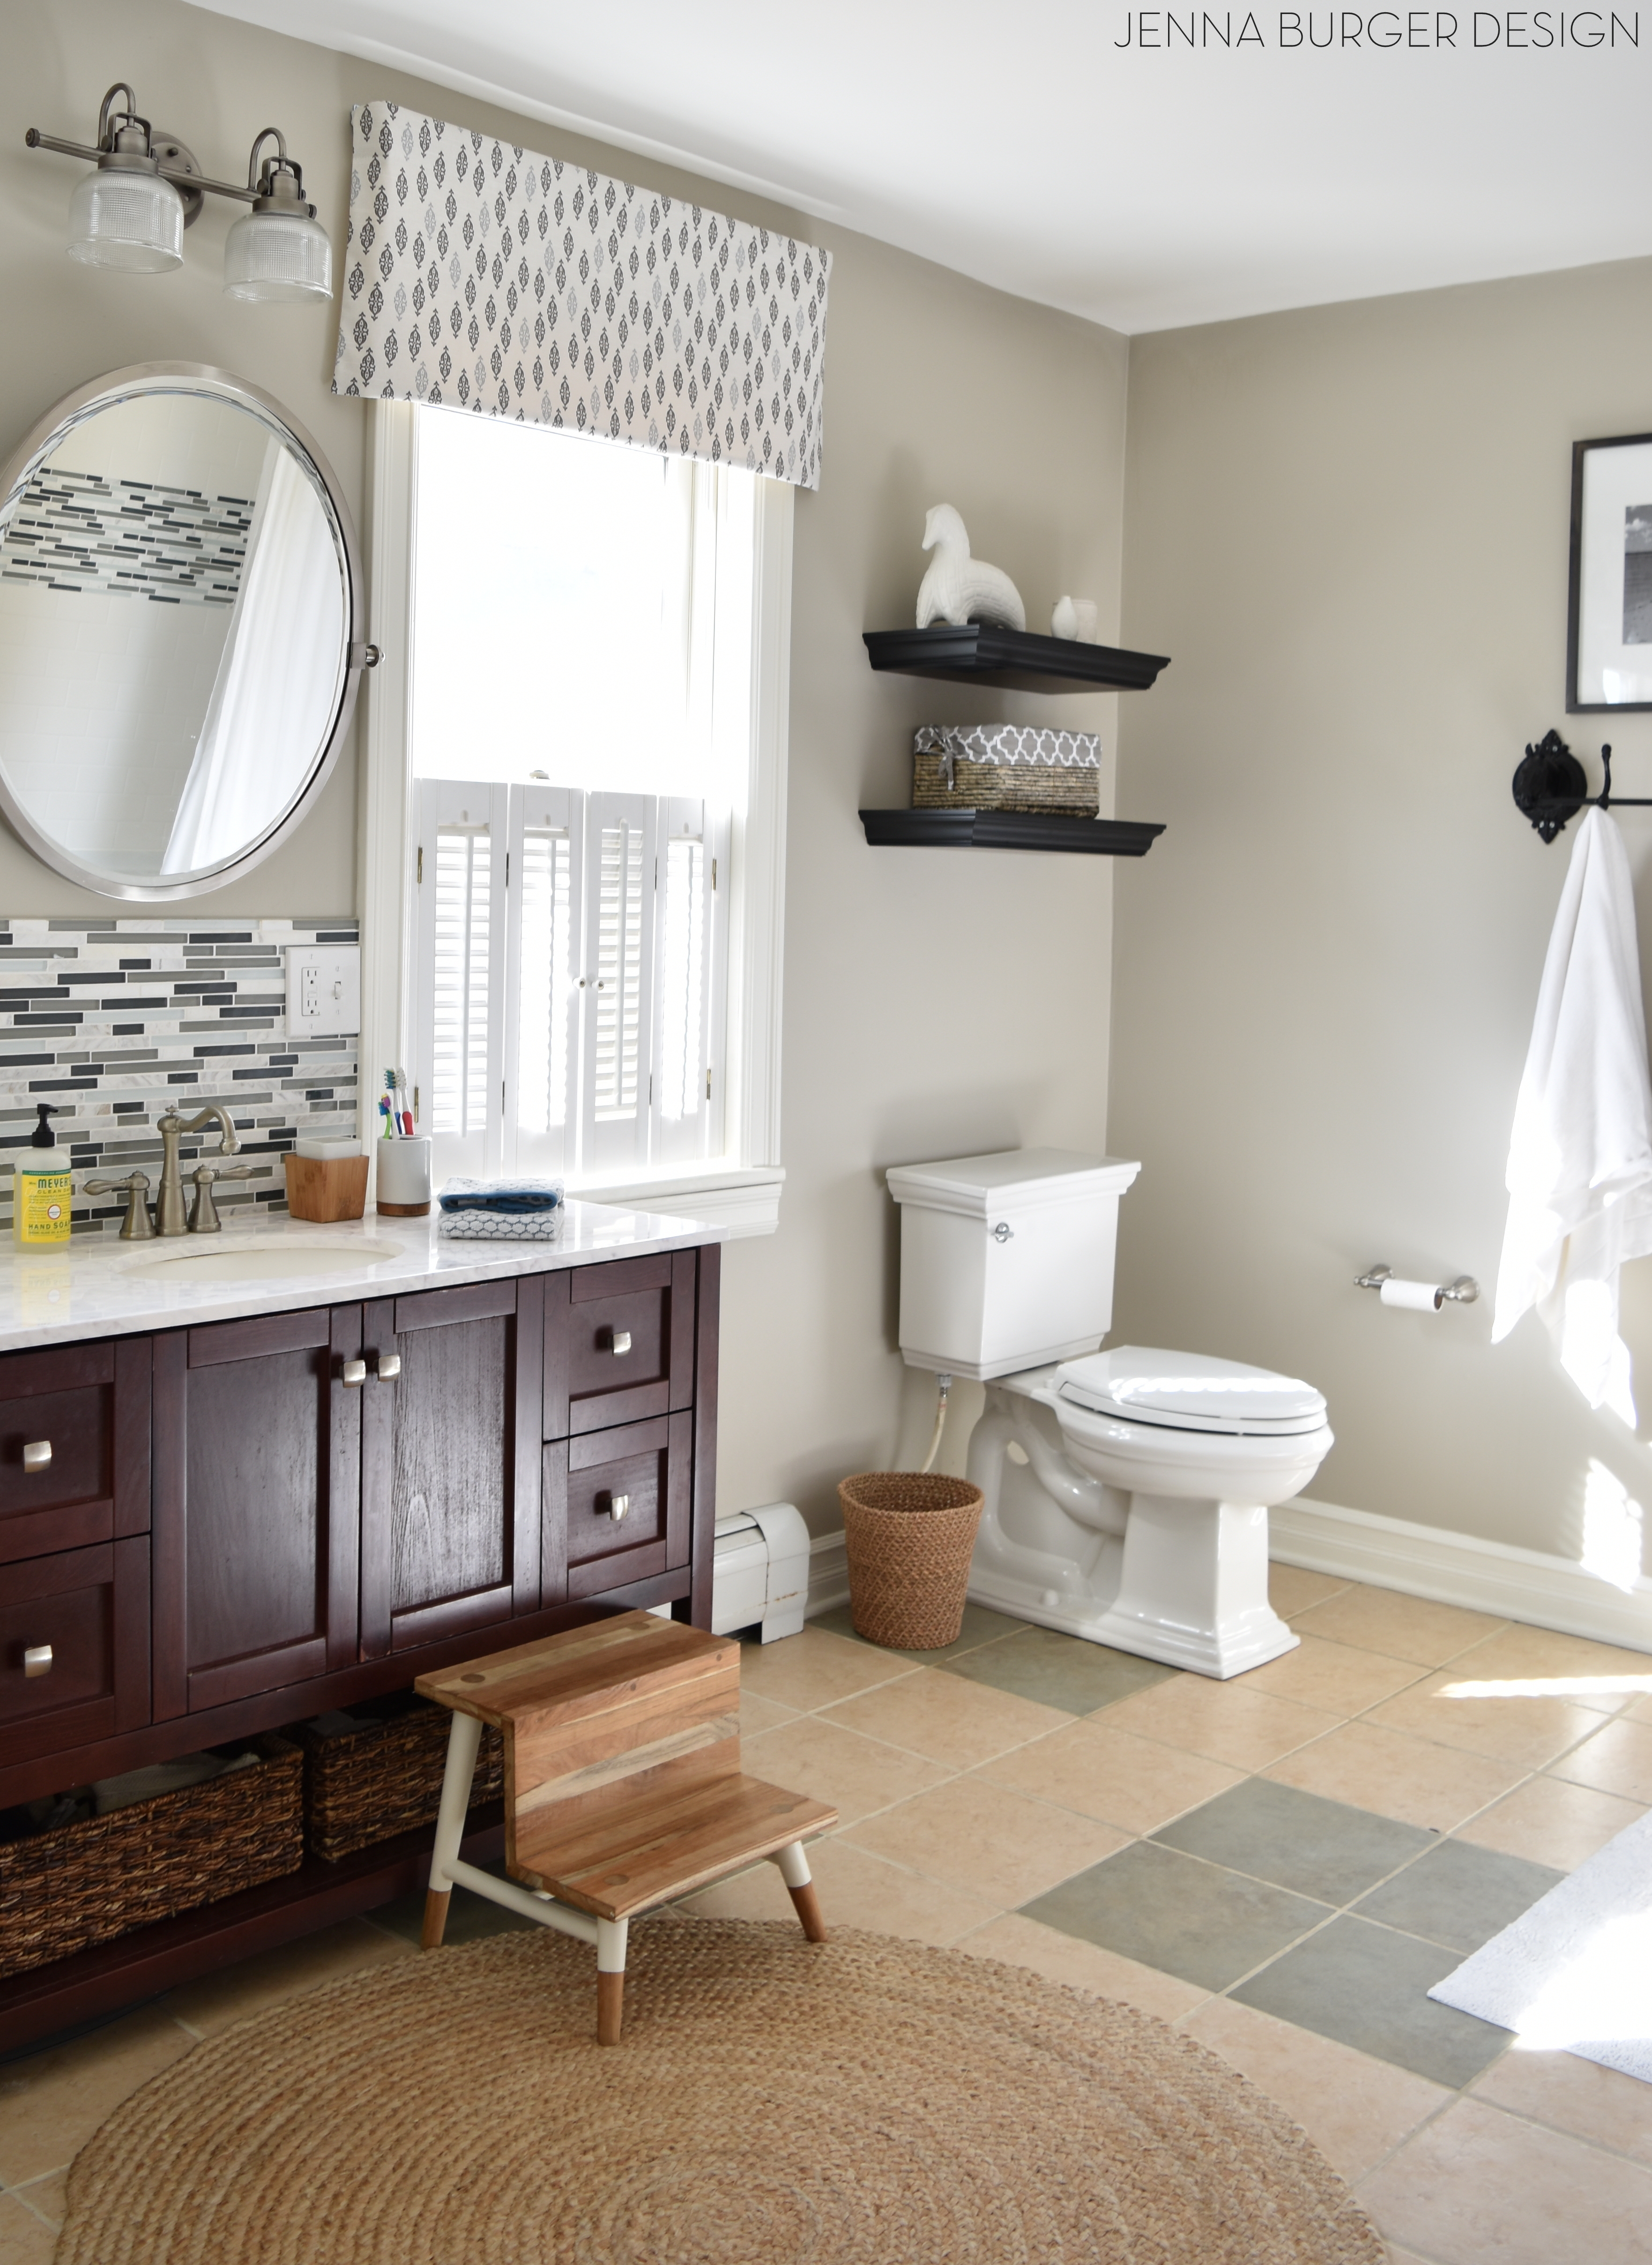
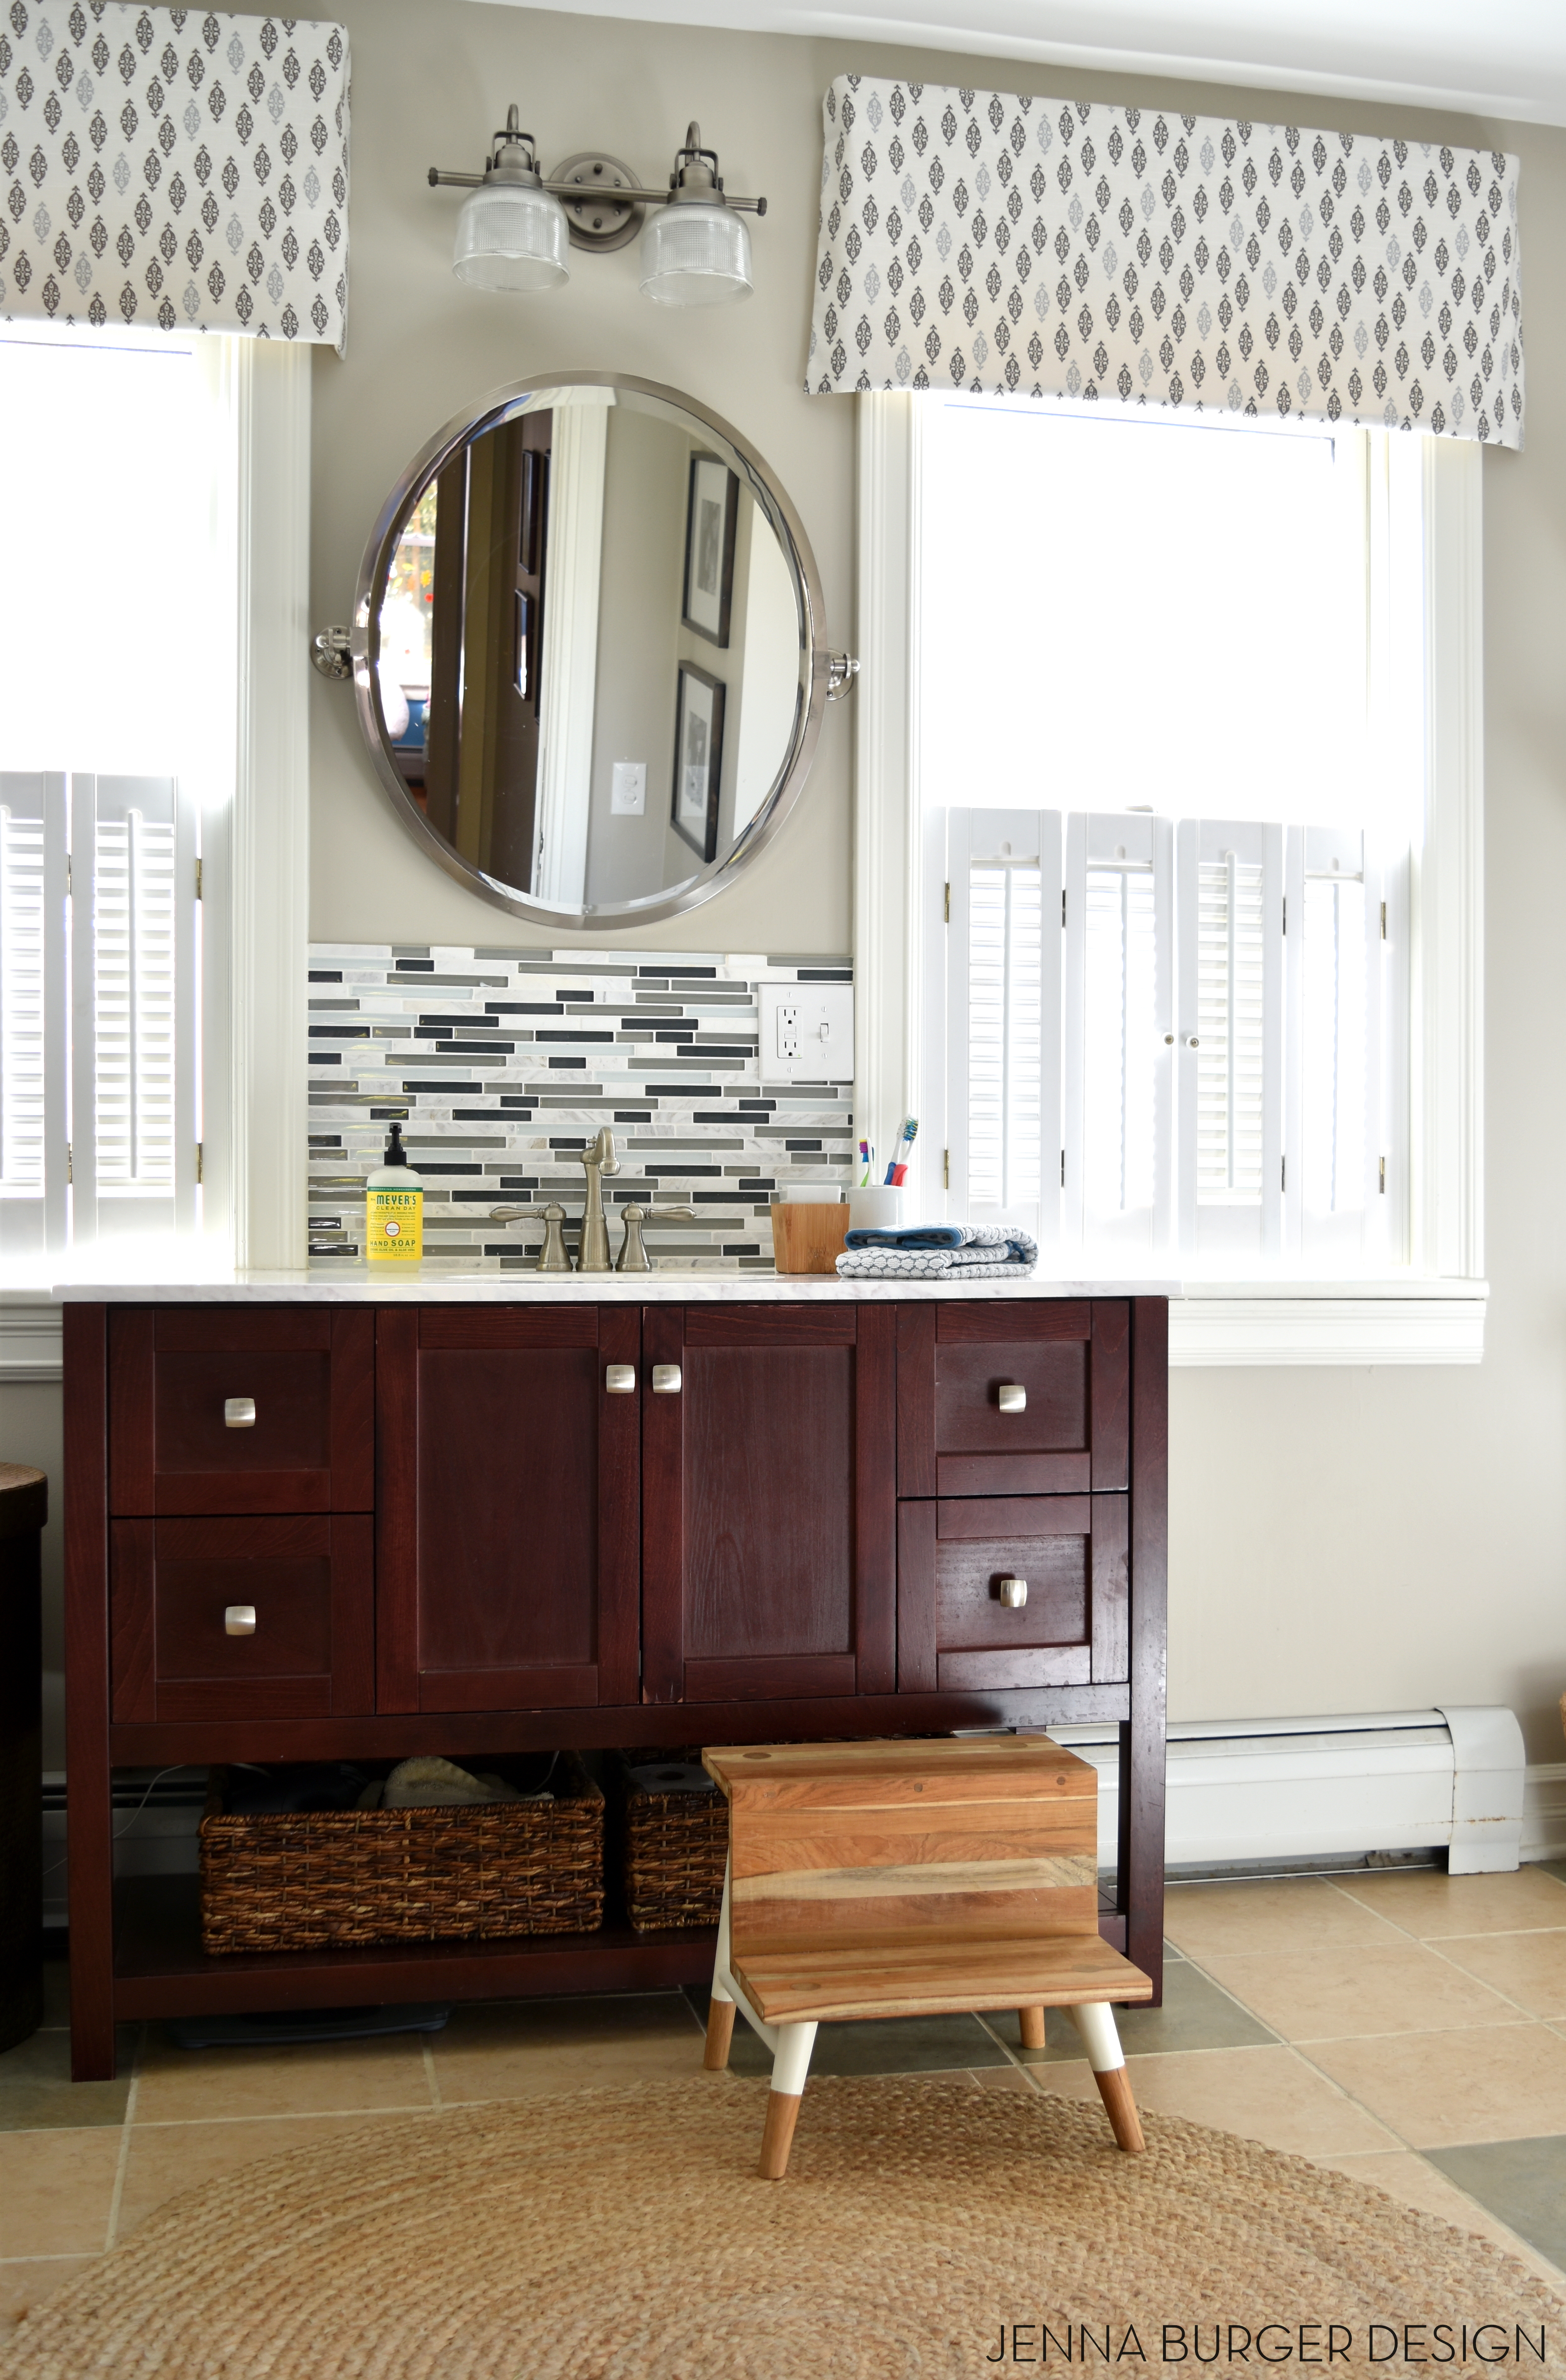
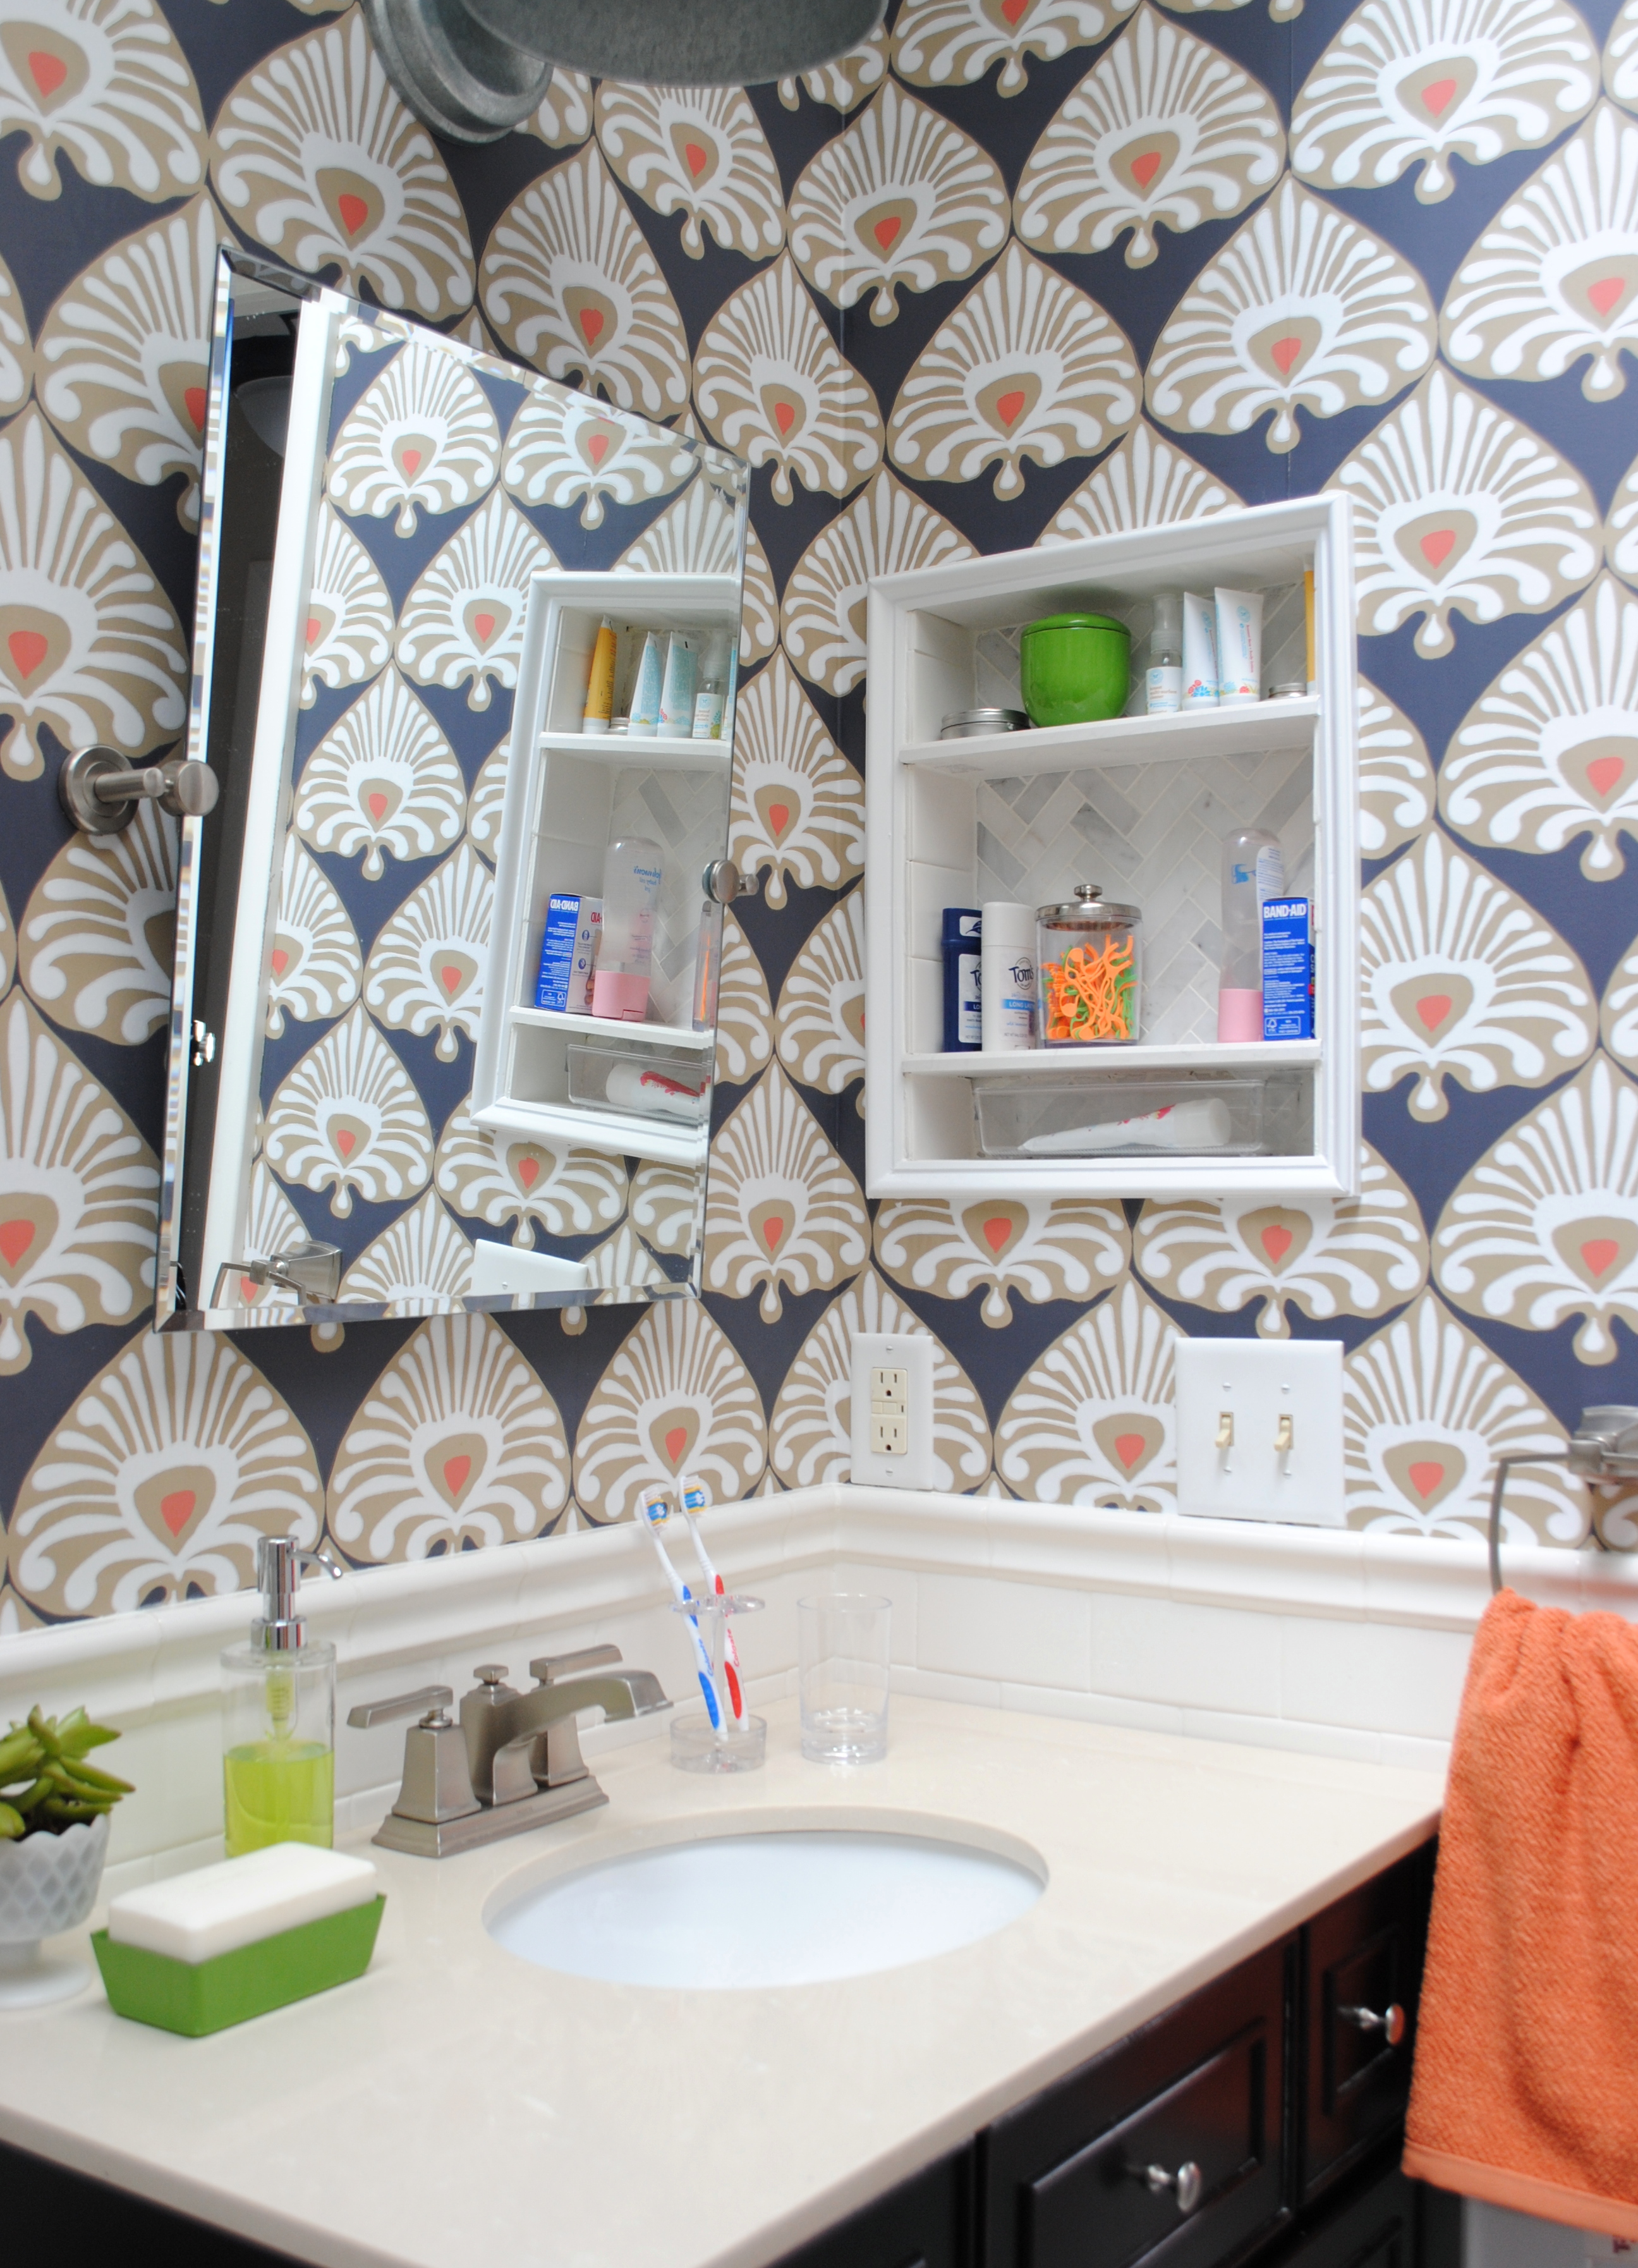
On the other side of the bathroom were more big changes…  a new toilet, vanity, lighting + a new shelf and medicine cabinet turned tiled niche.

Bathroom Makover with 95% of the space being a DIY project - new tub + tile, vanity, wallpaper, and more!  Lots of details on this multi-post before & after.  Bathroom makeover by Jenna Burger Design www.jennaburger.com

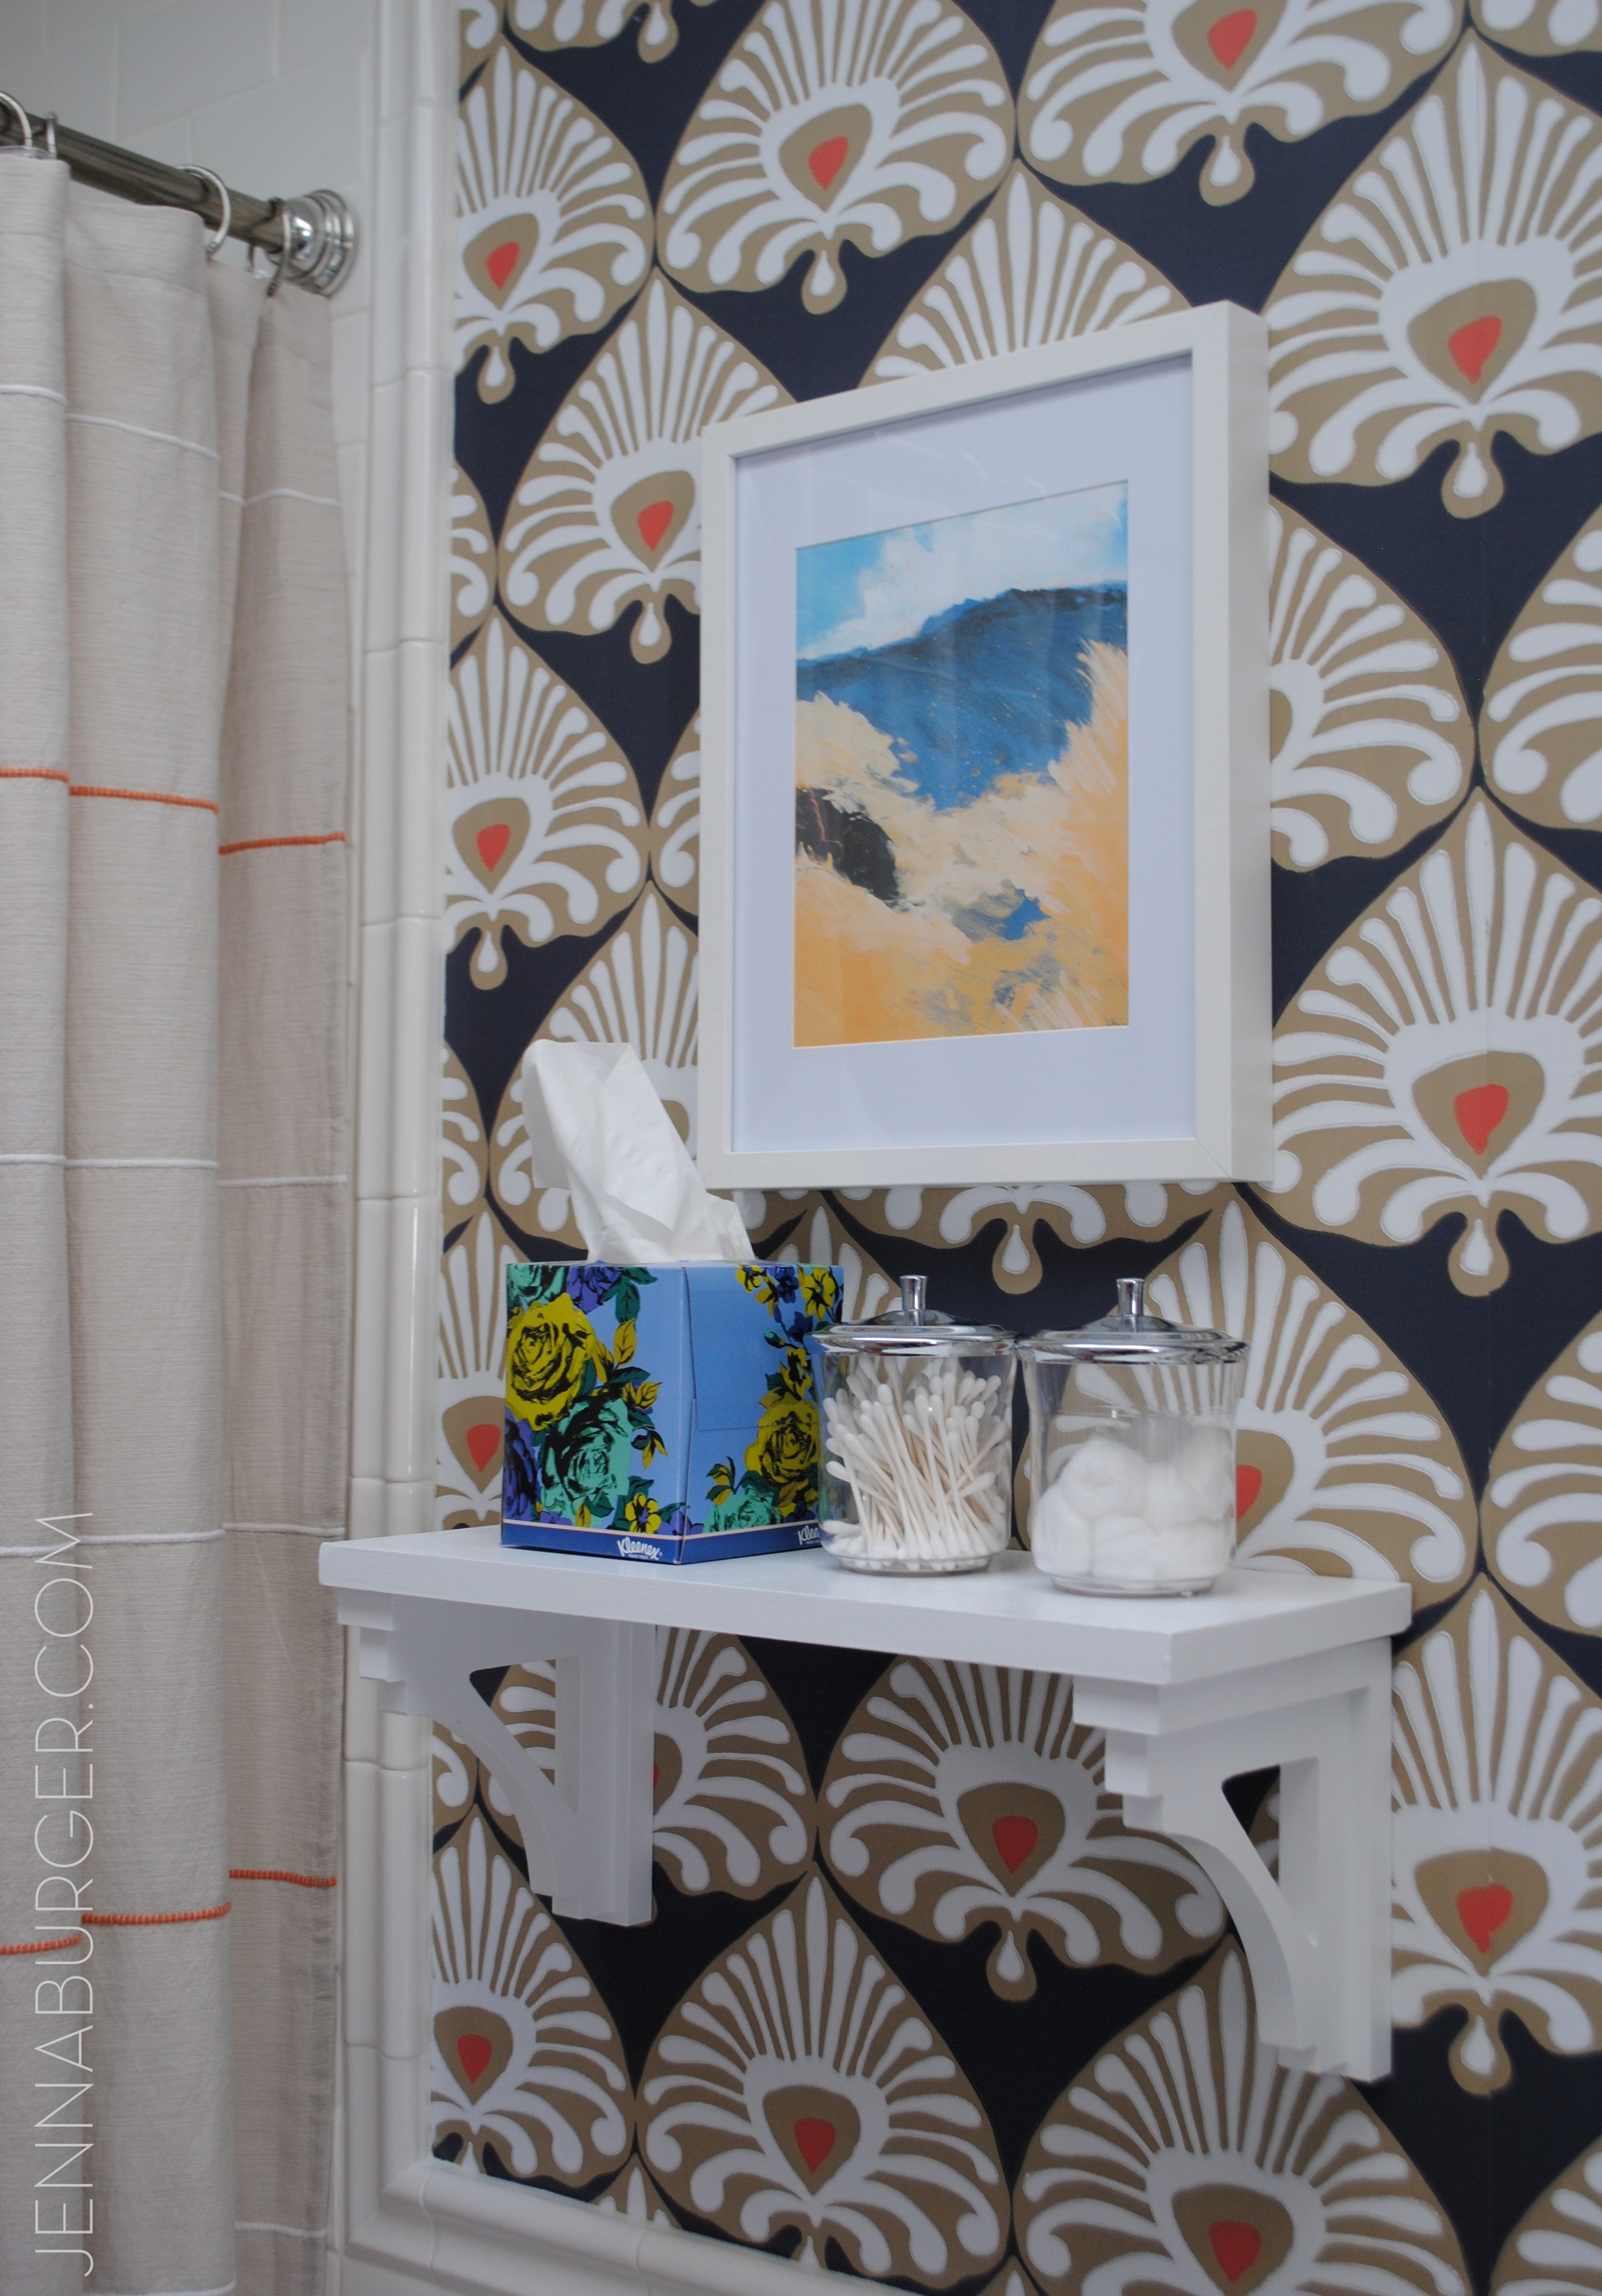
The shelf is a simple DIY project that I will share more about soon.  The original thought / plan was to add an industrial-style shelf above the toilet, but after the wallpaper went up, I just couldn’t bring myself to cover it + with the new vanity there was ample storage.

A simple white shelf along with a few layered accessories and a framed print seemed to be the perfect addition.
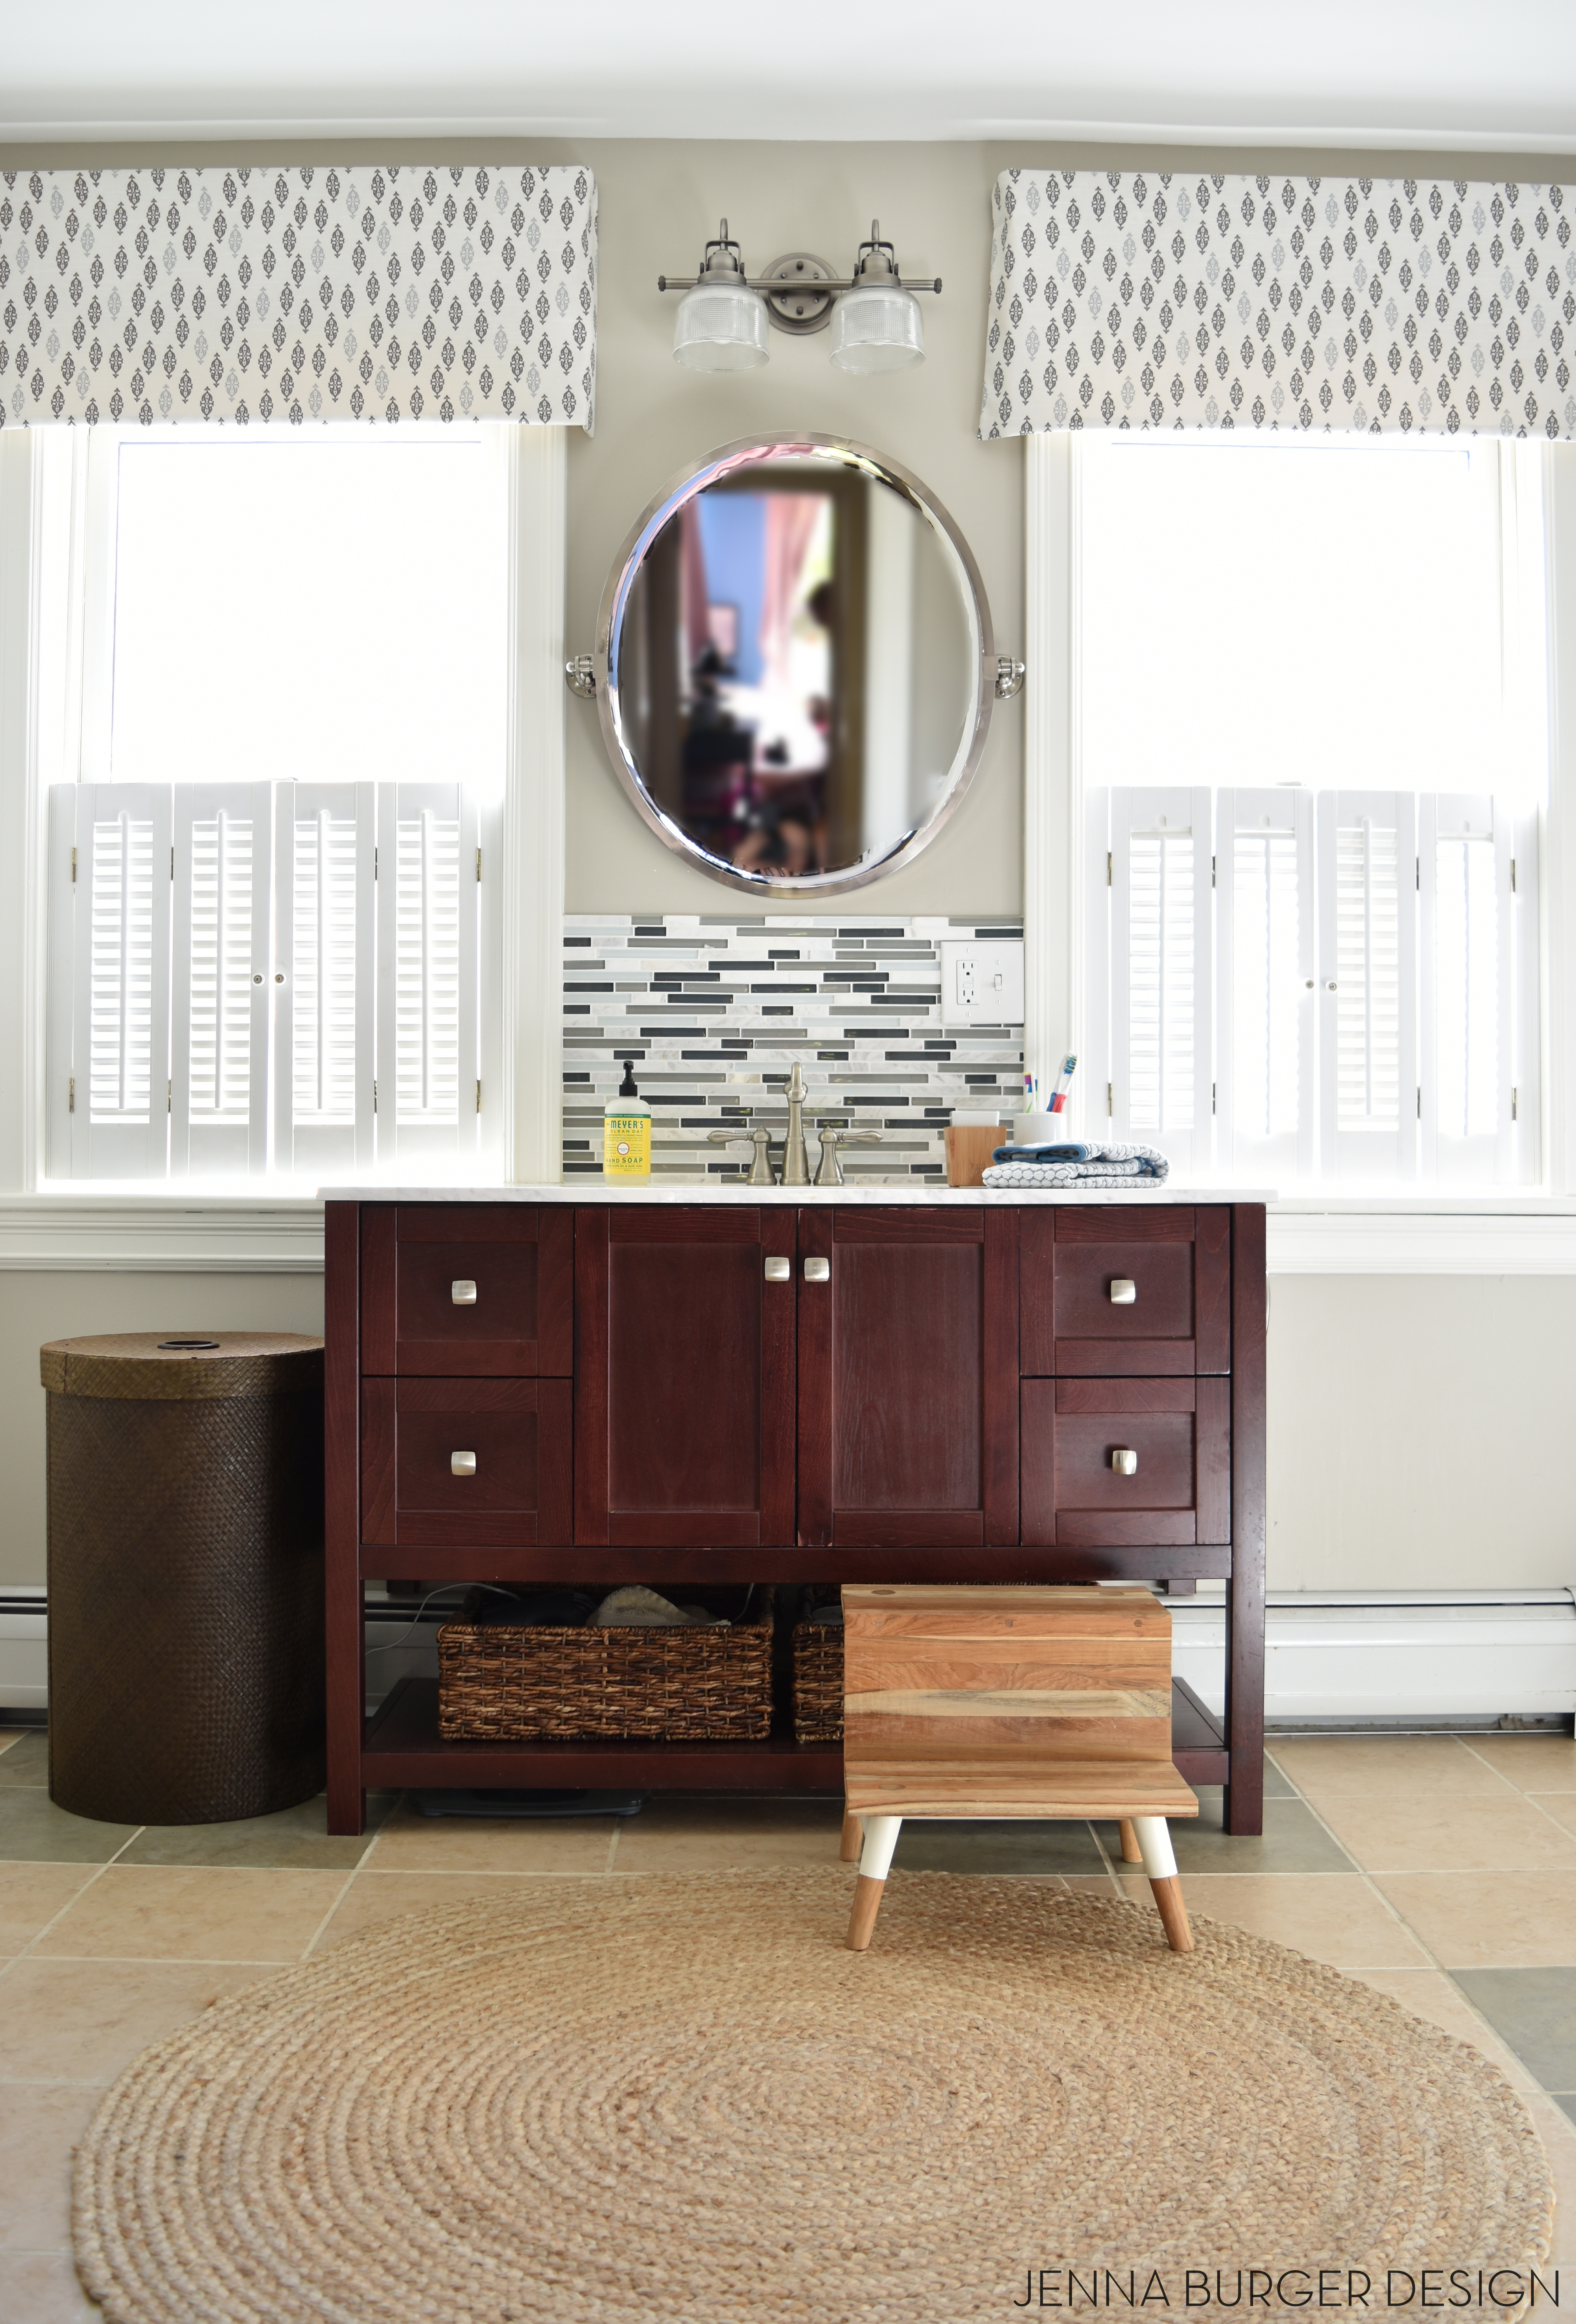
Bathroom Makover with 95% of the space being a DIY project - new tub + tile, vanity, wallpaper, and more!  Lots of details on this multi-post before & after.  Bathroom makeover by Jenna Burger Design www.jennaburger.com

Bathroom Makover with 95% of the space being a DIY project - new tub + tile, vanity, wallpaper, and more!  Lots of details on this multi-post before & after.  Bathroom makeover by Jenna Burger Design www.jennaburger.comTo the vanity…

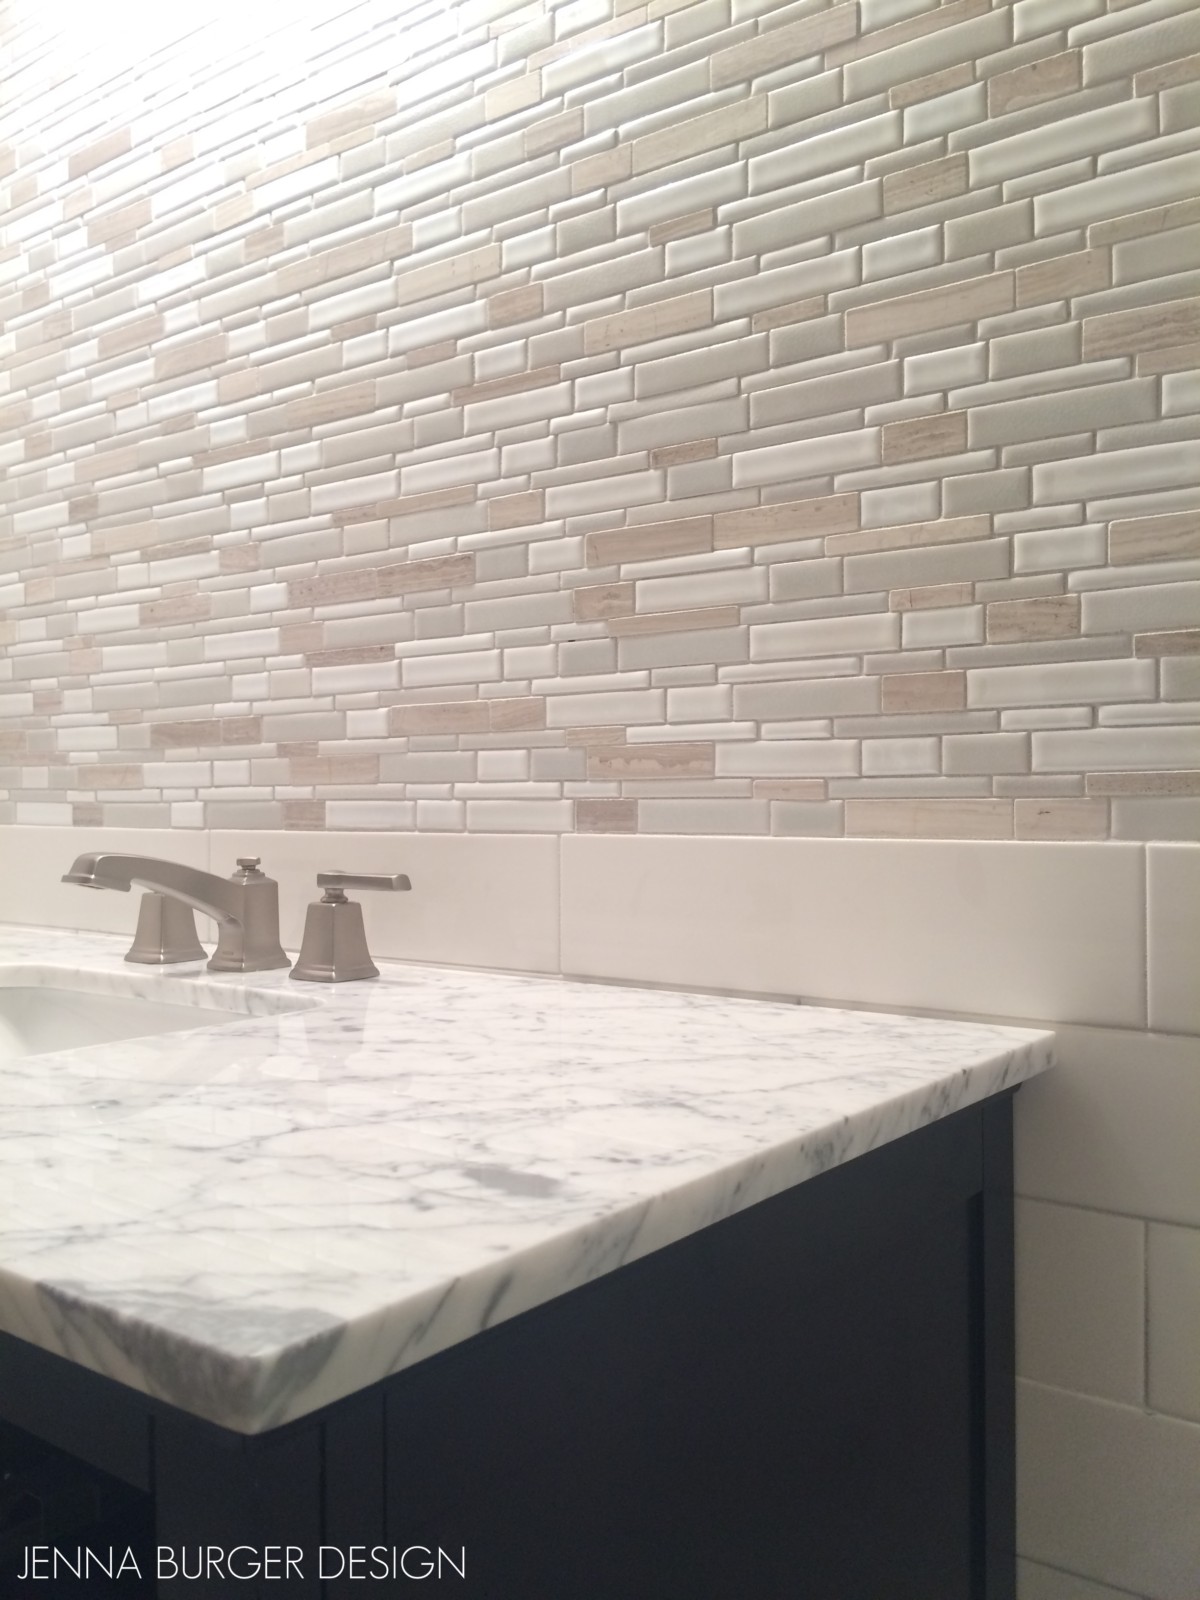
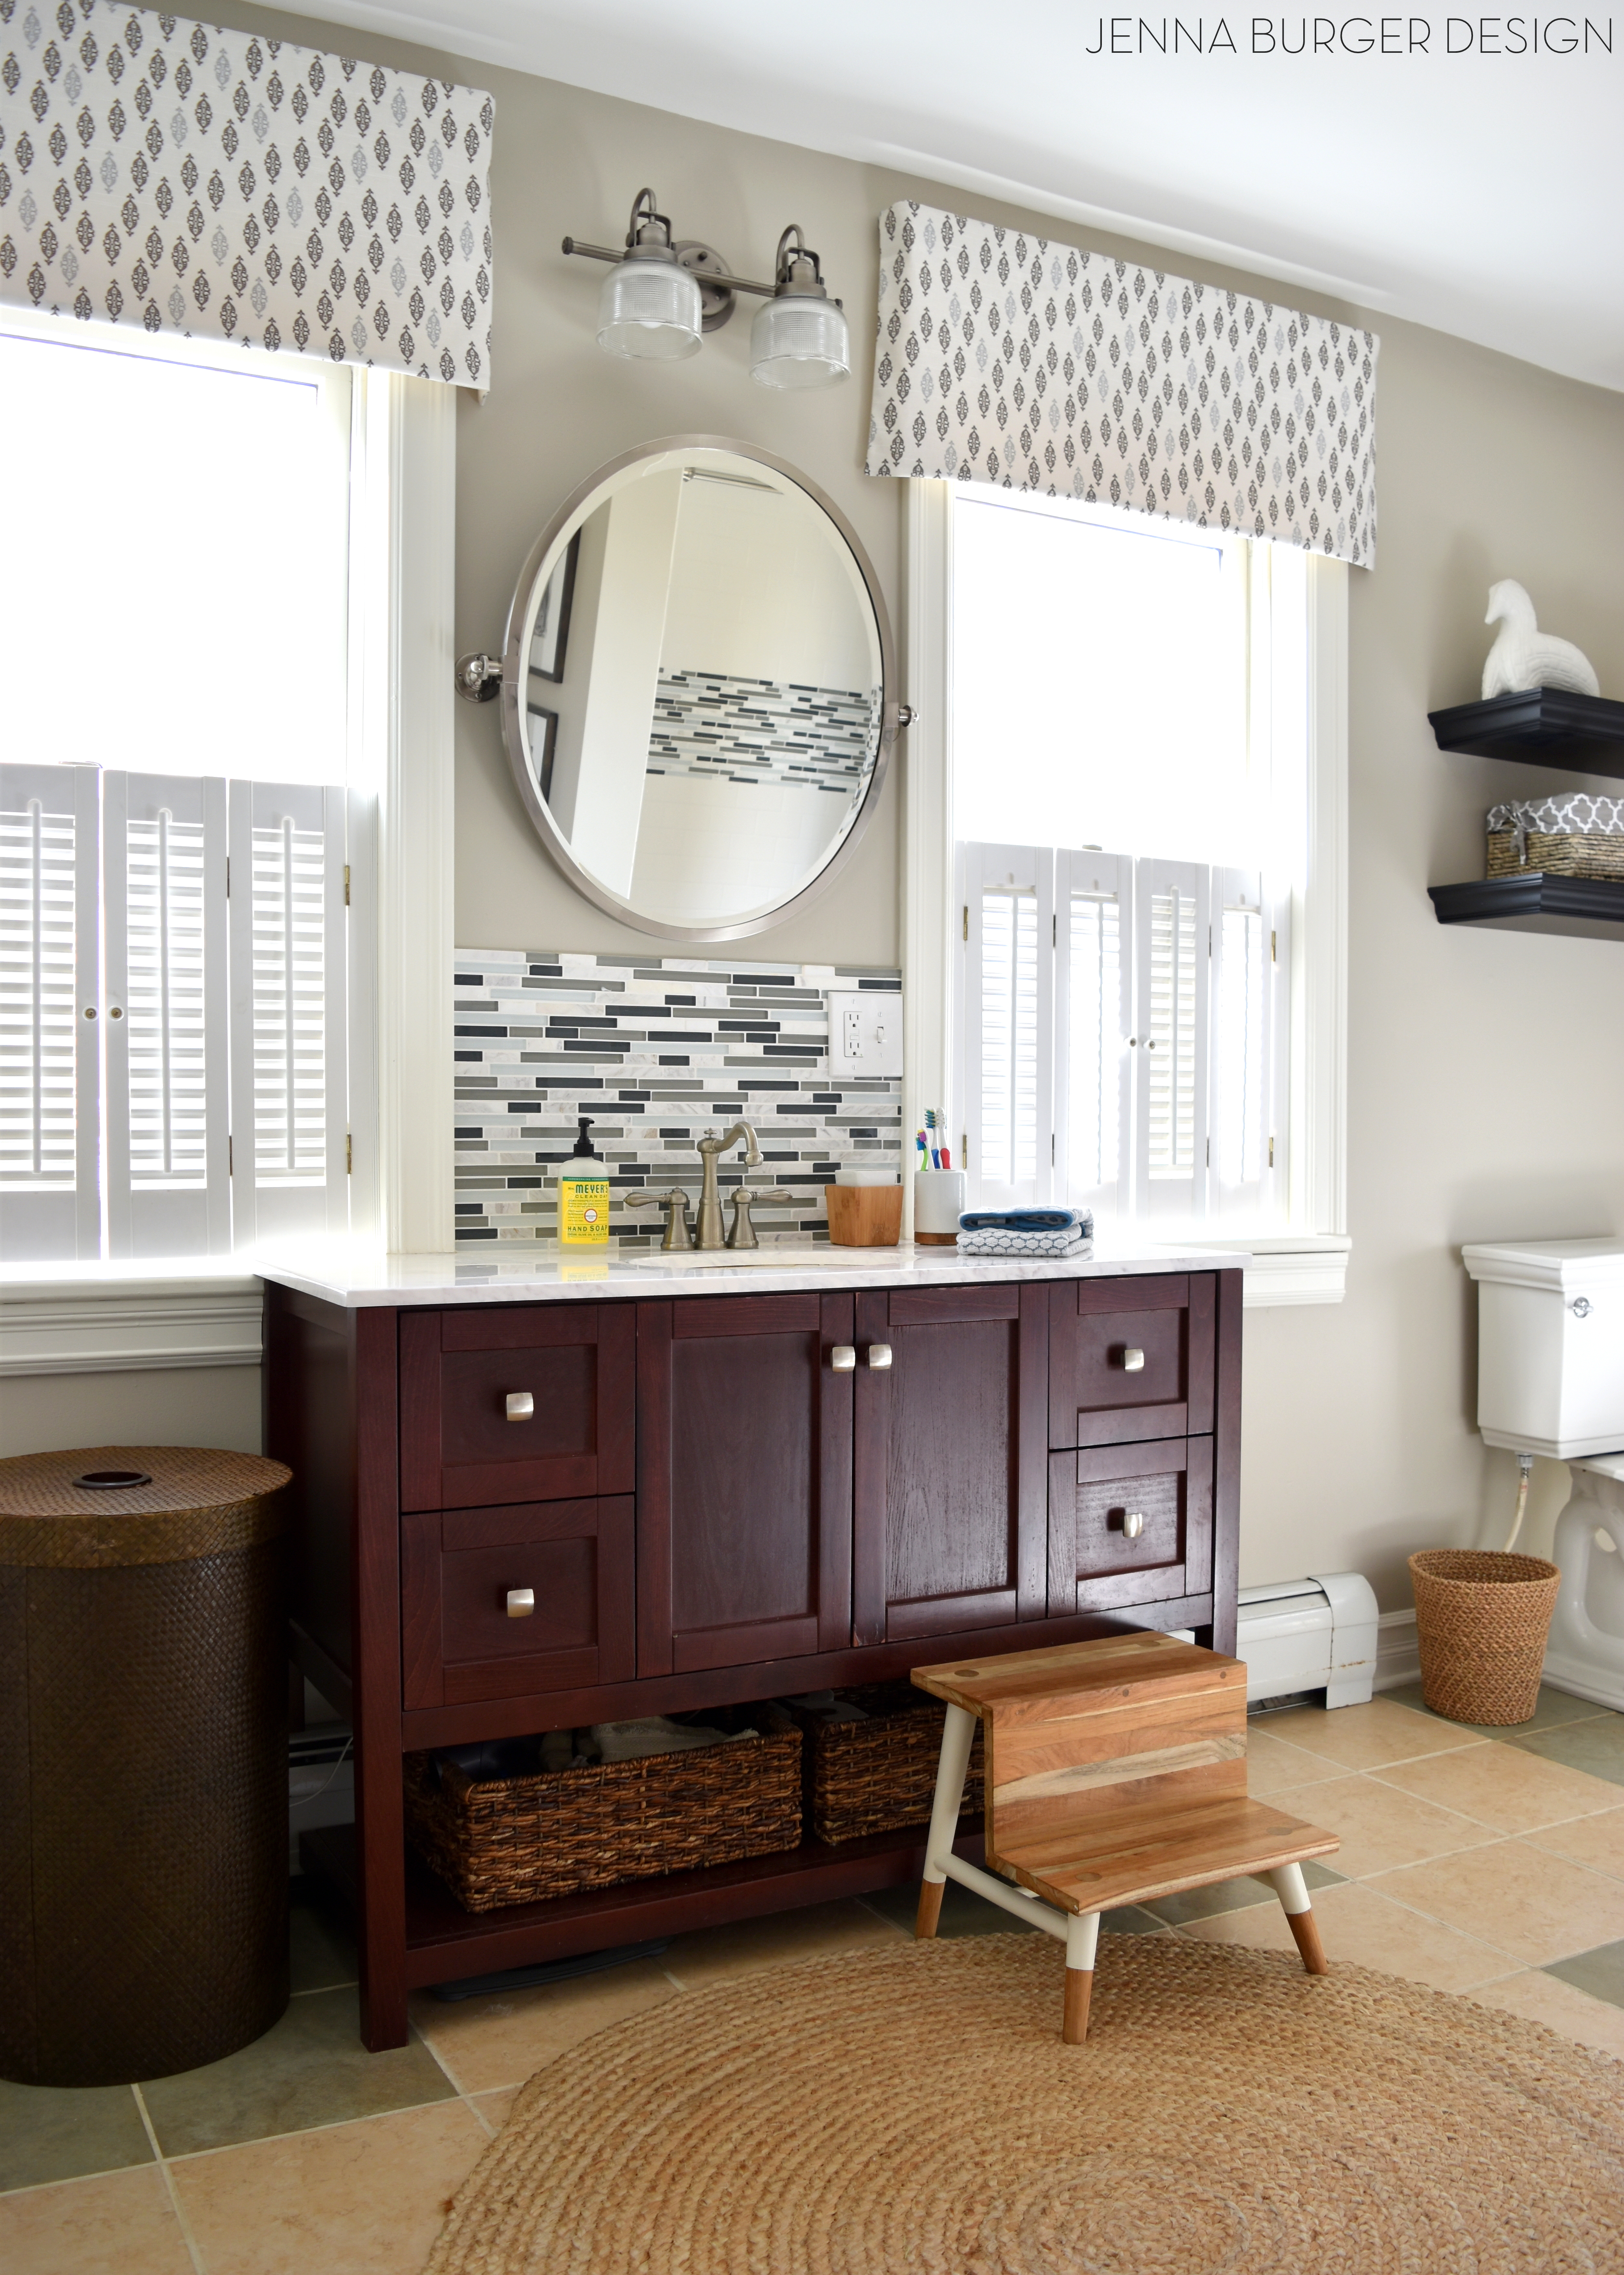
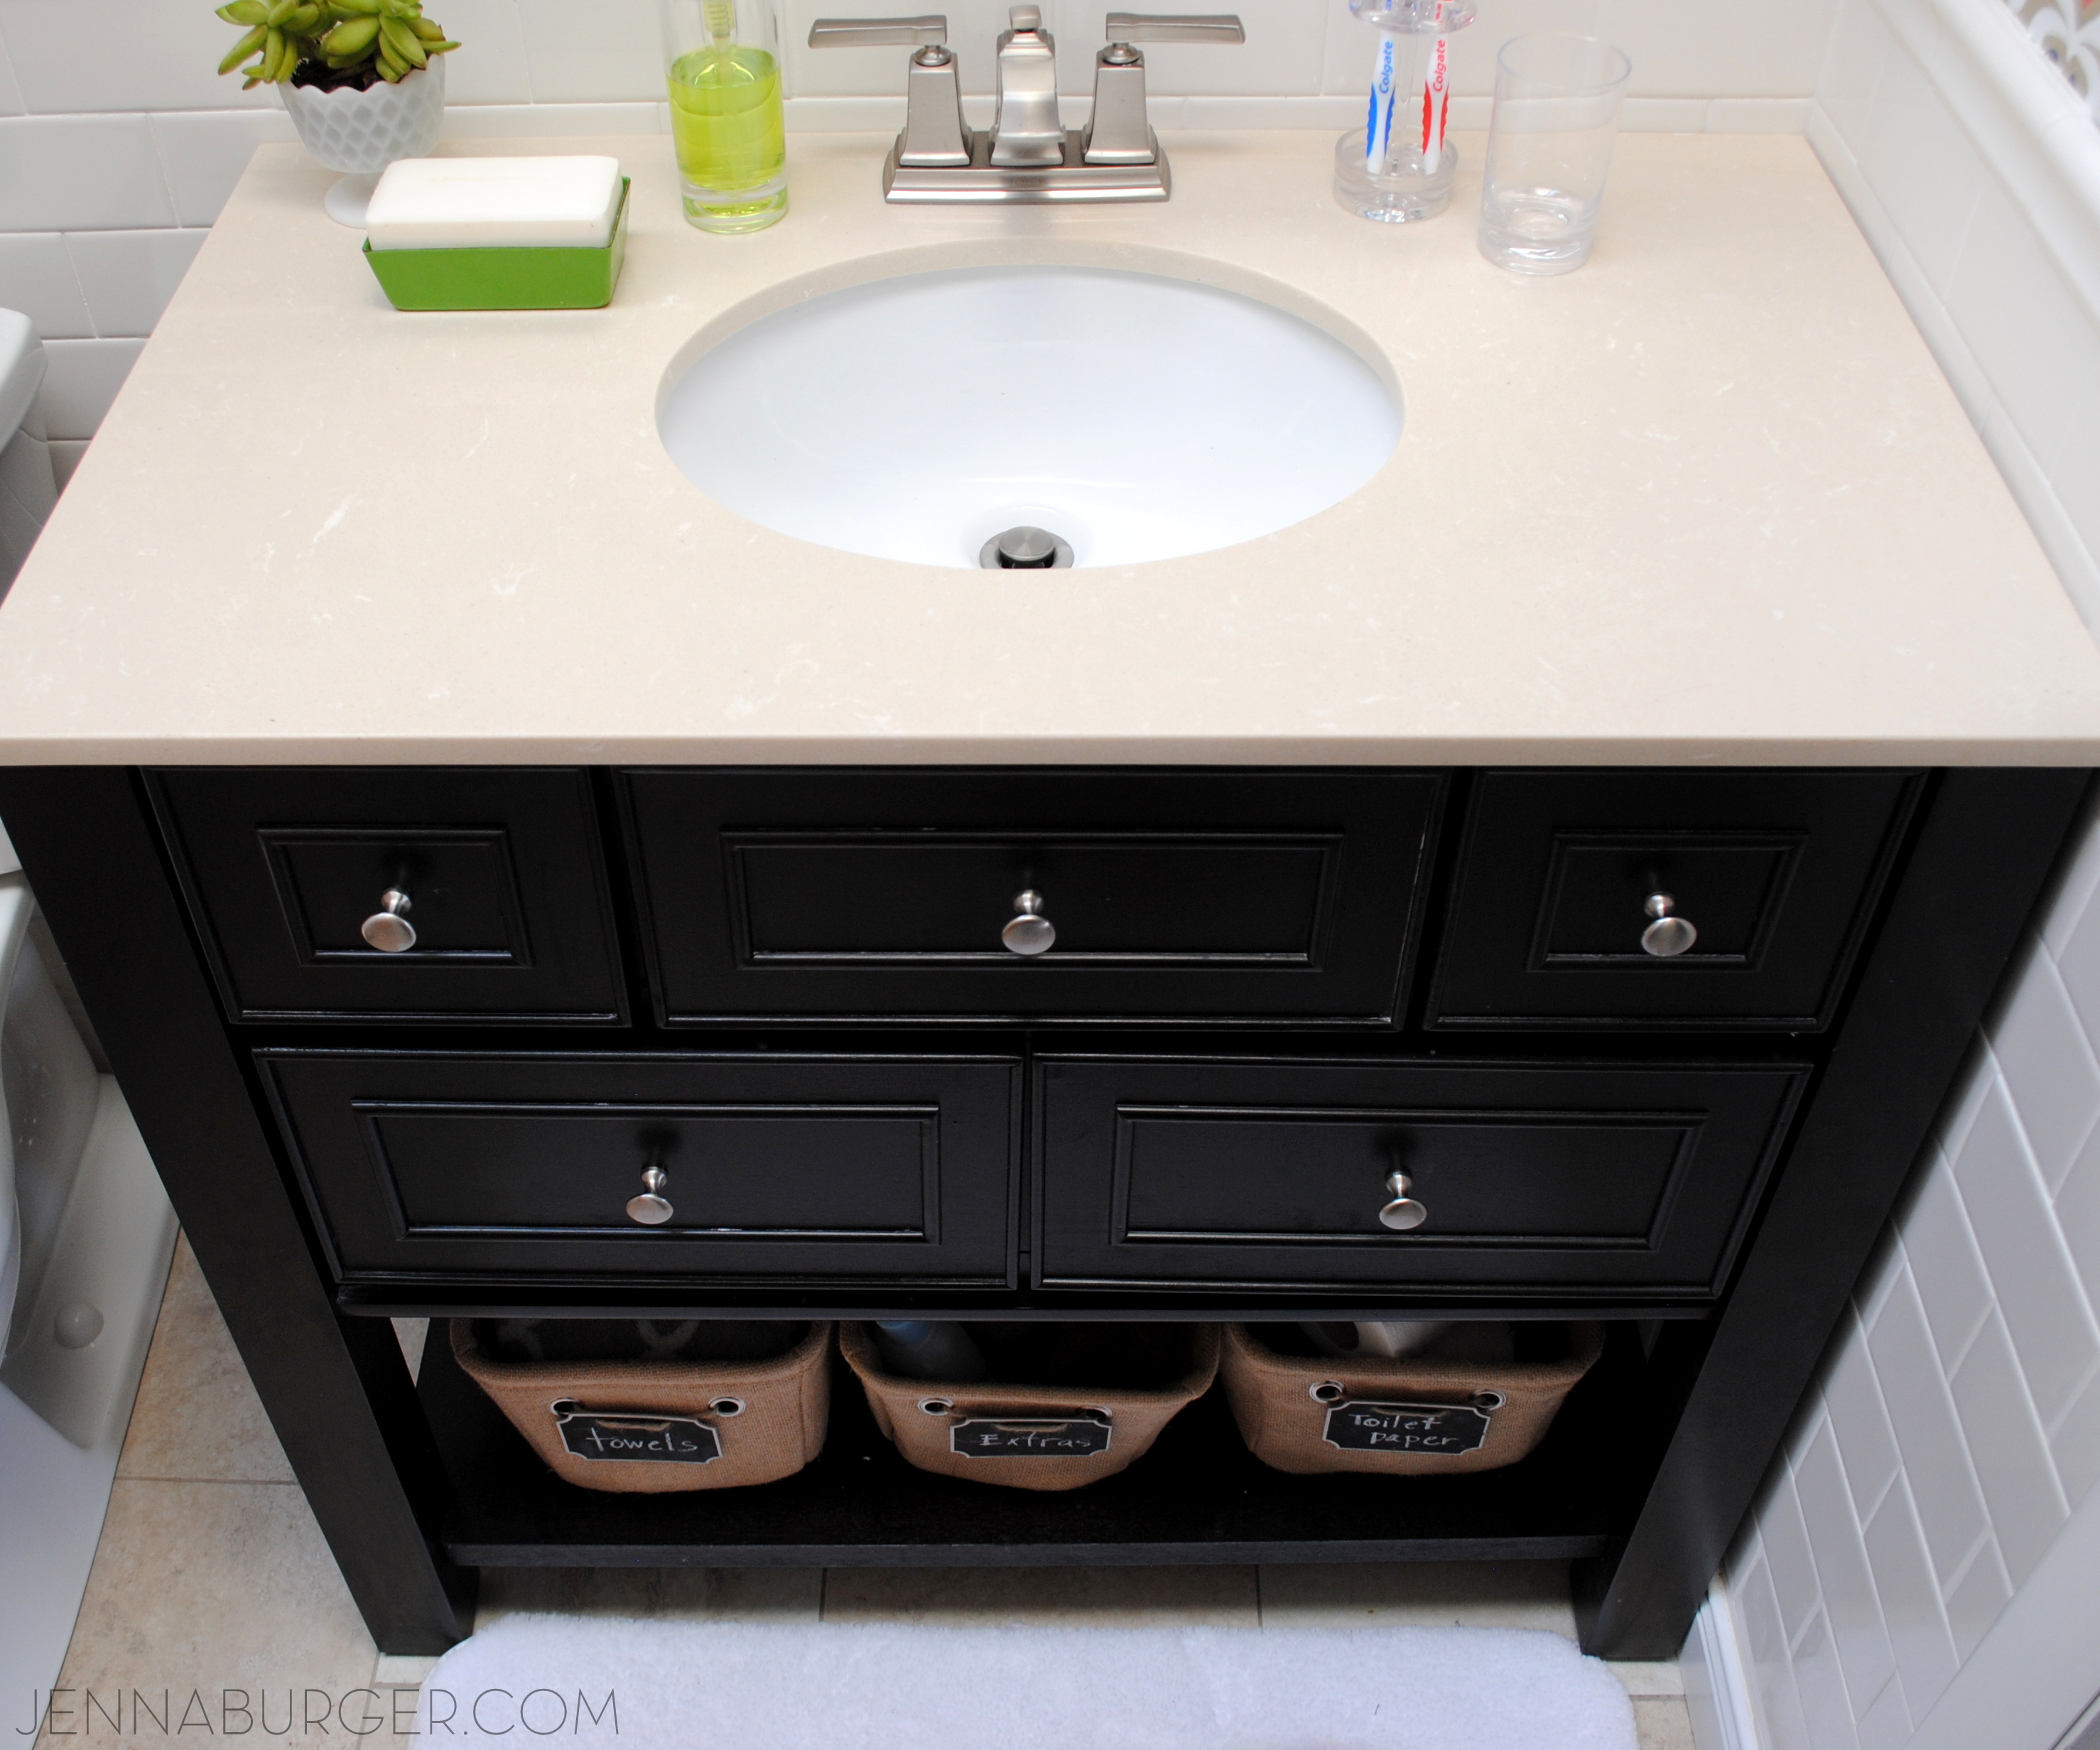
The vanity is a beauty and I love the openness it brings to the space.  This vanity compared to the previous one is about 6″ longer.  There was enough room at the side of the toilet to go a bit wider and the additional inches really makes a difference.  Even though it’s minimal, there seems to be a lot more countertop space.

Also having drawers with this vanity, the amount of storage has tripled versus having 1 large open cavity with the last cabinet.  There looks to be 5 drawers, but the center drawer under the sink is a faux panel.  The 2 smaller side drawers + the 2 larger drawers provide so much room.  As the kids get older & accumulate more stuff, I am sure the drawers will definitely fill up.  For now, they’re fairly unused.

Bathroom Makover with 95% of the space being a DIY project - new tub + tile, vanity, wallpaper, and more!  Lots of details on this multi-post before & after.  Bathroom makeover by Jenna Burger Design www.jennaburger.com

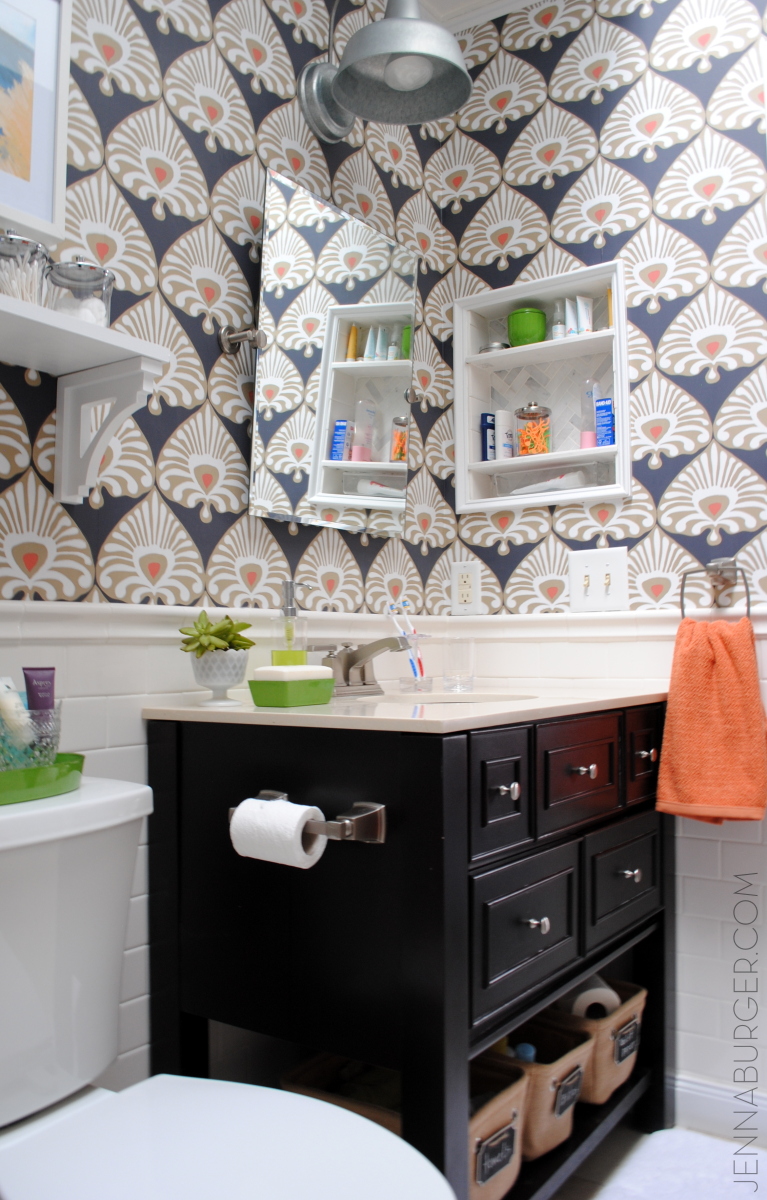
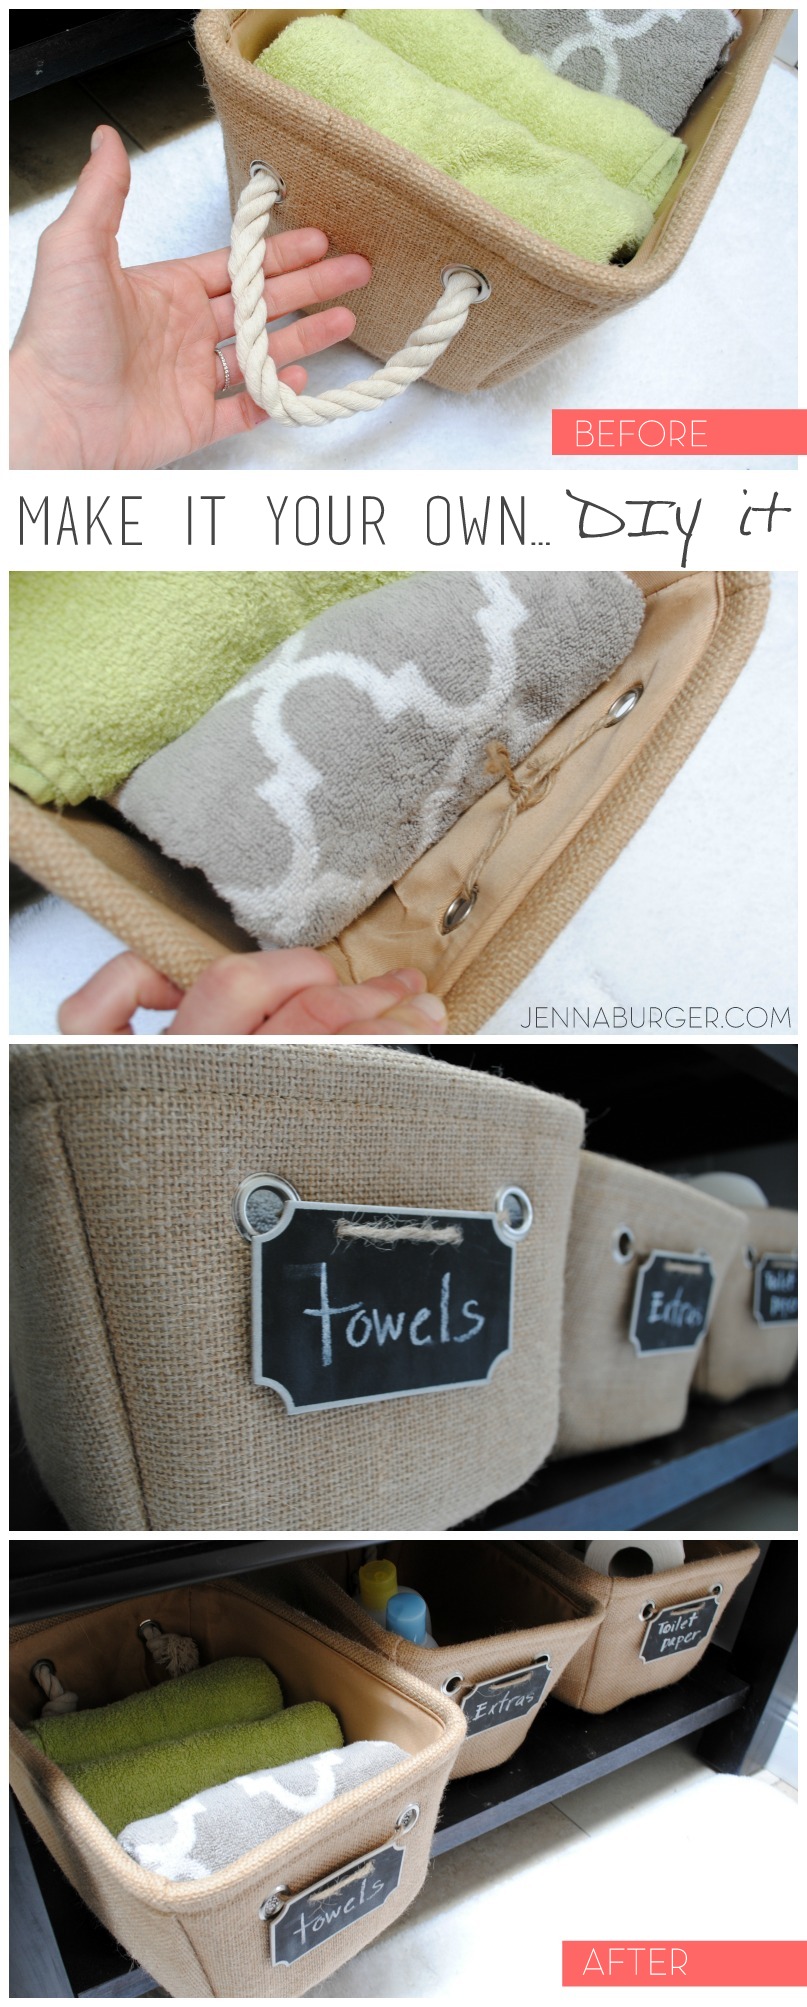
Underneath the closed part of the cabinet is an open shelf perfect for towels, baskets, etc.  I chose these cute burlap bins at Lowe’s and revamped them a bit (of course, how could I not…?)

I loved the texture of the burlap, but the rope pull was slightly too nautical, so I swapped them out for a chalkboard label that I found in the dollar bin at Target.  Using jute rope, I attached them through the holes and in 30 seconds gave these pretty bins a whole new look…

I love how easy & simple something like this can change a space & be unique to your personal aesthetic + style.

Make it your own by changing up a store-bought item.  From rope pulls to chalkboard labels, this DIY upgrade was less than a $1.

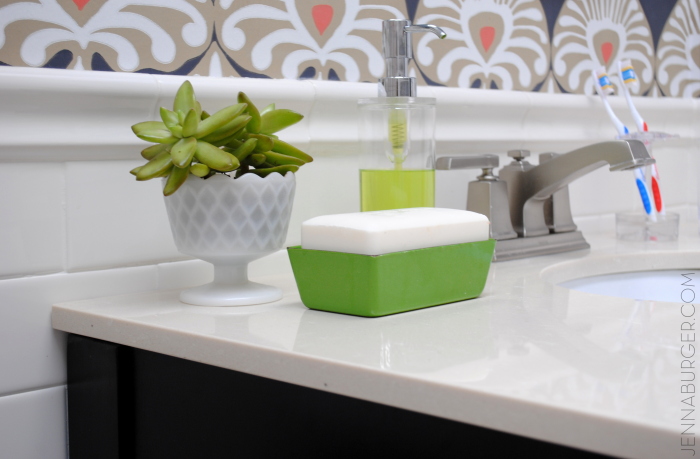
Back up above, the countertop is adorned with a few simple, but must-need items.  I found these really cute accessories – liquid soap holder, toothbrush holder, and cup – that were super inexpensive at Lowe’s.  They are clear (plastic), but look very modern and $$$.  The look of lucite is hot right now.

Bathroom Makover with 95% of the space being a DIY project - new tub + tile, vanity, wallpaper, and more!  Lots of details on this multi-post before & after.  Bathroom makeover by Jenna Burger Design www.jennaburger.com

I chose a minimalist-style, frameless, rectangular tilt mirror and an industrial-style oversized outdoor light that is centered above (because of the longer vanity, the light had to move over a few inches – my contractor did that since it’s above & beyond my skillset).

Bathroom Makover with 95% of the space being a DIY project - new tub + tile, vanity, wallpaper, and more!  Lots of details on this multi-post before & after.  Bathroom makeover by Jenna Burger Design www.jennaburger.com

Bathroom Makover with 95% of the space being a DIY project - new tub + tile, vanity, wallpaper, and more!  Lots of details on this multi-post before & after.  Bathroom makeover by Jenna Burger Design www.jennaburger.com

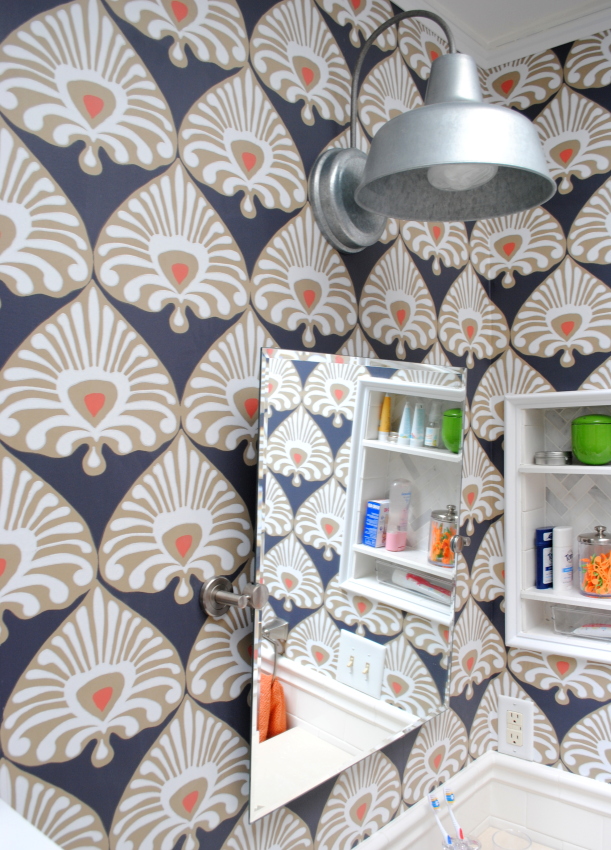
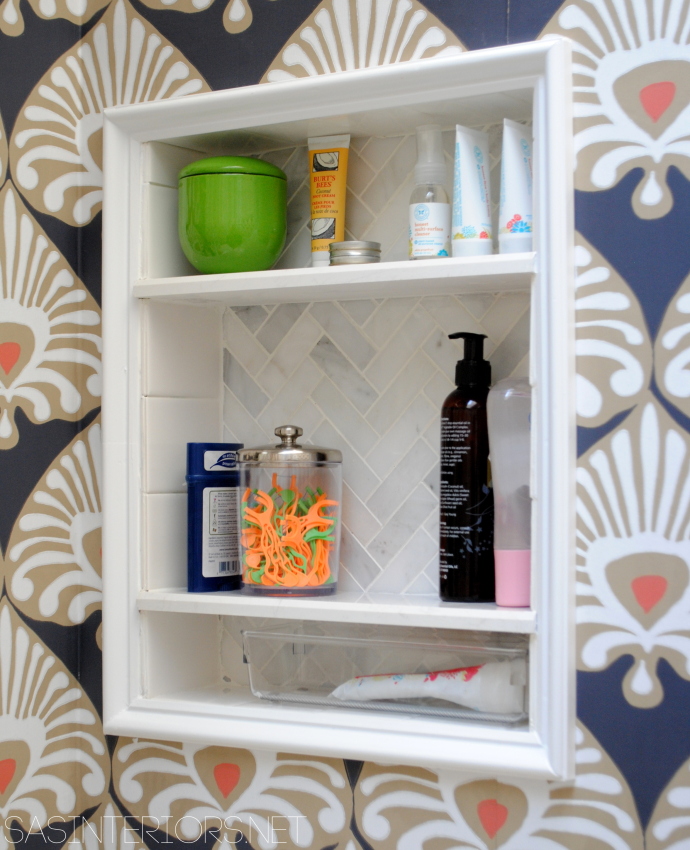
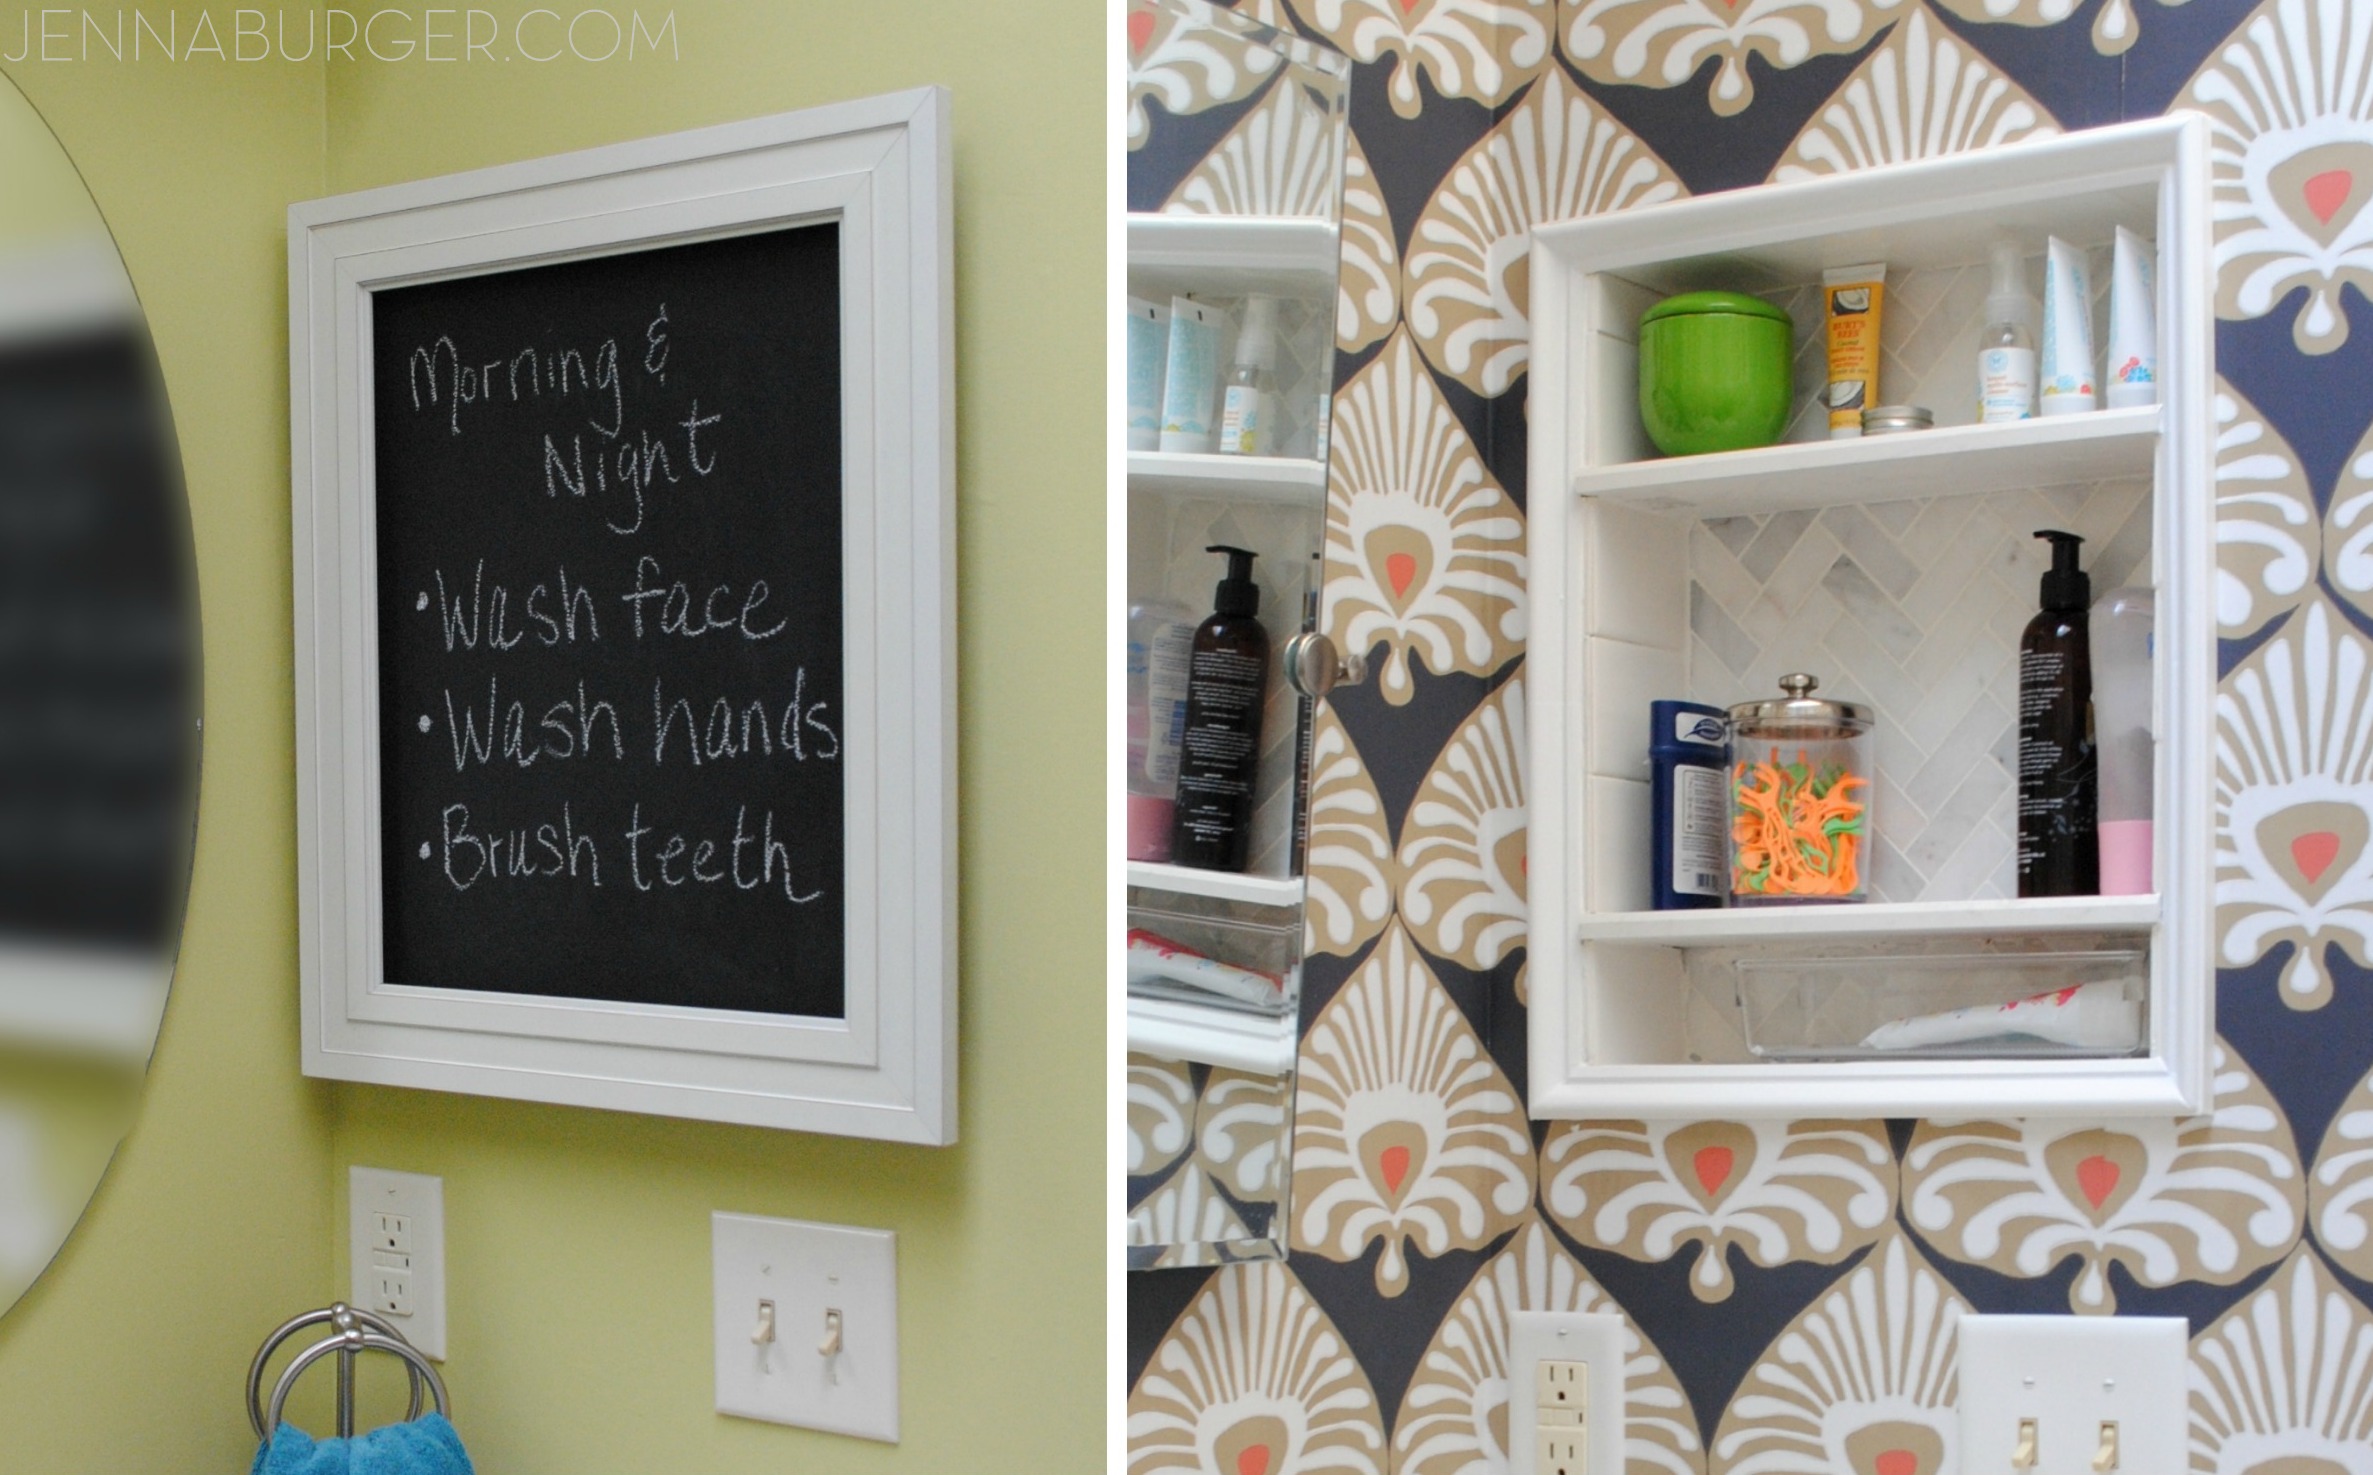
On the wall to the right of the vanity was a medicine cabinet (which I had painted with chalkpaint + added a frame a few years ago) and is now an open tiled niche

Bathroom Makover with 95% of the space being a DIY project - new tub + tile, vanity, wallpaper, and more!  Lots of details on this multi-post before & after.  Bathroom makeover by Jenna Burger Design www.jennaburger.com

A niche is really so much easier for the kids and tiling it makes cleanup so simple.  I was originally going to create the niche using wood and that would have been a big mistake. wood + water = disaster.

DIY: A tiled niche in place of a medicine cabinet.

tutorial for >>> creating a tiled niche

DIY: A tiled niche in place of a medicine cabinet.

before &after DIY: A tiled niche in place of a medicine cabinet.

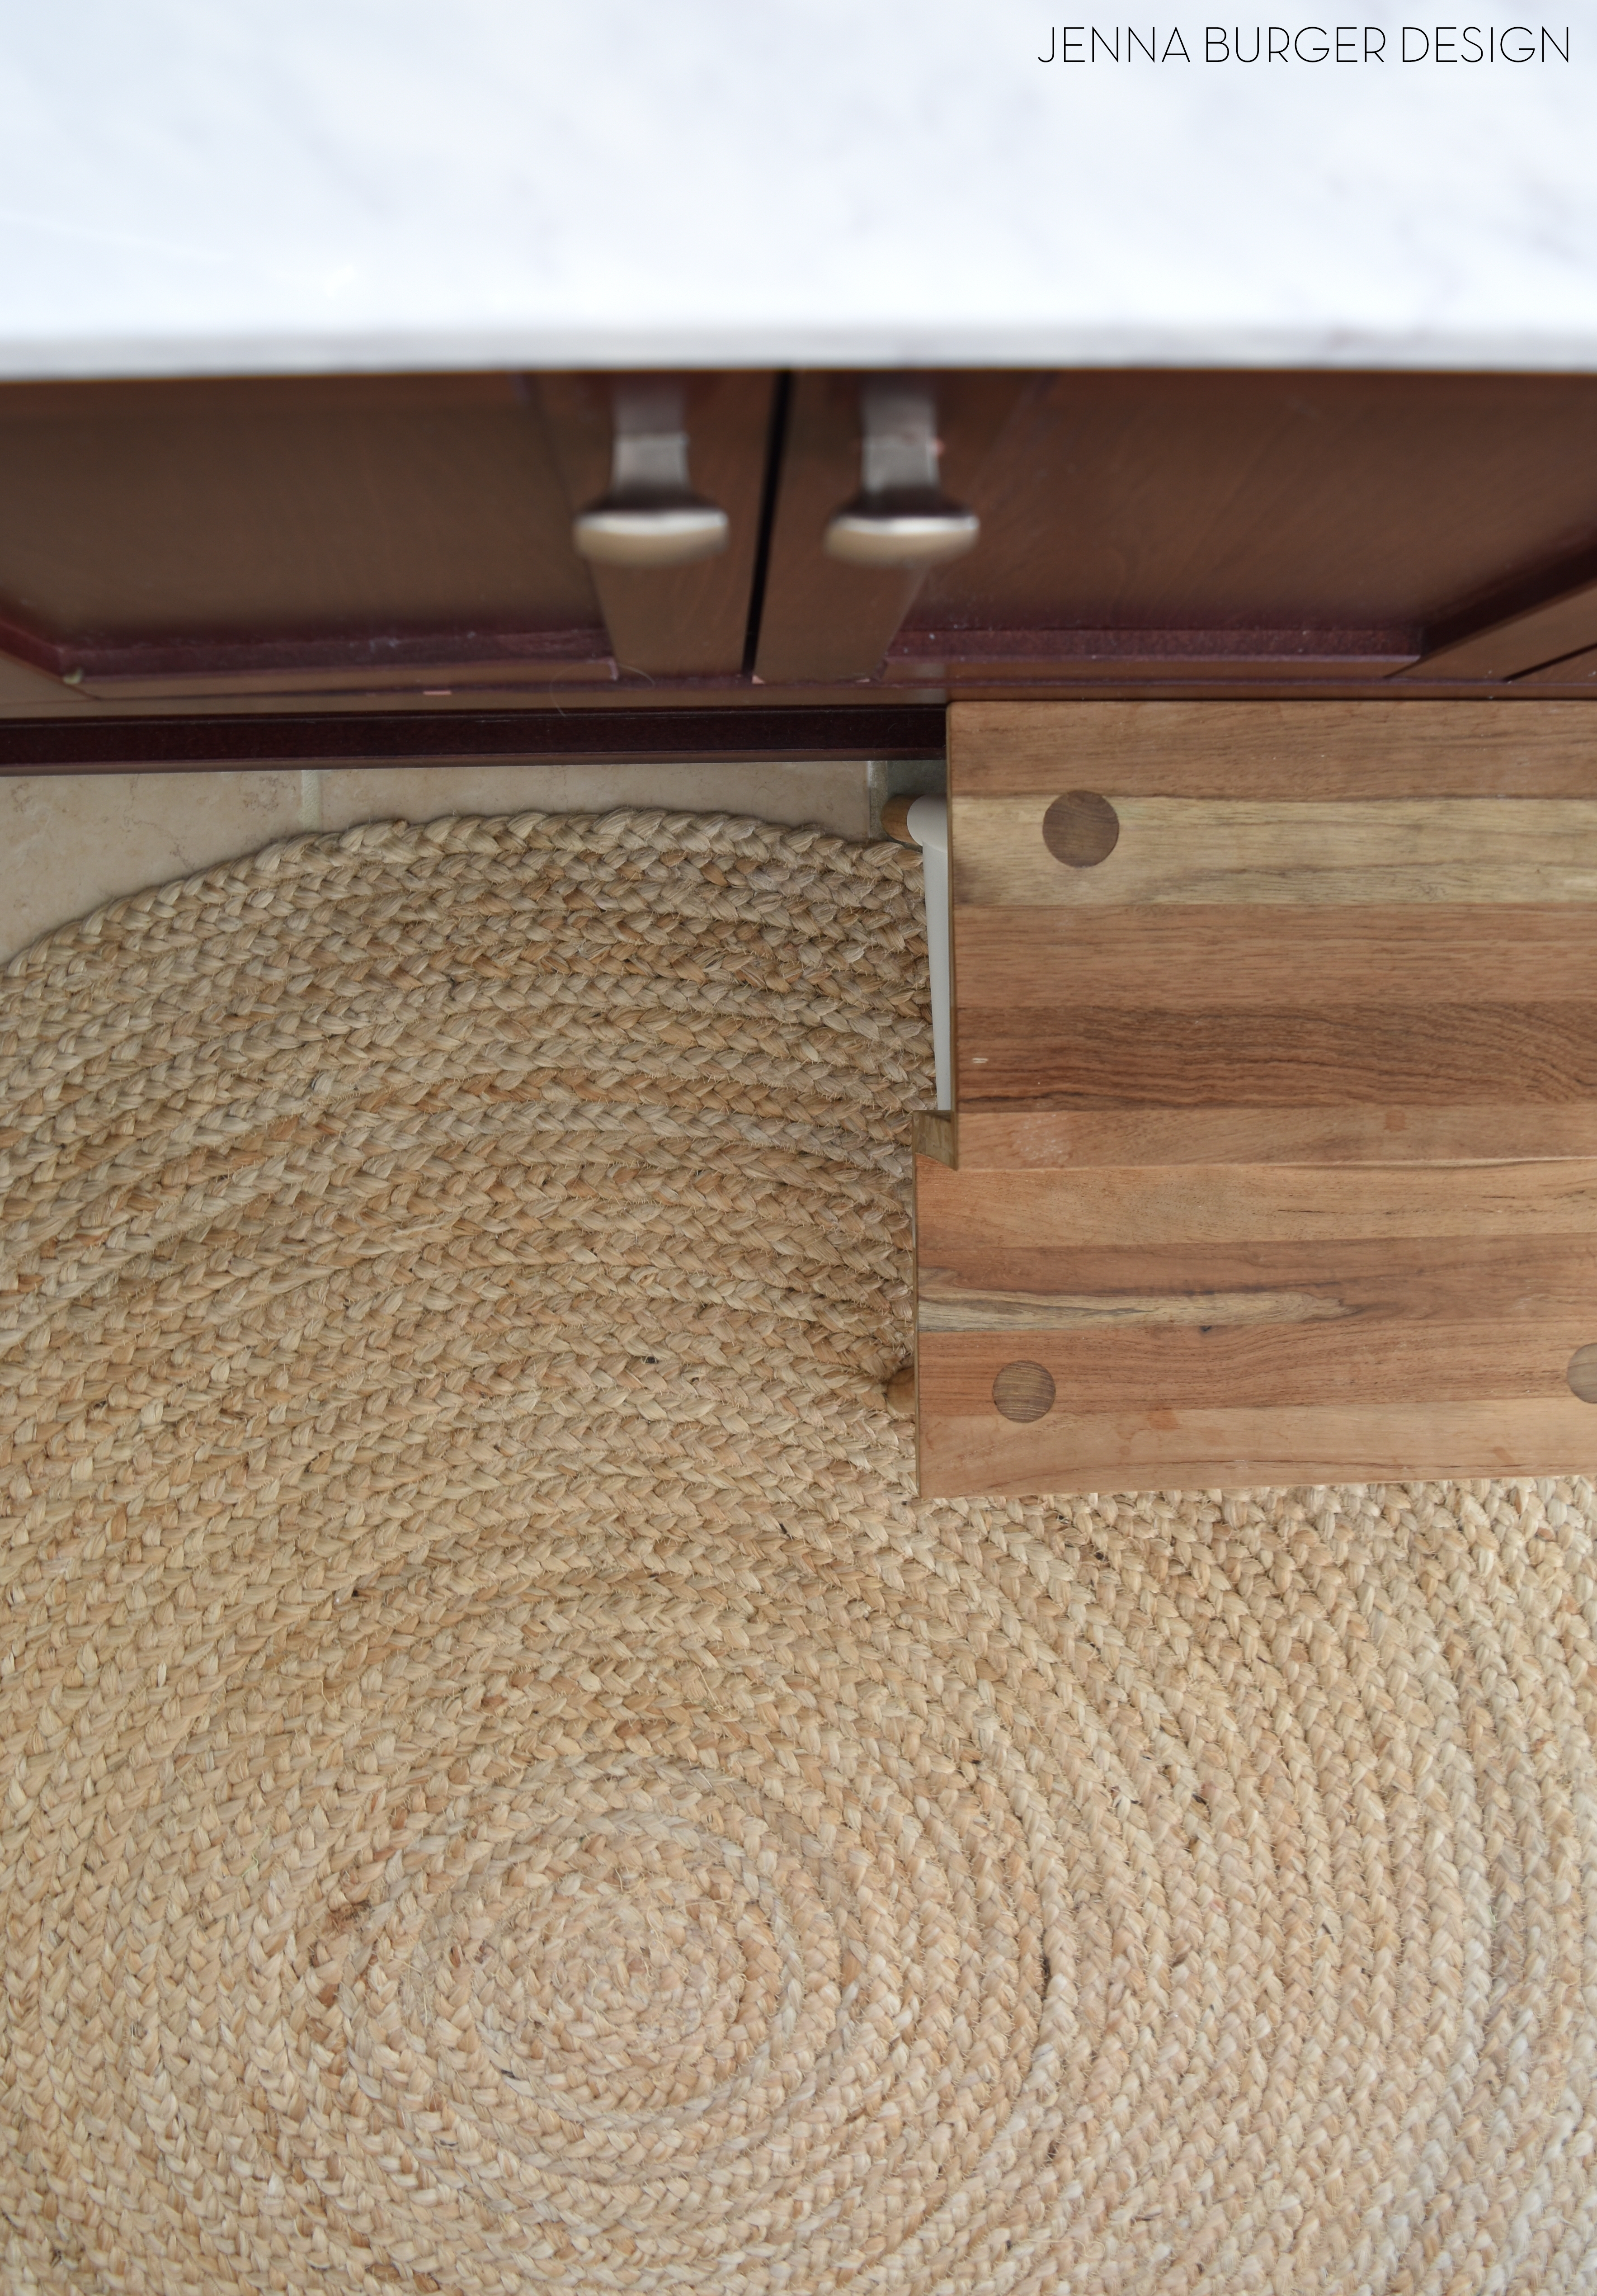
A few more detail shots…

Bathroom Makover with 95% of the space being a DIY project - new tub + tile, vanity, wallpaper, and more!  Lots of details on this multi-post before & after.  Bathroom makeover by Jenna Burger Design www.jennaburger.com

Bathroom Makover with 95% of the space being a DIY project - new tub + tile, vanity, wallpaper, and more!  Lots of details on this multi-post before & after.  Bathroom makeover by Jenna Burger Design www.jennaburger.com

Bathroom Makover with 95% of the space being a DIY project - new tub + tile, vanity, wallpaper, and more!  Lots of details on this multi-post before & after.  Bathroom makeover by Jenna Burger Design www.jennaburger.com

Bathroom Makover with 95% of the space being a DIY project - new tub + tile, vanity, wallpaper, and more!  Lots of details on this multi-post before & after.  Bathroom makeover by Jenna Burger Design www.jennaburger.com

And of course a look at a few before & afters…

BEFORE & AFTER Bathroom Makover with 95% of the space being a DIY project - new tub + tile, vanity, wallpaper, and more!  Lots of details on this multi-post before & after.  Bathroom makeover by Jenna Burger Design www.jennaburger.comBEFORE & AFTER Bathroom Makover with 95% of the space being a DIY project - new tub + tile, vanity, wallpaper, and more!  Lots of details on this multi-post before & after.  Bathroom makeover by Jenna Burger Design www.jennaburger.comI will admit, I am so happy this bathroom is done.  It was a bit tiring, but in all honesty, it was 100% worth the blood + sweat + tears the effort!  This post was chock full of info on the final stages + reveal of the space, but you really might be wanting where I got it all & the actual resources.  No worries… that post will be coming up later this week – pinky promise.

In all, from start to finish, this bathroom makeover took just around 30 days to complete (95% DIY and mostly all by myself – the mister helped when he could).  So I guess I can say, I met my challenge… which I really only set for myself so I would finish it 100% and not slack off.   10 days, 30 days, 60 days, who cares.  It’s done!  This makeover was a big accomplishment for me as tackling the removal & install of a tub + such a HUGE tile project was nothing that I had done before.  The challenge scared me, but I did it! That’s the beauty of DIY!

From start to finish, these are all the posts pertaining to this bathroom remodel
Plan of Action
Demo: Removal + Installation of the Tub & Walls
How-To Tile + Grout the Bathroom Walls
Installing Wallpaper
Adding a Tile Accent Border
Creating a Tiled Niche
Bathroom Makeover Reveal
Resources

Lastly, I want to give a big shout out to Lowe’s for believing in my talents & choicing to partner with me on this project. They never tell me what to do, what to buy, or what to write, but instead they always say do what you do best… create something good & inspire!

Thanks for following along with me on this bathroom makeover journey!  Cheers to another successful (but tiring) before & after makeover!

Resources for all the items in this bathroom makeover coming later this week.

Bathroom Makeover: Tile Accent Border {Day 18}

Since the wallpaper, the last phase of the bathroom makeover, was fairly quick taking only a day from start to finish, I was able to move on the next step pretty quick.  With the completion of the dynamic + bold wallpaper, I am feeling so happy with how the bathroom is coming along.  There were a few points that I questioned my decisions + selections, but I feel the wallpaper really pulled it together and added the interest needed to make this new space + funky against the stark white tile.  It’s all about the balance and the contrast…

Onto the next phase to get this space done.  I’m on Day 18 of this Bathroom Makeover in 30 Days Challenge and it was spent adding a tile accent (trim) border to finish the edge of the subway tile.

Take a look…

Adding a Tile Trim Border in a bathroom to give a finished edge!

From the start, I had intention of using a tile board to finish off the subway tile, but once the installation of the horizontally layed subway tile was complete, it confirmed that something was definitely needed to finish the ends.  I chose a pretty decorative tile at Lowe’s that was the perfect complement to the subway tile.

American Olean Linea Gloss Ice White Ceramic Chair Rail Tile (Common: 2-in x 6-in; Actual: 2-in x 6-in)I chose to use the border tile vertically to border the shower tile and then turn it horizontally to border the subway tile on the walls outside of the shower space.  Originally I was going to use this accent barliner to border the herringbone tile in the shower as well, but I chose a simpler tile instead > see it here.   Like I said before, this has been my biggest tile job EVER.  I HAVE NEVER ventured into a project as big, so I was learning as I worked.  I questioned my skillset a few times along the way, but in the end I am very happy with the result.

For the tile border, I started with the corner pieces because they had to be cut on a 45 degree angle.  I measured and cut the two pieces using a wet saw and then worked my way up vertically and over horizontally.

Adding a Tile Trim Border

I installed the accent tile using the same method as I did for the subway tile.  To learn more about installing the tile, check out my post on How-To Tile + Grout Bathroom Walls

Once the tile border was in place, I used painters tape to tape off the wallpaper so the grout would not get on it.  After installing that gorgeous paper, the last thing I wanted was to get it ruined!

Then it was time to grout.  After mixed + made the grout mixture, I put it in a ziploc bag and cut one corner creating a small hole for the grout to come out of.  Kind of like icing a cake…  Then I worked the grout into the cracks & crevices.

Adding a Tile Trim Border

It was a little messy, but using the Ziploc bag was very helpful to direct the grout where I wanted it, instead of going on the entire tile surface.

Adding a Tile Trim Border

Once I filled all the holes and crevices, I used a damp sponge to smooth out the grout.  This not only cleans the tile face but smooths out the grout joints.

Adding a Tile Trim Border

If your walls are painted or have wallpaper on them, like mine, go slow + be careful so the wall surface doesn’t get grout on it otherwise it’ll become hazy.  Thankfully the wallpaper was easy to wipe off, but I am sure paint wouldn’t be as simple.  I guess you could always touch up those spots…

BEFORE THE GROUT DRIES, REMOVE THE TAPE!  This is in caps because if not the tape will dry into the grout.  Yes, it’s happened to me (not on this project thankfully).  As soon as you finish grouting while the grout is still moist, pull the tape off.

Adding a Tile Trim Border

From start to finish…

Adding a Tile Trim Border in a bathroom to give a finished edge!

And the result…

Adding a Tile Trim Border

BathroomAdding a Tile Trim Border in a bathroom to give a finished edge!

Adding a Tile Trim Border in a bathroom to give a finished edge!

Adding a Tile Trim Border in a bathroom to give a finished edge!

And a peek at a few other things happening {art + accessories}…

Adding a Tile Trim Border in a bathroom to give a finished edge!

The tile accent border is truly a beautiful addition.  Not only did it hide a lot of little mistakes and imperfect spots, but it has given this bathroom such an elegant + sophisticated finished look.  I am so happy that I installed the wallpaper before adding the border because it has really given a nice clean edge.  If / when I ever want to remove the wallpaper, my plan would be to score the edge of the accent tile with a sharp blade and then peel the paper off.

Adding a tile accent border on Day 18 is complete!  Up next… creating a tiled niche.  I removed the old medicine cabinet and replaced the space with a tiled niche.  More to come next week!

The installation of the tile accent border took about 4 hours on one day

From start to finish, these are all the posts pertaining to this bathroom remodel
Plan of Action
Demo: Removal + Installation of the Tub & Walls
How-To Tile + Grout the Bathroom Walls
Installing Wallpaper
Adding a Tile Accent Border
Creating a Tiled Niche
Bathroom Makeover Reveal
Resources

{Day 18} Tile Accent Border – Complete!  12 more days to go…

This post is sponsored by Lowe’s, but all thoughts and opinions are 100% my own.  I am thrilled (and a bit nervous) about tackling this project, but very excited to be partnering with Lowe’s on creating an entirely new bathroom space.  I’d love for you to follow along on this new project!

Bathroom Makeover: Installing Wallpaper {Day 17}

Bathroom Remodel: DIY bathroom makeover in 30 days. This phase of the project is installing wallpaper. Check out the details + the before & after NOW

If you follow along with me on Instagram, then you may have seen a few sneak peeks of the next phase of the Bathroom Remodel… the WALLPAPER!  Tile is done (well mostly) and after 17 days of cutting, grouting, tiling, I never want to touch another tile again in my life.  Now we know that’s not true.  But in all honesty, it was a big job.  Totally doable for any skill level, but just time consuming!

As I move forward with this Bathroom Makeover in 30 Days Challenge, the walls are now adorned with pure beautiful.

Take a look…

Bathroom Remodel: DIY bathroom makeover in 30 days. This phase of the project is installing wallpaper. Check out the details + the before & after NOW

Can we say dynamic?!  What do you think??

The evolution of this bathroom has been quite interesting.  Every moment I think I am leaning one direction, I end up going the opposite way.  Such as life, I guess.  Originally my plan was to go basic and neutral for the base elements, and then add pops of color and interest with layers.  Before tiling, I painted over the previous yellow paint color with a neutral greige. Once the white tile went up, it felt boring.  It wasn’t a reflection of my design style or the home we’ve created.  It needed something…  Then I found the wallpaper.

This wallpaper by Serena and Lily gave the perfect amount of eye-catching intrigue without overwhelming the space.  There is still a lot of whites + neutrals, and with the other elements I have planned, it’s going to be my next favorite space.

So on to the install…

I’ve wallpapered areas in my home before including the powder room and my son’s bedroom.  Both were one wall projects and didn’t involve a lot of cutting.  When working with a tight space that has lots of nooks, crannies, and crevices, it can get a bit tricky.

Differently from the other walls I’ve used wallpaper on, I never before used a wallpaper paste.  A discussion started a few weeks back on a picture I shared on Instagram about using wallpaper primer.  An expert chimed in strongly suggesting using wallpaper primer before wallpapering, ” You can install wallpaper without primer if you have smooth walls, however, it’s going to be a pain later when when you want to remove it. If you prime your walls, the wallpaper will roll down in long flowing strips. If you don’t prime, the drywall comes off with the wallpaper in 6+ years.”  My thought upon this input… USE WALLPAPER PRIMER.

Bathroom Remodel: DIY bathroom makeover in 30 days. This phase of the project is installing wallpaper. Check out the details + the before & after NOW

I chose this clear wallpaper primer at Lowe’s and the gallon was about $16.  I used the smallest amount so a little goes a long way.  I wish they sold it in smaller amounts, but o well.

I poured the primer into a paint tray and using a roller, I  applied it to the walls.  You really only need a thin coat because it is watery.  I found after a few minutes some of the primer dripping down the wall, so I took a cloth and dabbed it so it wouldn’t harden.

Bathroom Remodel: DIY bathroom makeover in 30 days. This phase of the project is installing wallpaper. Check out the details + the before & after NOW

In about 3 hours, it was dry and ready to wallpaper.  I waited till the next morning to start though…

Supplies for Wallpapering

  • Wallpaper
  • Wallpaper Paste
  • Smoothing Tool
  • Sharp Razor or blade
  • Other handy tools for wallpapering are: a tape measure, a laser level, a pencil

How-To Wallpaper

I started off at one edge of the wall and worked my way around the room from that point. Because I am planning on adding moulding at the top of the wall, and a tile trim piece at the bottom, measuring exactly wasn’t needed – phew!  I measured about the length of the wall and cut my wallpaper with a scissor. Then I layed it on the floor so I could apply the paste.

Bathroom Remodel: DIY bathroom makeover in 30 days. This phase of the project is installing wallpaper. Check out the details + the before & after NOW

Unlike with my previous wallpaper experiences, this time I applied the wallpaper paste to the back of the wallpaper as indicated on the instructions that came with the wallpaper.  In the past, I put the paste directly on the wall, then adhered the paper.  I wanted to see if this other method worked better (and in the end, it did!).  Why?  I felt that by adding the paste to the back of the wallpaper instead of applying the paste to the wall there resulted in less air bubbles and air pockets.  The paper was easier to smooth out which avoided the paper from getting creased or damaged.

I applied a nice coating of wallpaper paste using an inexpensive paint brush.

Bathroom Remodel: DIY bathroom makeover in 30 days. This phase of the project is installing wallpaper. Check out the details + the before & after NOW

2

Then I let the paper sit about 3 minutes (as the instructions stated) and aligned it on the wall.

Bathroom Remodel: DIY bathroom makeover in 30 days. This phase of the project is installing wallpaper. Check out the details + the before & after NOW

Once I positioned it where I thought it look best, I used a long level (sorry no picture) and made sure it was vertically plumb.  Once I had the paper in the right place, I used the smoothing tool to smooth out the paper from air bubbles and air pockets. It’s best to start in the center of the paper and work your way out to the edges.

Bathroom Remodel: DIY bathroom makeover in 30 days. This phase of the project is installing wallpaper. Check out the details + the before & after NOW

Once the paper was smooth, it was time to move on to the next piece.  I cut another piece of wallpaper length and then aligned it edge to edge with the previous piece.  Never overlap the wallpaper.

Bathroom Remodel: DIY bathroom makeover in 30 days. This phase of the project is installing wallpaper. Check out the details + the before & after NOW

Bathroom Remodel: DIY bathroom makeover in 30 days. This phase of the project is installing wallpaper. Check out the details + the before & after NOW

Once it was smoothed out, I took a lint-free rag and cleaned off the paste from the seams. One reason that I love this paper is that is easily cleanable.

Bathroom Remodel: DIY bathroom makeover in 30 days. This phase of the project is installing wallpaper. Check out the details + the before & after NOW

This damask looking wallpaper was really nice to work with and the quality was very good, but I was slightly unhappy with the design repeat when I went to align the edges. The design didn’t match exactly like it should and I was bummed about it.  I tried my best to line up the design to make it look right.  Thankfully the pattern is so busy that you don’t really notice.

Bathroom Remodel: DIY bathroom makeover in 30 days. This phase of the project is installing wallpaper. Check out the details + the before & after NOW

Once I had the 2 sheets up, I was feeling really confident in my work.  I continued around the room and then I came to my first obstacle…  the corner and the door.

For this area, I used the old method of applying the paste to the wall because I was afraid if I didn’t, the paste would get on everything – door, tile, etc.   To start, I measured and trimmed the paper leaving lots of extra on the edges. Then I put it in place and trimmed again until the size of the paper fit the exact space.

Bathroom Remodel: DIY bathroom makeover in 30 days. This phase of the project is installing wallpaper. Check out the details + the before & after NOW

I had a few other obstacles to overcome like the outlets, the switches, and the light.  I typically use a scissor or a sharp blade to cut the paper.

Bathroom Remodel: DIY bathroom makeover in 30 days. This phase of the project is installing wallpaper. Check out the details + the before & after NOW

Before I knew it, a few hours later, all the walls were covered and the wallpapering process was complete.

Bathroom Remodel: DIY bathroom makeover in 30 days. This phase of the project is installing wallpaper. Check out the details + the before & after NOW

A recap of the before & in-progress now.

Bathroom Remodel: before & progress / Check out this DIY bathroom makeover

Whats up next?

The moulding at the top + the tile trim around the shower & walls…

Bathroom Remodel: DIY bathroom makeover in 30 days. This phase of the project is installing wallpaper. Check out the details + the before & after NOW

As you can see, this new bathroom space is surely NOT going to be boring.  I can’t wait to finish it up and finally use it.  Even though there are lots of little things still to do, I am thrilled with the direction that it is taking.

The installation of this dynamic wallpaper took about 5 hours on one day

Follow along on this bathroom remodel with these other posts
Plan of Action {Day 1}
Demo: Removal + Installation of the Tub & Walls {Day 2-4}
How-To Tile + Grout the Bathroom Walls {Day 5-16}
Installing Wallpaper {Day 17}
Adding a Tile Accent Border {Day 18}
Creating a Tiled Niche {Day 19 + 20}

Coming up (still to do)
Details: Moulding, Lighting, Accessories
Finishing Touches
Bathroom Remodel Reveal

{Day 17} Wallpaper – Complete!  13 more days to go…

This post is sponsored by Lowe’s, but all thoughts and opinions are 100% my own.  I am thrilled (and a bit nervous) about tackling this project, but very excited to be partnering with Lowe’s on creating an entirely new bathroom space.  I’d love for you to follow along on this new project!

Check out more of my posts on wallpapering

[Frames Wallpaper in my son’s bedroom]How To Wallpaper: tips + tricks to wallpaper like a pro!

[Amy Butler Wallpaper in my Powder Room]How-To Hang Wallpaper with paste

Powder Room Remodel: The Plan of Action

Happy Hump Day, y’all!

You may have noticed a lack of DIY creations around here lately.  To be honest, I have been knee deep in so many other projects that my personal projects have had to take a back burner.  From E-Design clients, to local clients, to getting the house ready for the BHG crew to come soon, I have been non-stop on the go.  Plus I was away last week on a little vacay, so getting back into the groove of things has been a bit rough.

Powder Room Renovation_SASinteriors.net
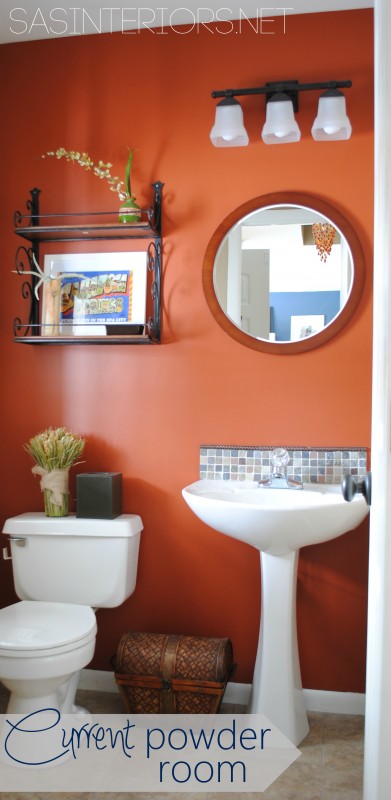
ANYWAY, enough of the chit-chat, I am psyched to share with you that I have decided to spice-up one of my bathrooms.  The powder room to be exact.
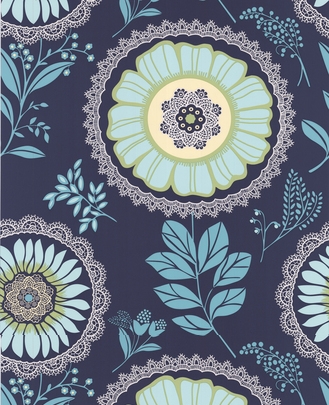
It’s pretty.

It’s fine.

But I want it to be dynamite!  So a new (hopefully quick) reno is in store.

Before that, a ‘before‘ shot is a must.

The current space has an orange focal wall – same paint color (glidden crisp autumn leaves) as the family room.  The toilet, pedestal sink, and faucet are original to the house (about 15 years old), but the light and door hardware got a switch-aroo since we’ve lived here…  hence why they are oil rubbed bronze and the faucet is chrome.  The tile floor is new – used to be blue ceramic  – so that will be staying.

I’m pretty psyched about what I have planned for the new space.  After much thinking about how to create a WOW impact in a  4′ x 4′ box, I think I’ve come up with a pretty awesome solution.

So on to the plan of action

The fixture placement will remain – there’s no need to move them, the cost would be way too much, and I couldn’t even think of a better configuration than the existing.  So basically, the fixtures will be replaced, a new vibrant wallpaper will be introduced, and some major awesome accessories will complete the look.

The concept for the powder room reno started with this beautiful wallpaper by Amy Butler.

Amy Butler Graham & Brown Wallpaper _ Powder Room Reno _ SASinteriors.net

Continuing my love for navy, it will be the perfect addition to the powder room which can be seen from my home office / family room that dons deep blue walls.

The repeat is fairly large, so this space is going to be dynamic. Here’s a picture of the wallpaper used in a foyer setting.

amy-butler-lacework-midnight-blue-wallpaper_1320679302

Once I found the wallpaper, I started to become really excited about the rest of the space, but was still at a loss on what style sink would be ideal.  Pedestal? Cabinet?  And then I found this wash sink at Lowe’s and literally gasped when I saw it.

Powder Room Remodel_SASinteriors.net

I’ll be honest, I think it looks better in person than in this picture.  And I think it’ll look even more fabulous against that hot modern floral Amy Butler wallpaper.  Don’t you think?

To complete the bathroom, a few new other details will be added. Here is a quick Creative Vision Board I put together.

Powder Room

Major gorgeousness, don’t you think?  It will absolutely be epic, and continue the classic eclectic style of my home.

So here is the bummer part.  I have the wallpaper.  I have the wash basin (sink).  But I have not started any of the actual remodel yet.  Like I said, I’ve been super busy over the past few weeks, but by mid-April I hope to start tackling all of this DIY goodness.  I hope you’ll follow along for the before-and-after.

Stay Tuned…

Have you tackled a DIY bathroom makeover?  How did you make it WOW and dynamic?

Horrid to Heavenly Master Bathroom Reveal

In one week, my master bathroom went from a place that I dreaded and turned into a heavenly, serene, and spa-like oasis.  The last 7 days have been a whirlwind of working around the clock, but it’s all worth it!  Looking back, I can’t believe I waited so long.  I walk into this space now and I feel a fresh of breathe air.  Take a look…

Pin It

Beautiful right?  But wait until you see the before, and you’ll be sure to appreciate the after even more!

Pin It

I’ve been slightly secretive about the plan that I had for this space.  I didn’t want to reveal too many details and ruin the big reveal.  If you want to see more though, you can check out Part 1 and Part 2 of the Bathroom Makeover.

Can you believe how horrid the bathroom looked before?  Frightening! Enough about that…  Let’s take a tour!

The process for this bathroom makeover started last Friday when I spackled and prepared the walls for painting. Quick backstory: Before we moved into our home, the walls were wallpapered.  The previous owners removed the wallpaper, and painted the walls that horrid pink/purple color.  When they removed the wallpaper, the walls got really damaged, so there was ALOT of prep work before painting could begin.

Along with the walls, we also painted the previously stained mouldings, with a fresh coat of semi-gloss white. This update alone, made the space look completely different!

Once the walls were painted and complete, it was time to lay the new floor.  I decided to use groutable vinyl floor tiles, which I layed directly over my existing floor.  I chose a tile that has a similar look to Botticino natural stone and installed the tile the same way I did for my parents foyer. Groutable vinyl truly looks JUST LIKE ceramic – it’s amazing!

After the joints were grouted and set, I moved onto the sink base cabinet.  This was quite the experiment for sure and turned out nothing as I envisioned, but I’m still happy with the result.  I desired a dark cabinet, but with a light glaze overlay (opposite of my glazed cabinet), but it didn’t work.  After wracking my brain for a bit, I decided to use stain as the glaze.

The shower curtain isn’t a shower curtain at all.  It’s actually two drapery panels made and hung to look like a shower curtain.  I had found these panels at Target and was desperate to use them someplace, and this bathroom was the perfect spot. (Tutorial on how to make any window panel/curtain into a shower curtain).

The window valance I also made using drop cloth fabric and something pretty neat (another tutorial coming soon).

Even though I spent alot of time on this makeover, the process went quite quickly because all the existing plumbing fixtures remained.  The sink, faucet, cabinet, countertop, toilet, and tub are all the same pieces we had before – nothing is new.  Even though the fixtures looked a lil’ sad in the before space, once they were spruced up and surrounded by other beautiful elements, they looked new again.

Surprised that I didn’t do something funky or with more color?  I am, but I truly desired a soft, subtle, and spa-like retreat. And do you blame me after the color I’ve lived with for so long?!

For the existing frameless medicine cabinet that is built into the wall, I added a wood frame surround and secured it with liquid nails.  I took the same steps as I did with the kids bathroom, but without the chalkboard. Simply adding a frame around this somewhat boring style medicine cabinet, gives it new life and a new look for about $15.

I love a good quote and these are simple, to the point, and important to remember every day.

Of course you need a place to put a towel.. or two.  I installed these darling towel hooks right outside of the shower.  I added small frames above the hooks that I spray painted white and the glass with chalkboard paint to create a W (for wife) and H (for husband)…  now each of us knows which towel is whose!

Here’s a recap and rundown of everything in the space –

  1. New lighting fixture from Lowe’s
  2. DIY window valance made of drop cloth material (tutorial coming soon)
  3. 8×10 black frames with quotes I printed on my home printer
  4. Mirror was created using a 24 x 36 picture frame.  I took the existing frameless mirror to a local glass shop, which they reused and cut it down to size to create this new mirror – all for less than $20
  5. New hand and bath towels from TJ Maxx
  6. New tile backsplash (Read Tutorial: how-to install tile backsplash)
  7. Espresso bamboo roman shade from  Lowe’s
  8. Accessories from Target, Home Goods, and various local shops
  9. DIY cabinet makeover (Read Tutorial: how To glaze a cabinet using stain); Crystal knobs from Lowe’s
  10. Wool rug from Target 
  11. Window panels from Target made into a shower curtain (Read Tutorial: how to make any curtain into a shower curtain)
  12. Groutable Vinyl Tile (Read Tutorial: how-to install groutable vinyl tile)


13. Place card frames made into initial frames with white spray paint and chalkboard paint
14. Towel hooks from Hobby Lobby
15. Bath towels from TJ Maxx
16. Bath stand from Home Goods

For about $500 (for supplies and accessories), I think this bathroom makeover was a huge success and a must! Here are a few more pictures for ya…

So would you agree this bathroom is a drastic difference from what it was only one week ago?  I’ve enjoyed many of the comments and thoughts on what y’all thought about the before bathroom… at least I gave you a few chuckles!  I’m just SO glad it’s complete and I’m thrilled with the results!

Tutorials you may want to read:

Thanks to these sites for featuring my Master Bathroom Makeover: Stories of A to Z, Centsational Girl BOTB, Addicted 2 Decorating